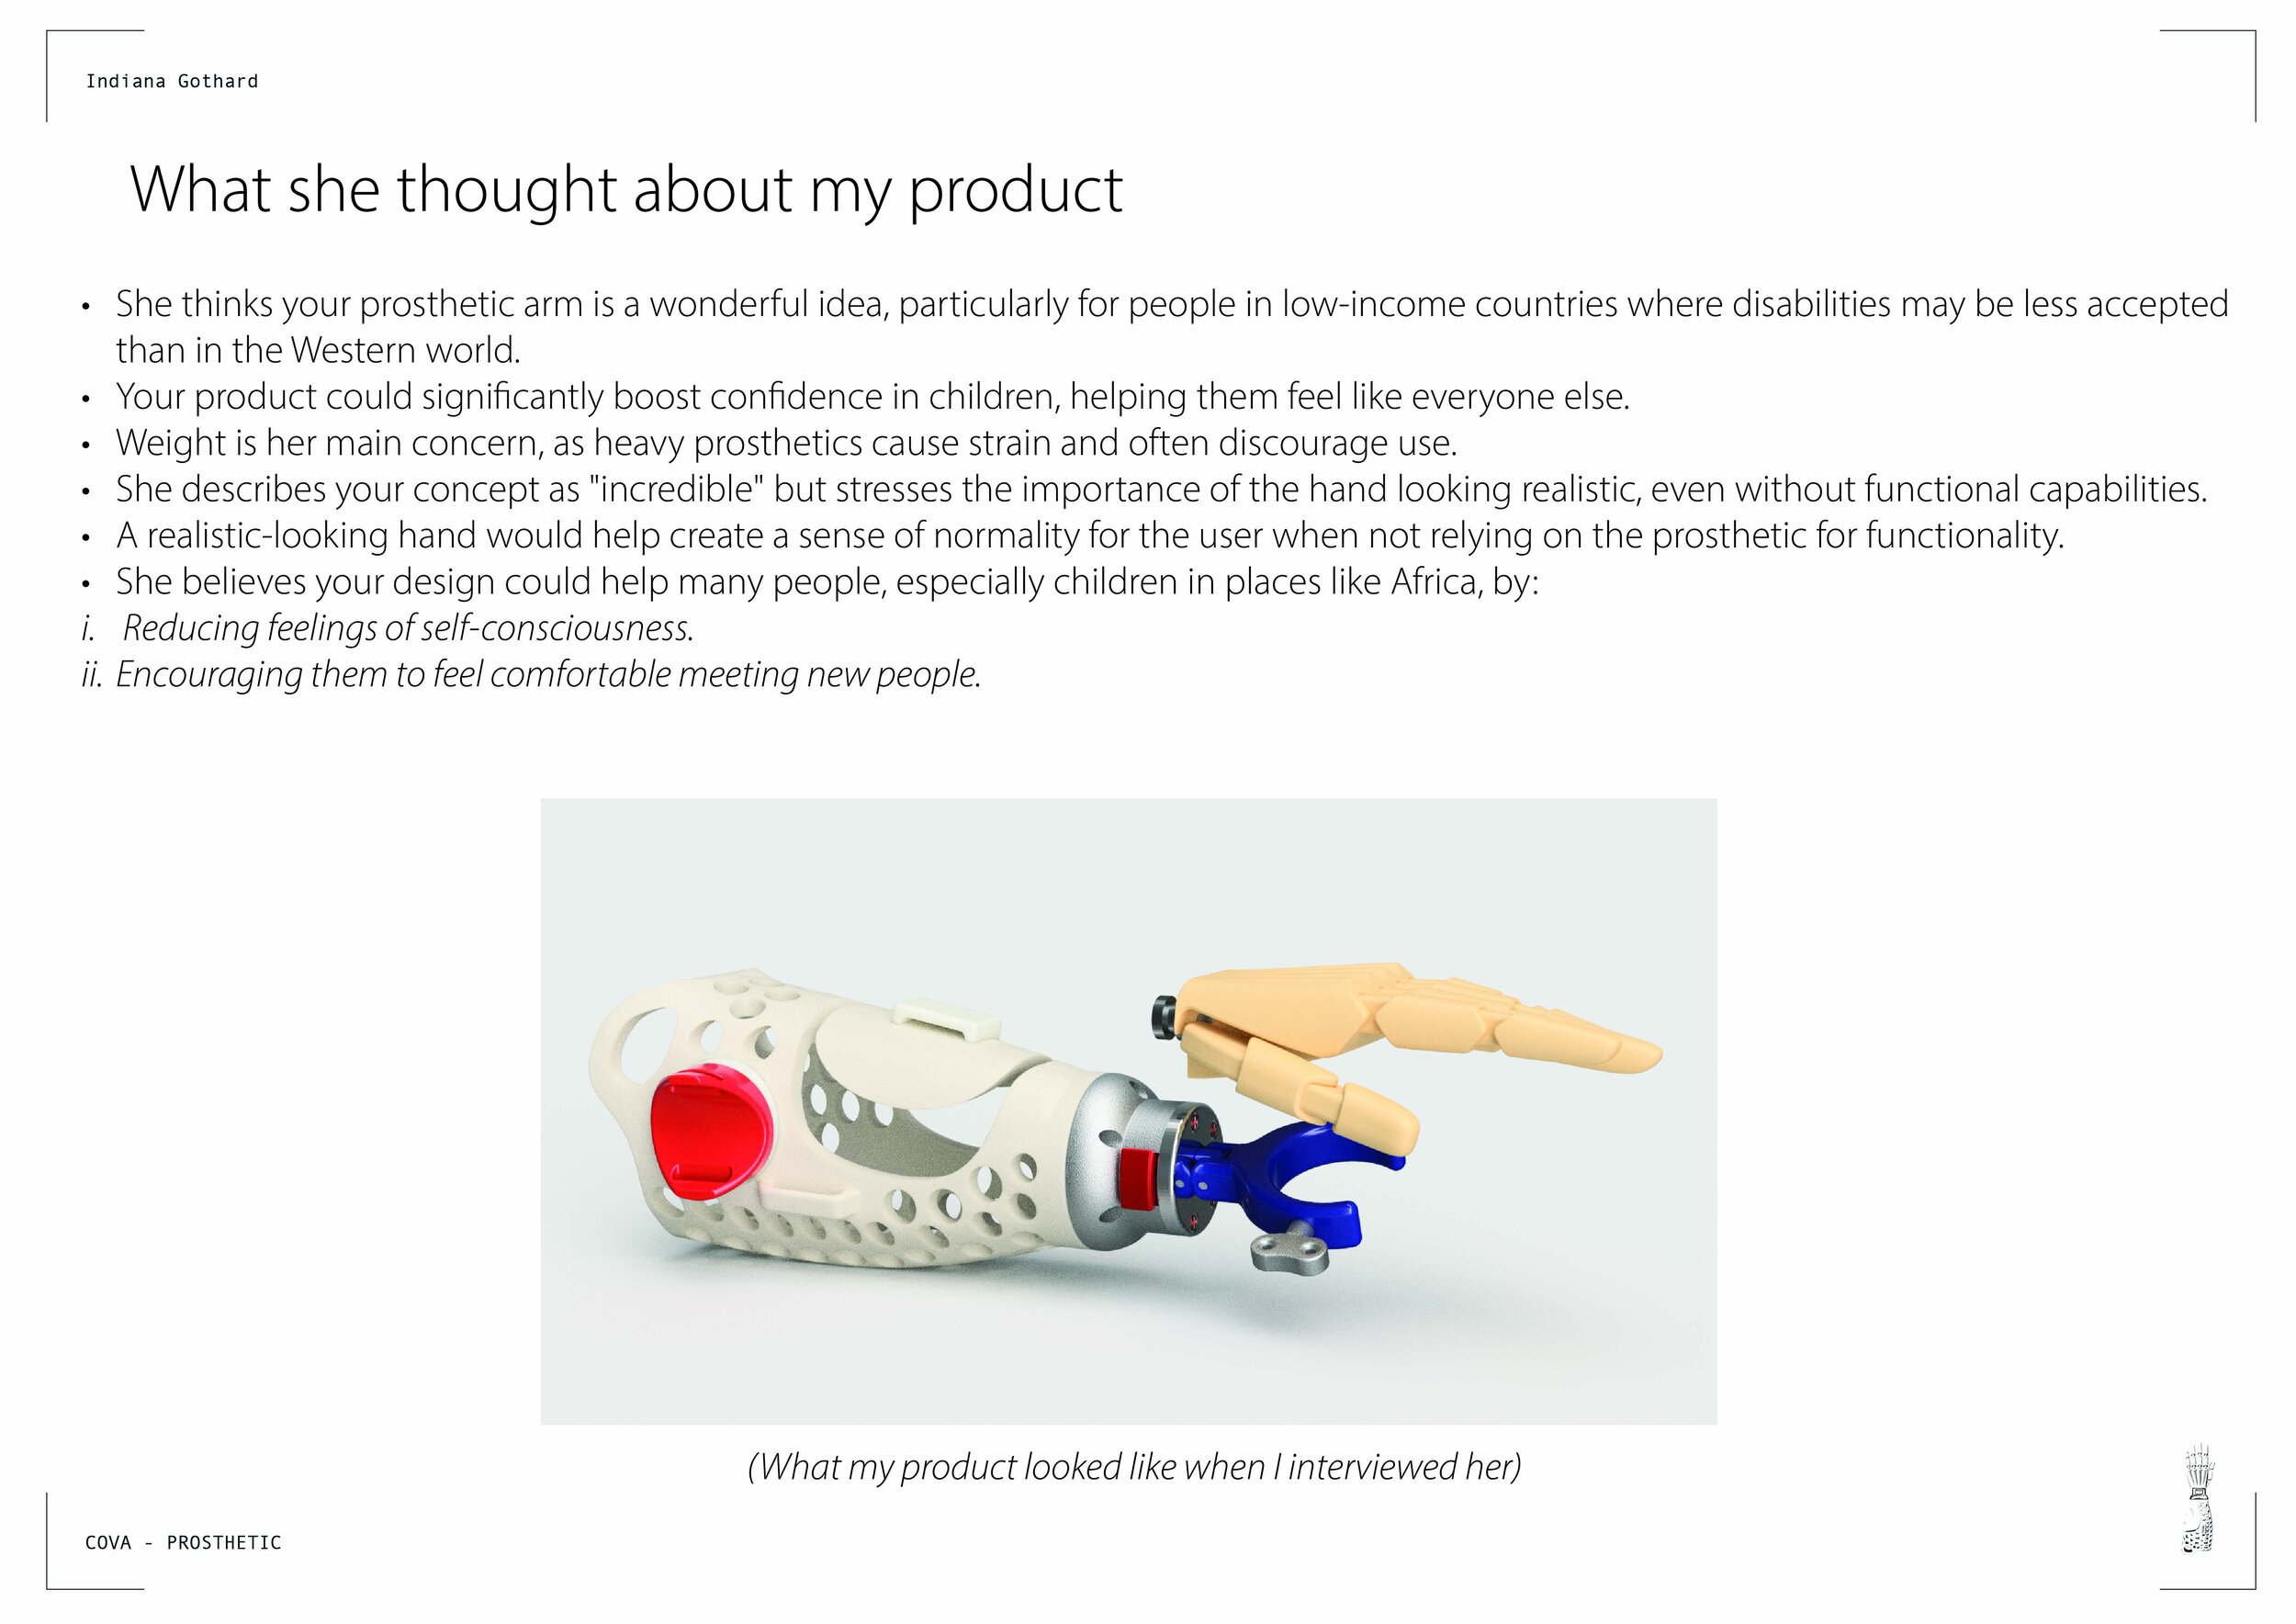
COVA – A low cost, self-mouldable prosthetic arm
ROLE
Individual project
Graduation project @ Central Saint Martins
DURATION
4 months (18 weeks)
TOOLS
Fusion 360 l Rhino l Photoshop l Illustrator
OVERVIEW
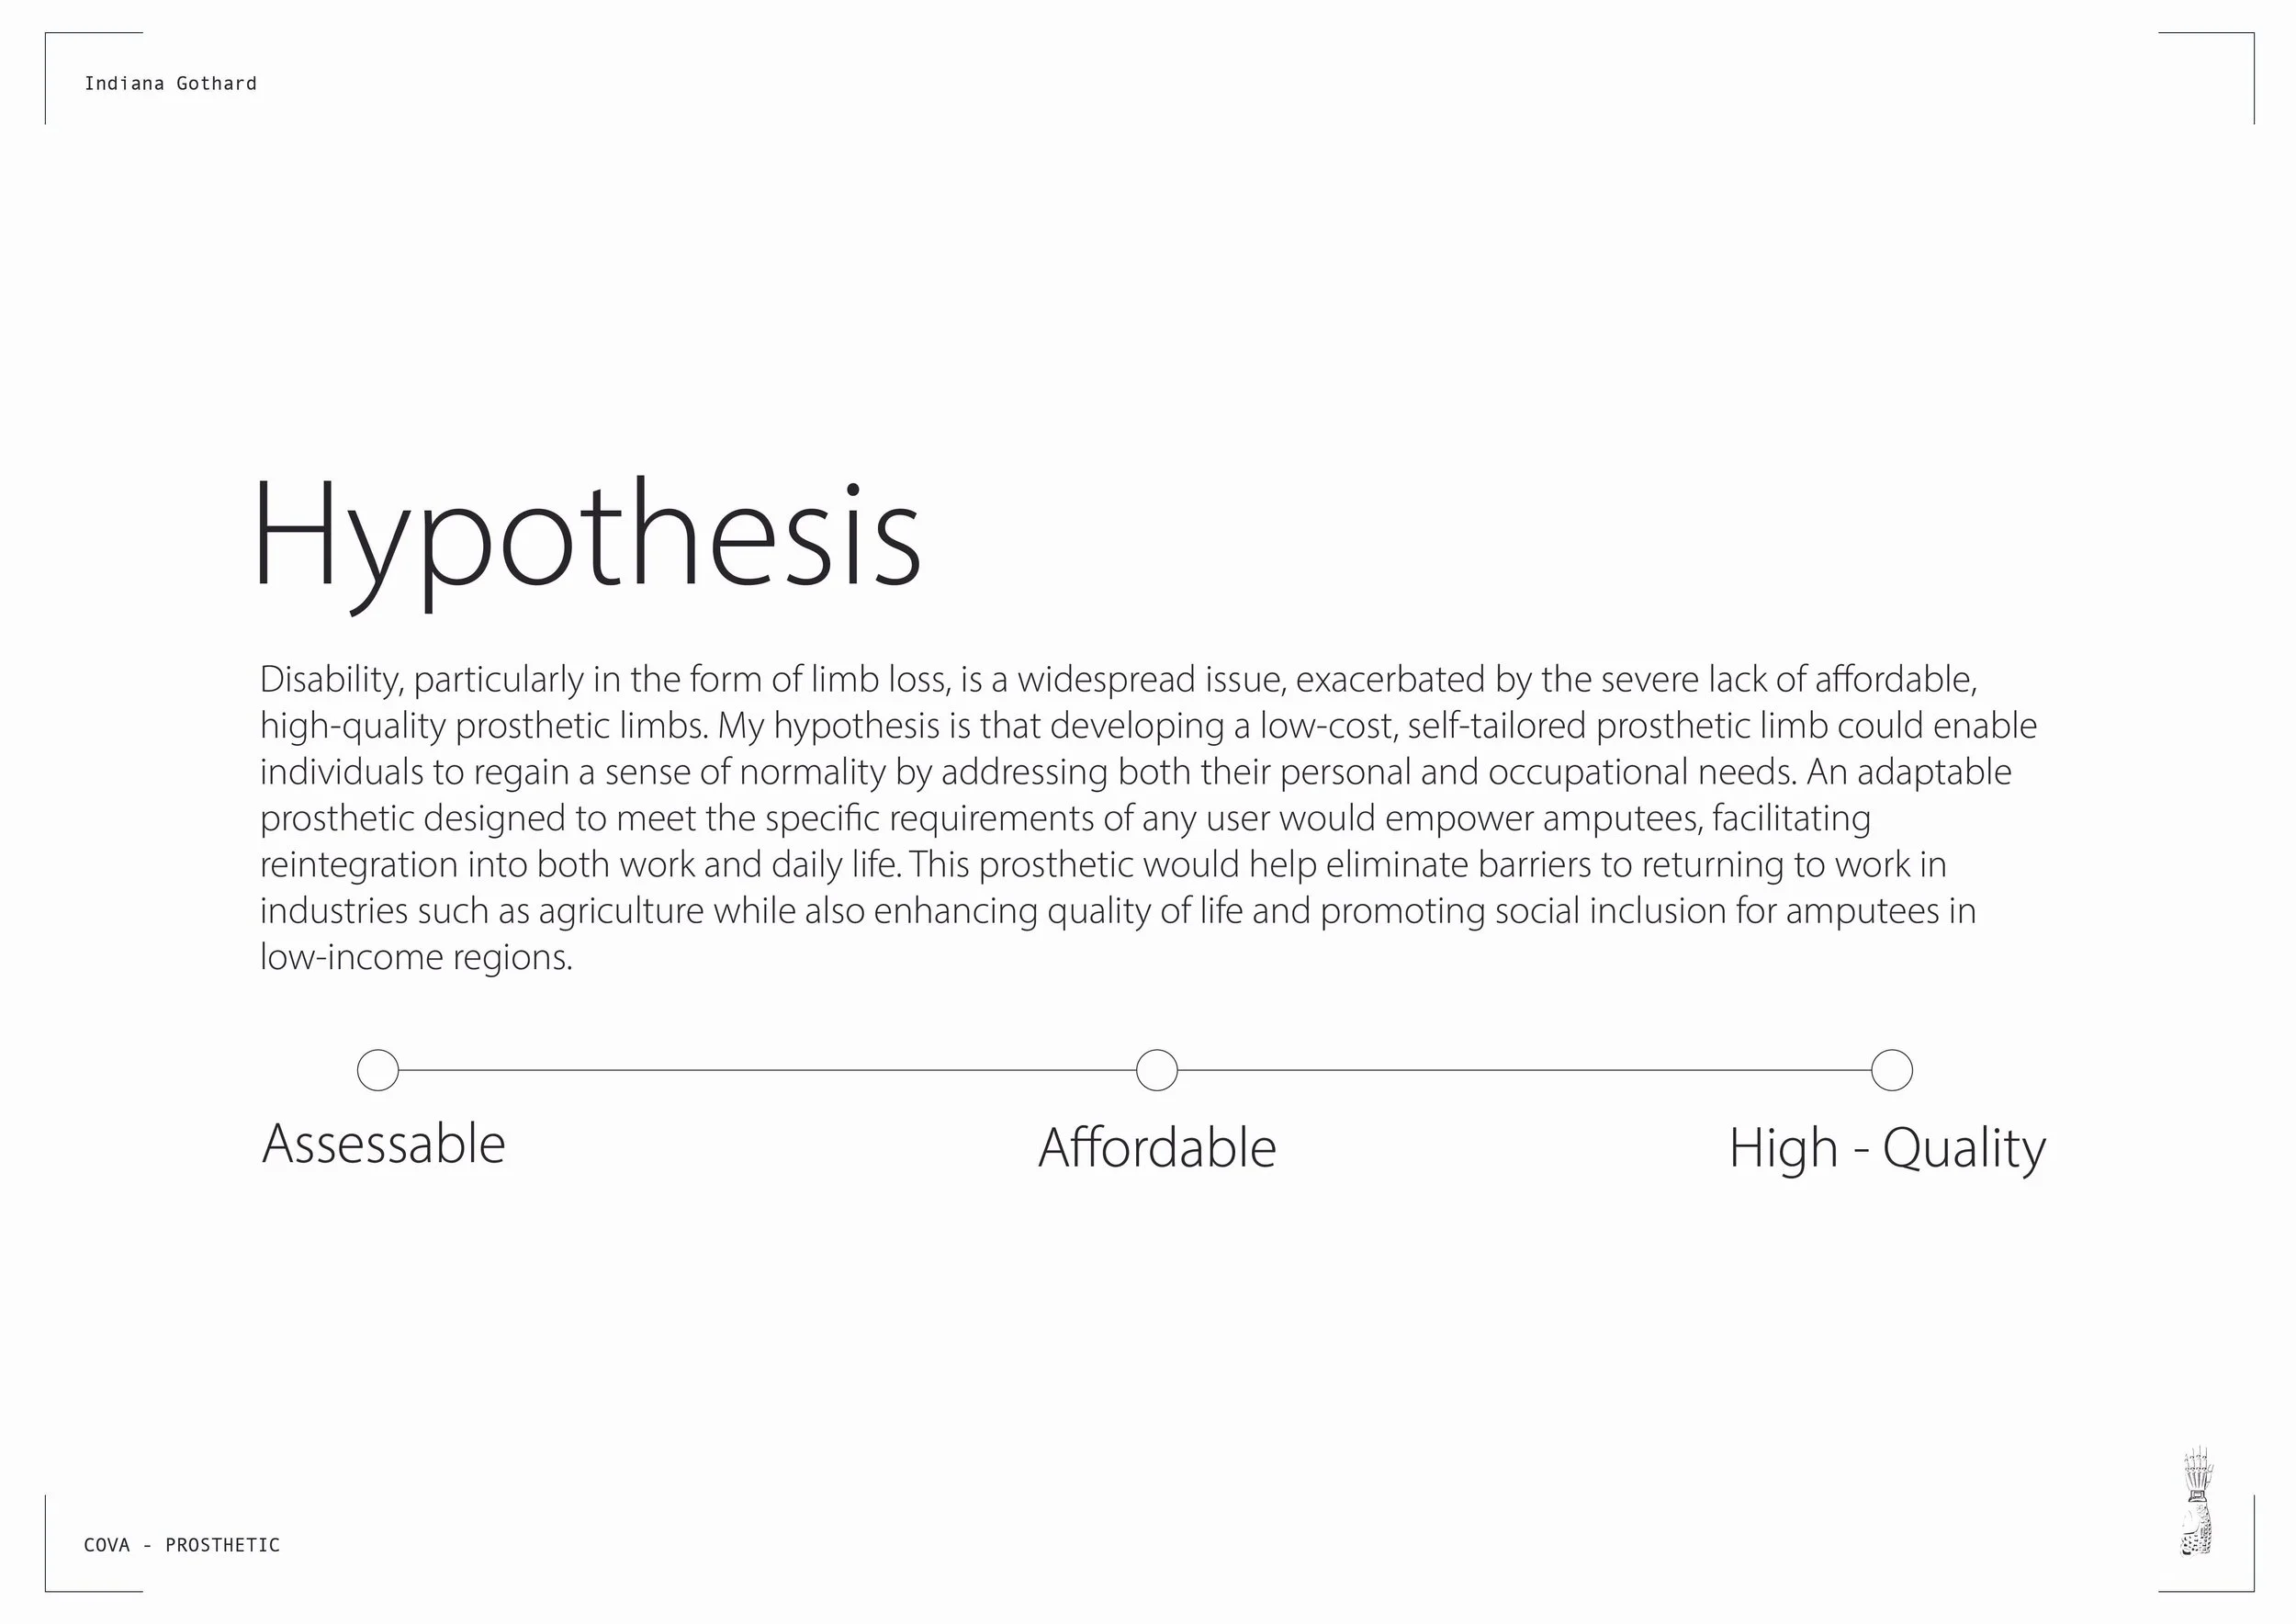
In a world where access to medical care is limited for many, this prosthetic offers a new kind of independence. Its mouldable structure uses PCL, a biodegradable plastic that becomes flexible in hot water, allowing users to shape, reshape, and repair it themselves. Designed with dignity in mind, it balances functionality and affordability without sacrificing aesthetic value — offering not just a tool, but the confidence to return to work, routine, and identity.

01 INTRO
INITIAL QUESTION
How can we improve the live of prosthetic limb users by enhancing functionality or/and aesthetics?
BRIEF
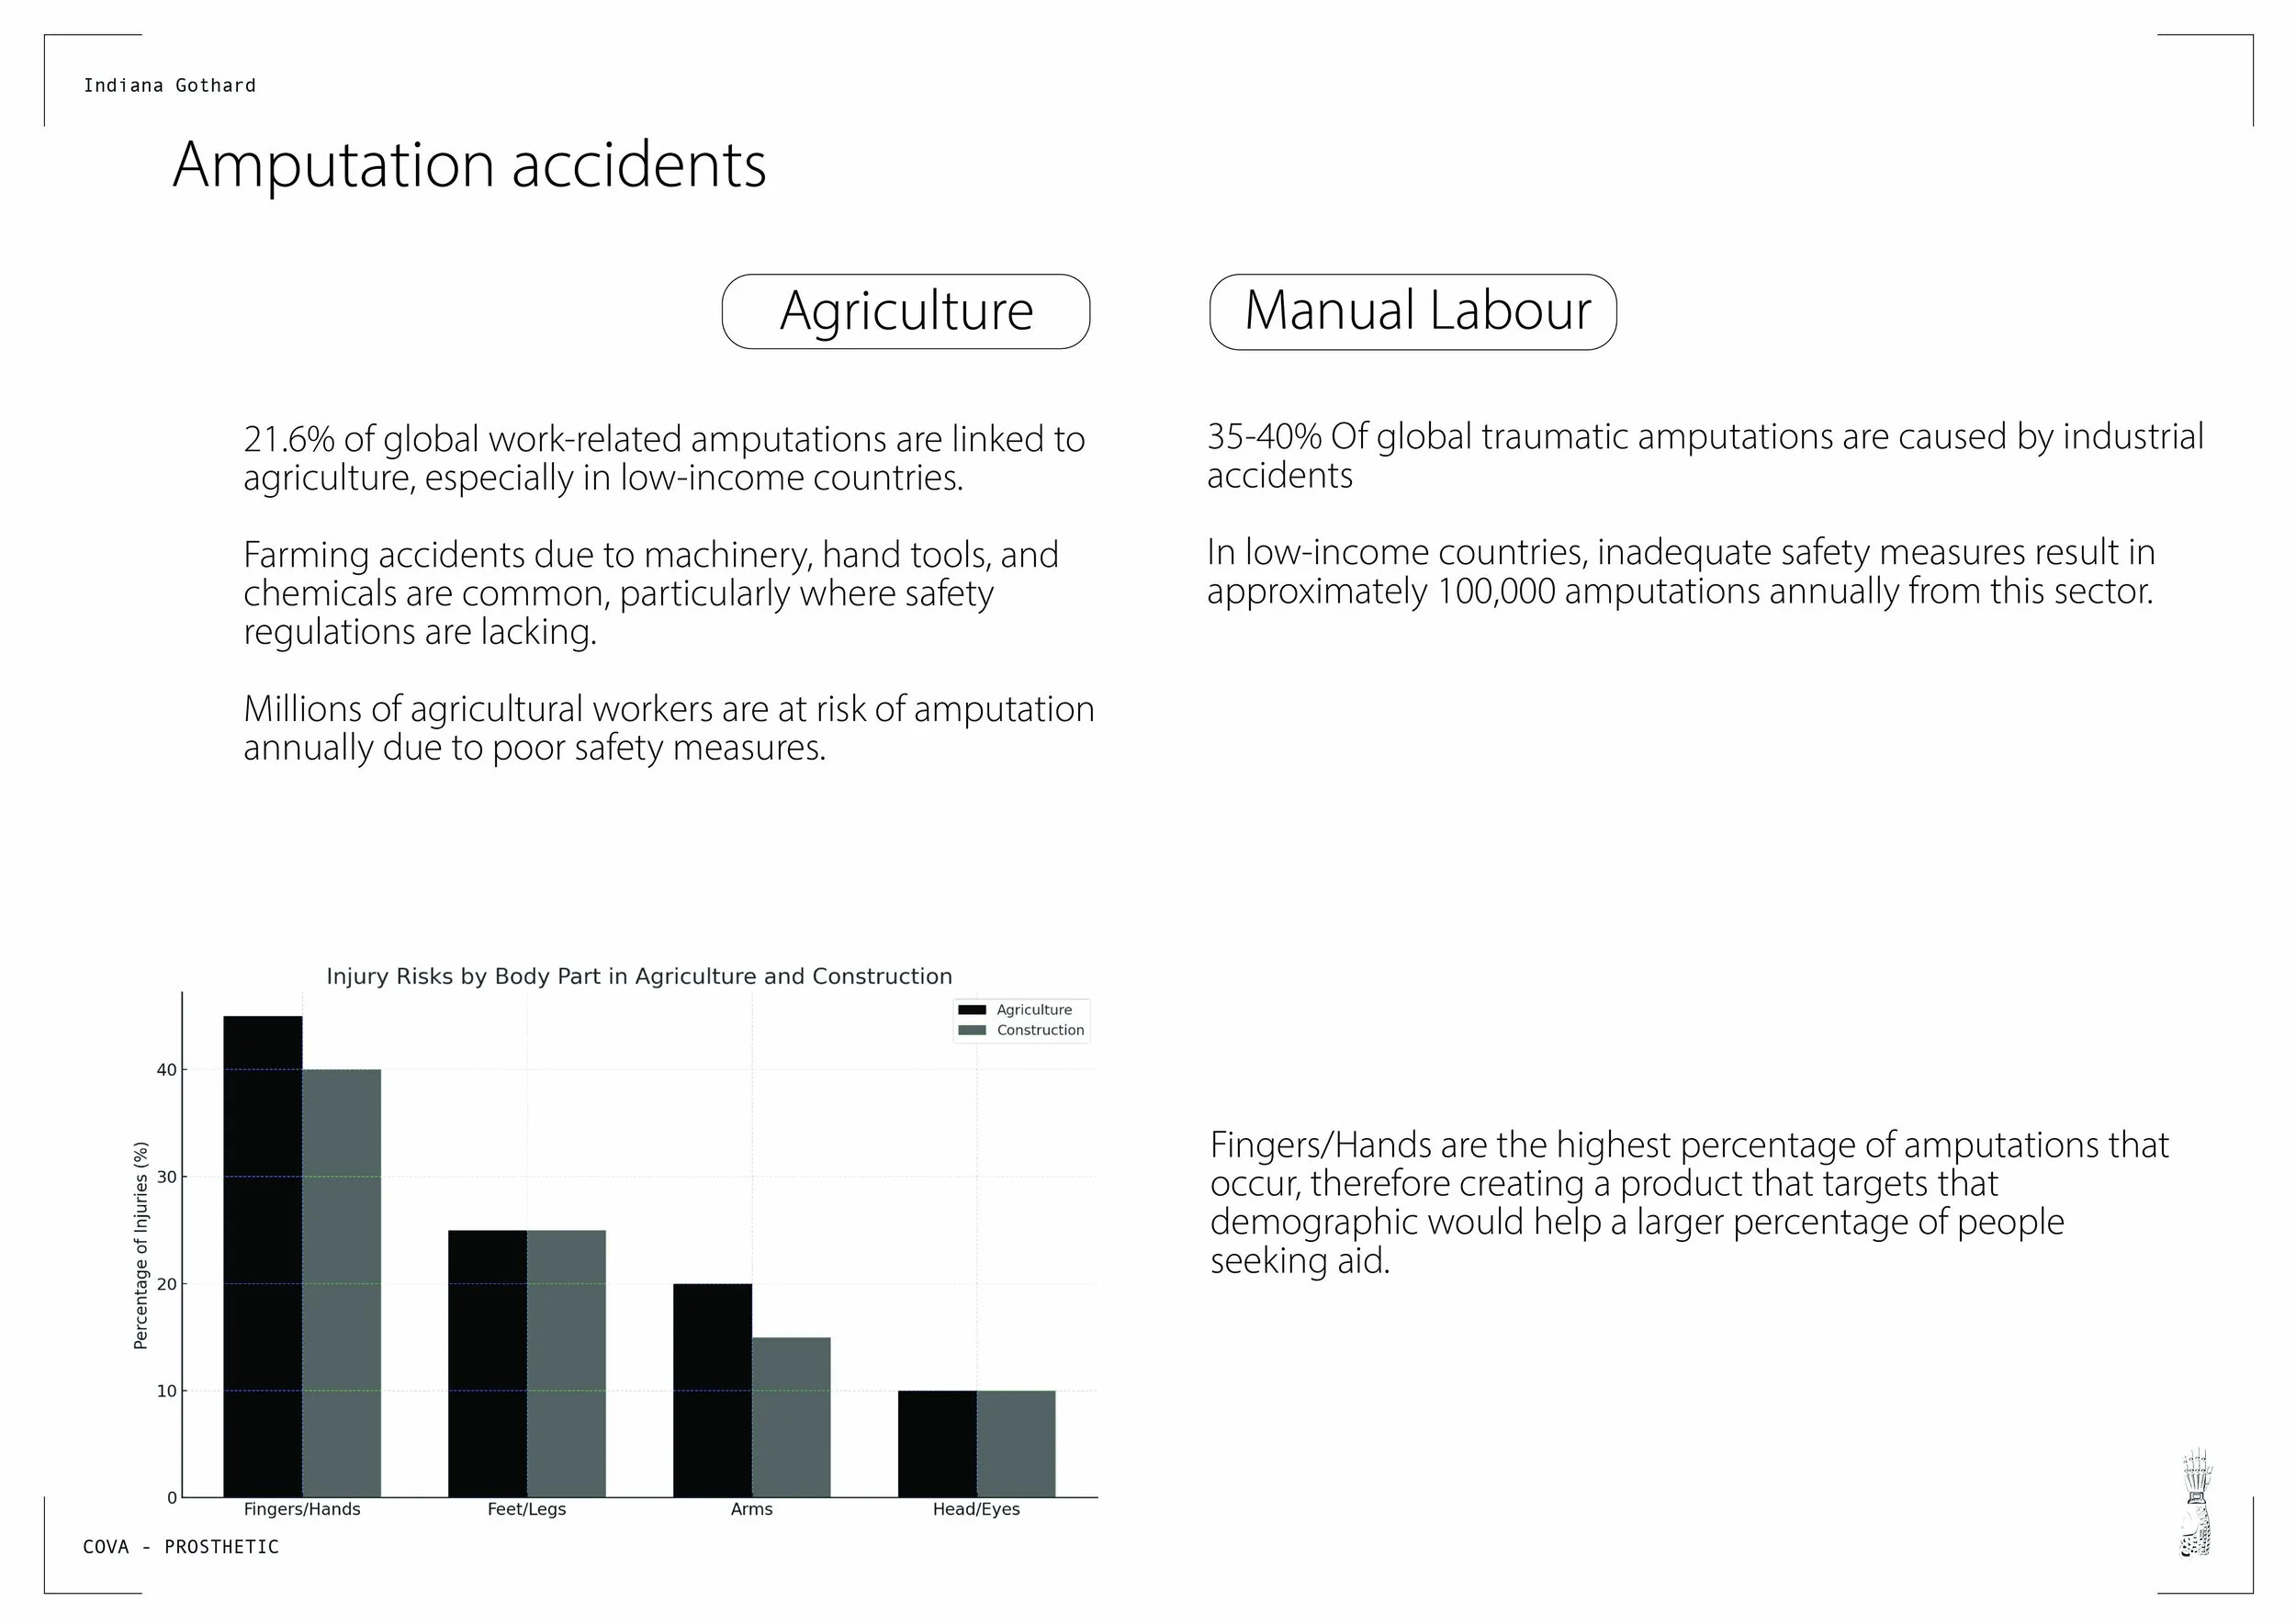
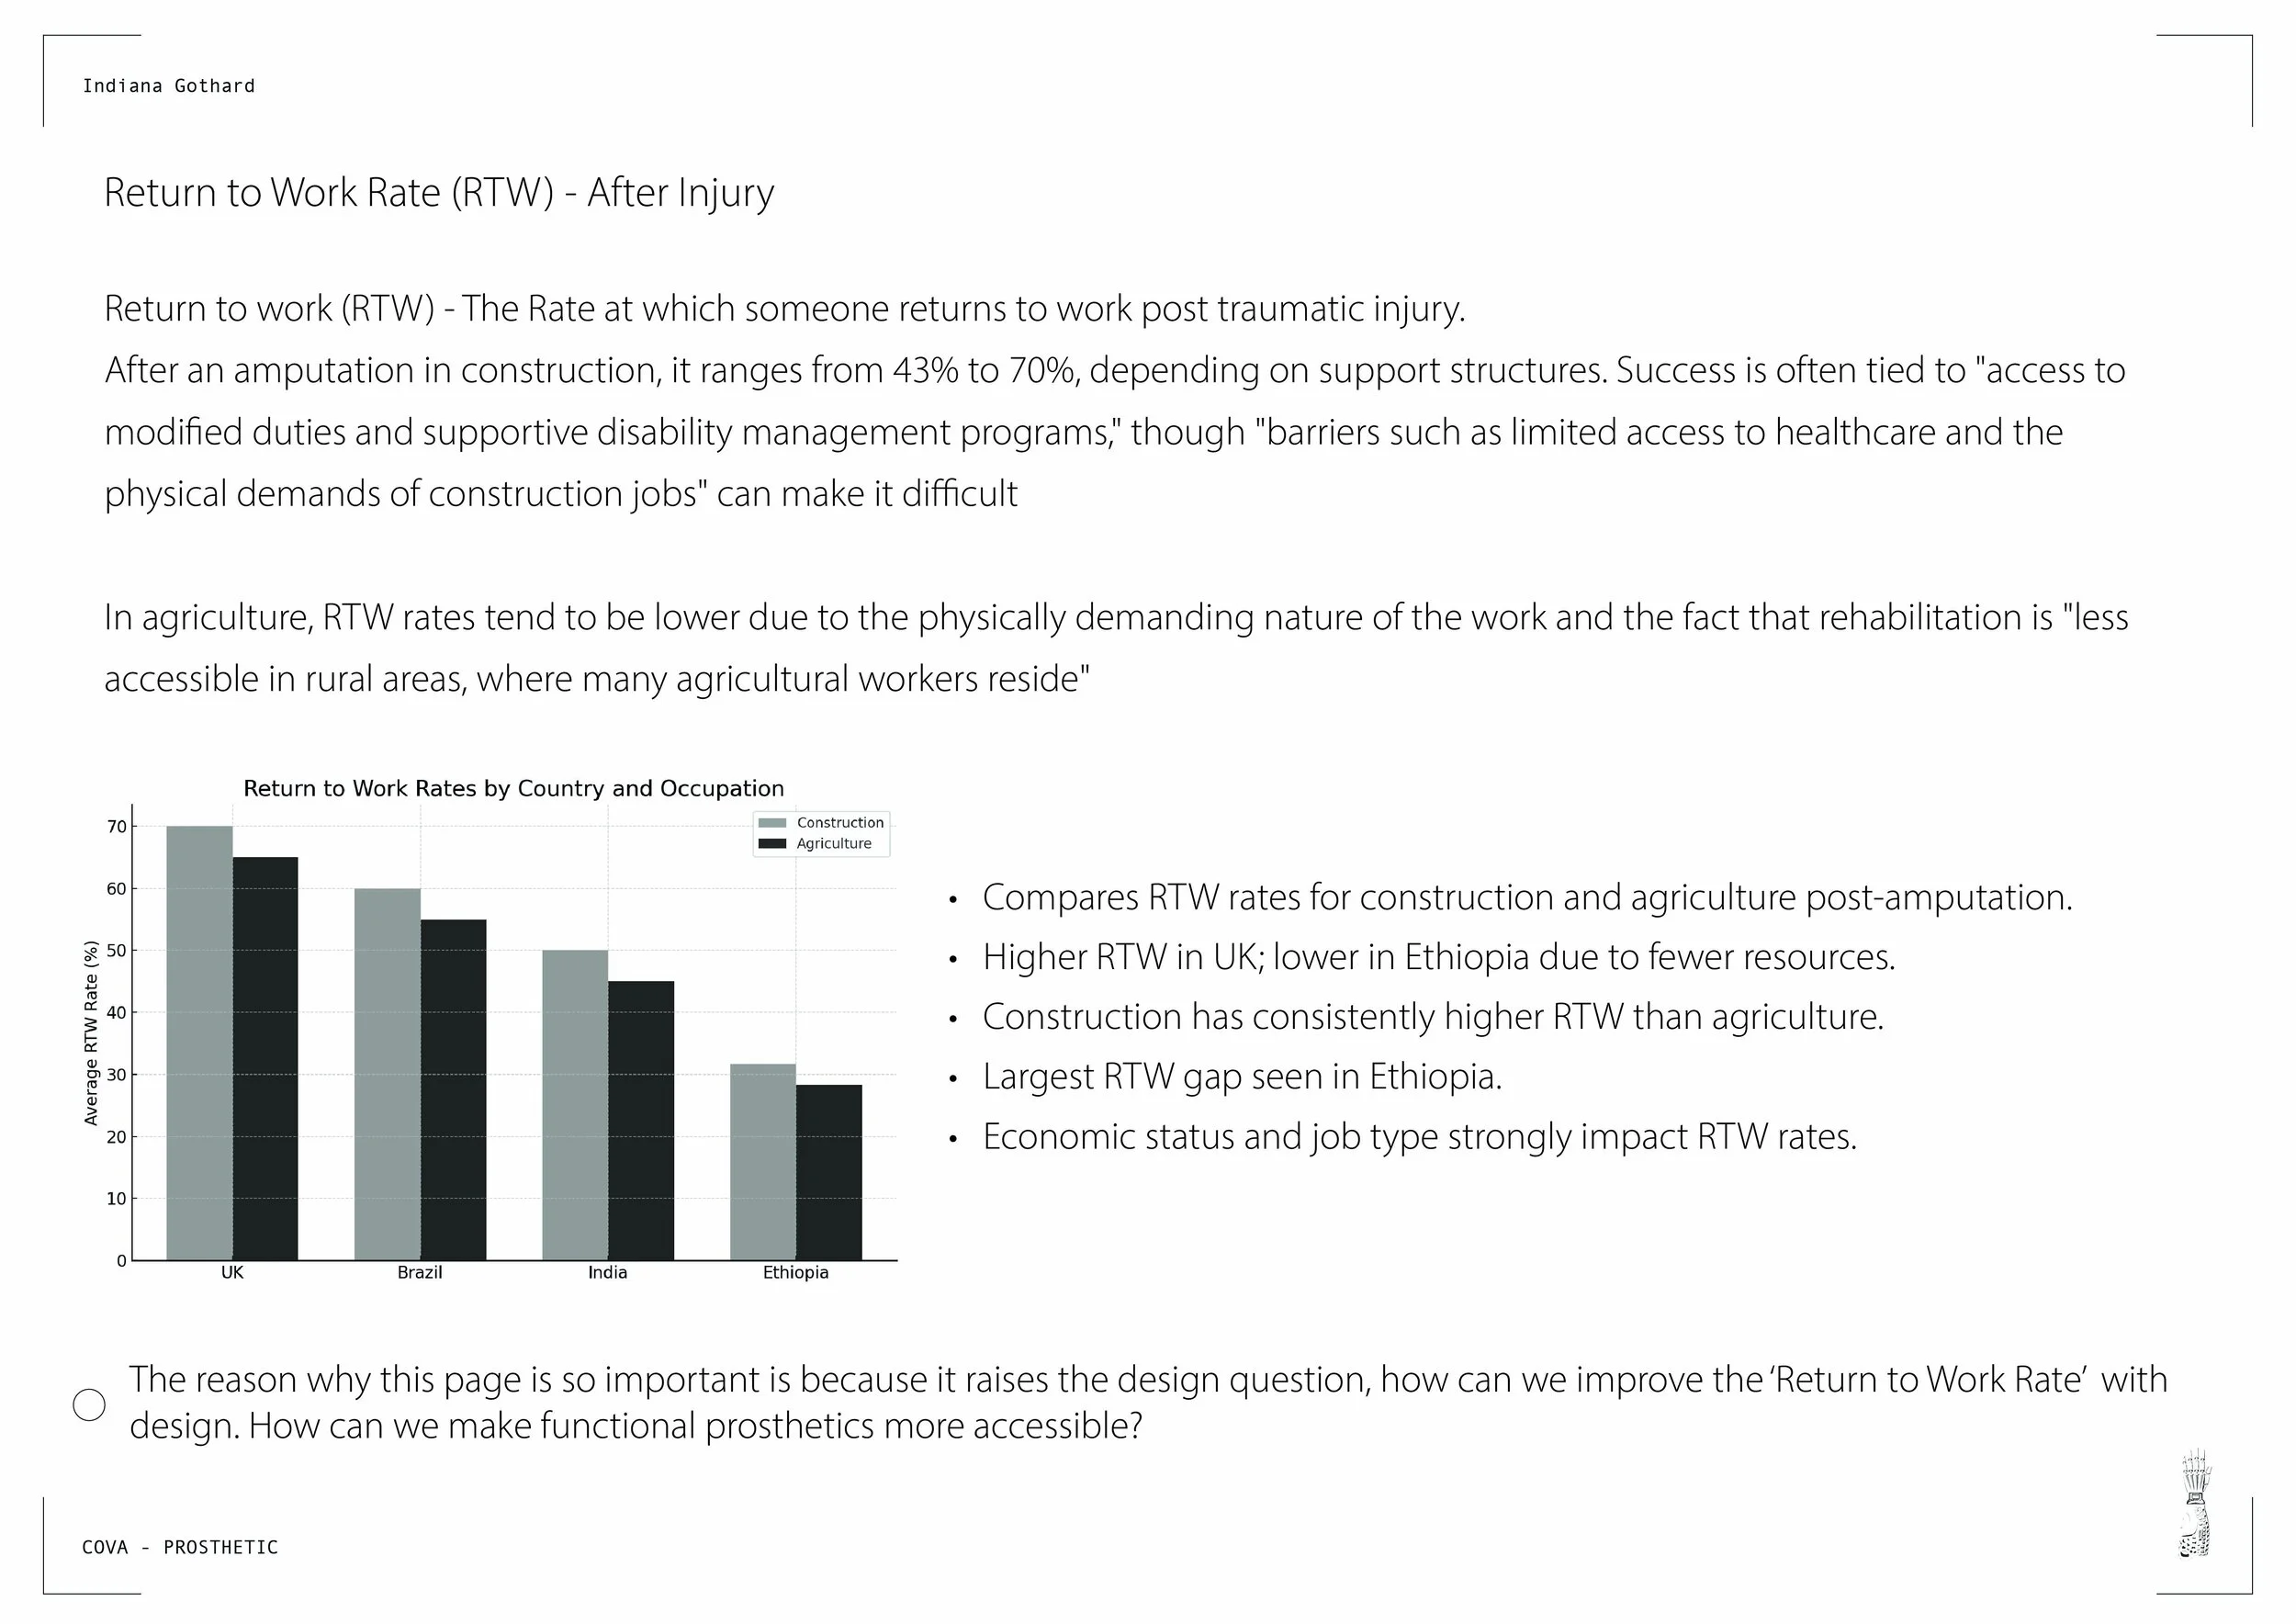
In many low-income countries, people who suffer a traumatic injury struggle to return to work. After an amputation, return-to-work (RTW) rates vary widely, from 43% to 70% in construction, and often much lower in agriculture. The gap is linked to access: healthcare, rehabilitation, and supportive work structures are harder to reach in rural or resource-limited areas.
For many, this means they are unable to re-enter employment, becoming dependent on family or society, and in some cases forced into begging. The problem is not just medical but economic and social and it raises a vital design question: how can functional prosthetics be made more accessible to those who need them most?


02 INSIGHTS
WHAT’S MY INSIGHT
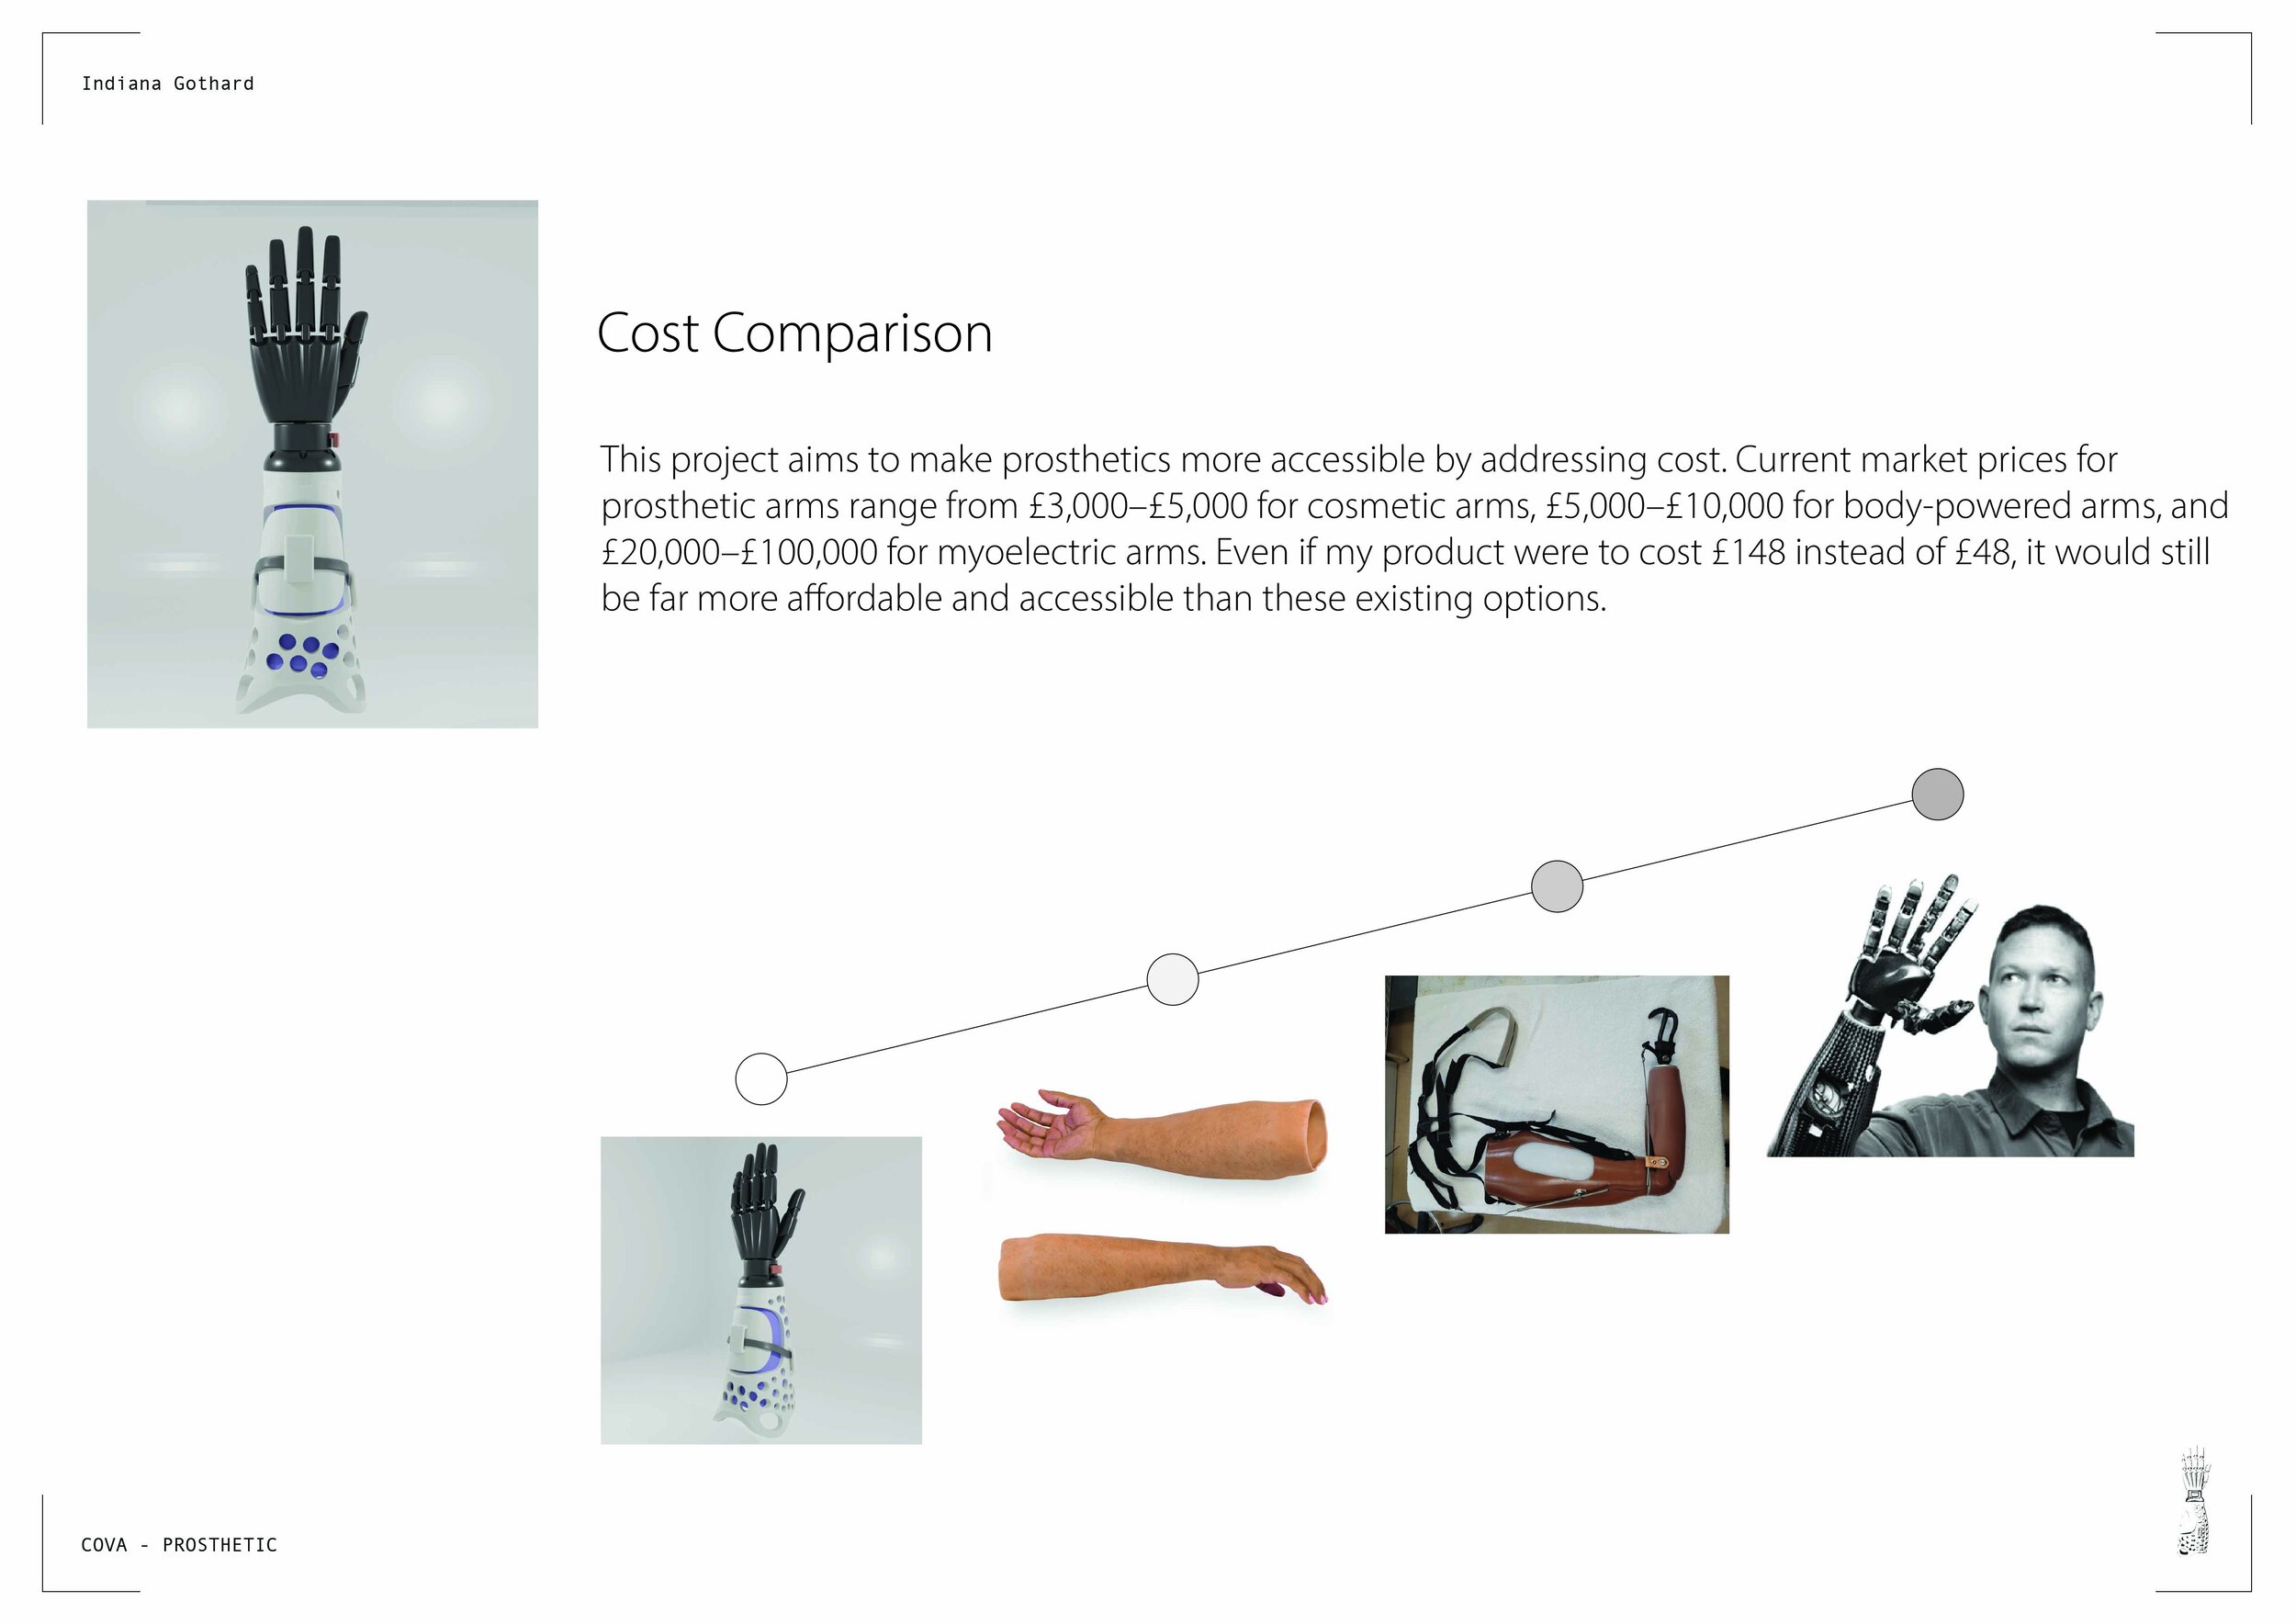
I found that there isn’t enough medical care in low-income countries to help people return to work after amputation. This is often due to financial strain and a lack of trained staff. The cost of a prosthetic is on average between $4,500 and $50,000, making it far too expensive for most people to afford. A large portion of this cost comes from the fitting and expertise required, not just the materials themselves. Therefore, creating a prosthetic that reduces or removes the service charge could lower the overall price significantly, allowing for a high-quality, low-cost prosthetic that is actually accessible.
“On average, a single prosthetic limb costs (USD) $4,500 and can go as high as (USD) $50,000.”
- Engineering for Change
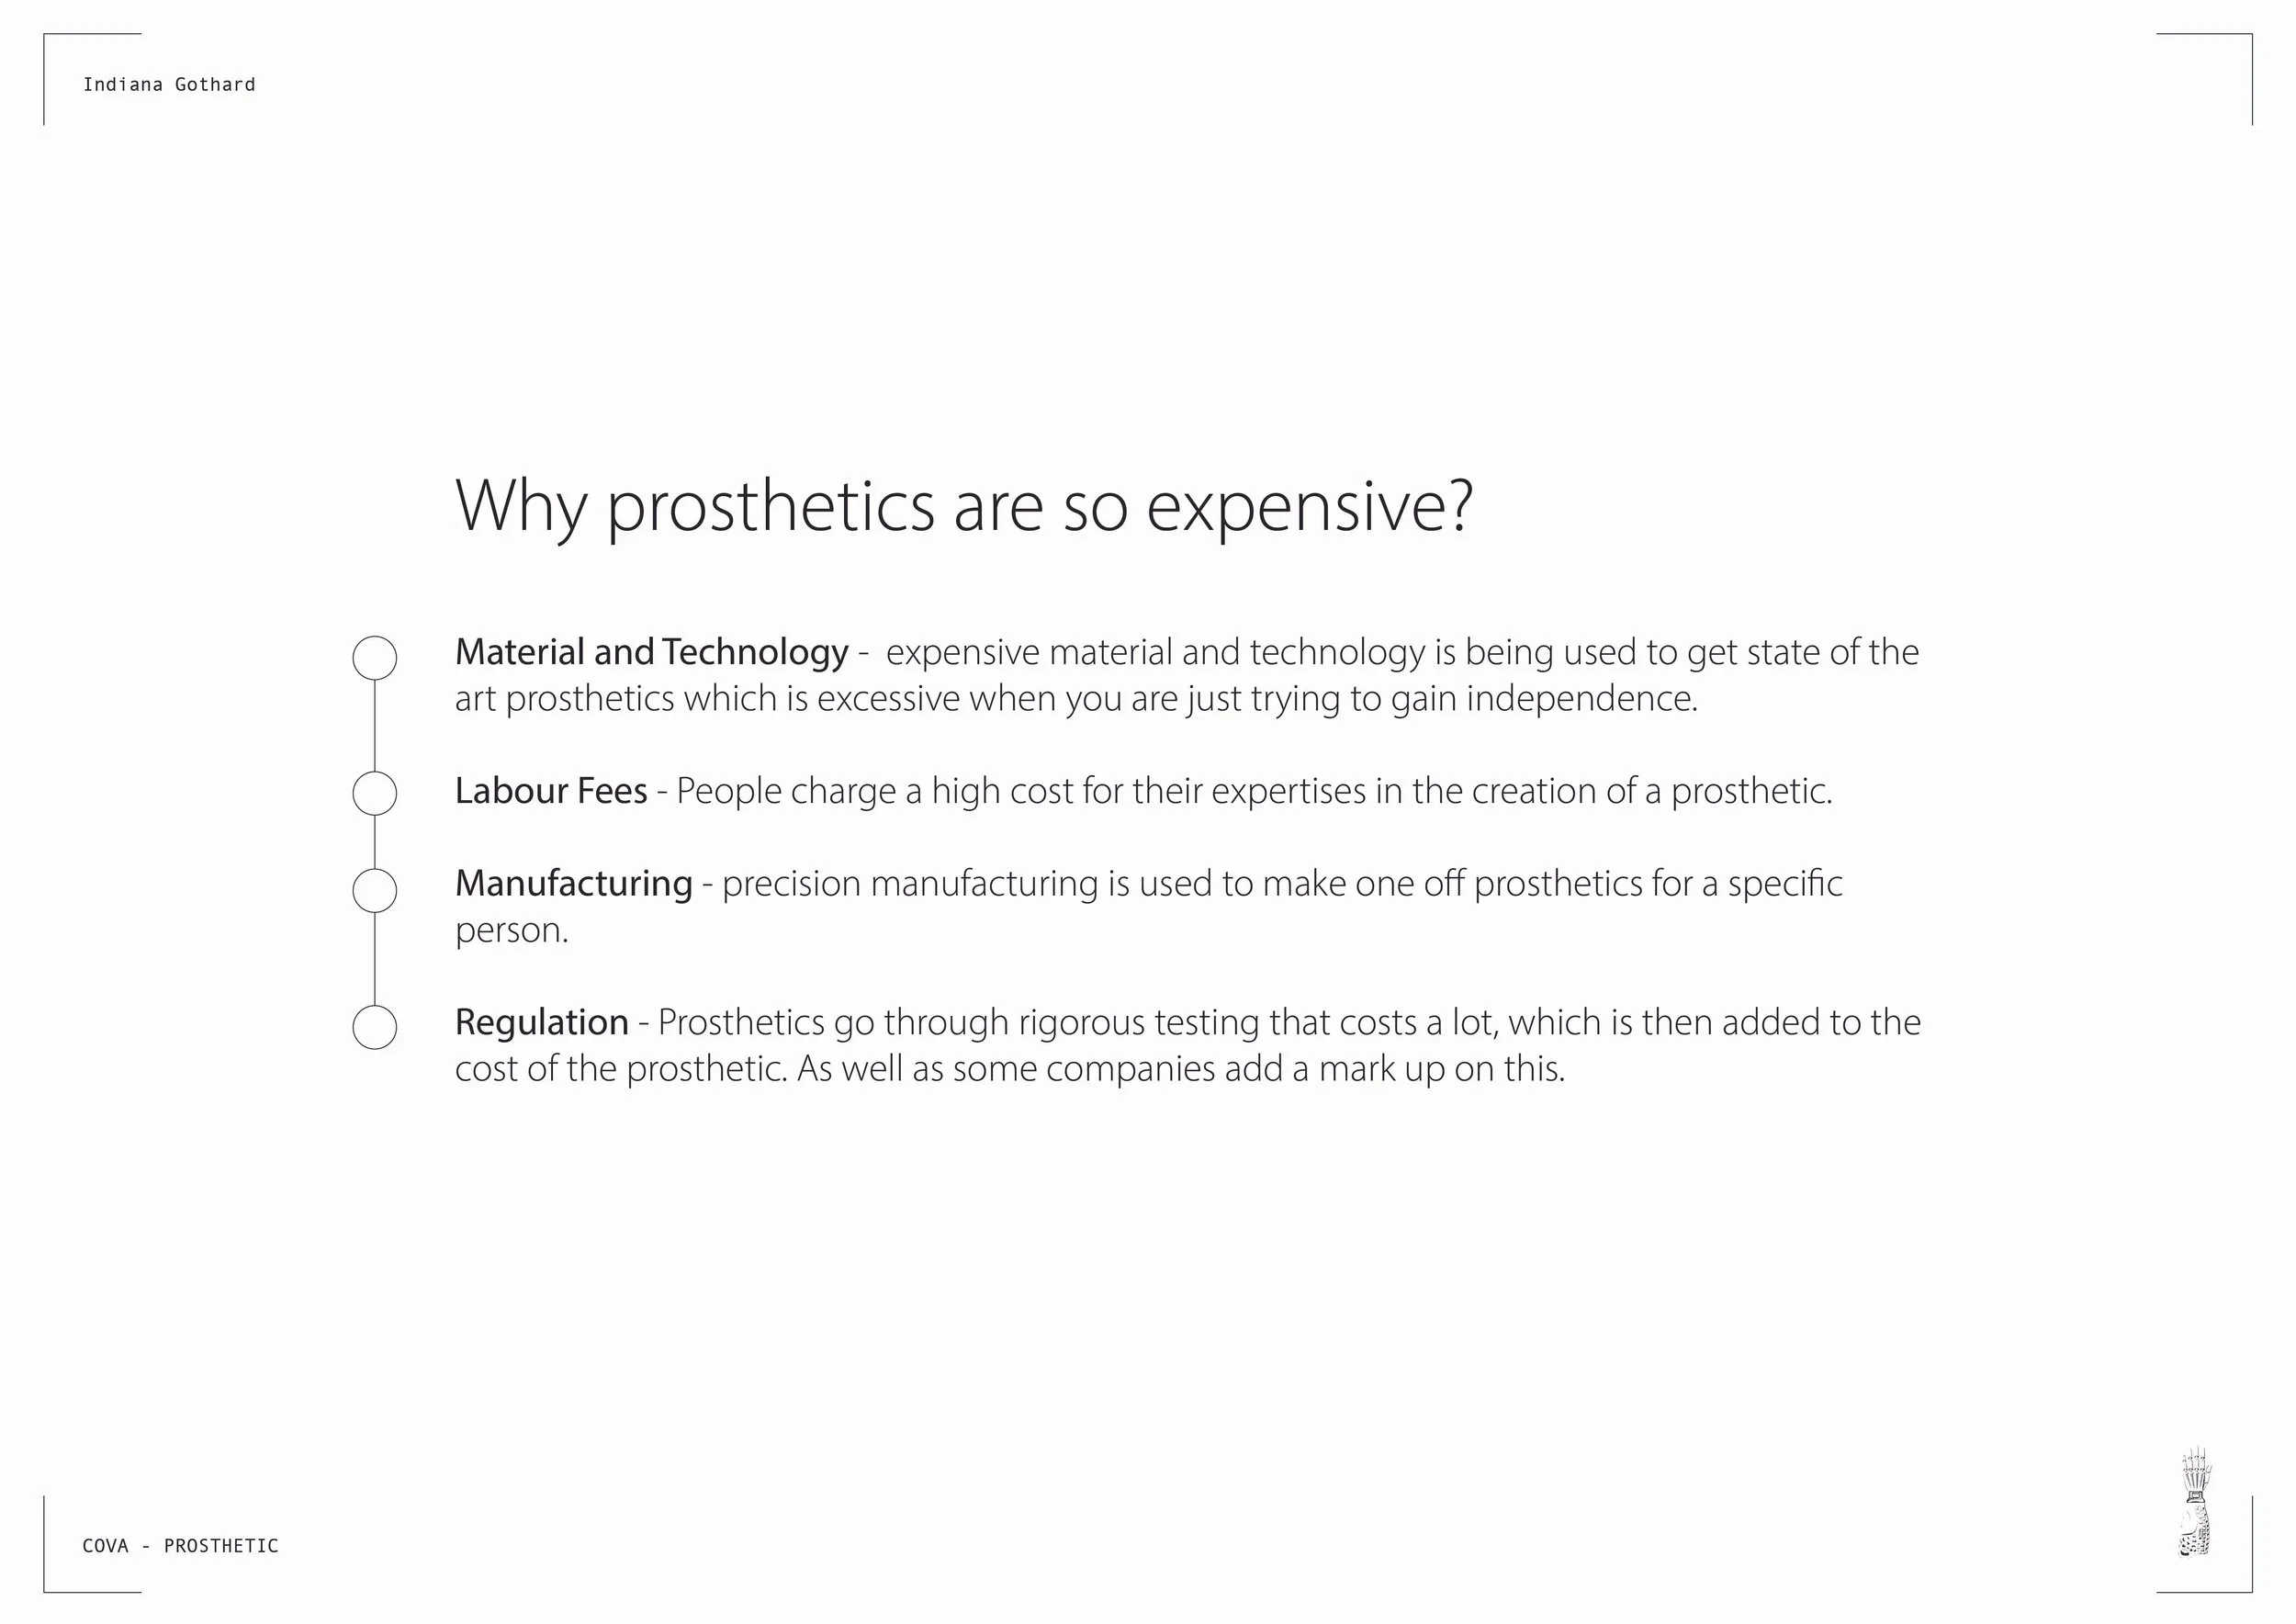
WHY ARE THEY SO EXPENSIVE?
Material and Technology - expensive material and technology is being used to get state of the art prosthetics which is expensive when you are just trying to gain independence.
Labour Fees - People charge a very high cost for their expertises in the creation of a prosthetic.
Regulation - Prosthetics go through rigorous testing that costs a lot, which is then added to the cost of the prosthetic. As well as some companies add a mark up on this.
Manufacturing - Precision manufacturing is used to make one off prosthetics for a specific person.
03 MY DESIGN CHALLENGE
How can I design a prosthetic arm that is affordable, clinic-free, and practical for people in low-income countries, enabling them to return to work and daily life without relying on expensive medical services?
04 RESEARCH


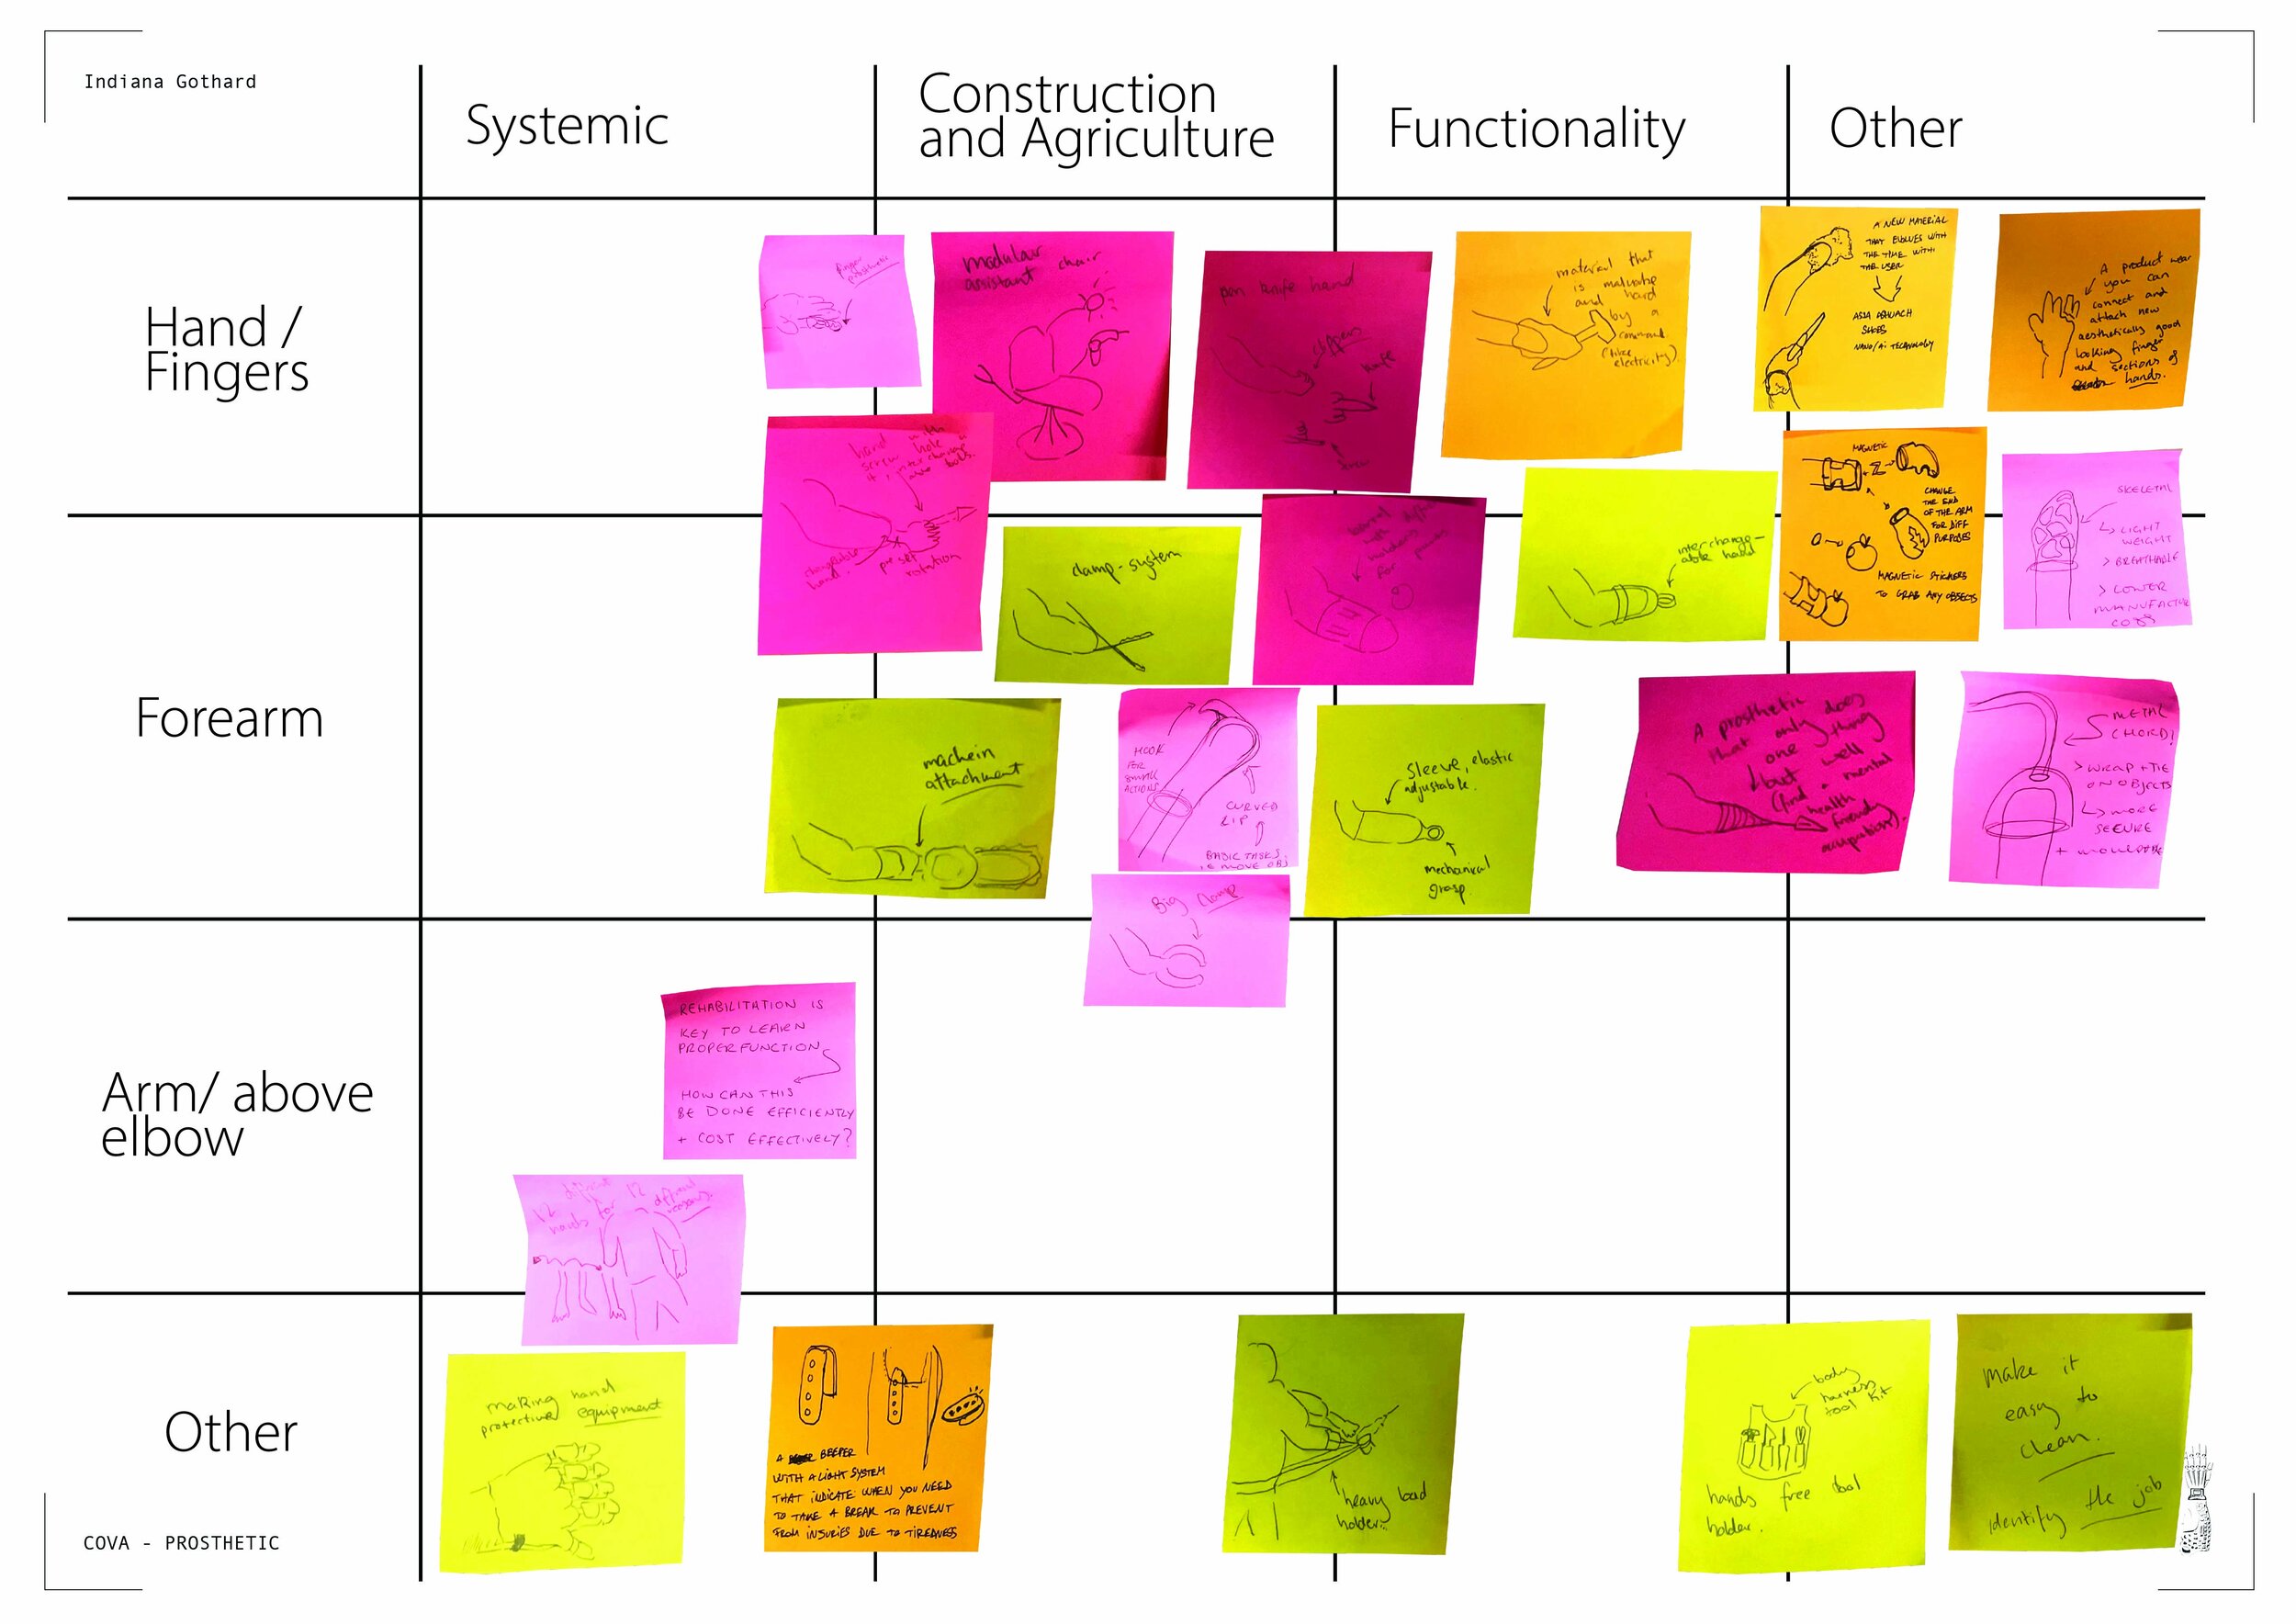


05 IDEATION

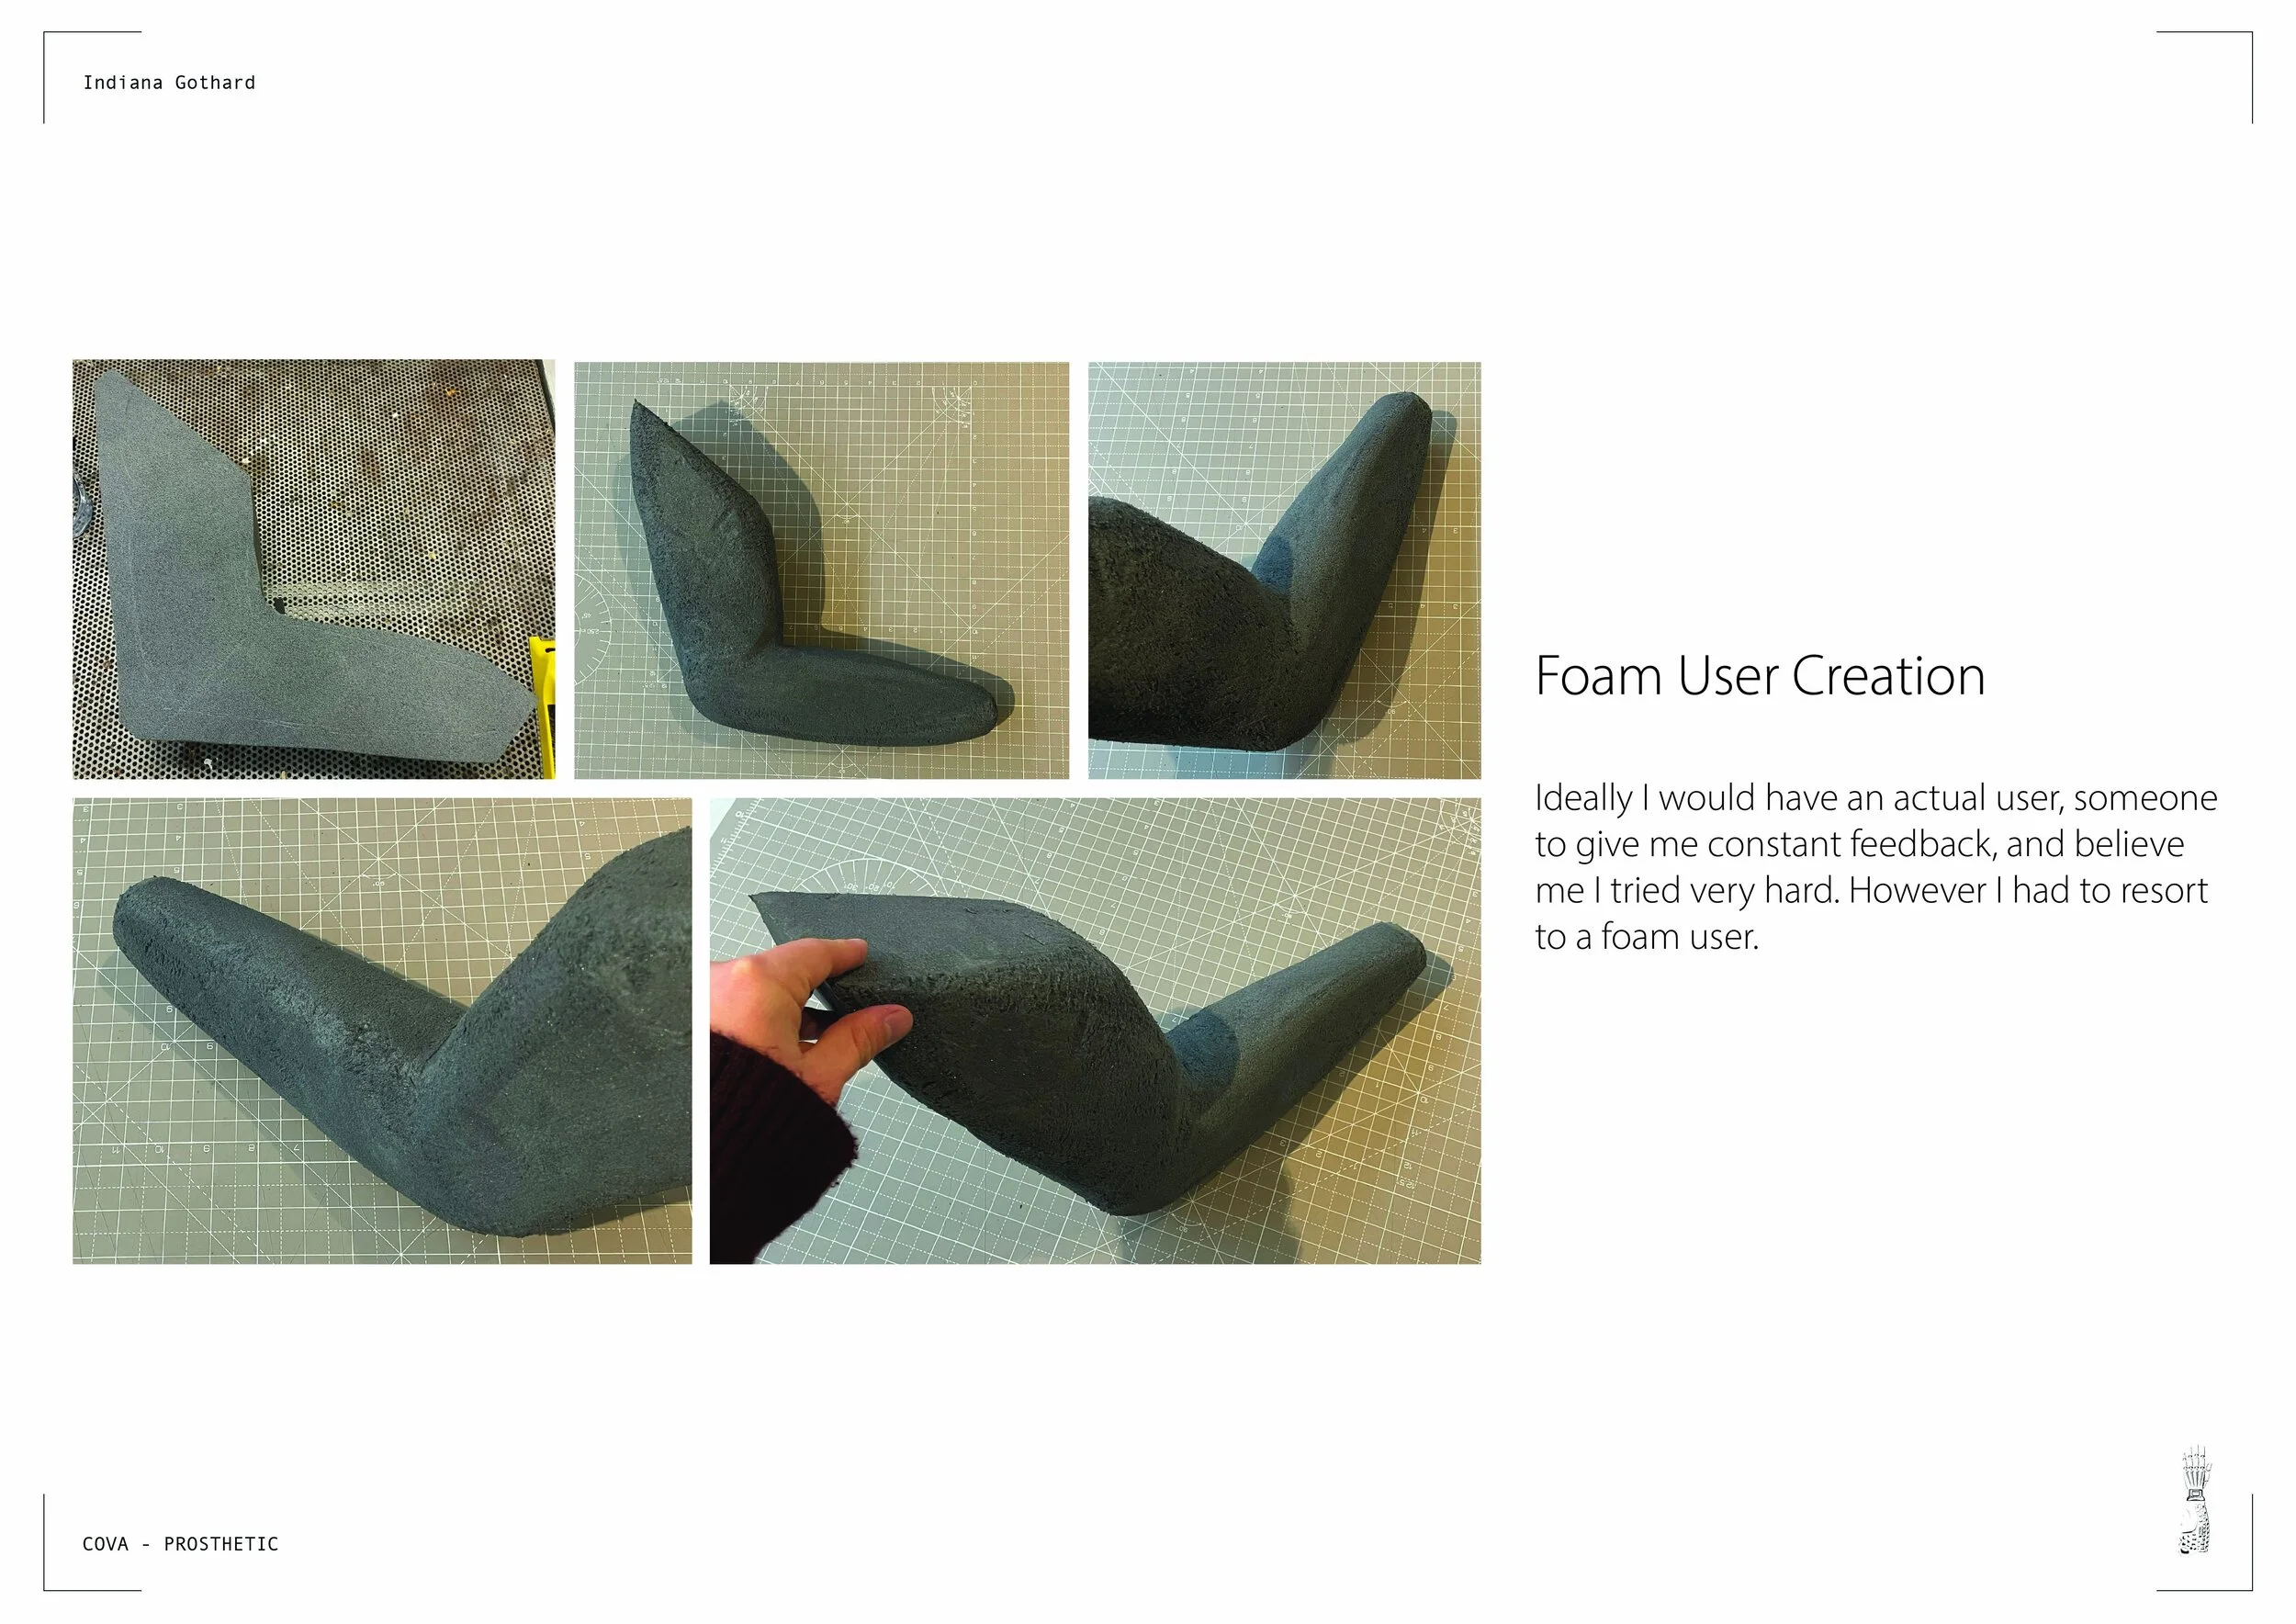
DESIGNING WITH A MODEL
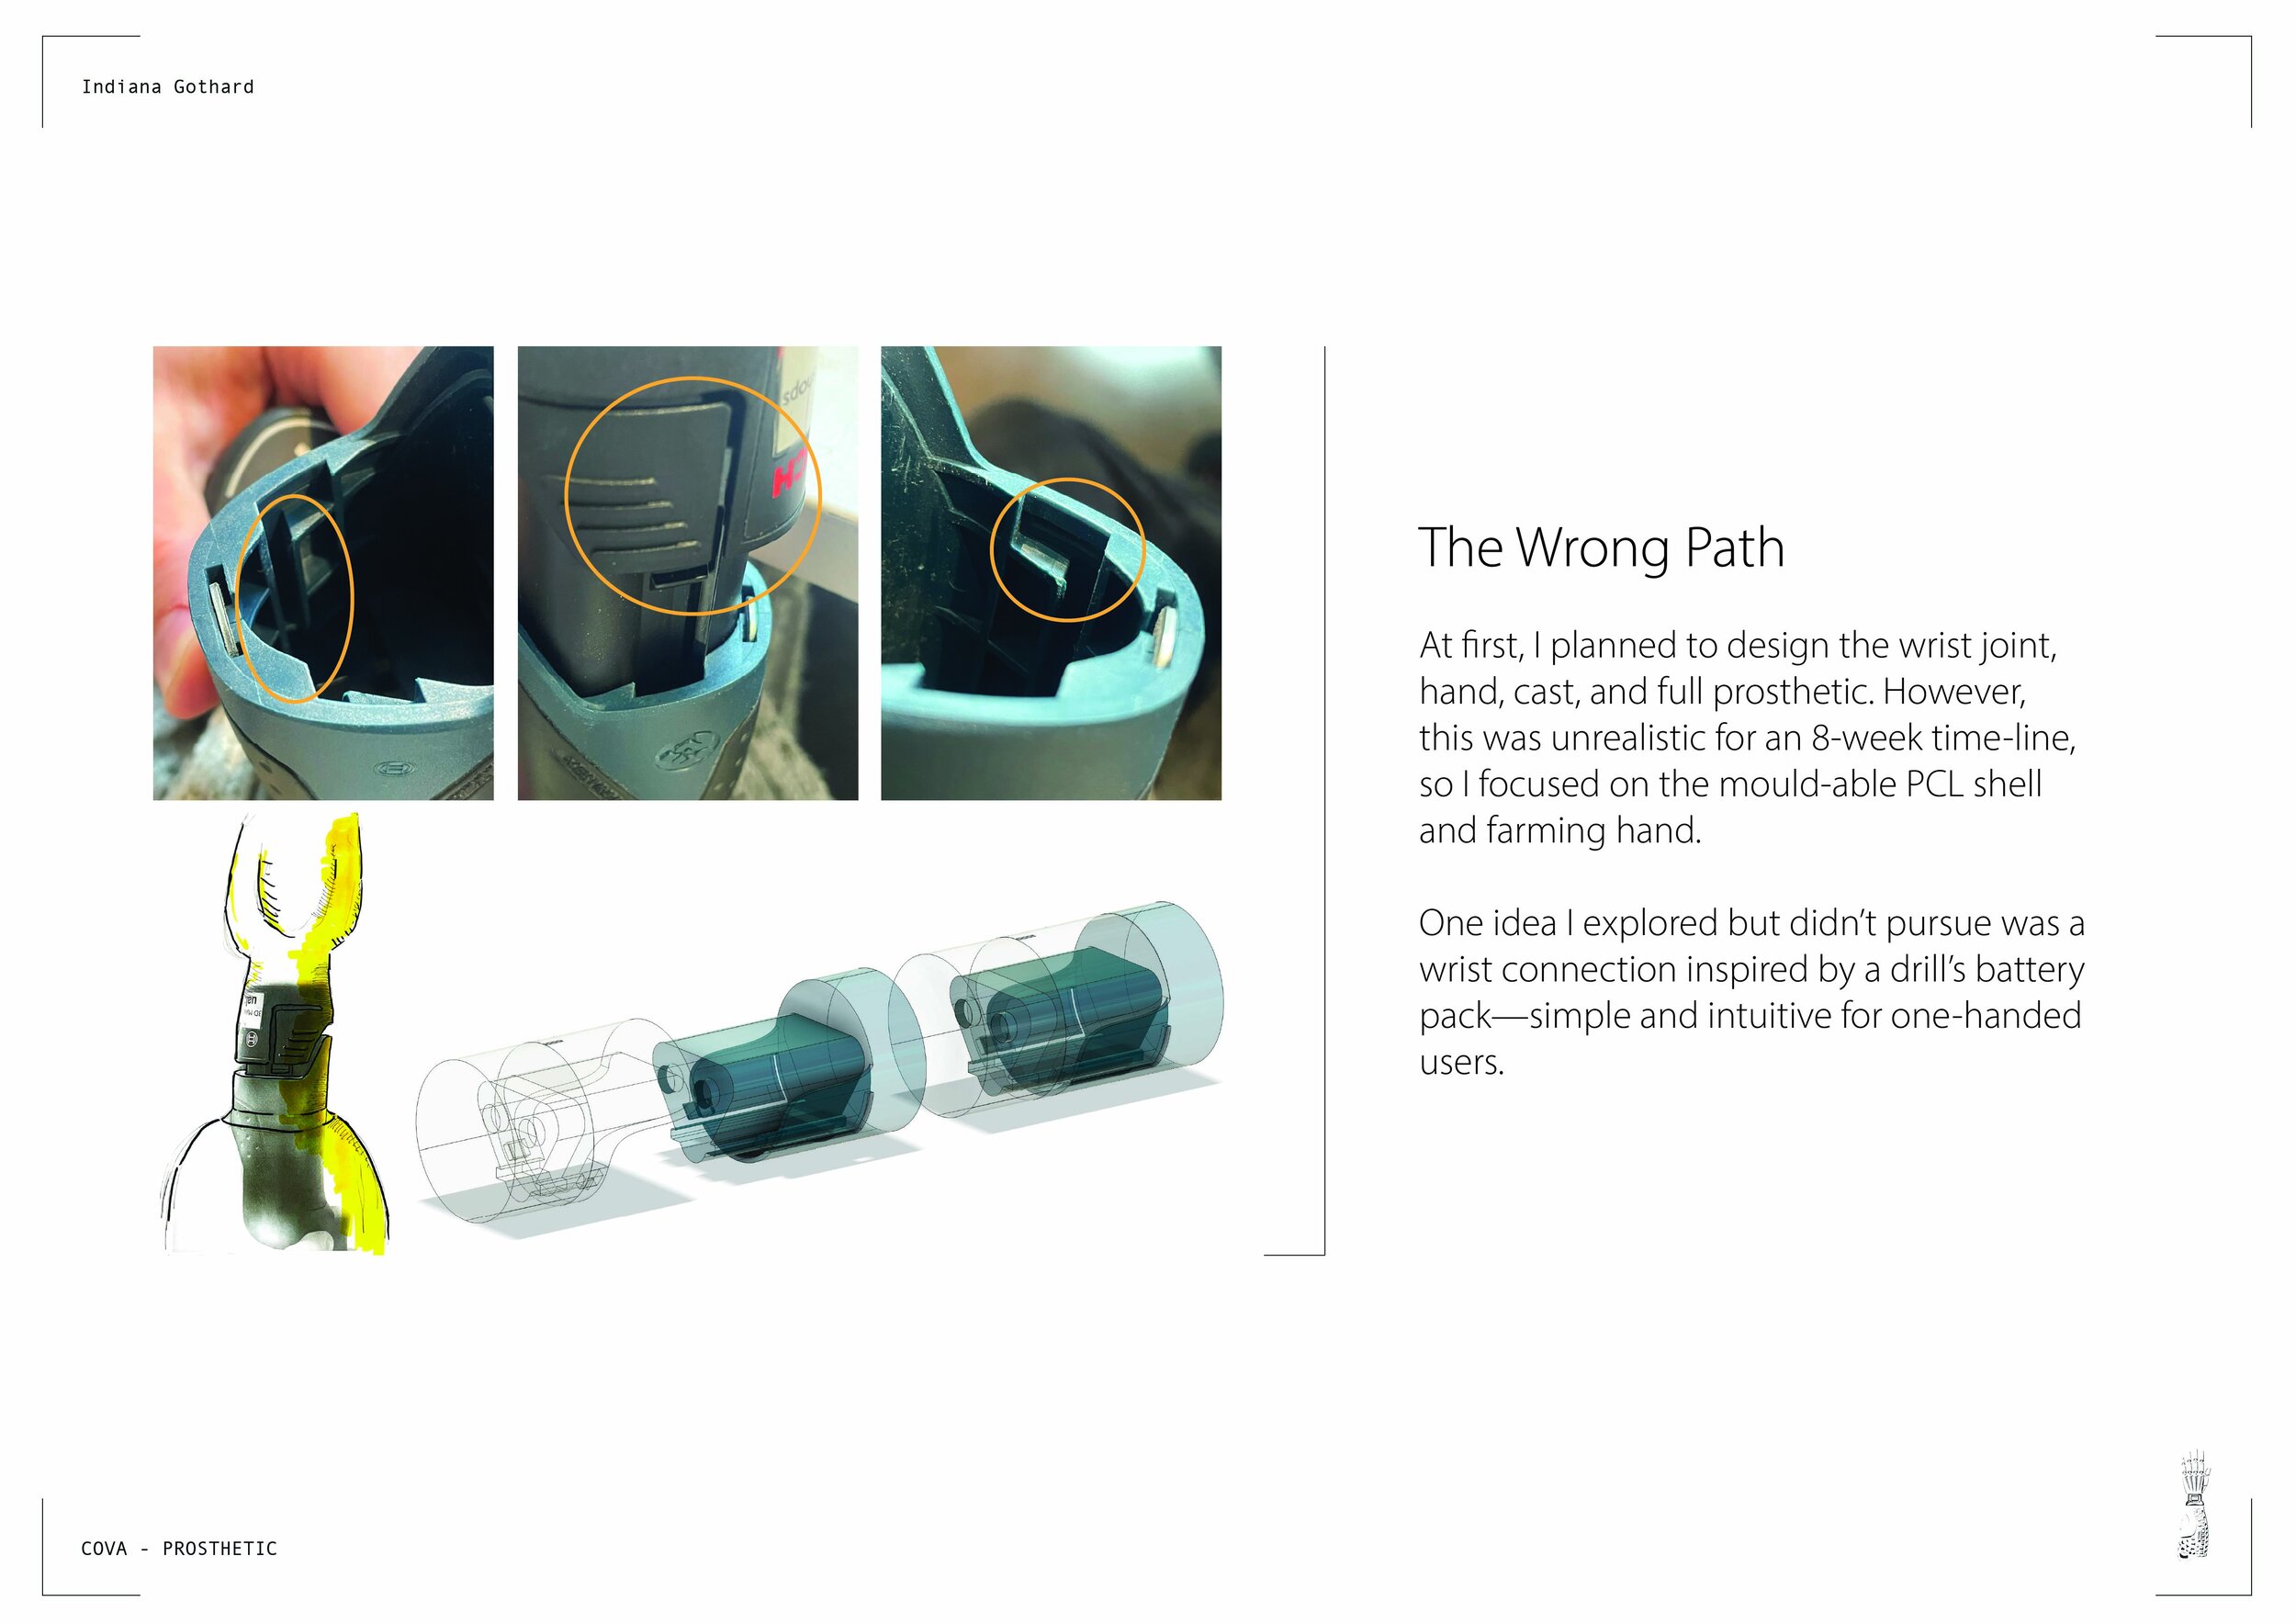
This foam arm acted as the reference user throughout the project, since finding people with upper-limb amputations to collaborate with is challenging due to their status as a vulnerable and protected group. Using this model gave me a practical framework to design against, helping me refine dimensions, ergonomics, and functional movements. It also made the sketching and ideation stages more focused, as every drawing related back to the form. I then produced a series of quick paper and cardboard prototypes, testing proportions, connections, and usability before moving forward with more durable materials.


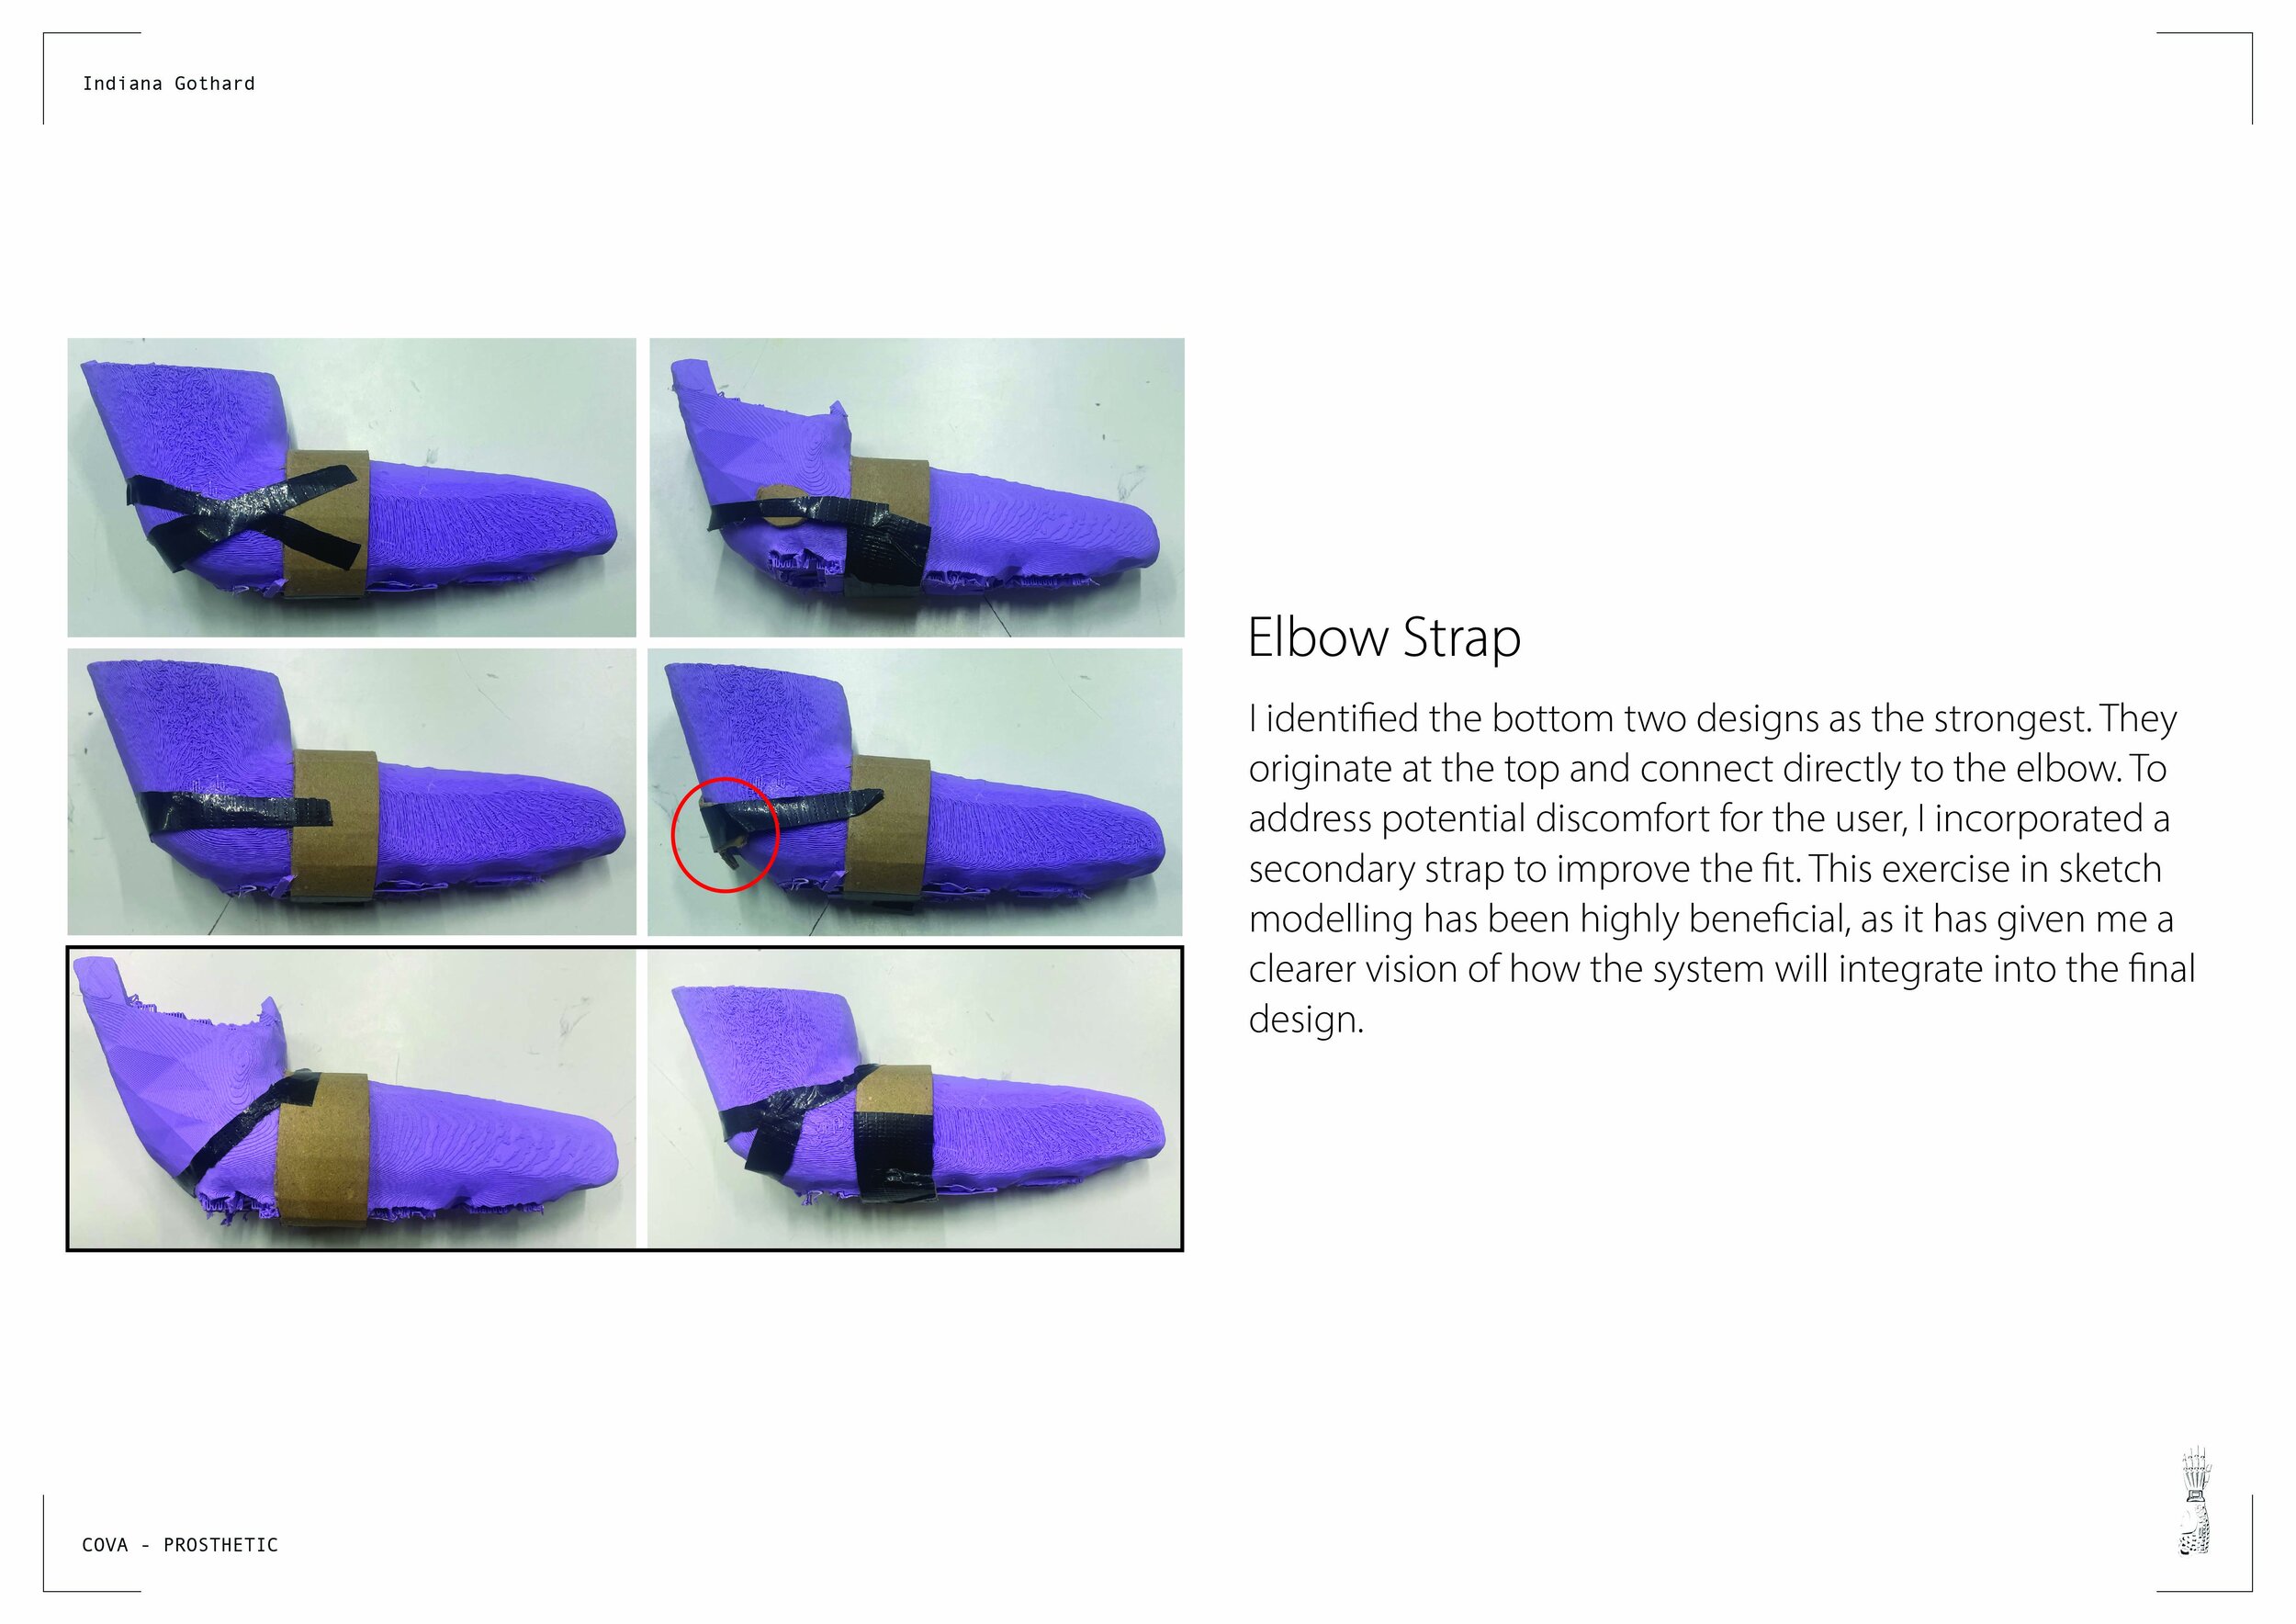
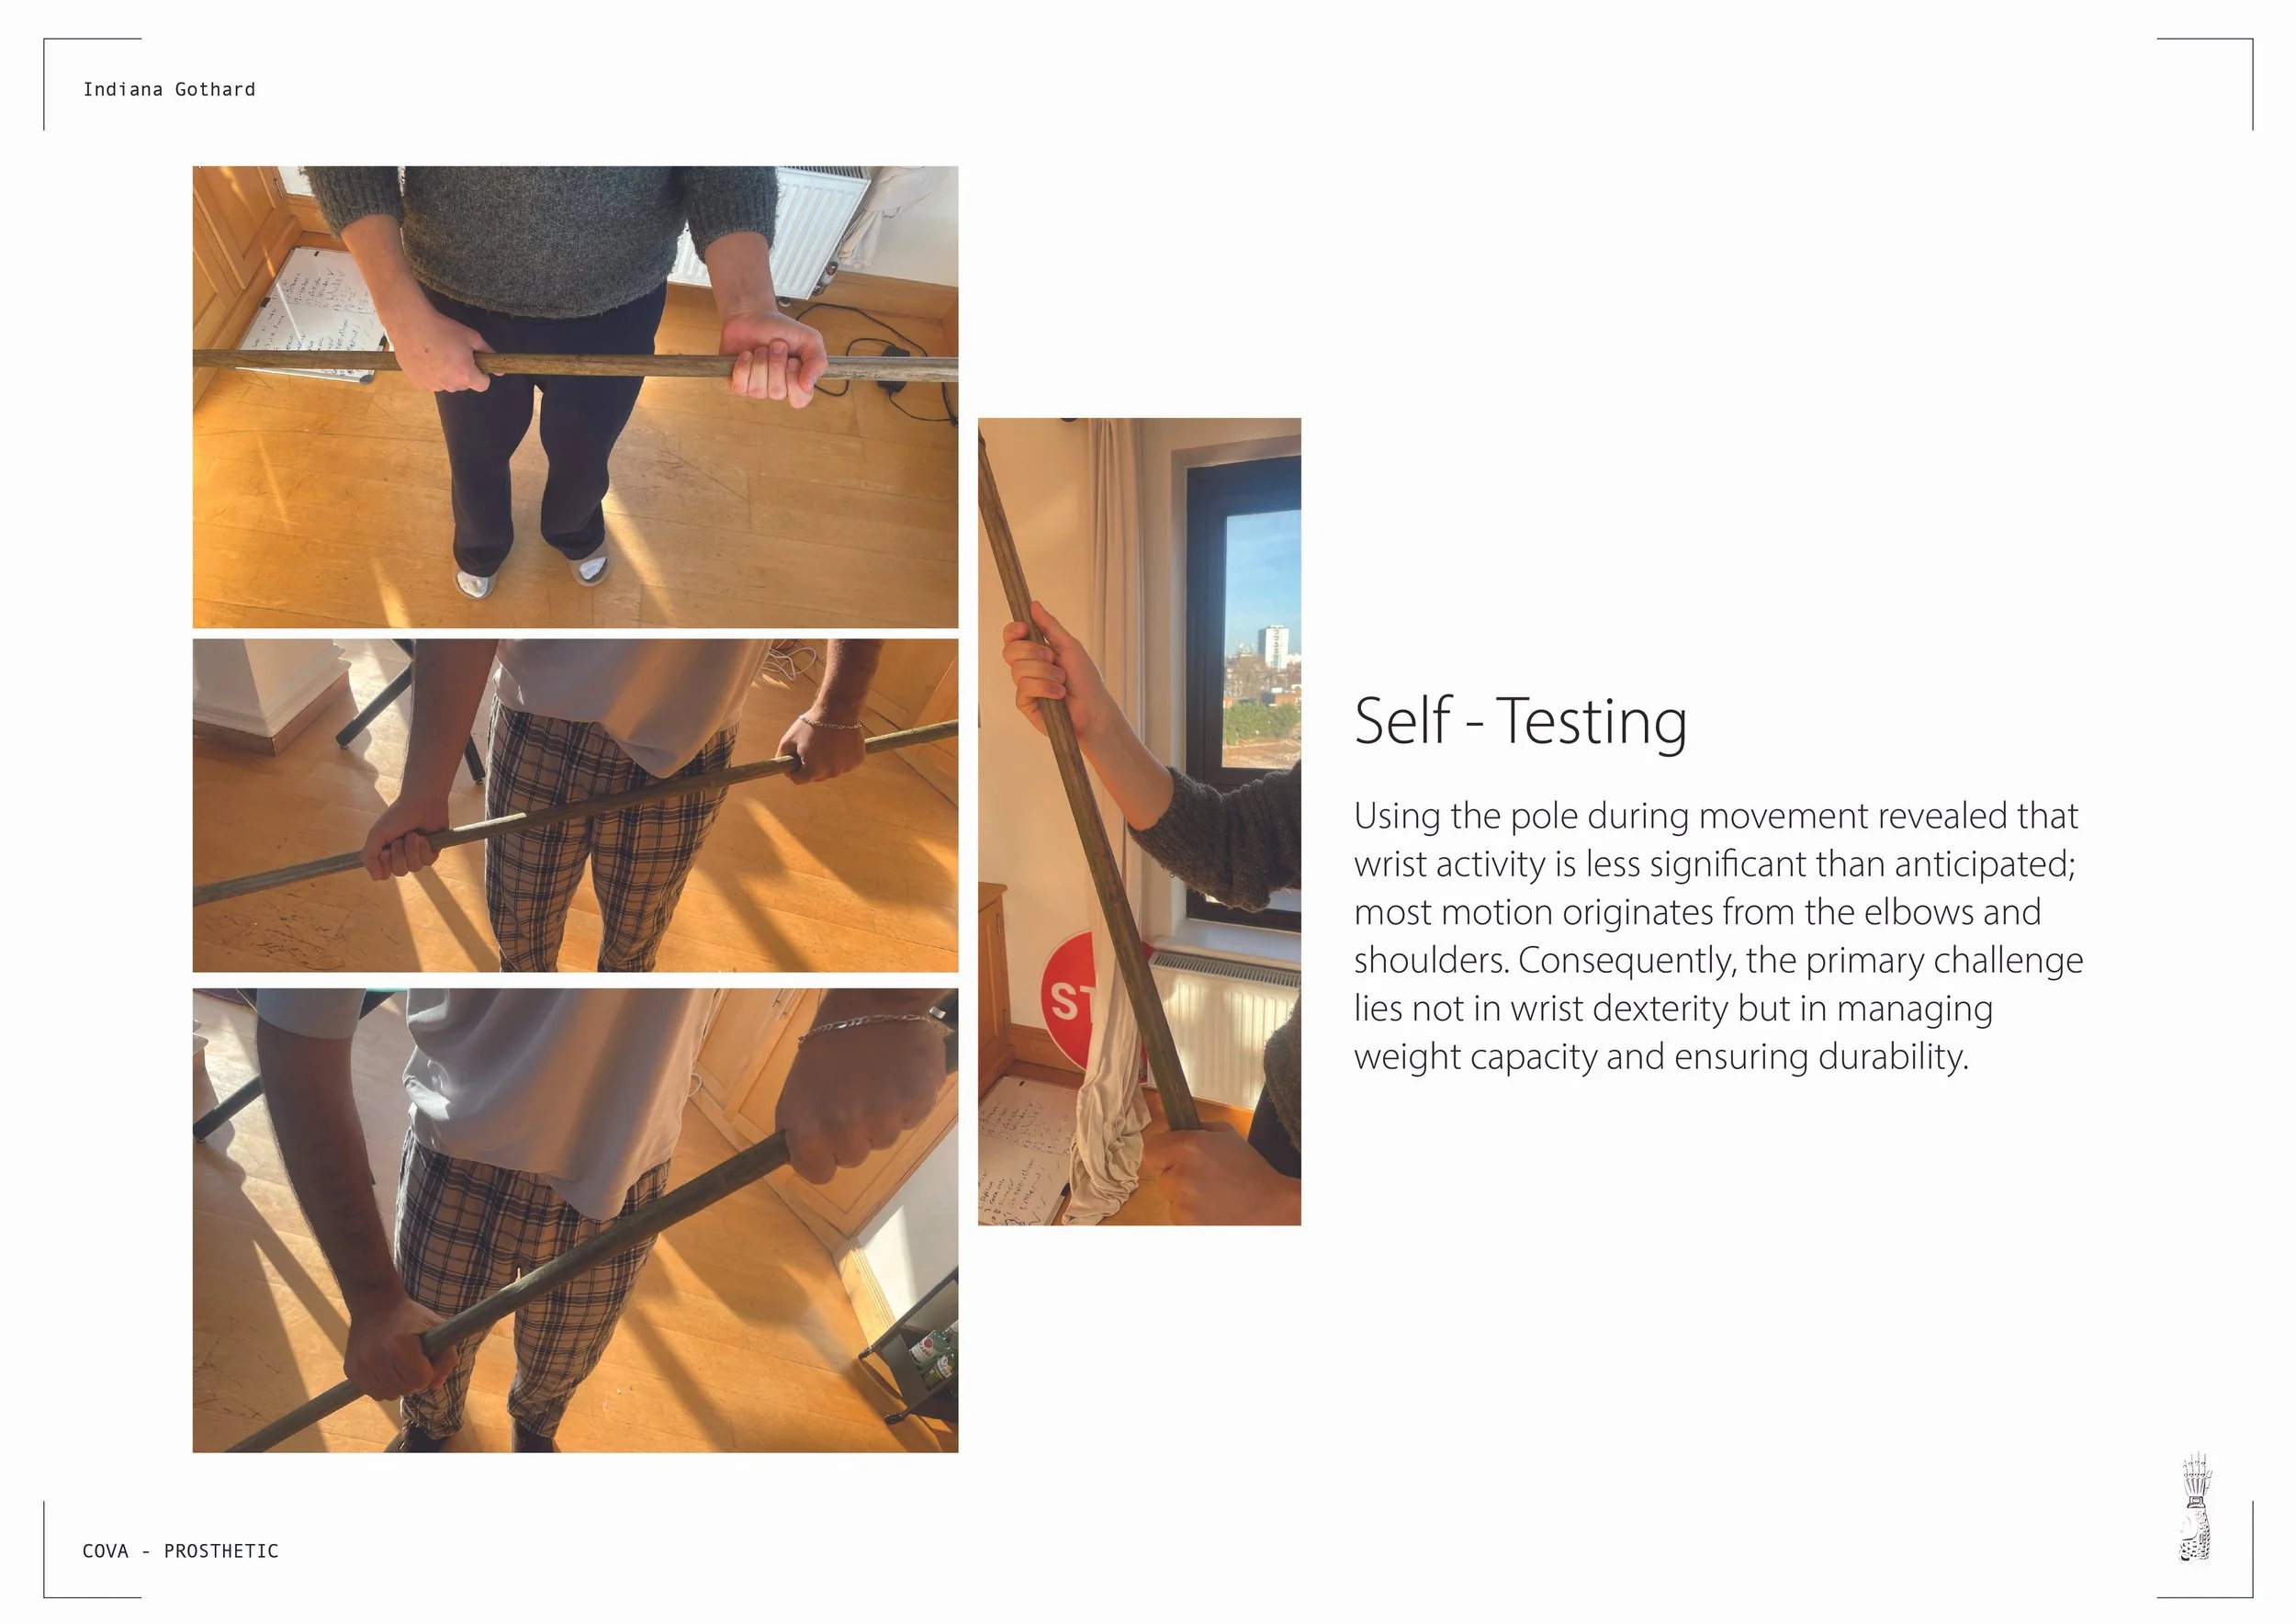
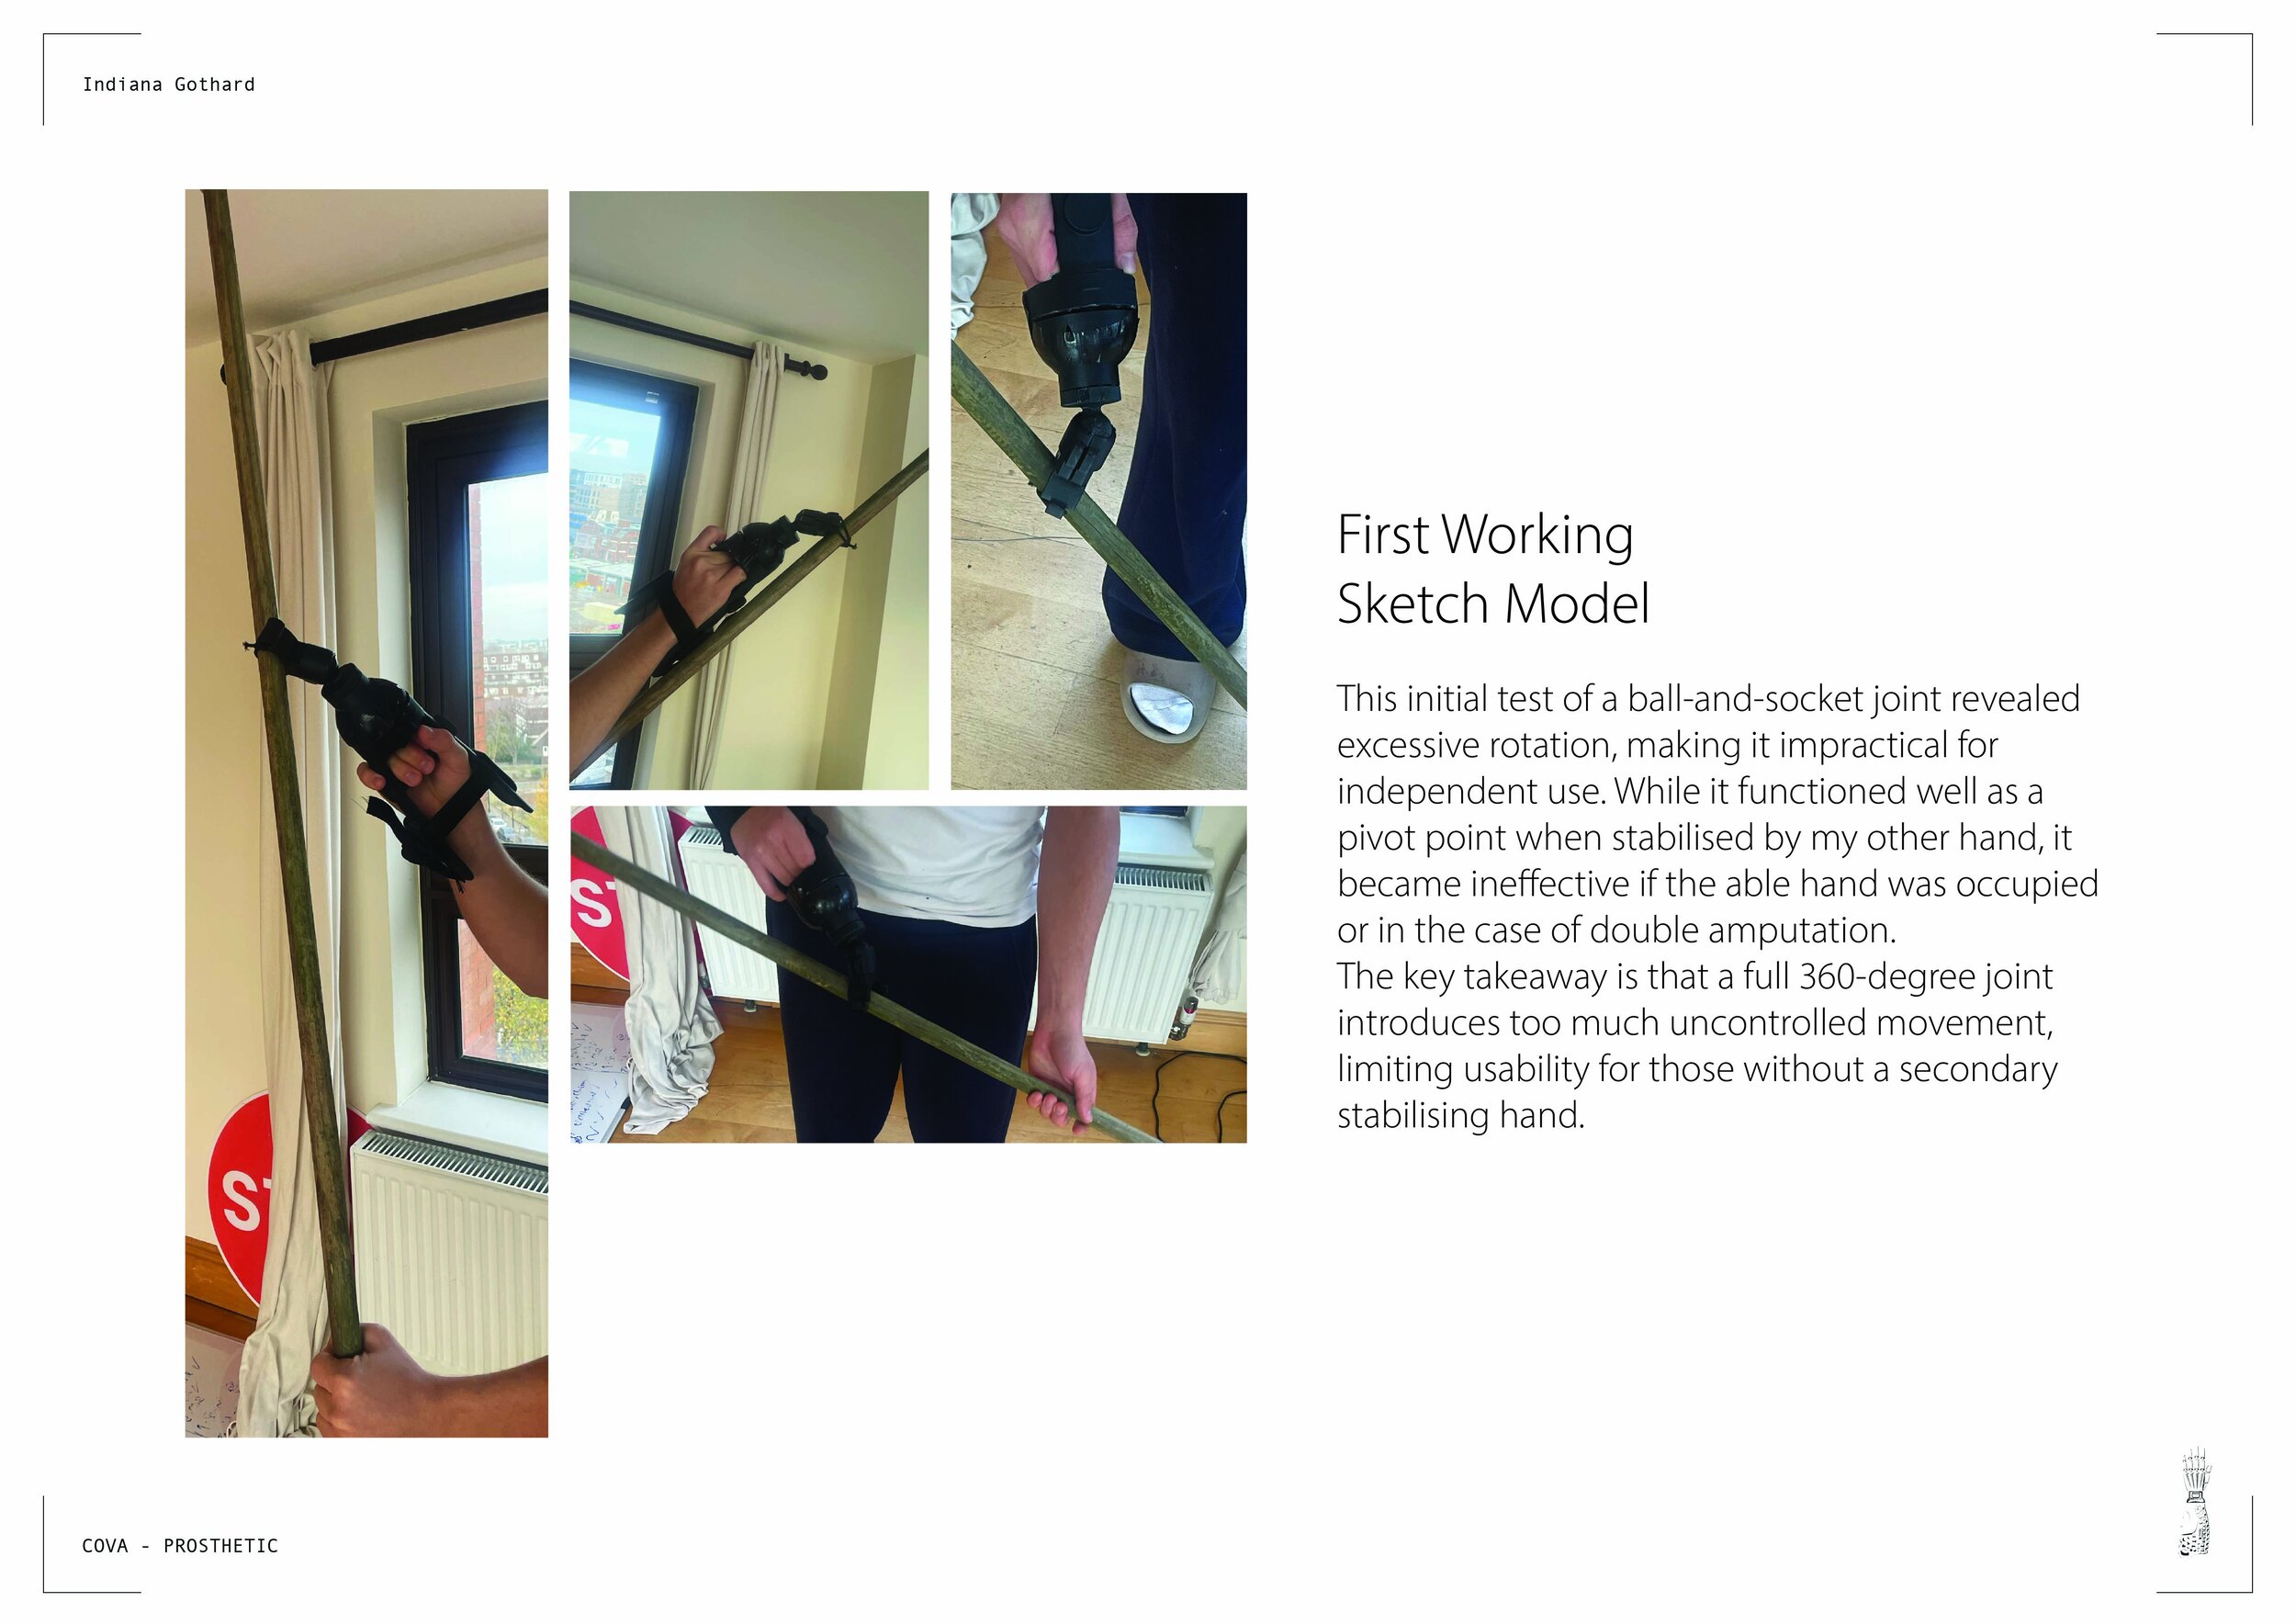
IDEATION AND TESTING
This stage focused on turning early ideas into practical exploration. I began by sketching directly over printouts of the foam arm, developing concepts that mapped proportions and functions. From there, I built quick paper and cardboard models to see how forms might behave in three dimensions. I also carried out strap tests on my own arm to evaluate comfort and learn how weight and tension would feel in use. To scale these experiments, I created a series of 1:5 cardboard mock-ups alongside small 3D-printed prototypes, gradually shaping the arm’s layout and refining attachment solutions.

REFINED SKETCH
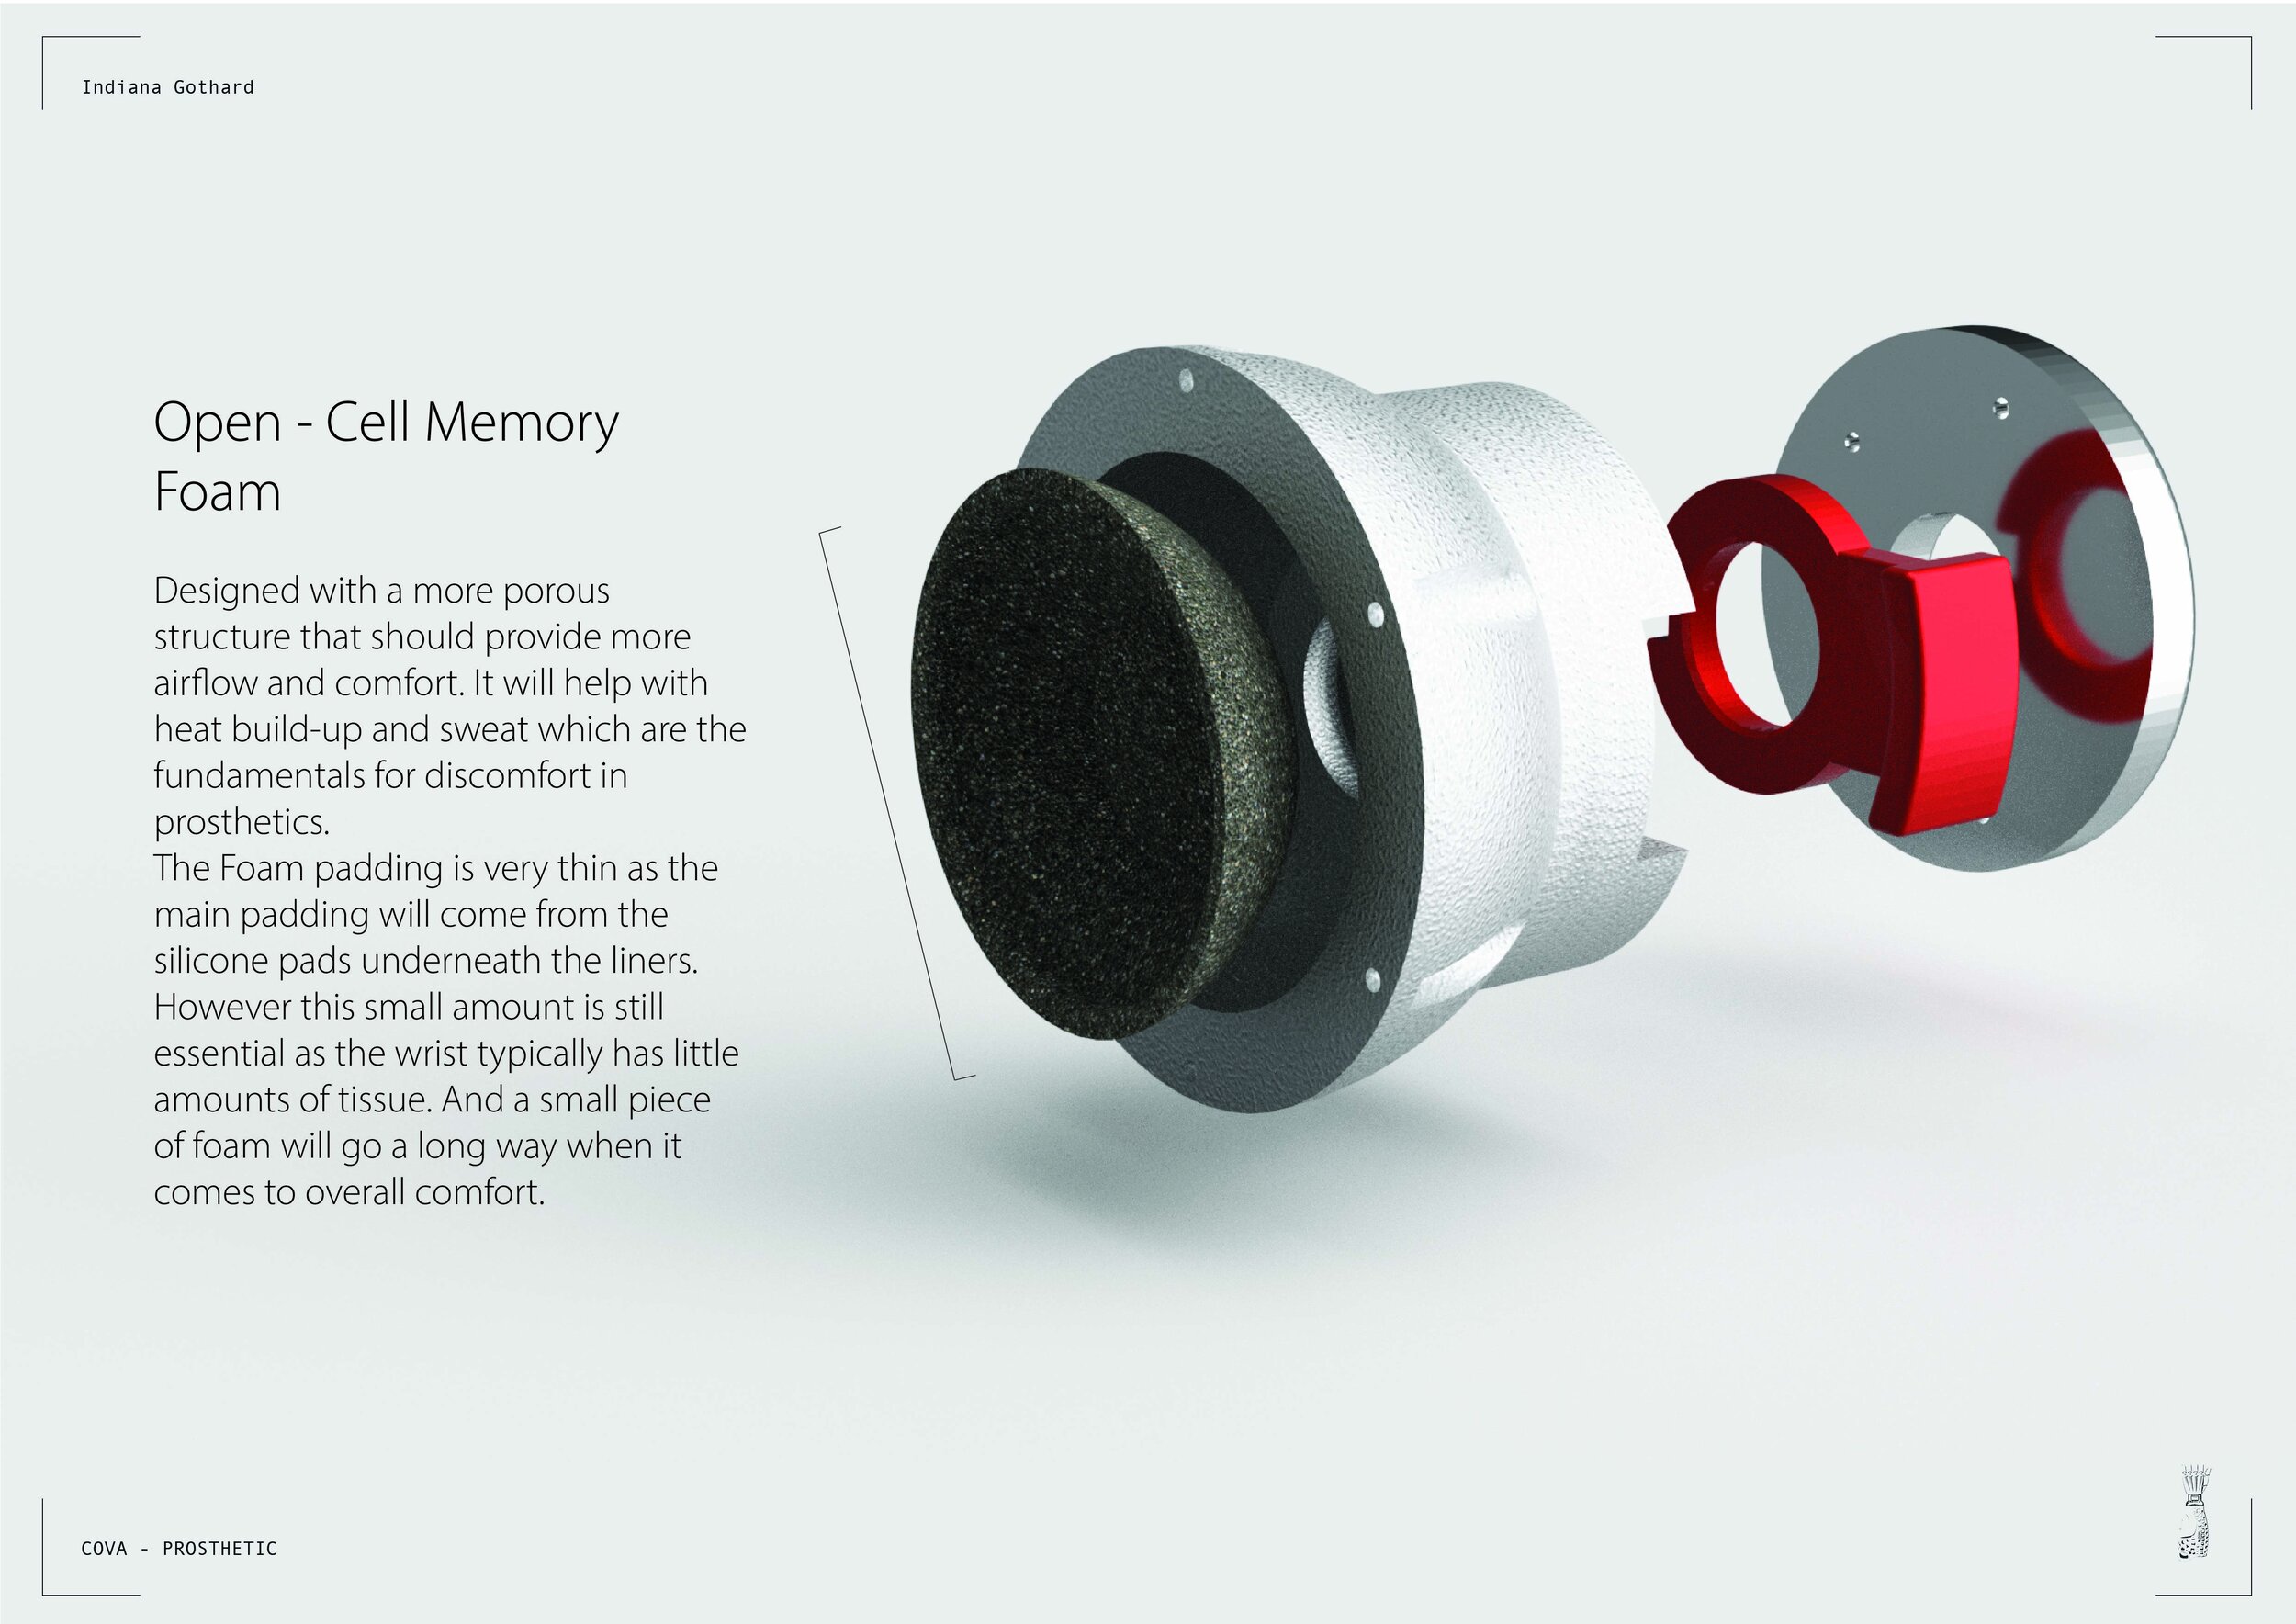
This sketch represents the outcome of my early ideation and trial models. I explored an adjustable section to adapt daily if sweating or discomfort occurred. Holes in the surface offered flexibility and supported molding, which was key at this stage. The arm was designed to be moldable, similar to a rugby gum shield, supported by straps and wrist joint research.
06 MATIERAL TESTING
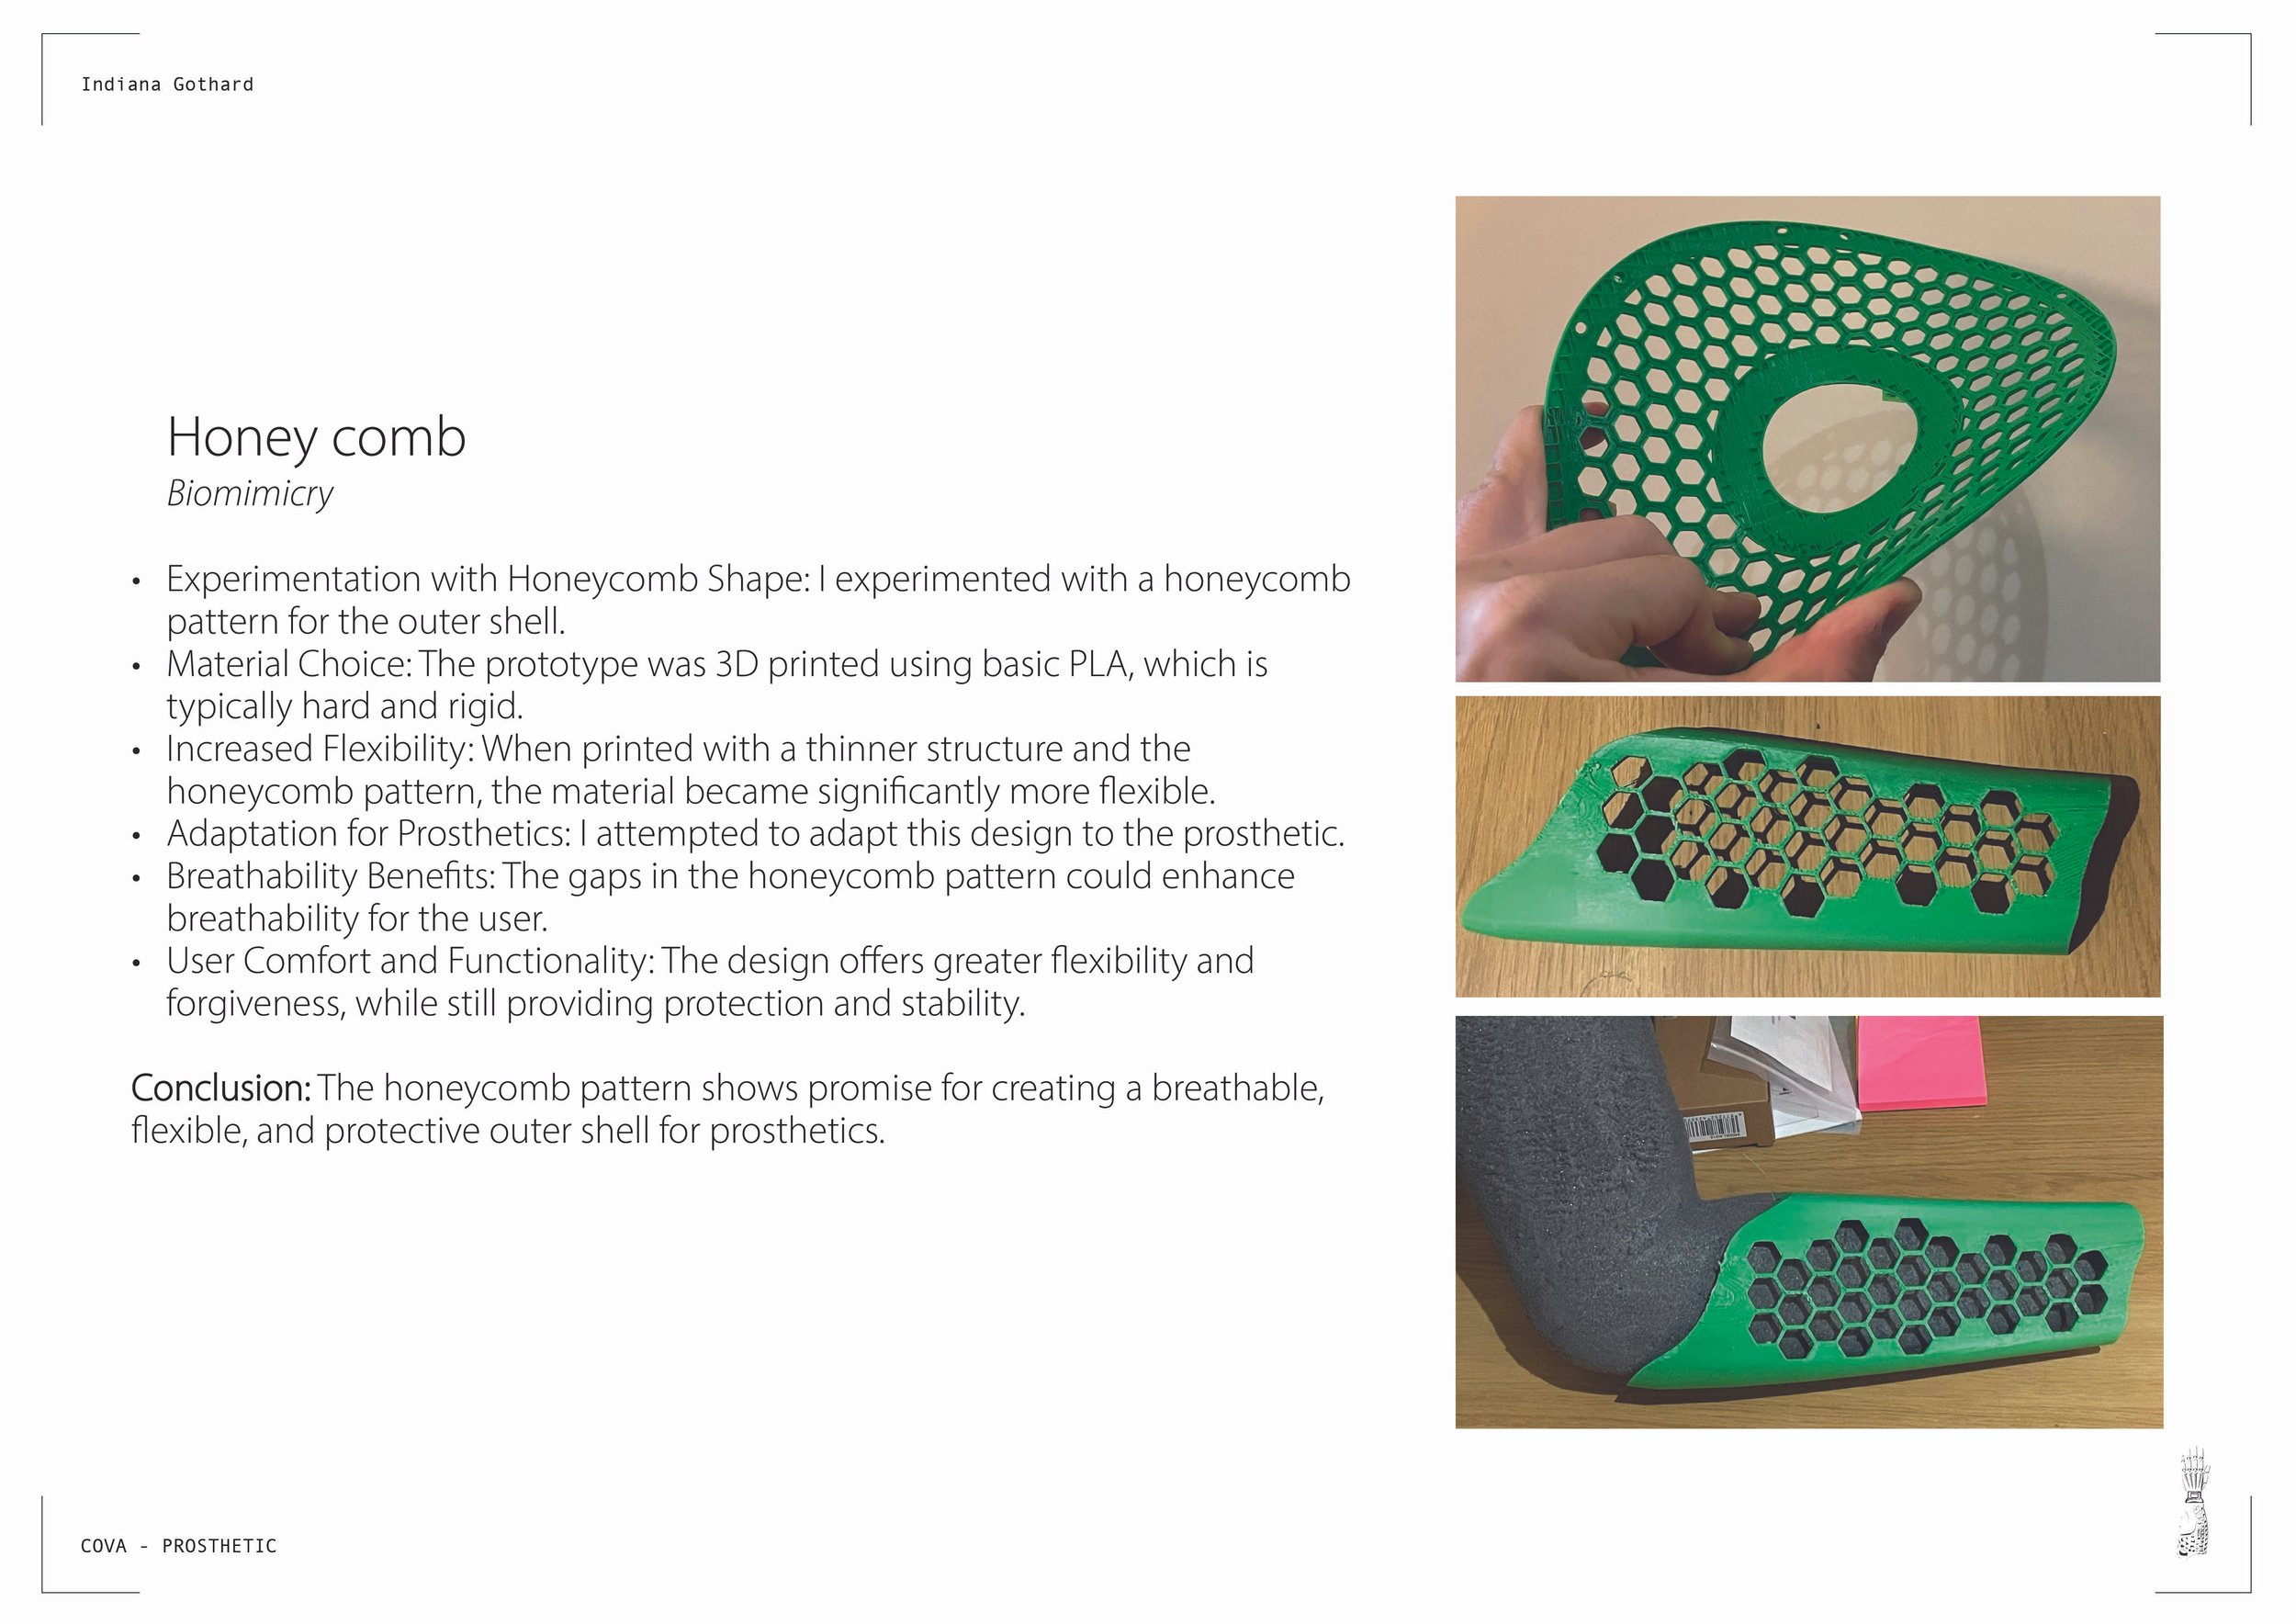
EXPERIMENTATION
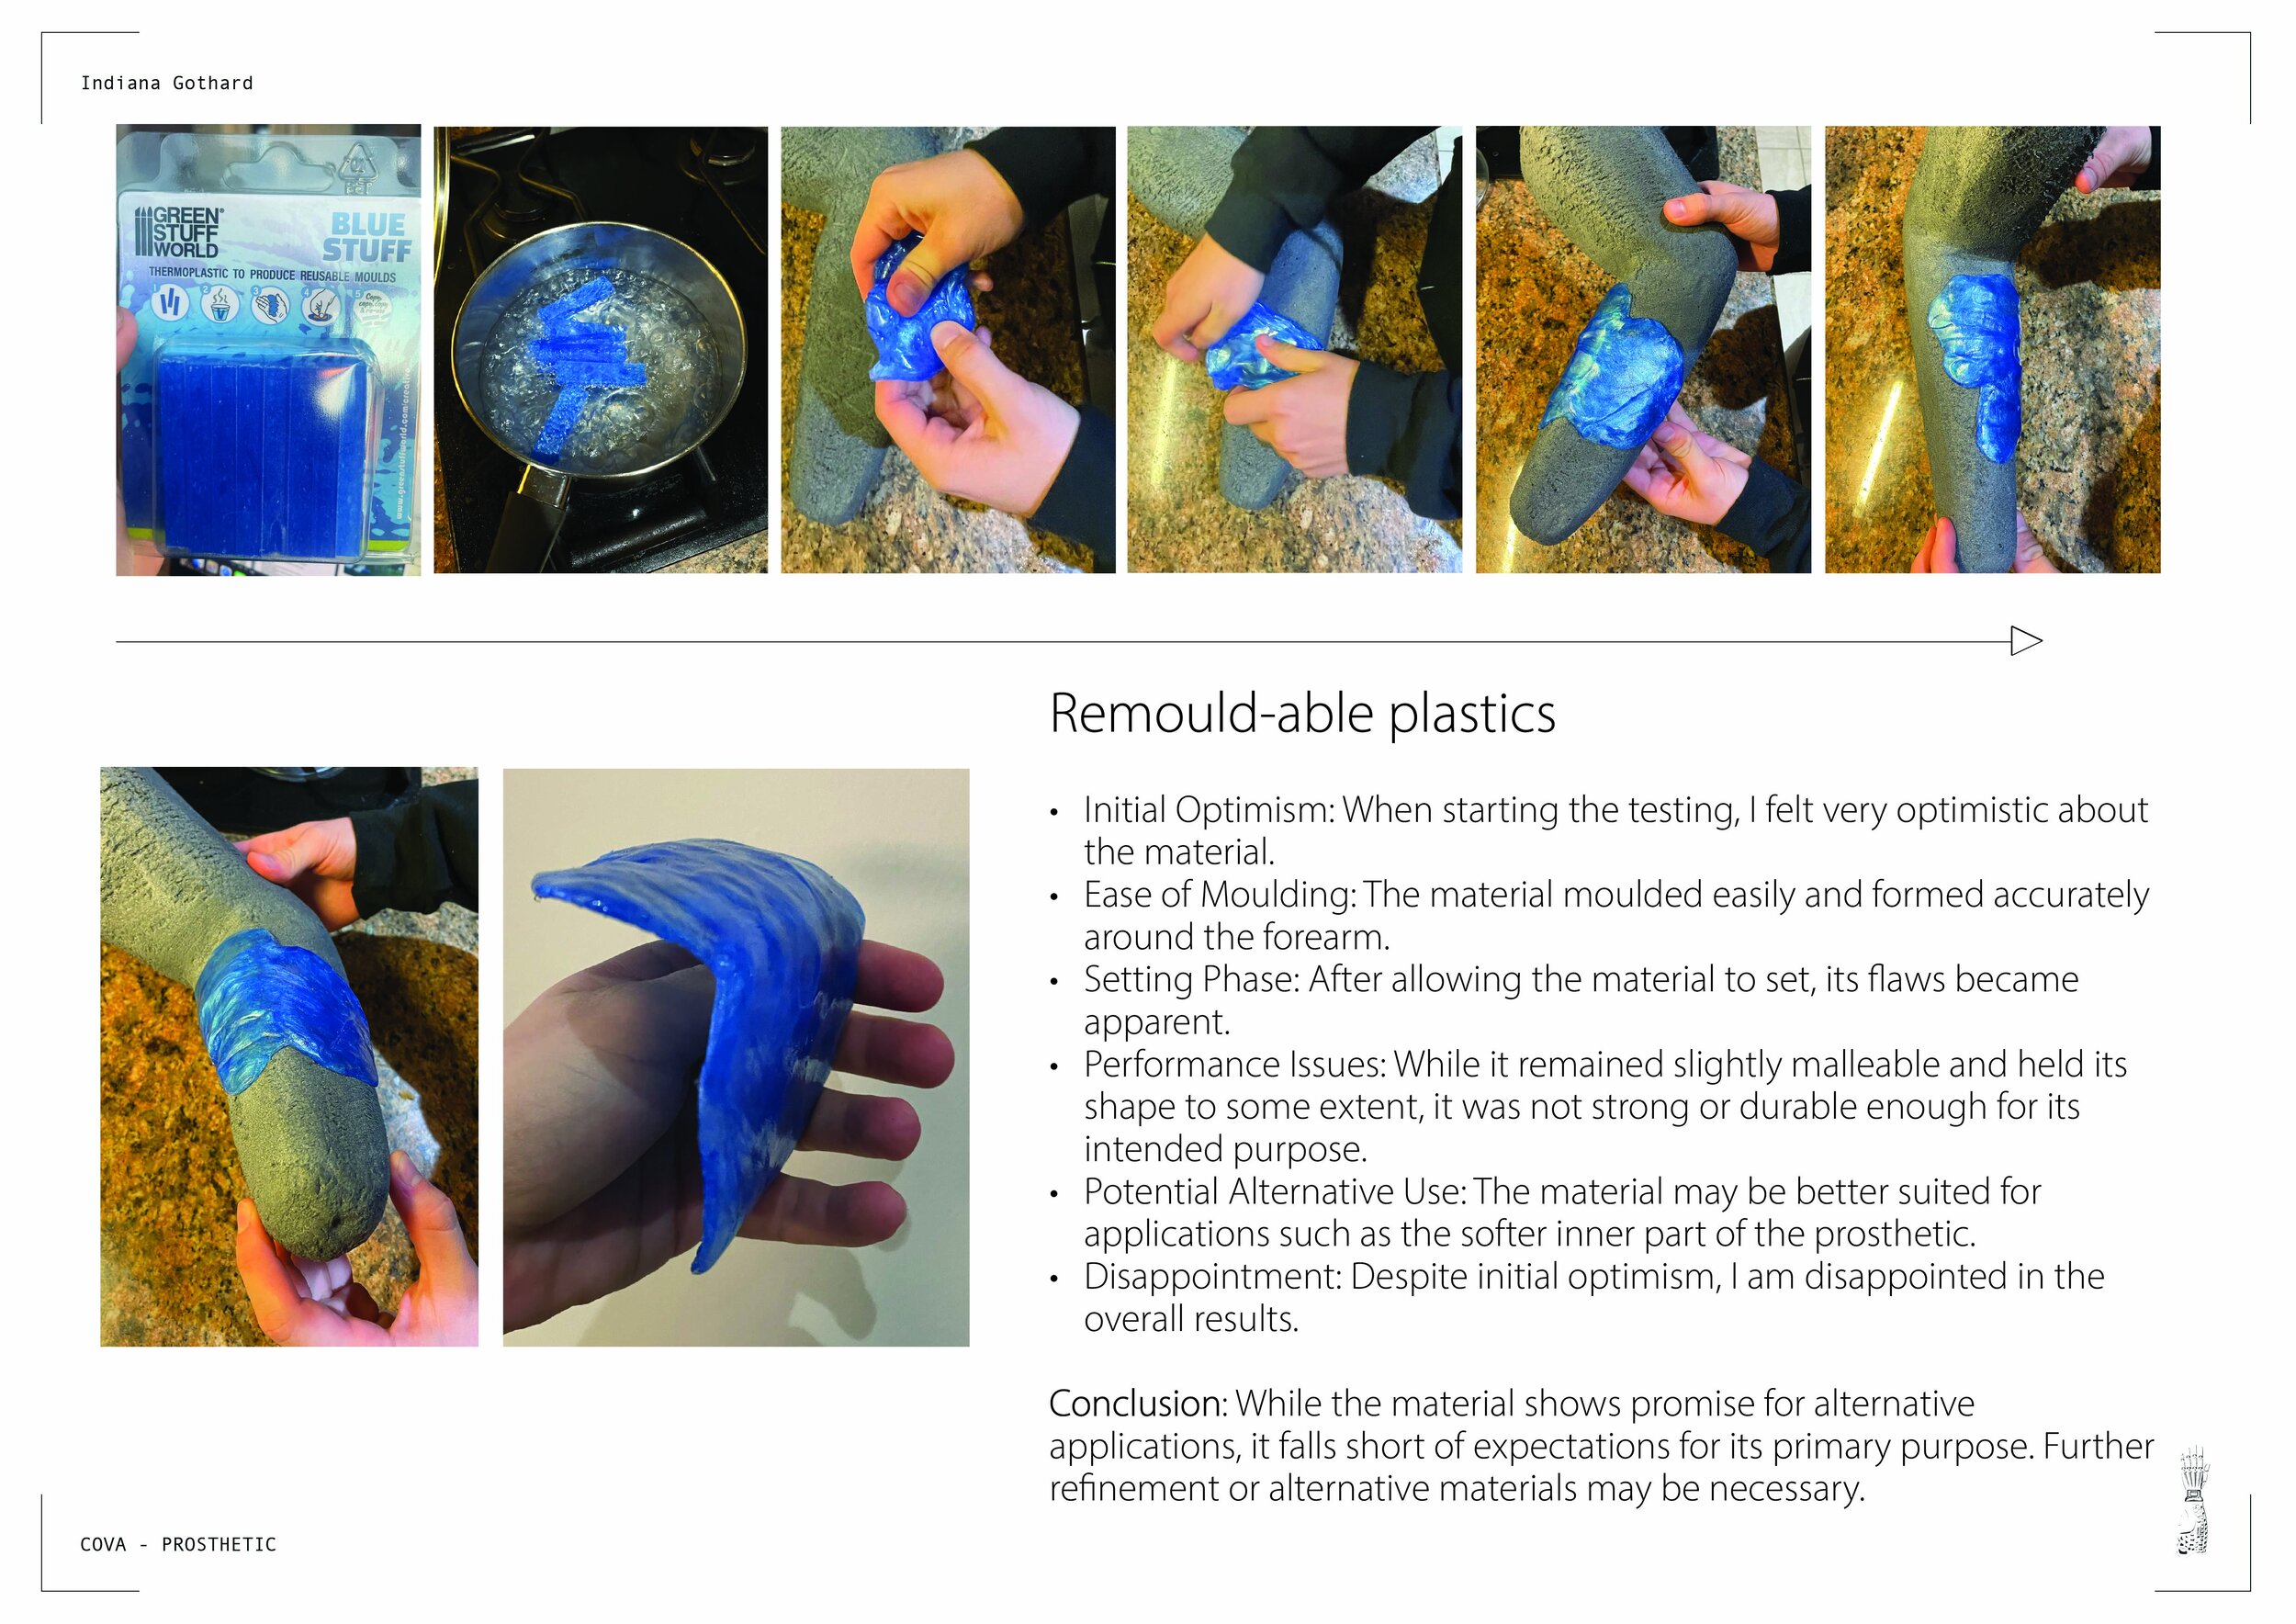
I found that at this point of the project I knew I wanted a material that can me self shaped by the user. To cut costs when it comes to the service charge. Make a one of one product for someone, make it personalised.


TESTING MATERIALS
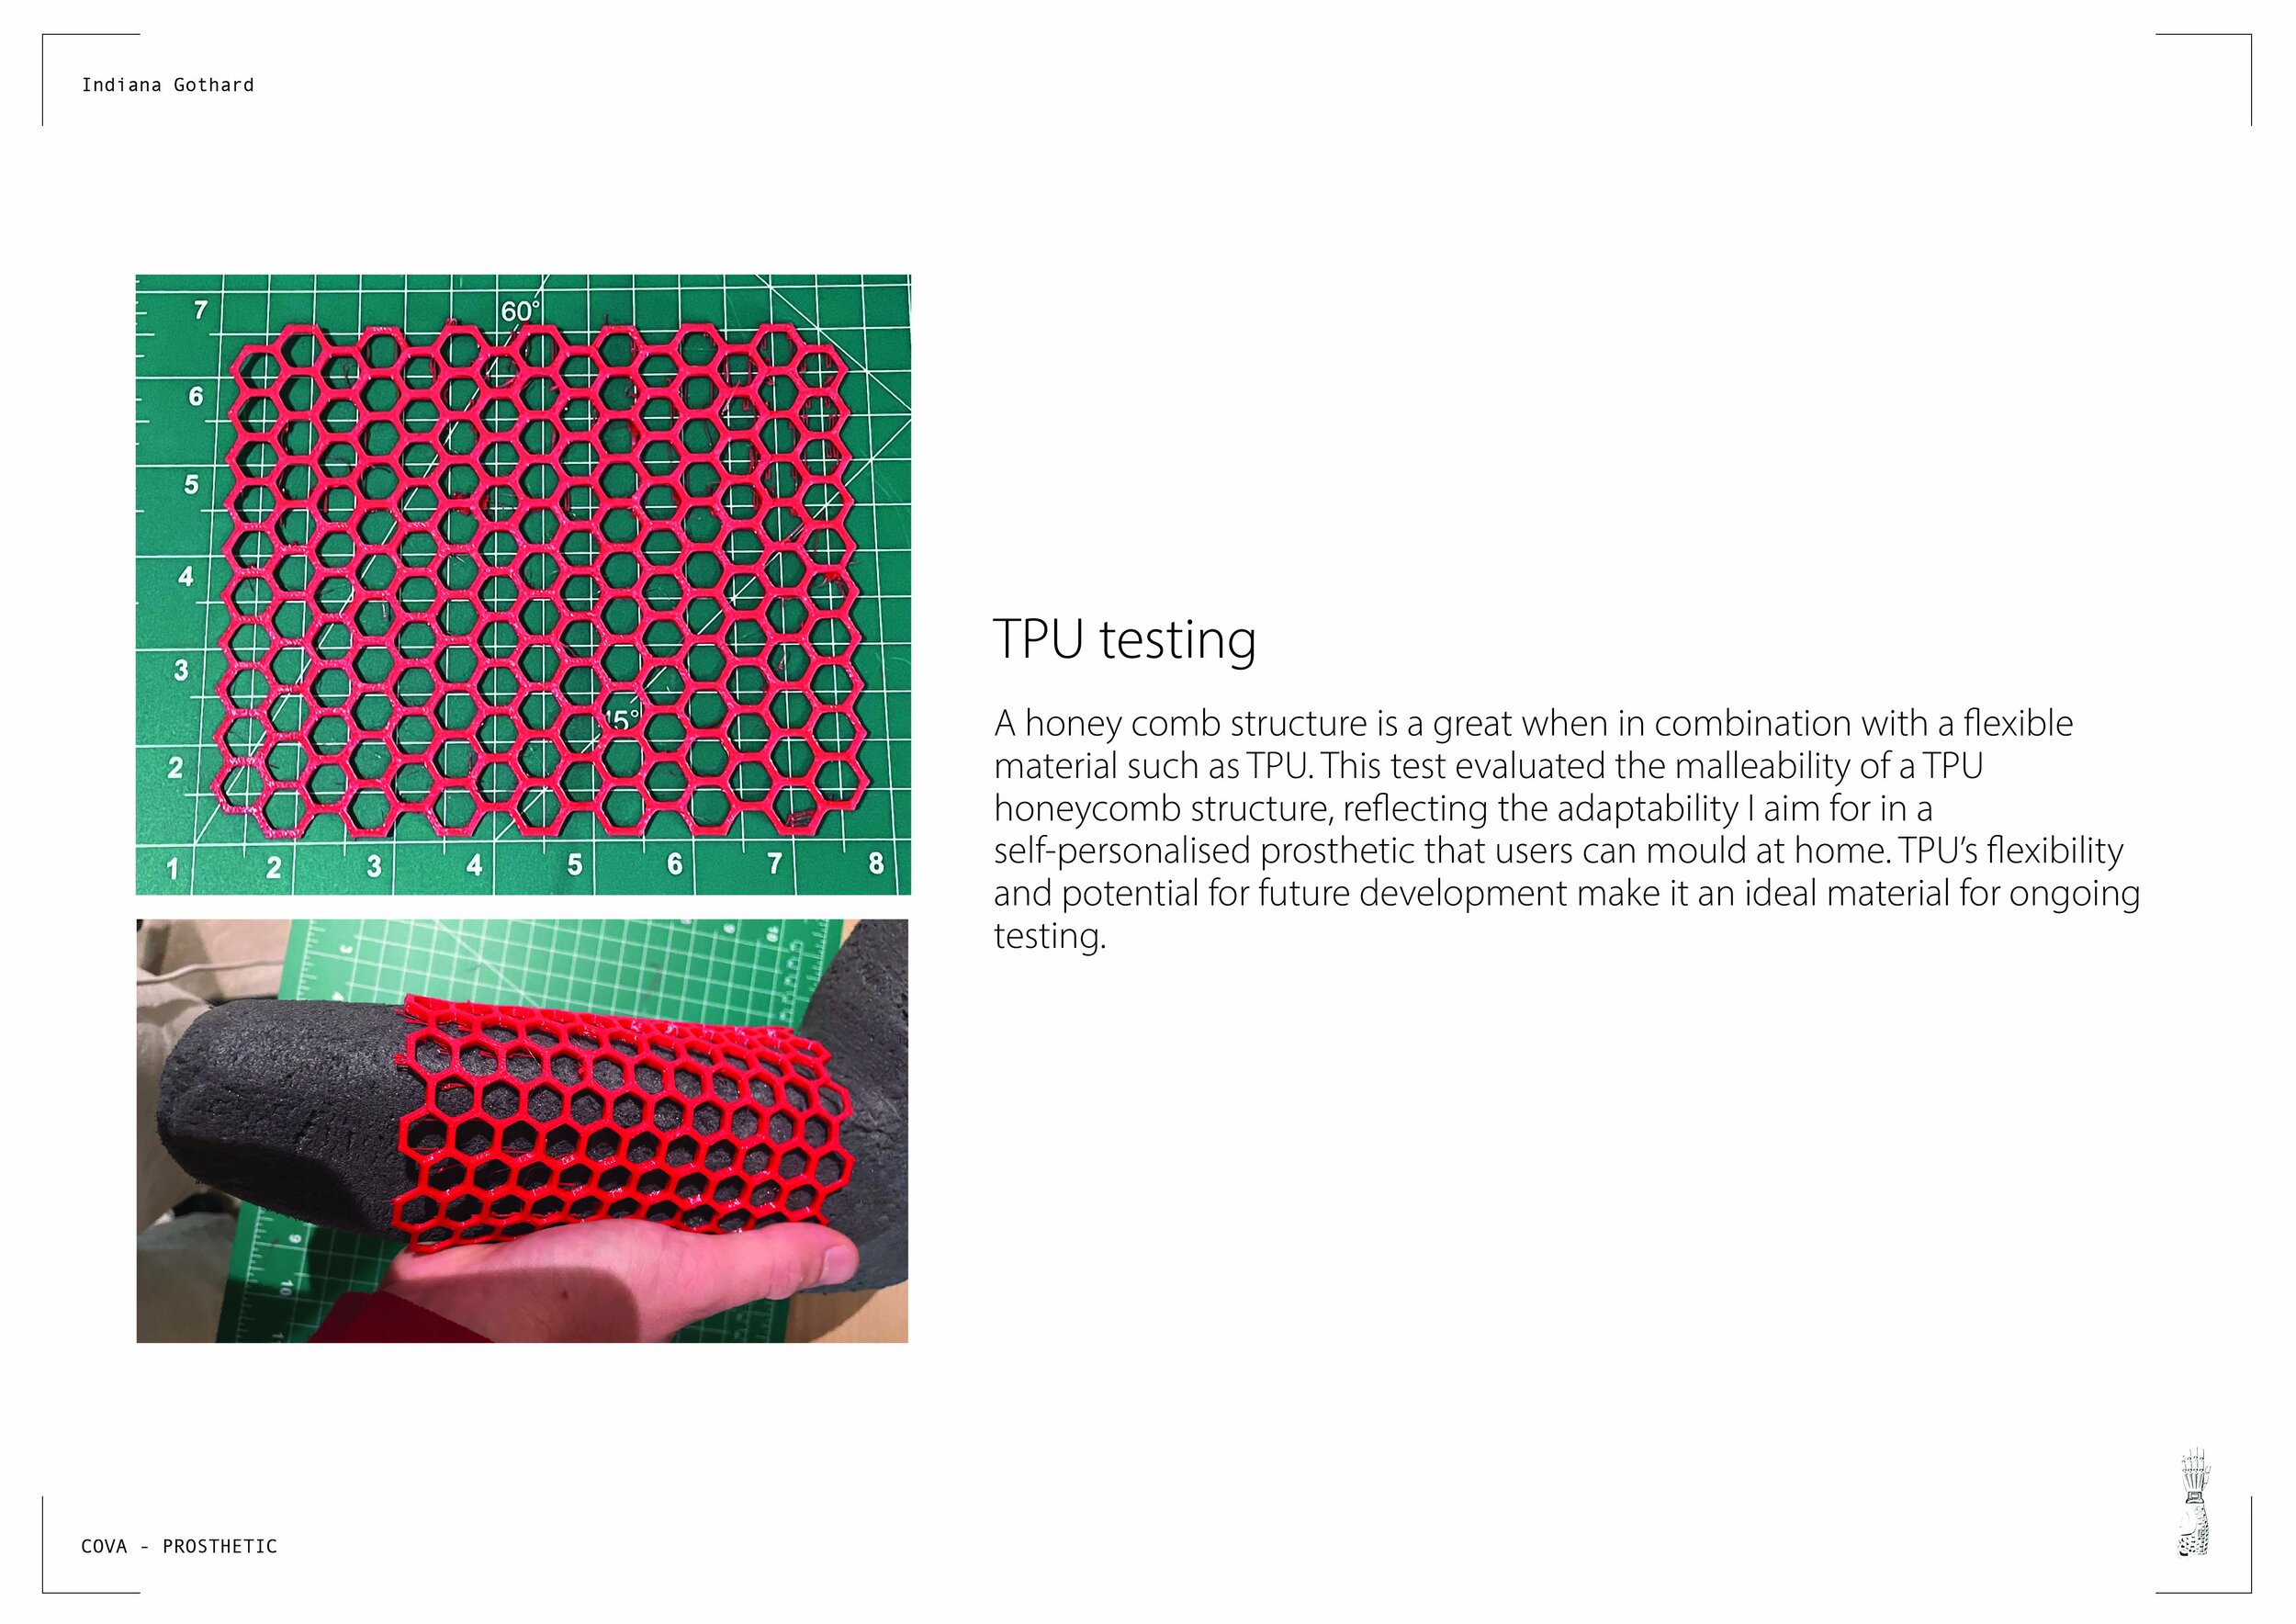
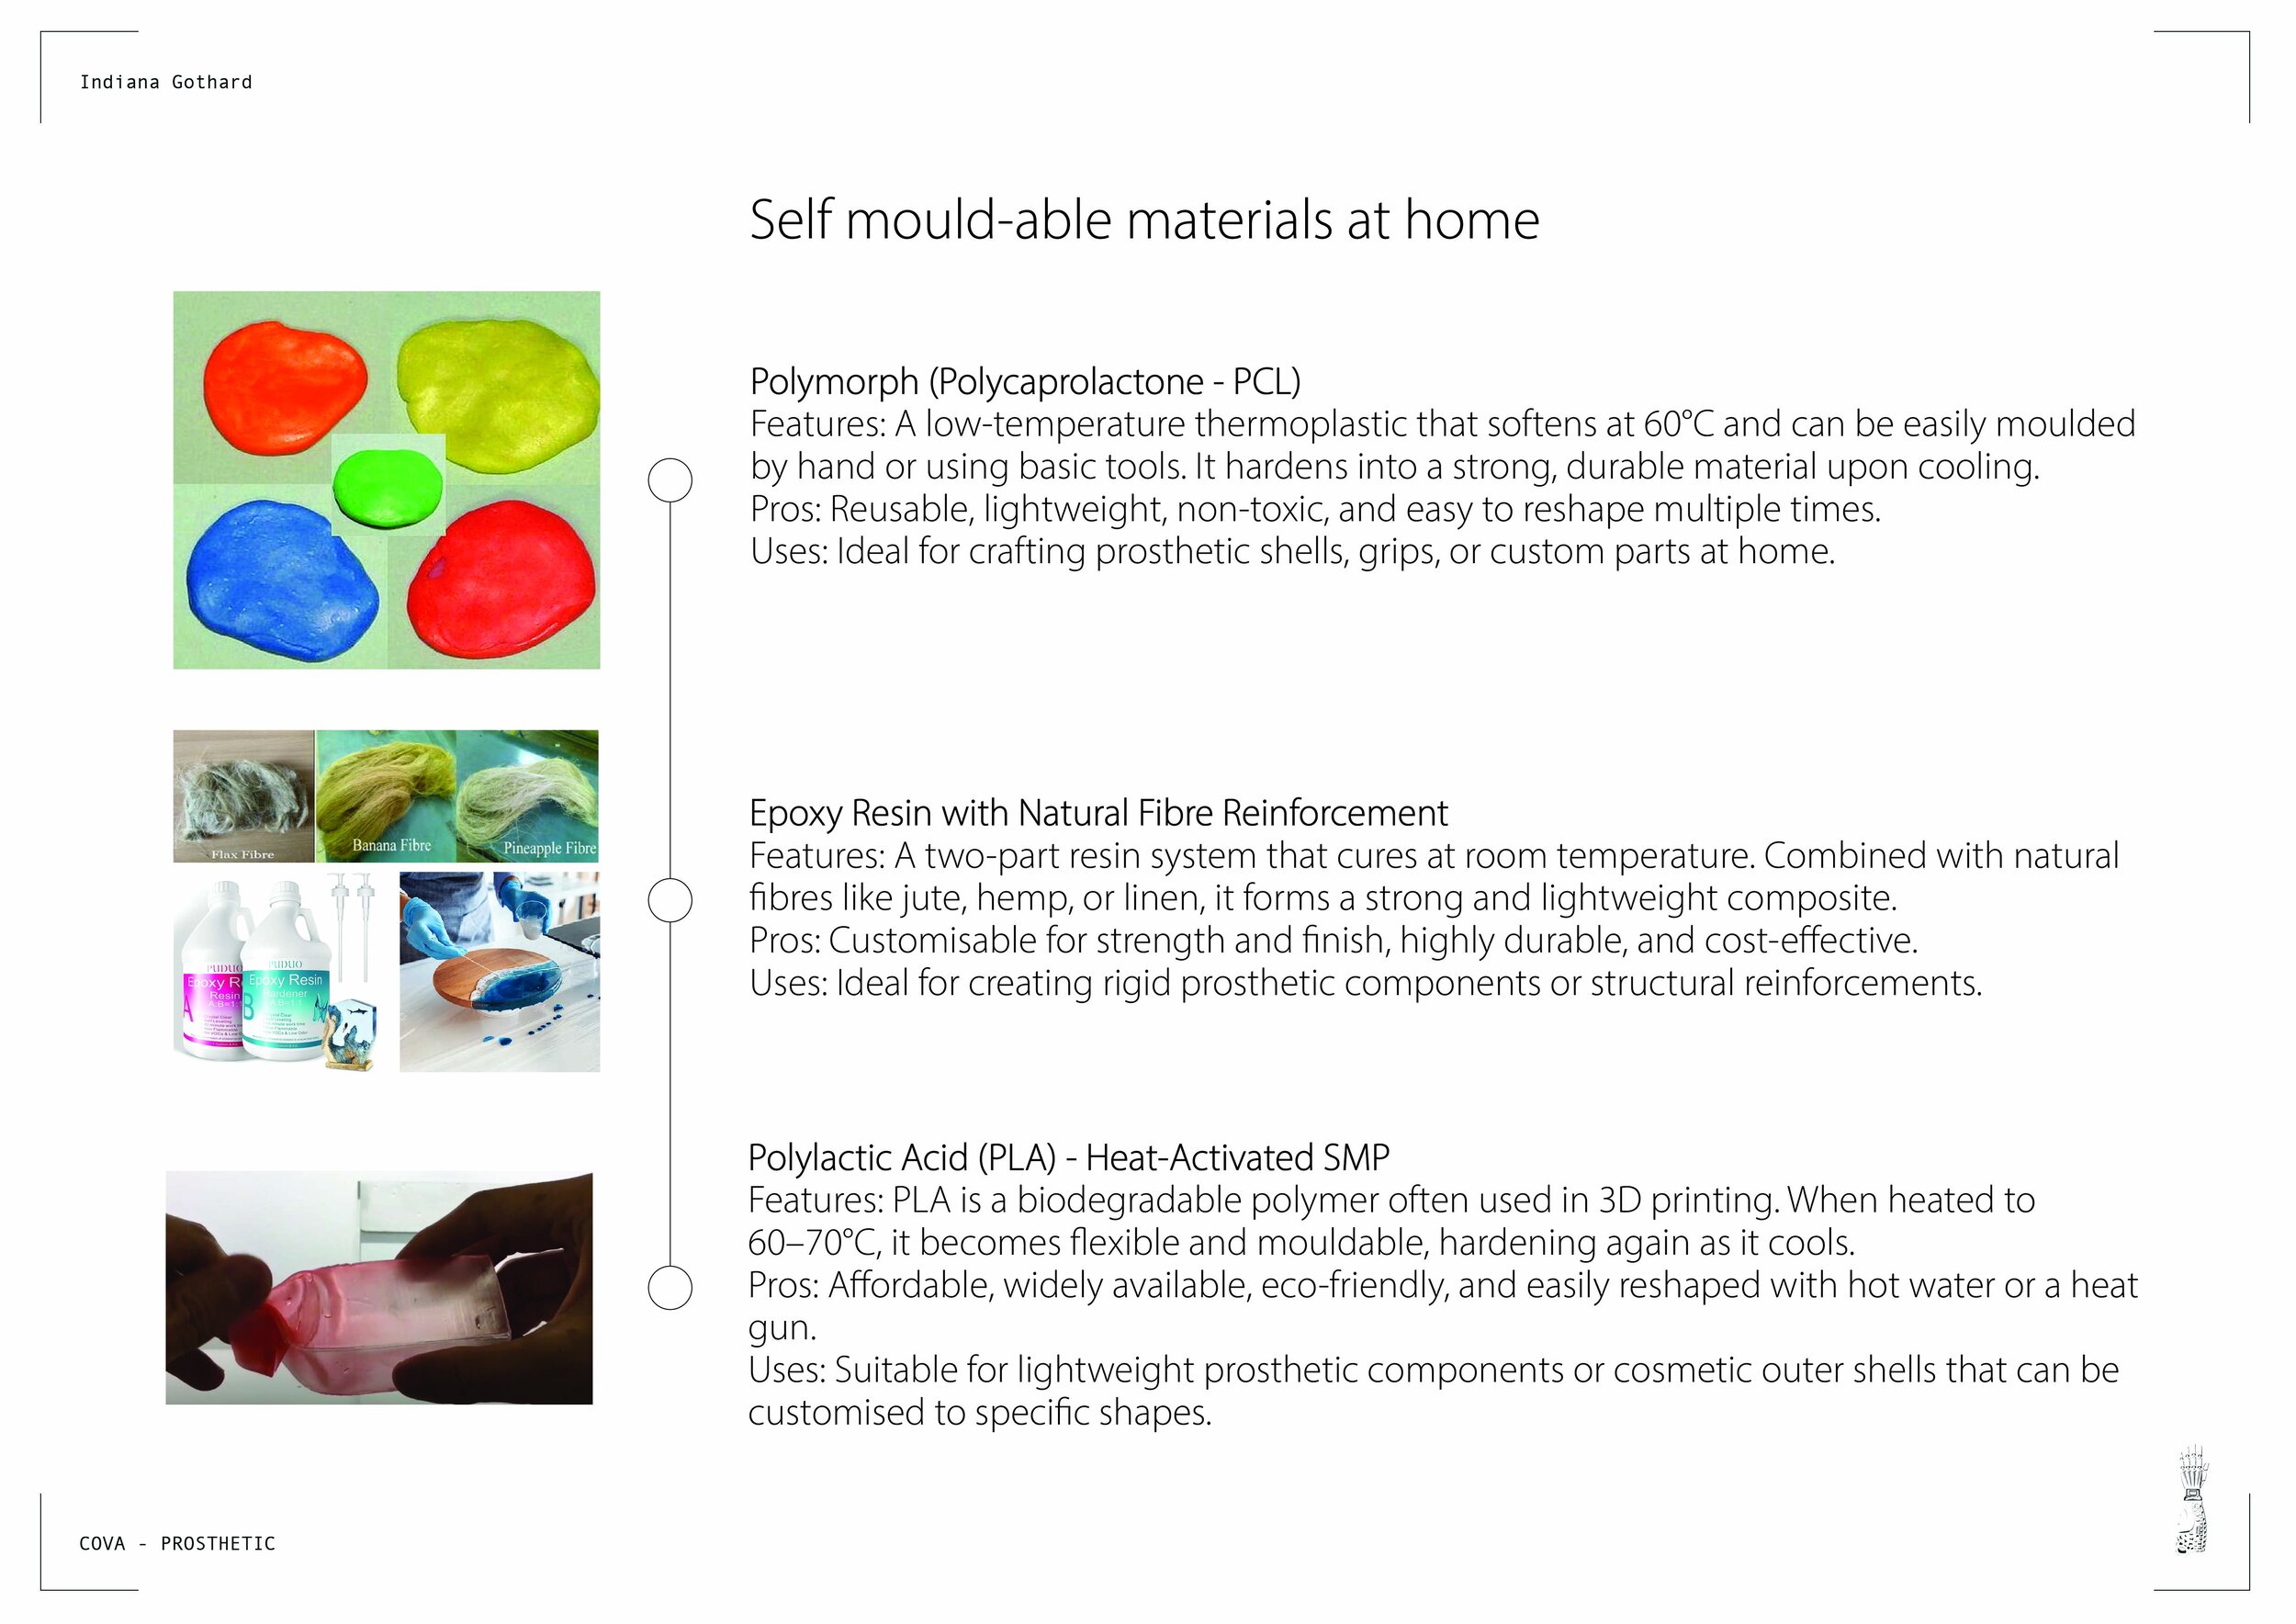
Here I tested moldable materials, since adaptability was a crucial part of the design. I explored smart polymers that could reset into pre-shaped forms, alongside a thermoplastic known as “blue stuff,” which could be heated, shaped to the arm, and cooled. I also trialled TPU arranged in a honeycomb structure that could be strapped tighter or looser for comfort. Each trial showed promise but clear flaws: smart polymers were difficult to manufacture, while the others lacked durability. PCL later proved the most reliable option.

MATERIAL
PCL - Polycaprolactone
PROPERTIES
Biodegradable I Low-melting (~60 °C) I Flexible

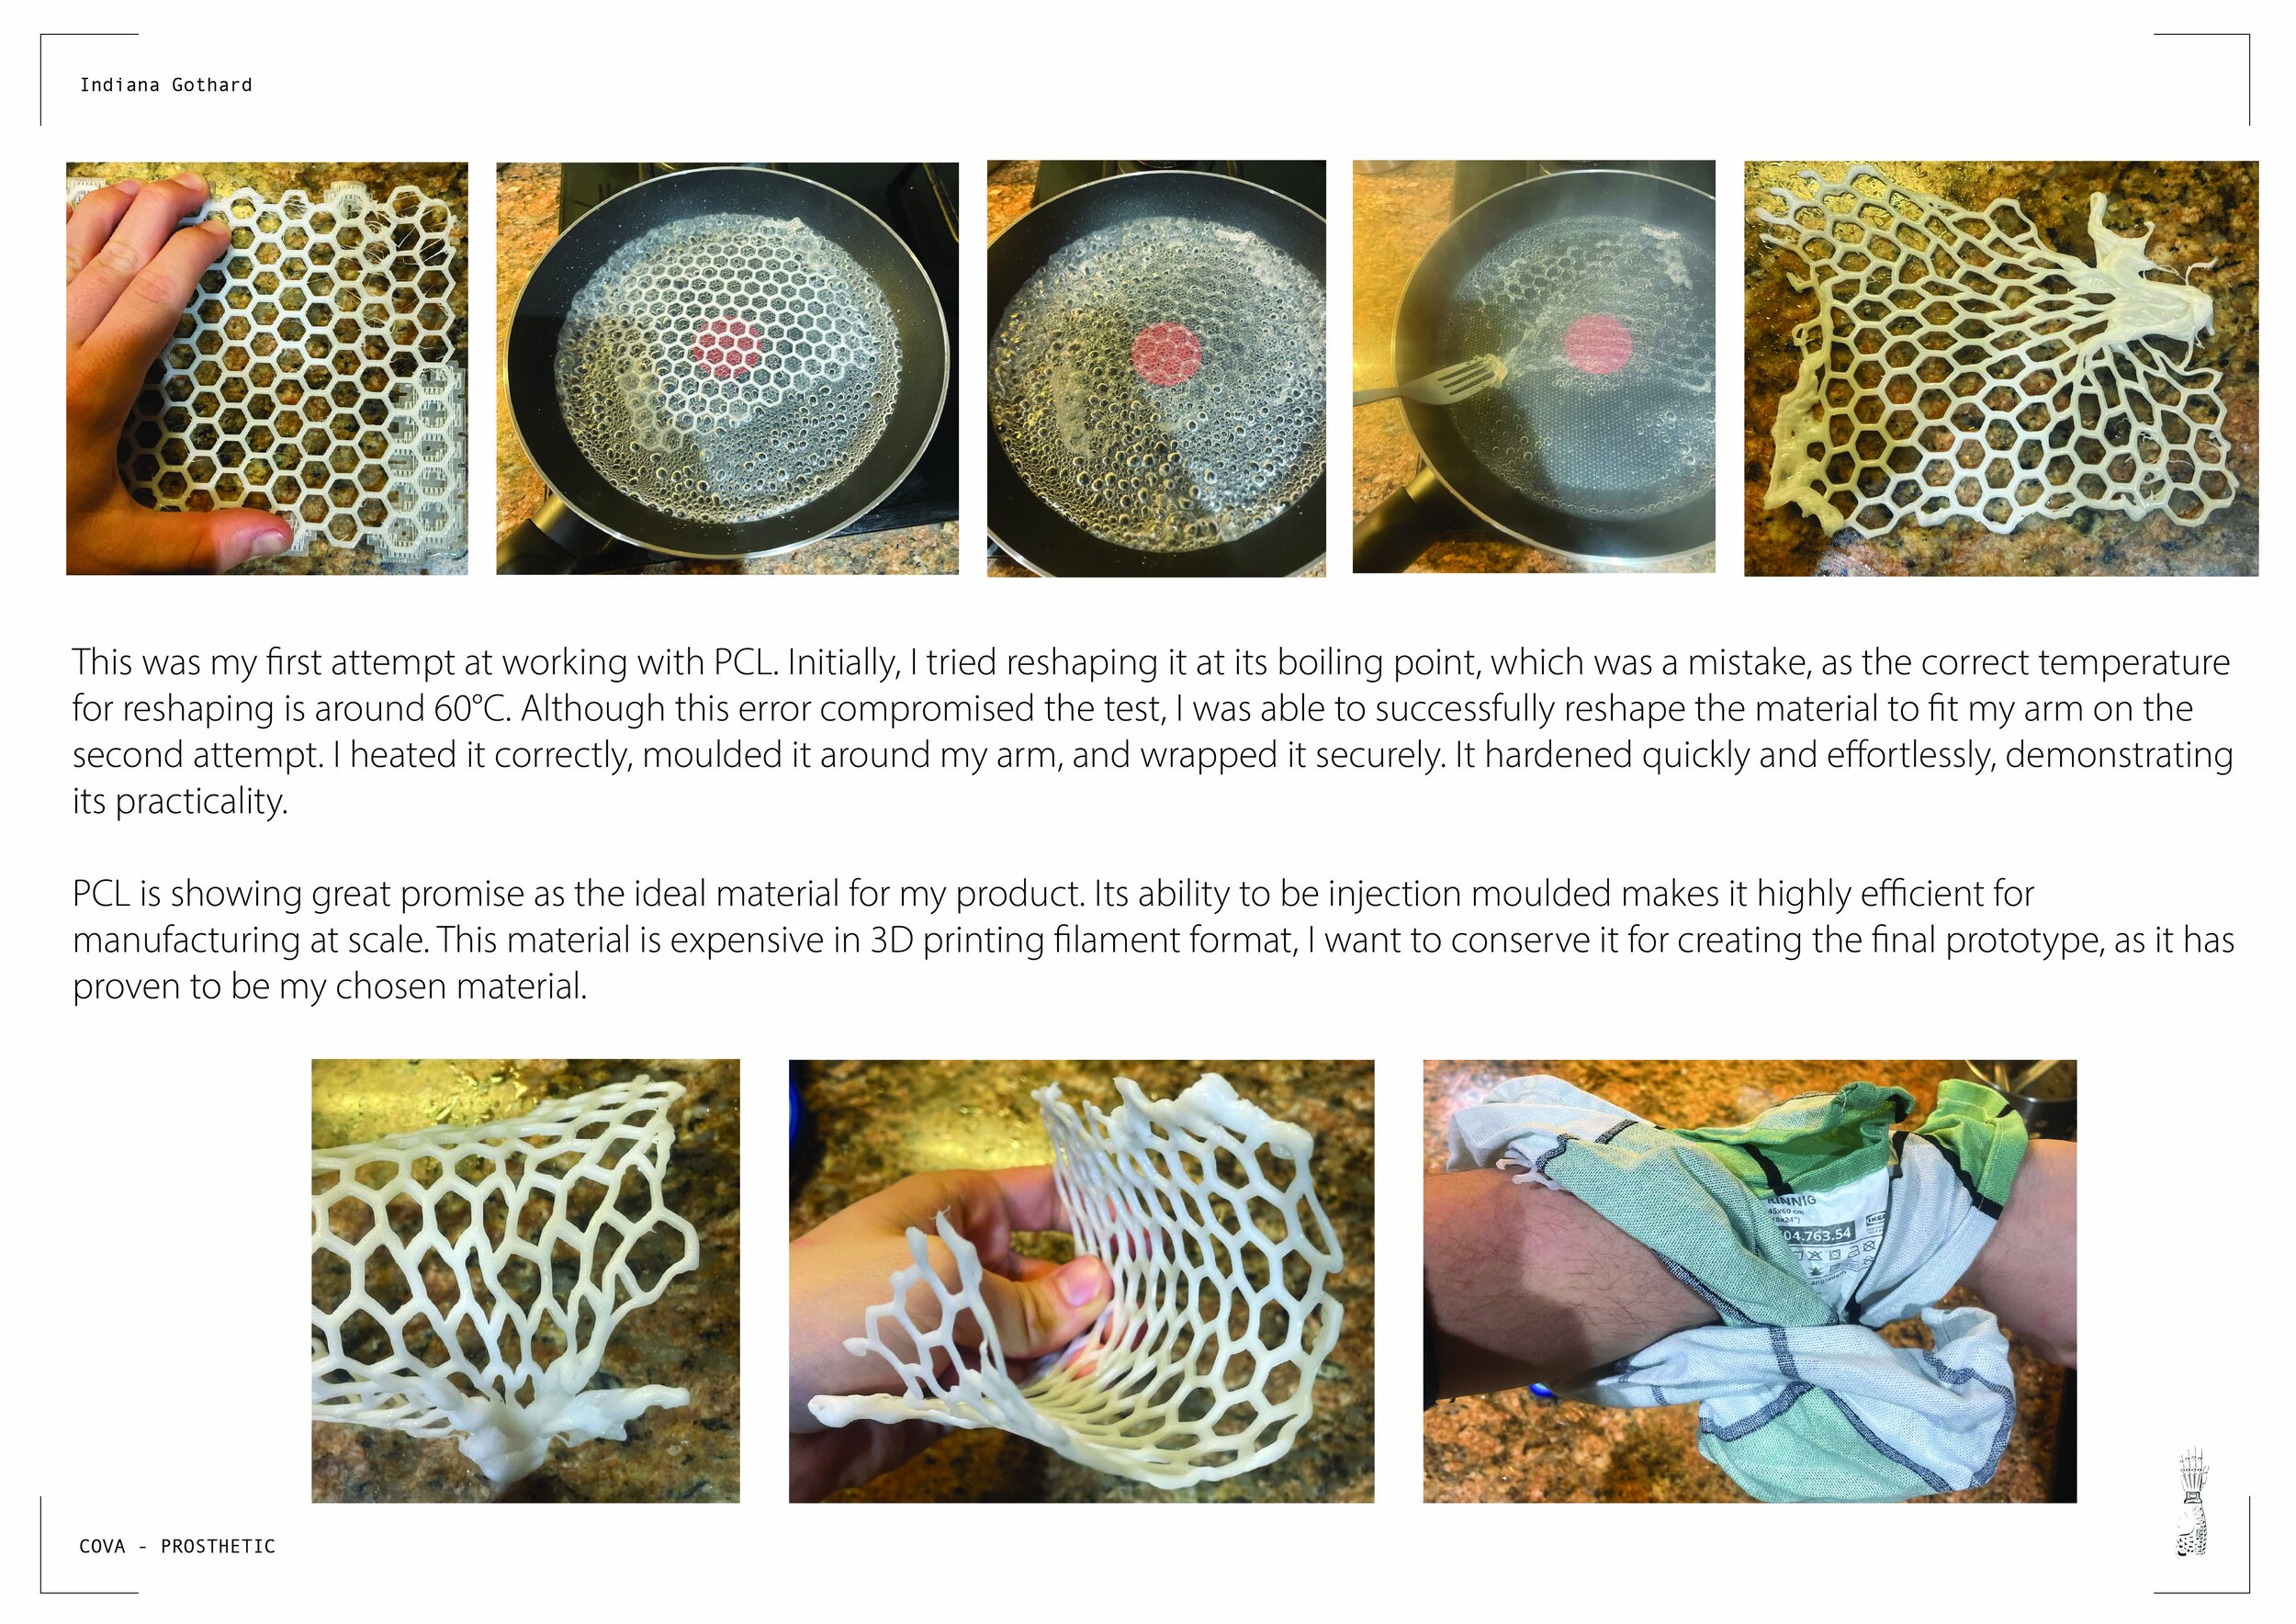
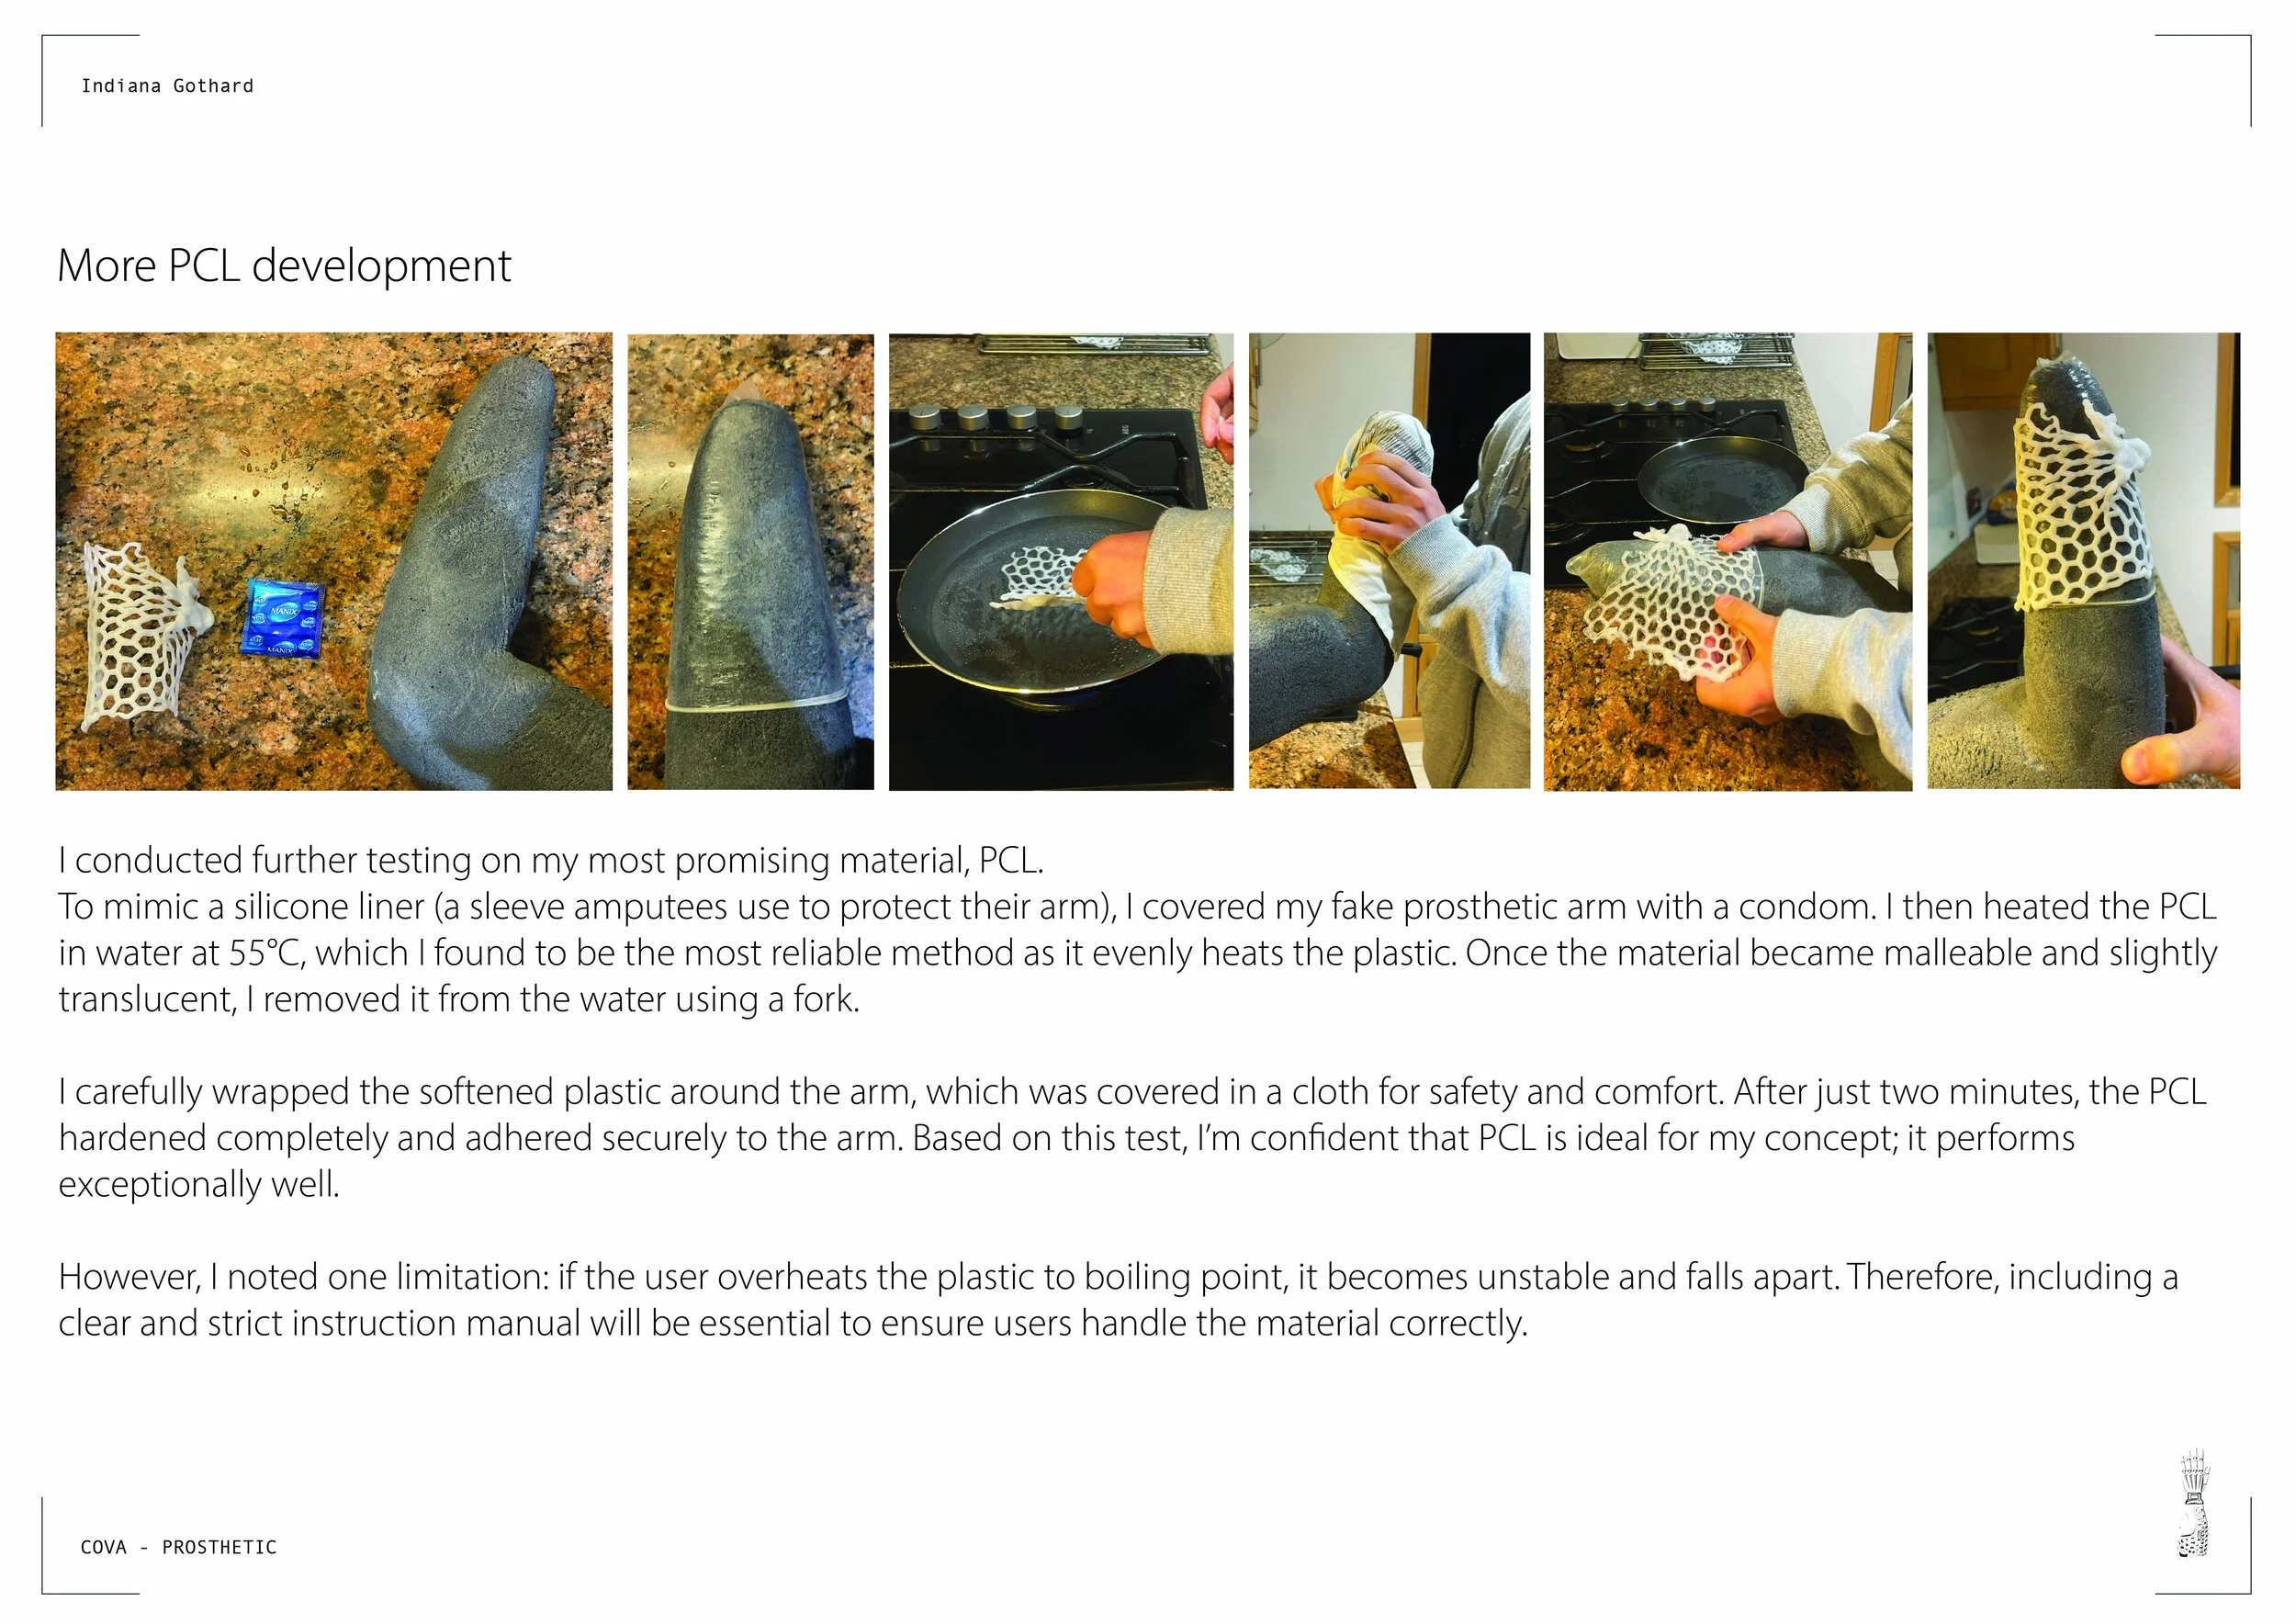
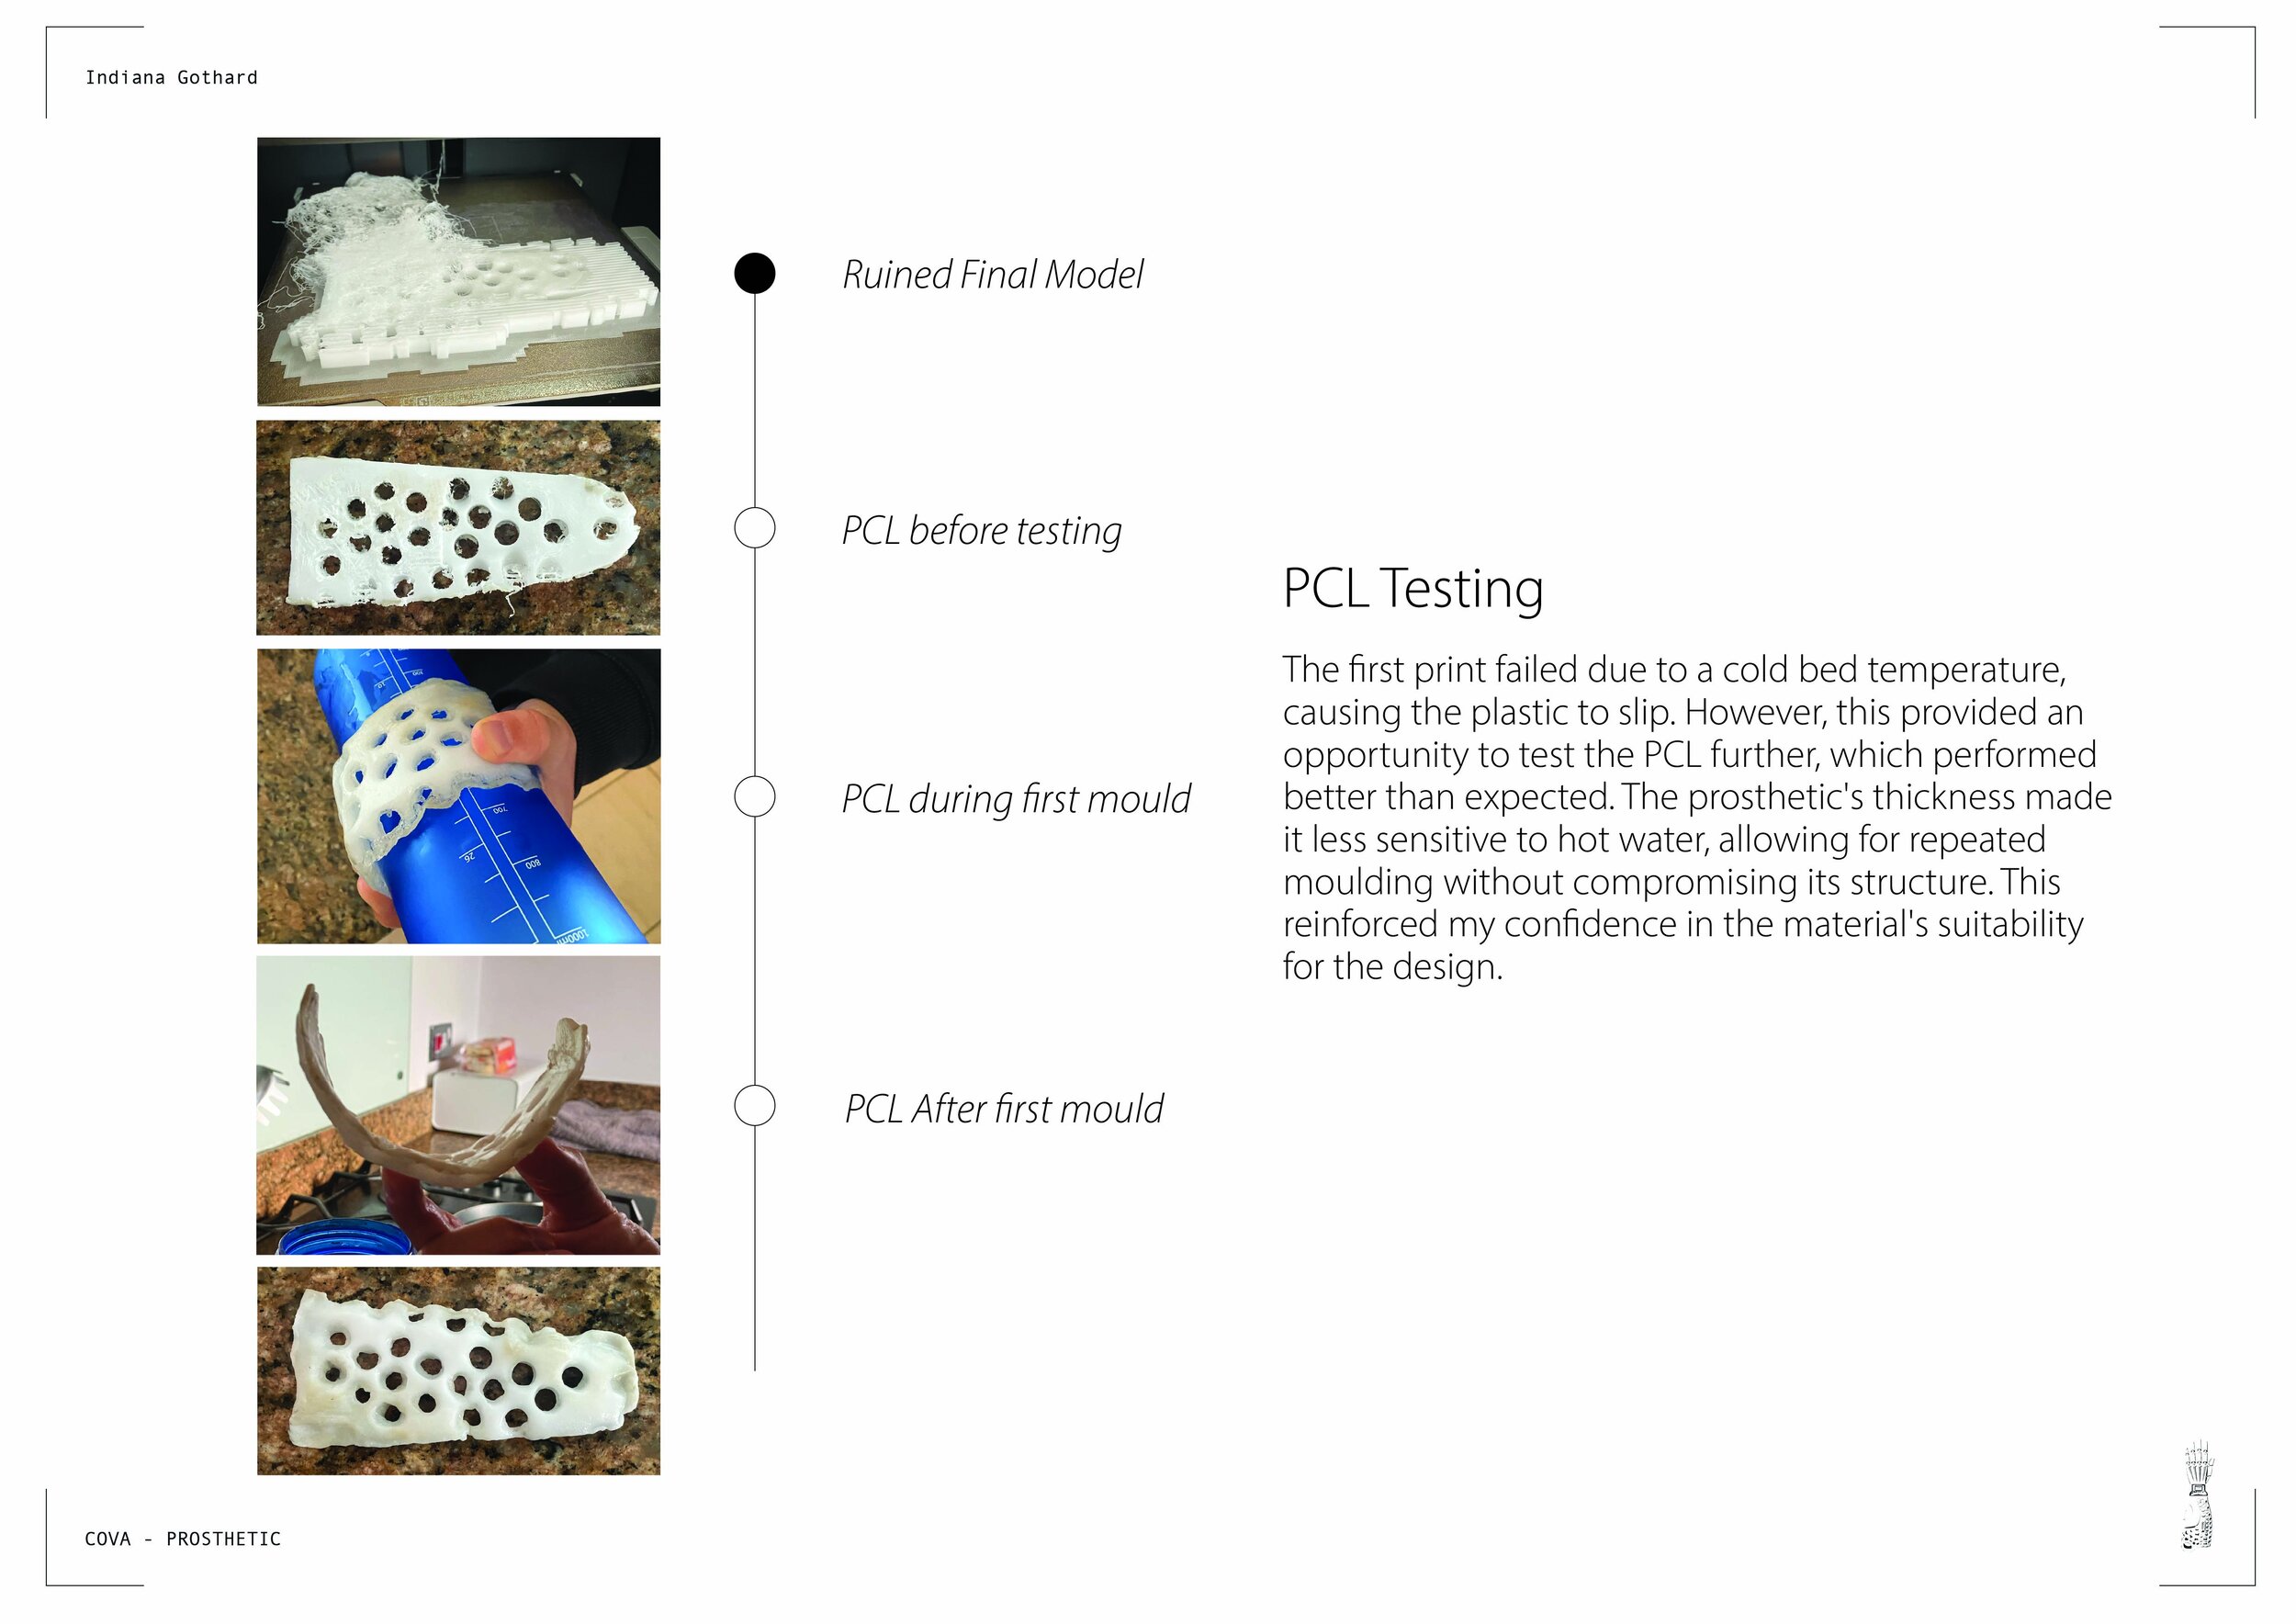
TESTING PCL
Whilst testing PCL, I discovered the manufacturing process was straightforward but lengthy when using 3D printing. This time could be reduced significantly if injection moulded instead. The material was sensitive to very hot water, yet once controlled, it became easy to mould and remould. Its rigid yet flexible qualities made it ideal, and its proven use in medical casts and athletic knee braces confirmed it as the most suitable choice for my prosthetic design.


OVERVIEW
PCL is a biodegradable polyester widely used in medicine and design. It softens in hot water, allowing easy moulding and reshaping. Strong yet flexible, it supports repeated use, making it ideal for prosthetics and custom-fit medical applications.

07 PROTOTYPING
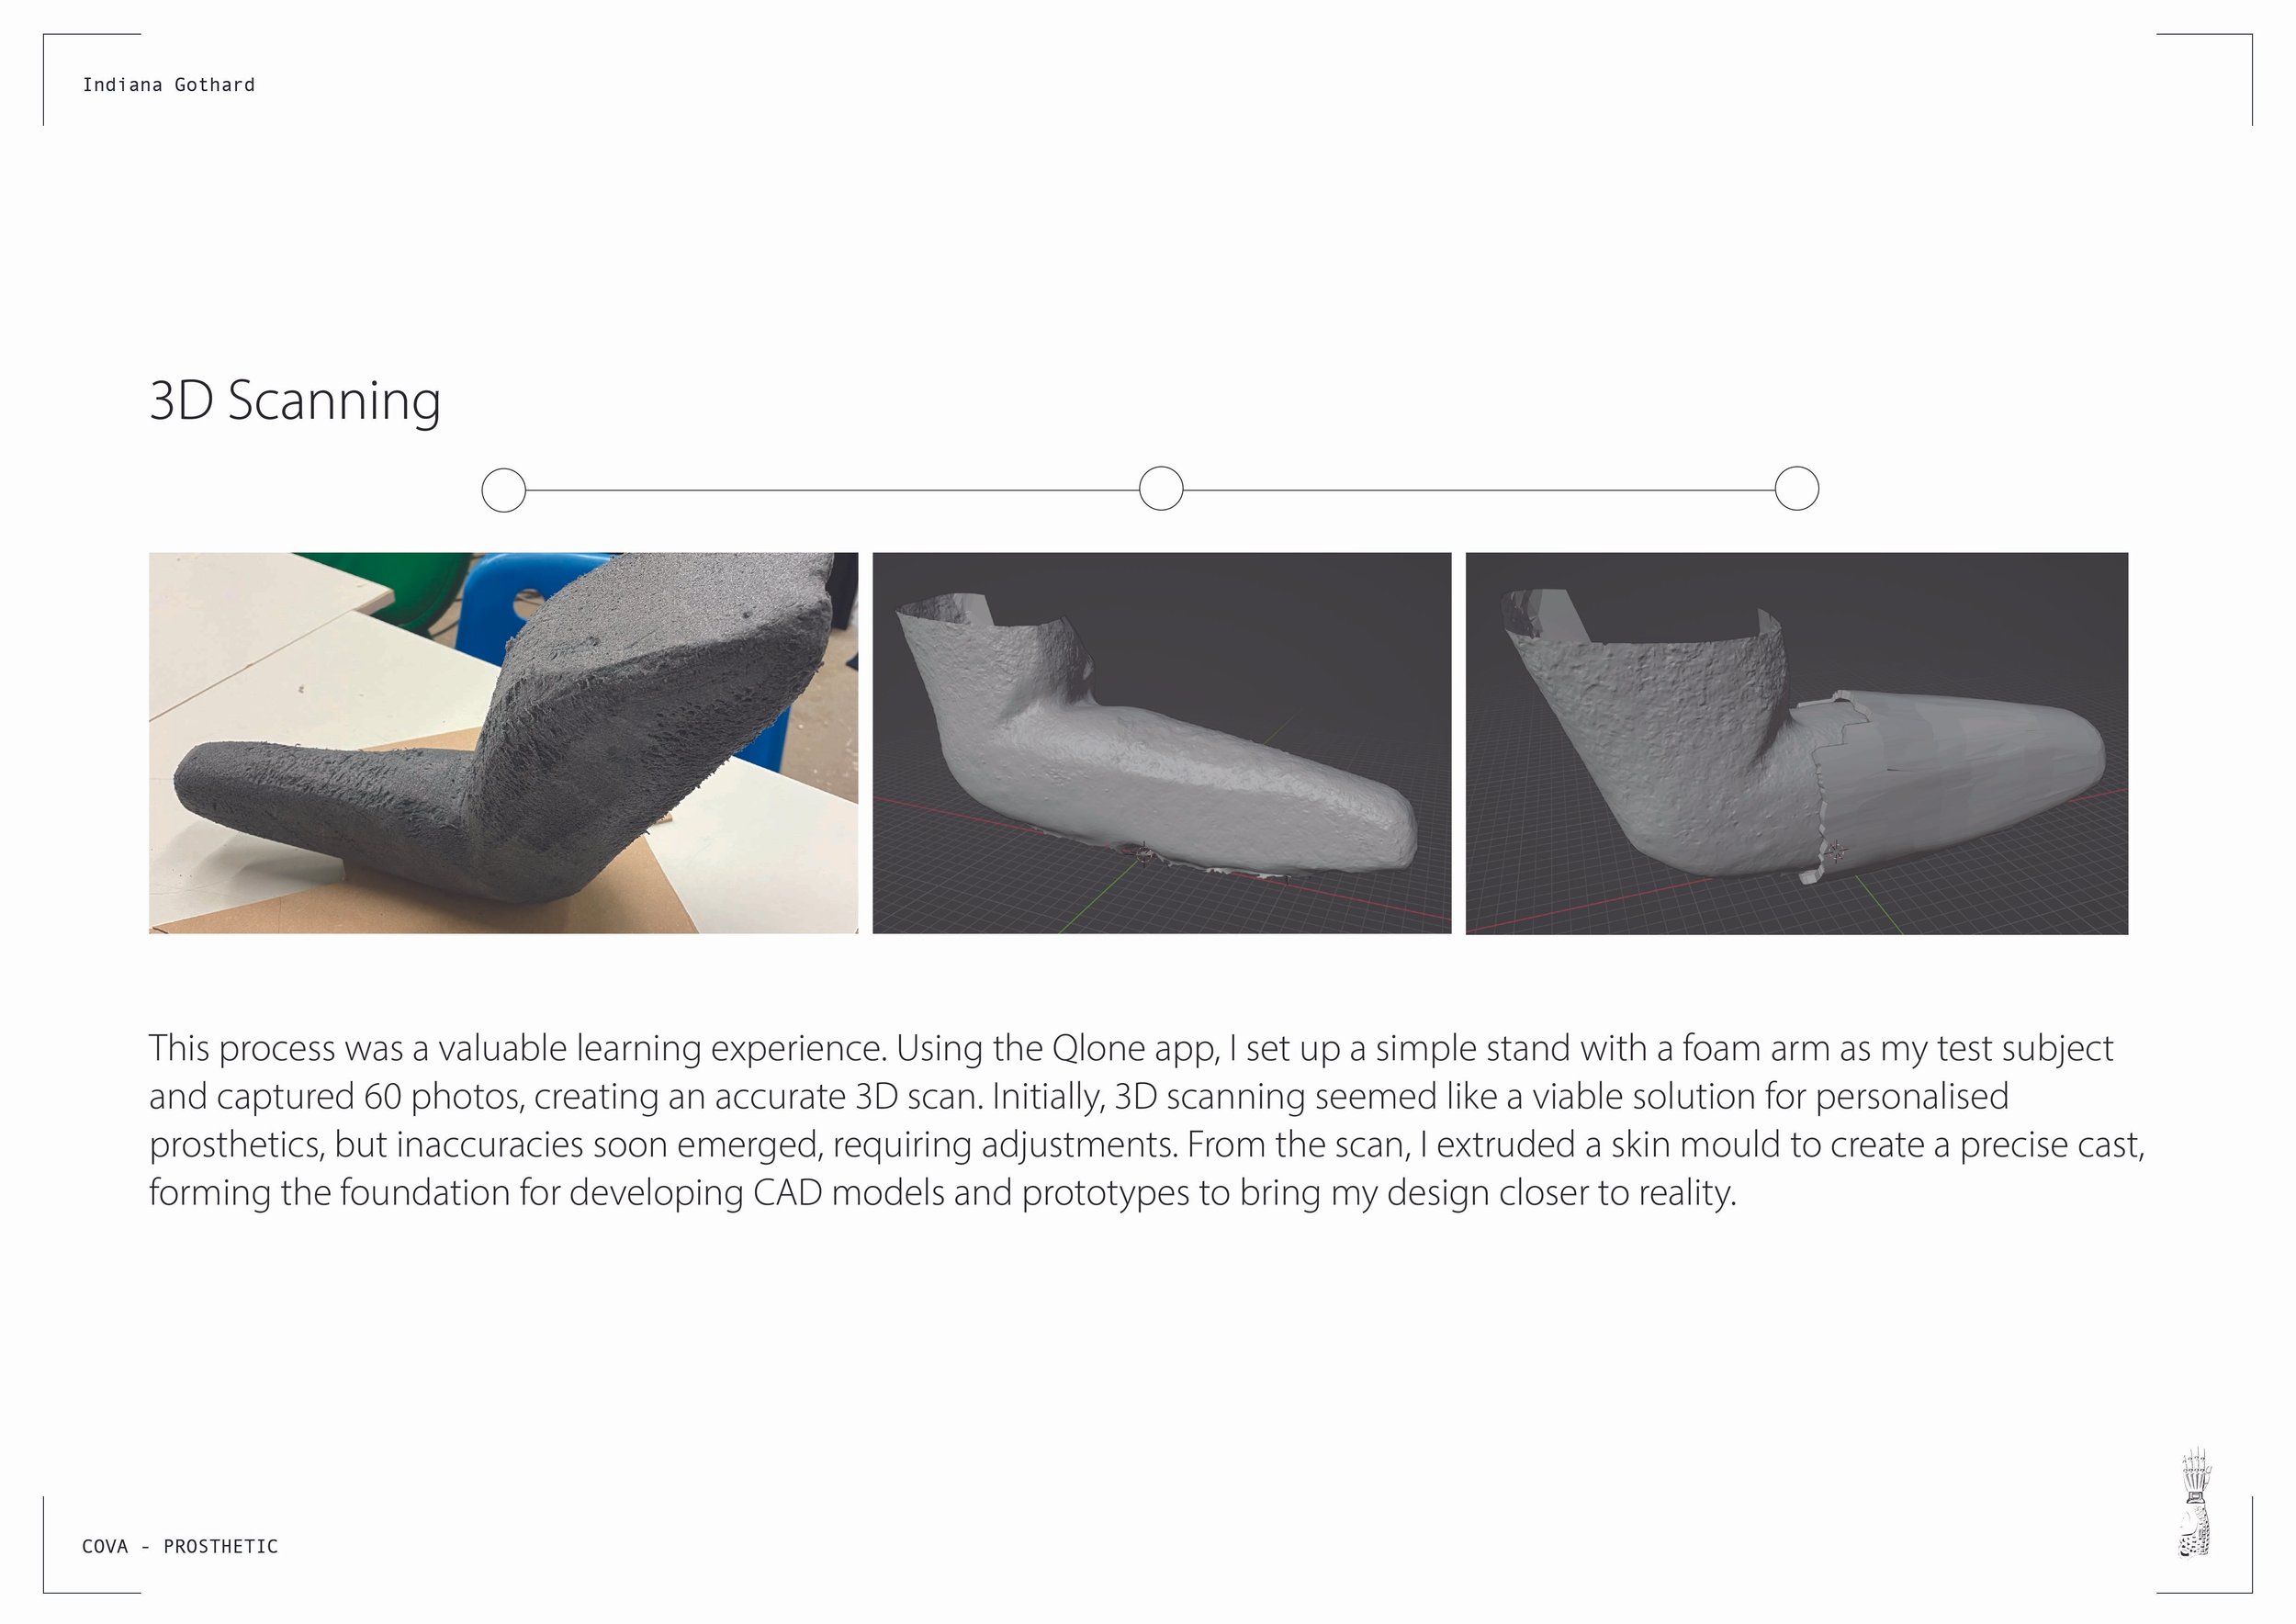
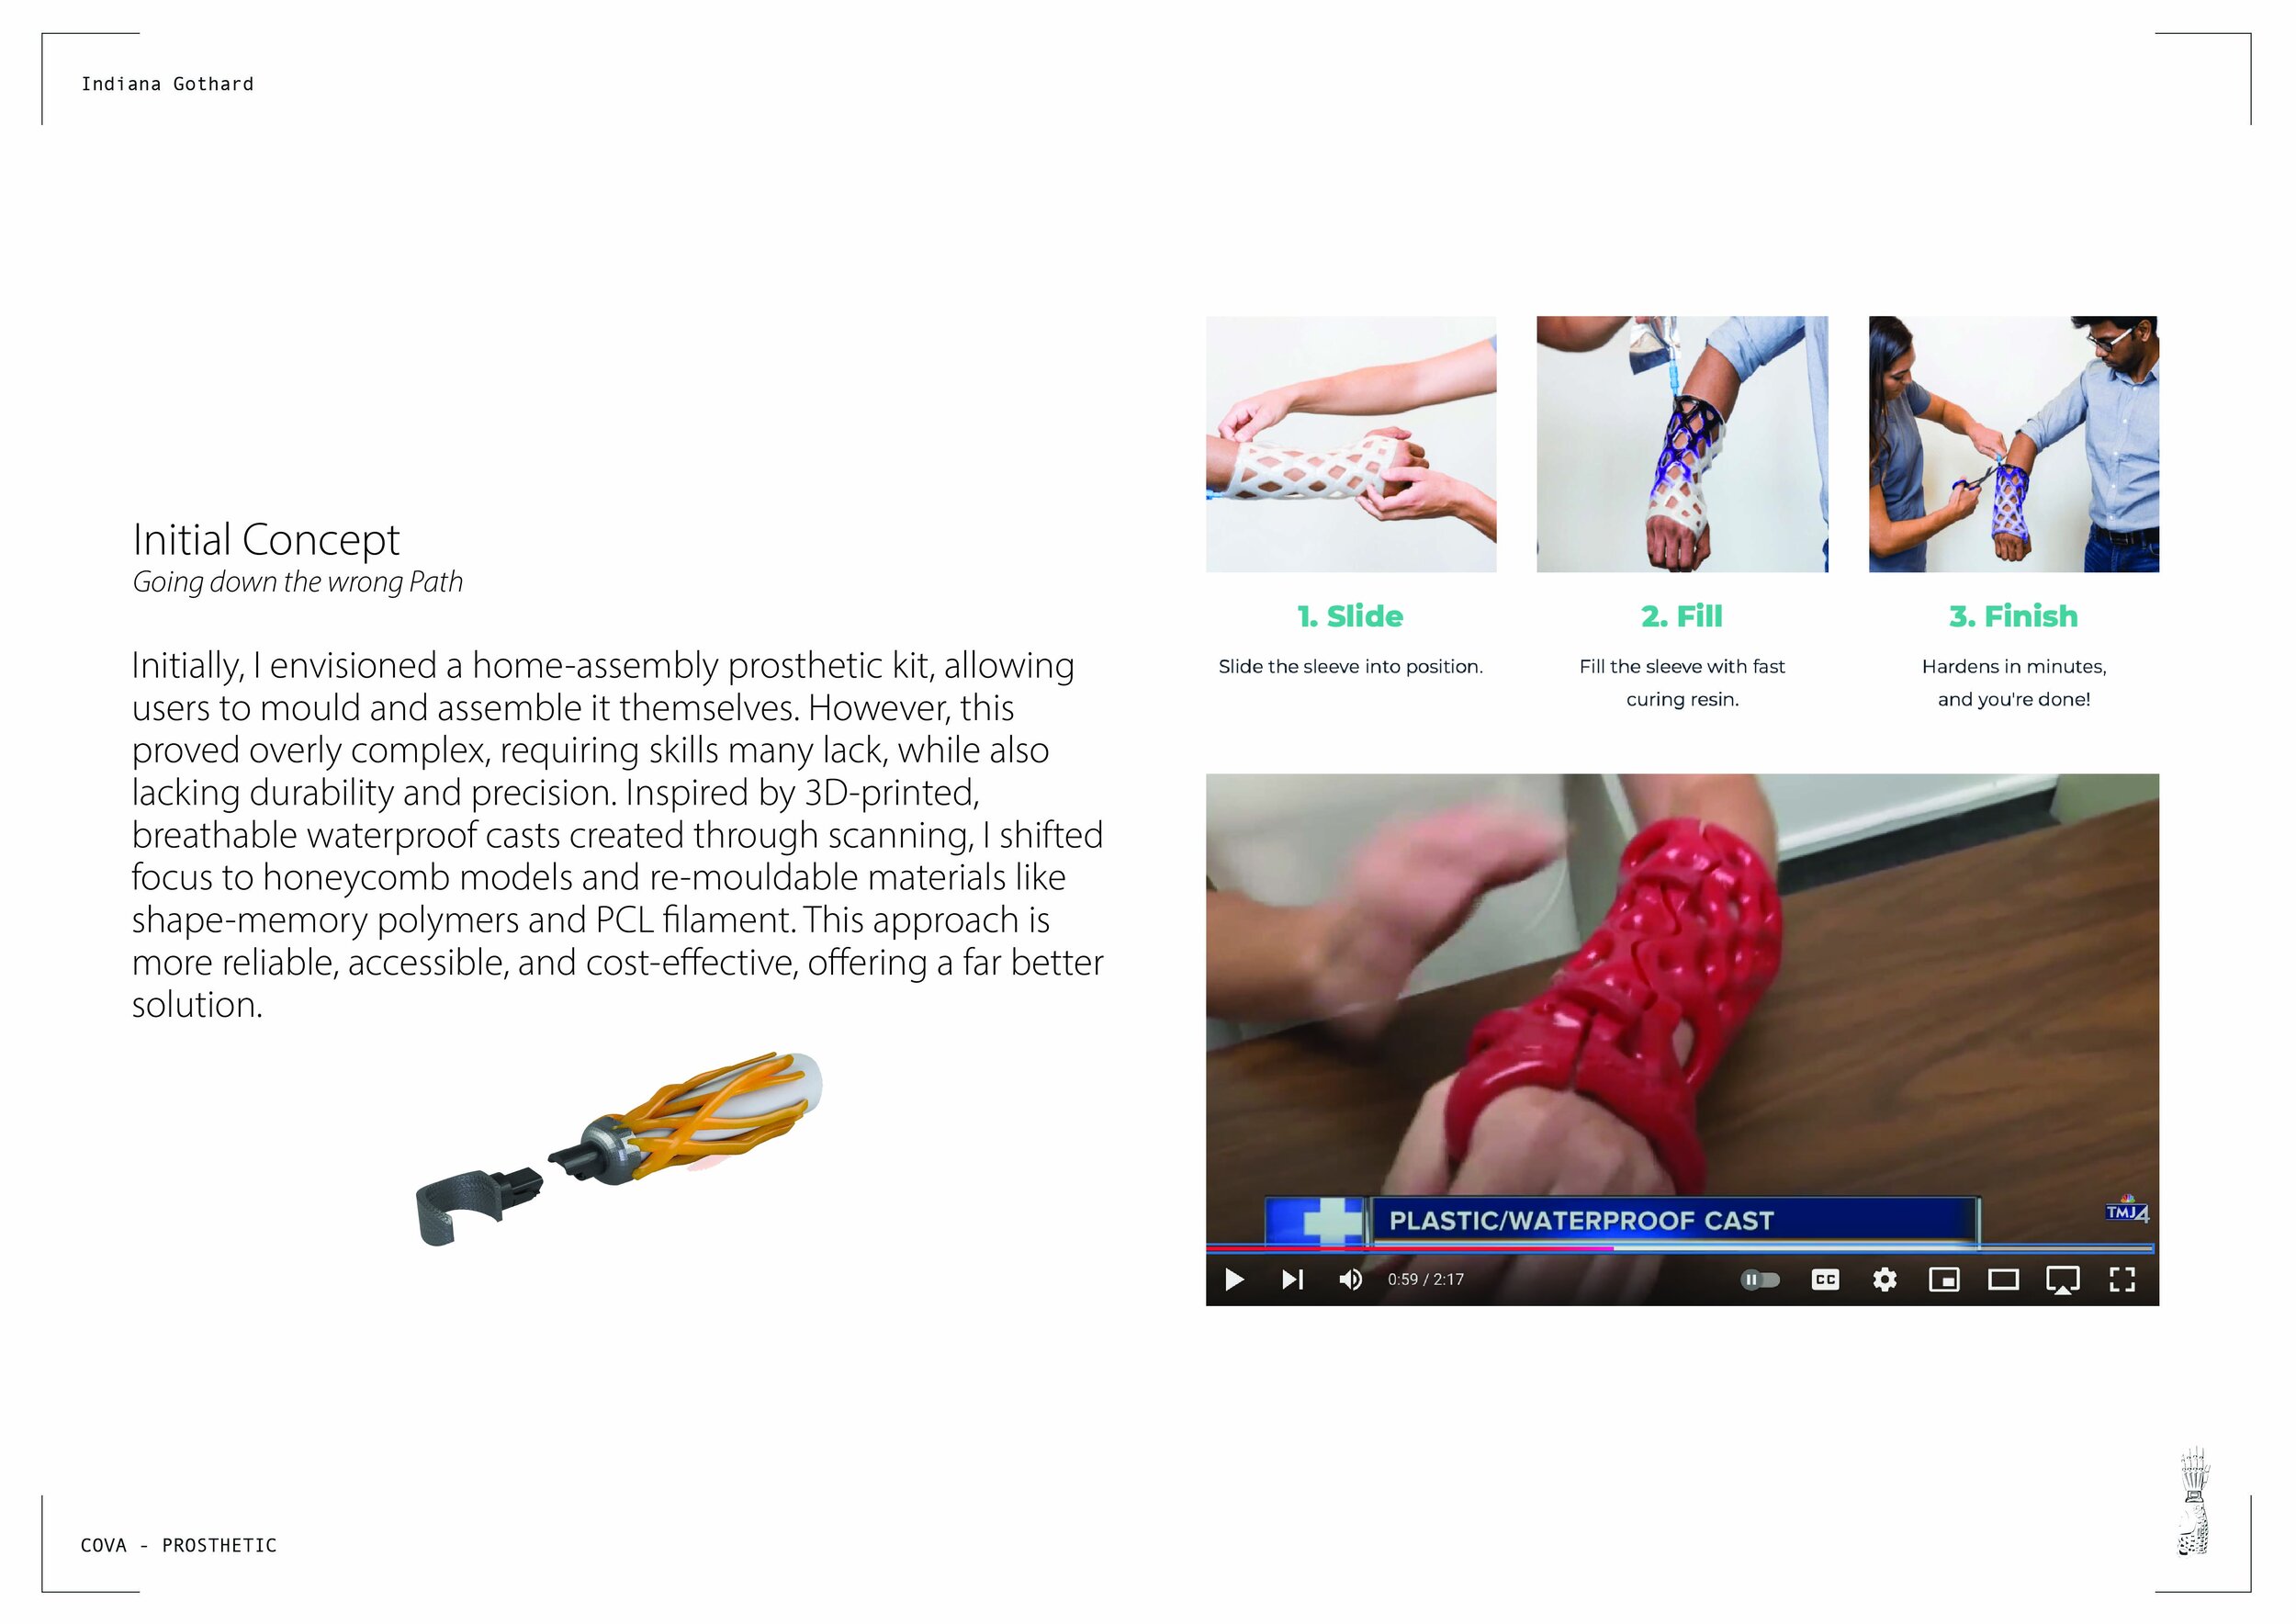
SD SCANNING AND DESIGN
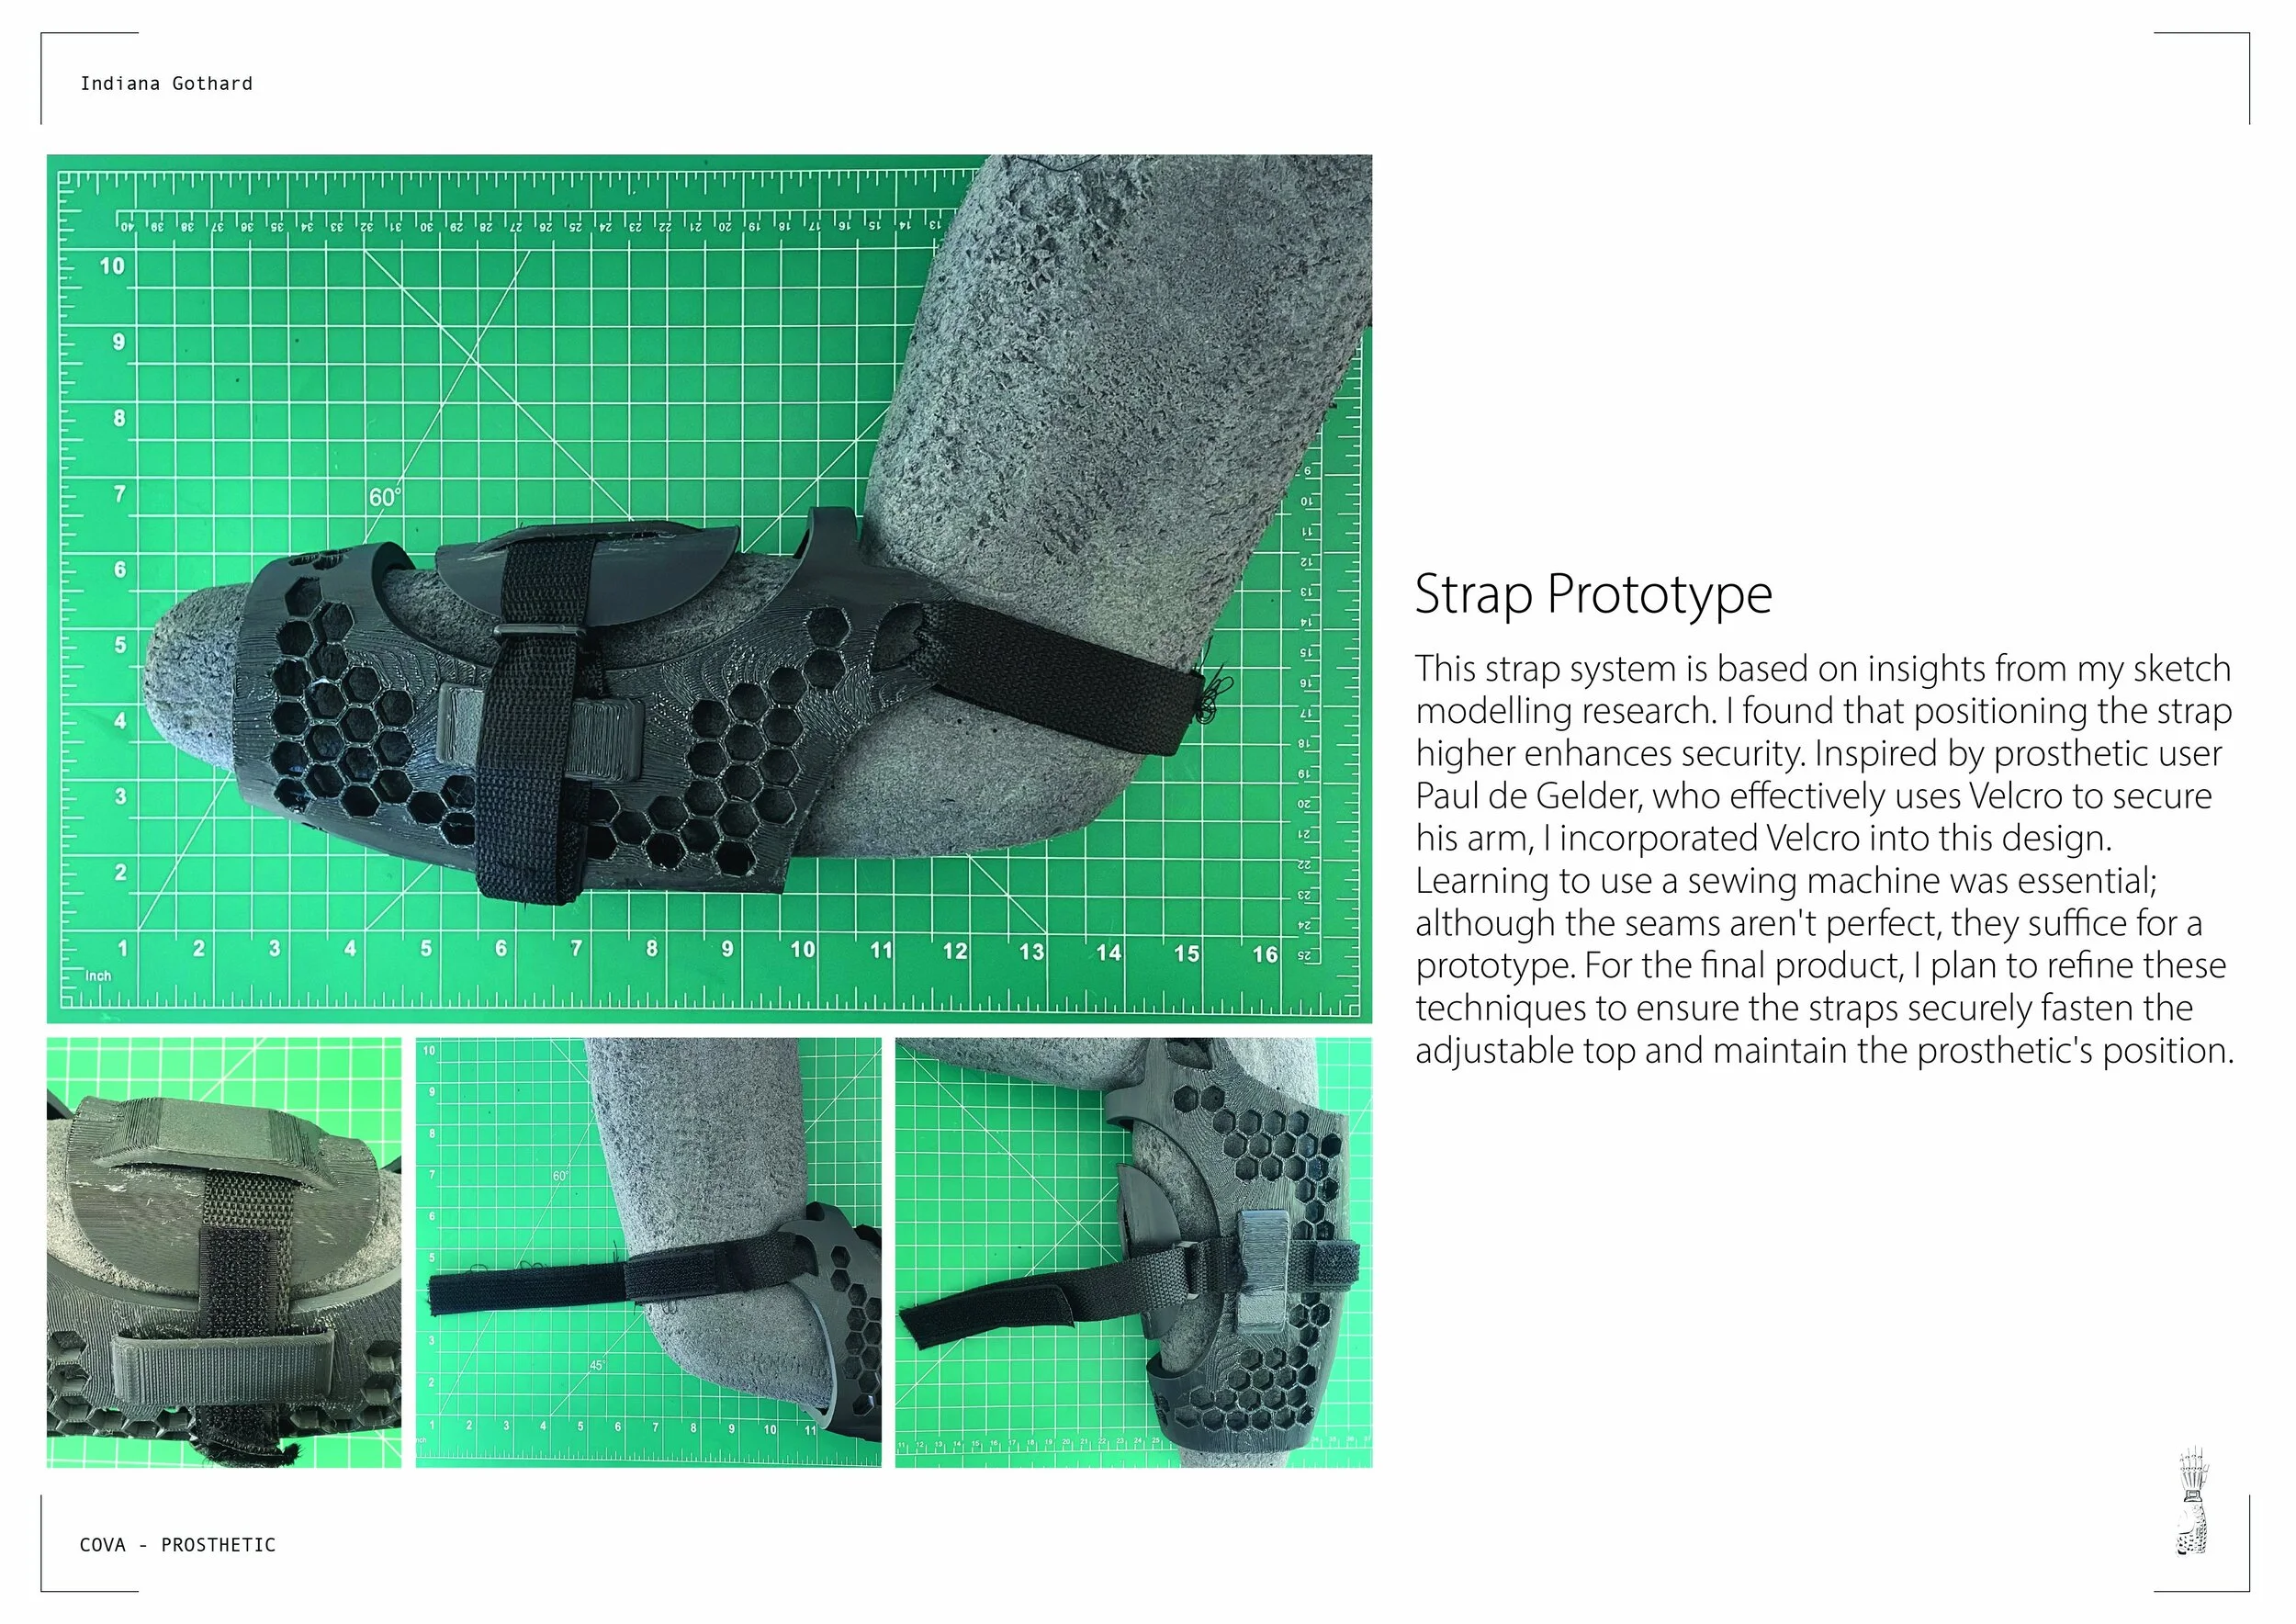
When beginning the 3D stage, I explored scanning as a way to create custom prosthetics for each user. While the method showed promise, it still had bugs, meaning fit adjustments were necessary. This reinforced PCL as the best material choice, since it could be remoulded easily. From these scans I built early strap prototypes, experimenting with TPU and paper to refine rough dimensions, before moving into more precise digital modelling in Fusion 360 and Rhino.


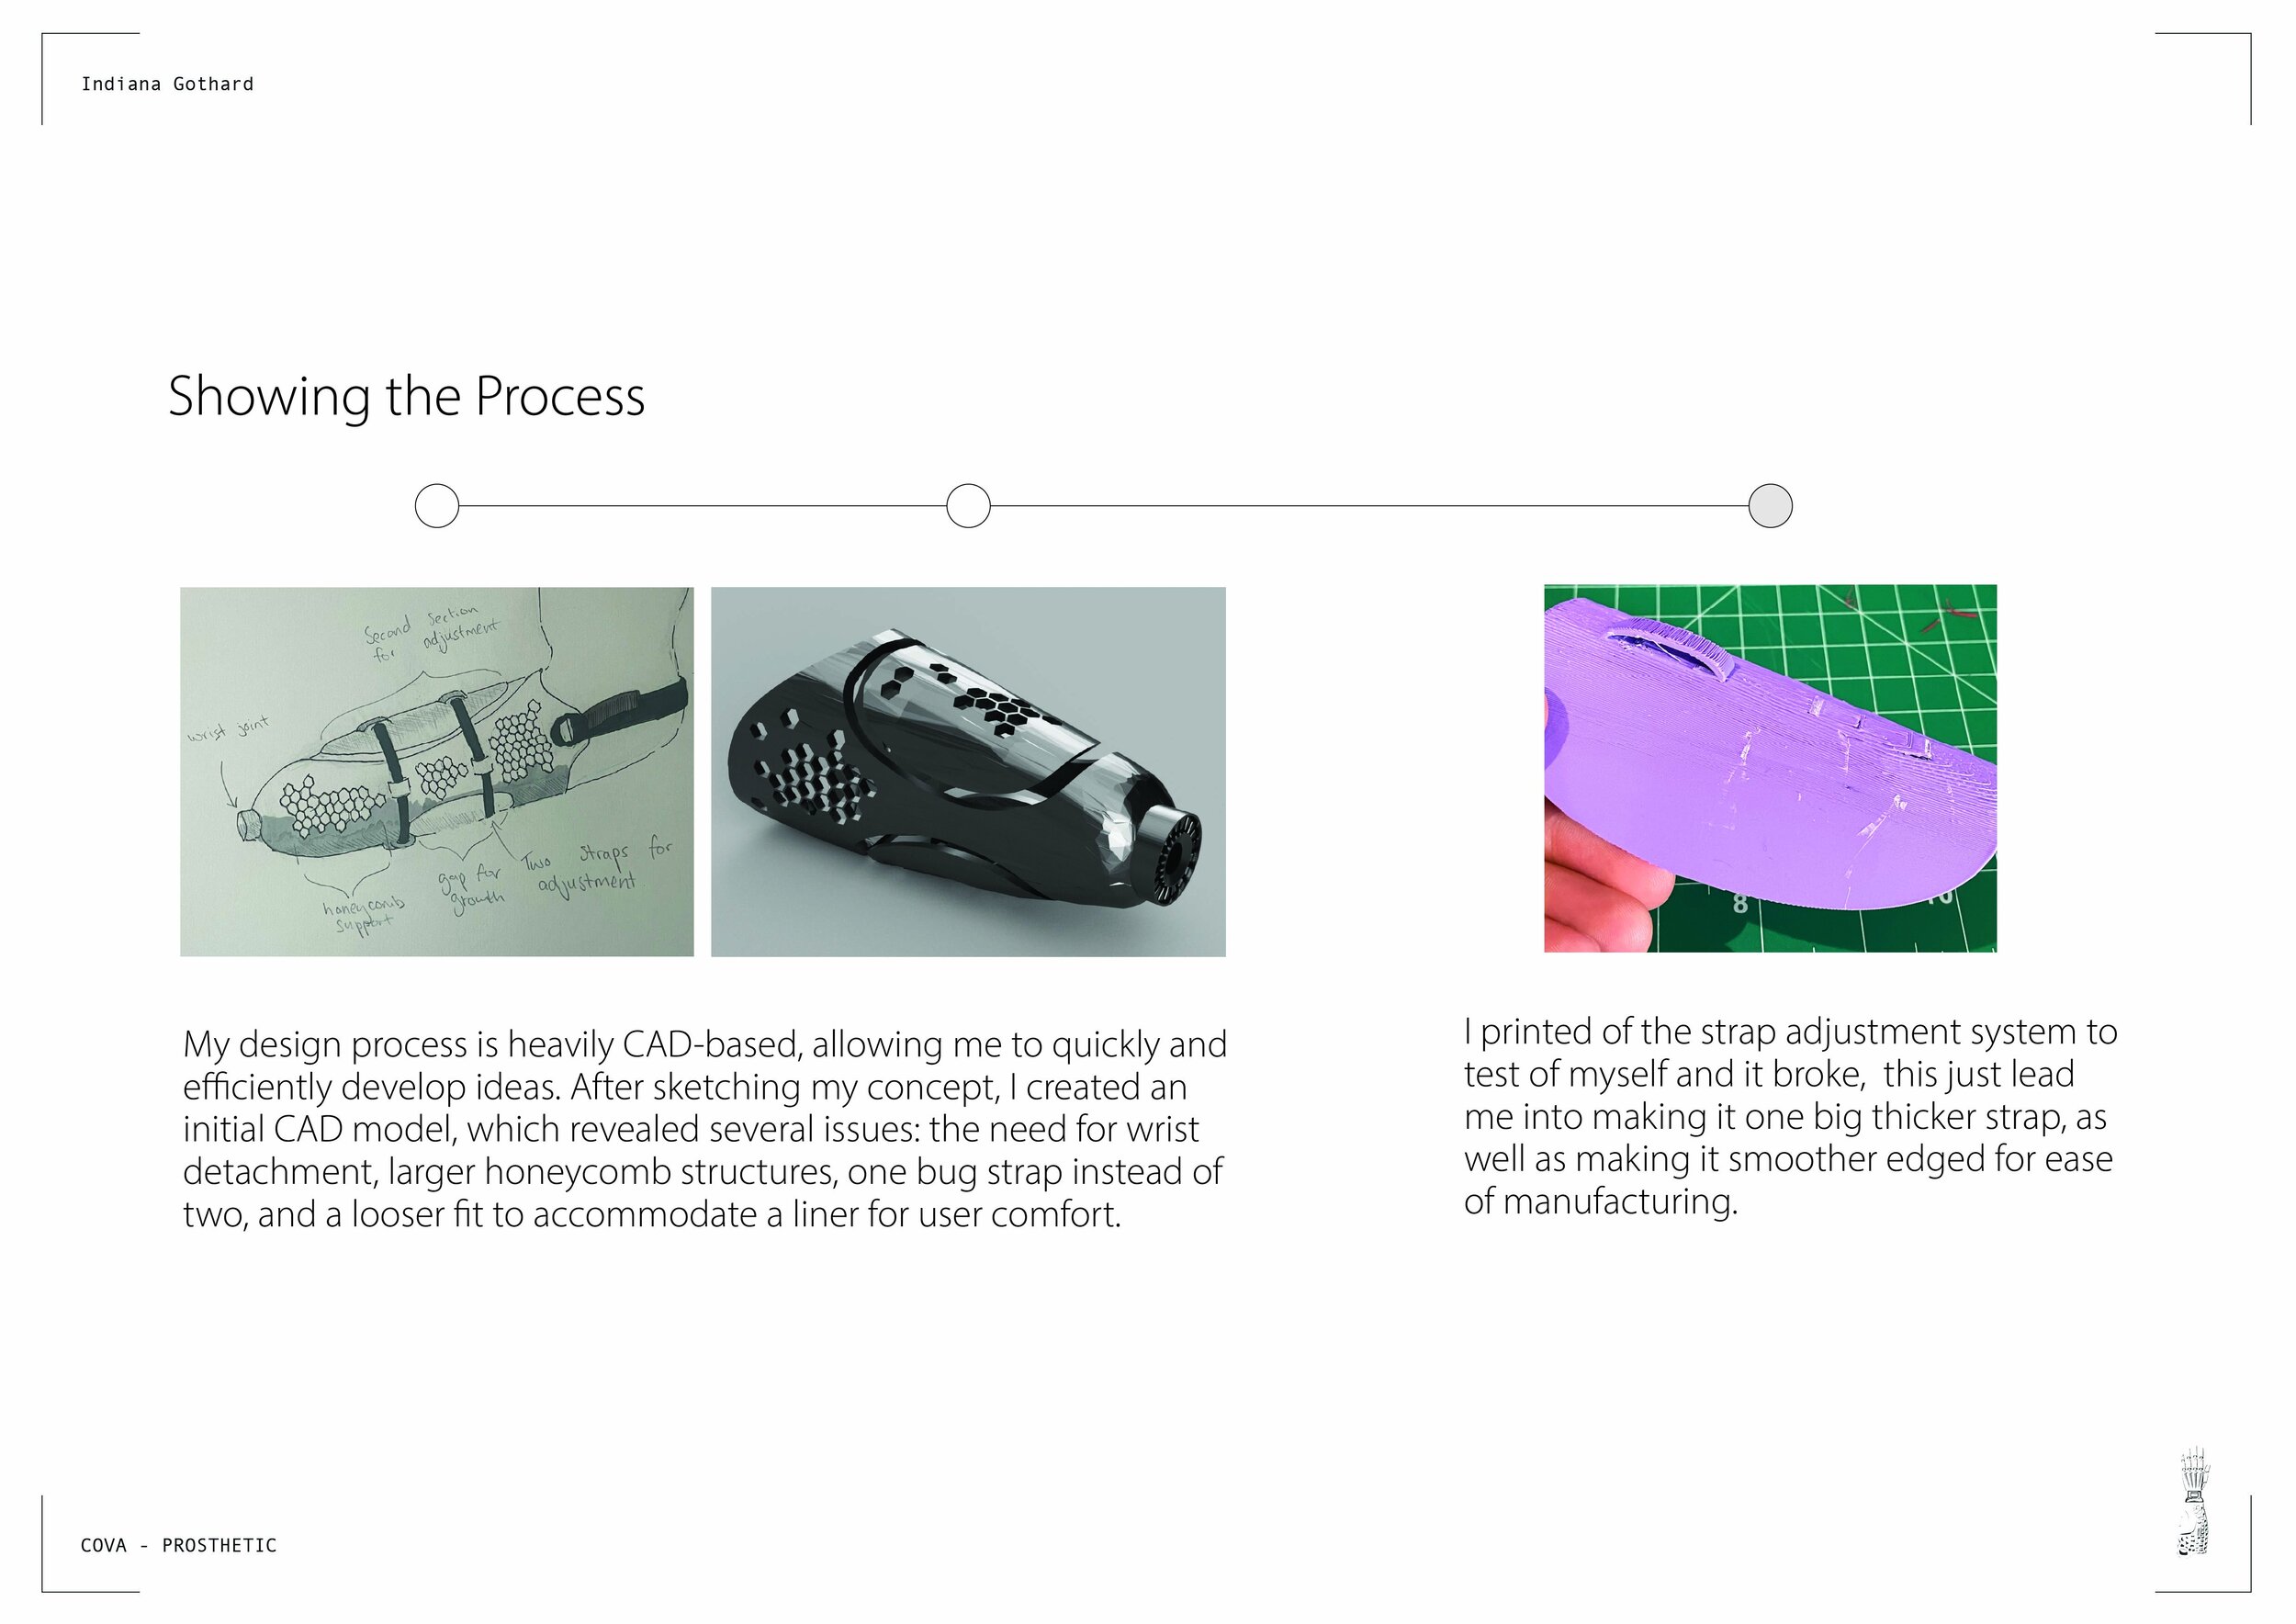
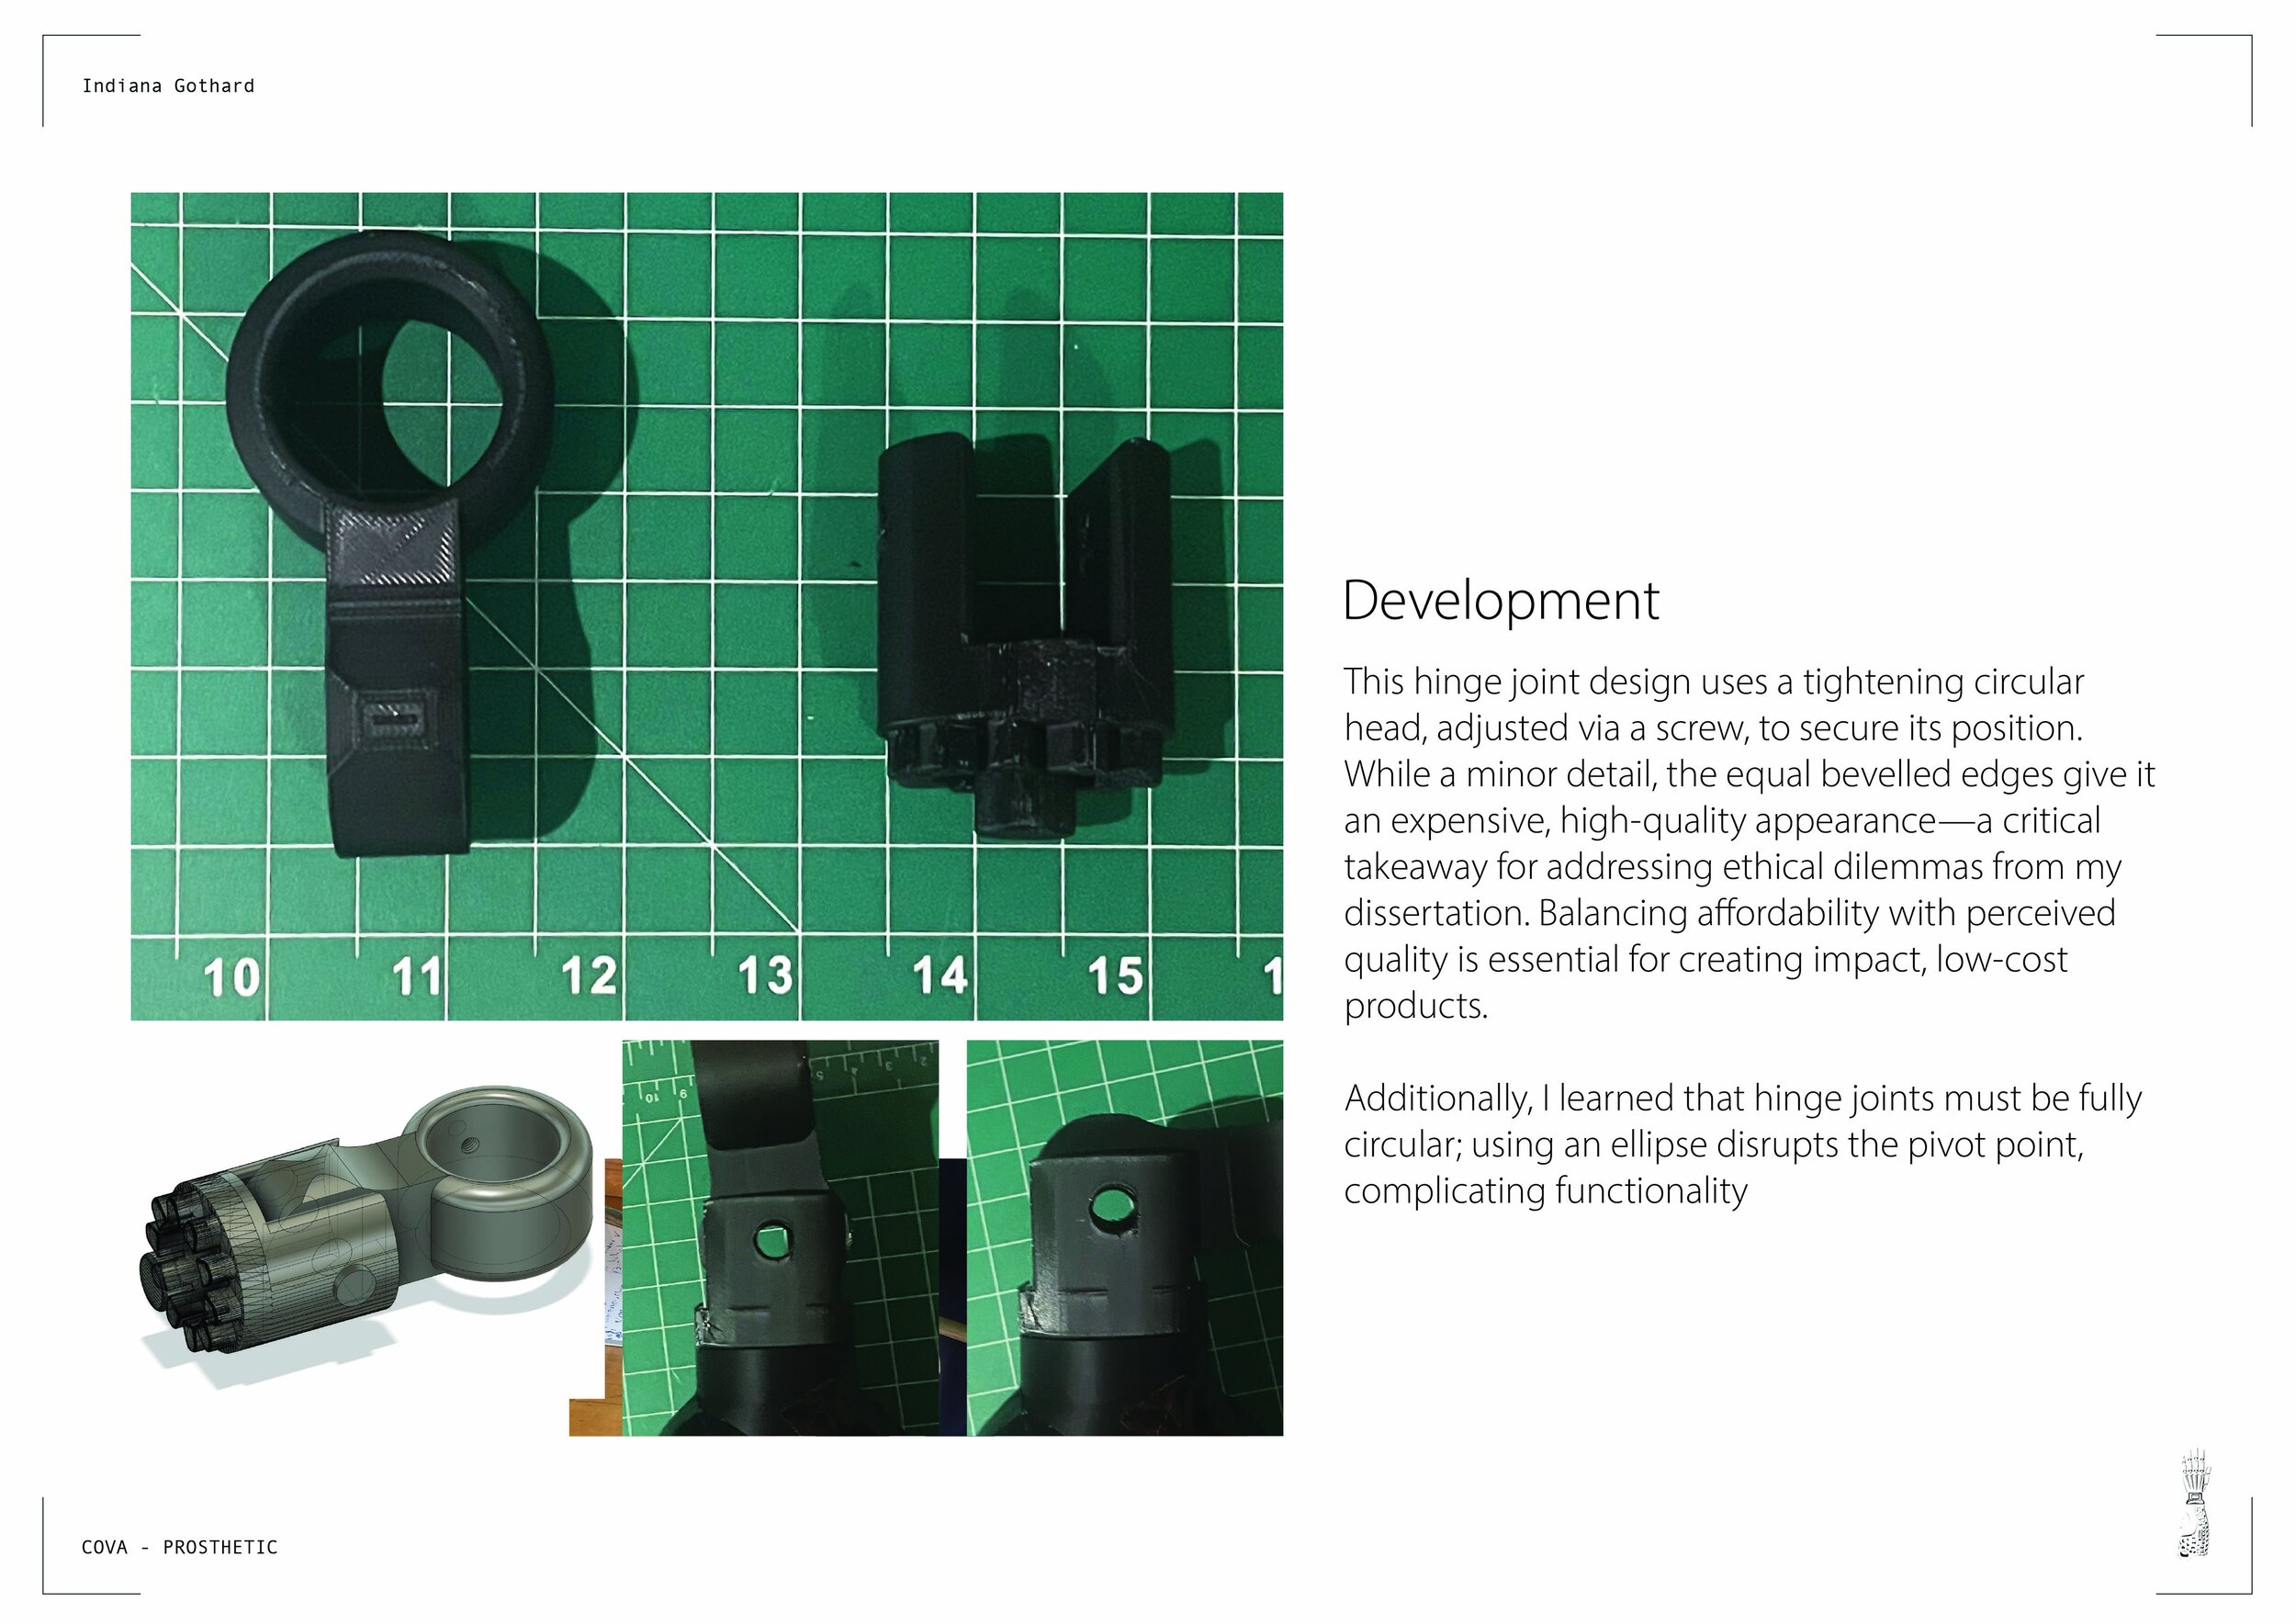
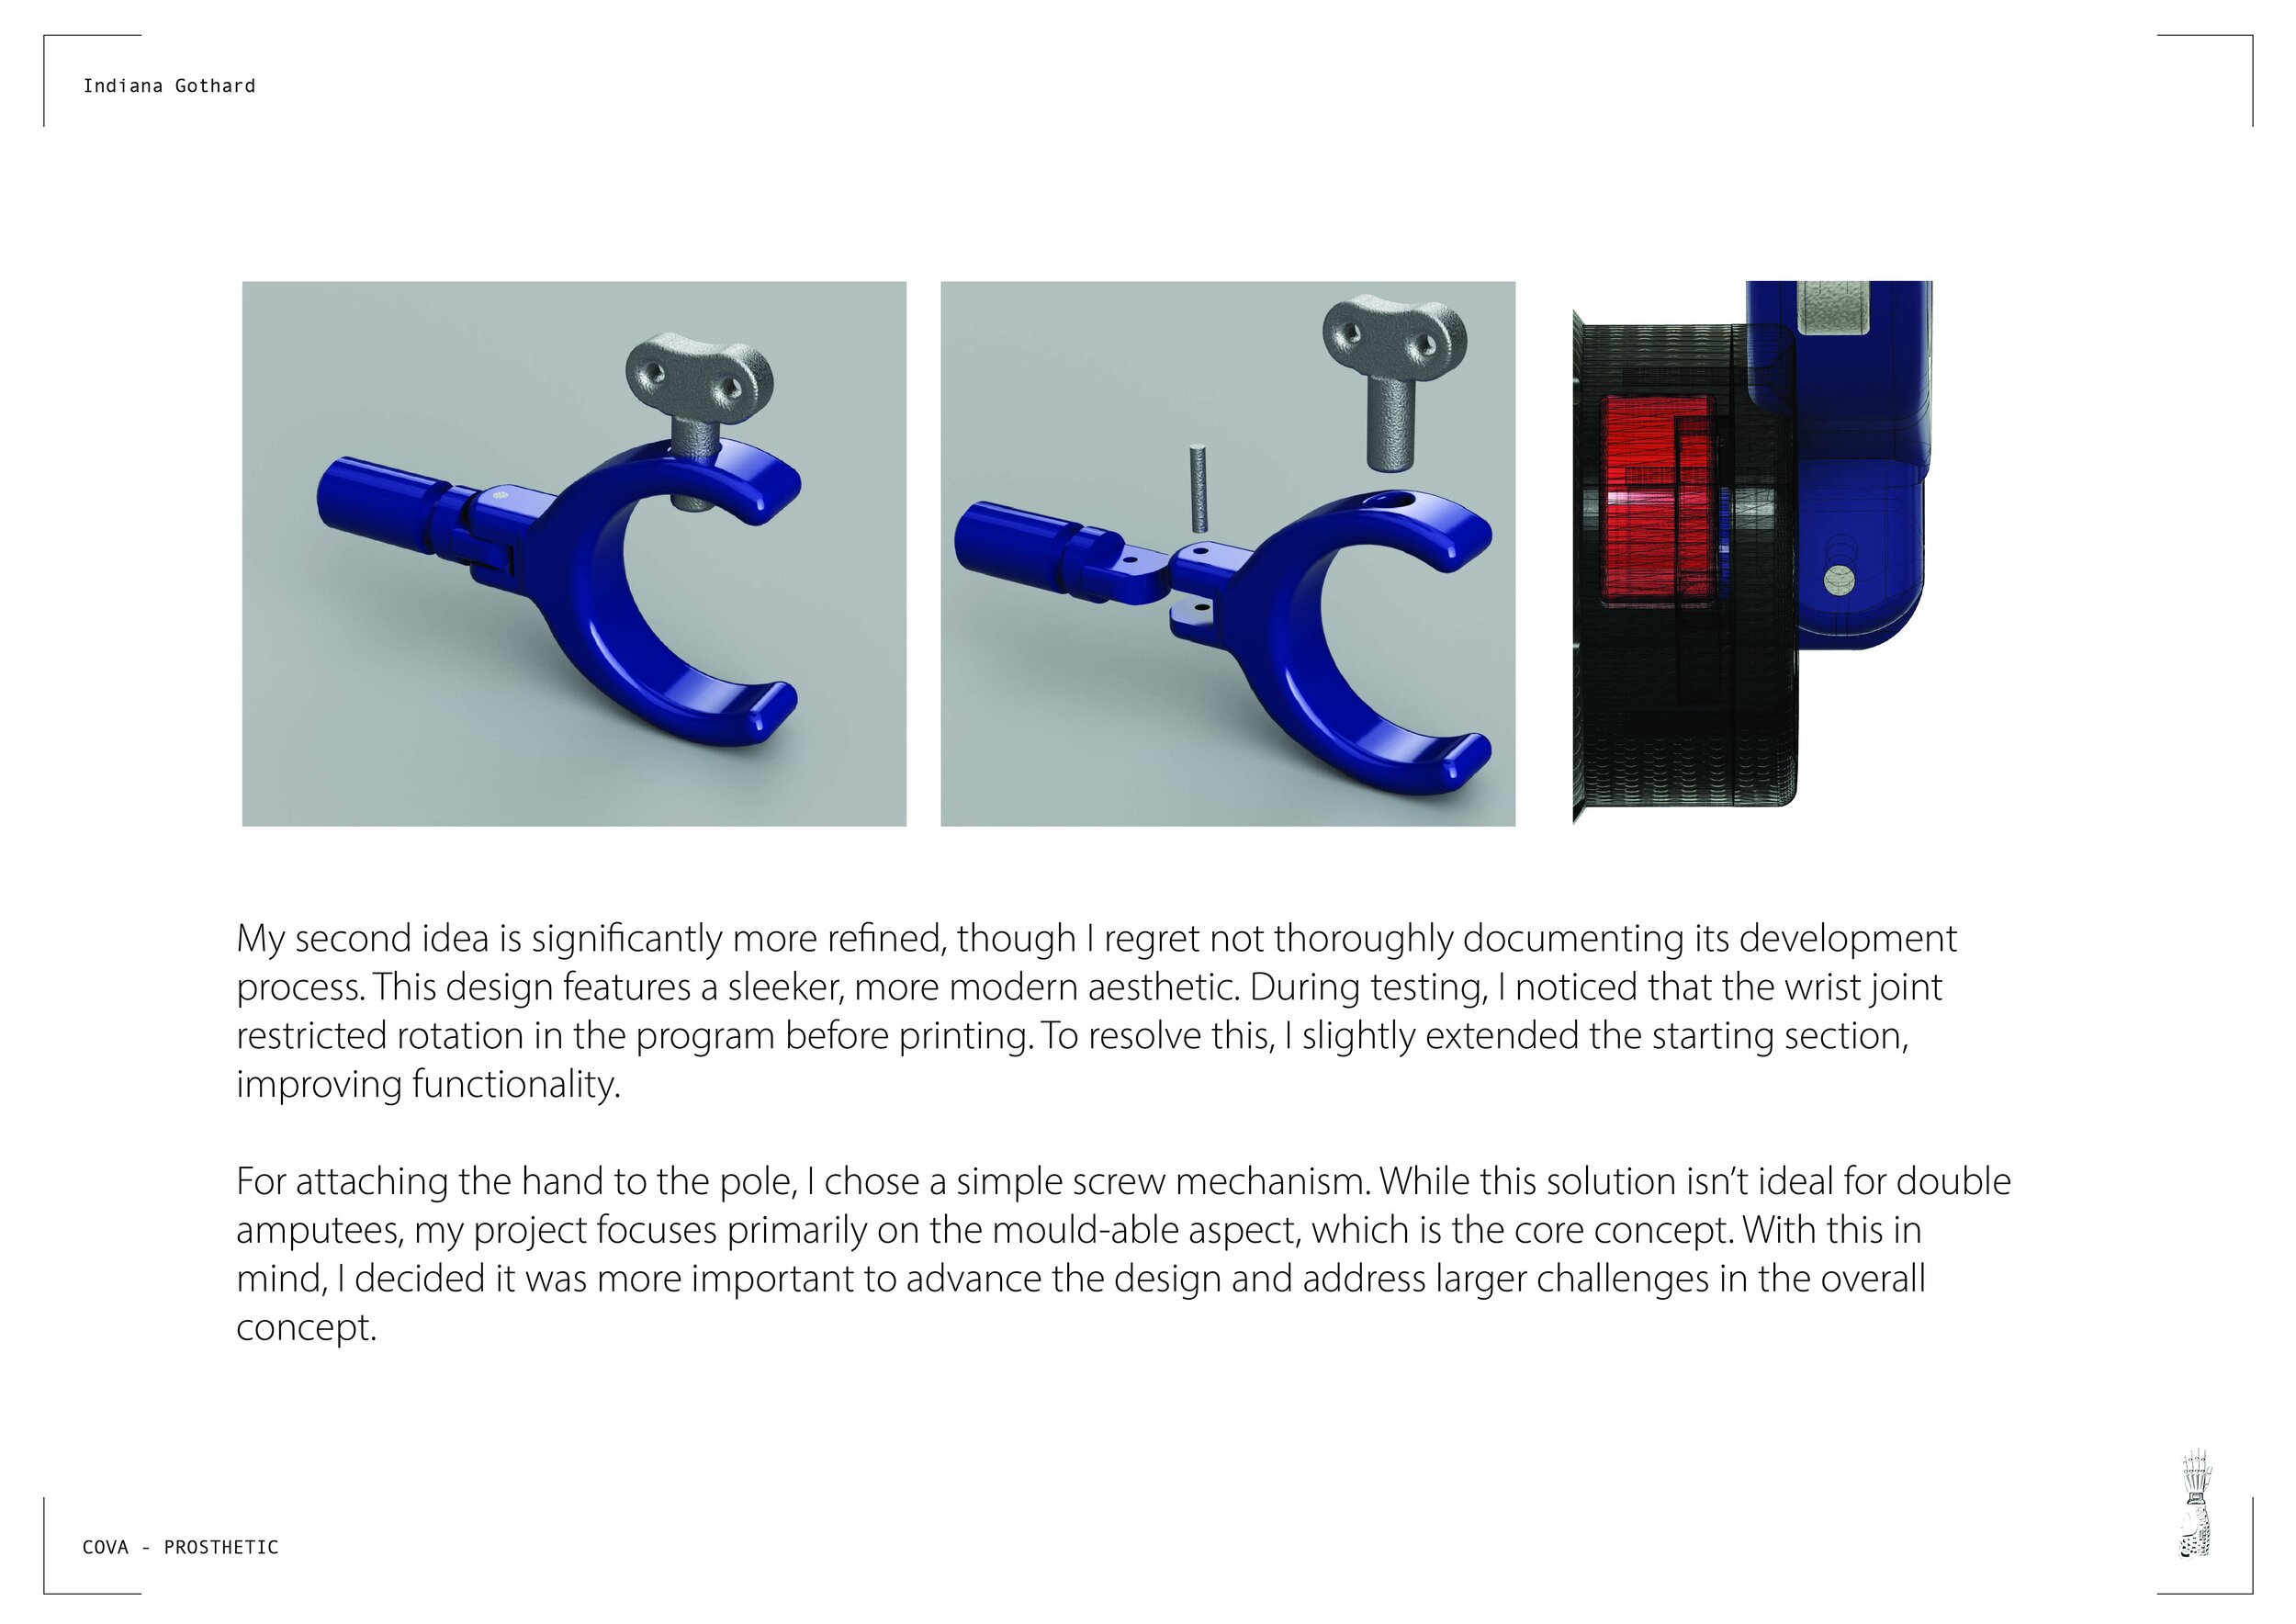
REFINEMENT / STRUCTURE AND ERGONOMICS
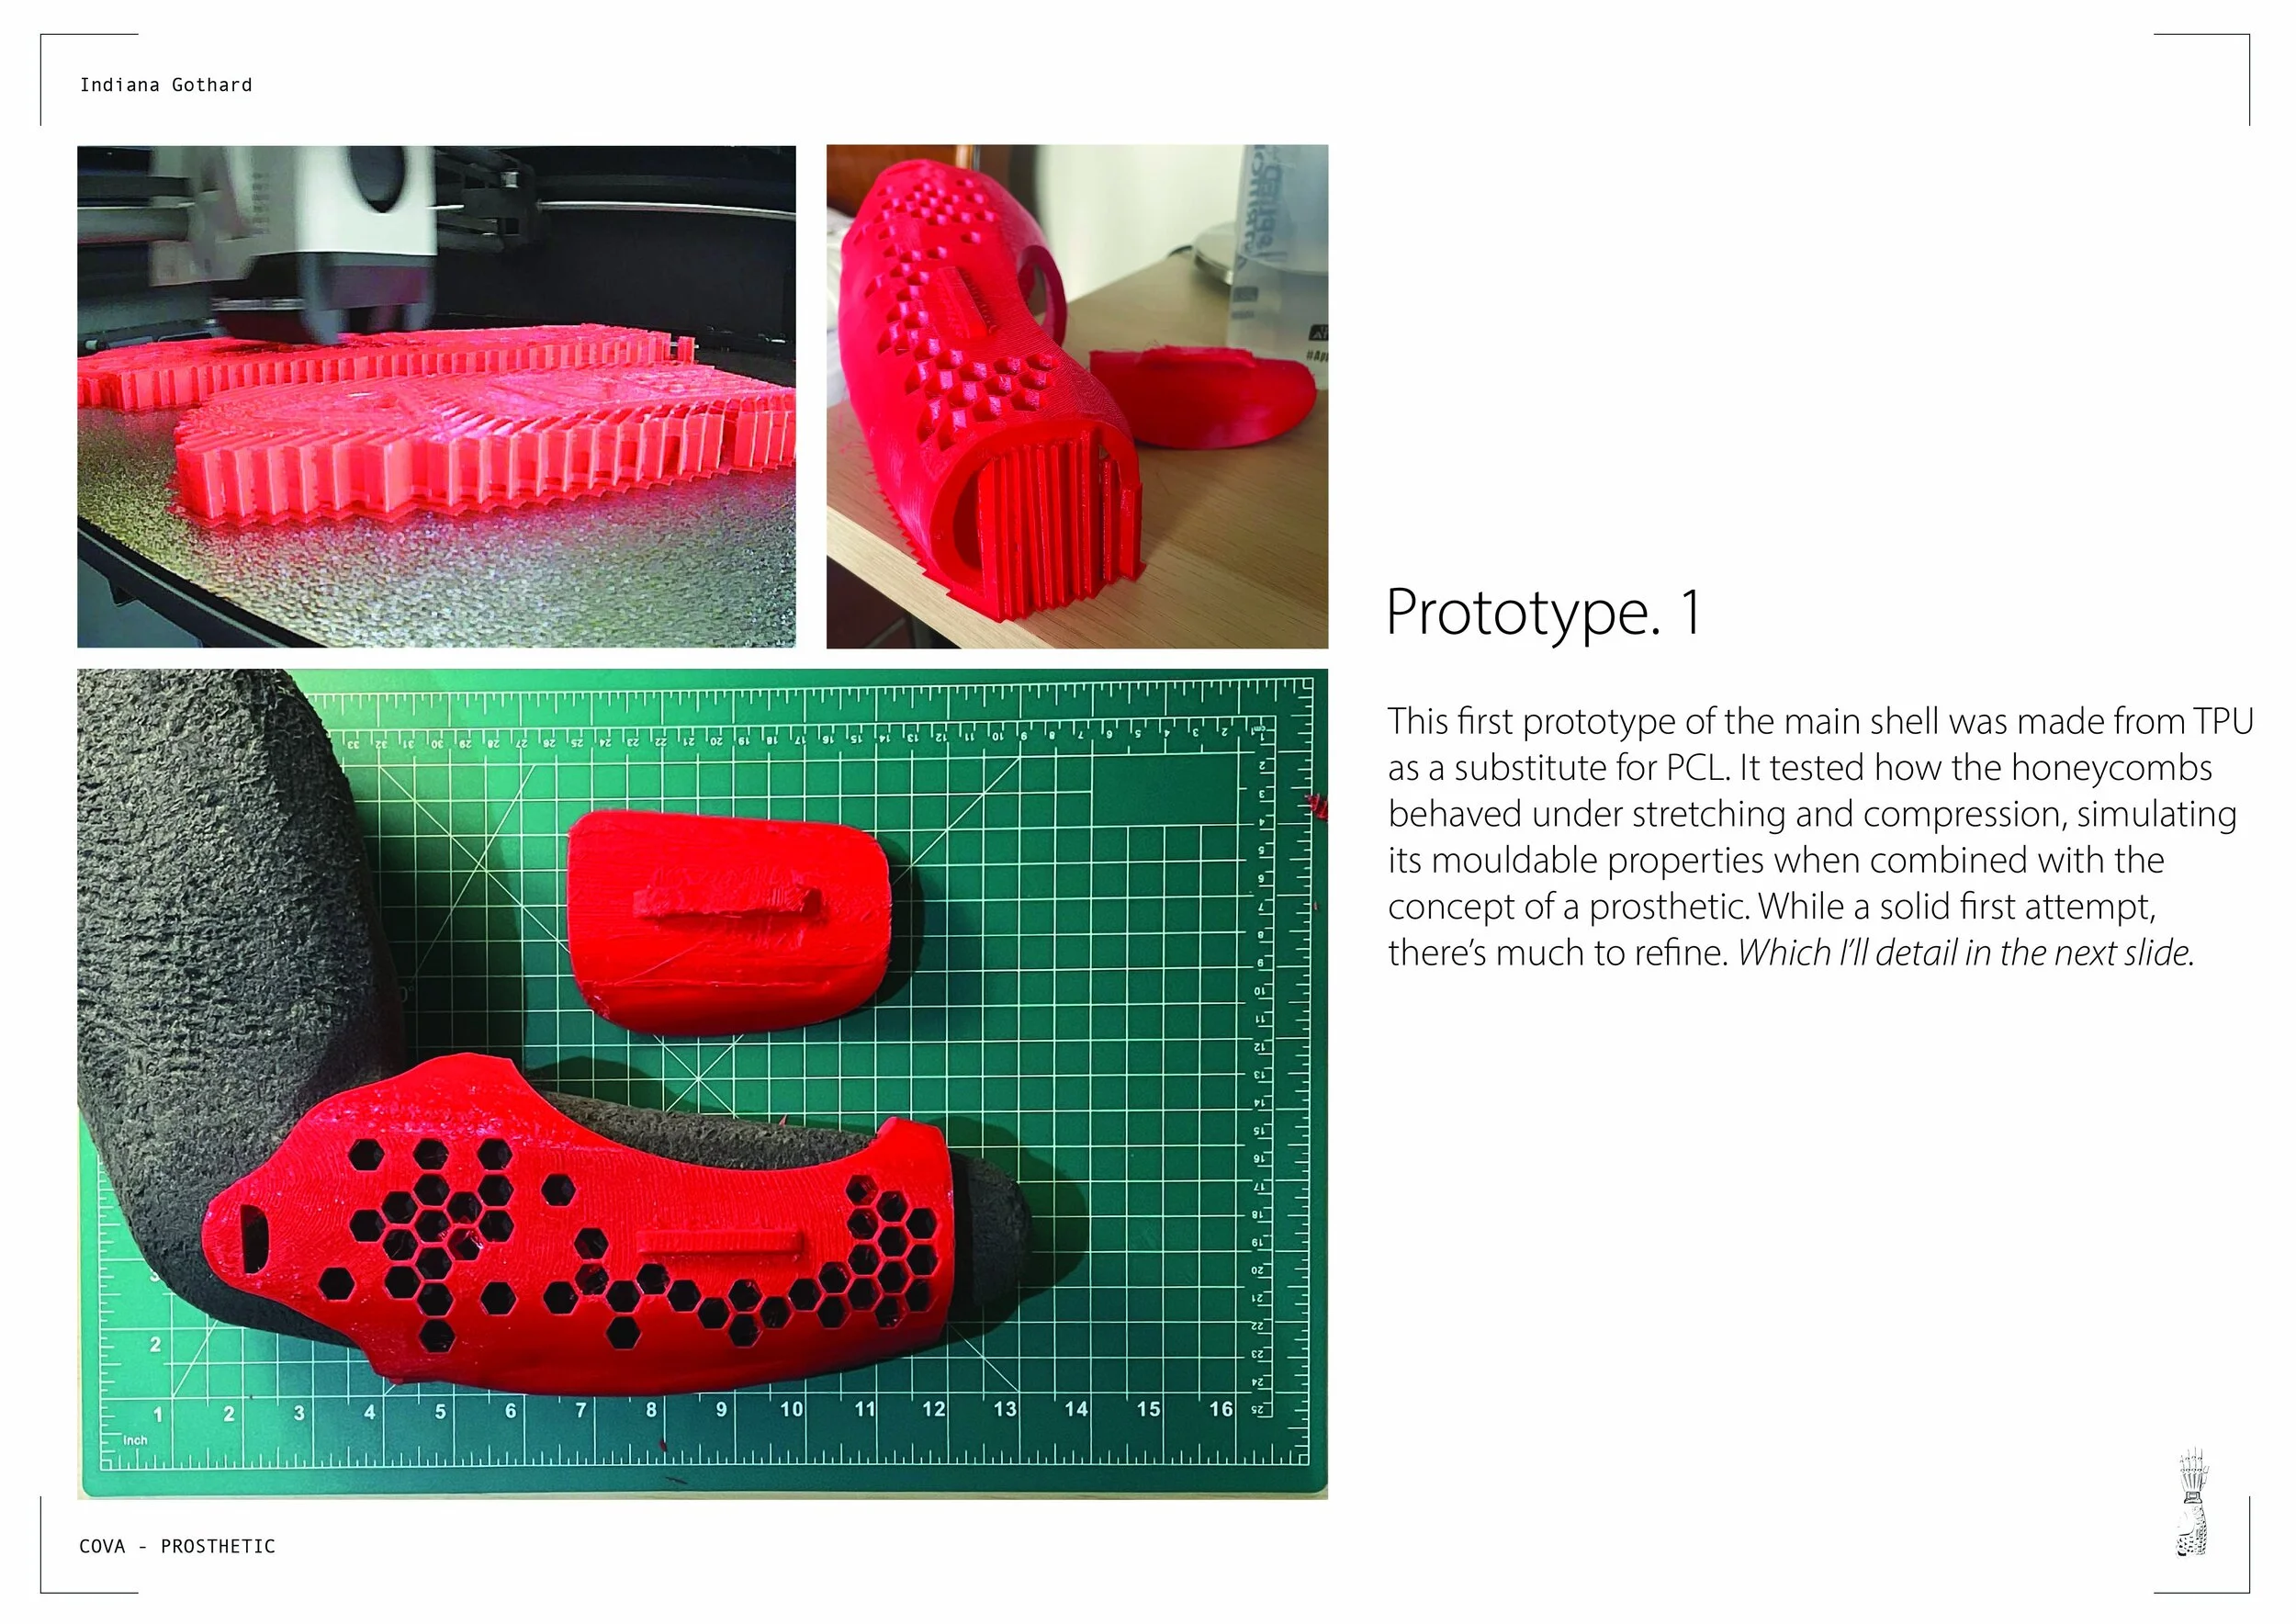
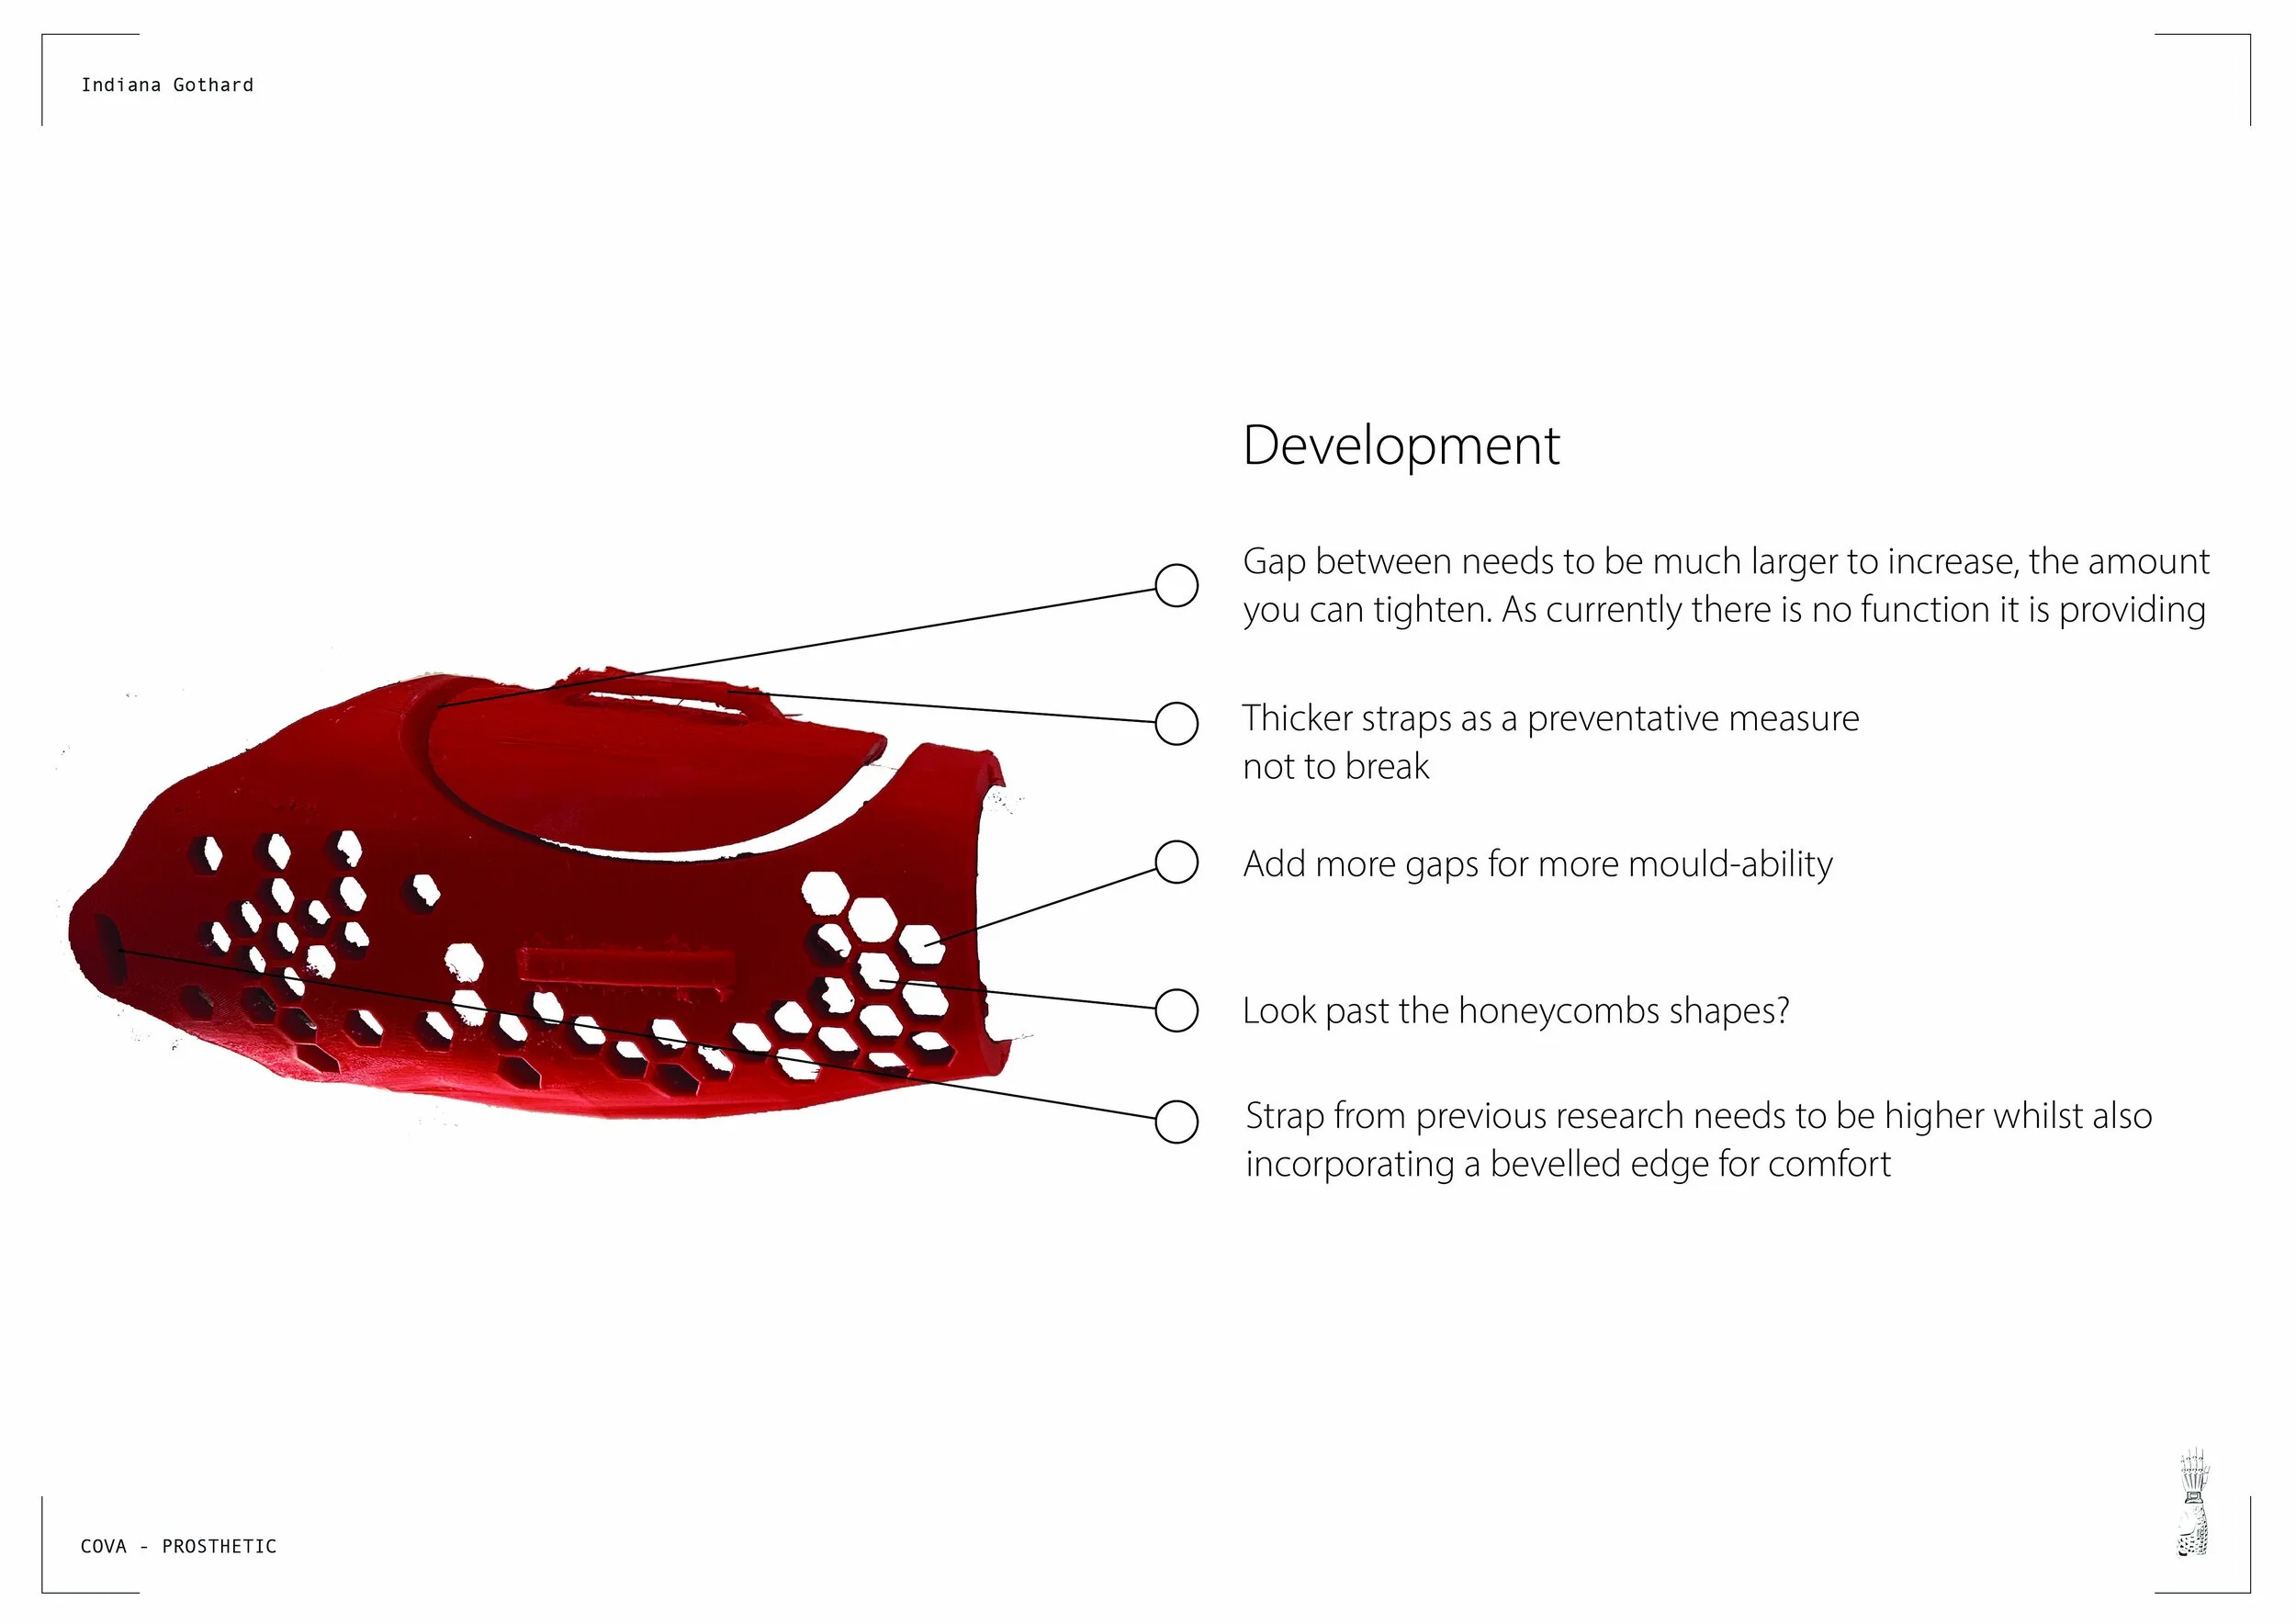
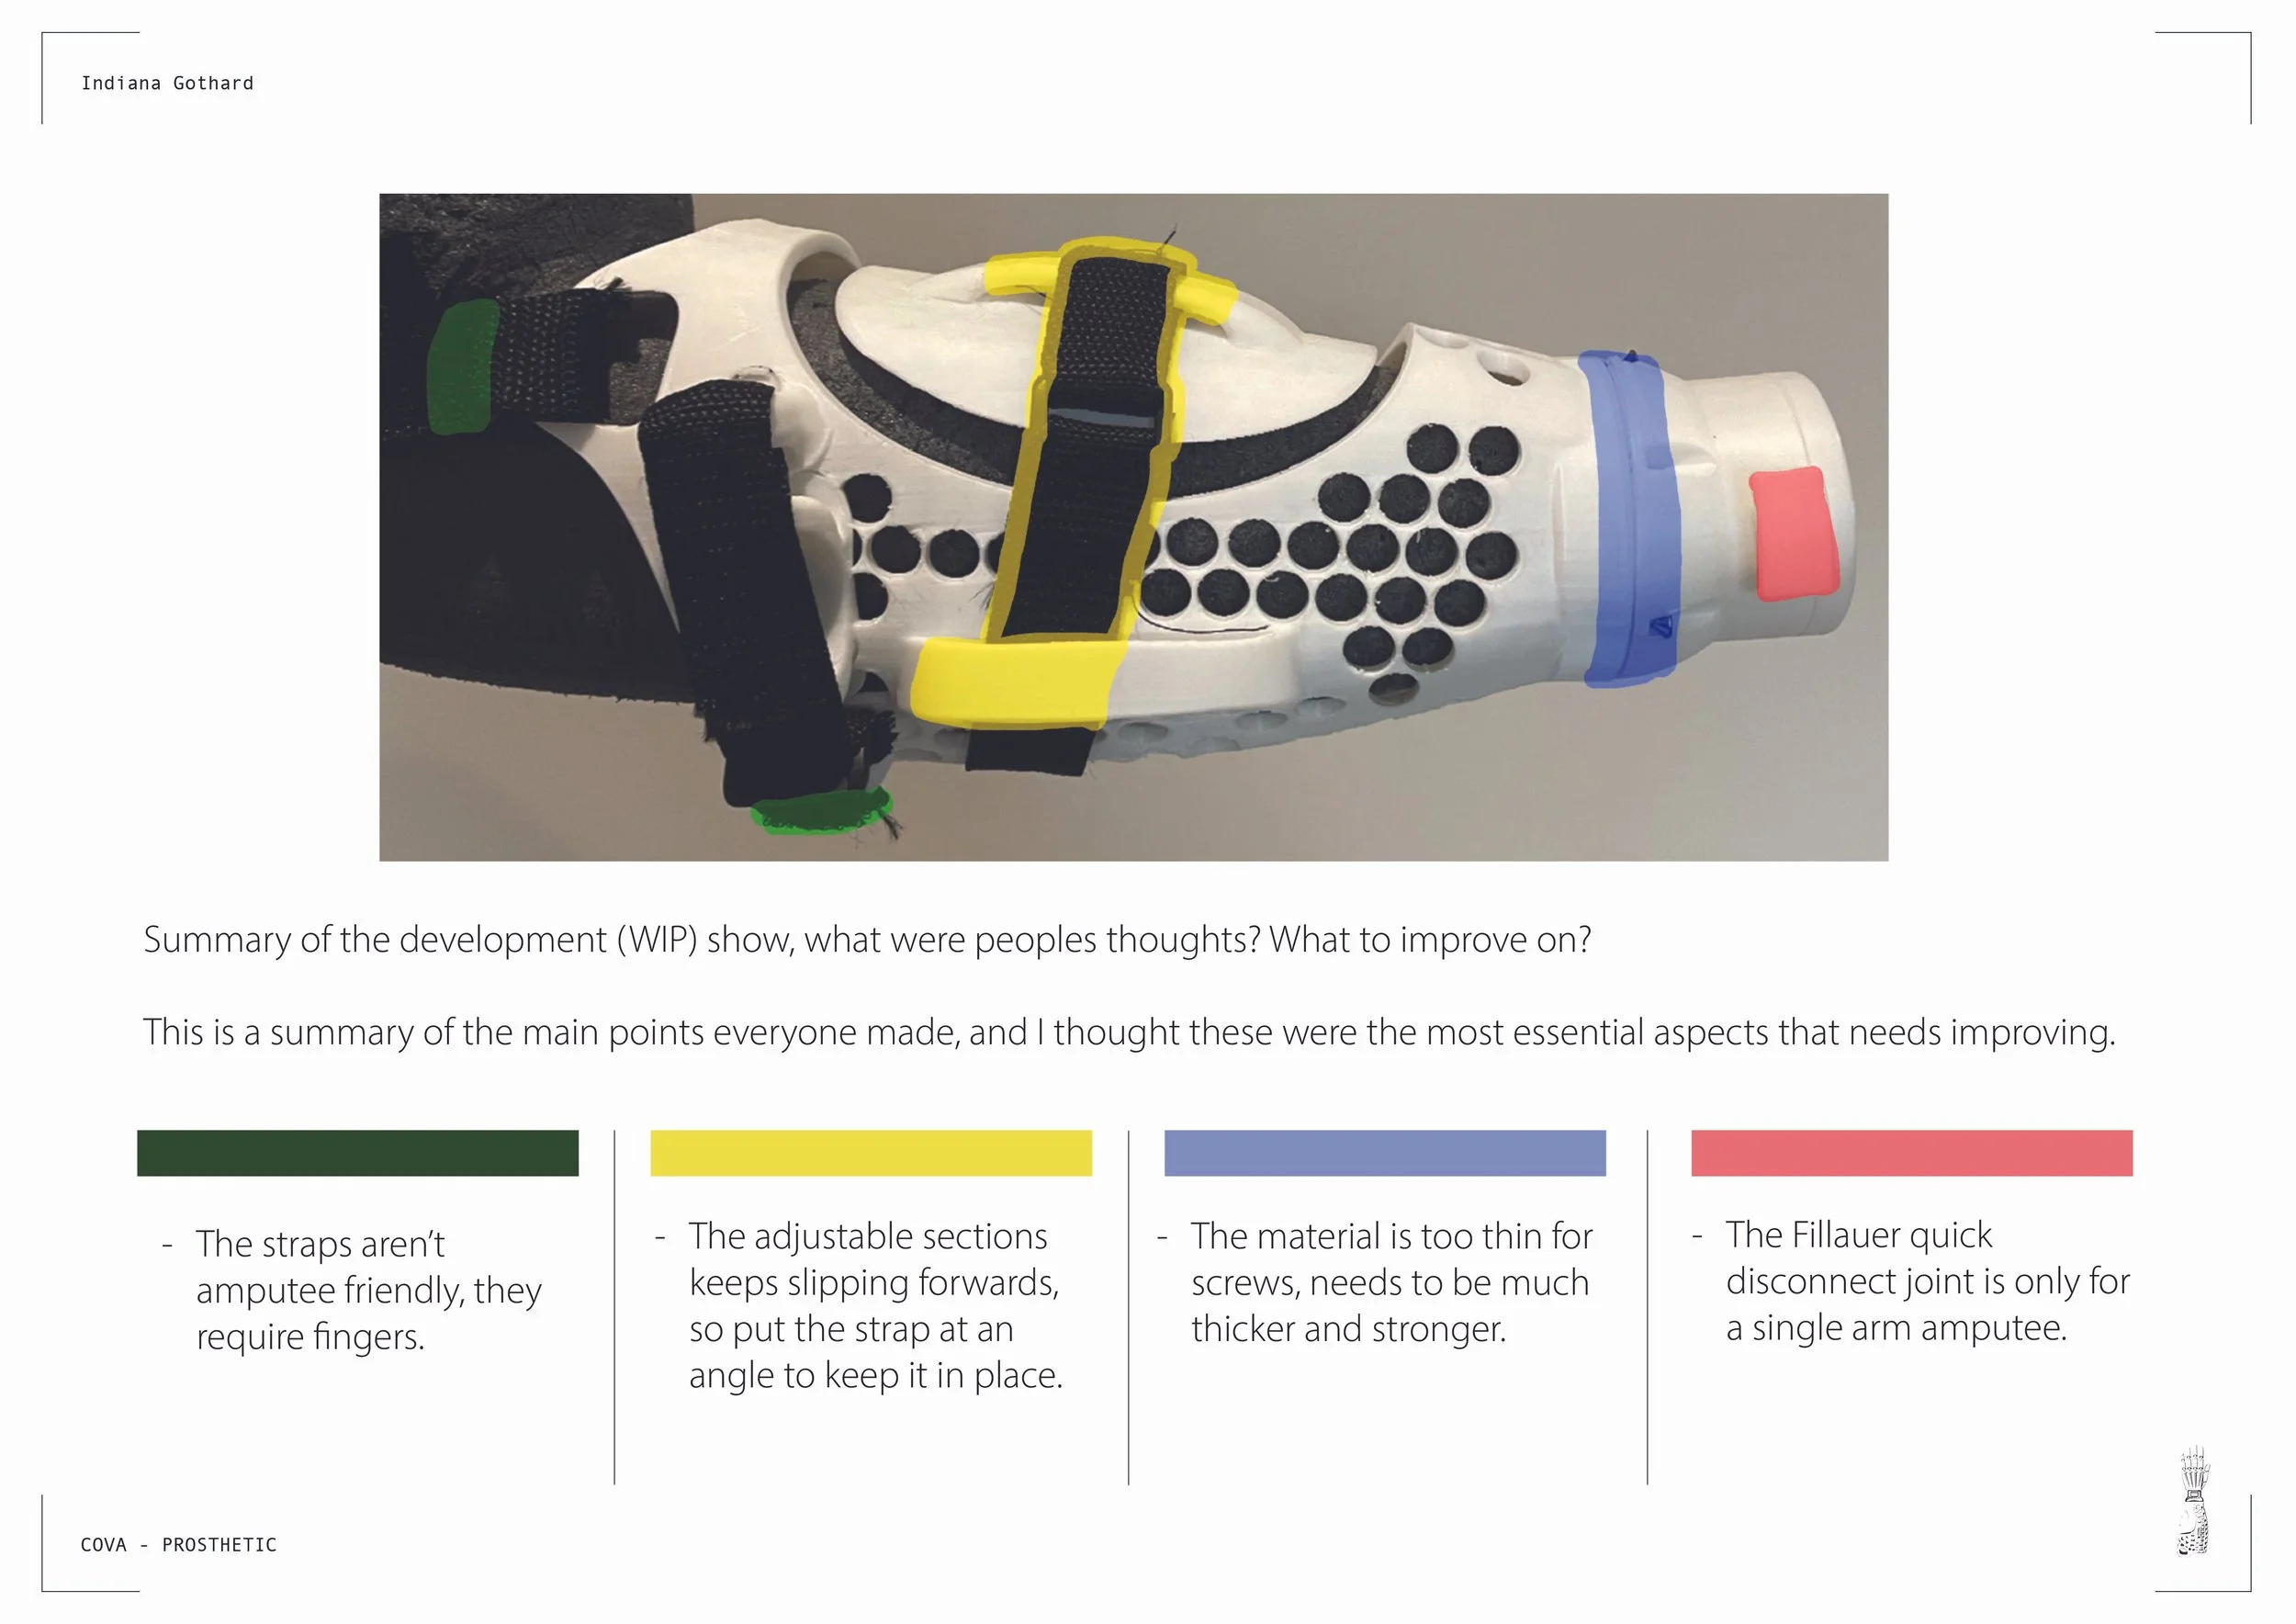
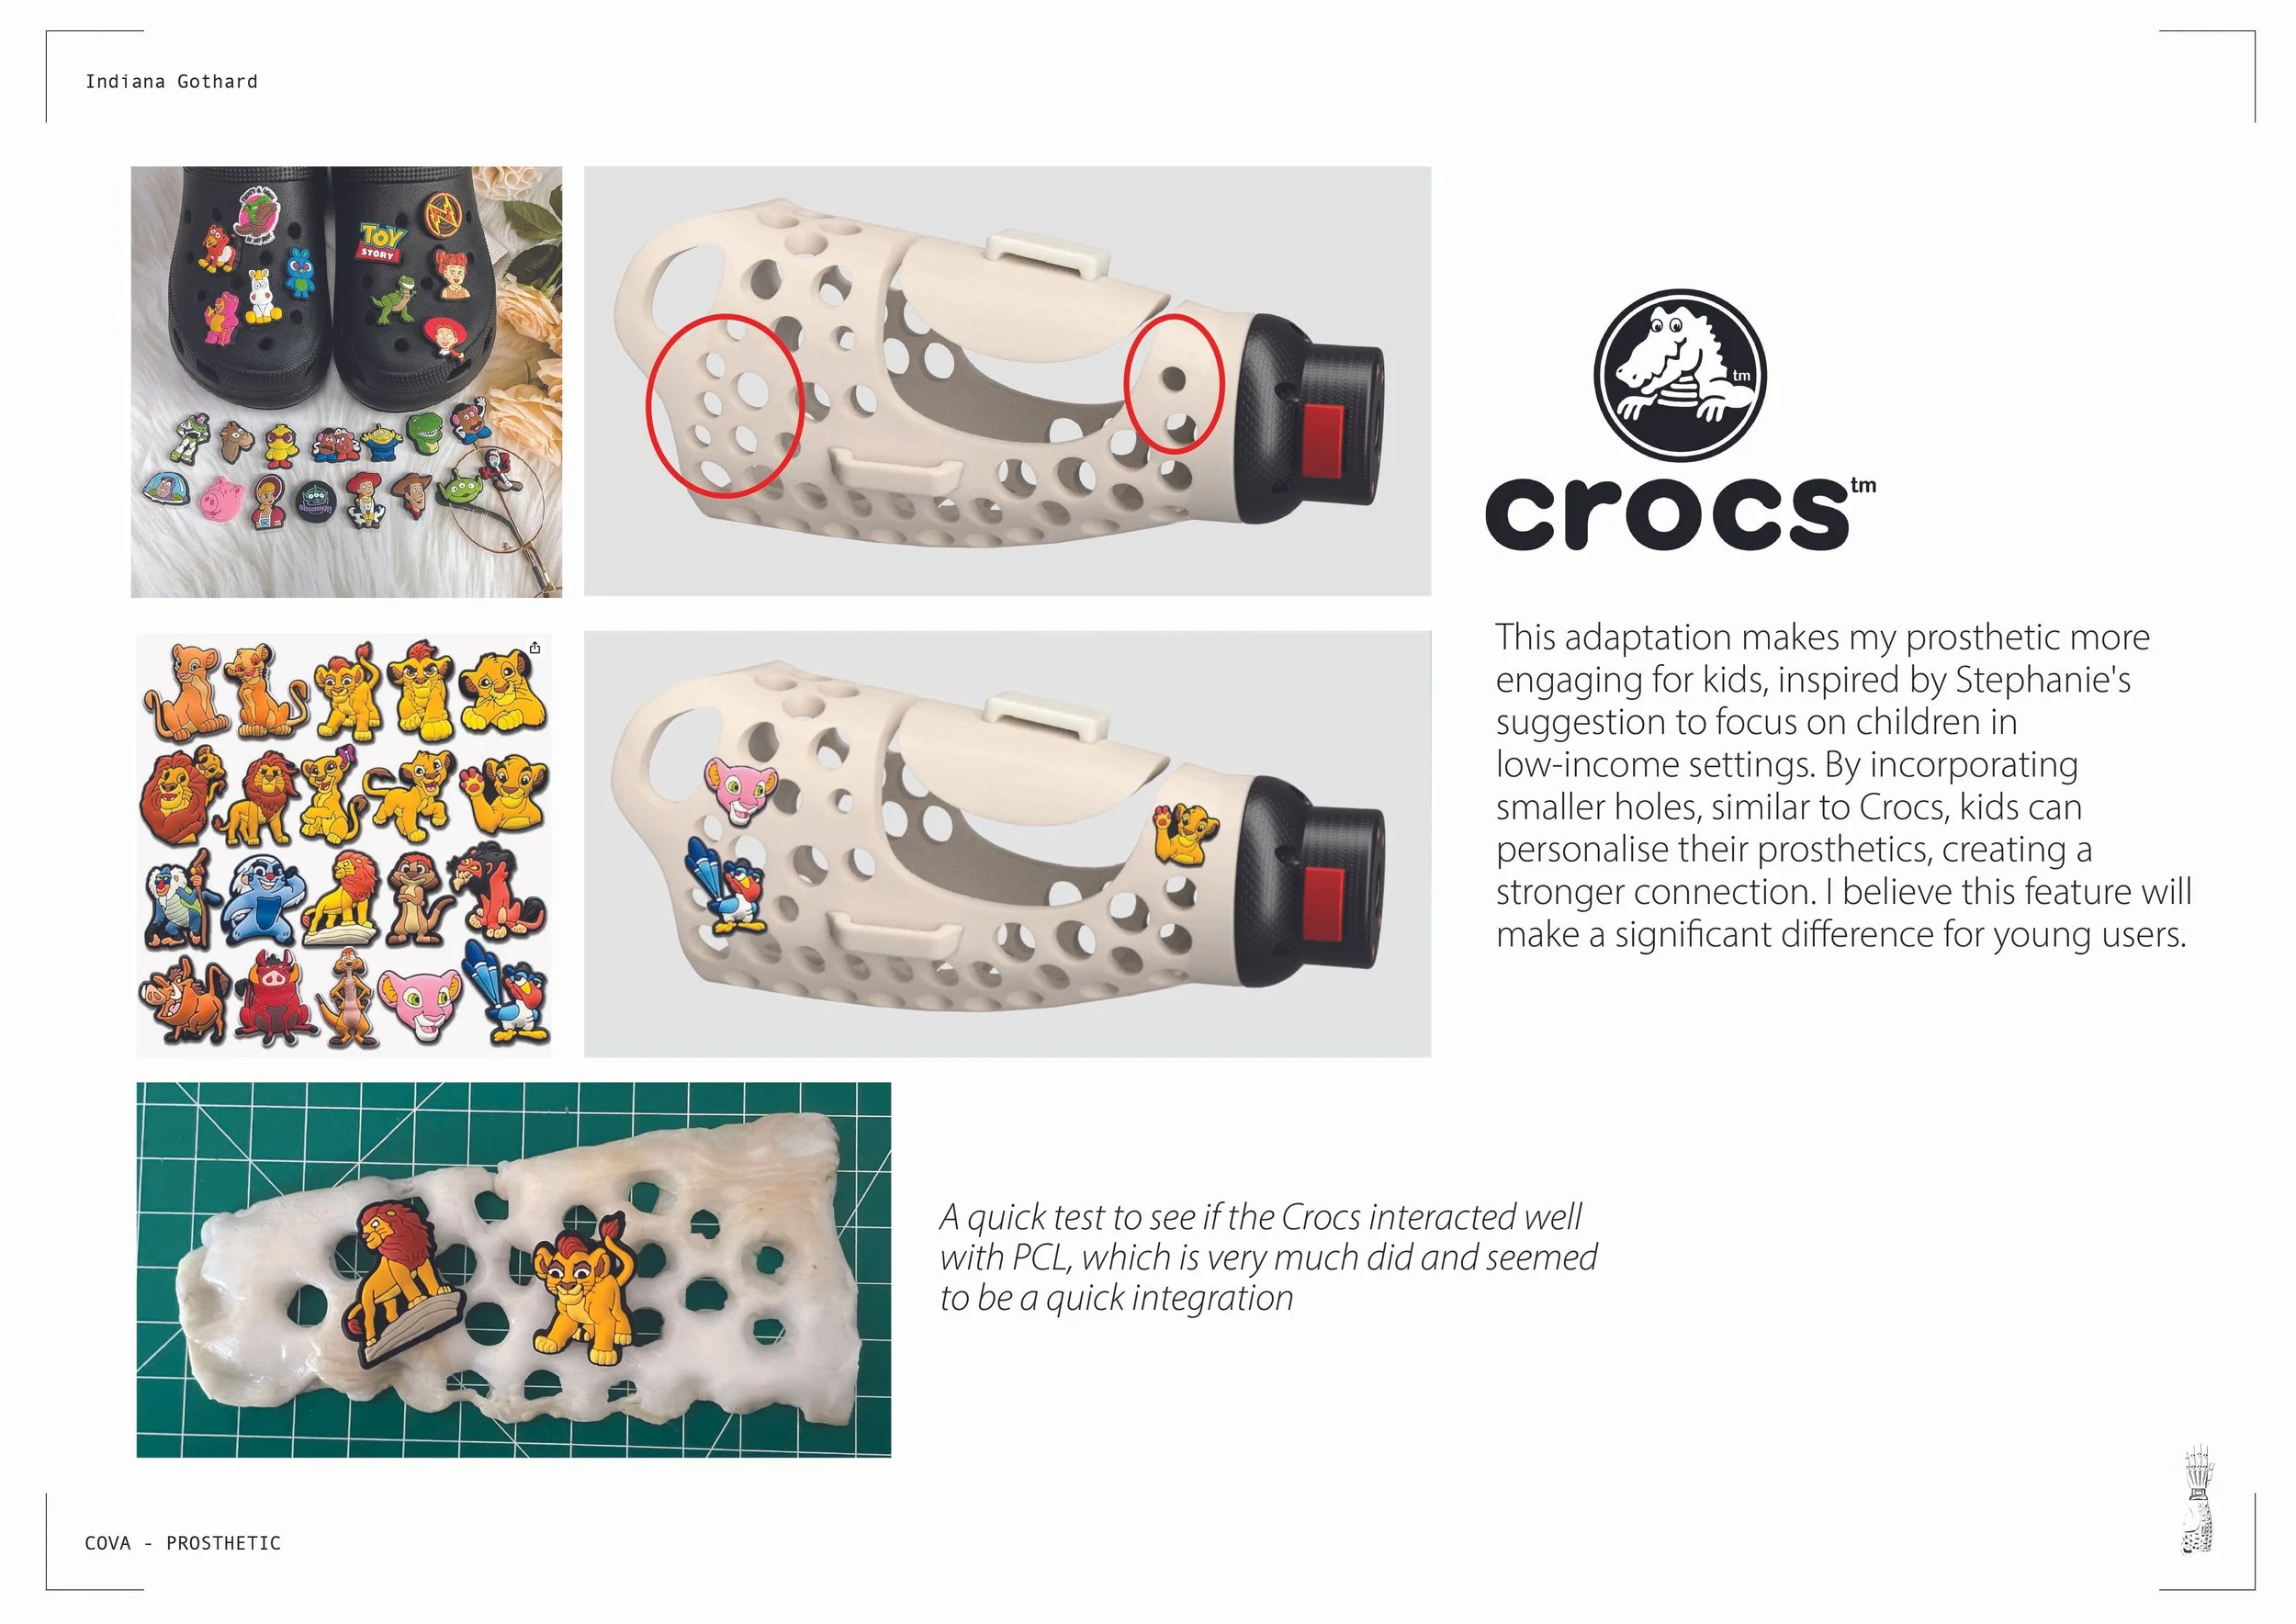
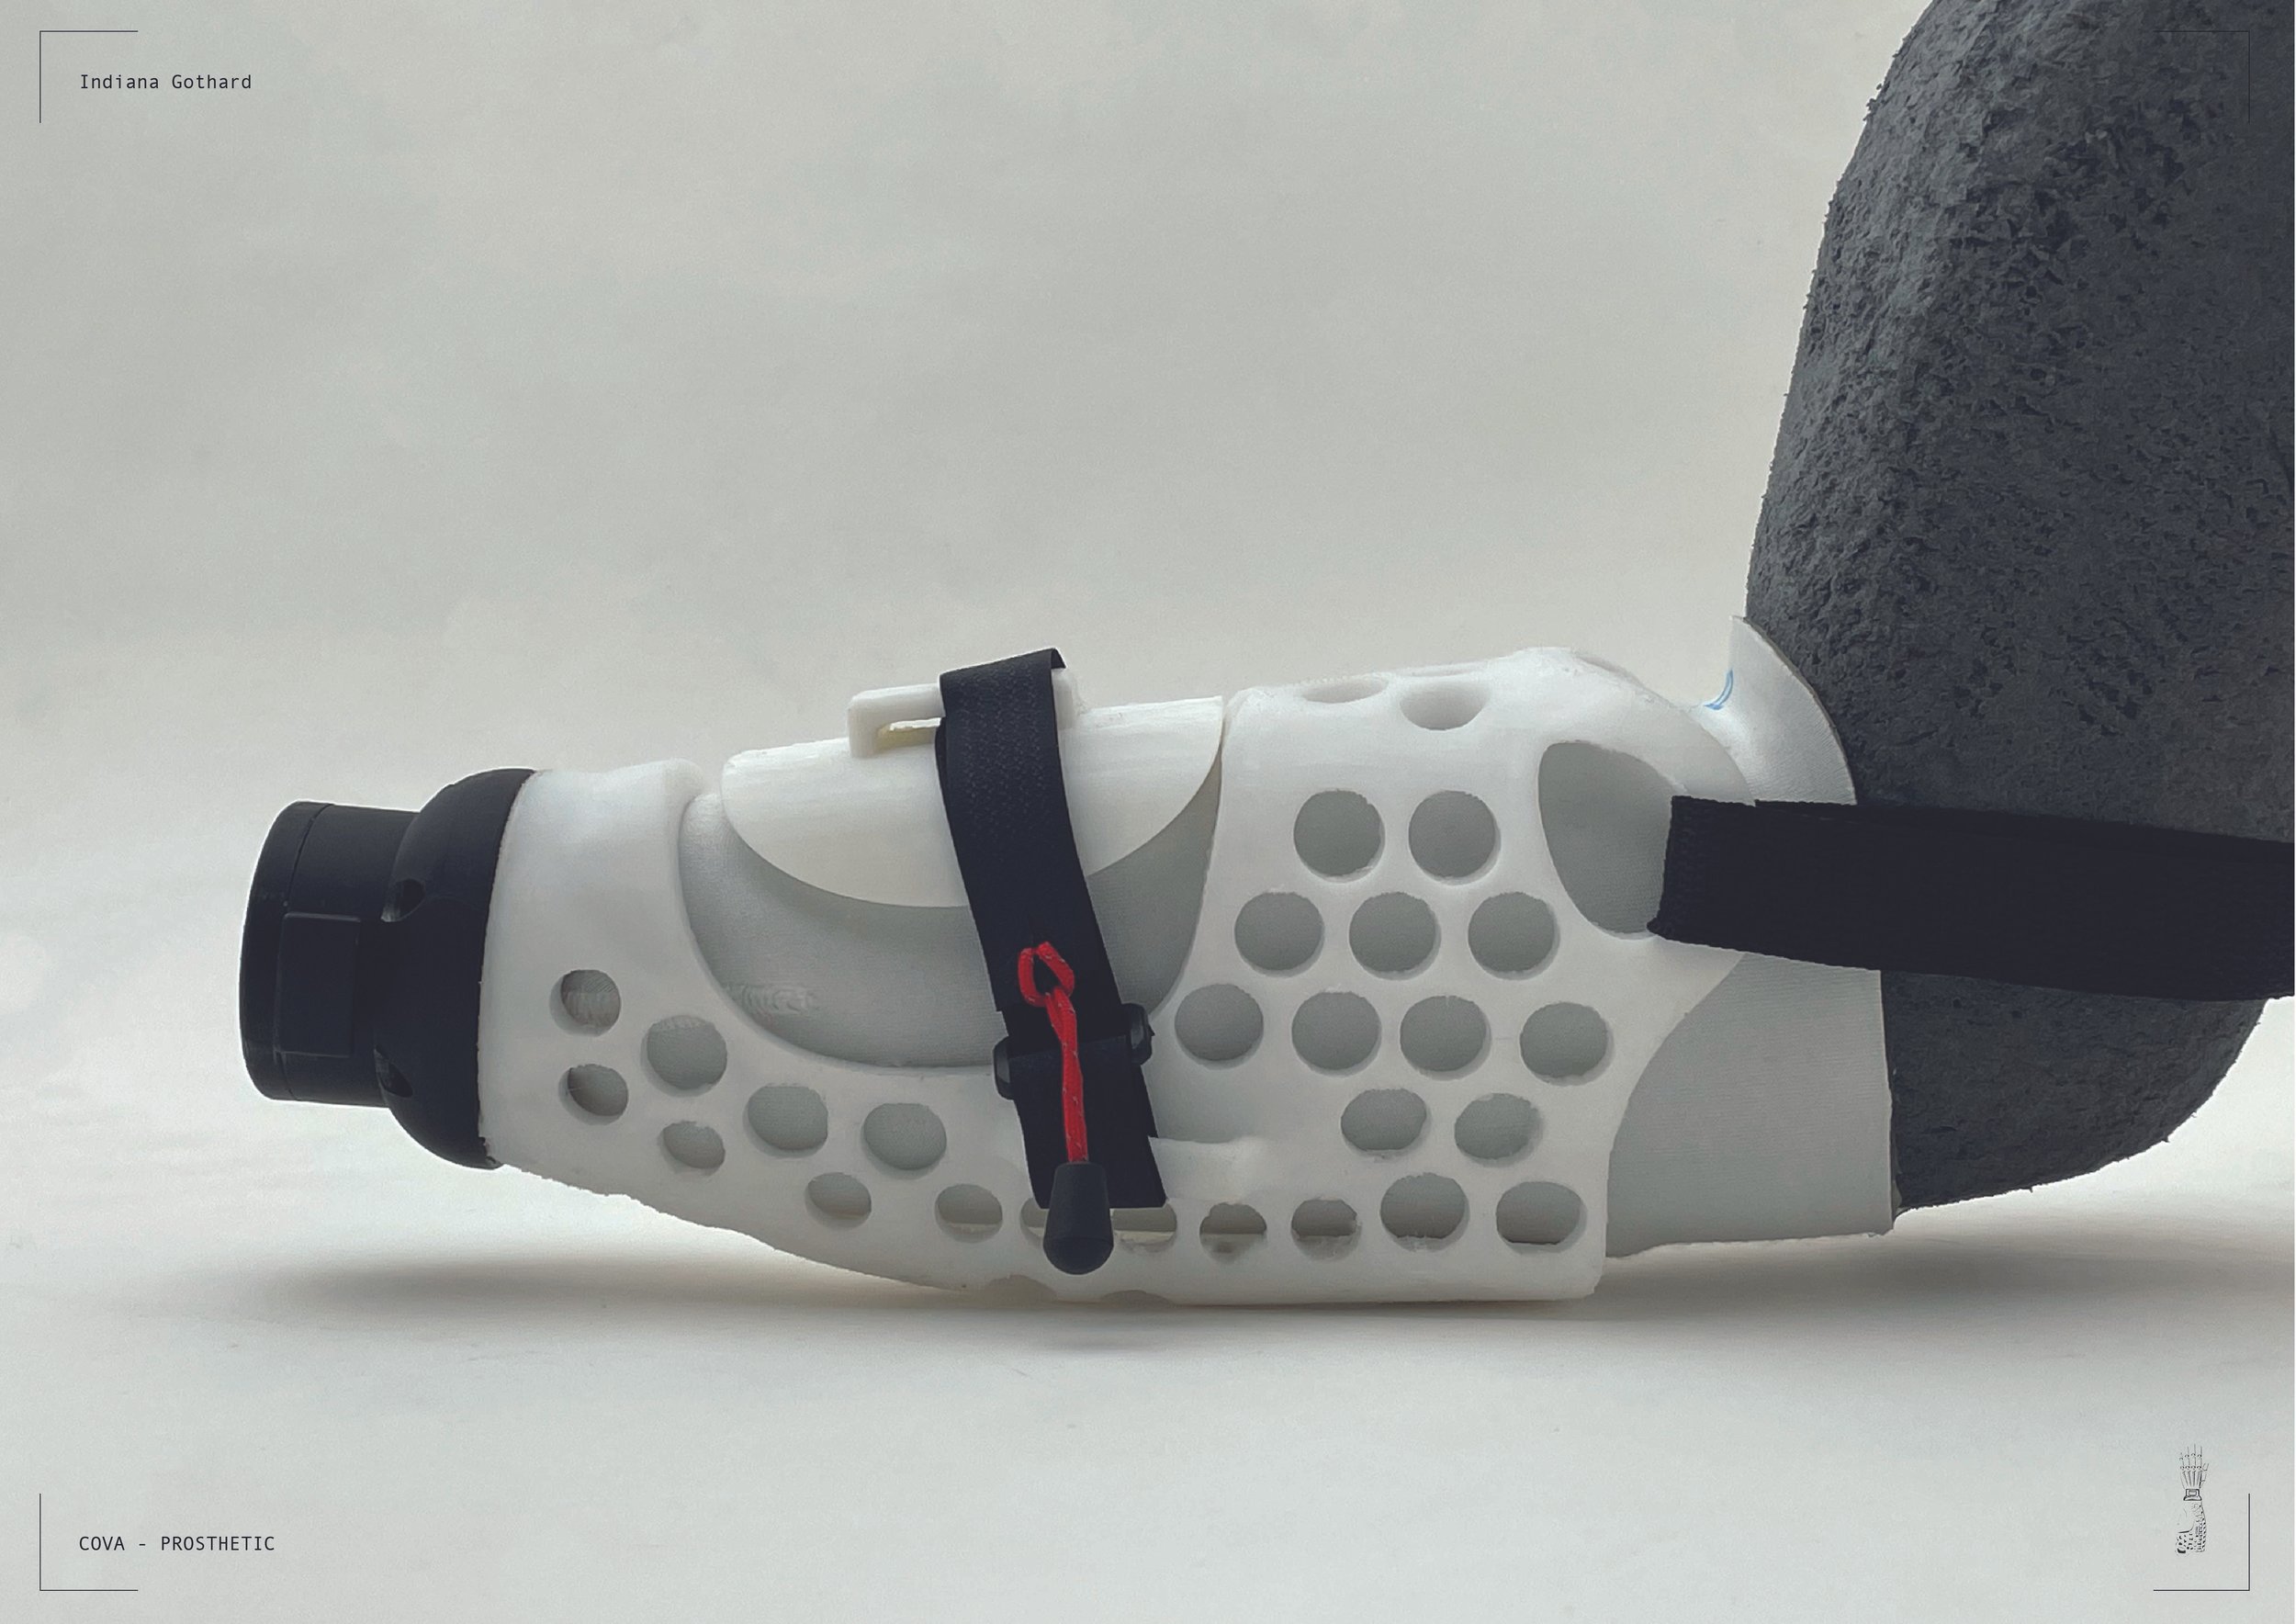
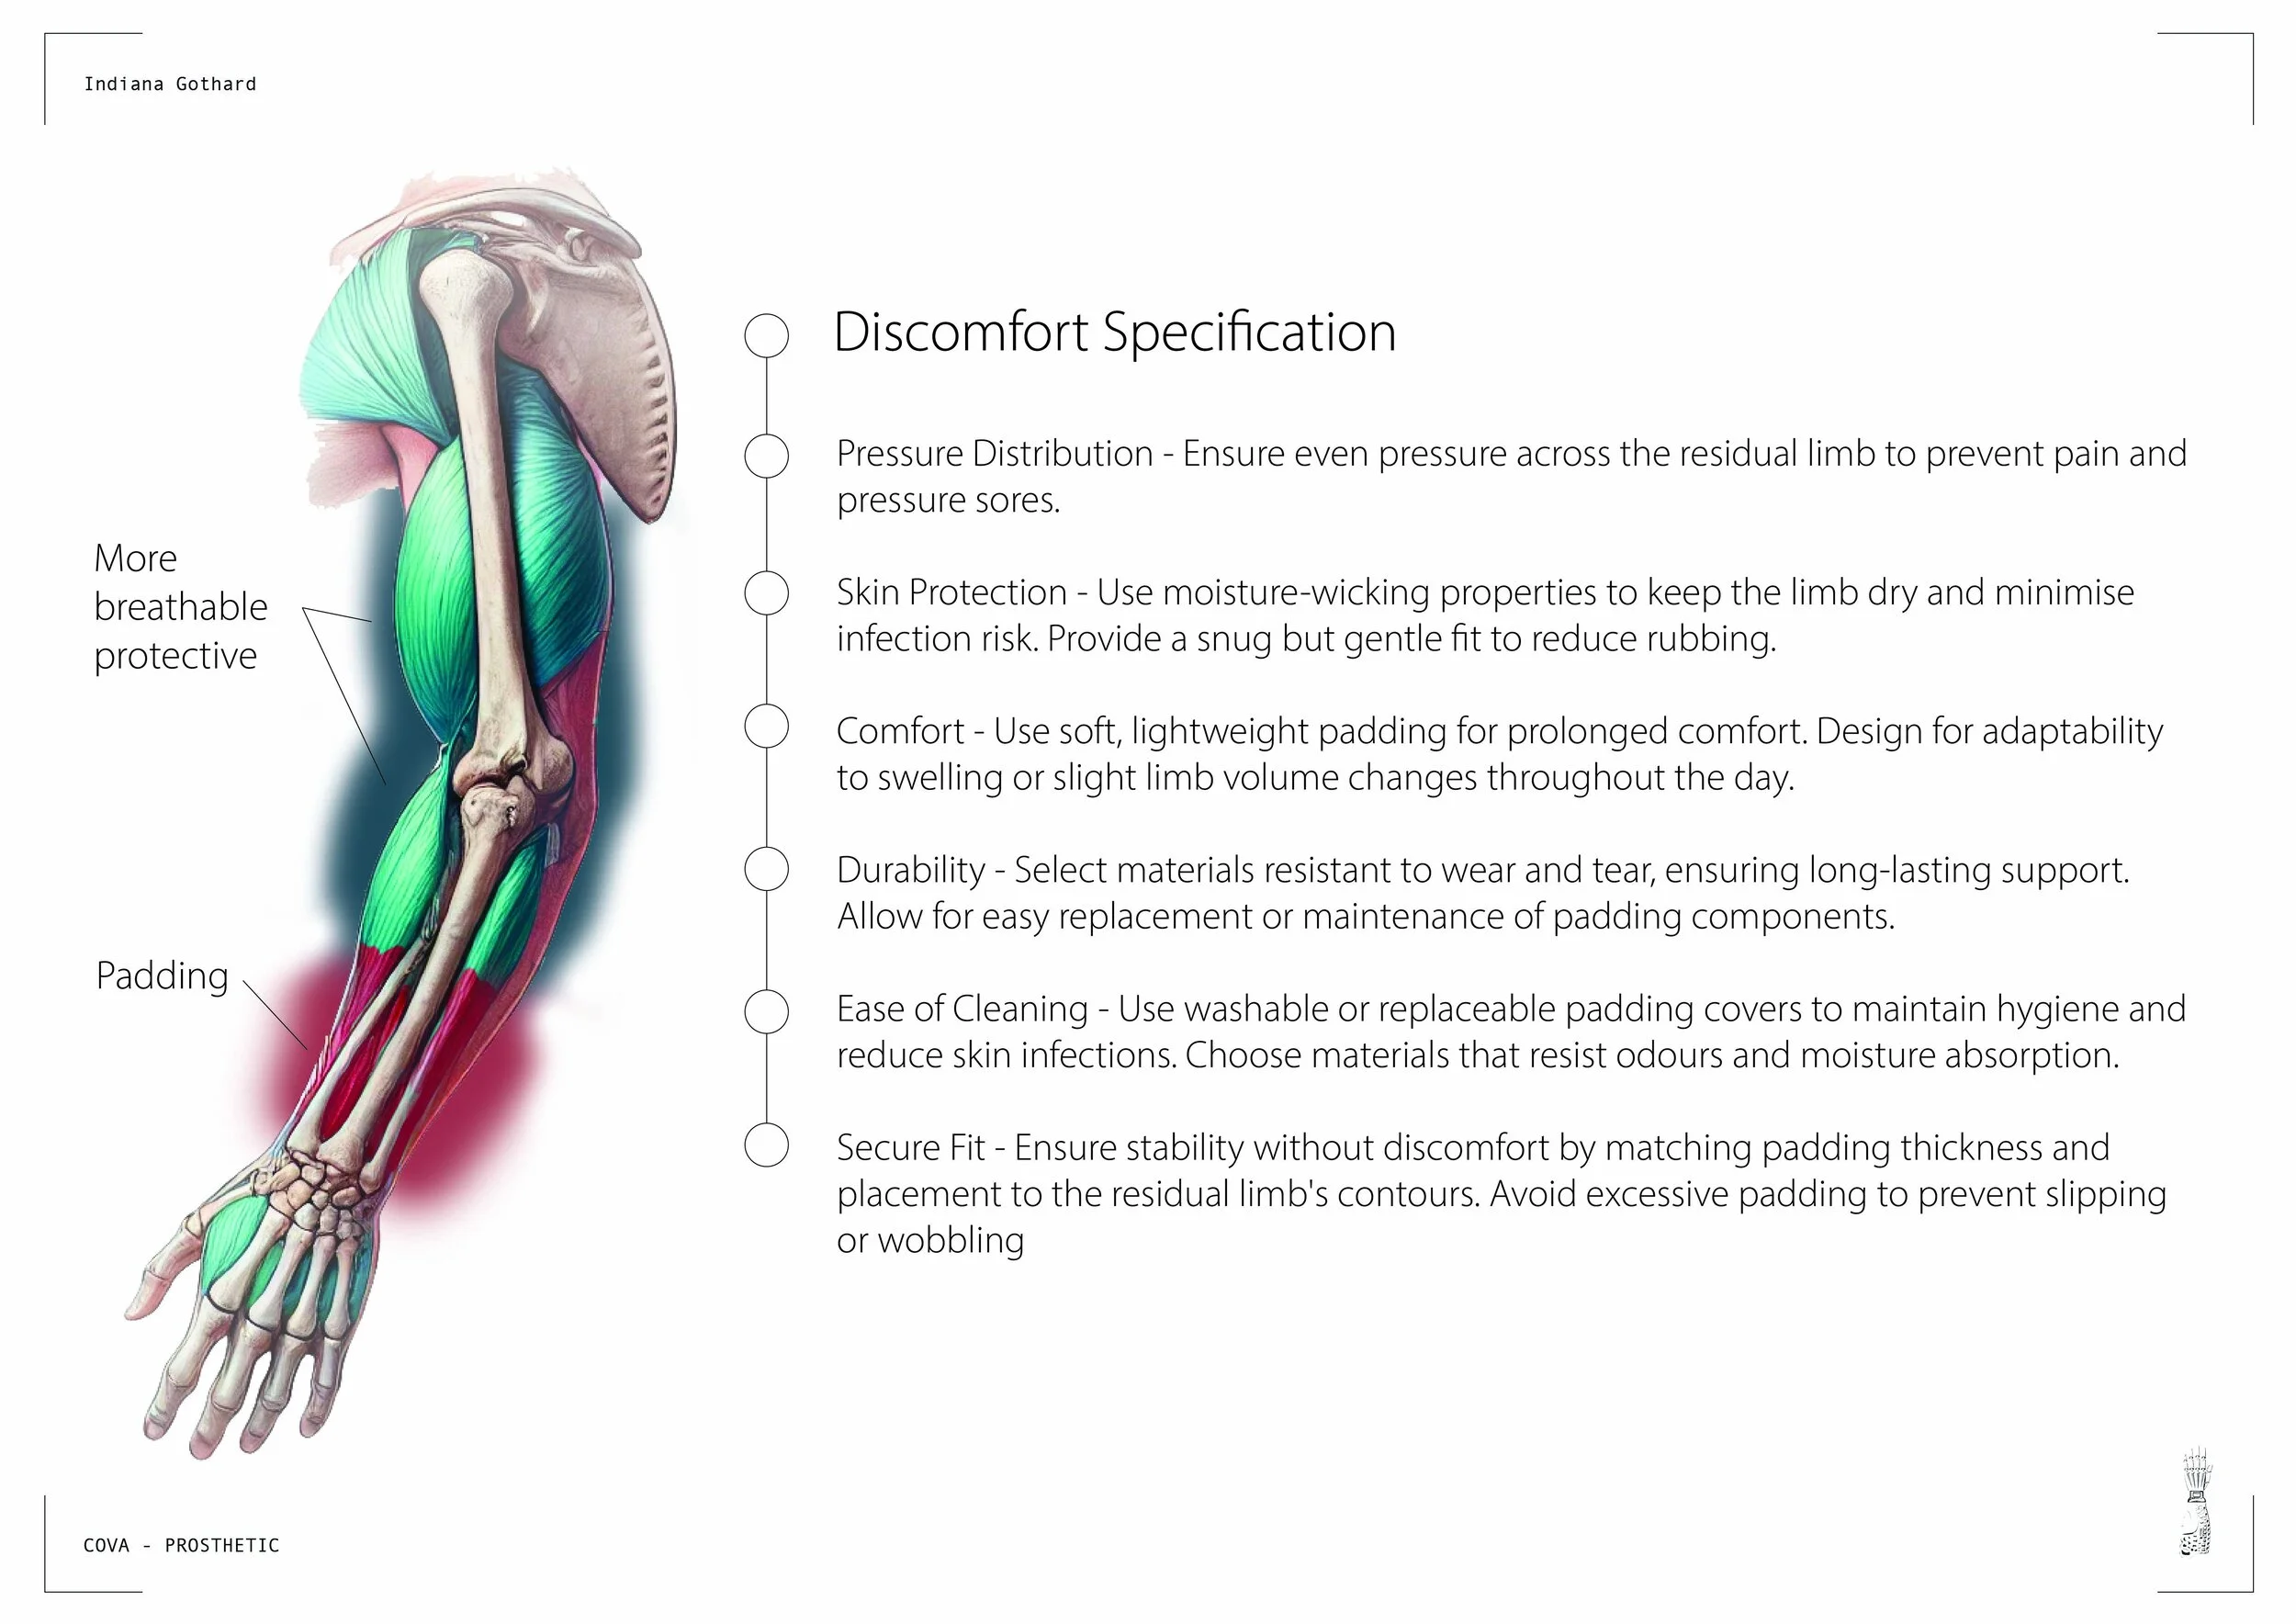
Since PCL was costly to work with as a student, I produced most prototypes in ABS plastic to test strength and functionality without wasting material. This stripped away the mouldable element and allowed me to focus on how the design itself performed. I studied strap positioning, comfort, and structural integrity, testing different surface geometries such as honeycombs and circular cut-outs. I also explored how easily the prosthetic could be cleaned. These iterations led me to shift from sharp honeycomb grids to rounded forms, and to introduce beveled edges for greater comfort. I refined the ergonomic shape through digital modelling, using Blender alongside Fusion to explore surfaces and proportions, before moving into later material tests.

WHAT I LEARNED
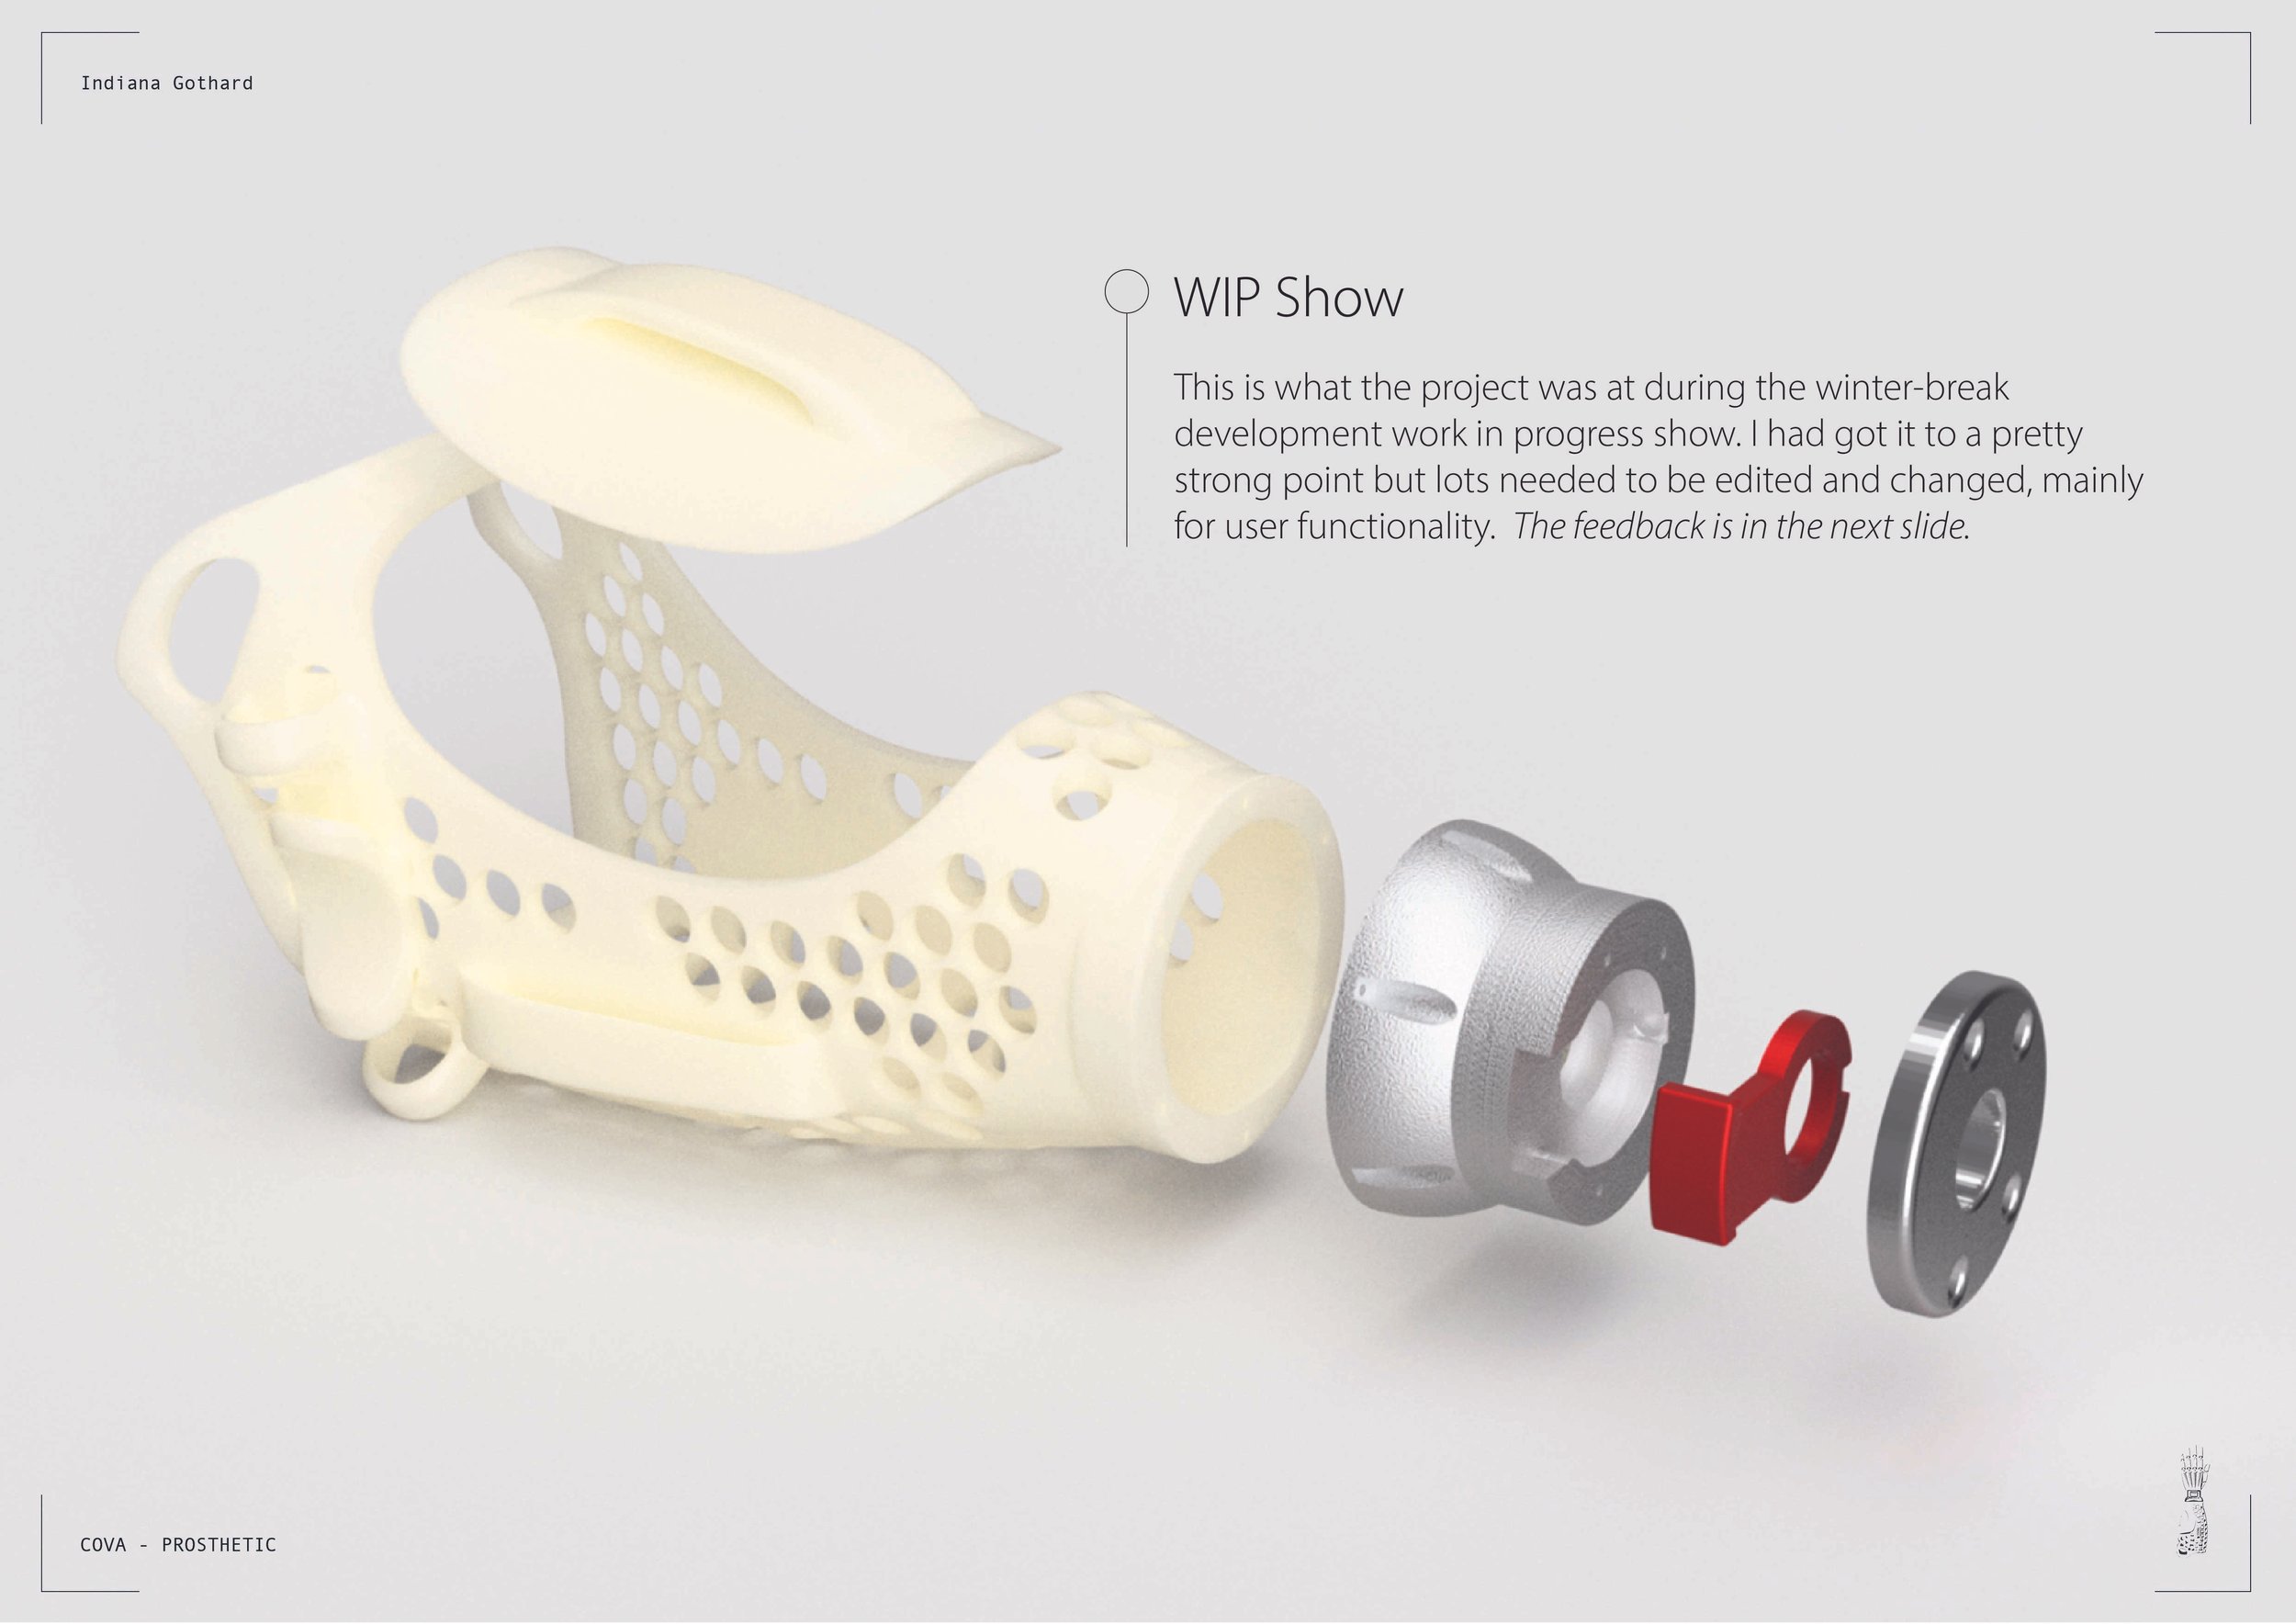
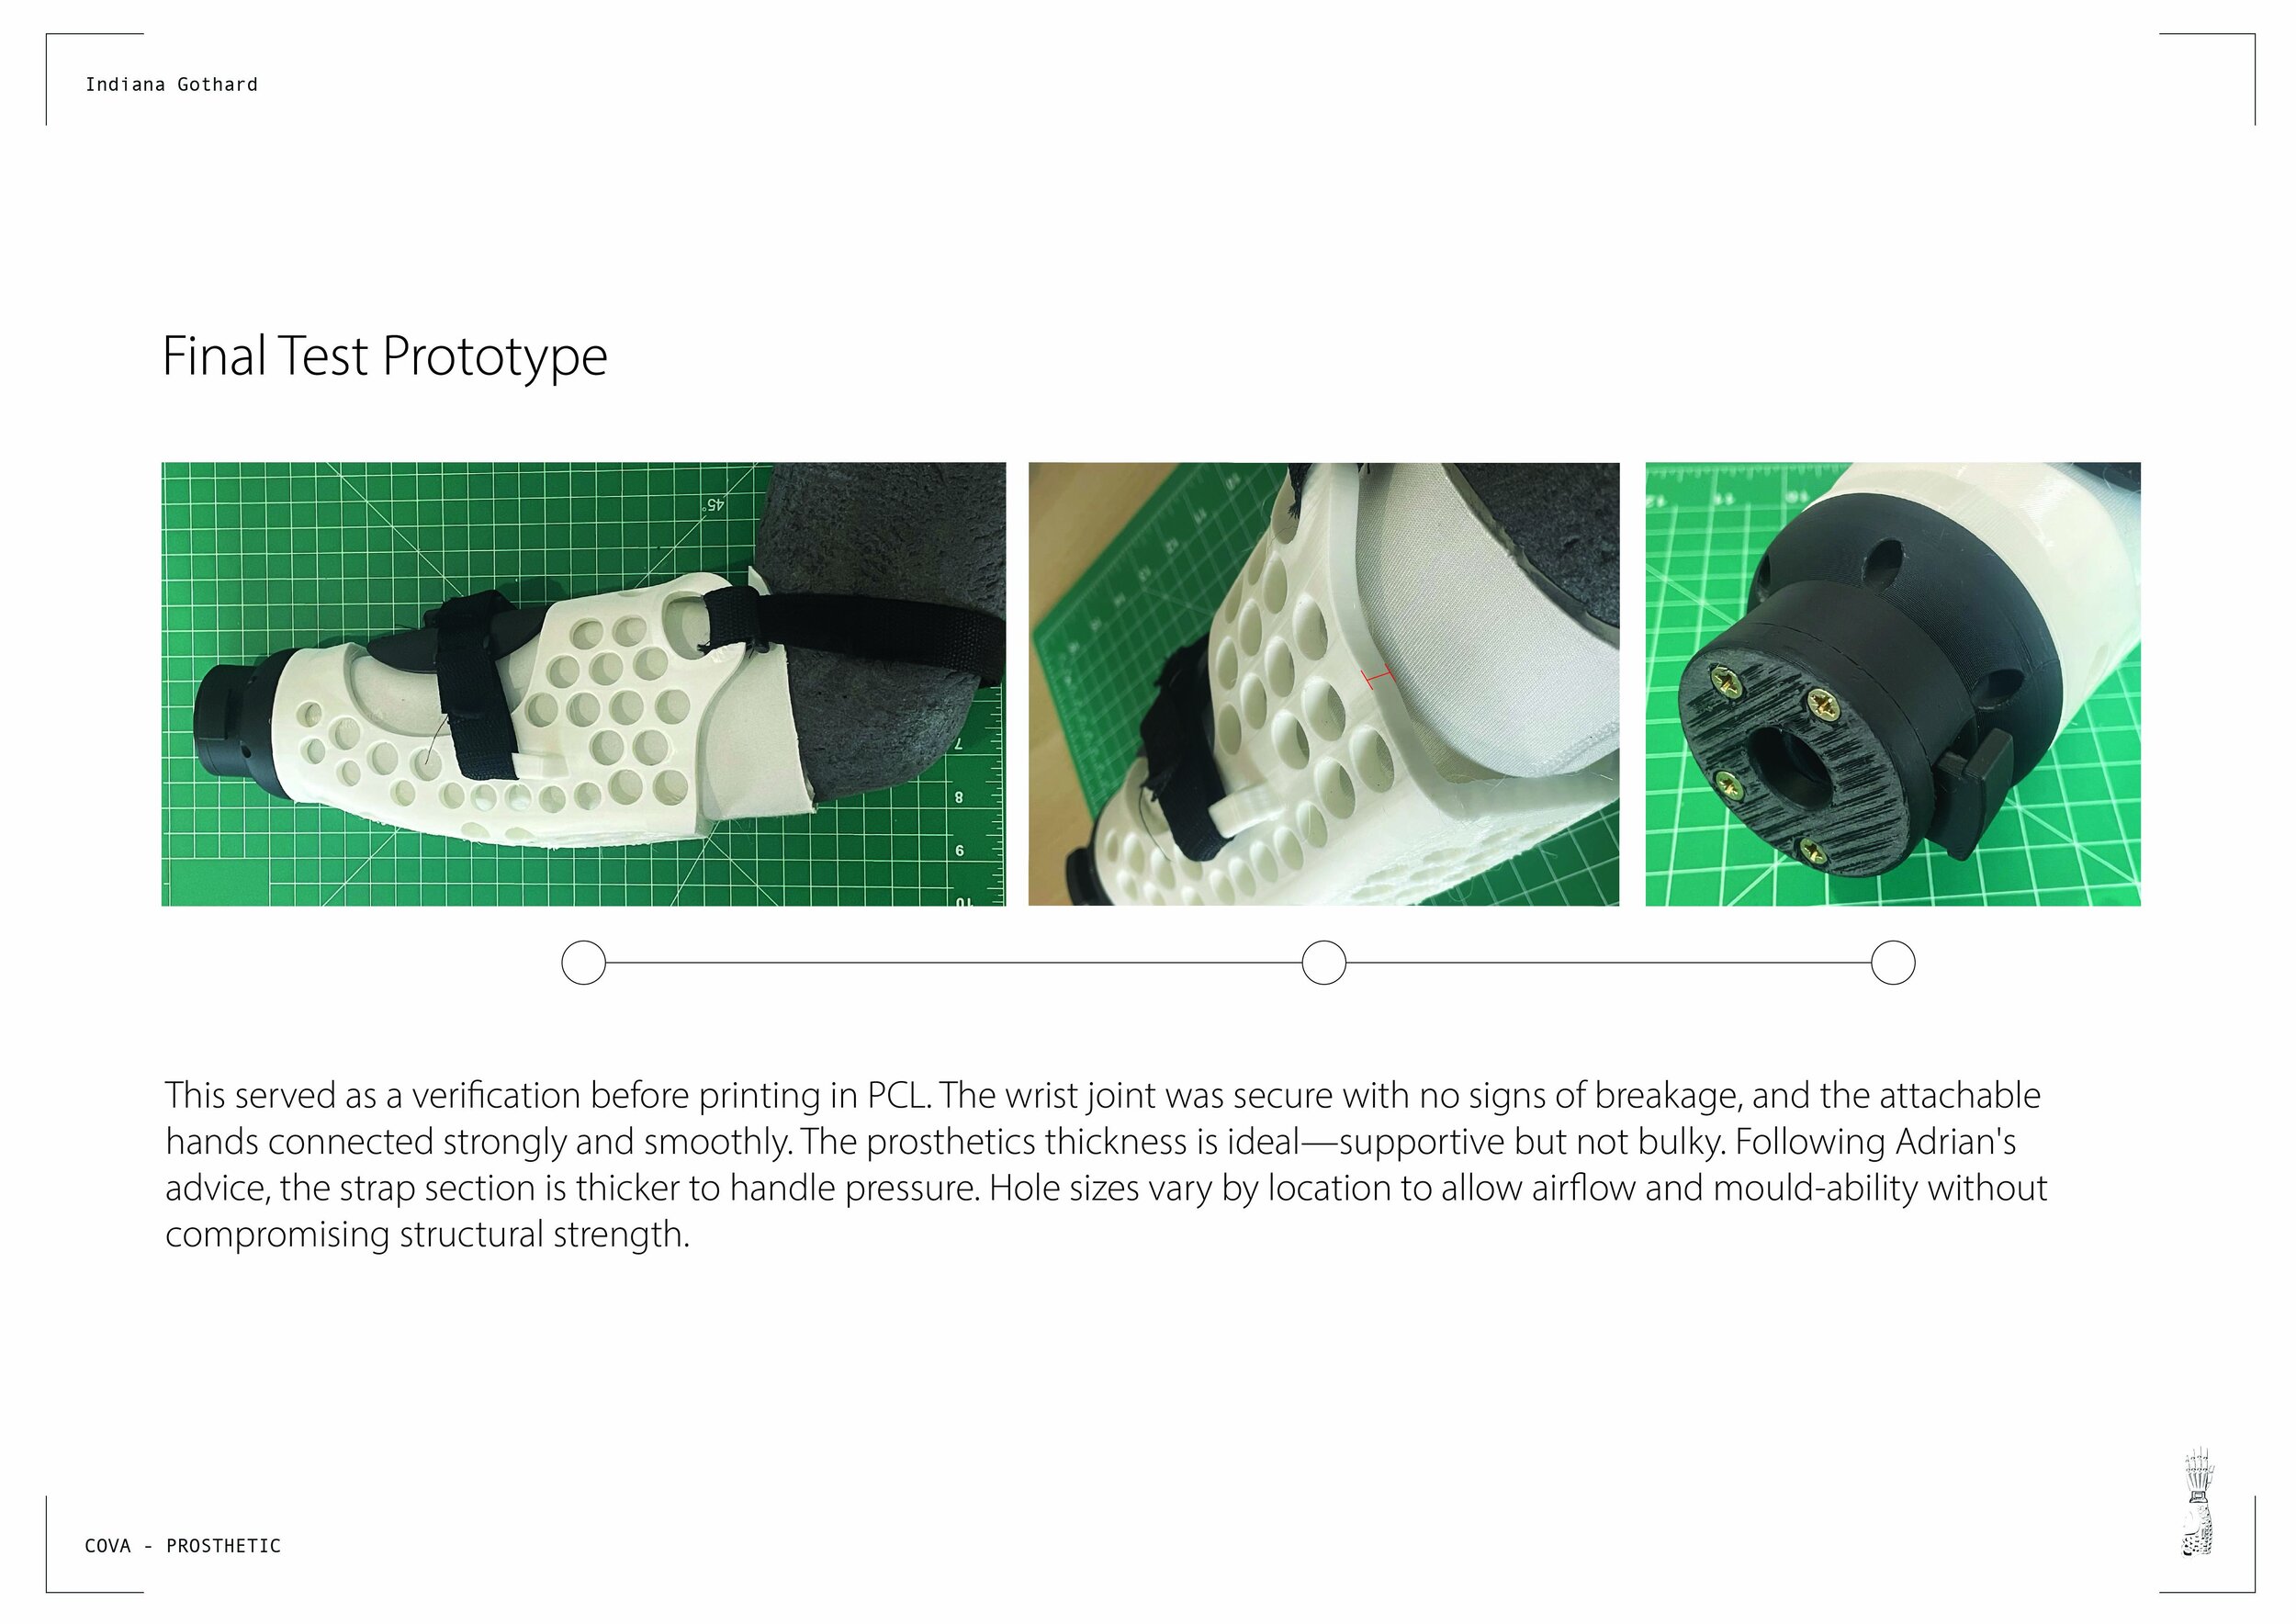
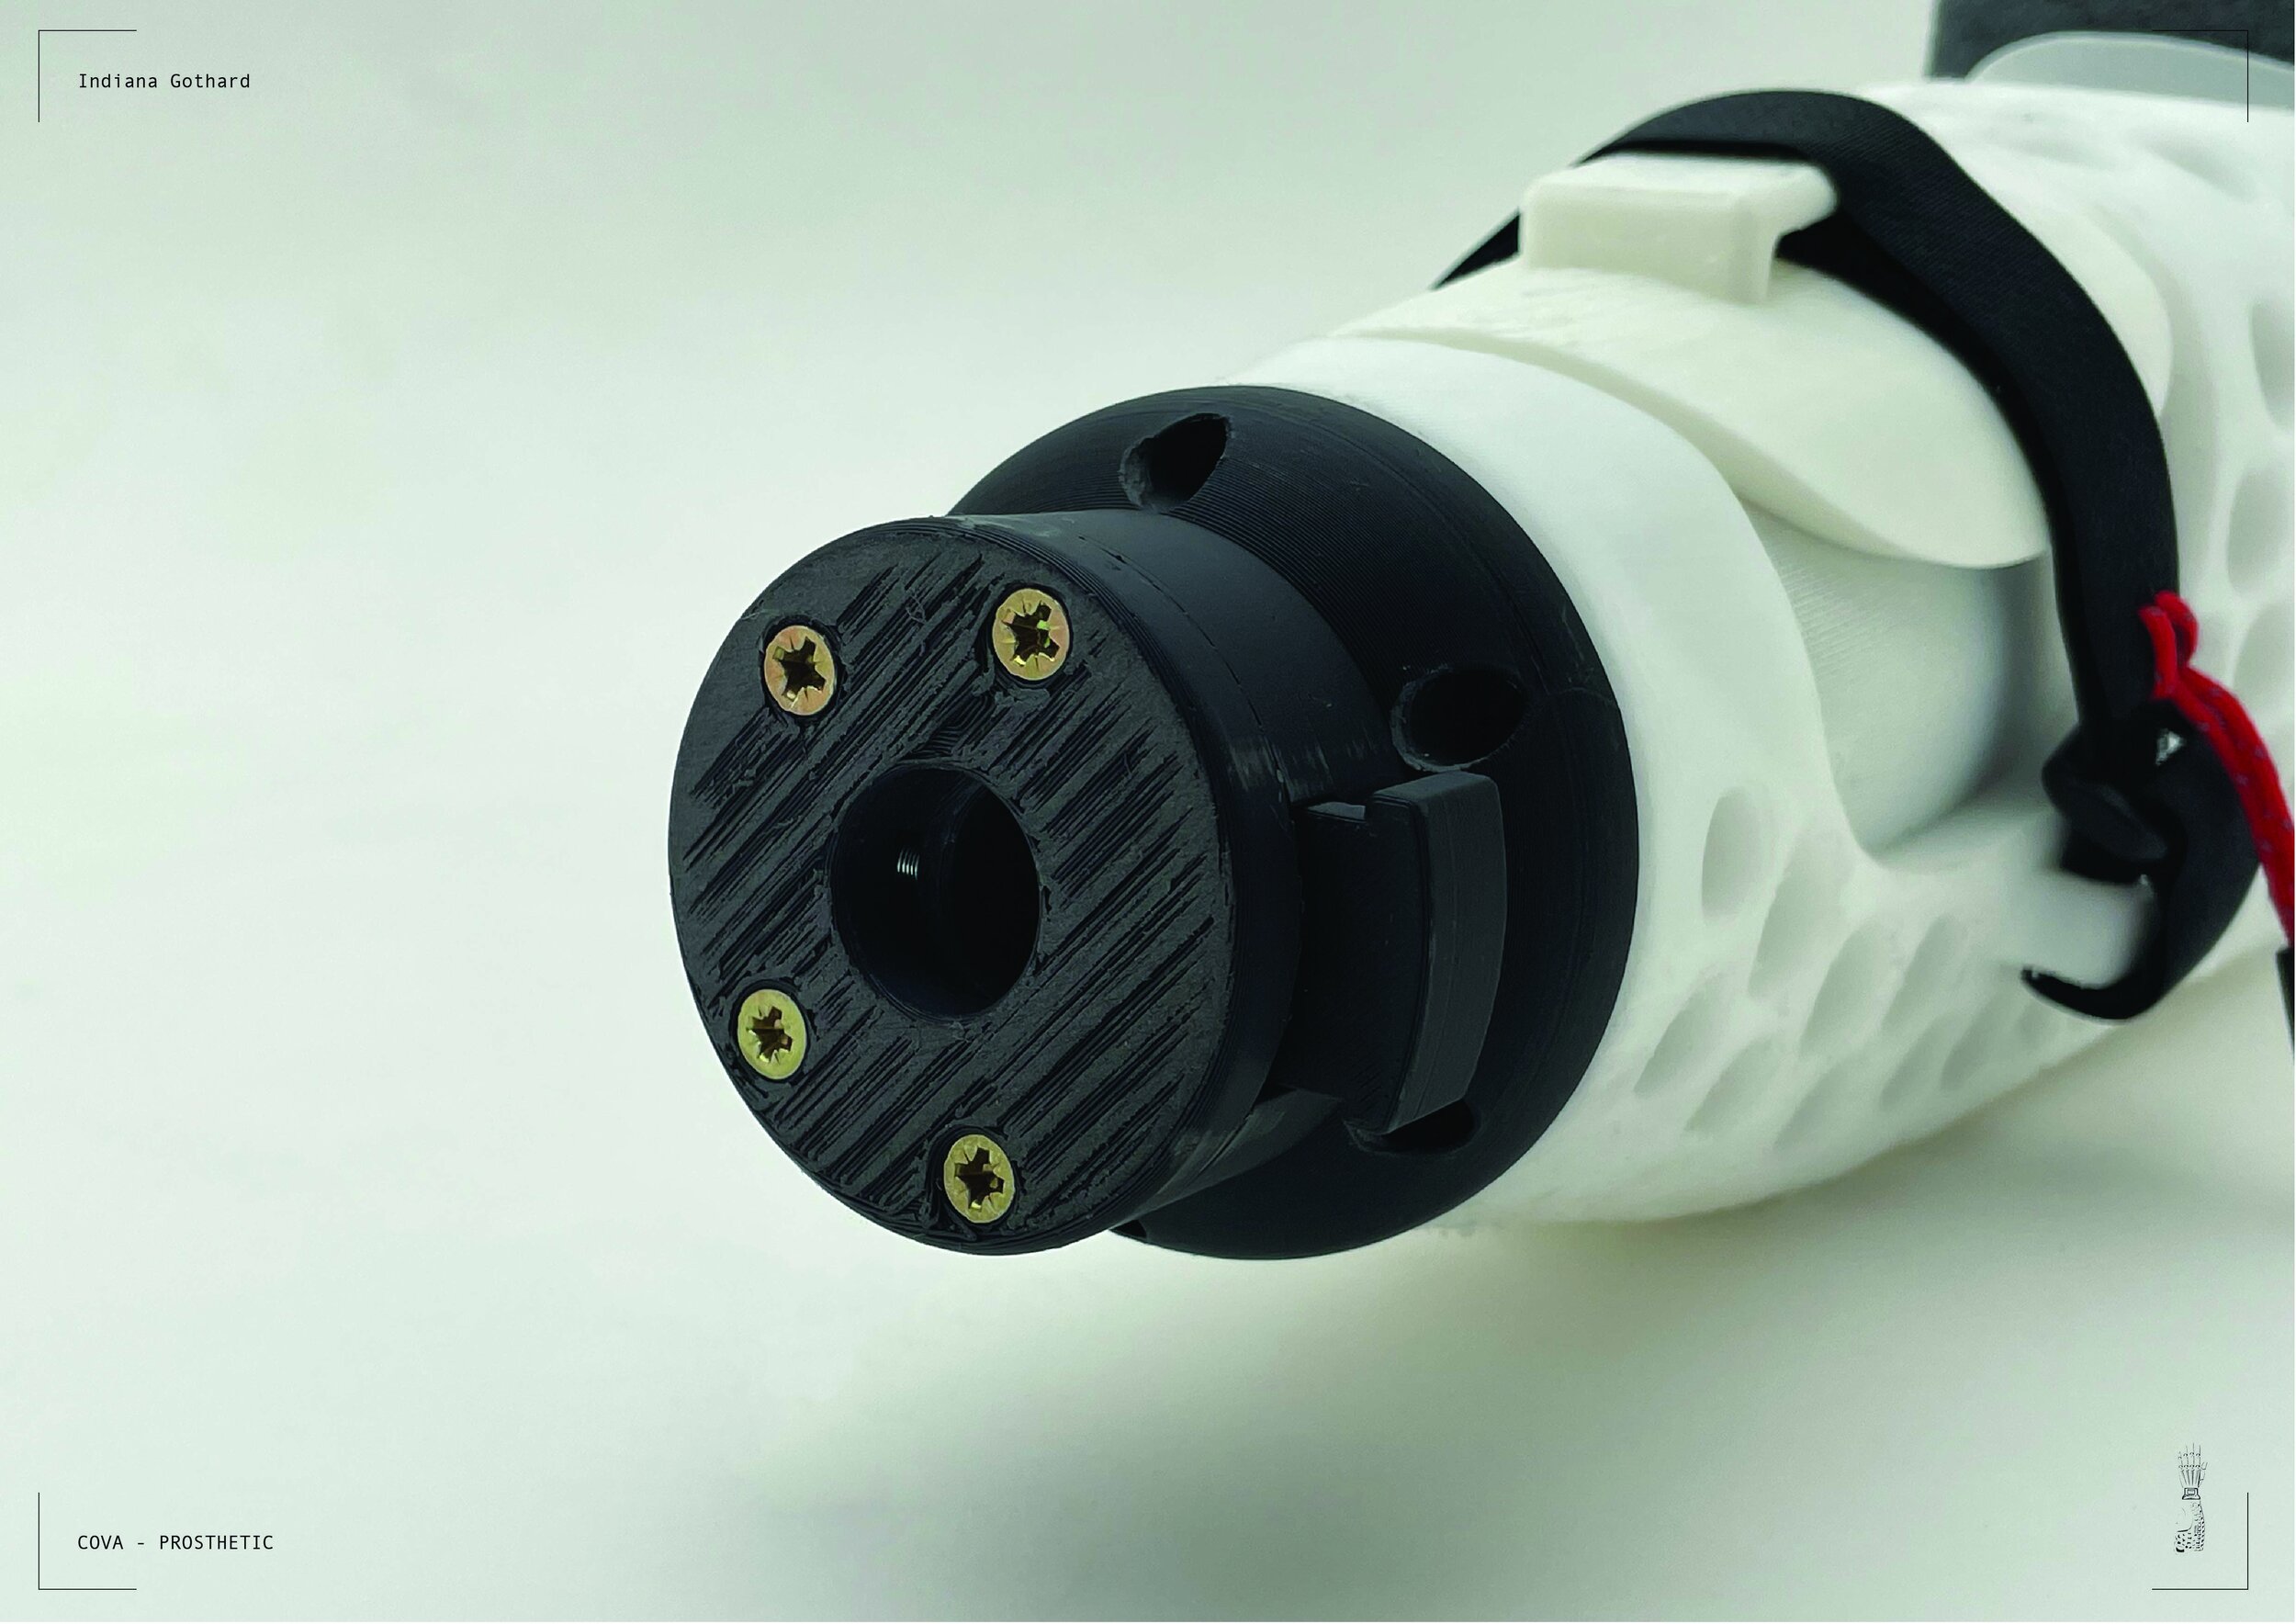
This final prototype before moving to PCL gave me a clear view of how the design functioned. I was pleased with its performance, including how it connected to the hinge and wrist joint, how the straps attached, and the overall aesthetic and feel.

08 OUTCOME
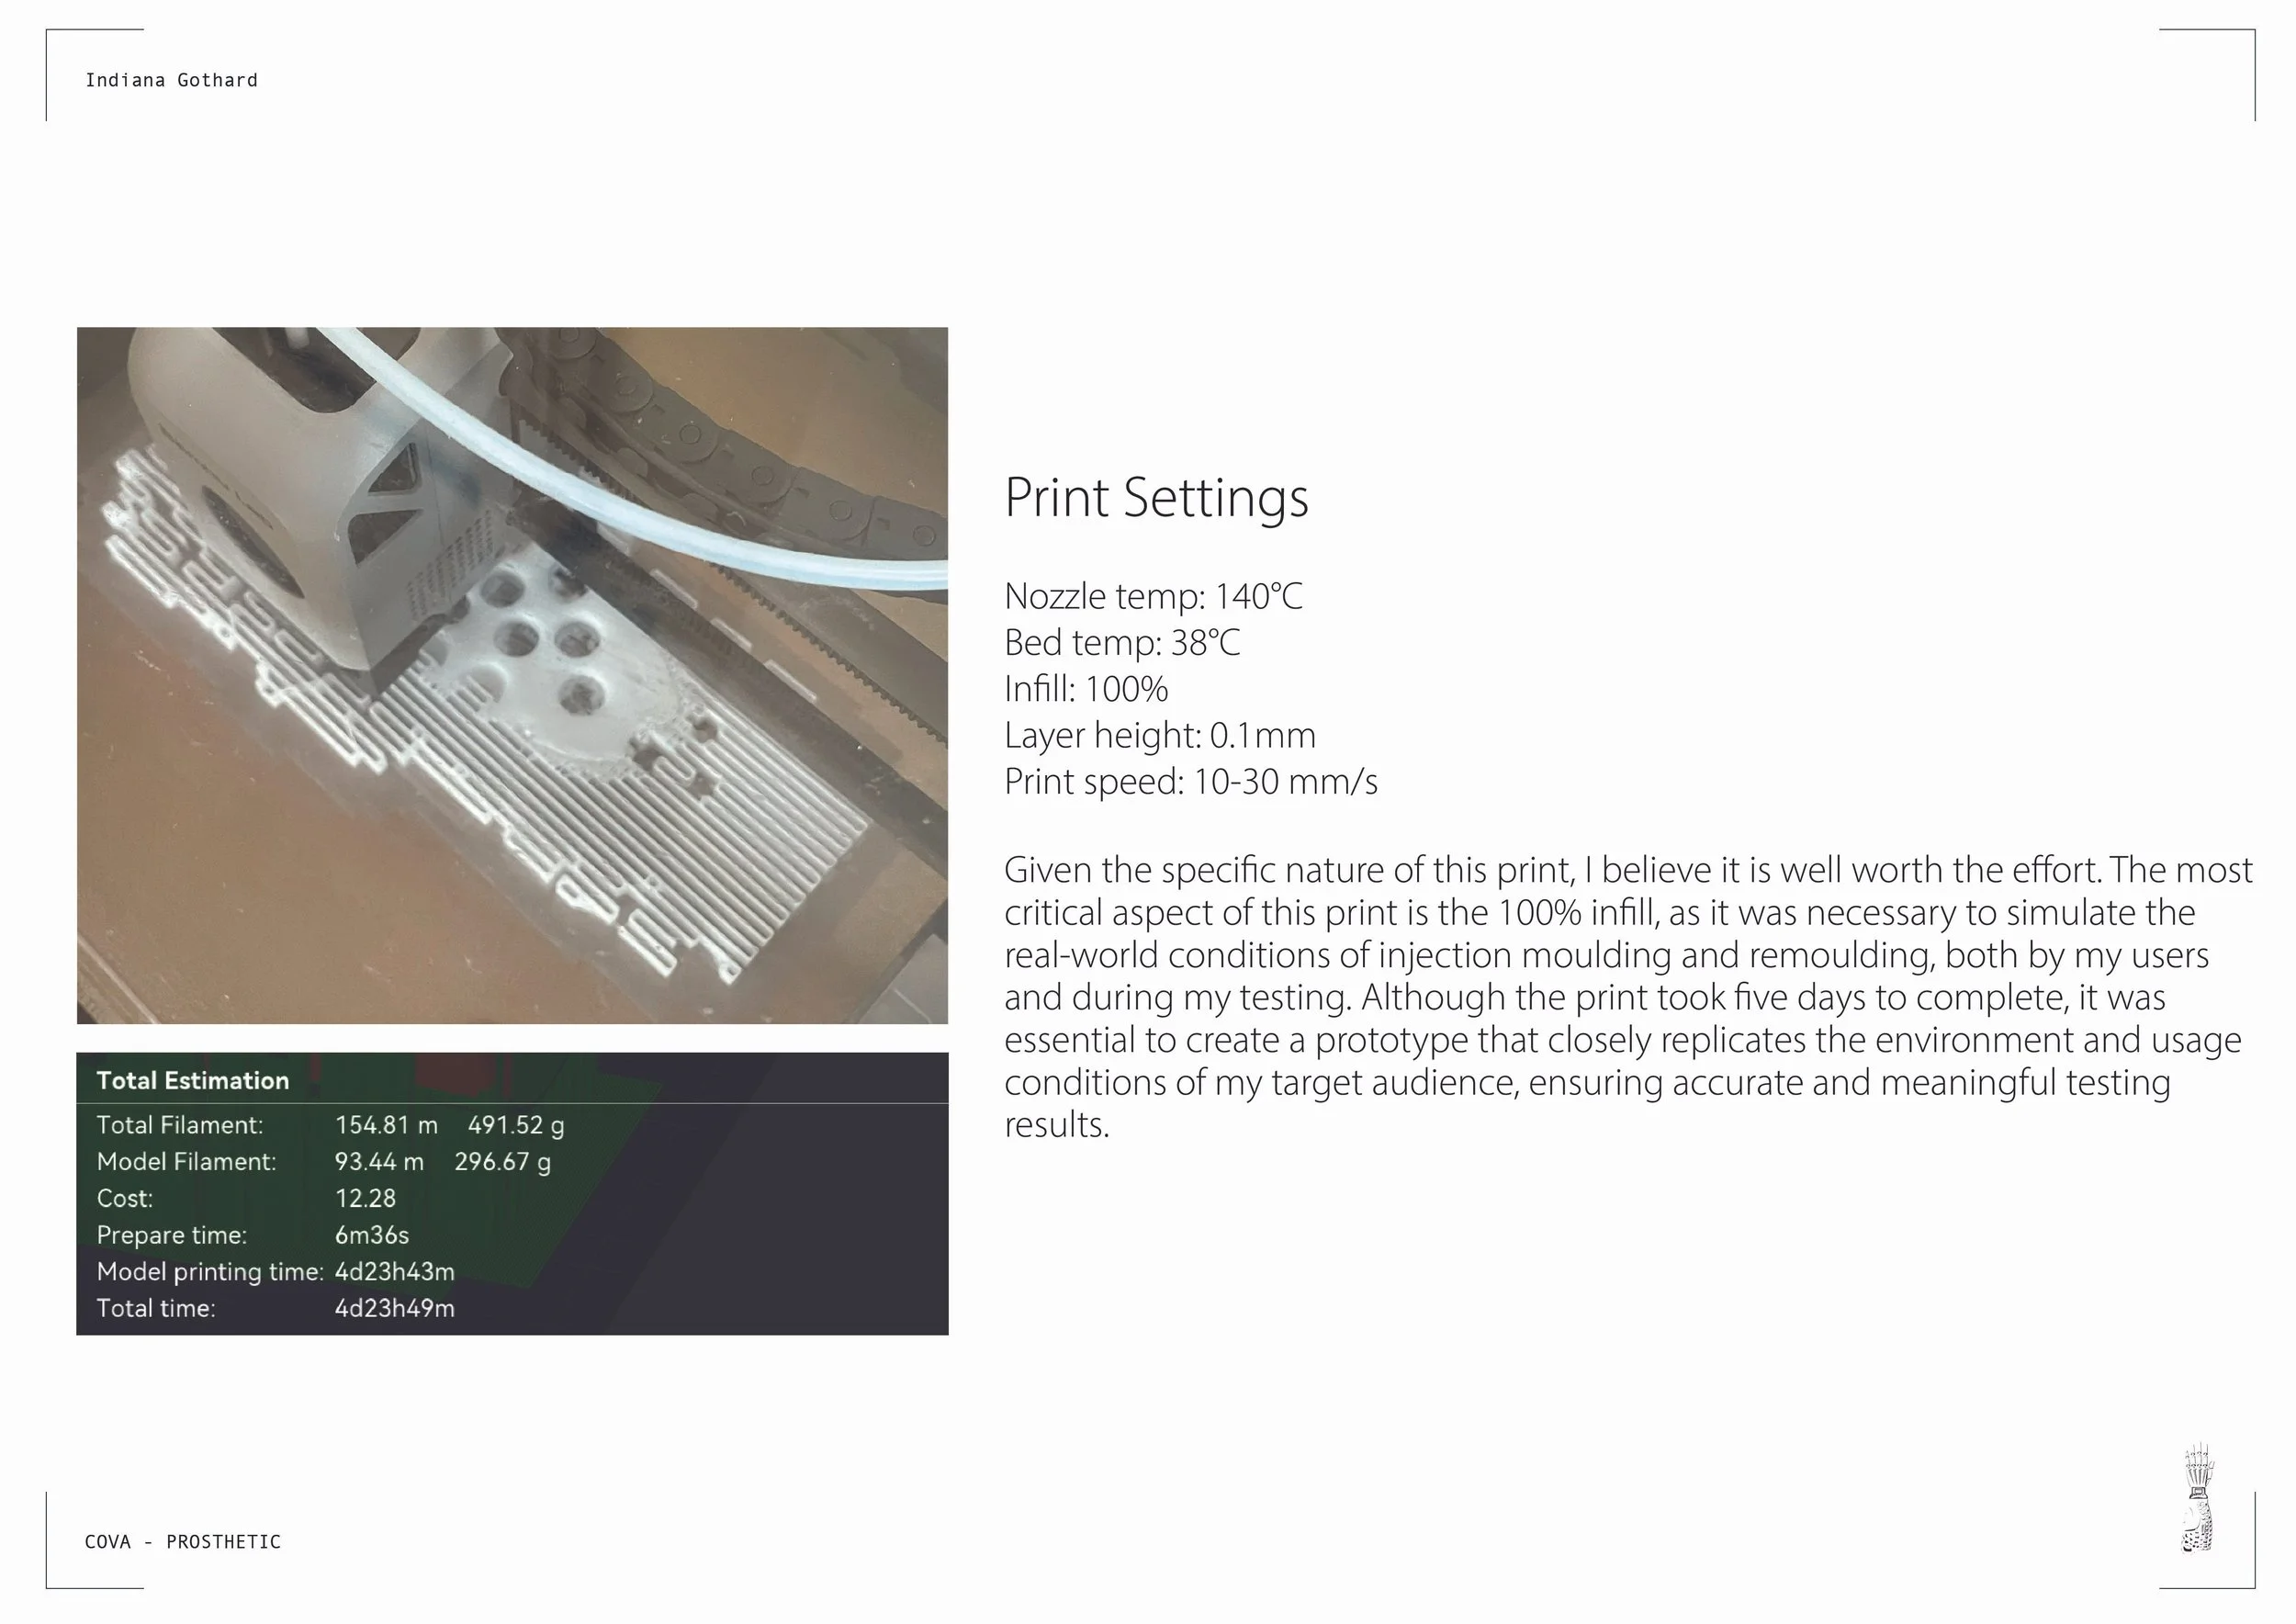
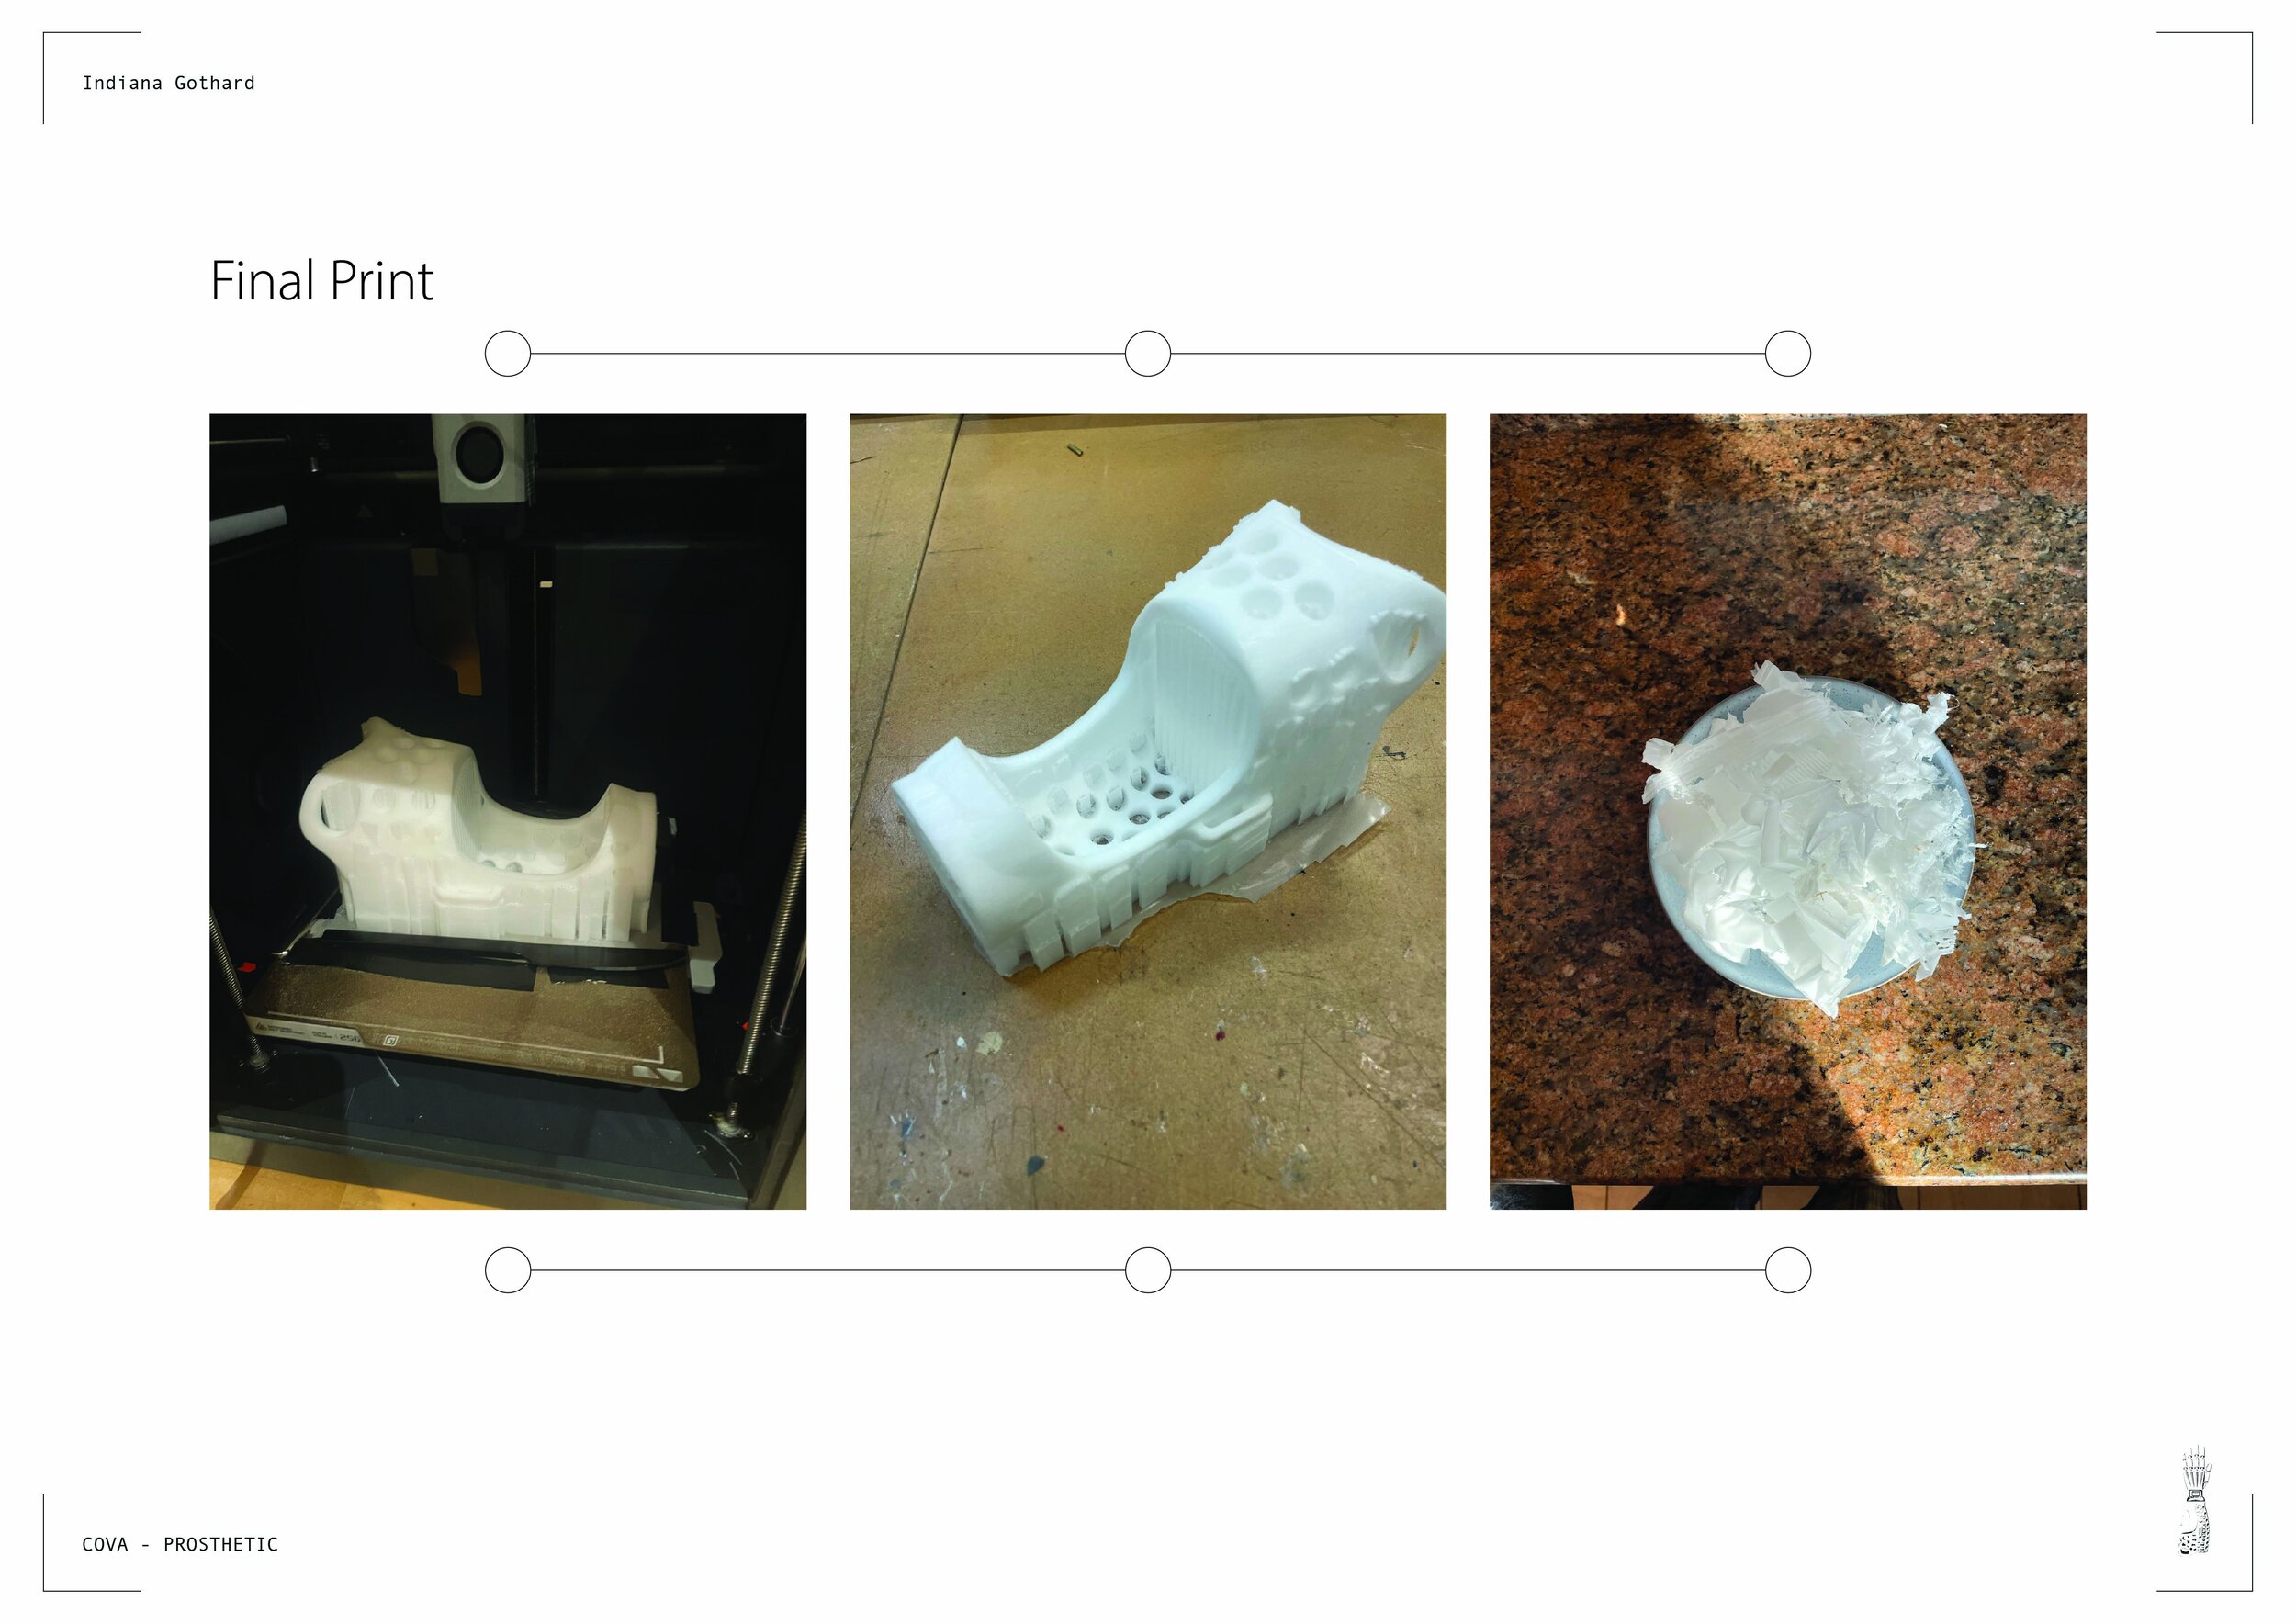
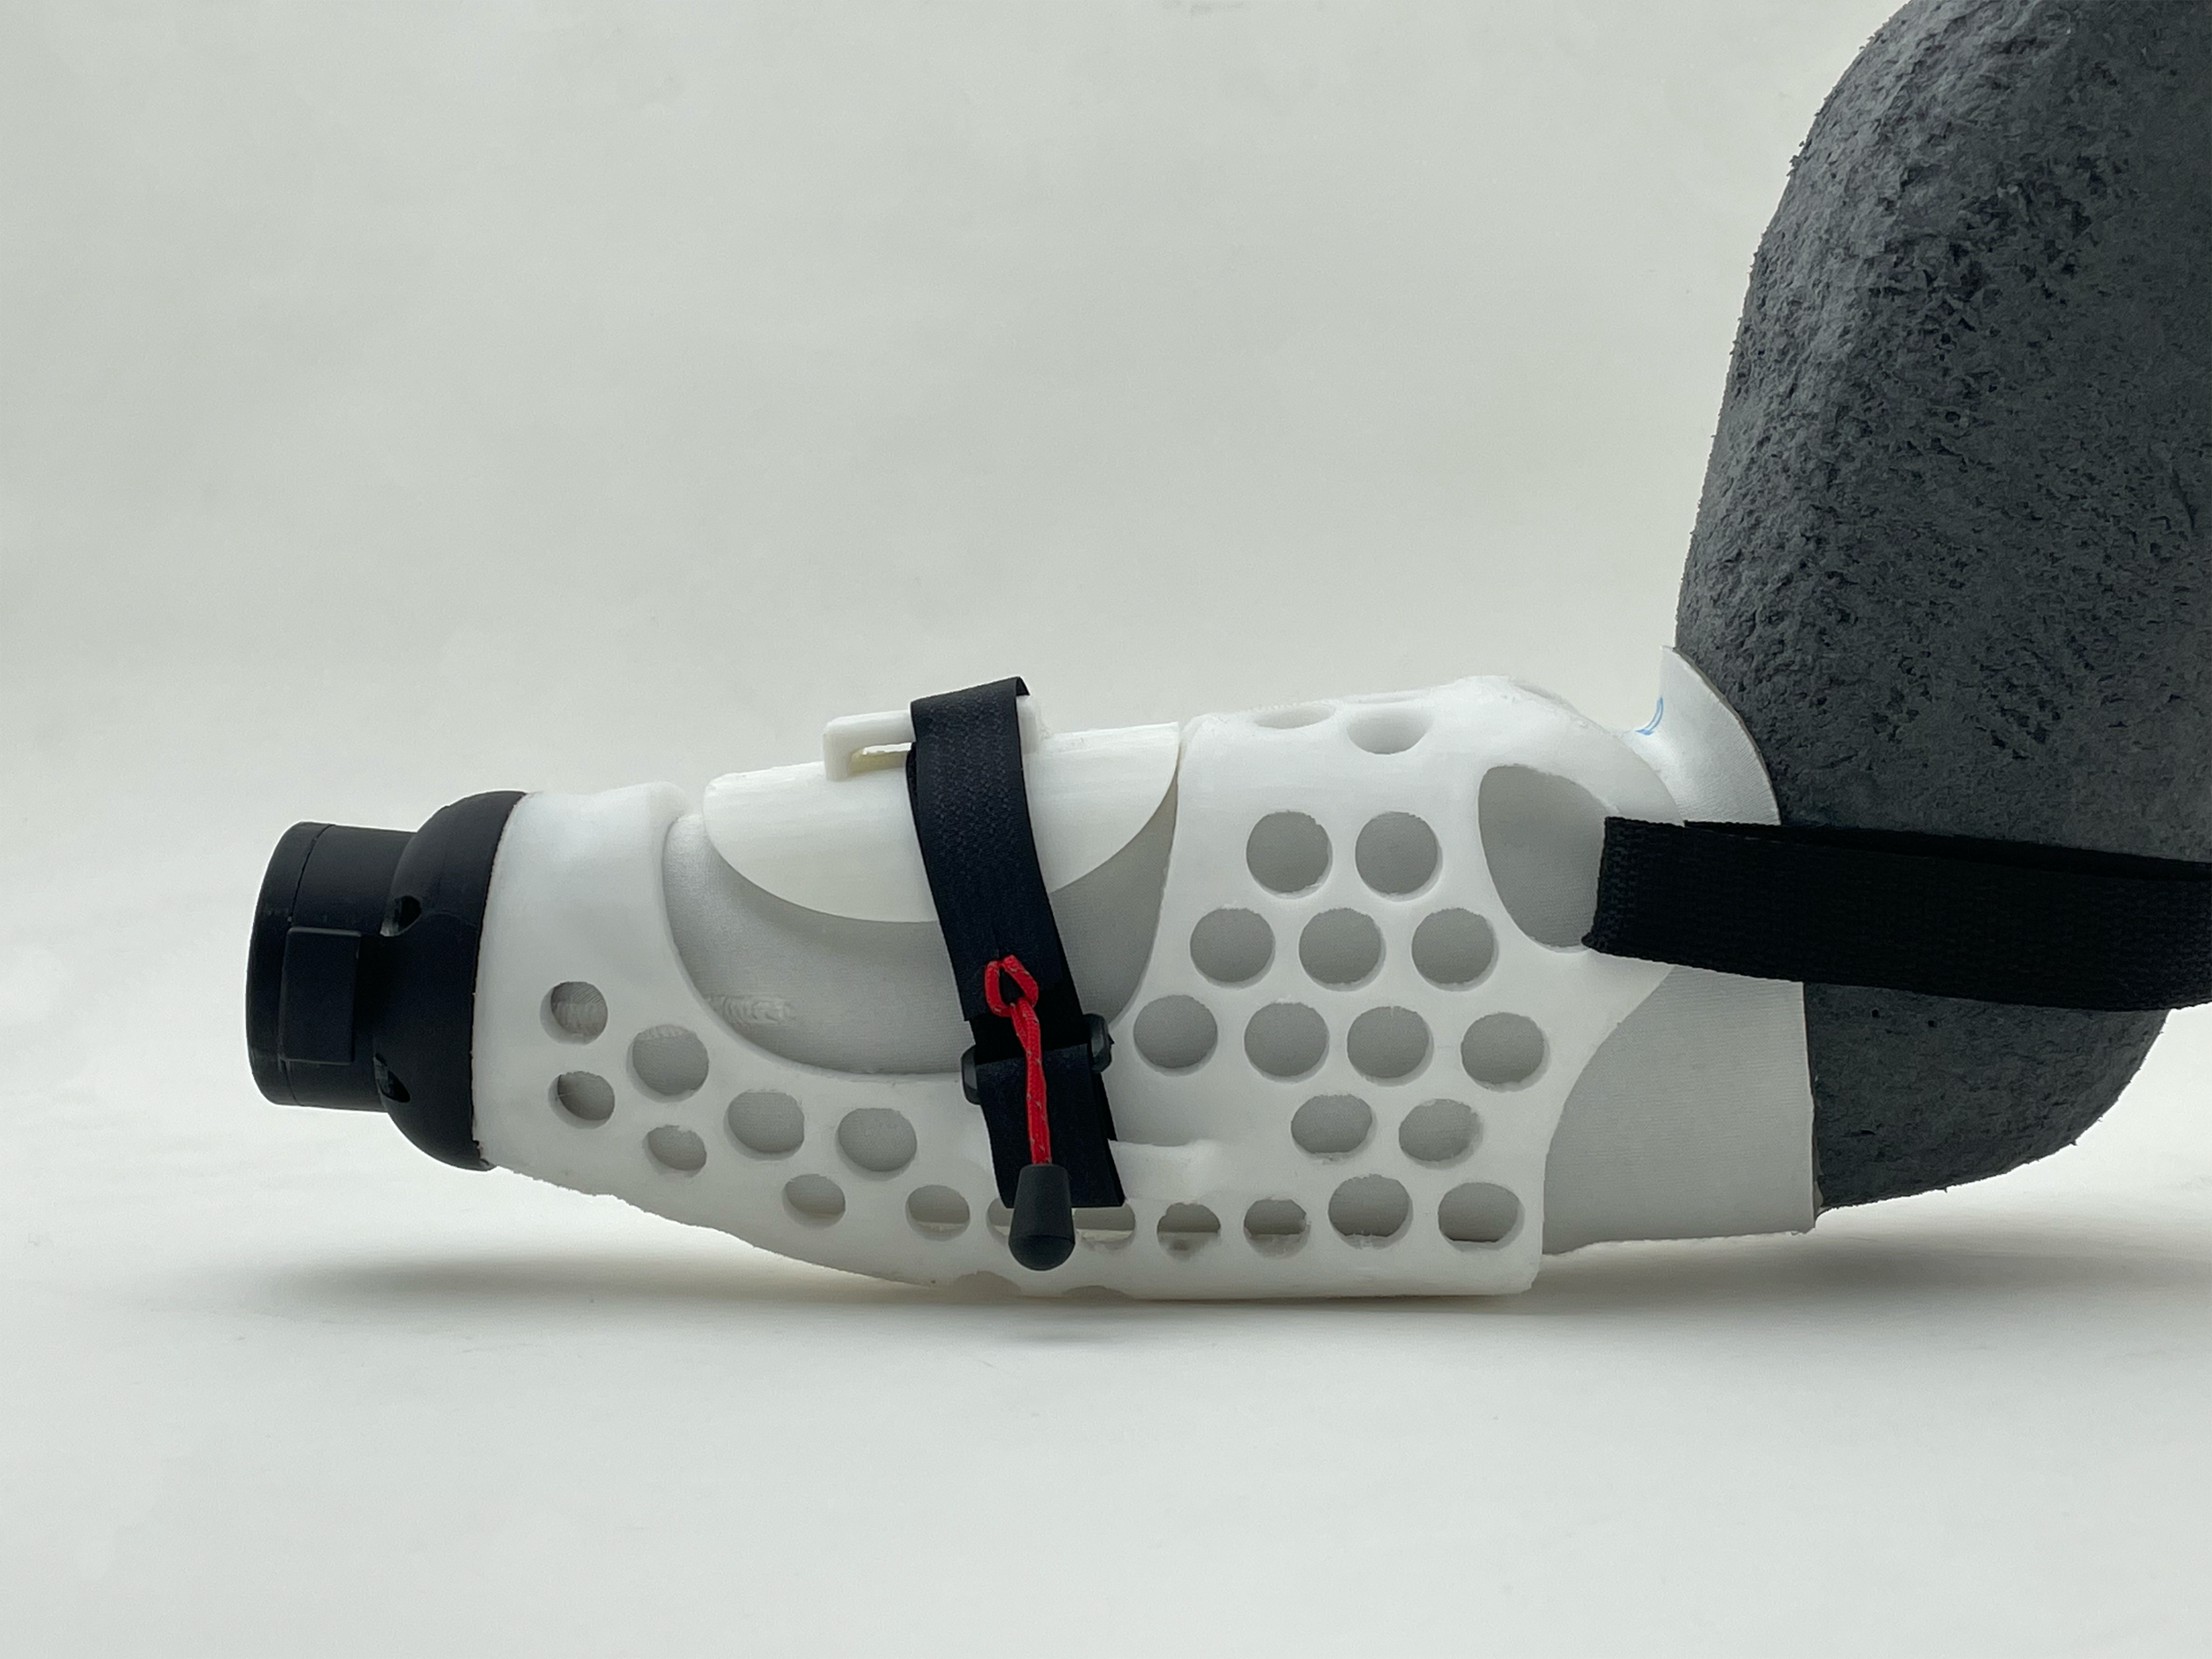
FINAL 3D PRINT PROTOTYPE
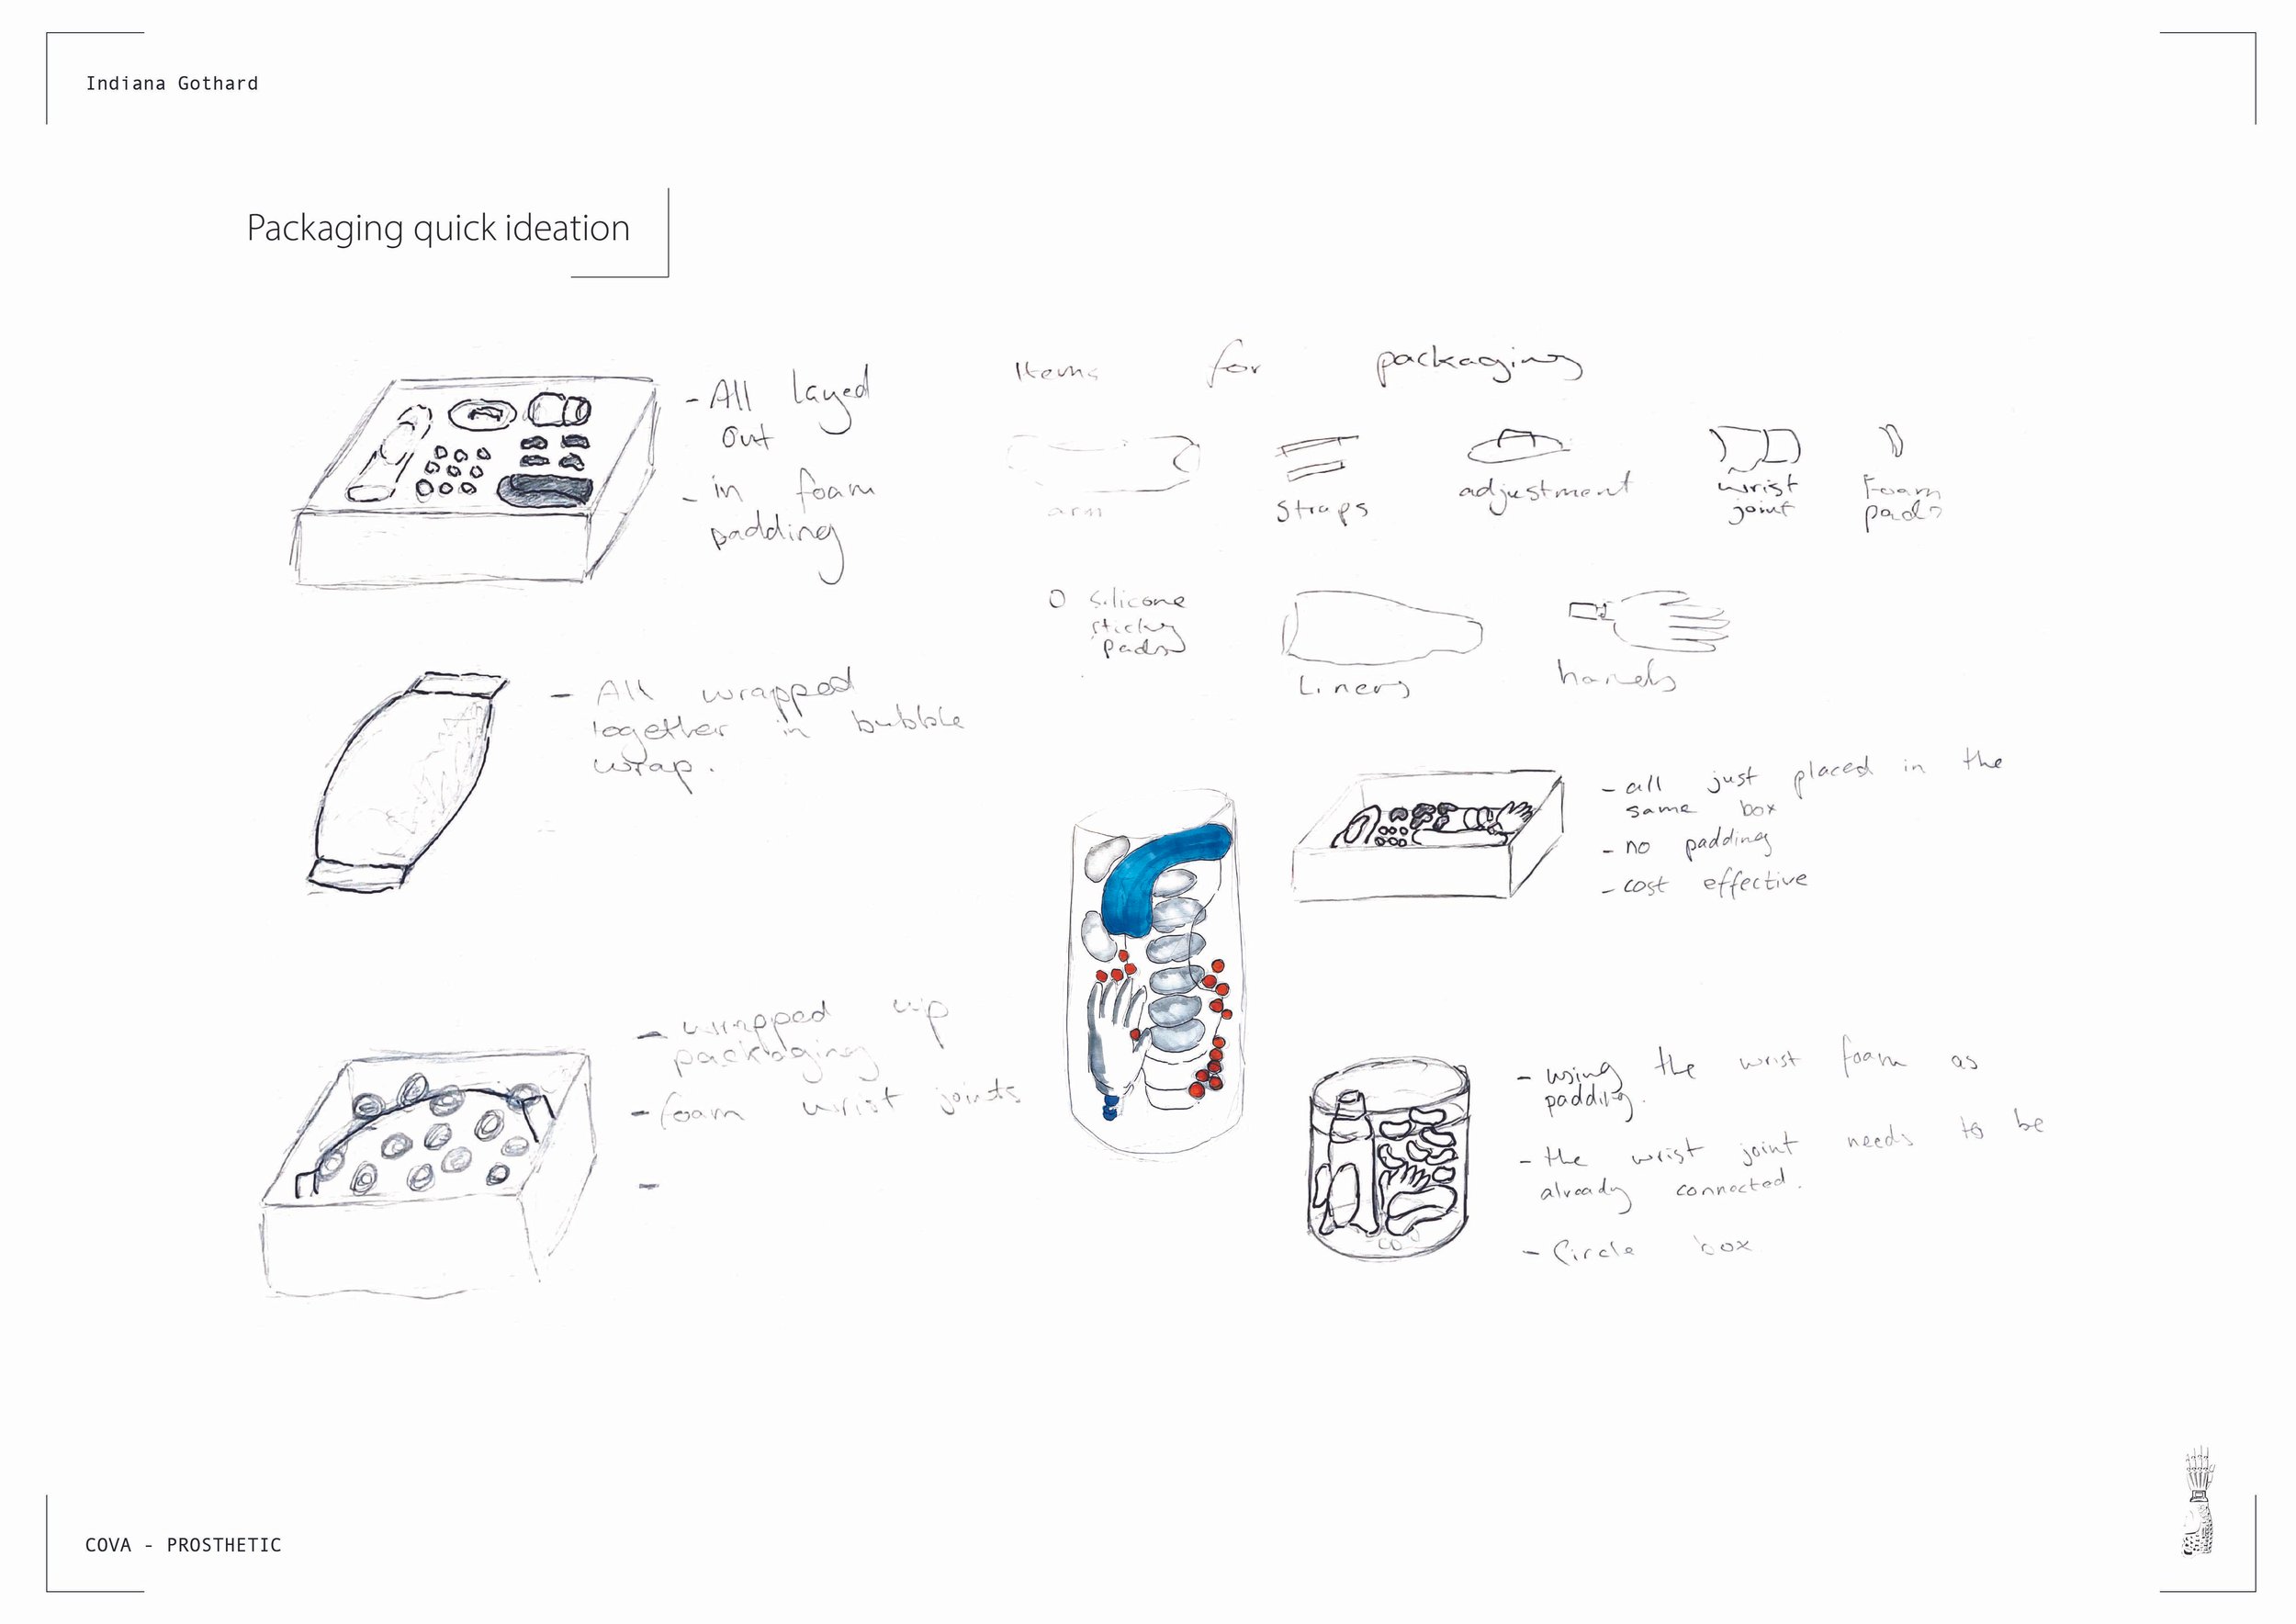
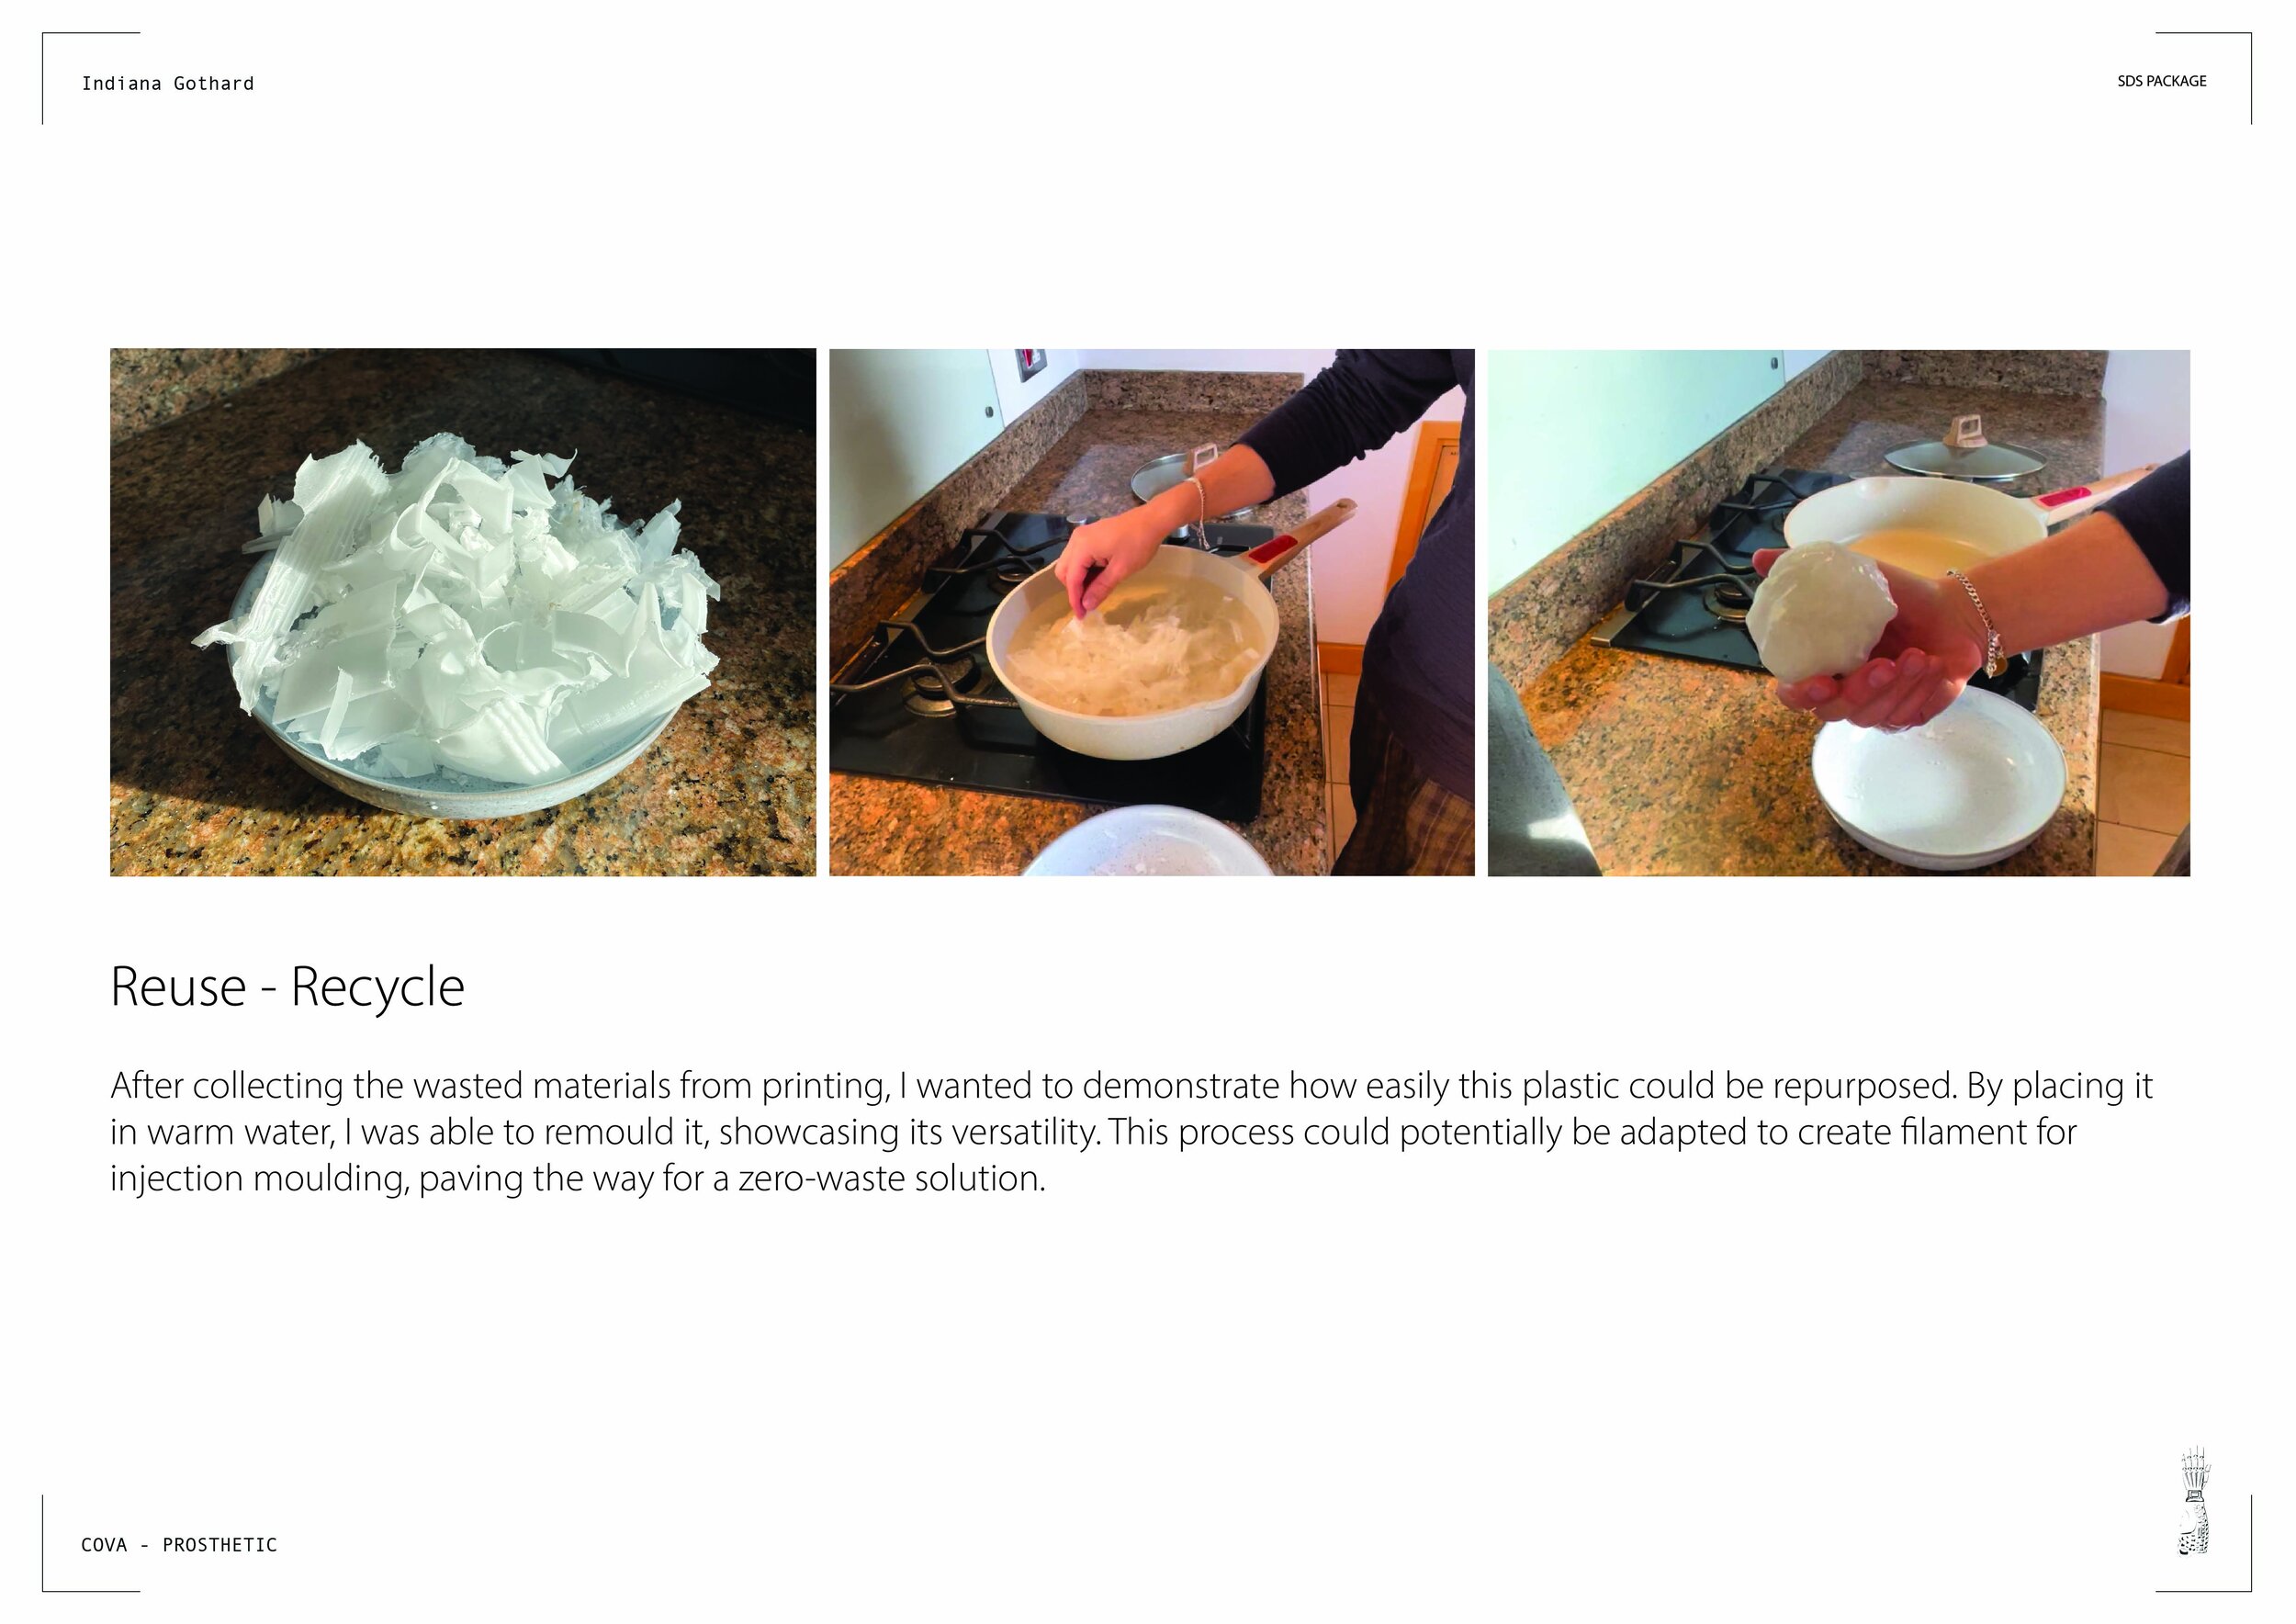
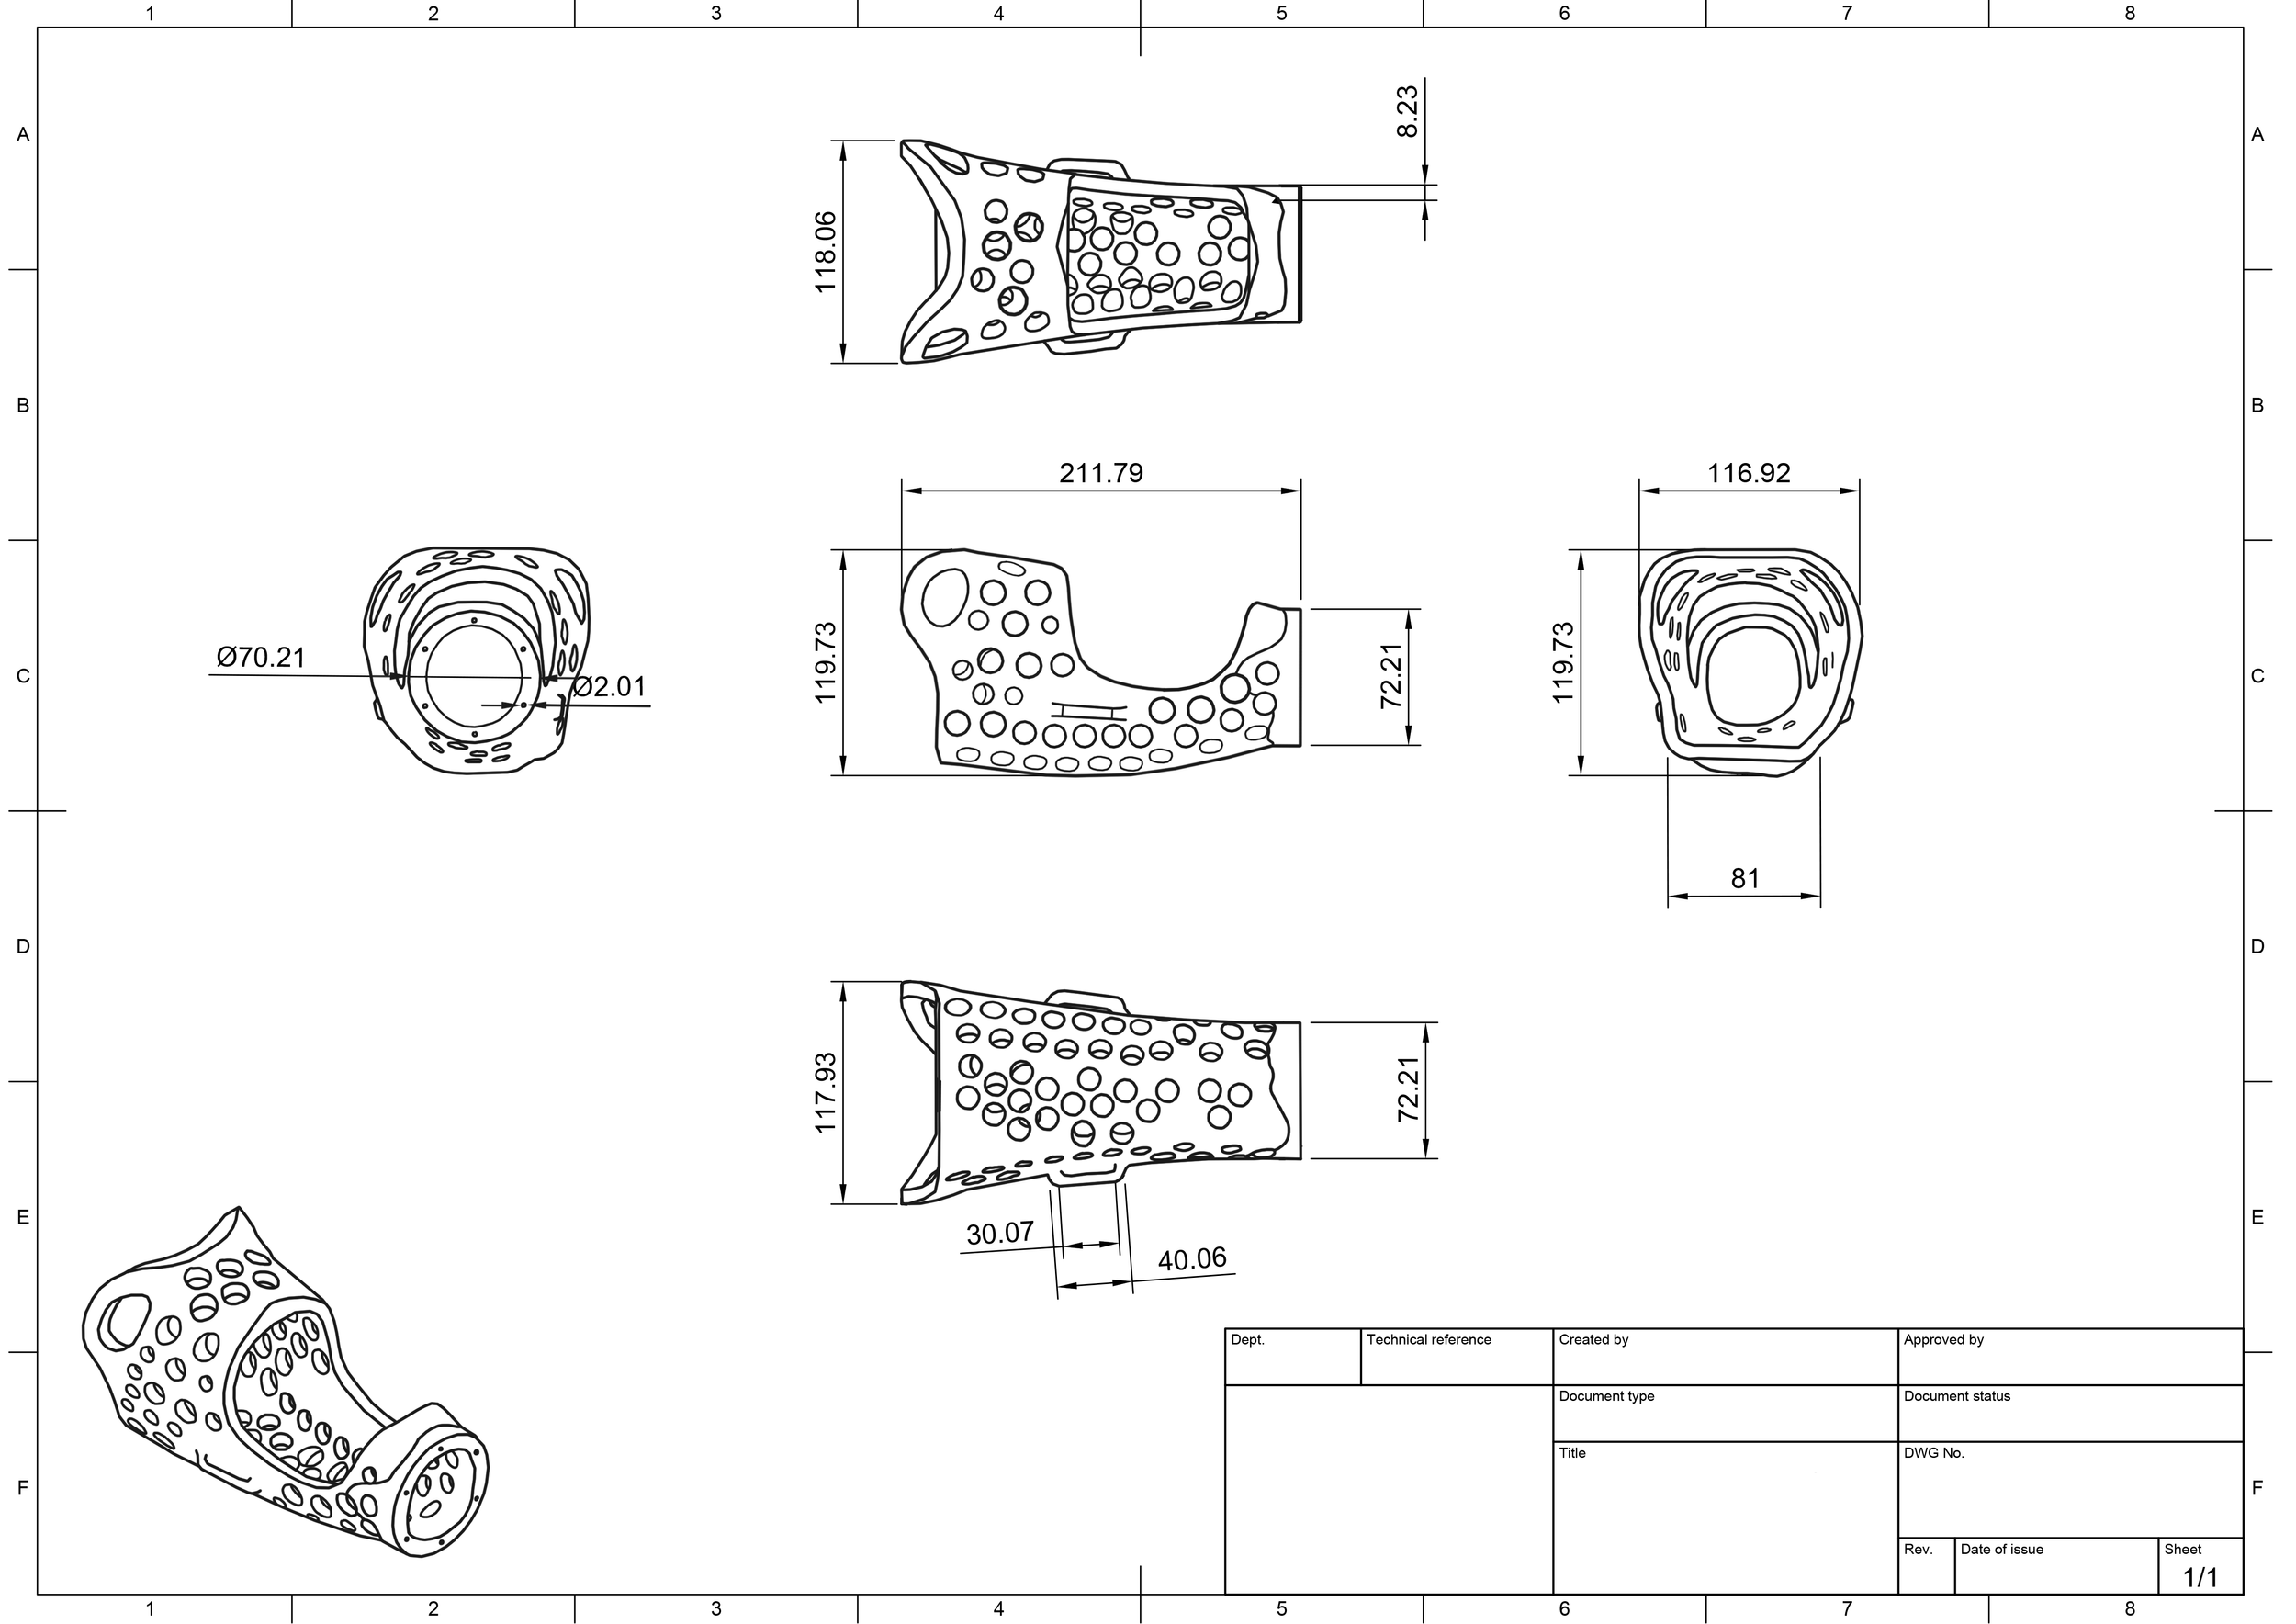
The final prototype was 3D printed at a very slow speed, under 10mm per second, which meant the process took around six to seven days. I chose a full 100% infill to replicate the density of an injection mould for realistic testing. Later, I remoulded the prosthetic onto the foam arm to refine fit. All excess plastic was collected and repurposed, suggesting how waste material might be reused in future moulding methods.


OUTCOME
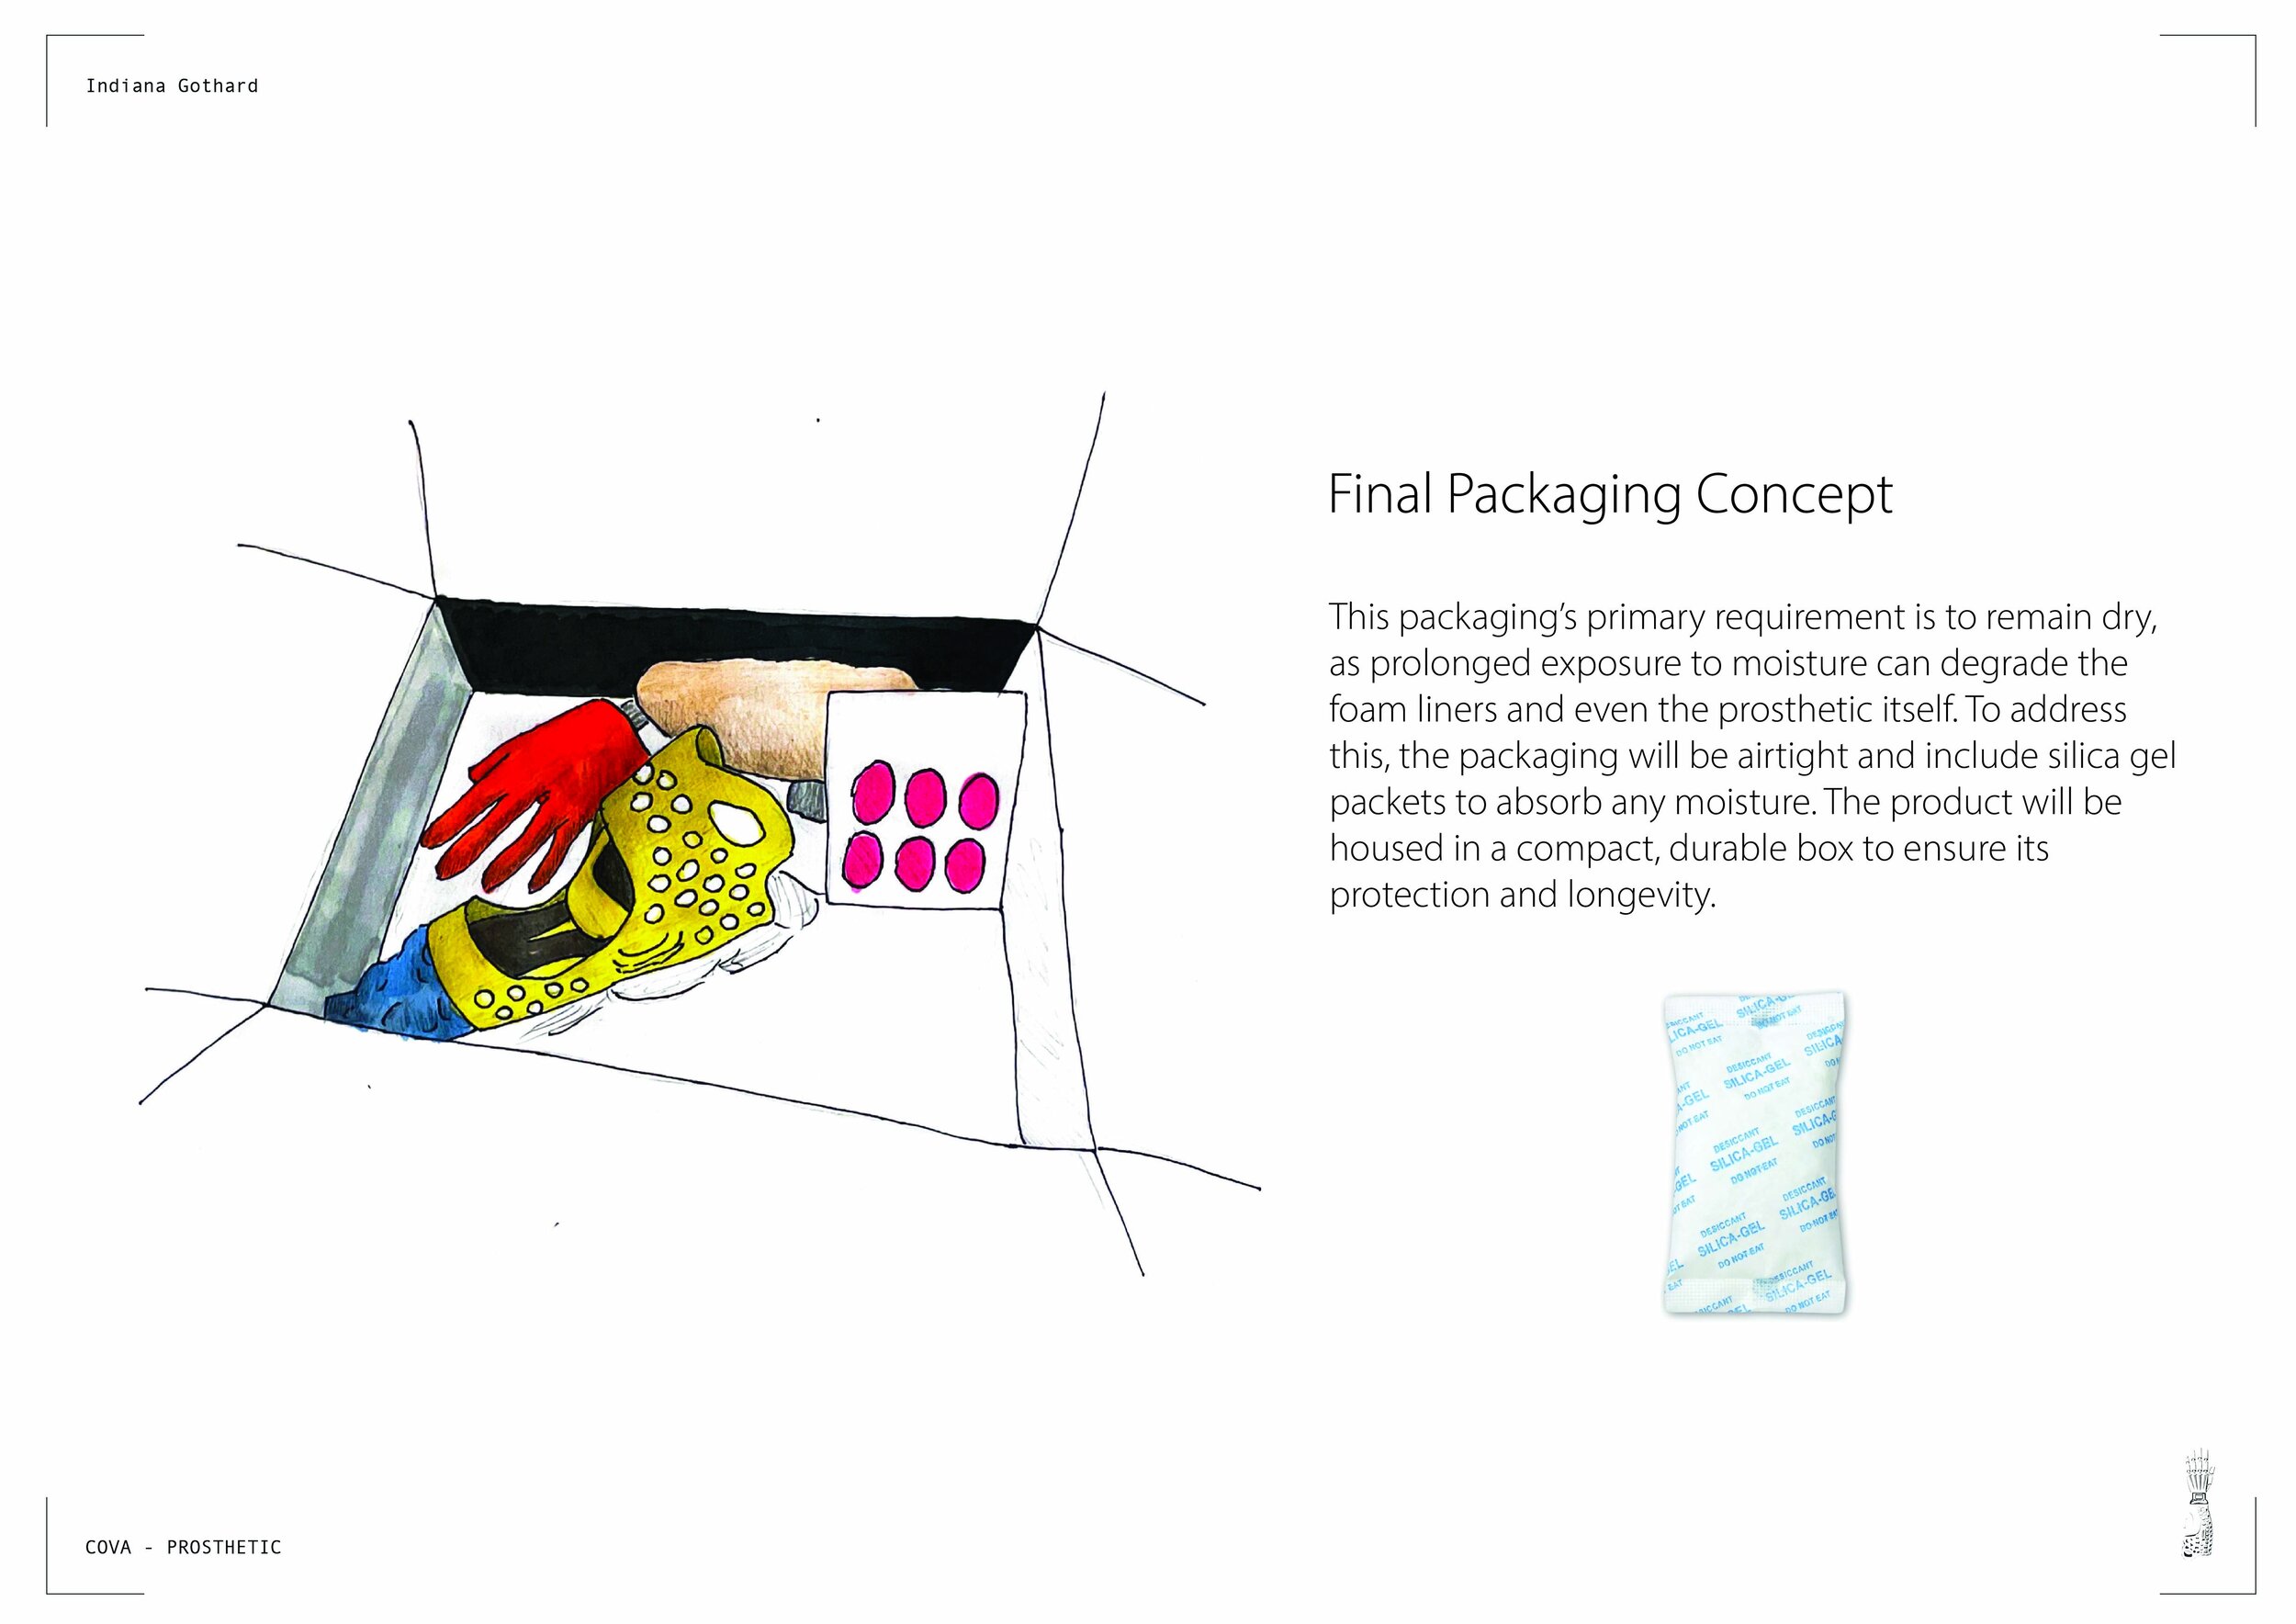
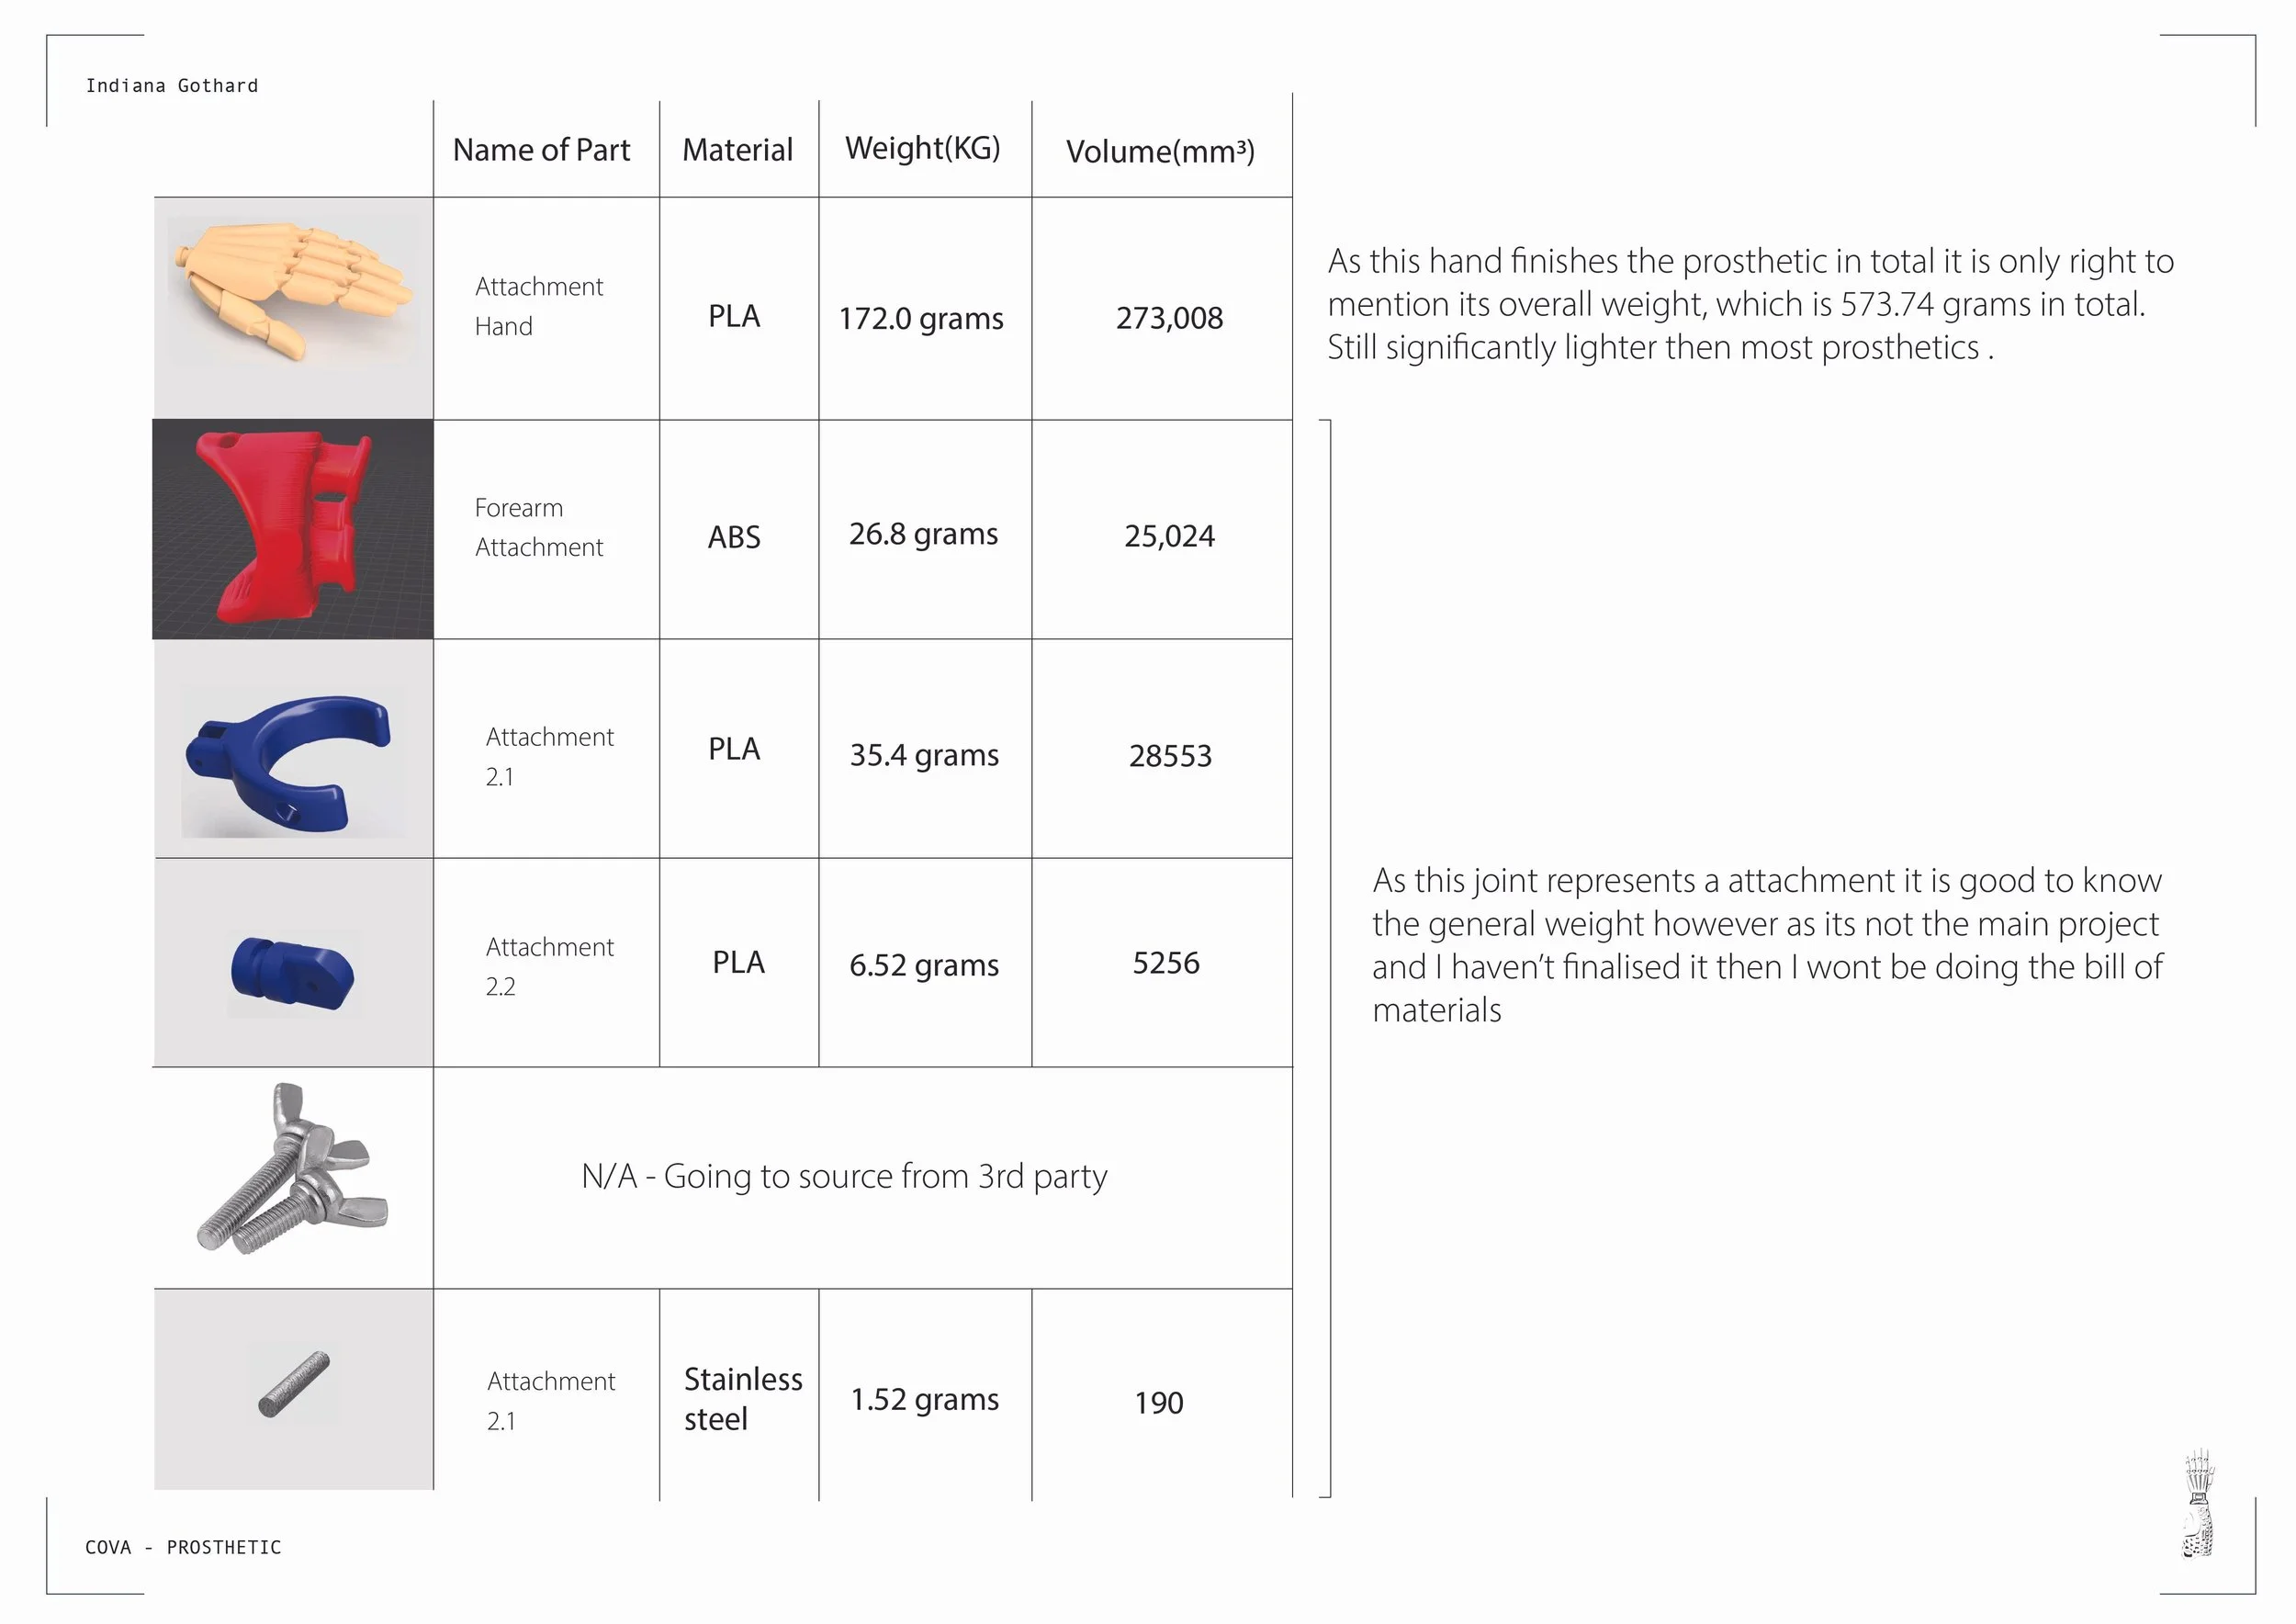
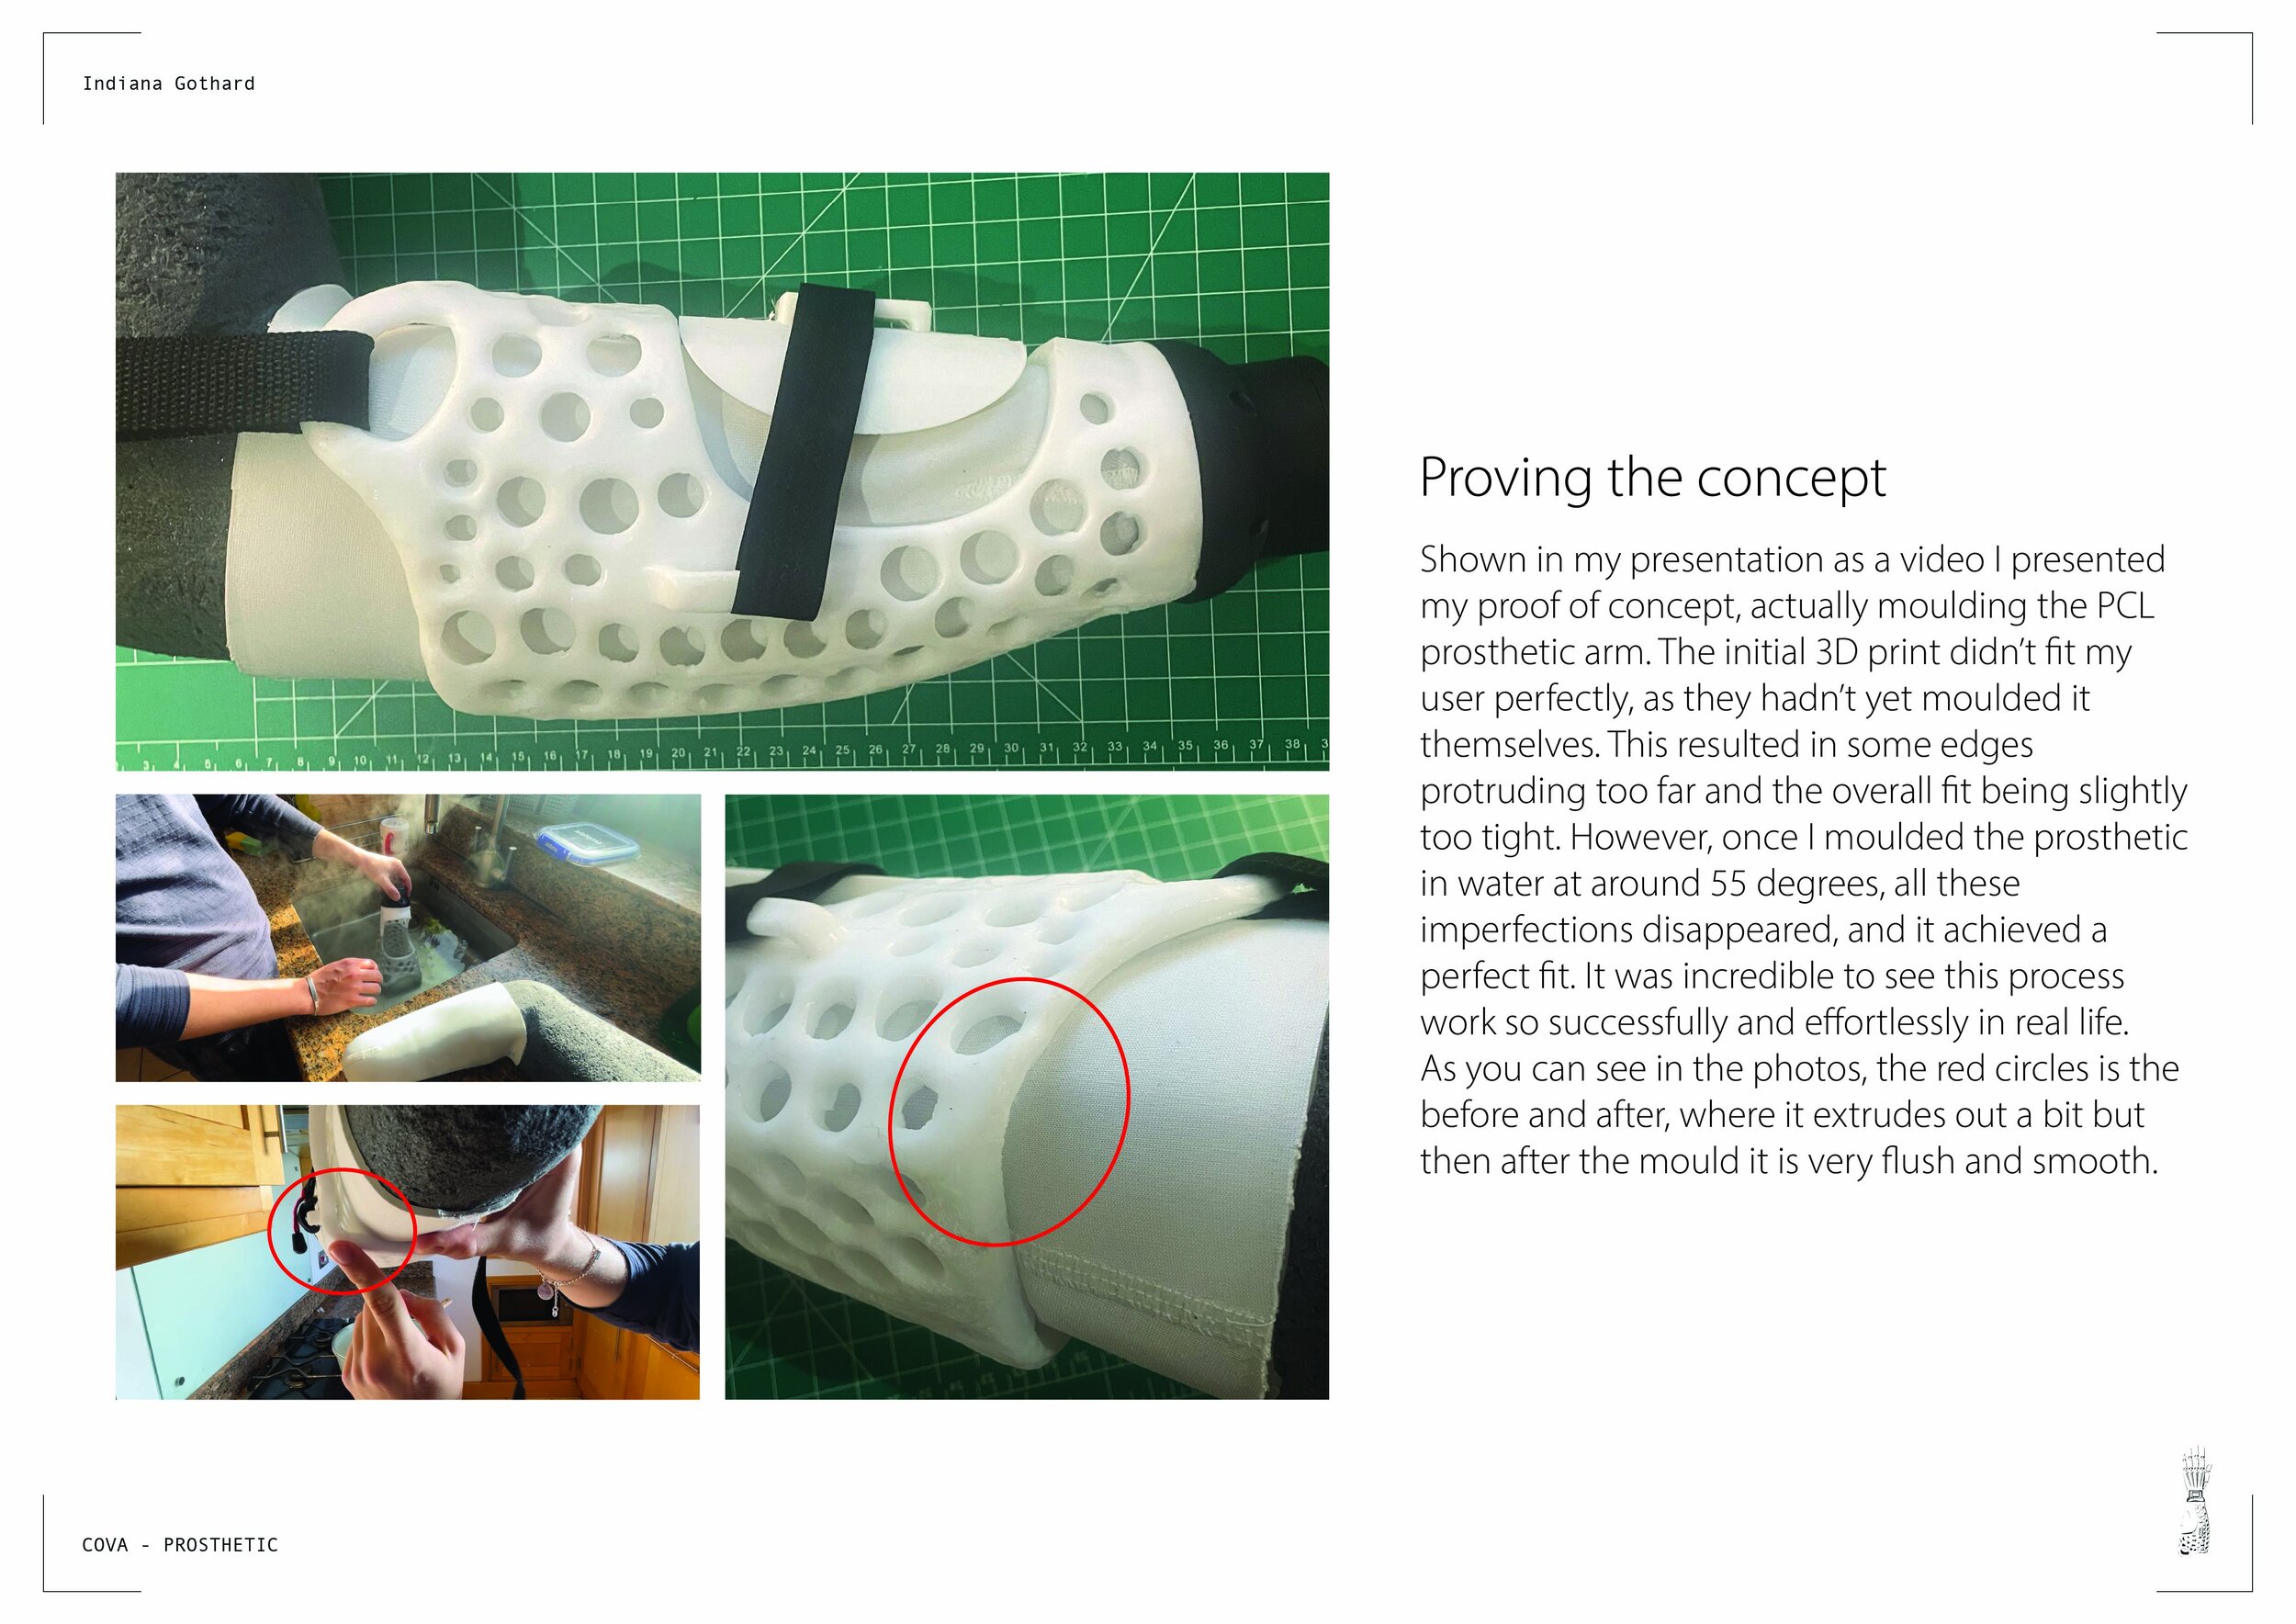
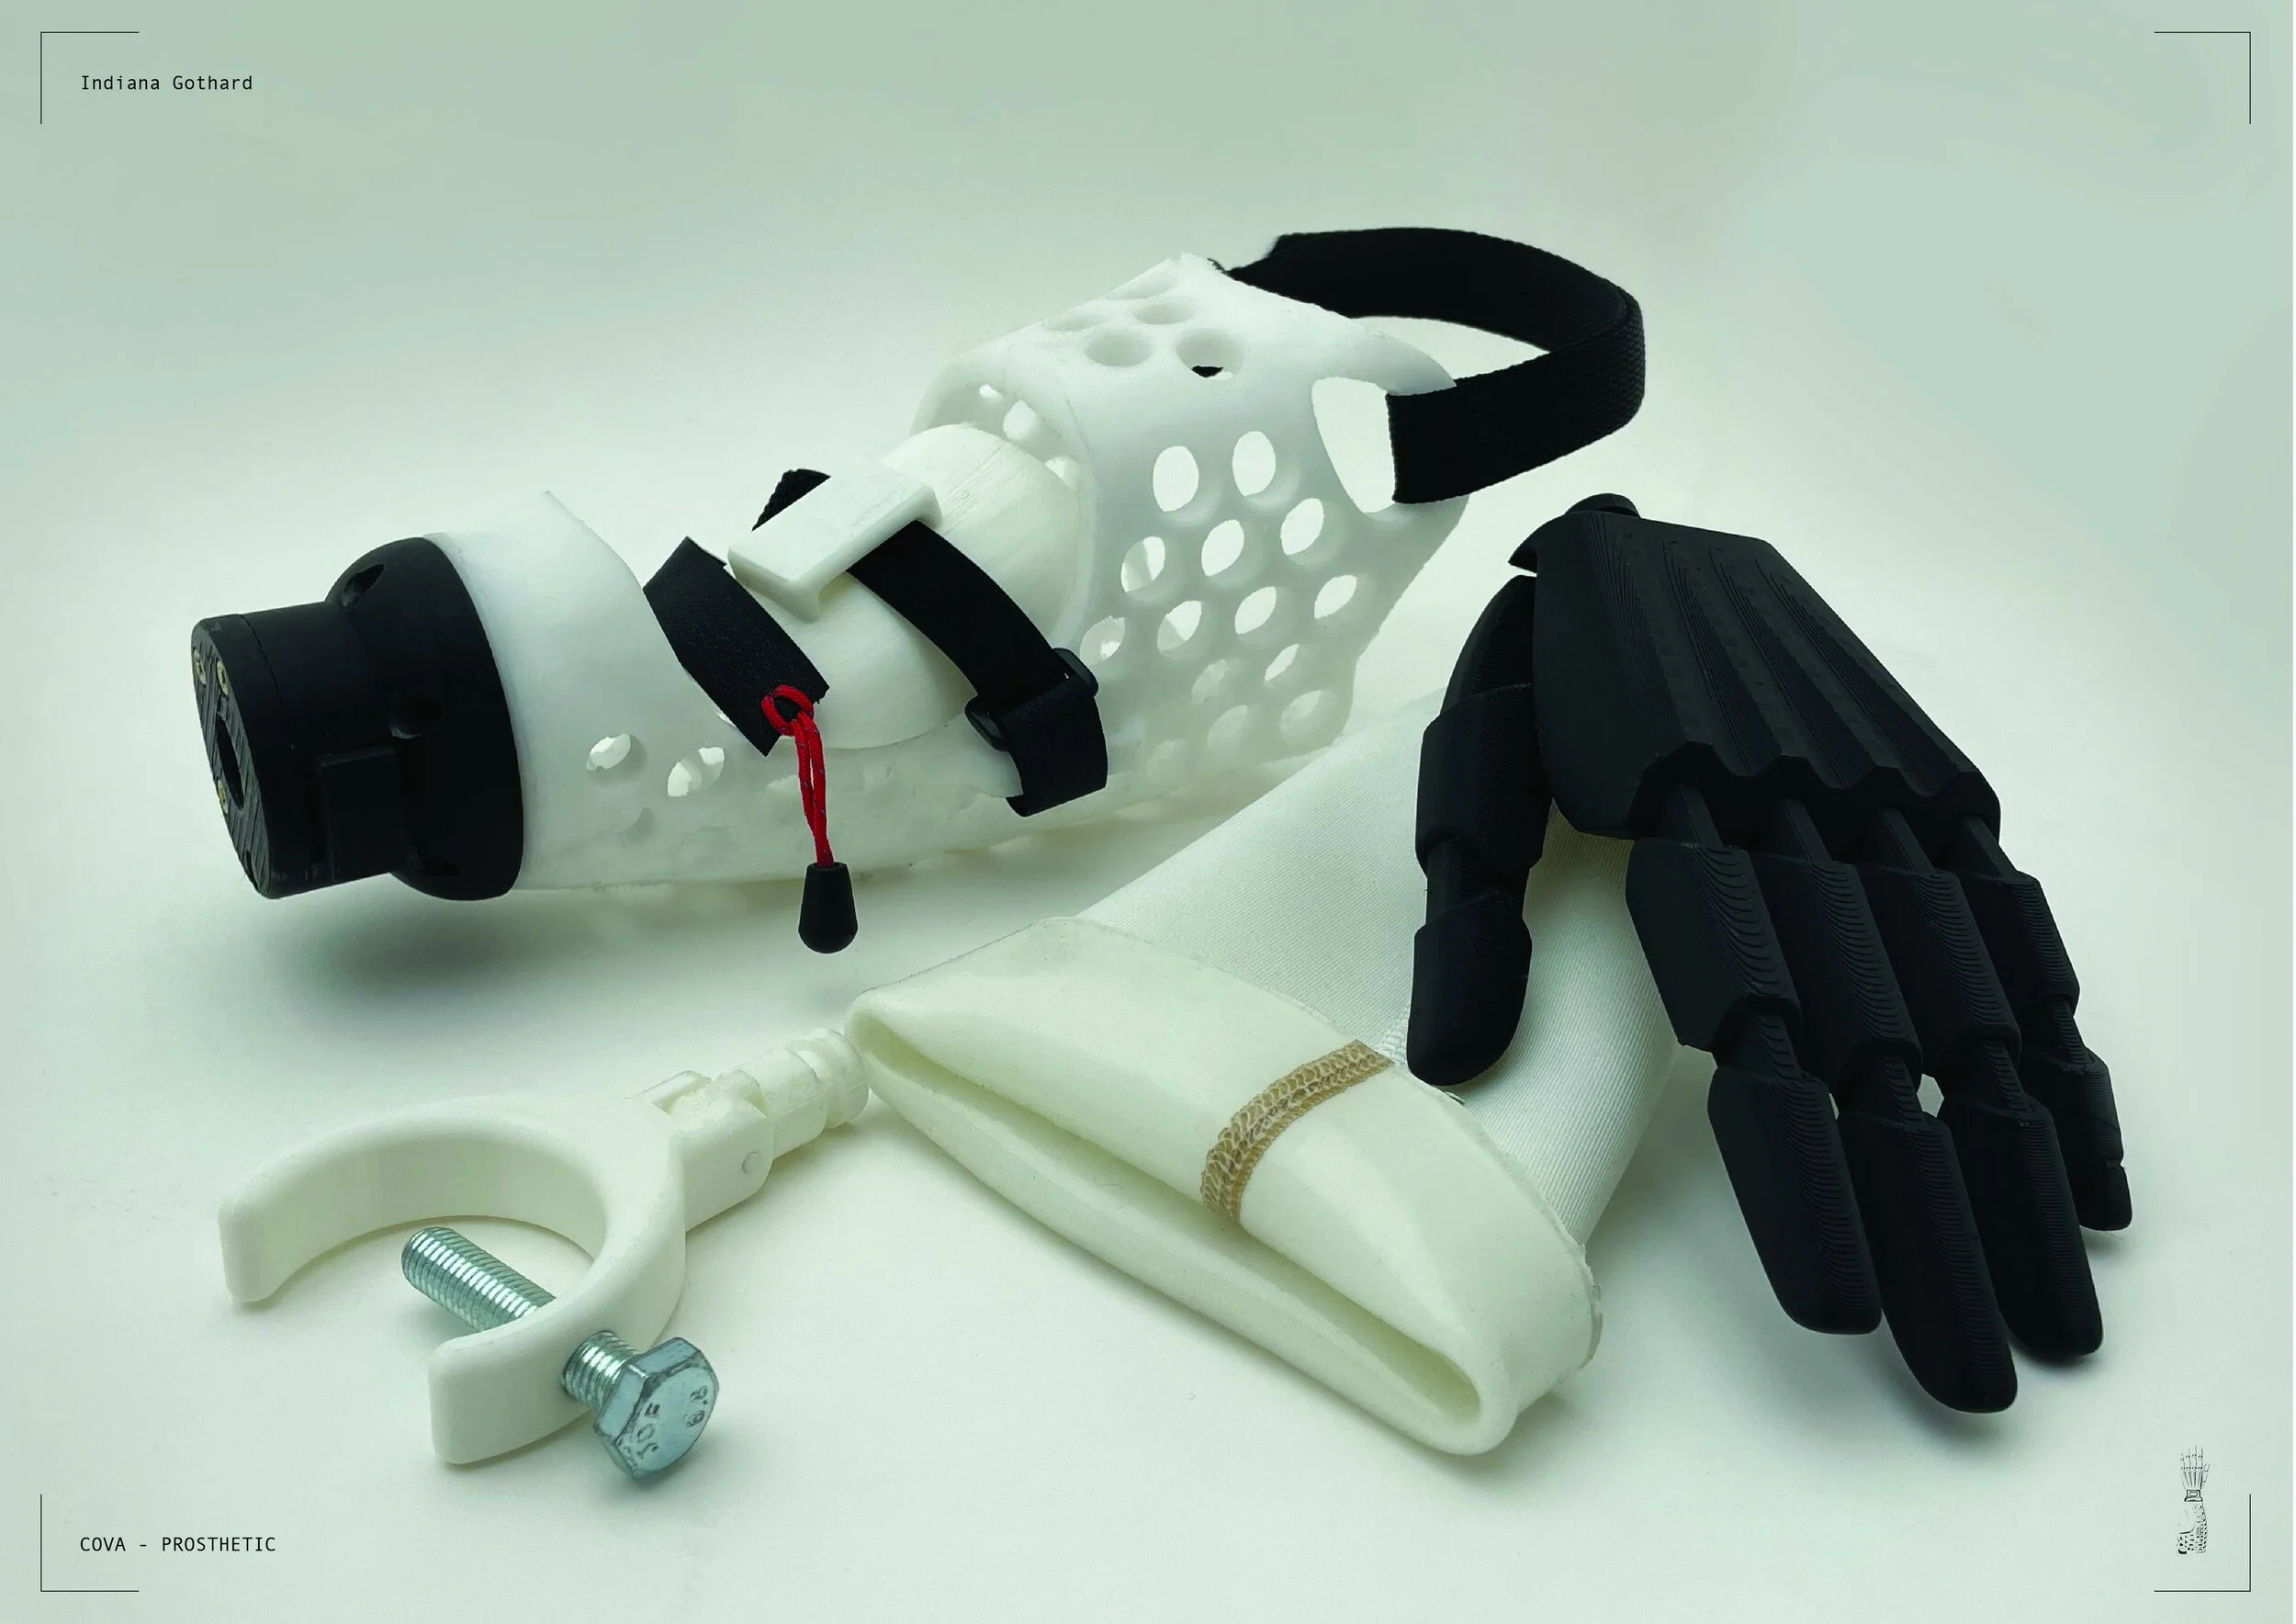
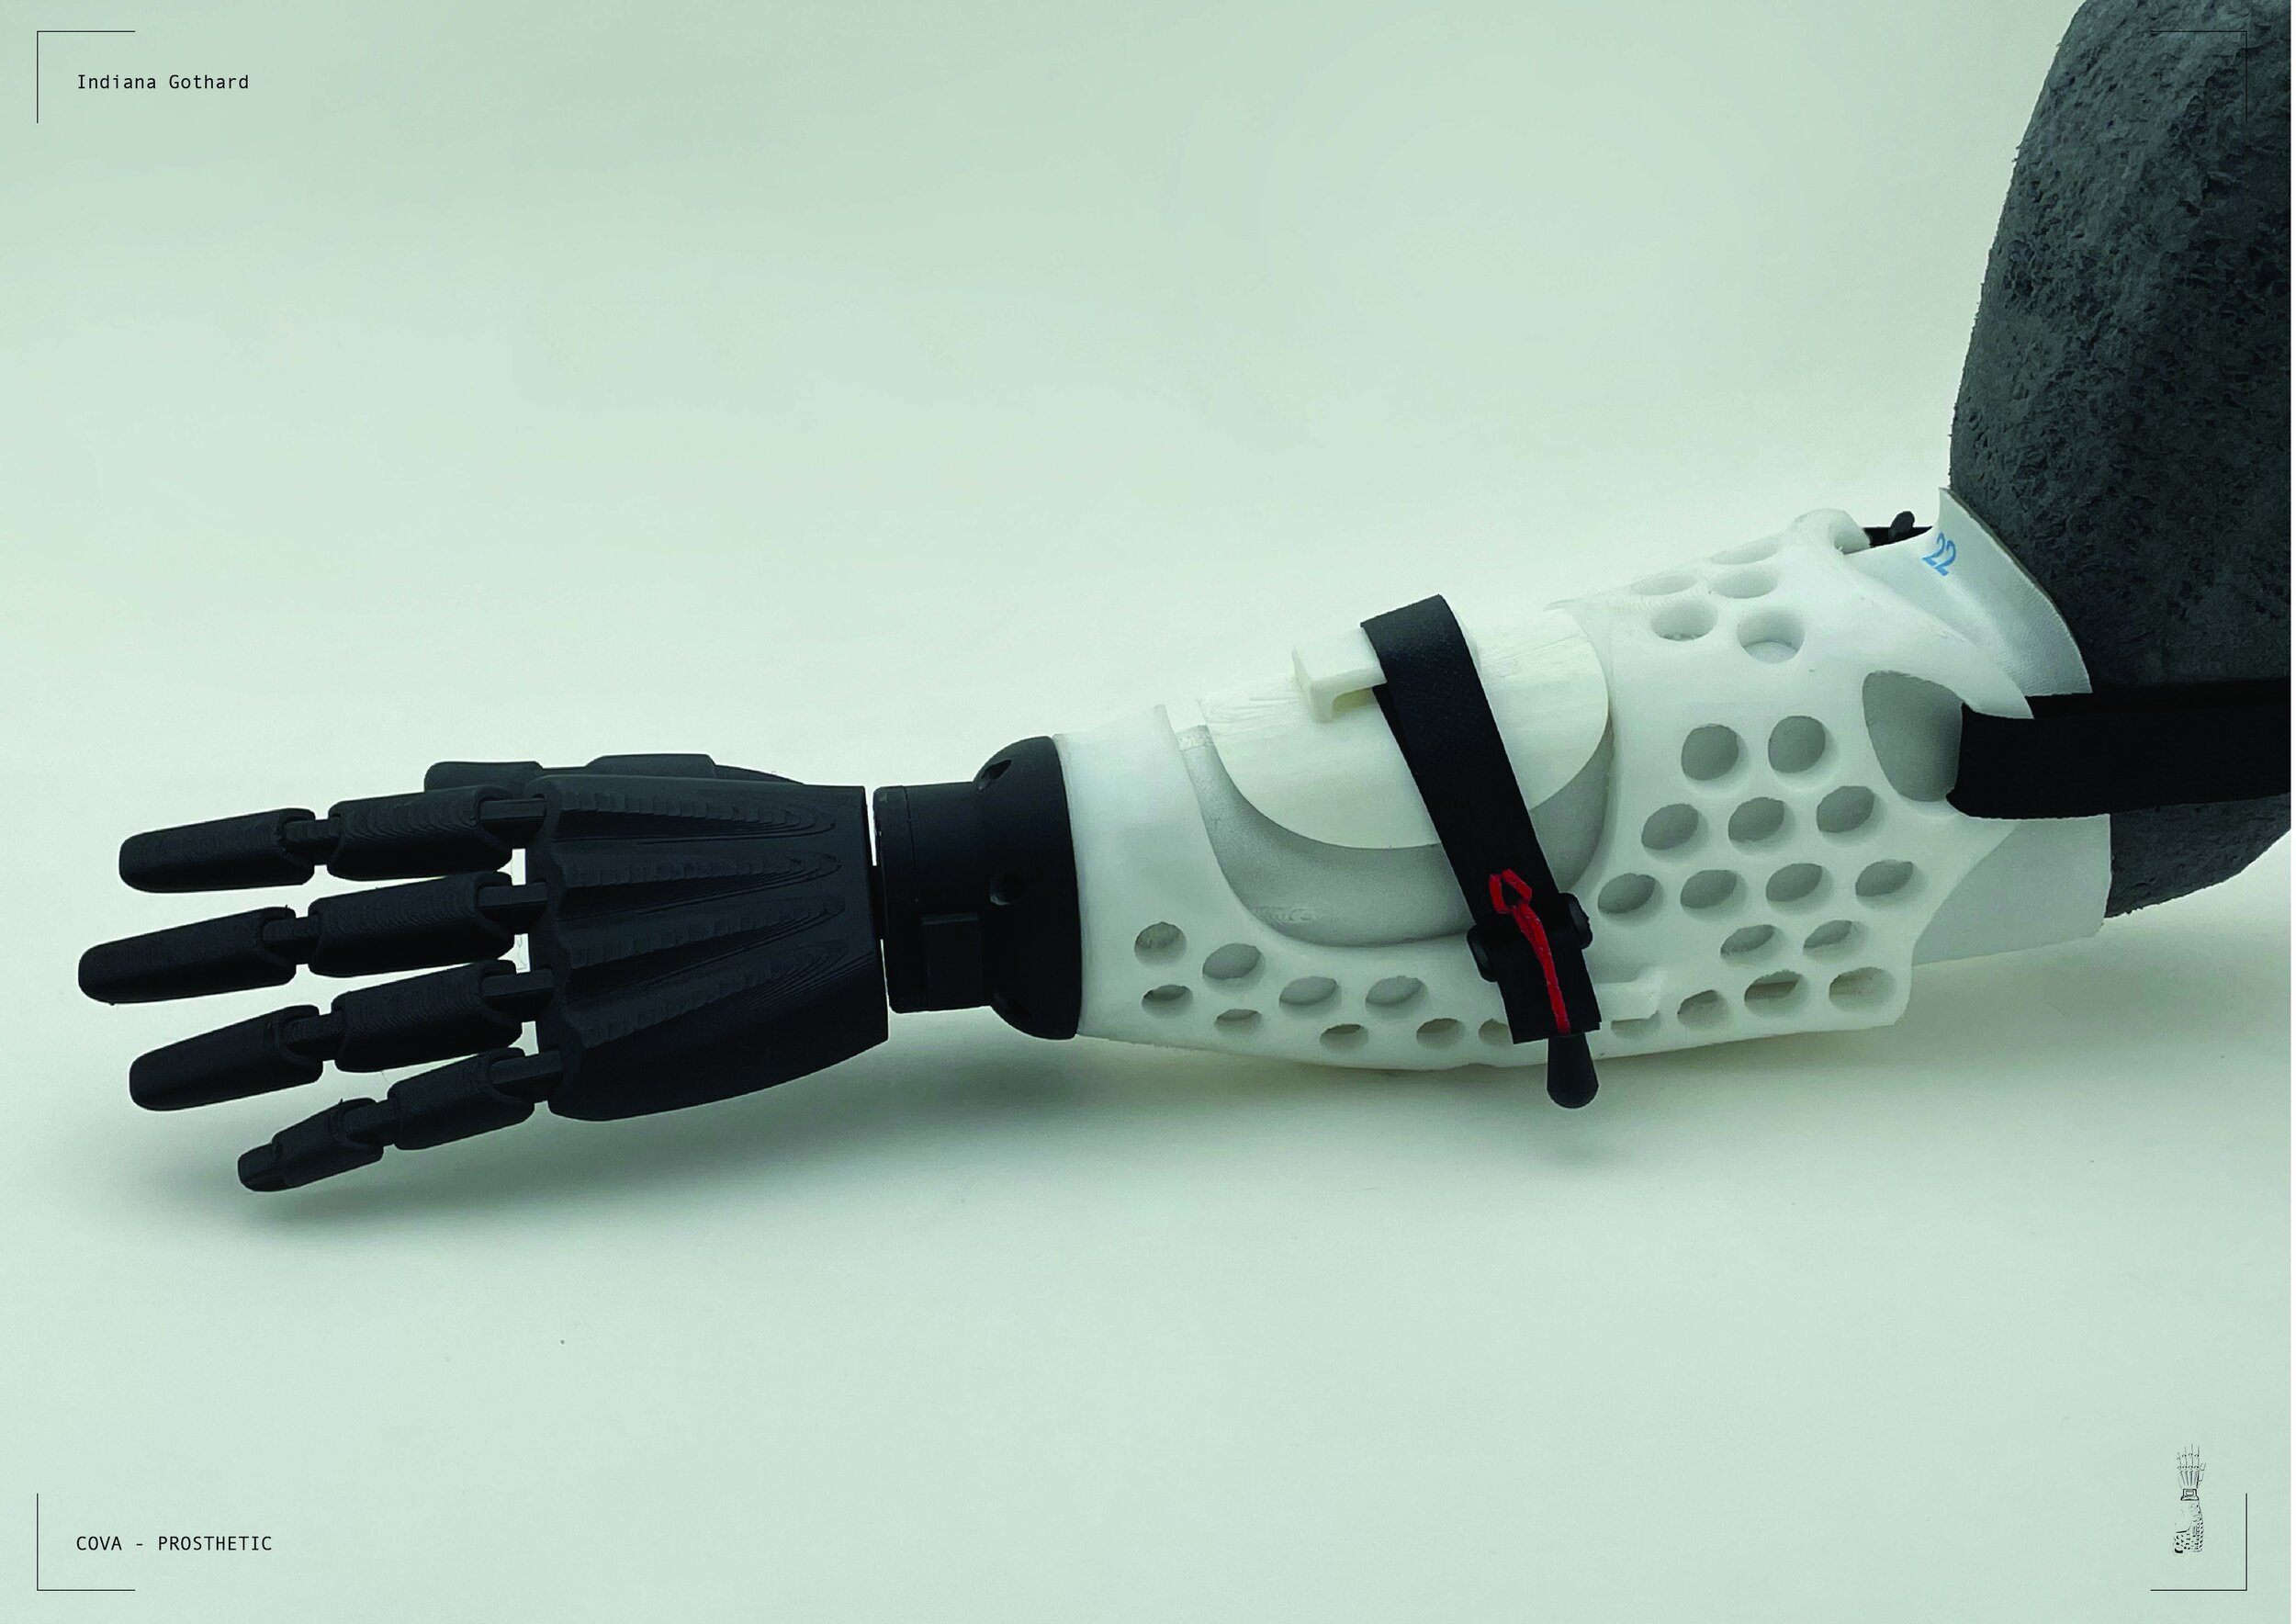
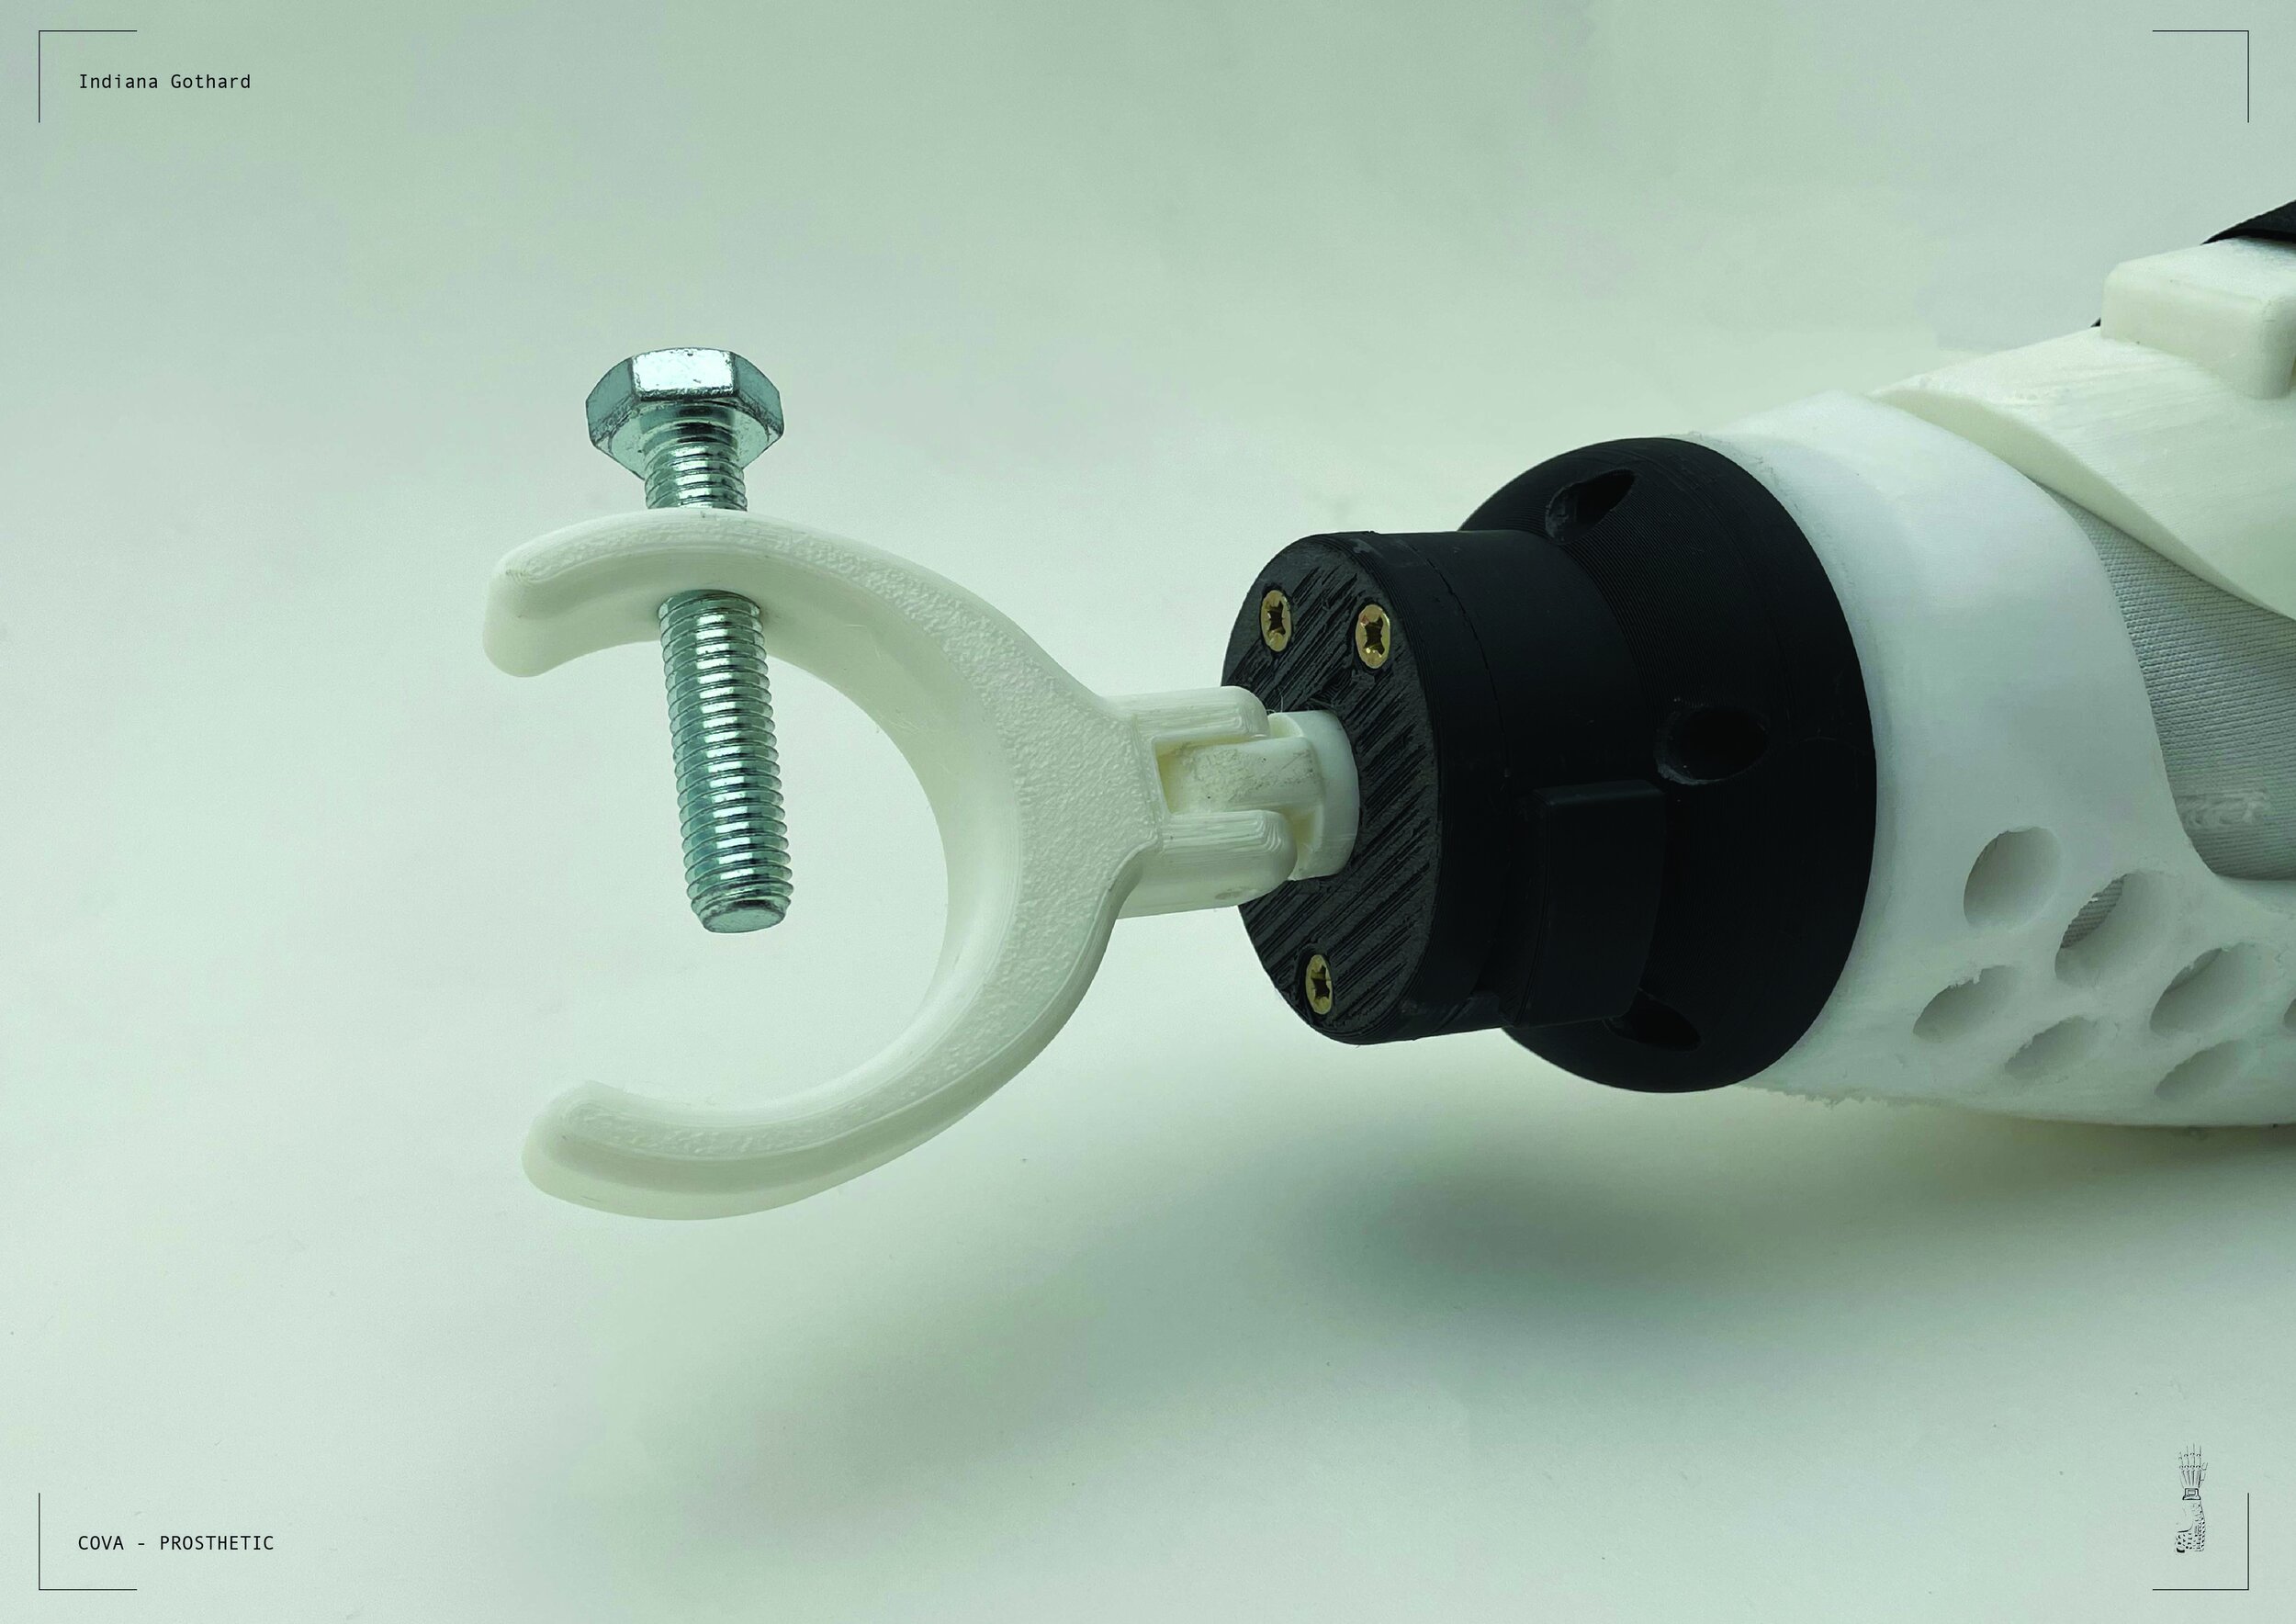
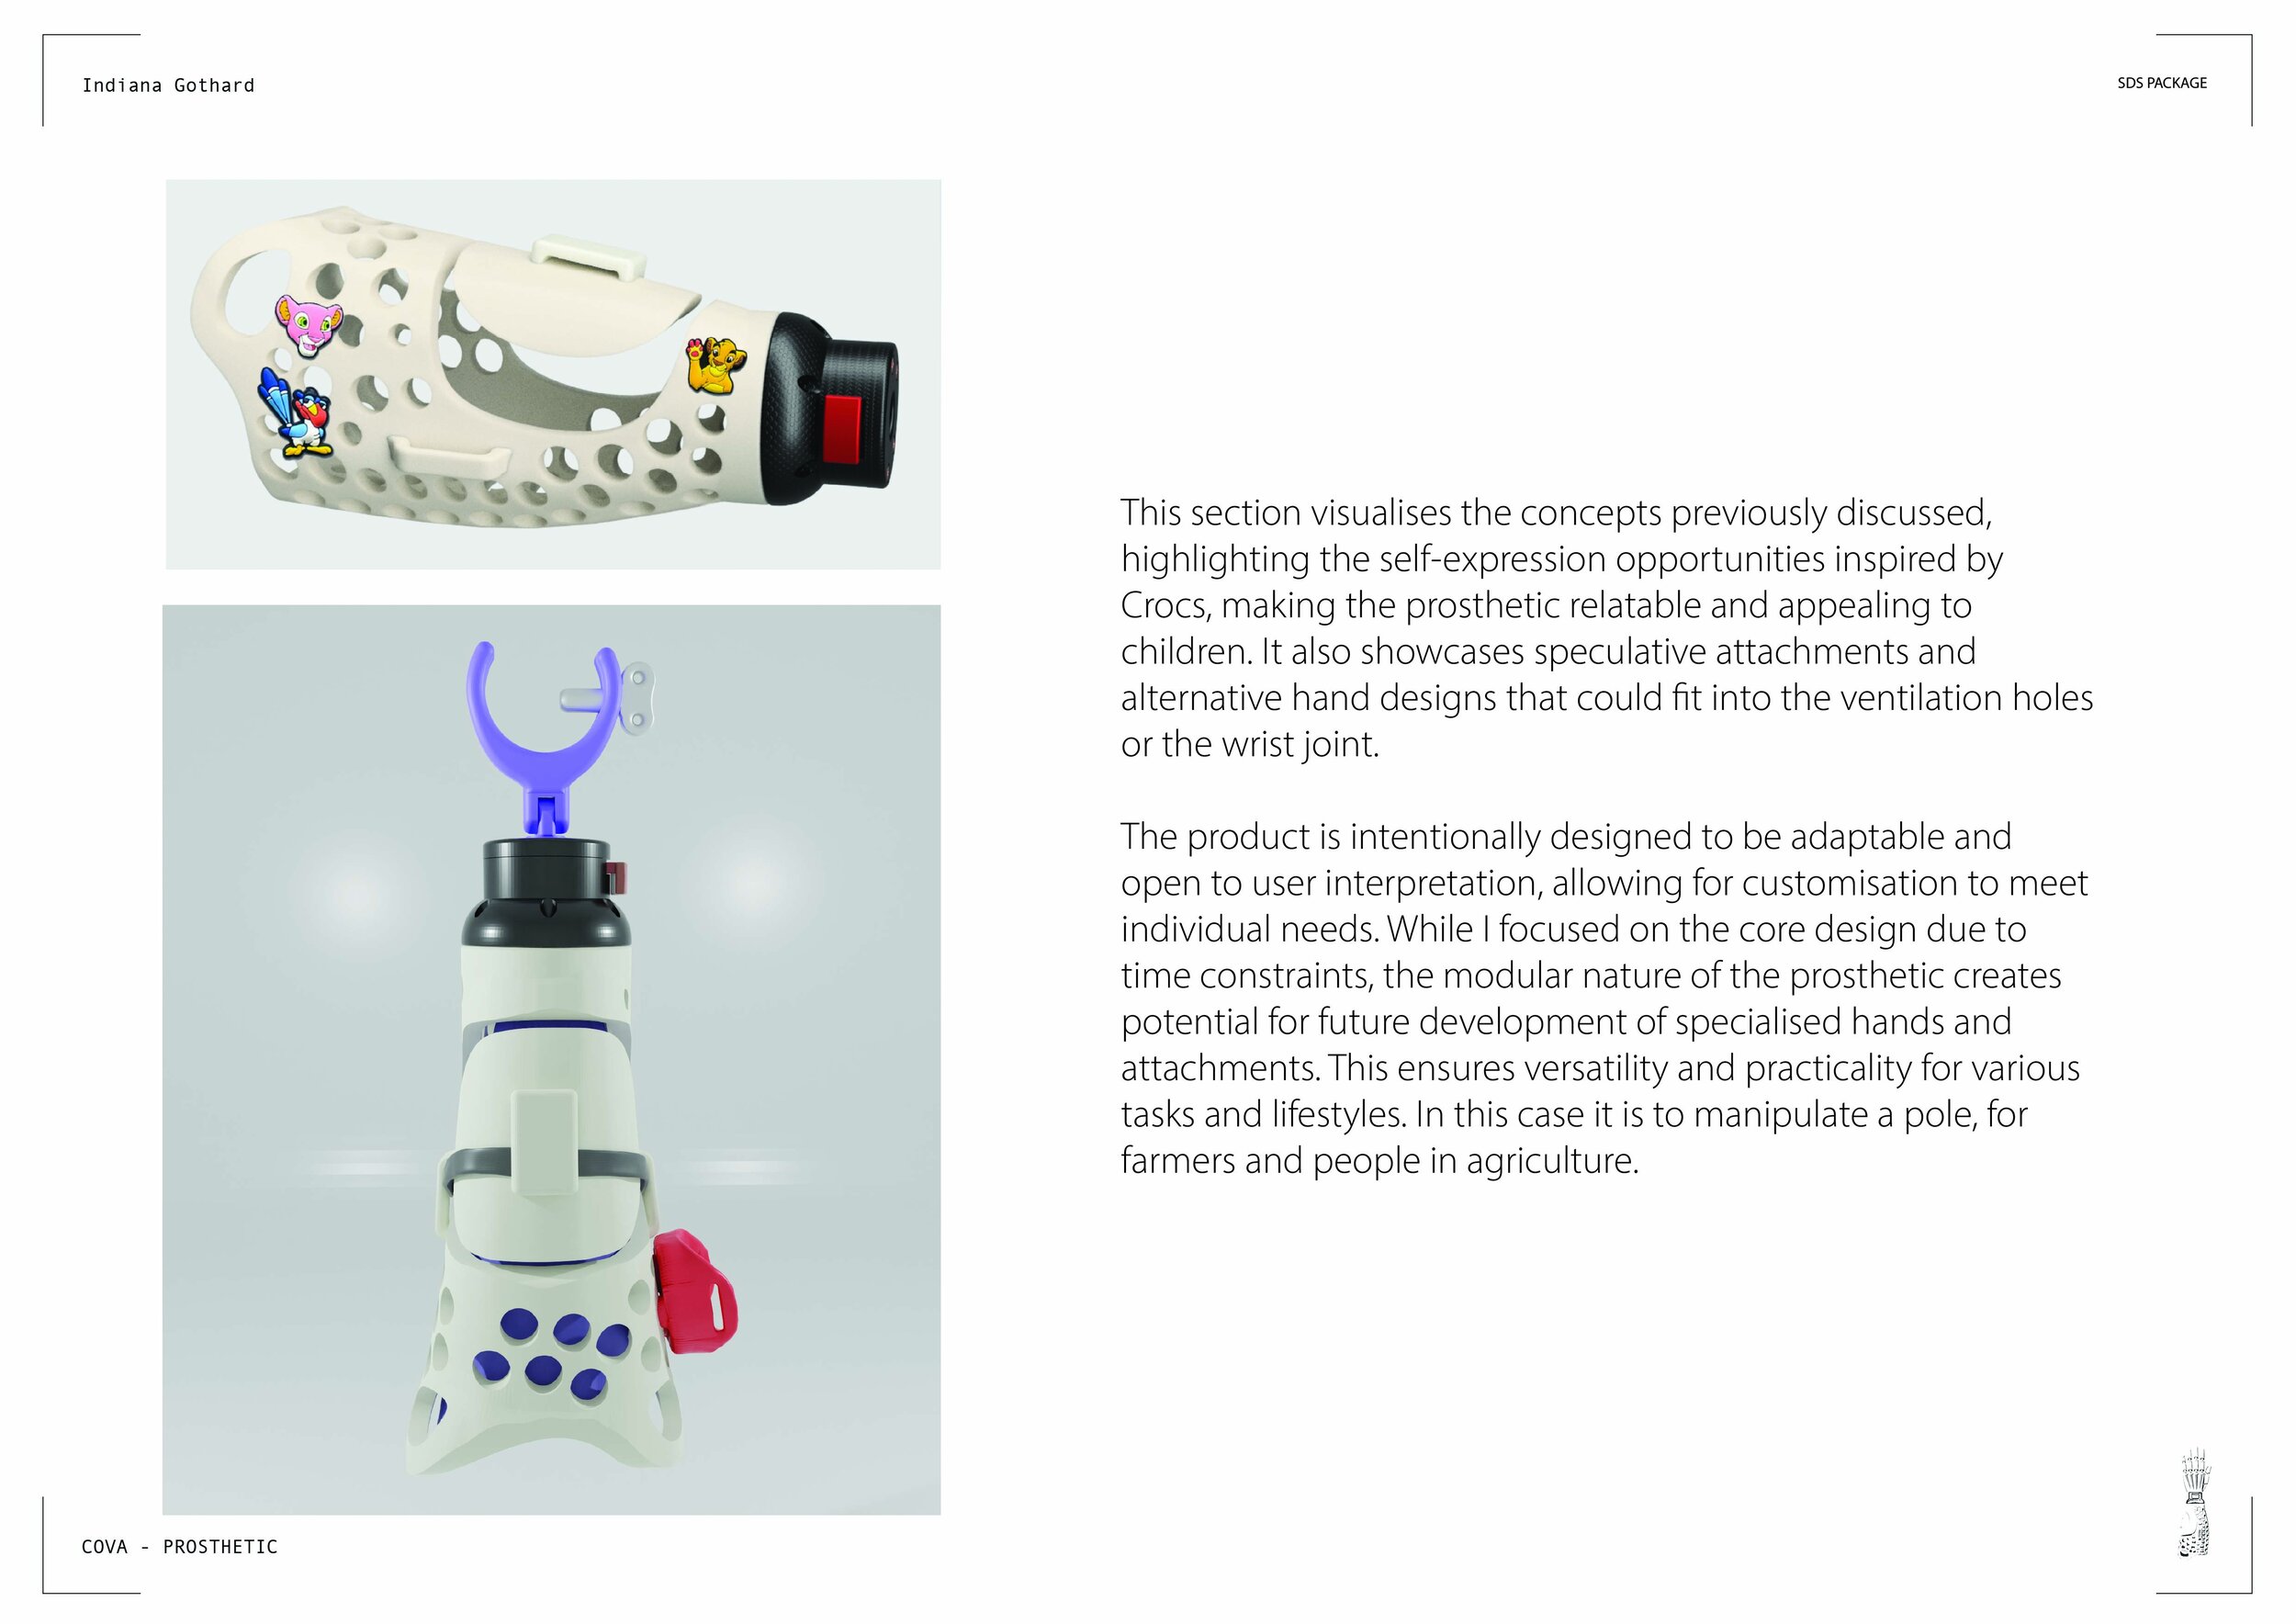
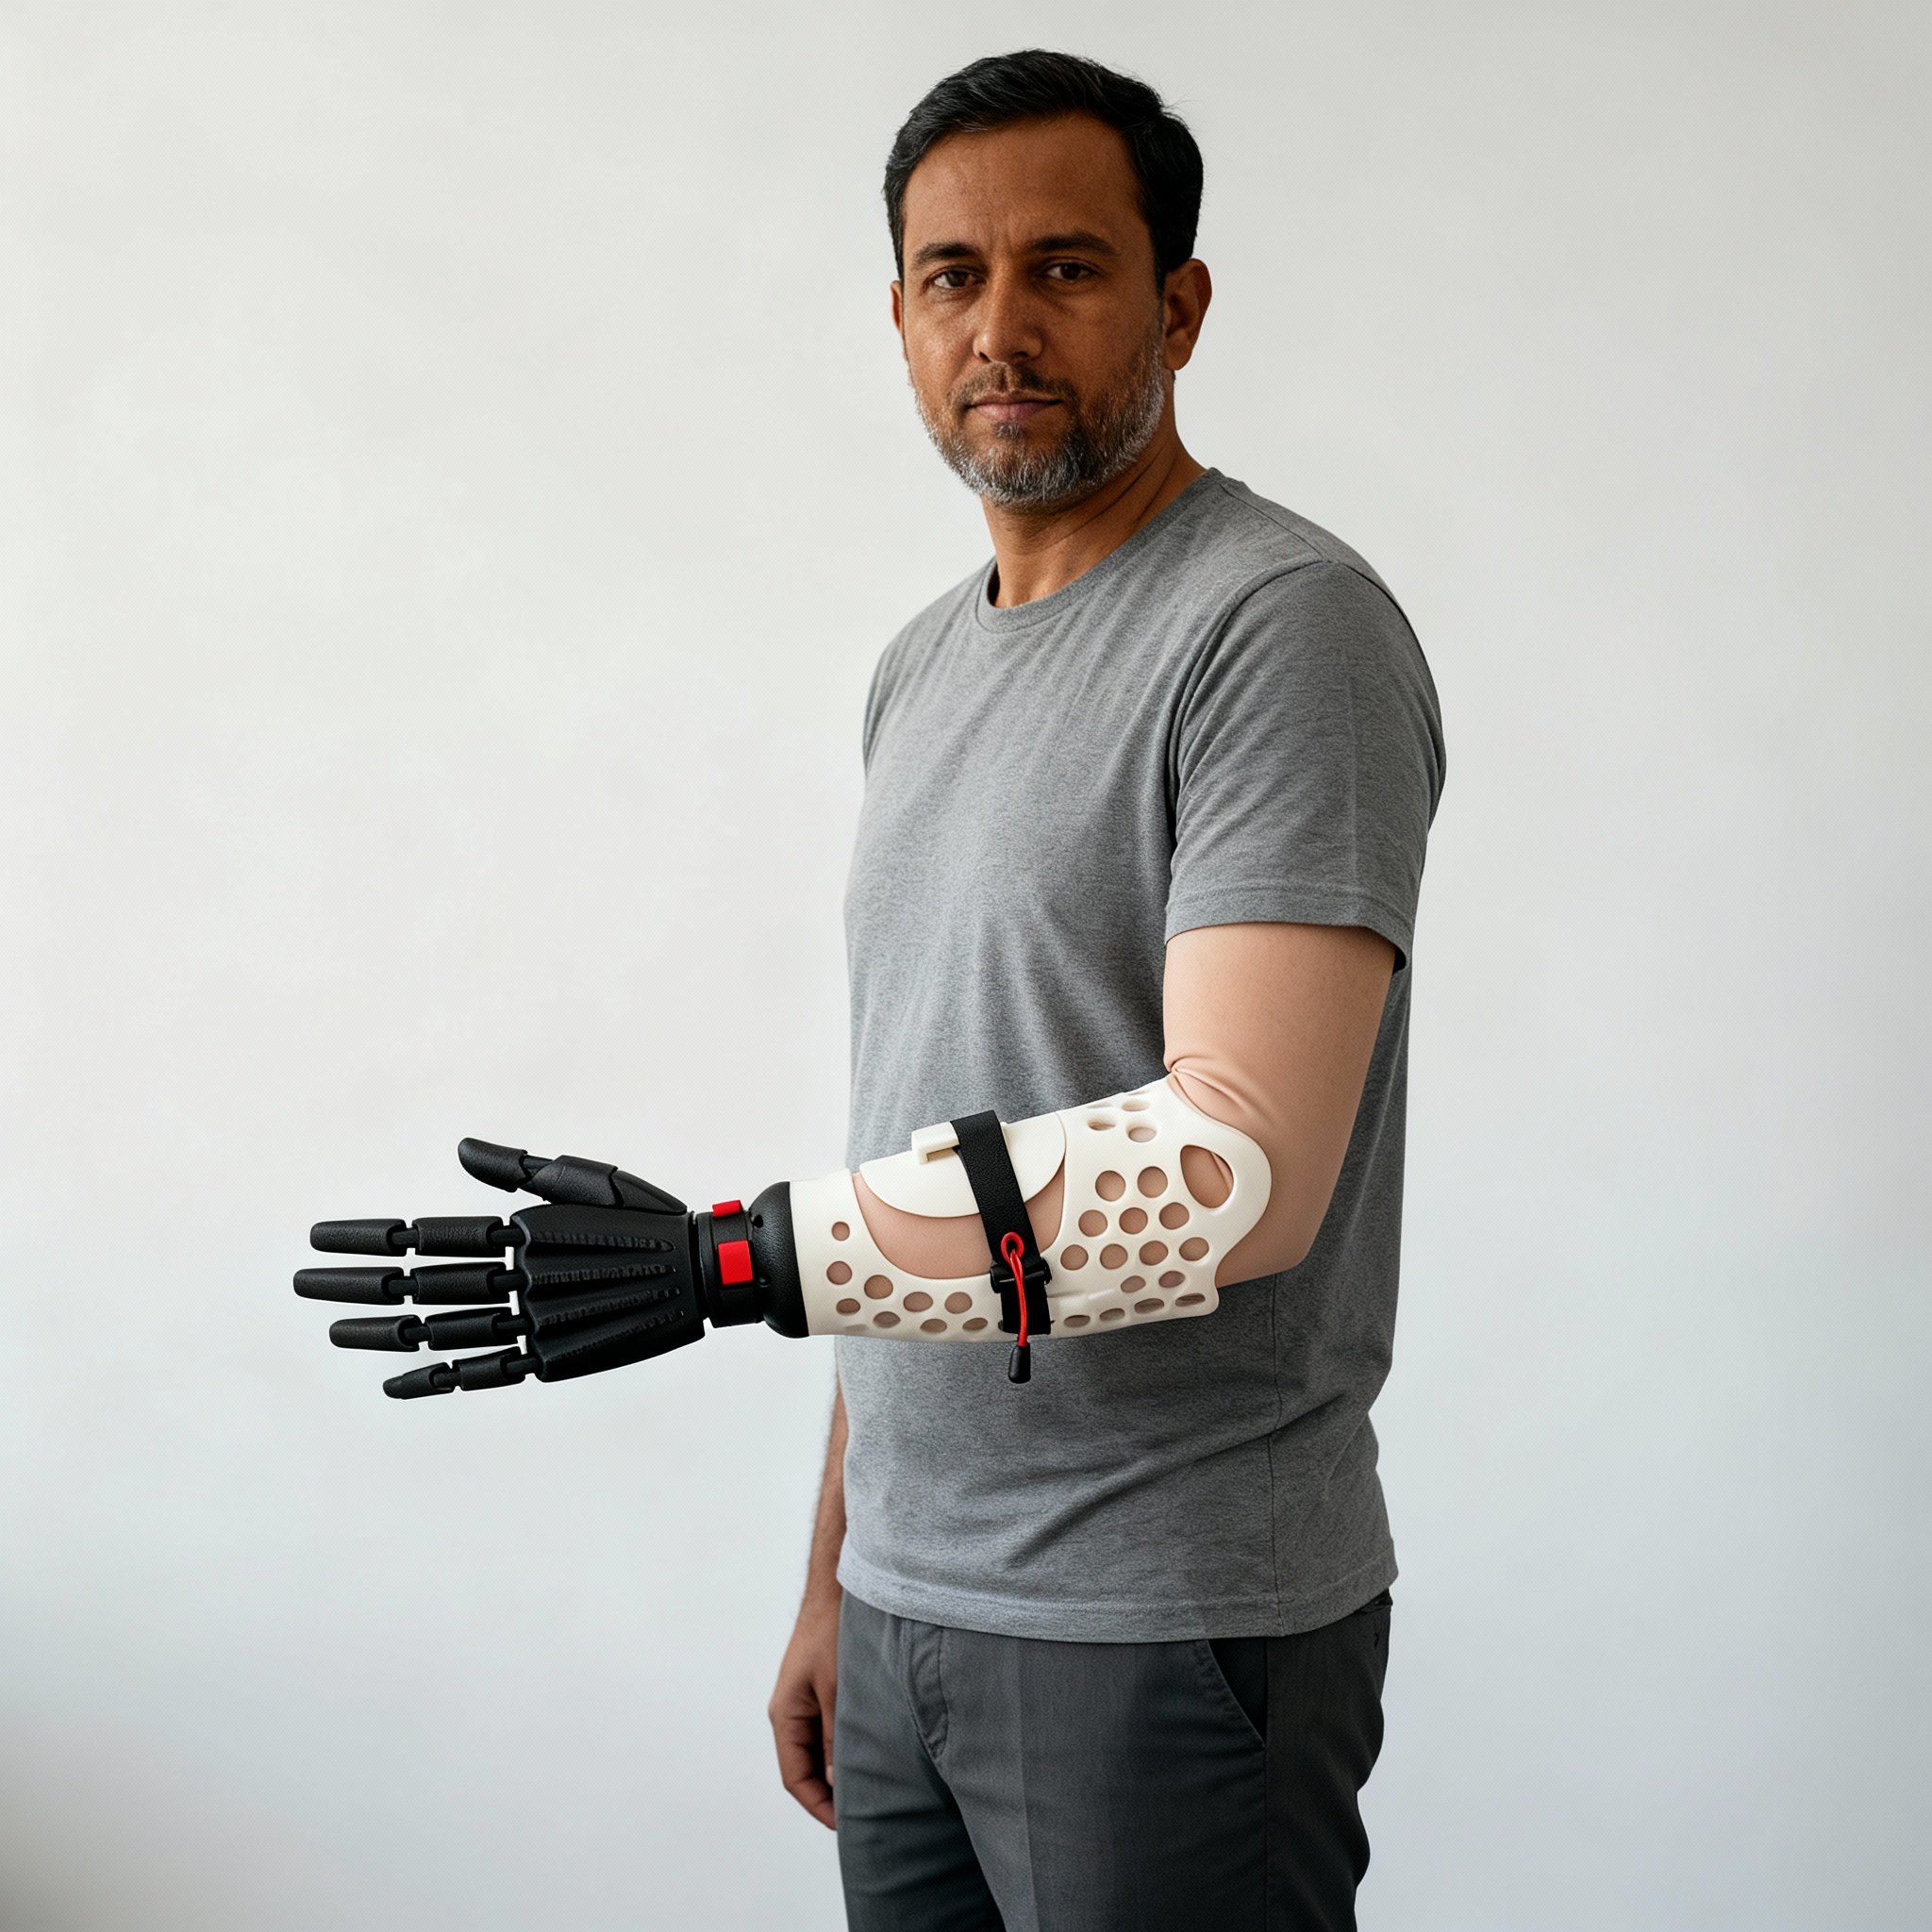
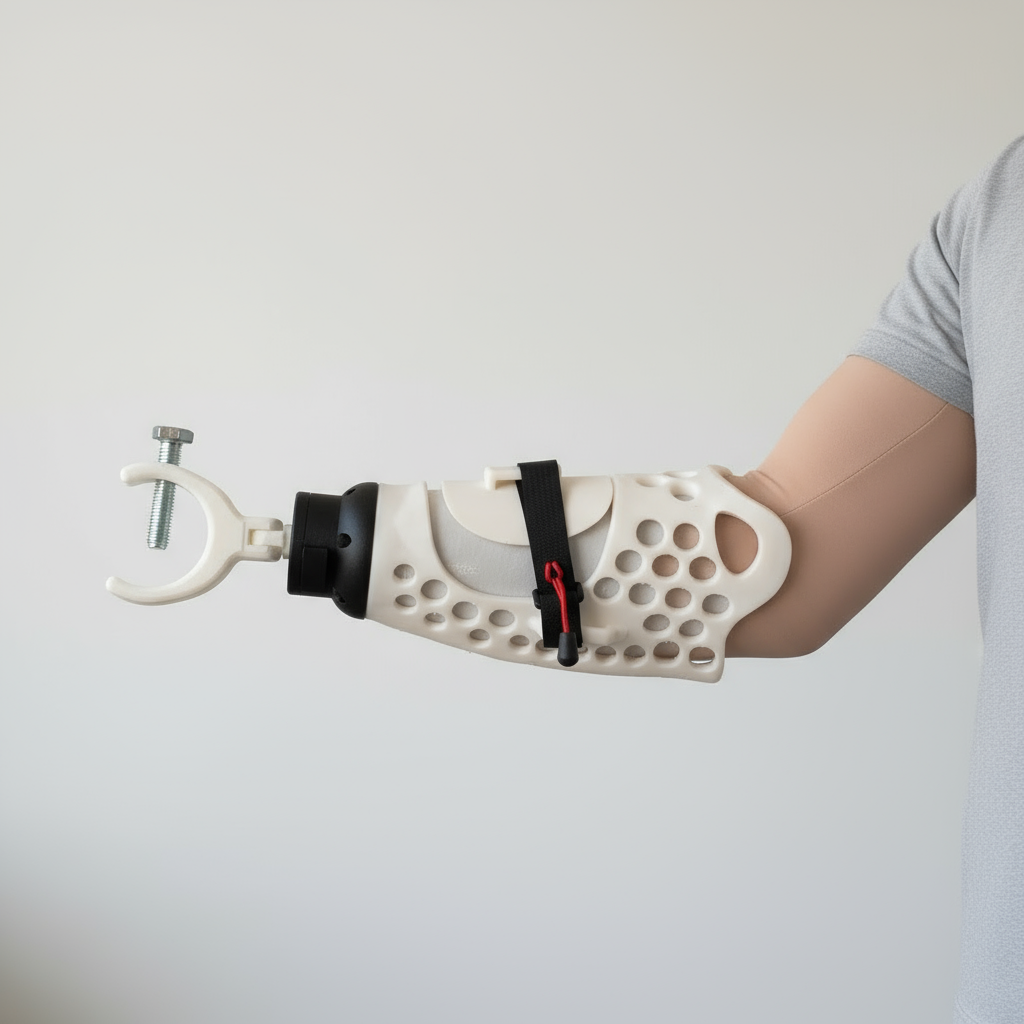
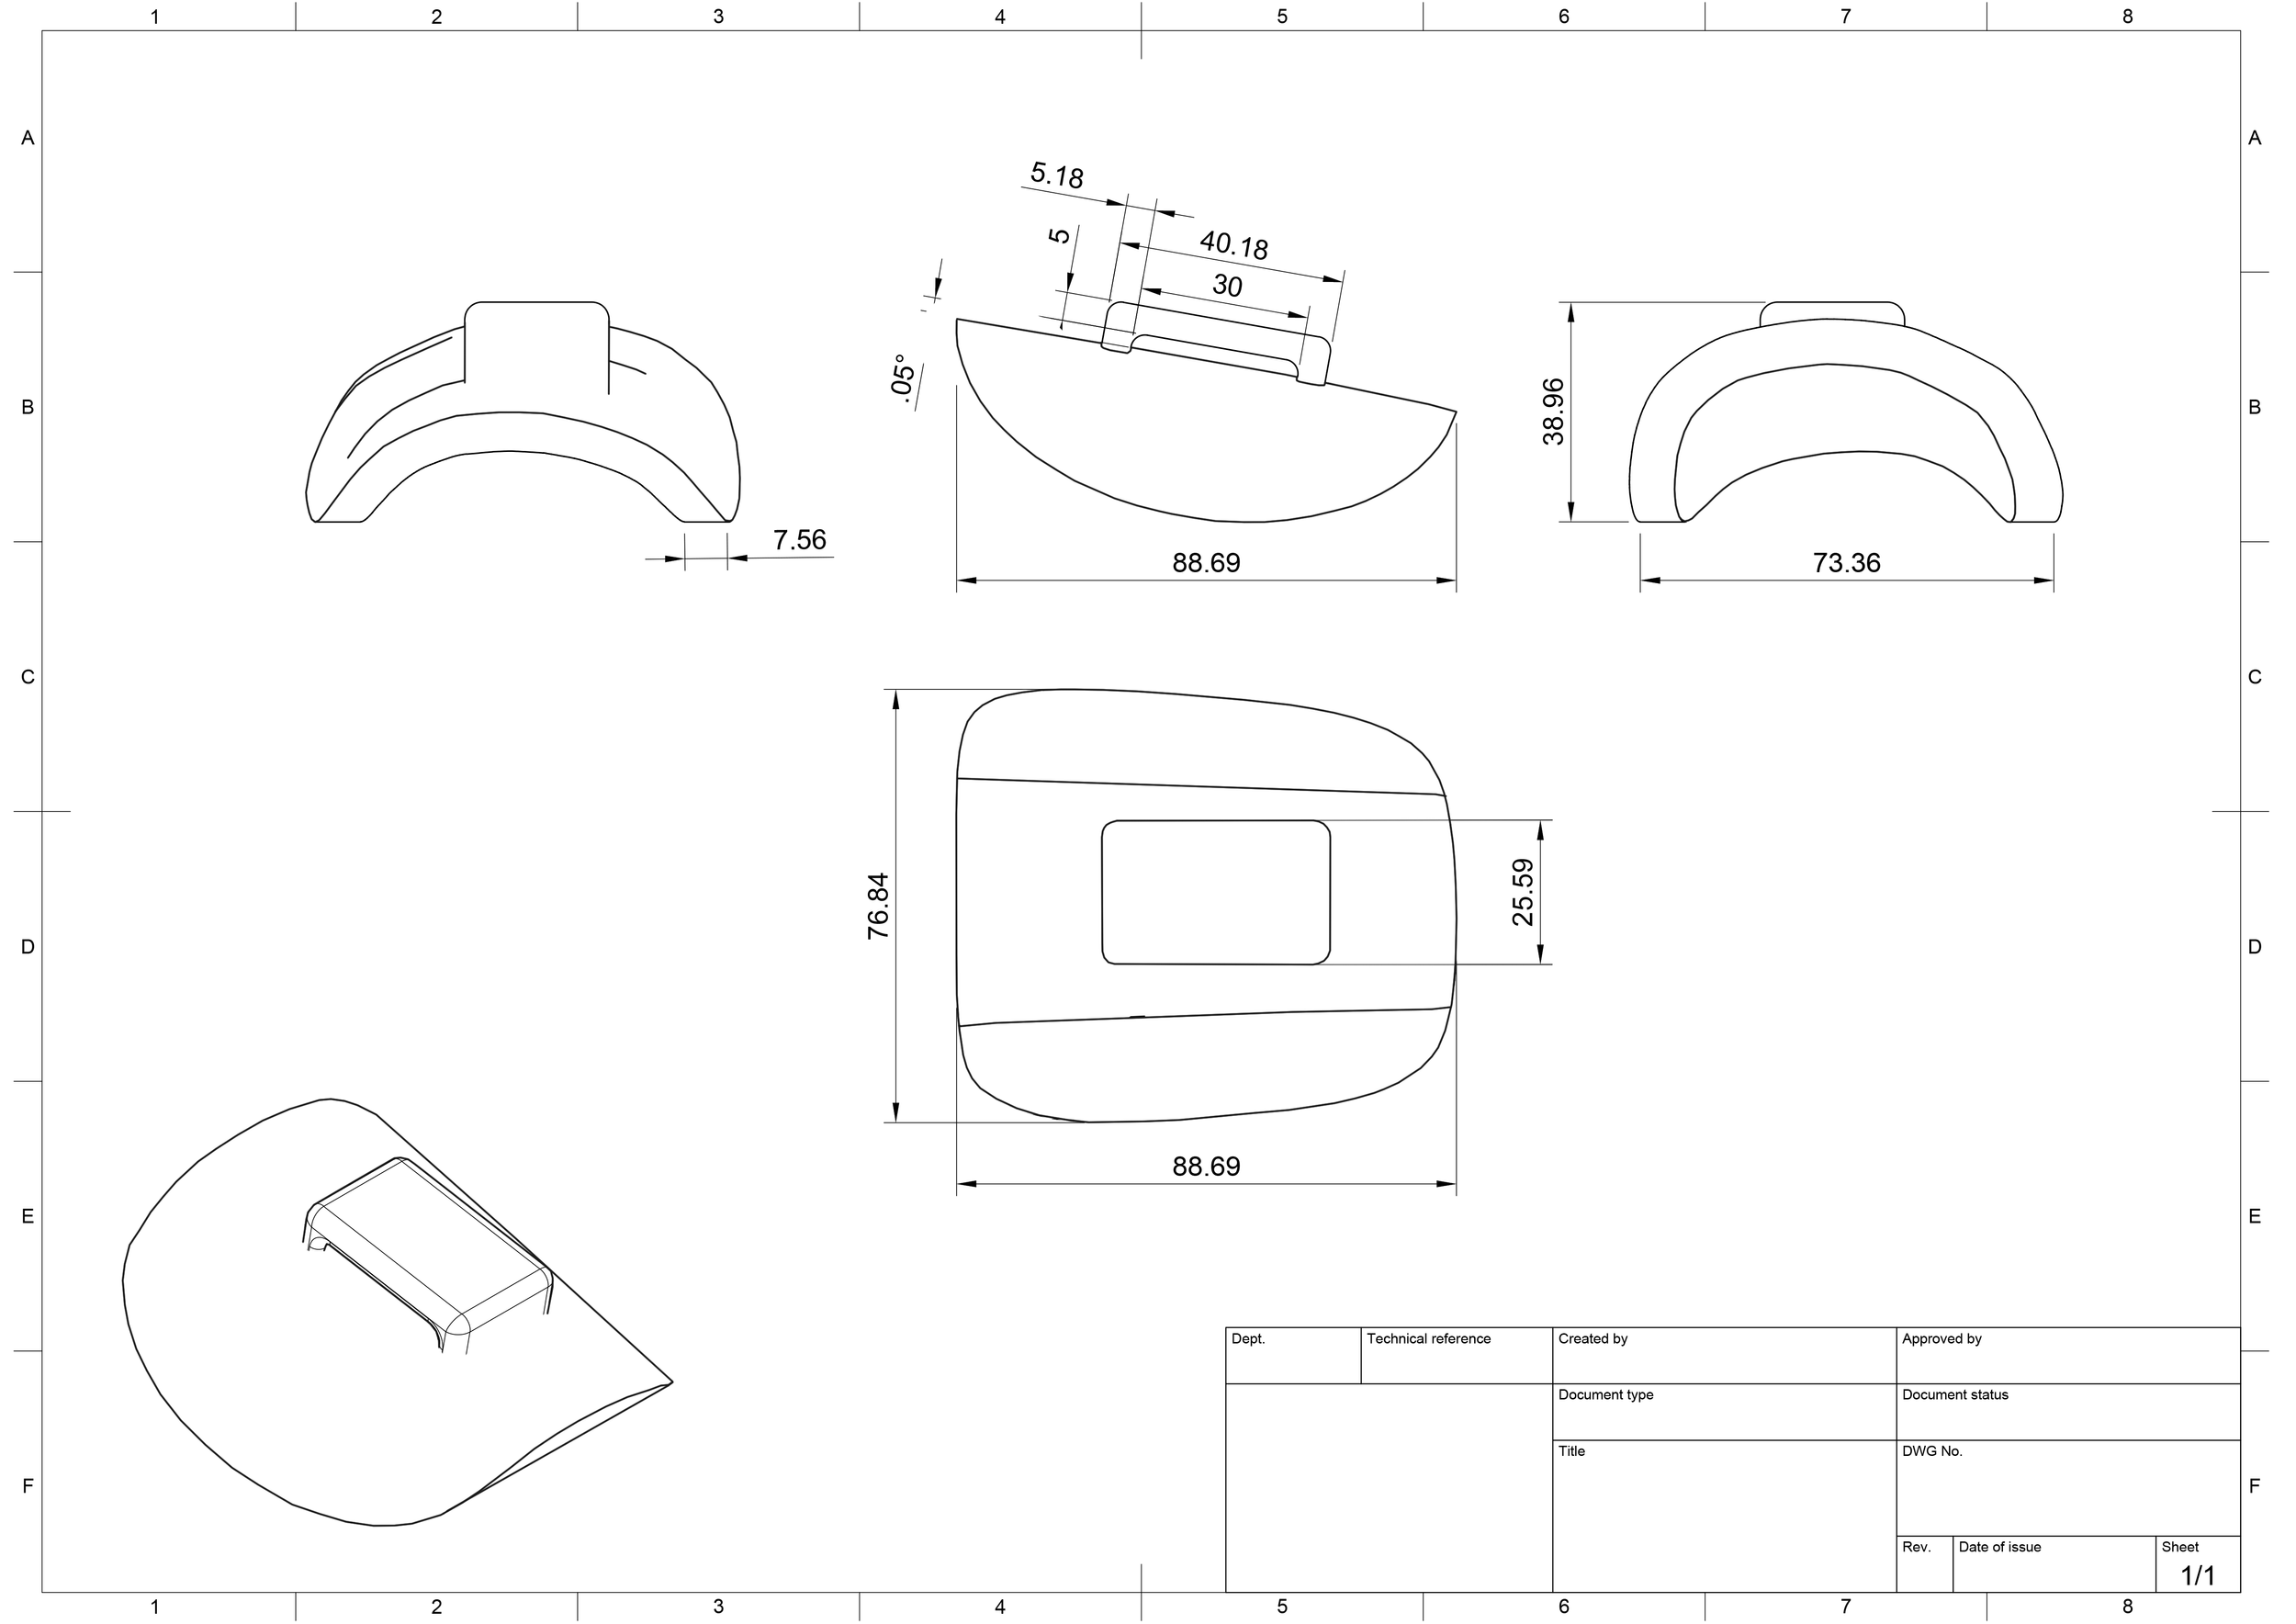
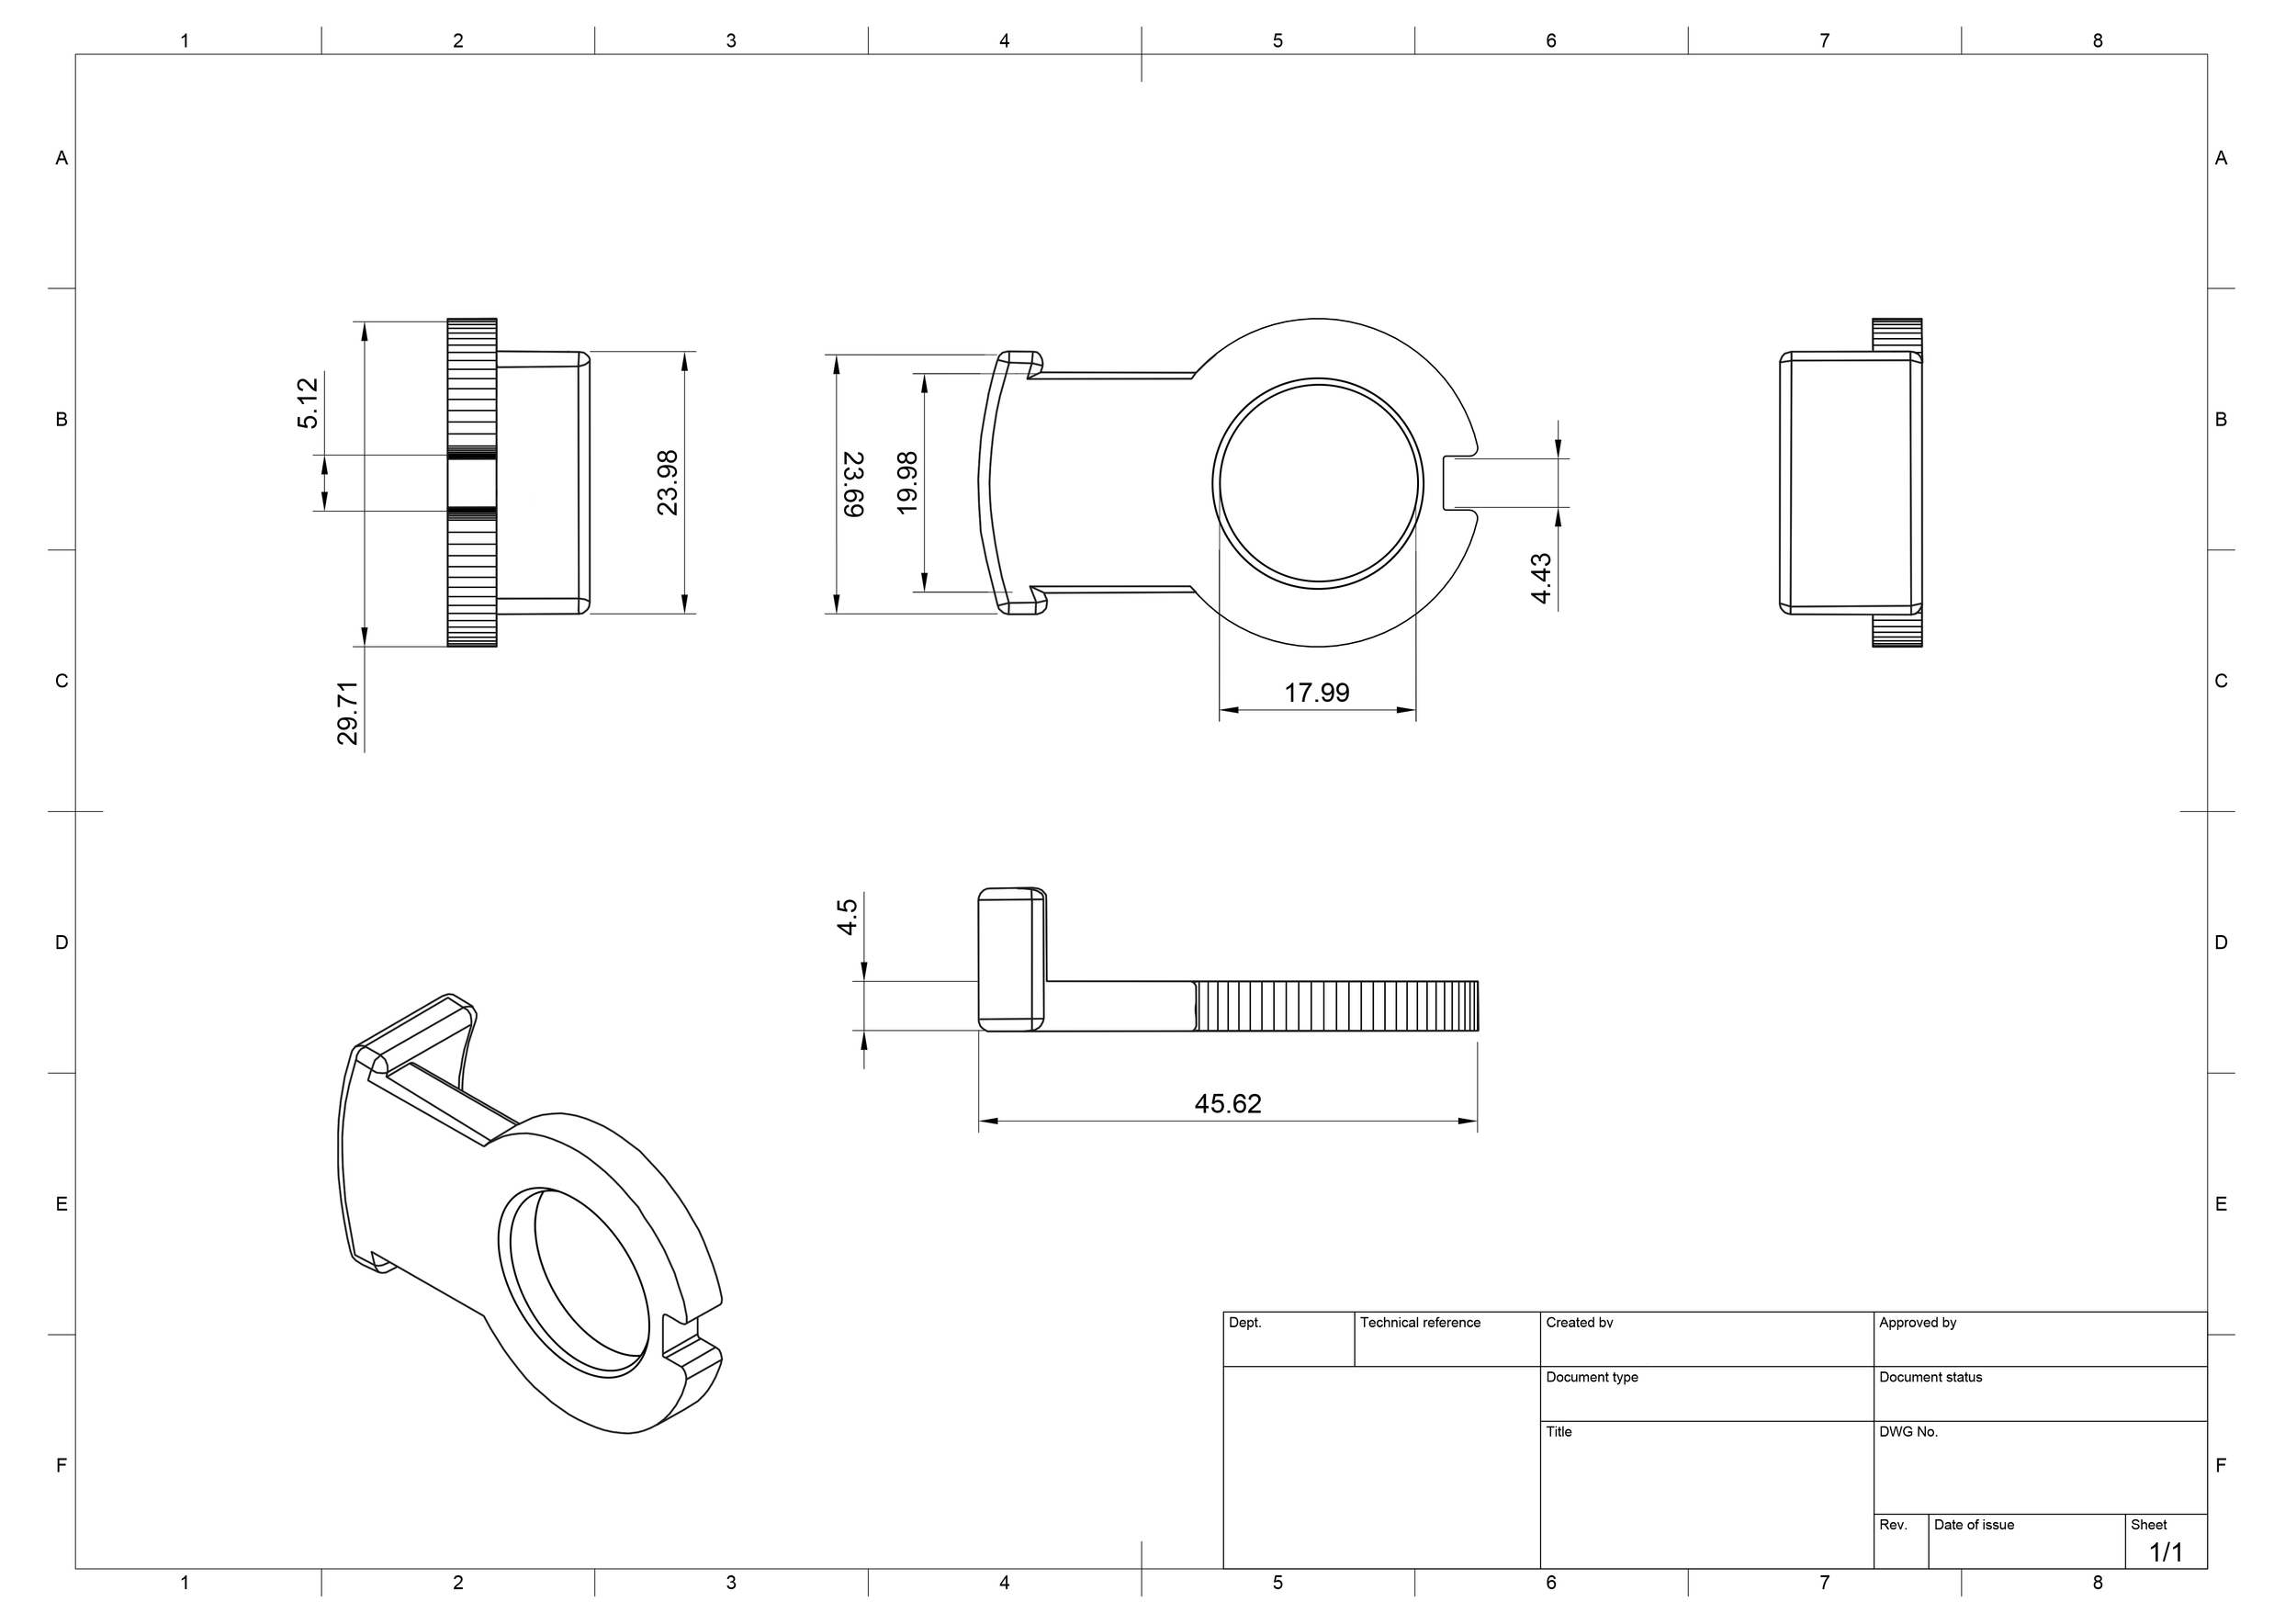
The outcome of this project represents a long process of testing, iteration, and refinement. The final design includes the mouldable PCL section, which can be heated and reshaped by the user, alongside attachable hinge joints that allow agricultural workers to return to practical tasks. Additional attachment points within the structure open possibilities for tool integration and further adaptations. While not every development is detailed here, they form a significant part of the project journey. I am proud of the final product and confident in its potential to support many people. At the bottom of this page, you can view the full 174-page document as a slideshow, along with a video of me moulding the PCL prosthetic in my kitchen to demonstrate how it functions in practice.
WHY DOES IT WORK?
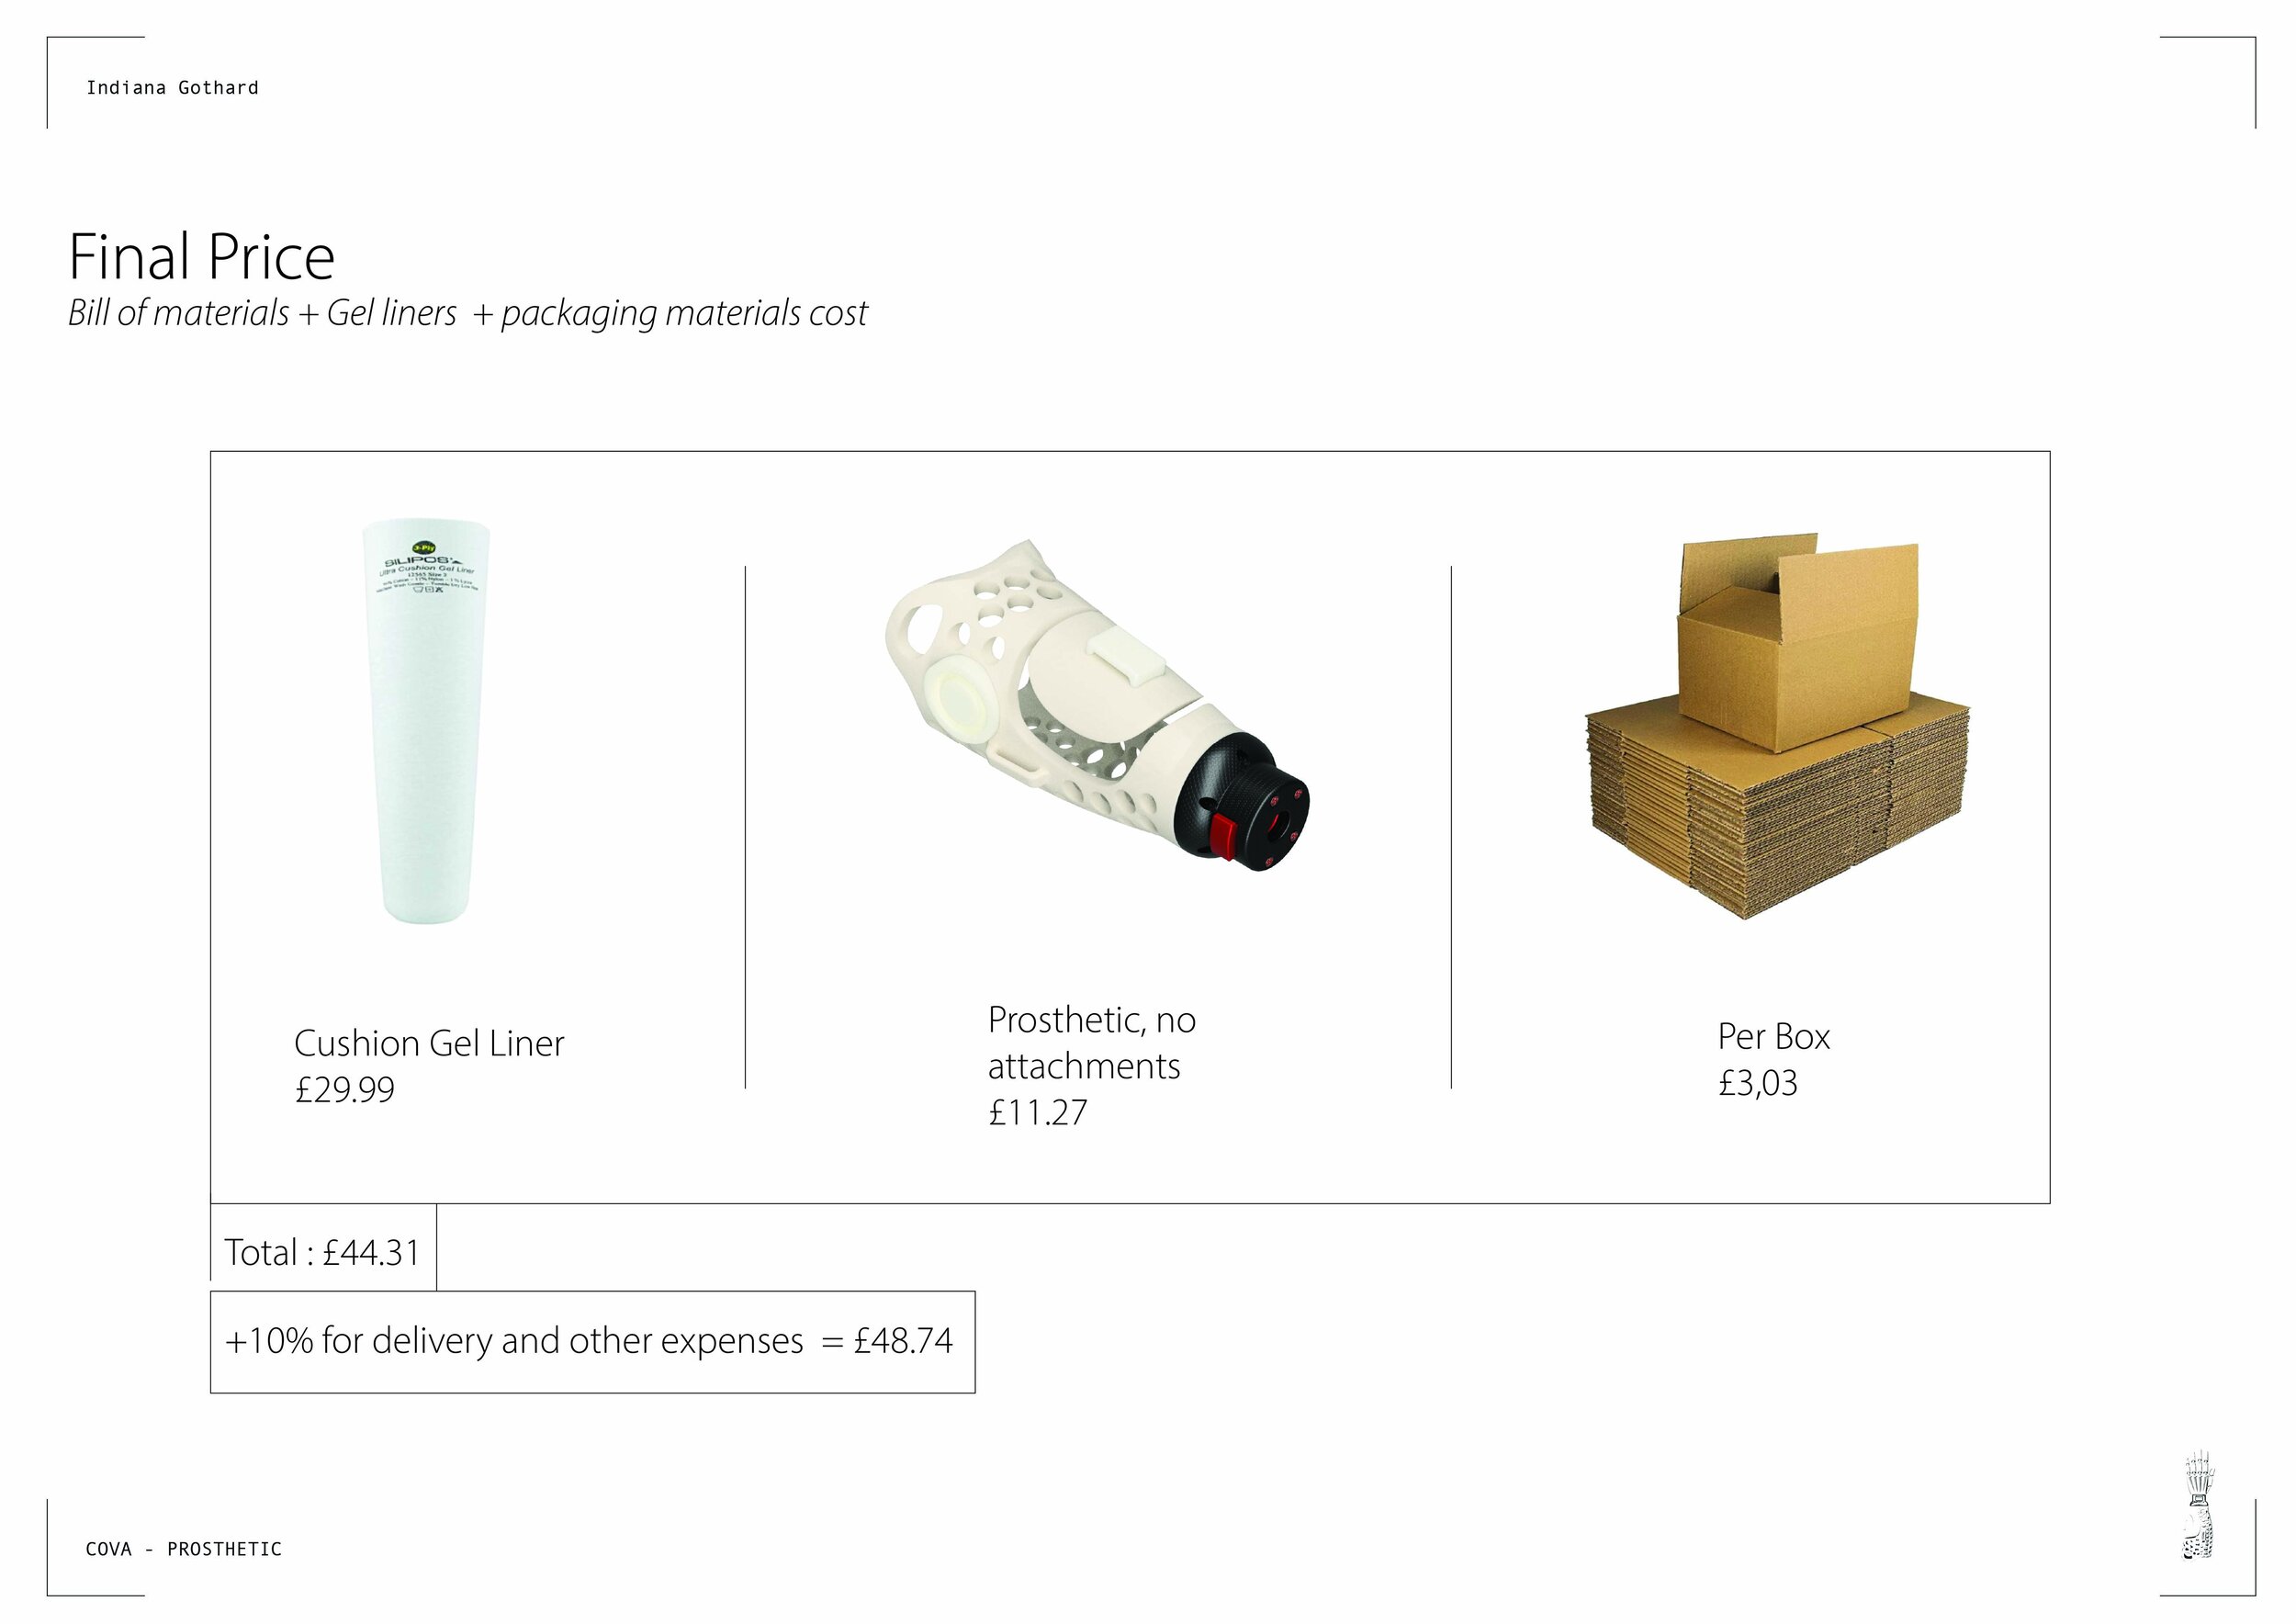
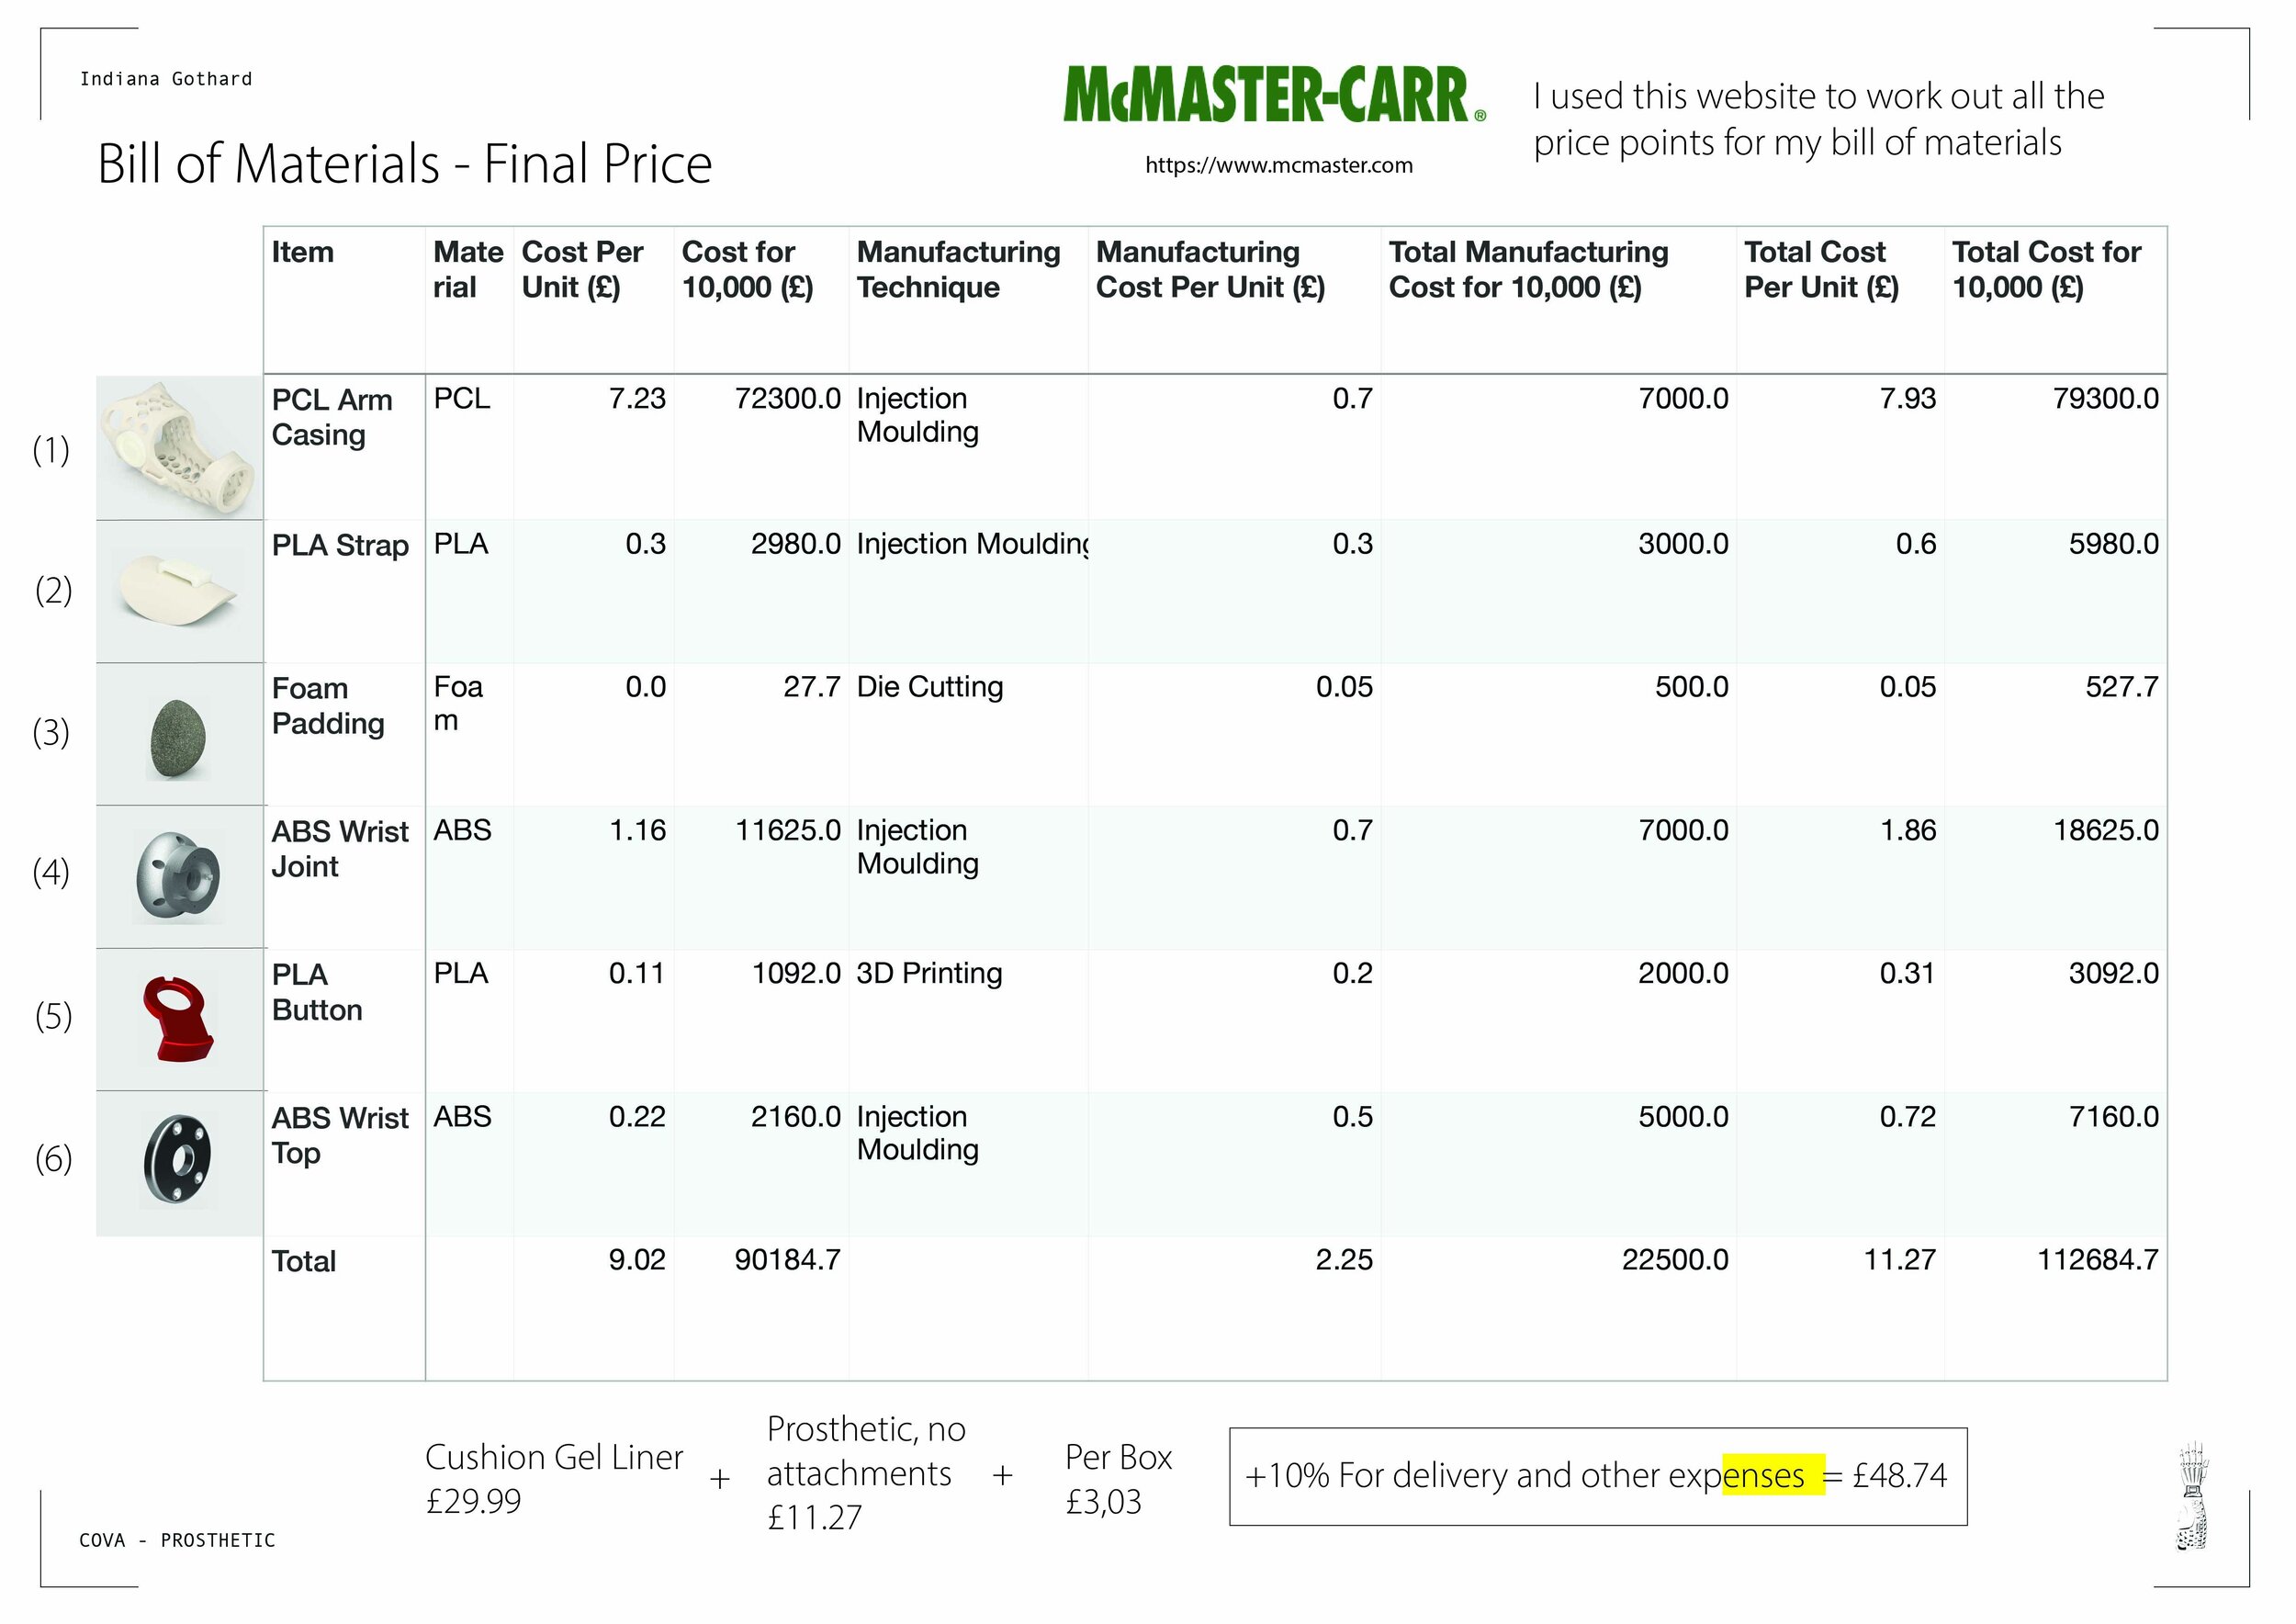
This is the final prosthetic, shown in the video moulding and adapting to create a more ergonomic fit. Such adjustability/customization makes it especially valuable for people in low-income countries who need accessible and affordable solutions. In an ideal scenario, these prosthetics could be purchased in packages for different levels of amputation; whether wrist, below elbow, or above elbow and distributed through local hubs or pharmacies for quick access. The total cost was estimated at around $54 after manufacturing, including the wrist joint, screws, and liner.
09 CONCLUSION

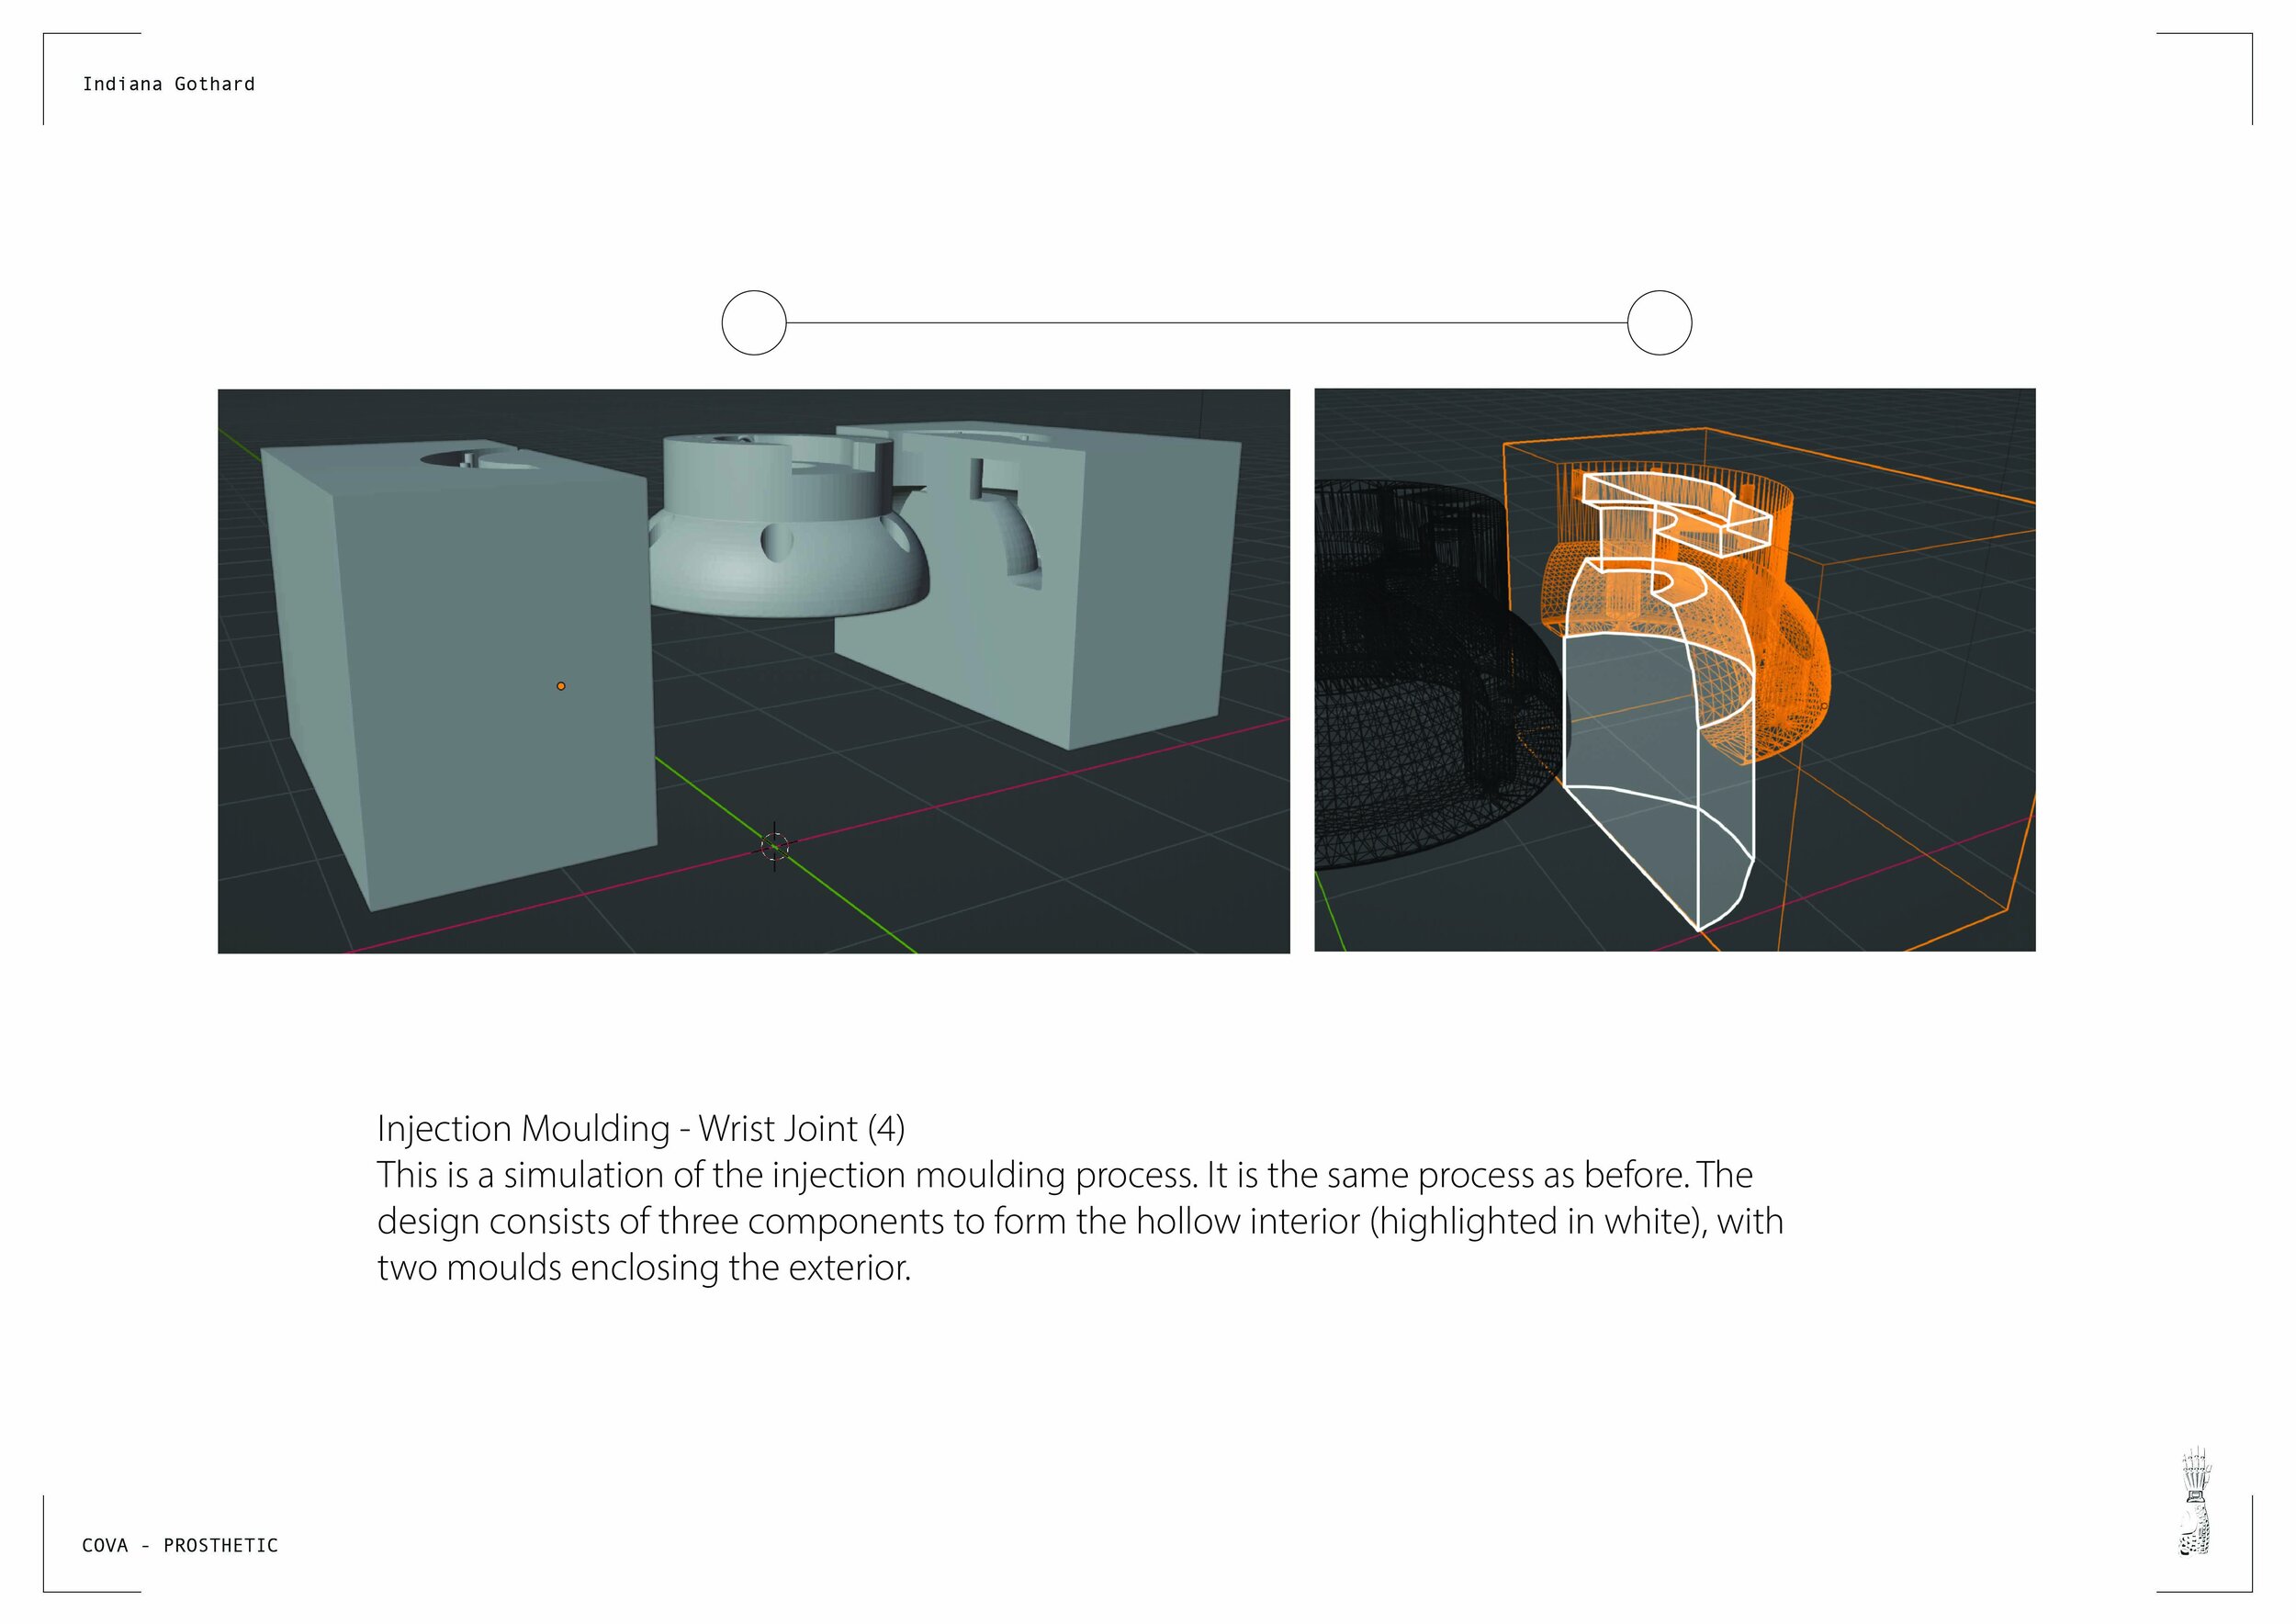
10 GENERAL ARRANGEMENT DRAWINGS


FULL 174 PAGE PROJECT
This document also details my exploration of wrist joints for agricultural workers and the process of selecting the most suitable prosthetic liner. It includes all of the interviews and personal research I carried out, along with an in-depth record of each stage that led to the final outcome.