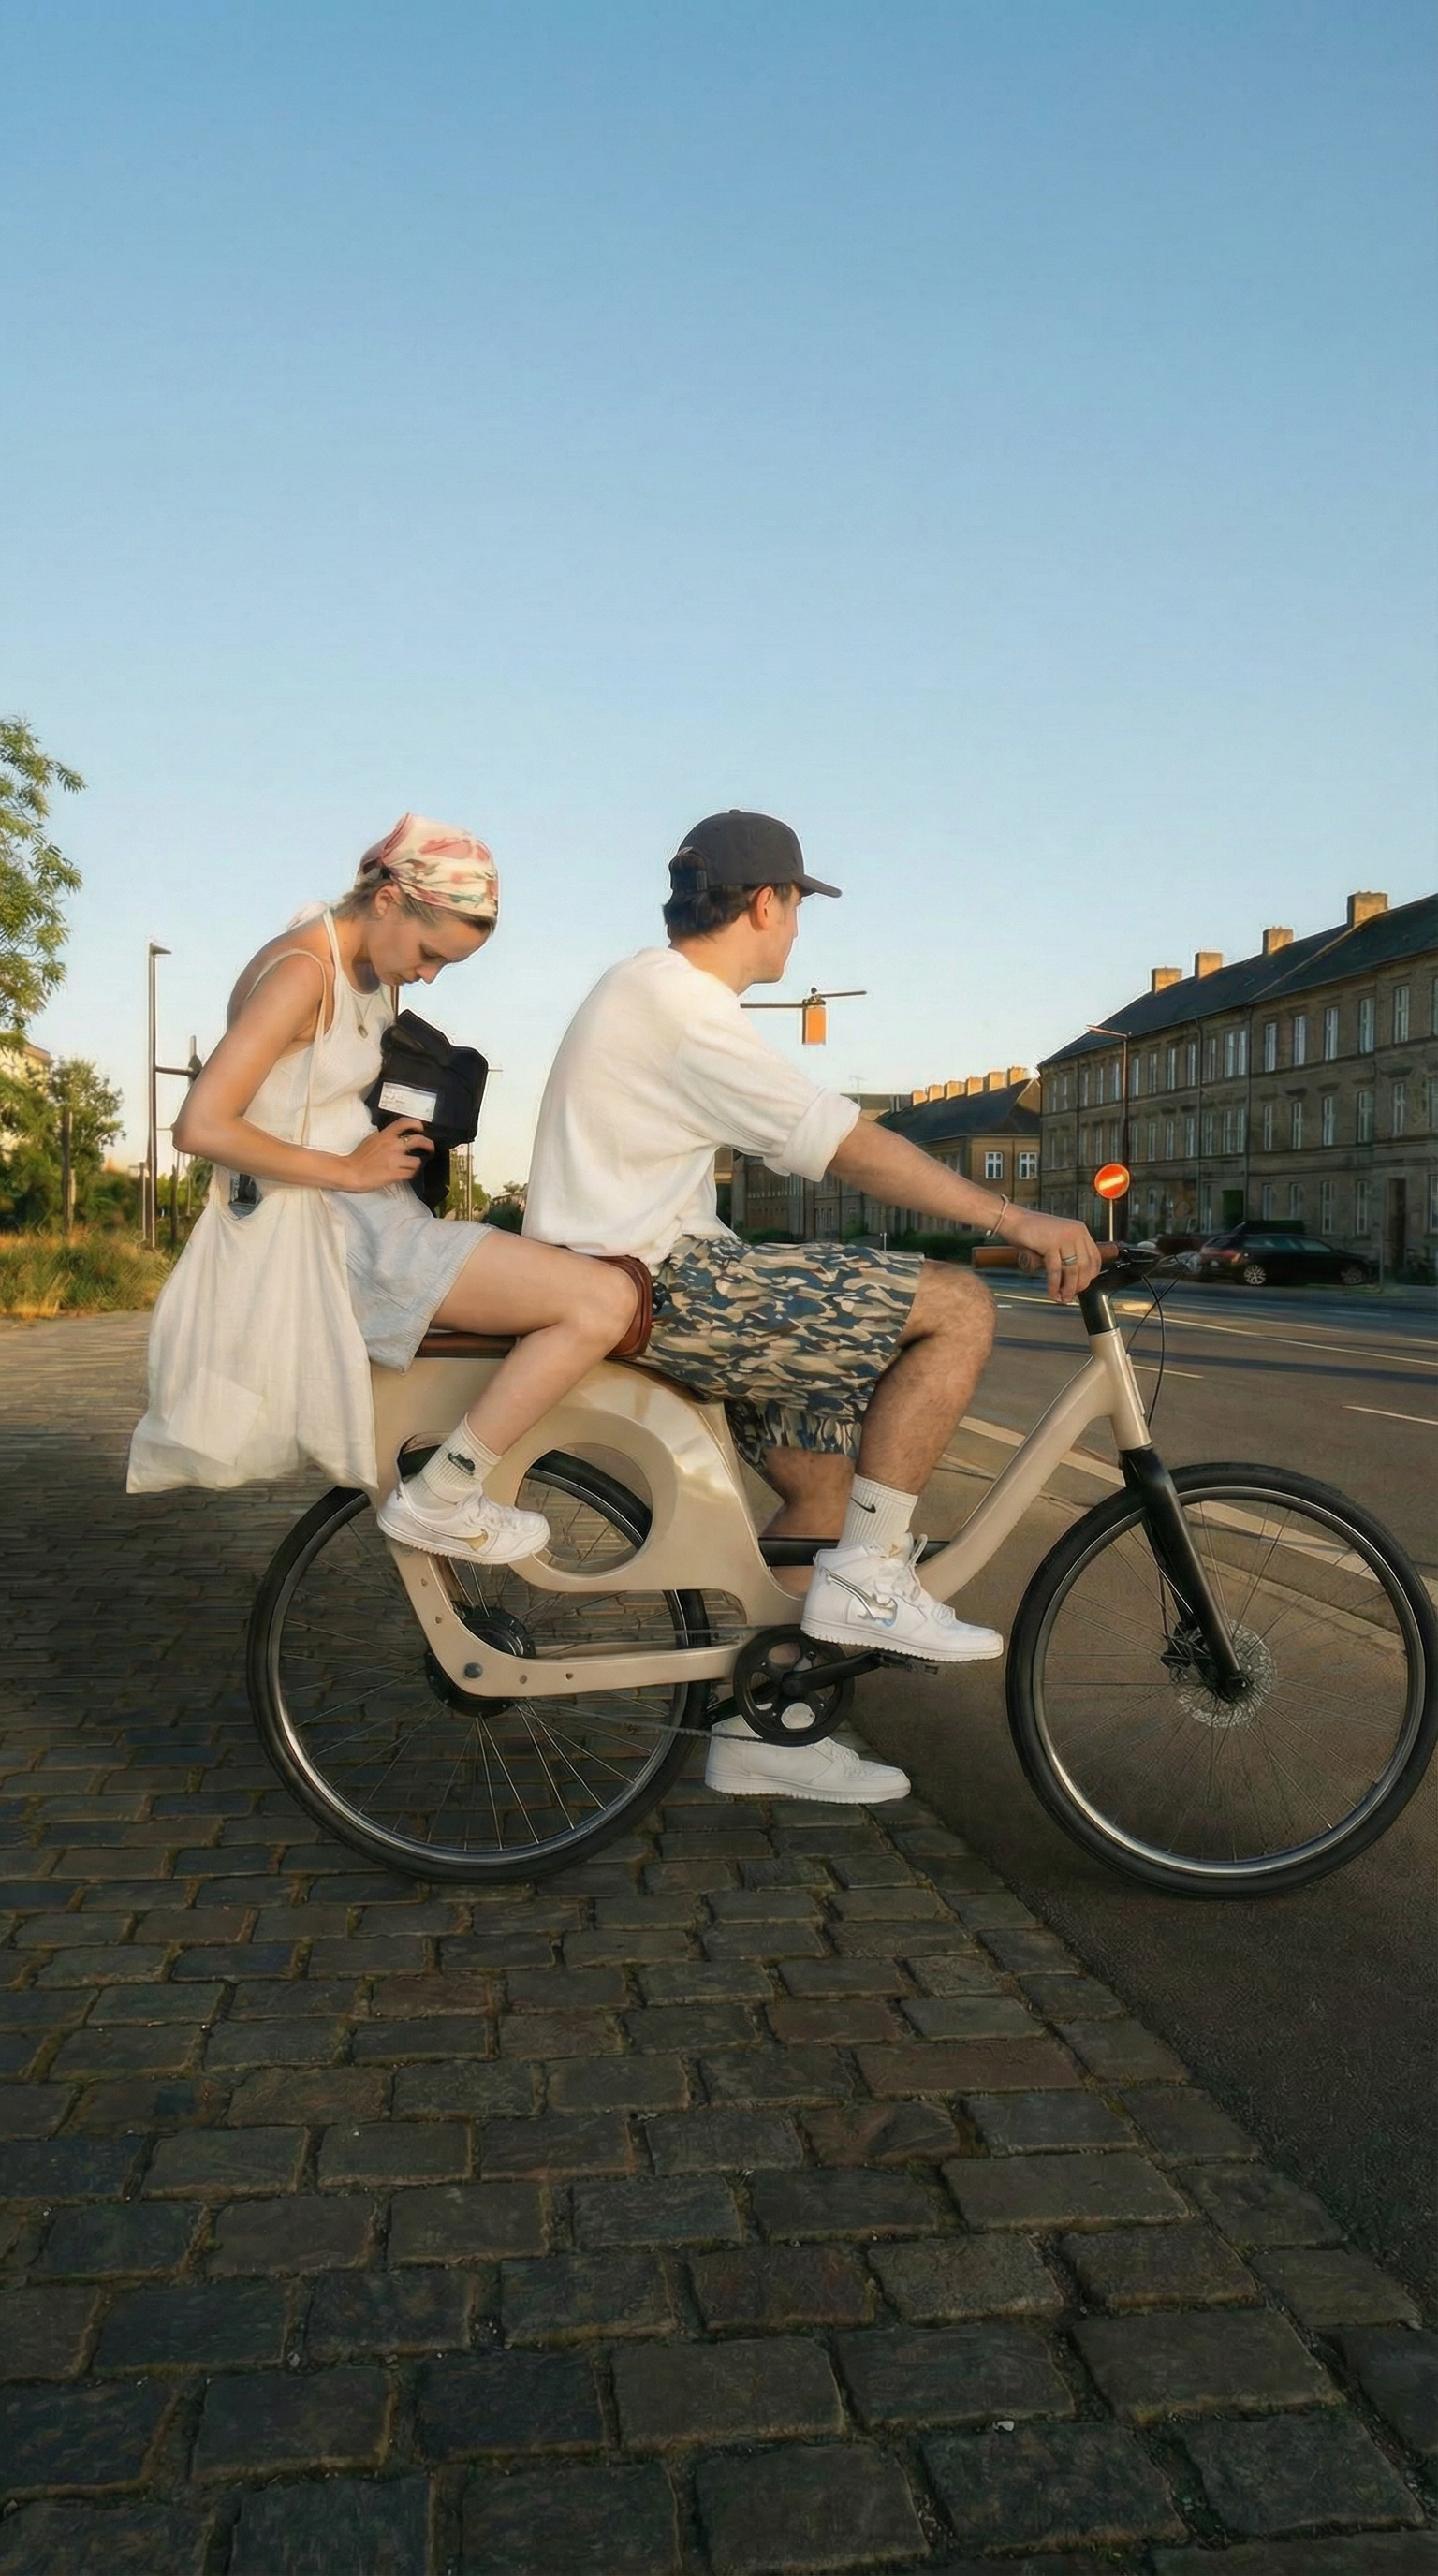
KUWA - A two person city bike with energy generation
ROLE
Individual project
Graduation project @ Central Saint Martins
DURATION
4 months (18 weeks)
TOOLS
Fusion 360 l Rhino l Photoshop l Illustrator
OVERVIEW
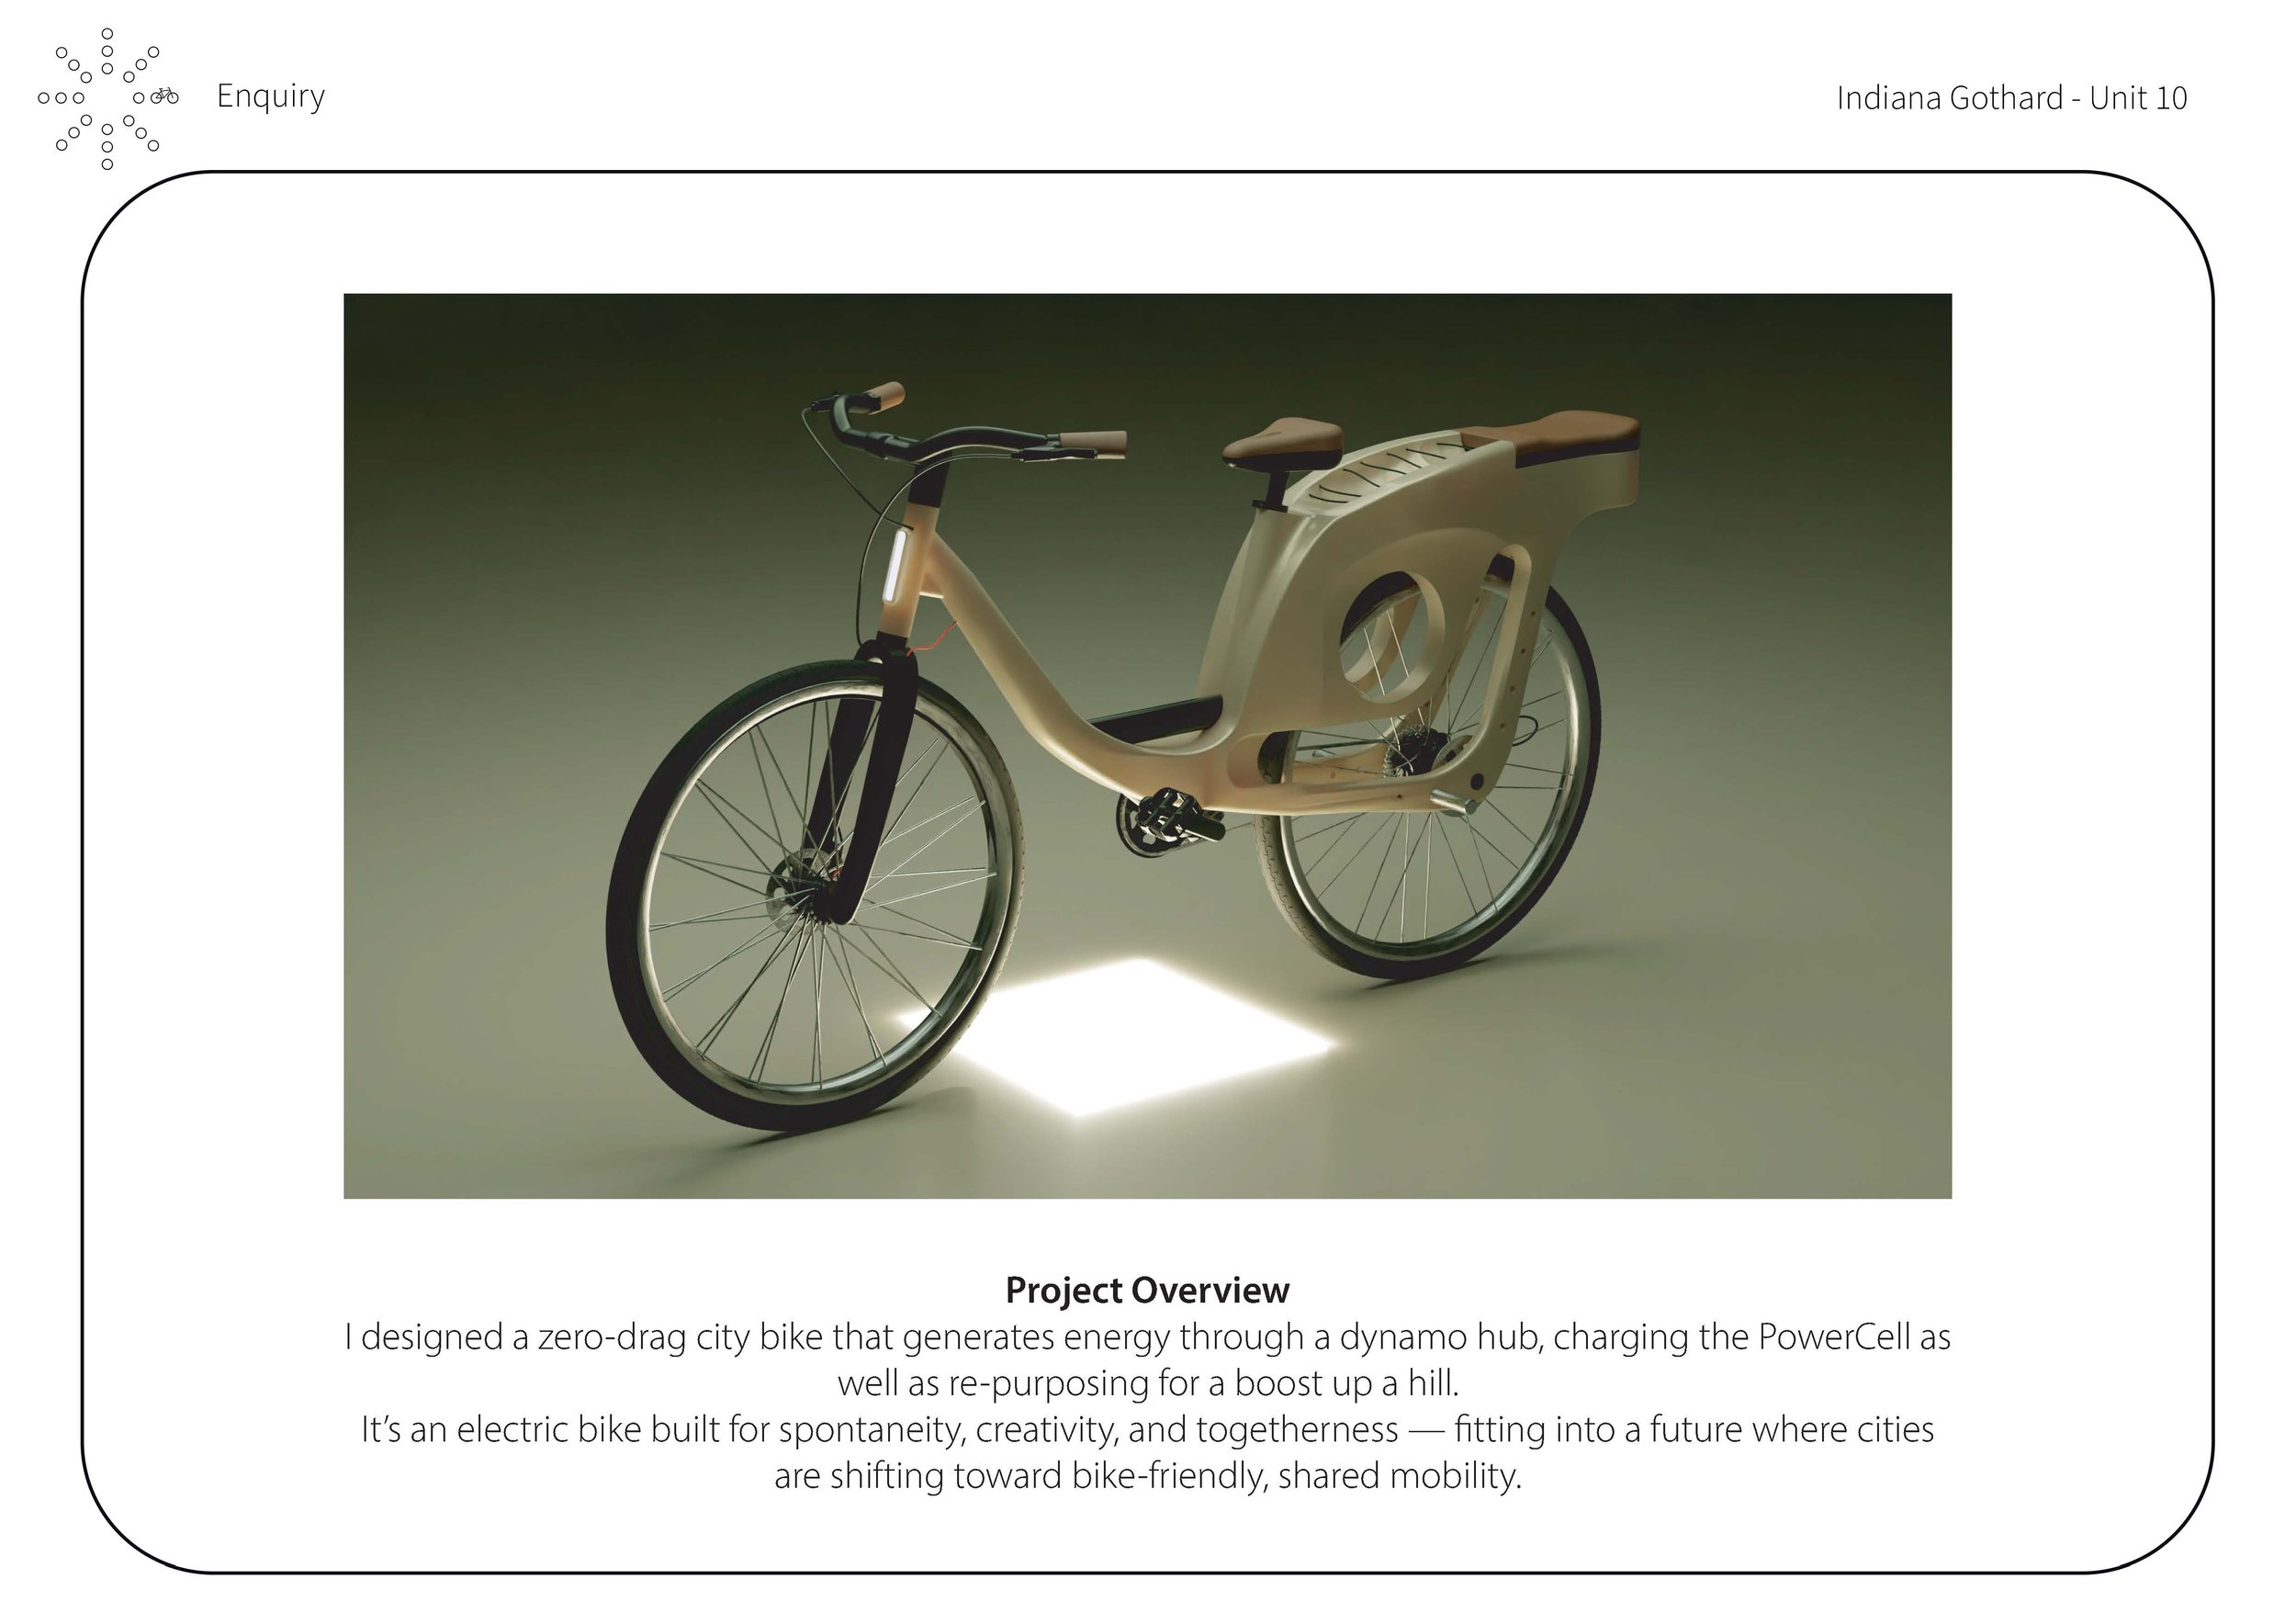
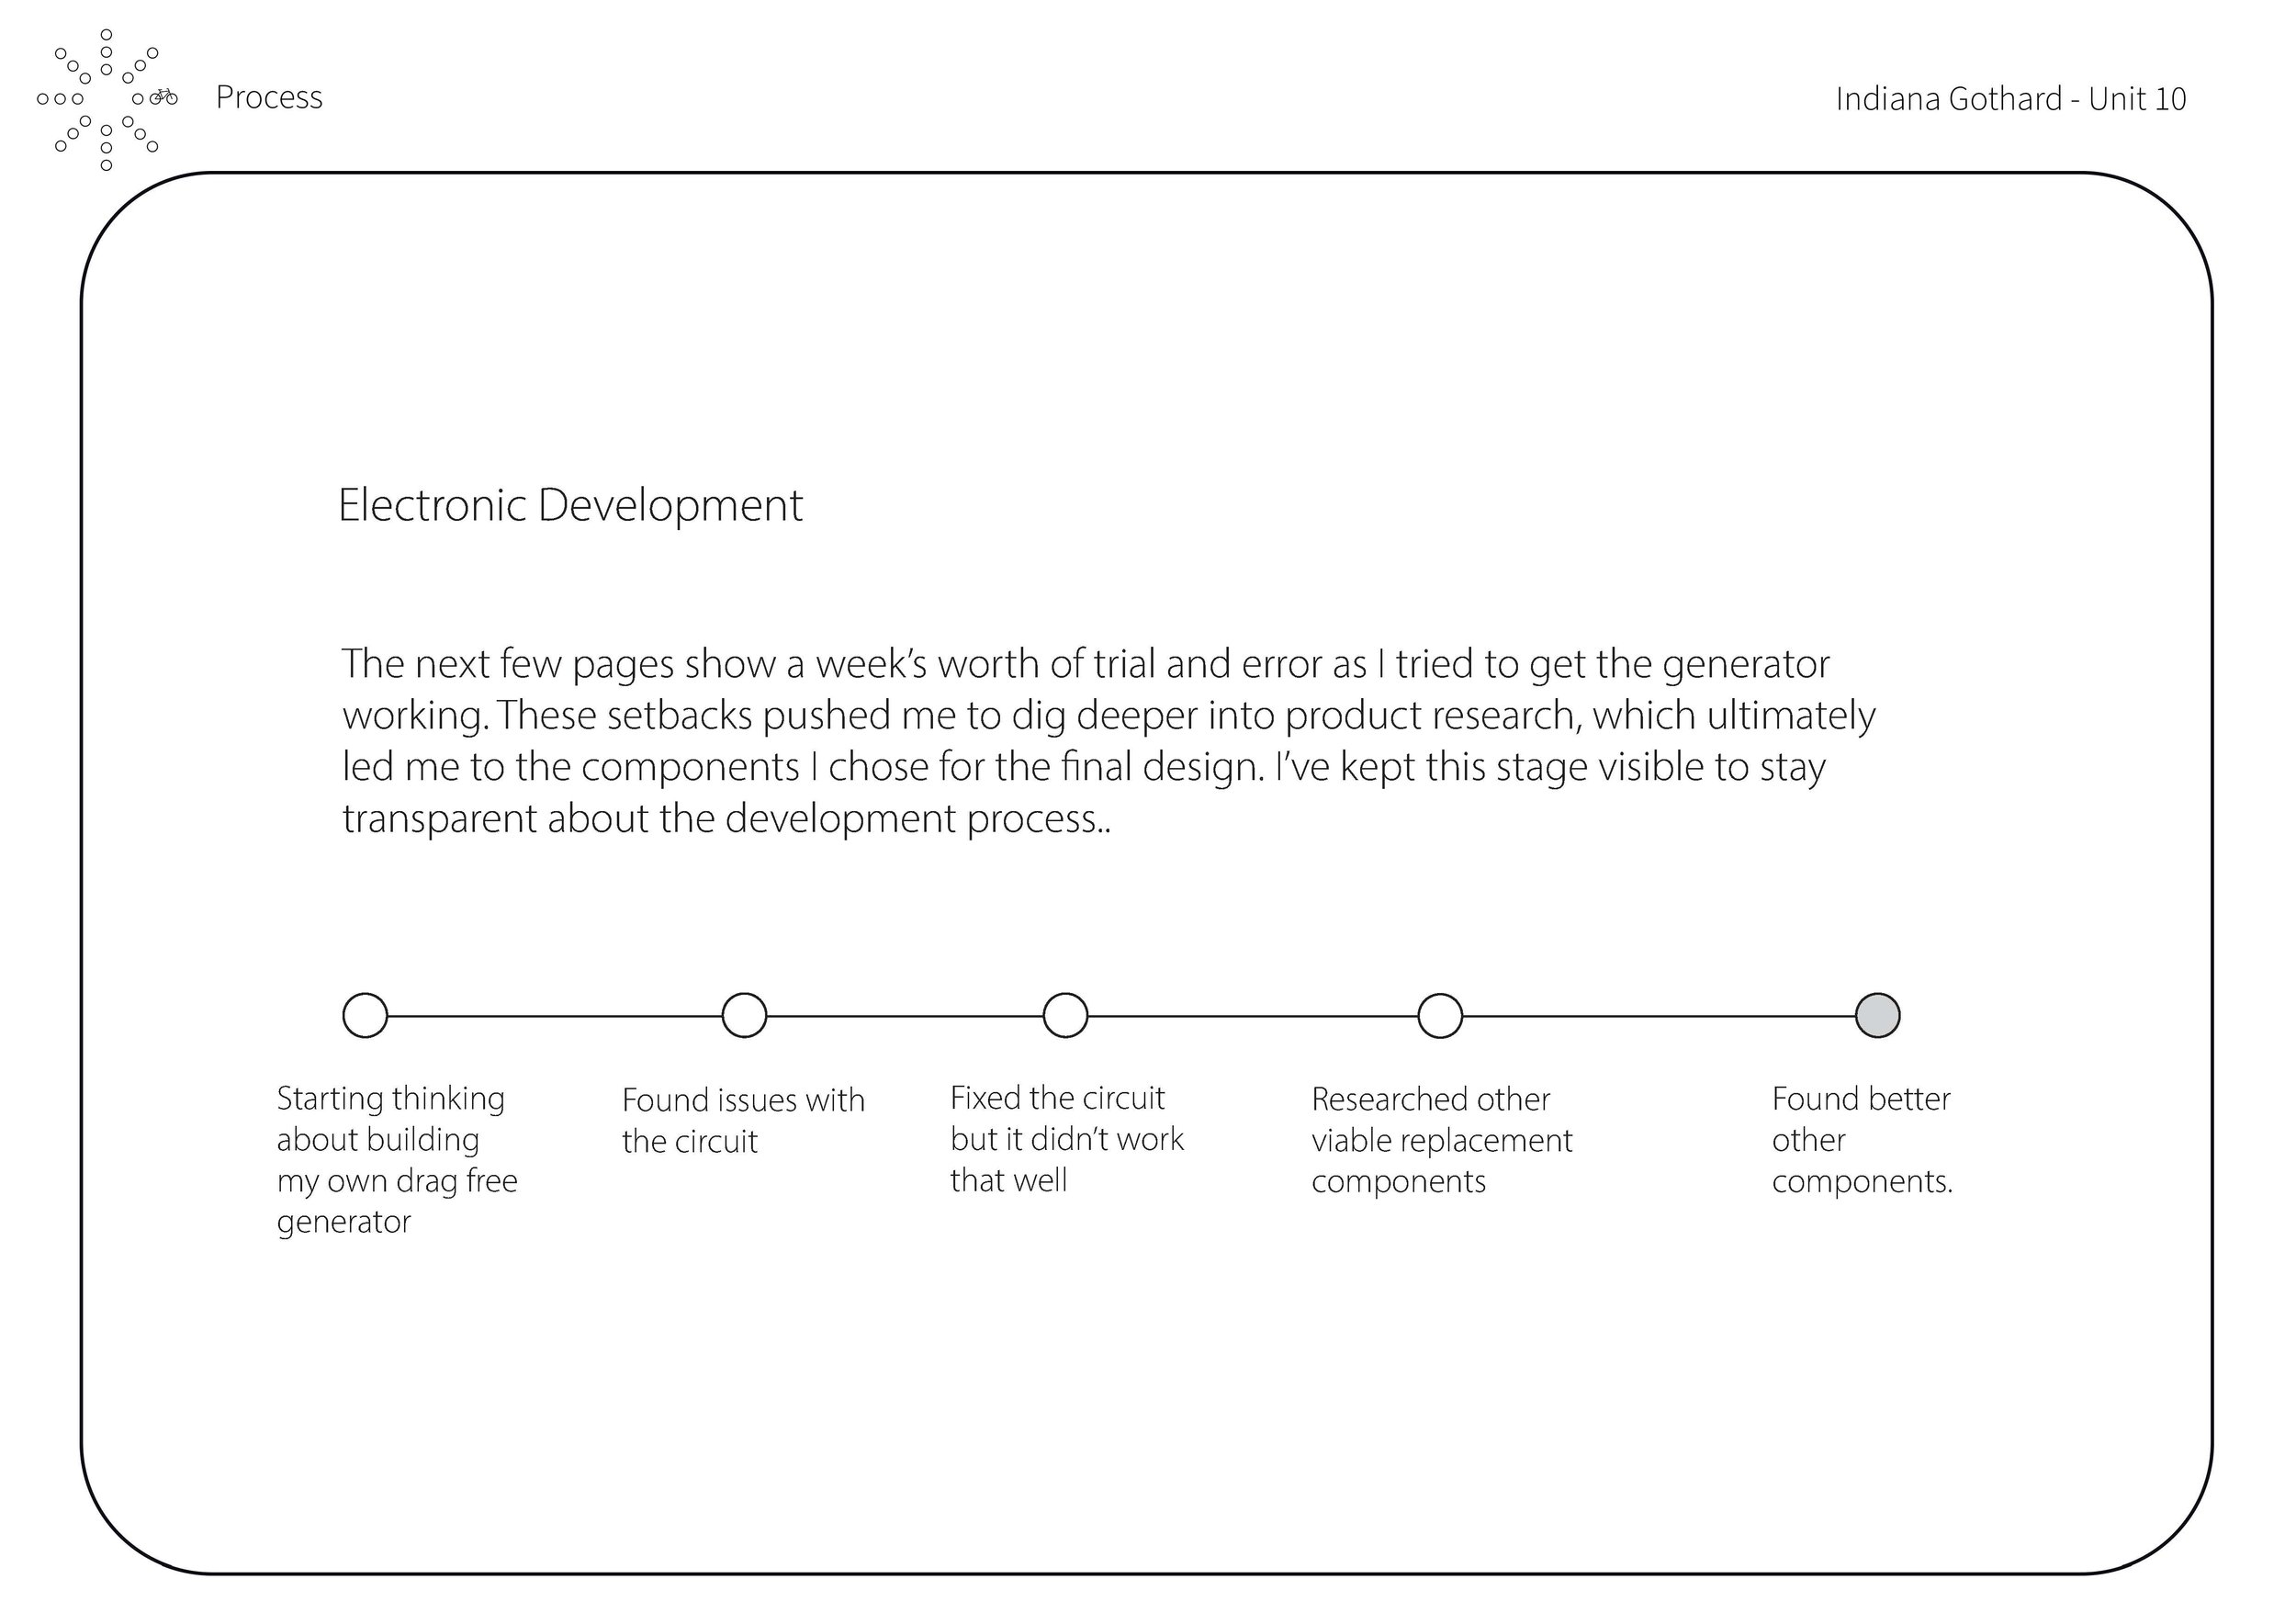
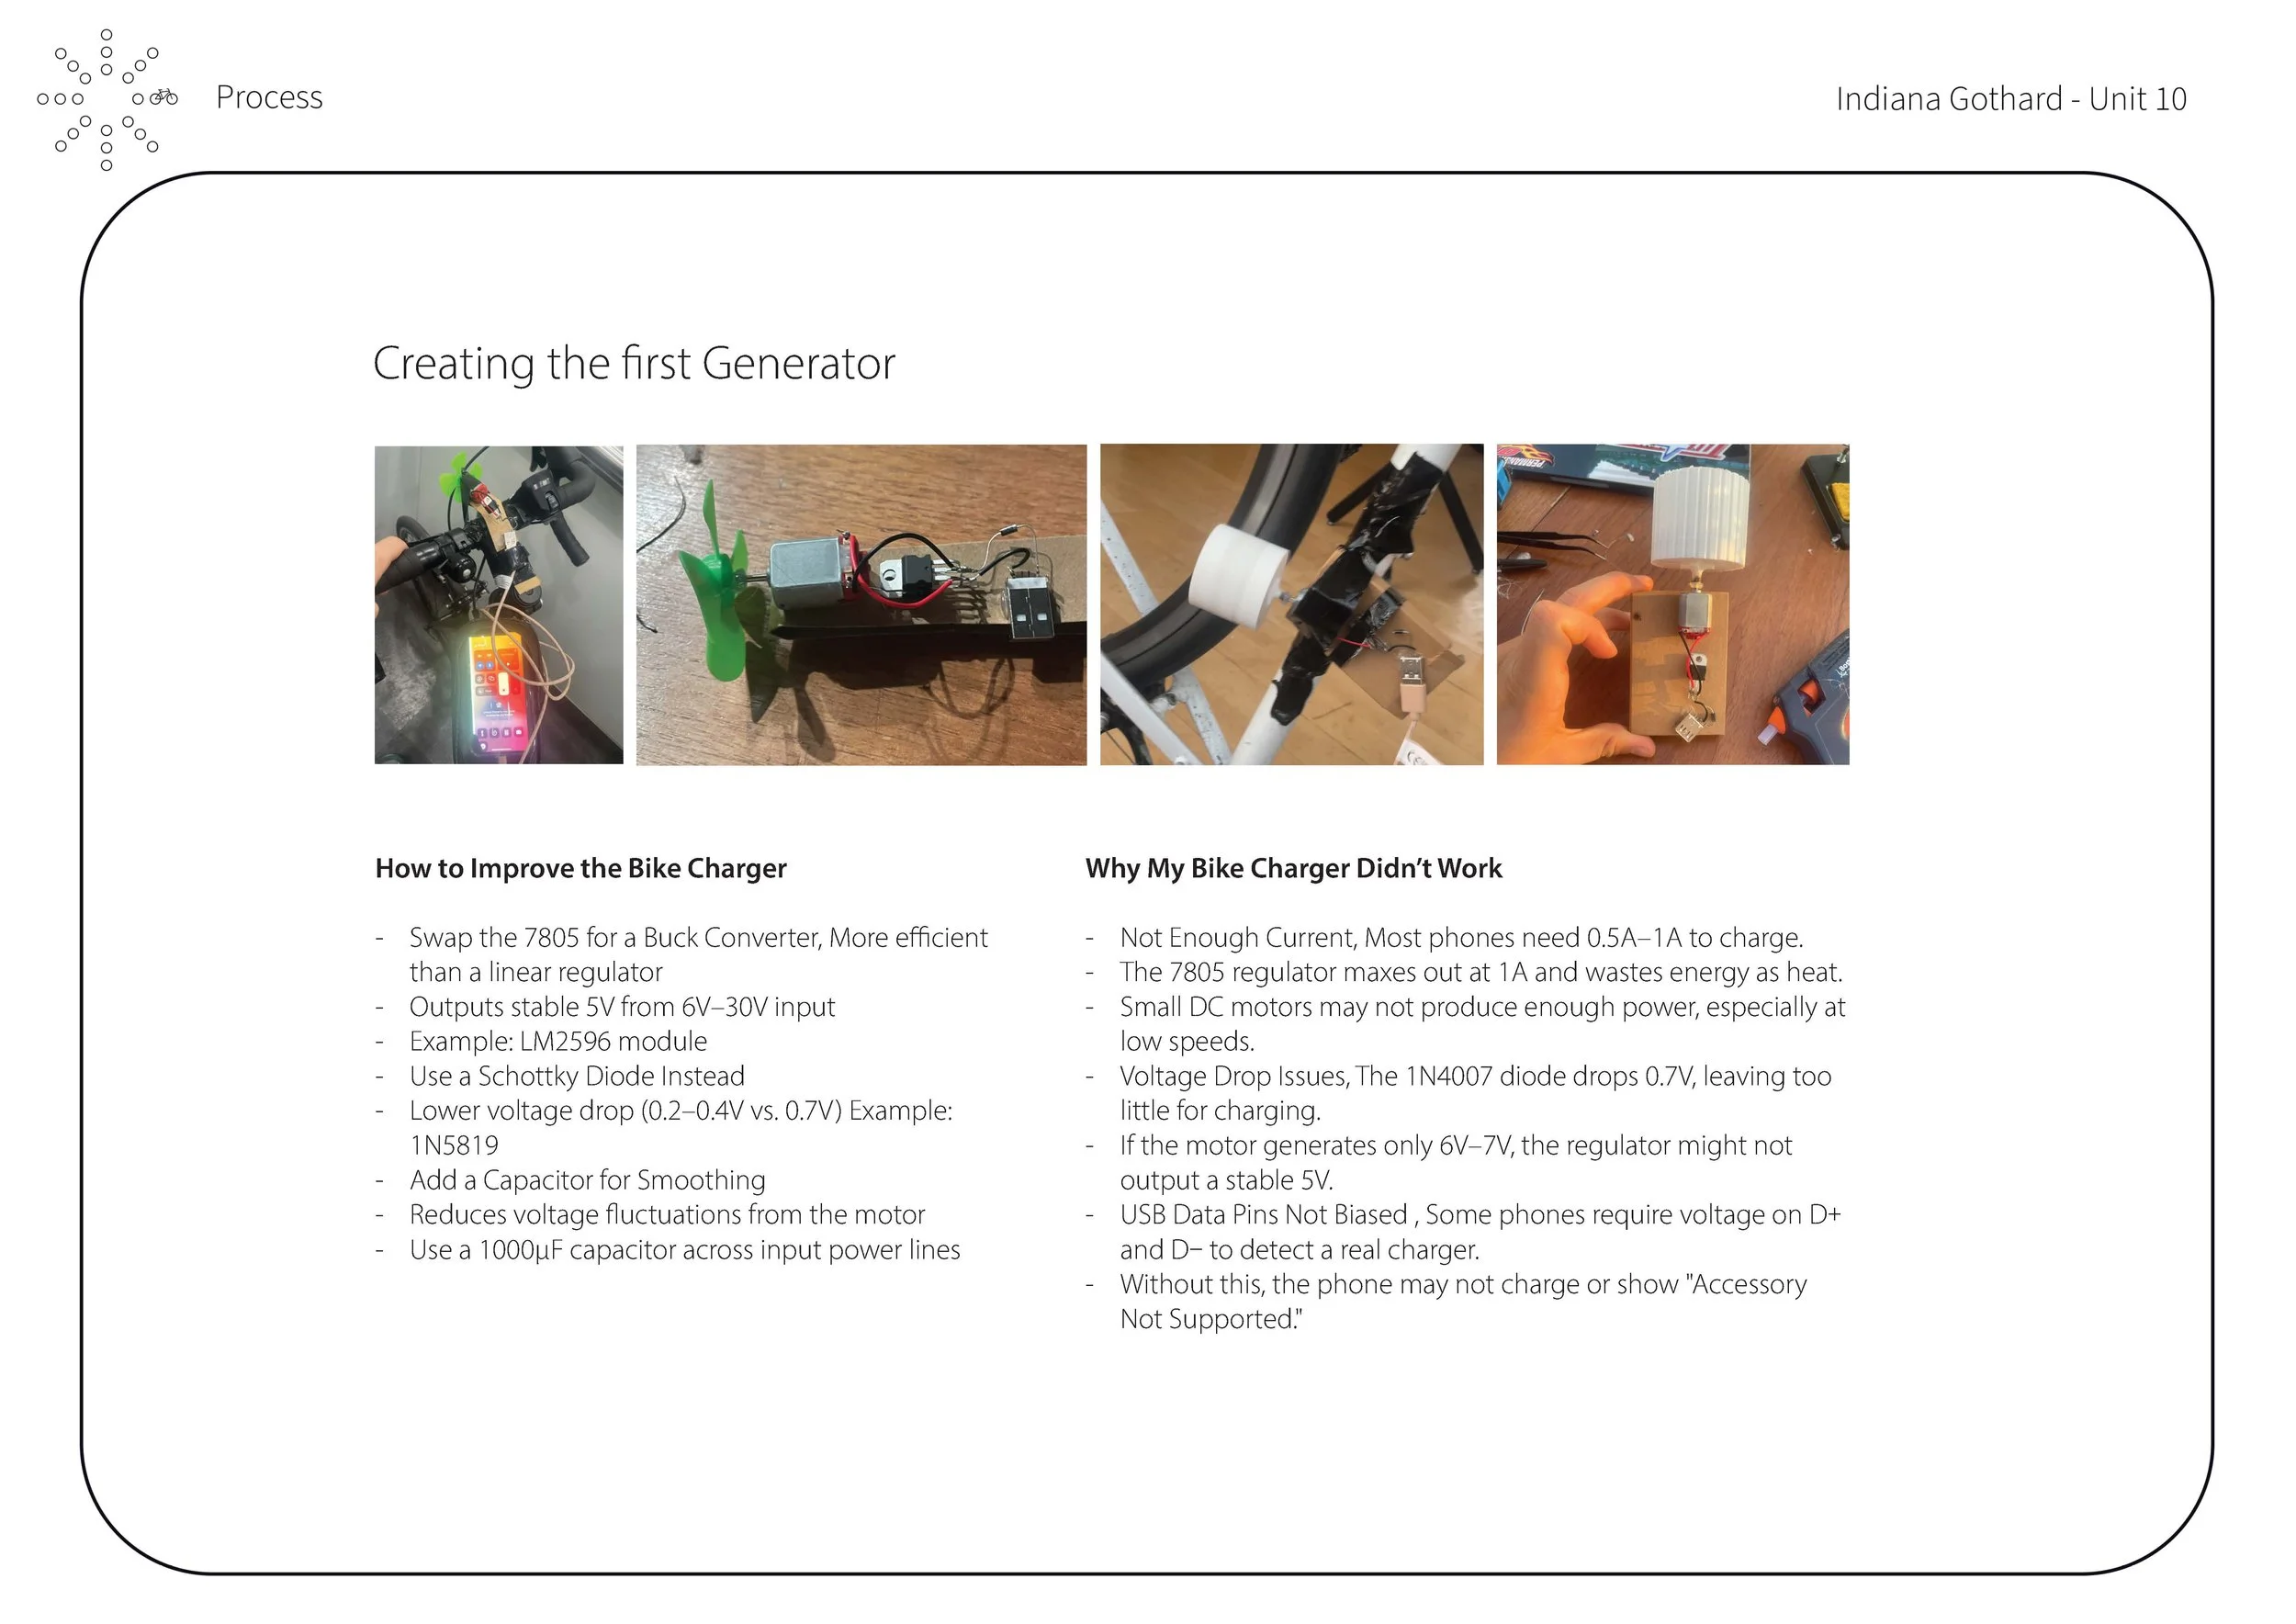
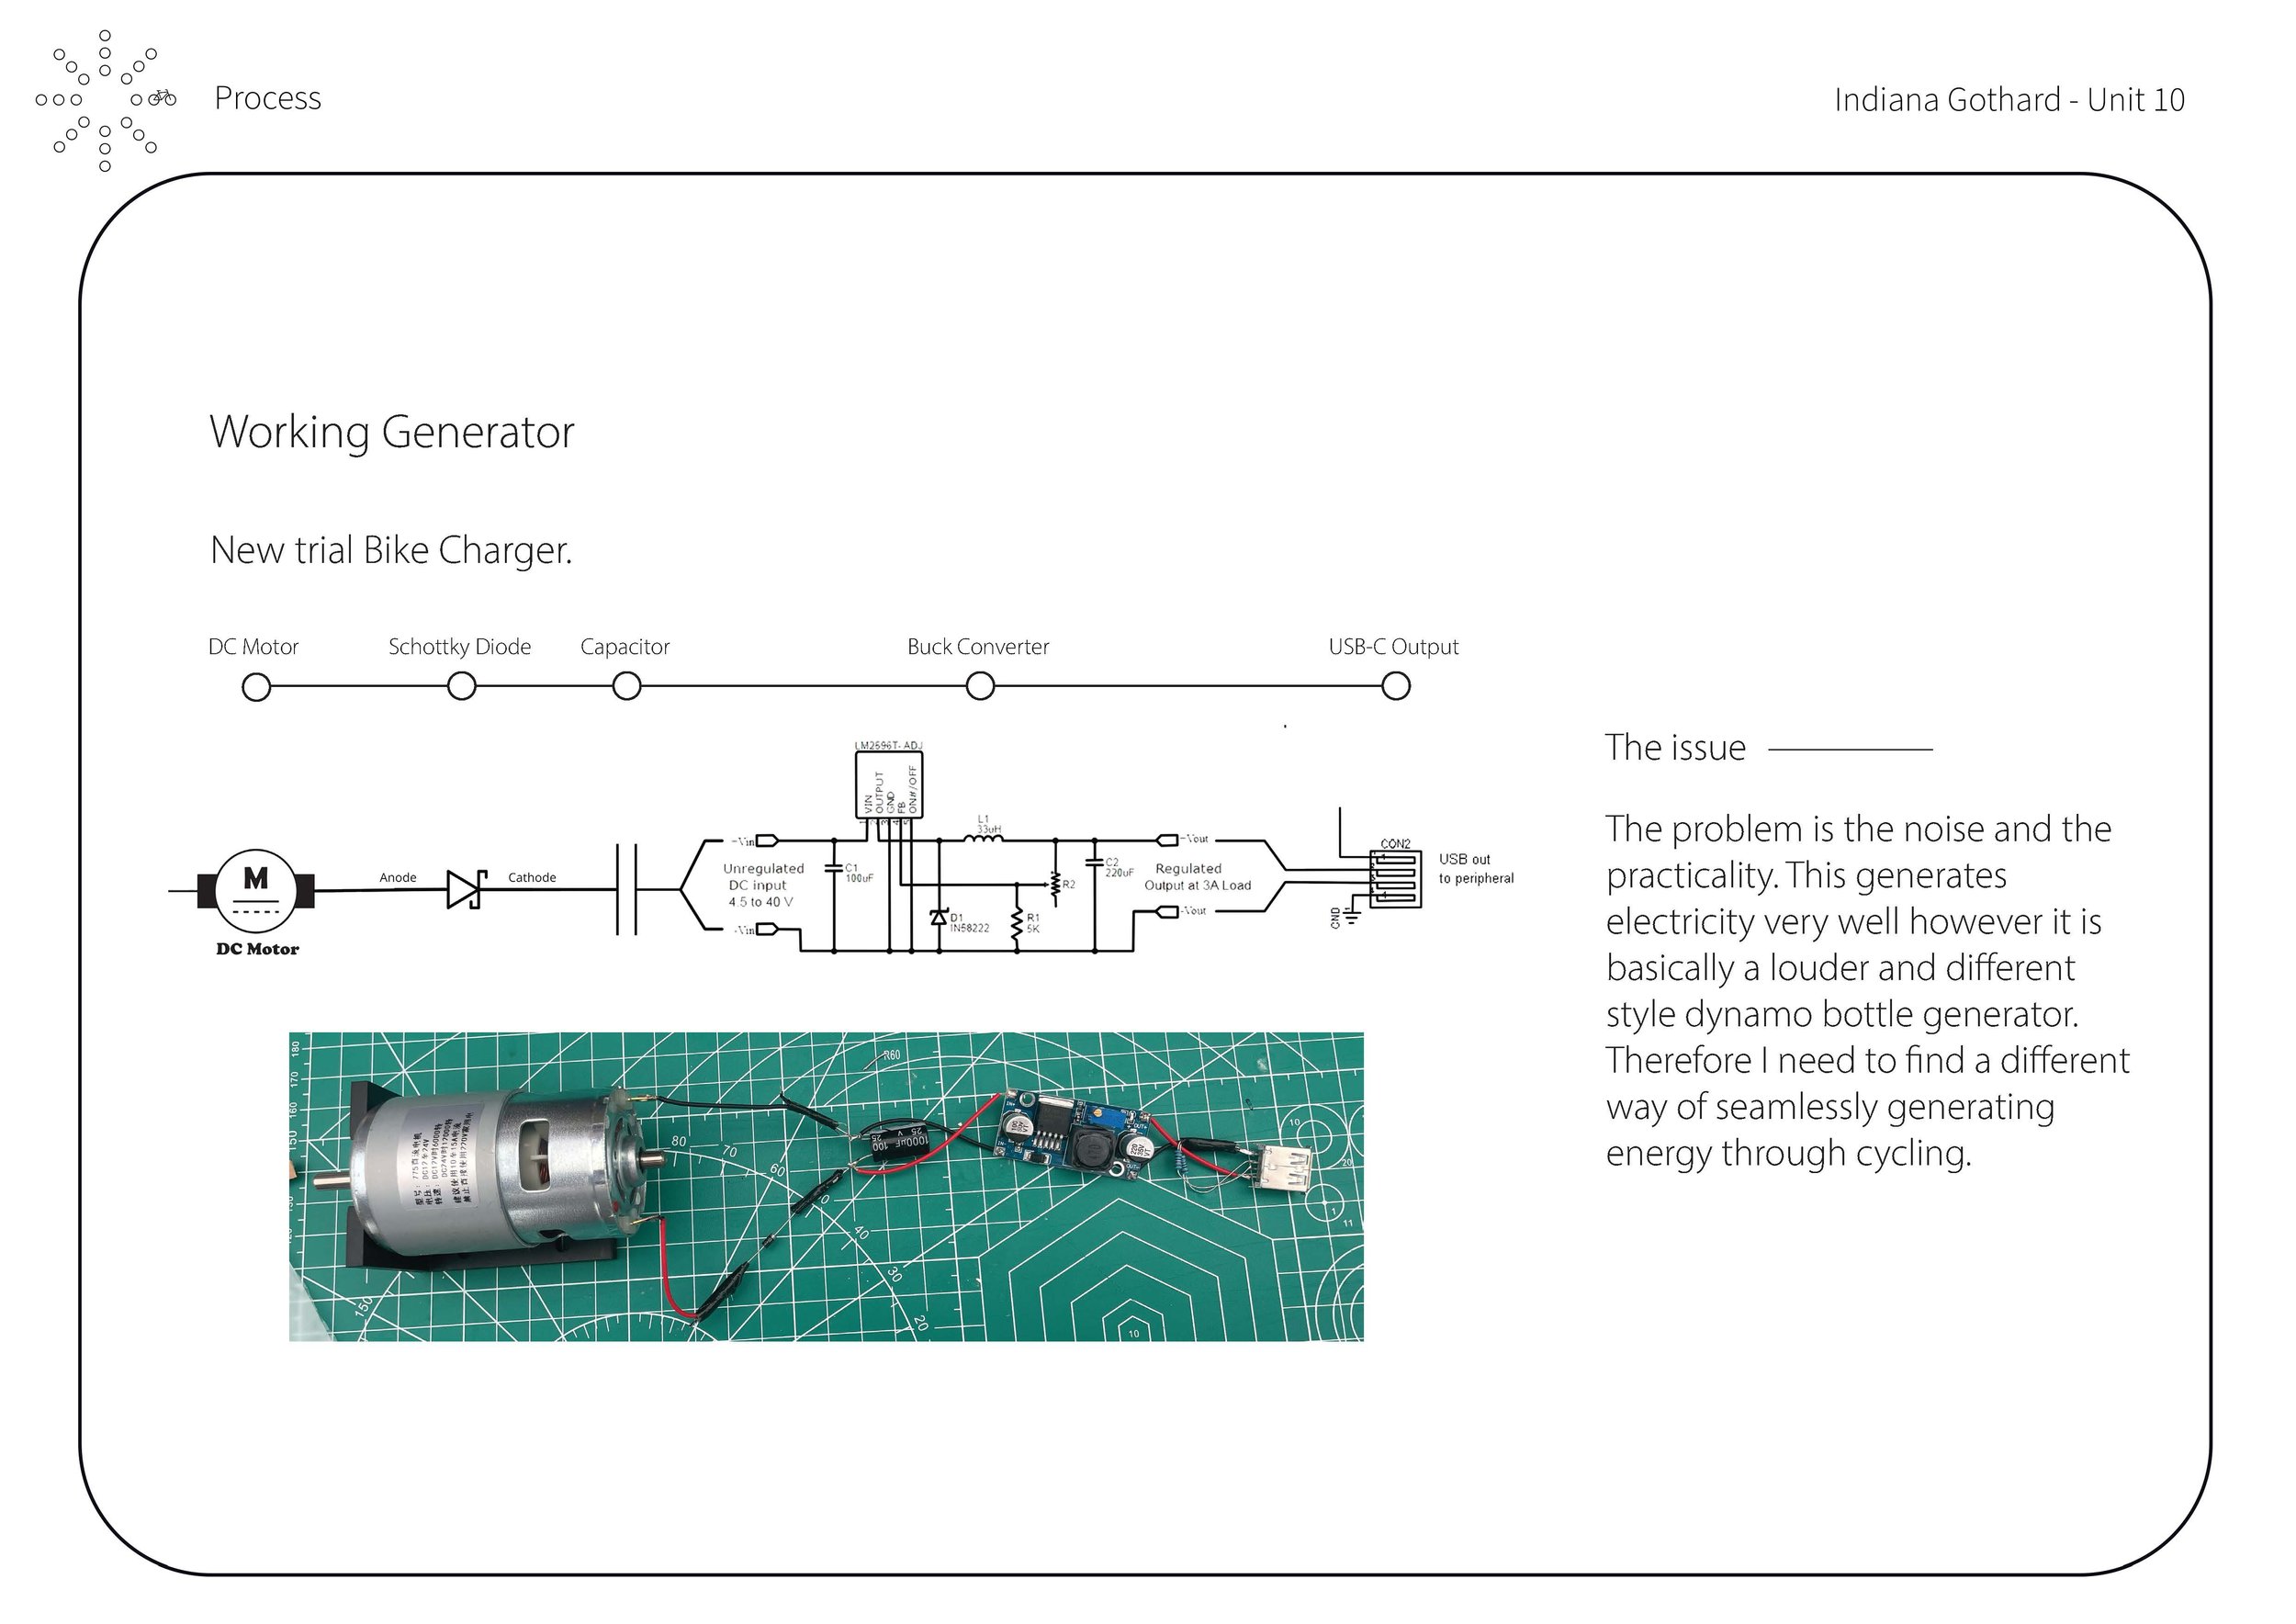
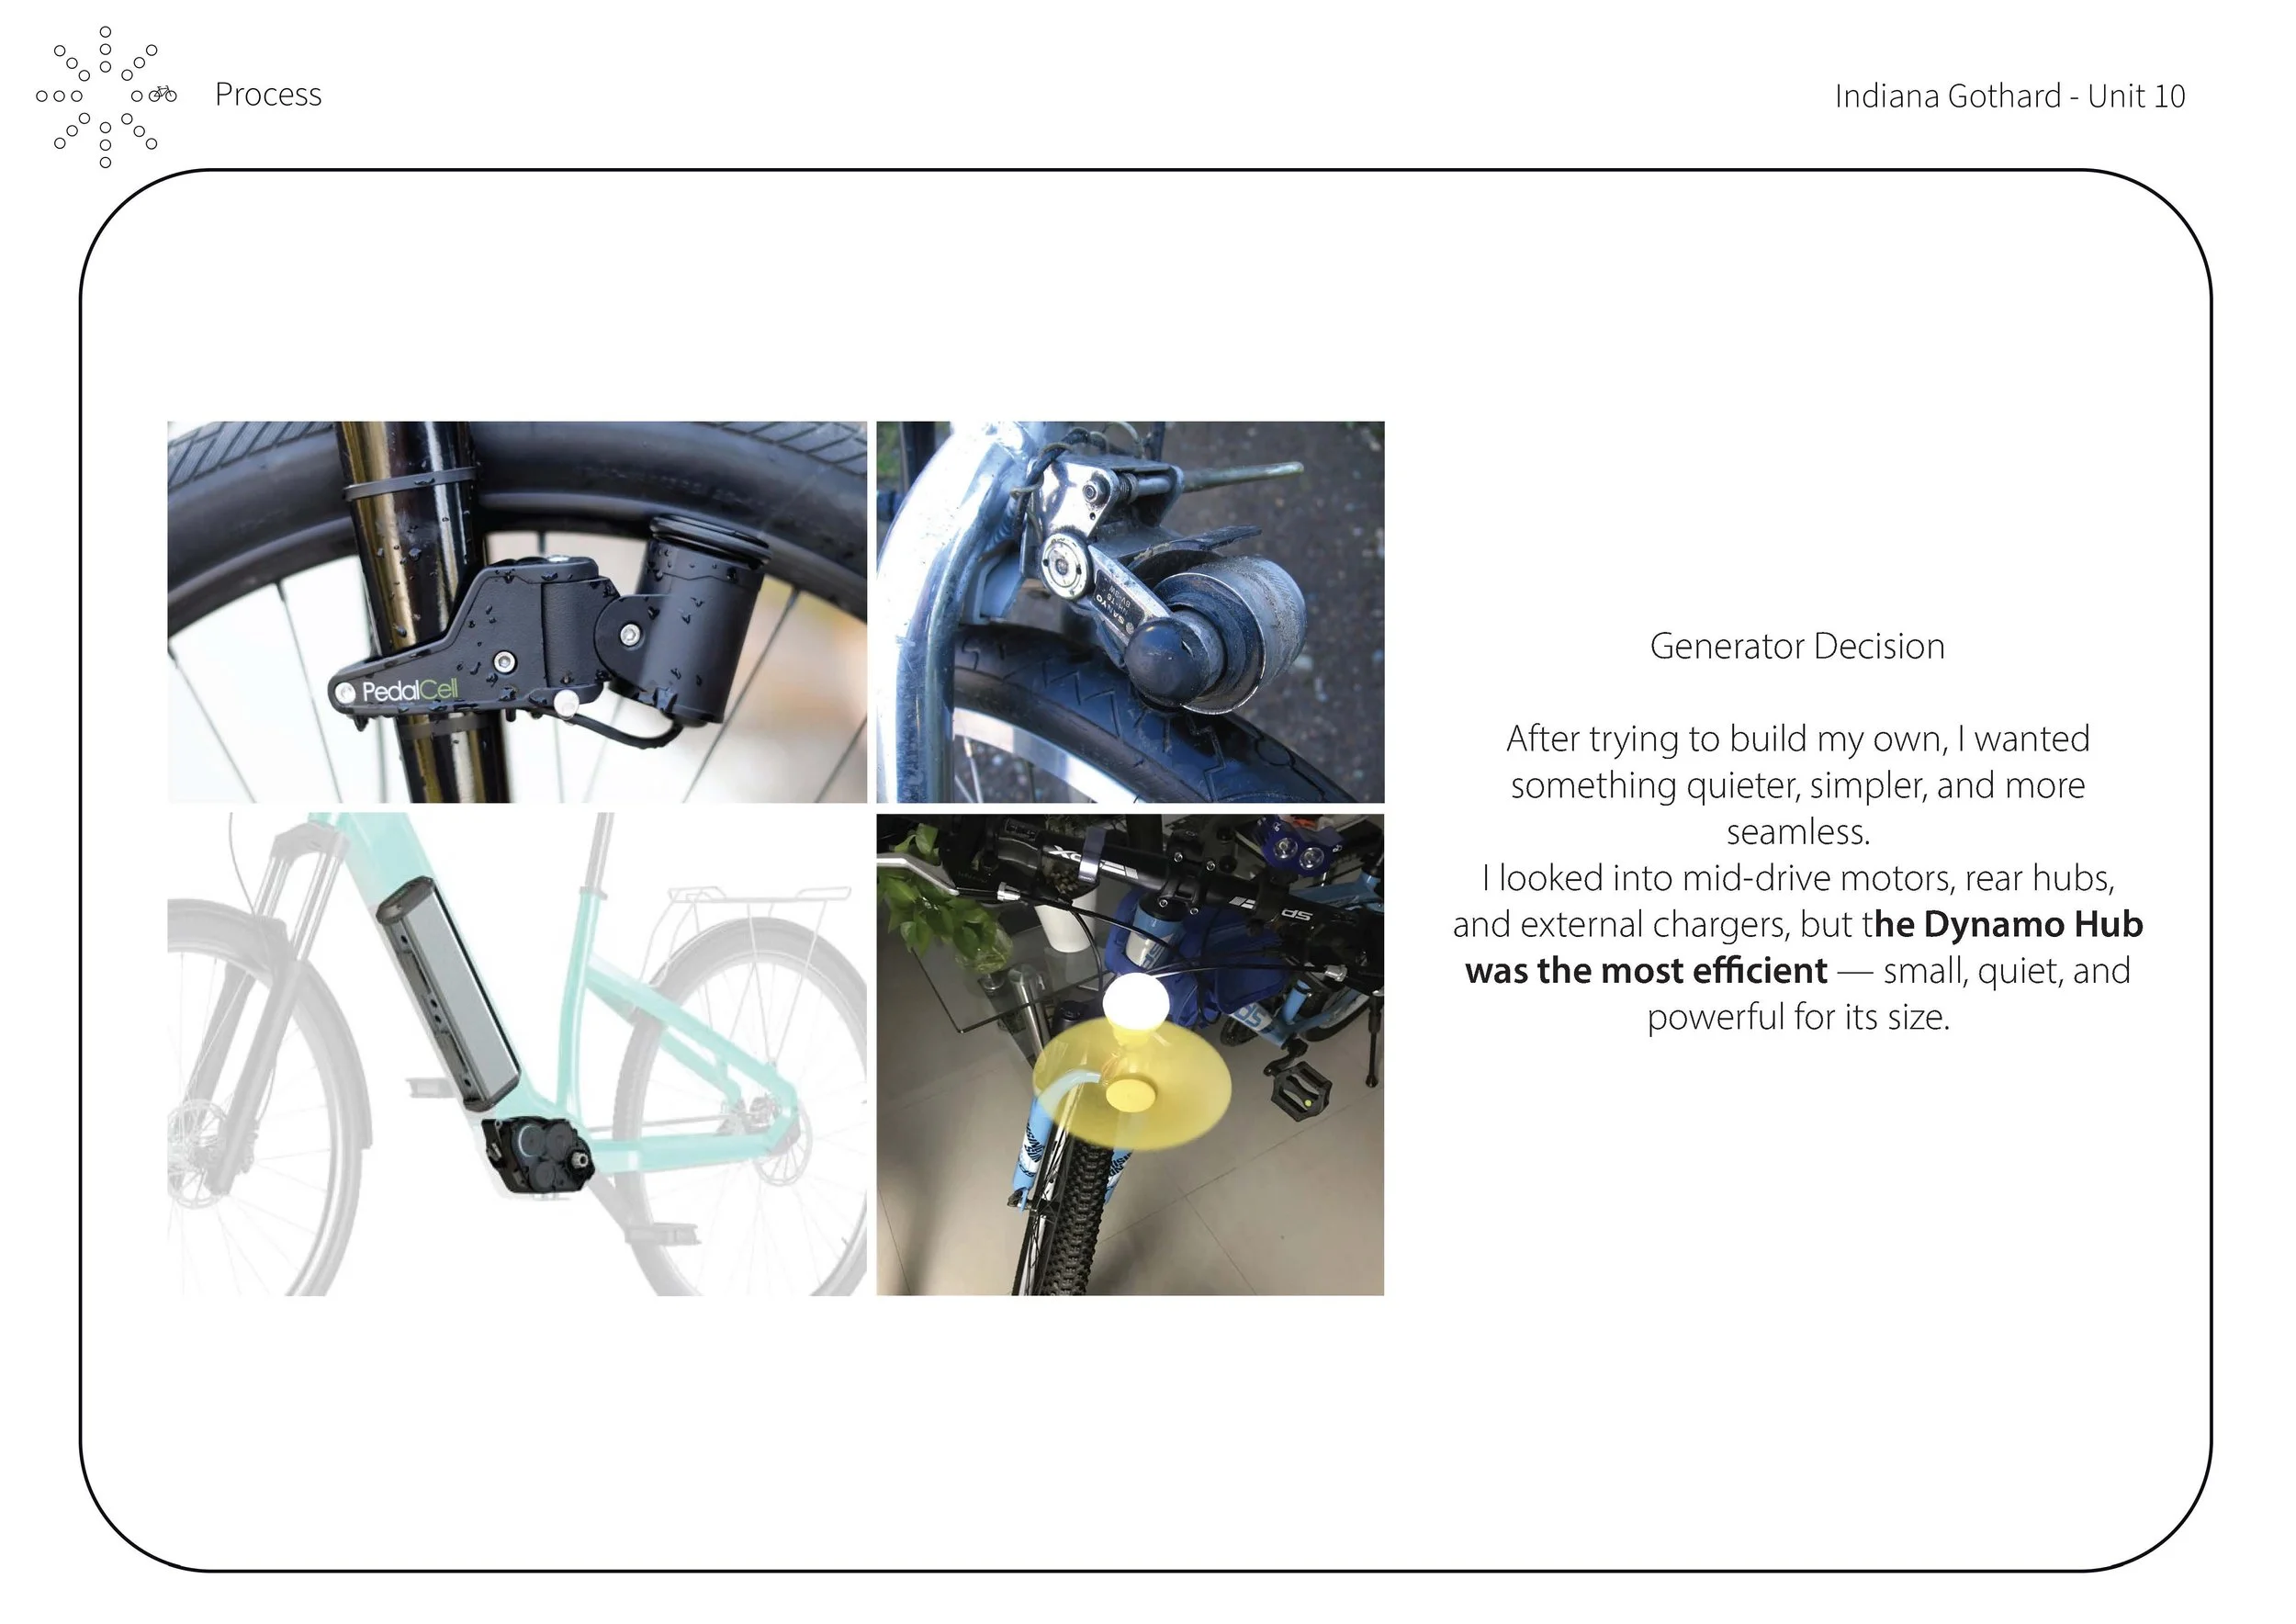
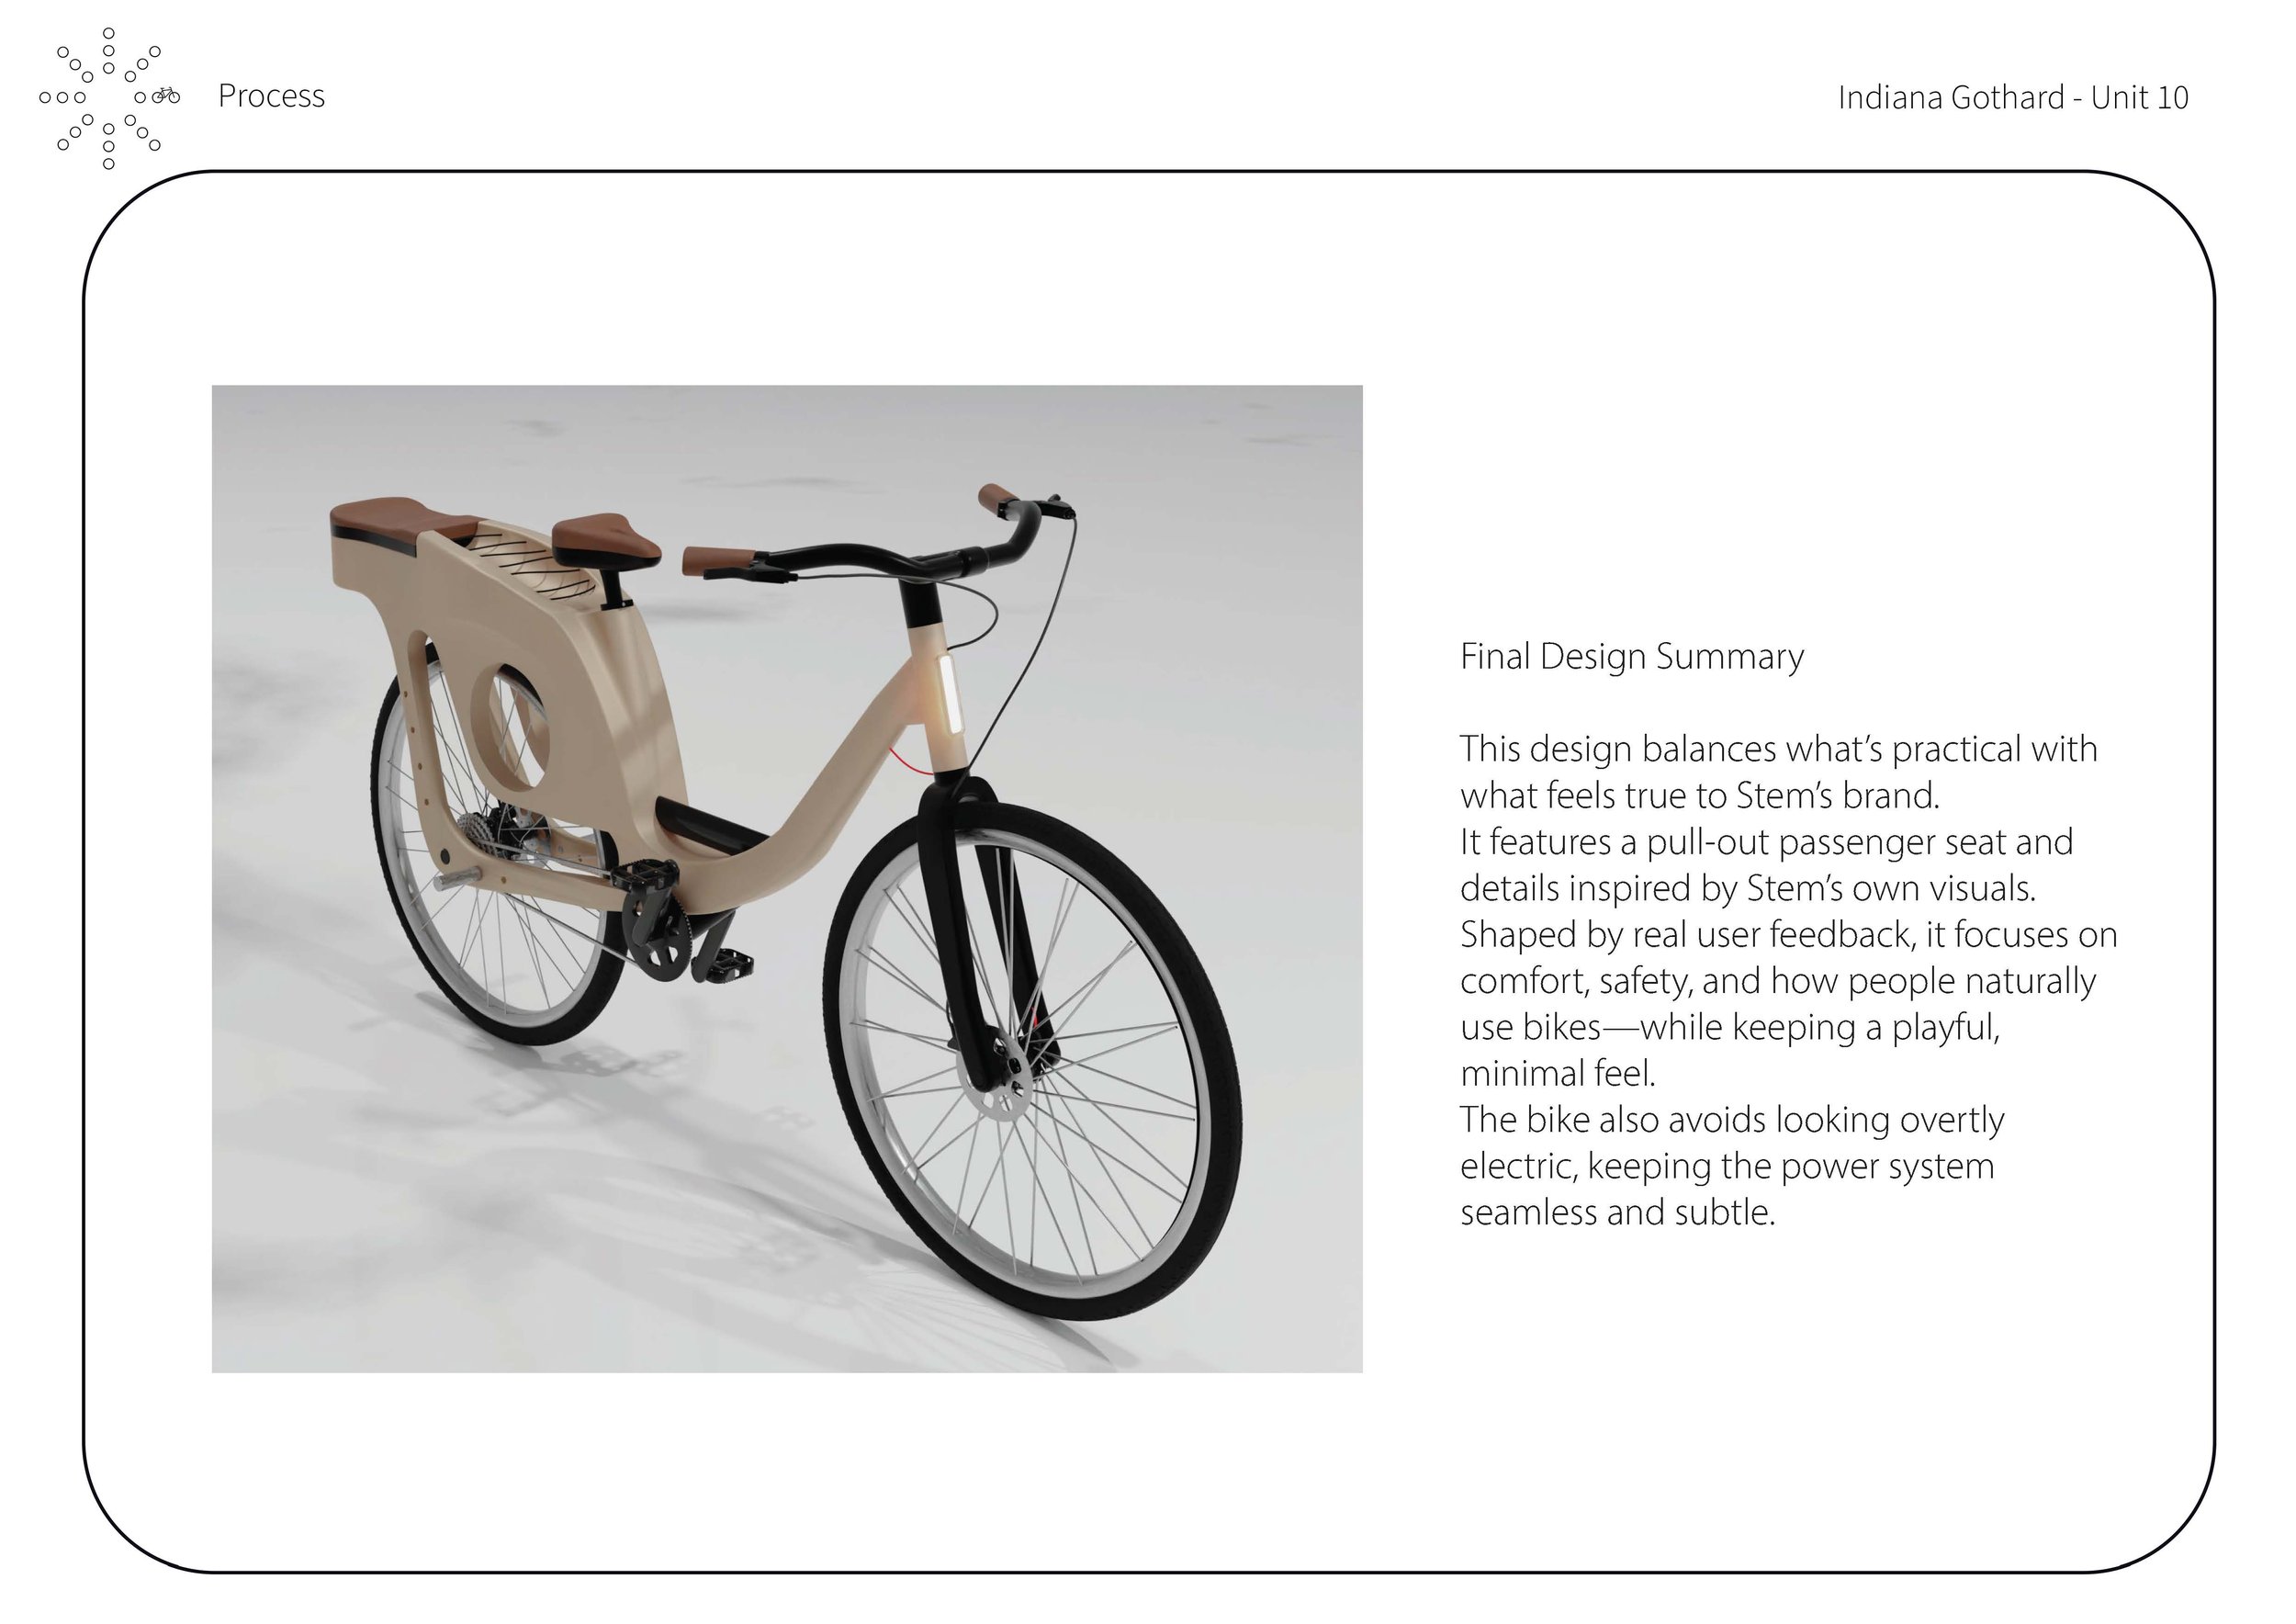
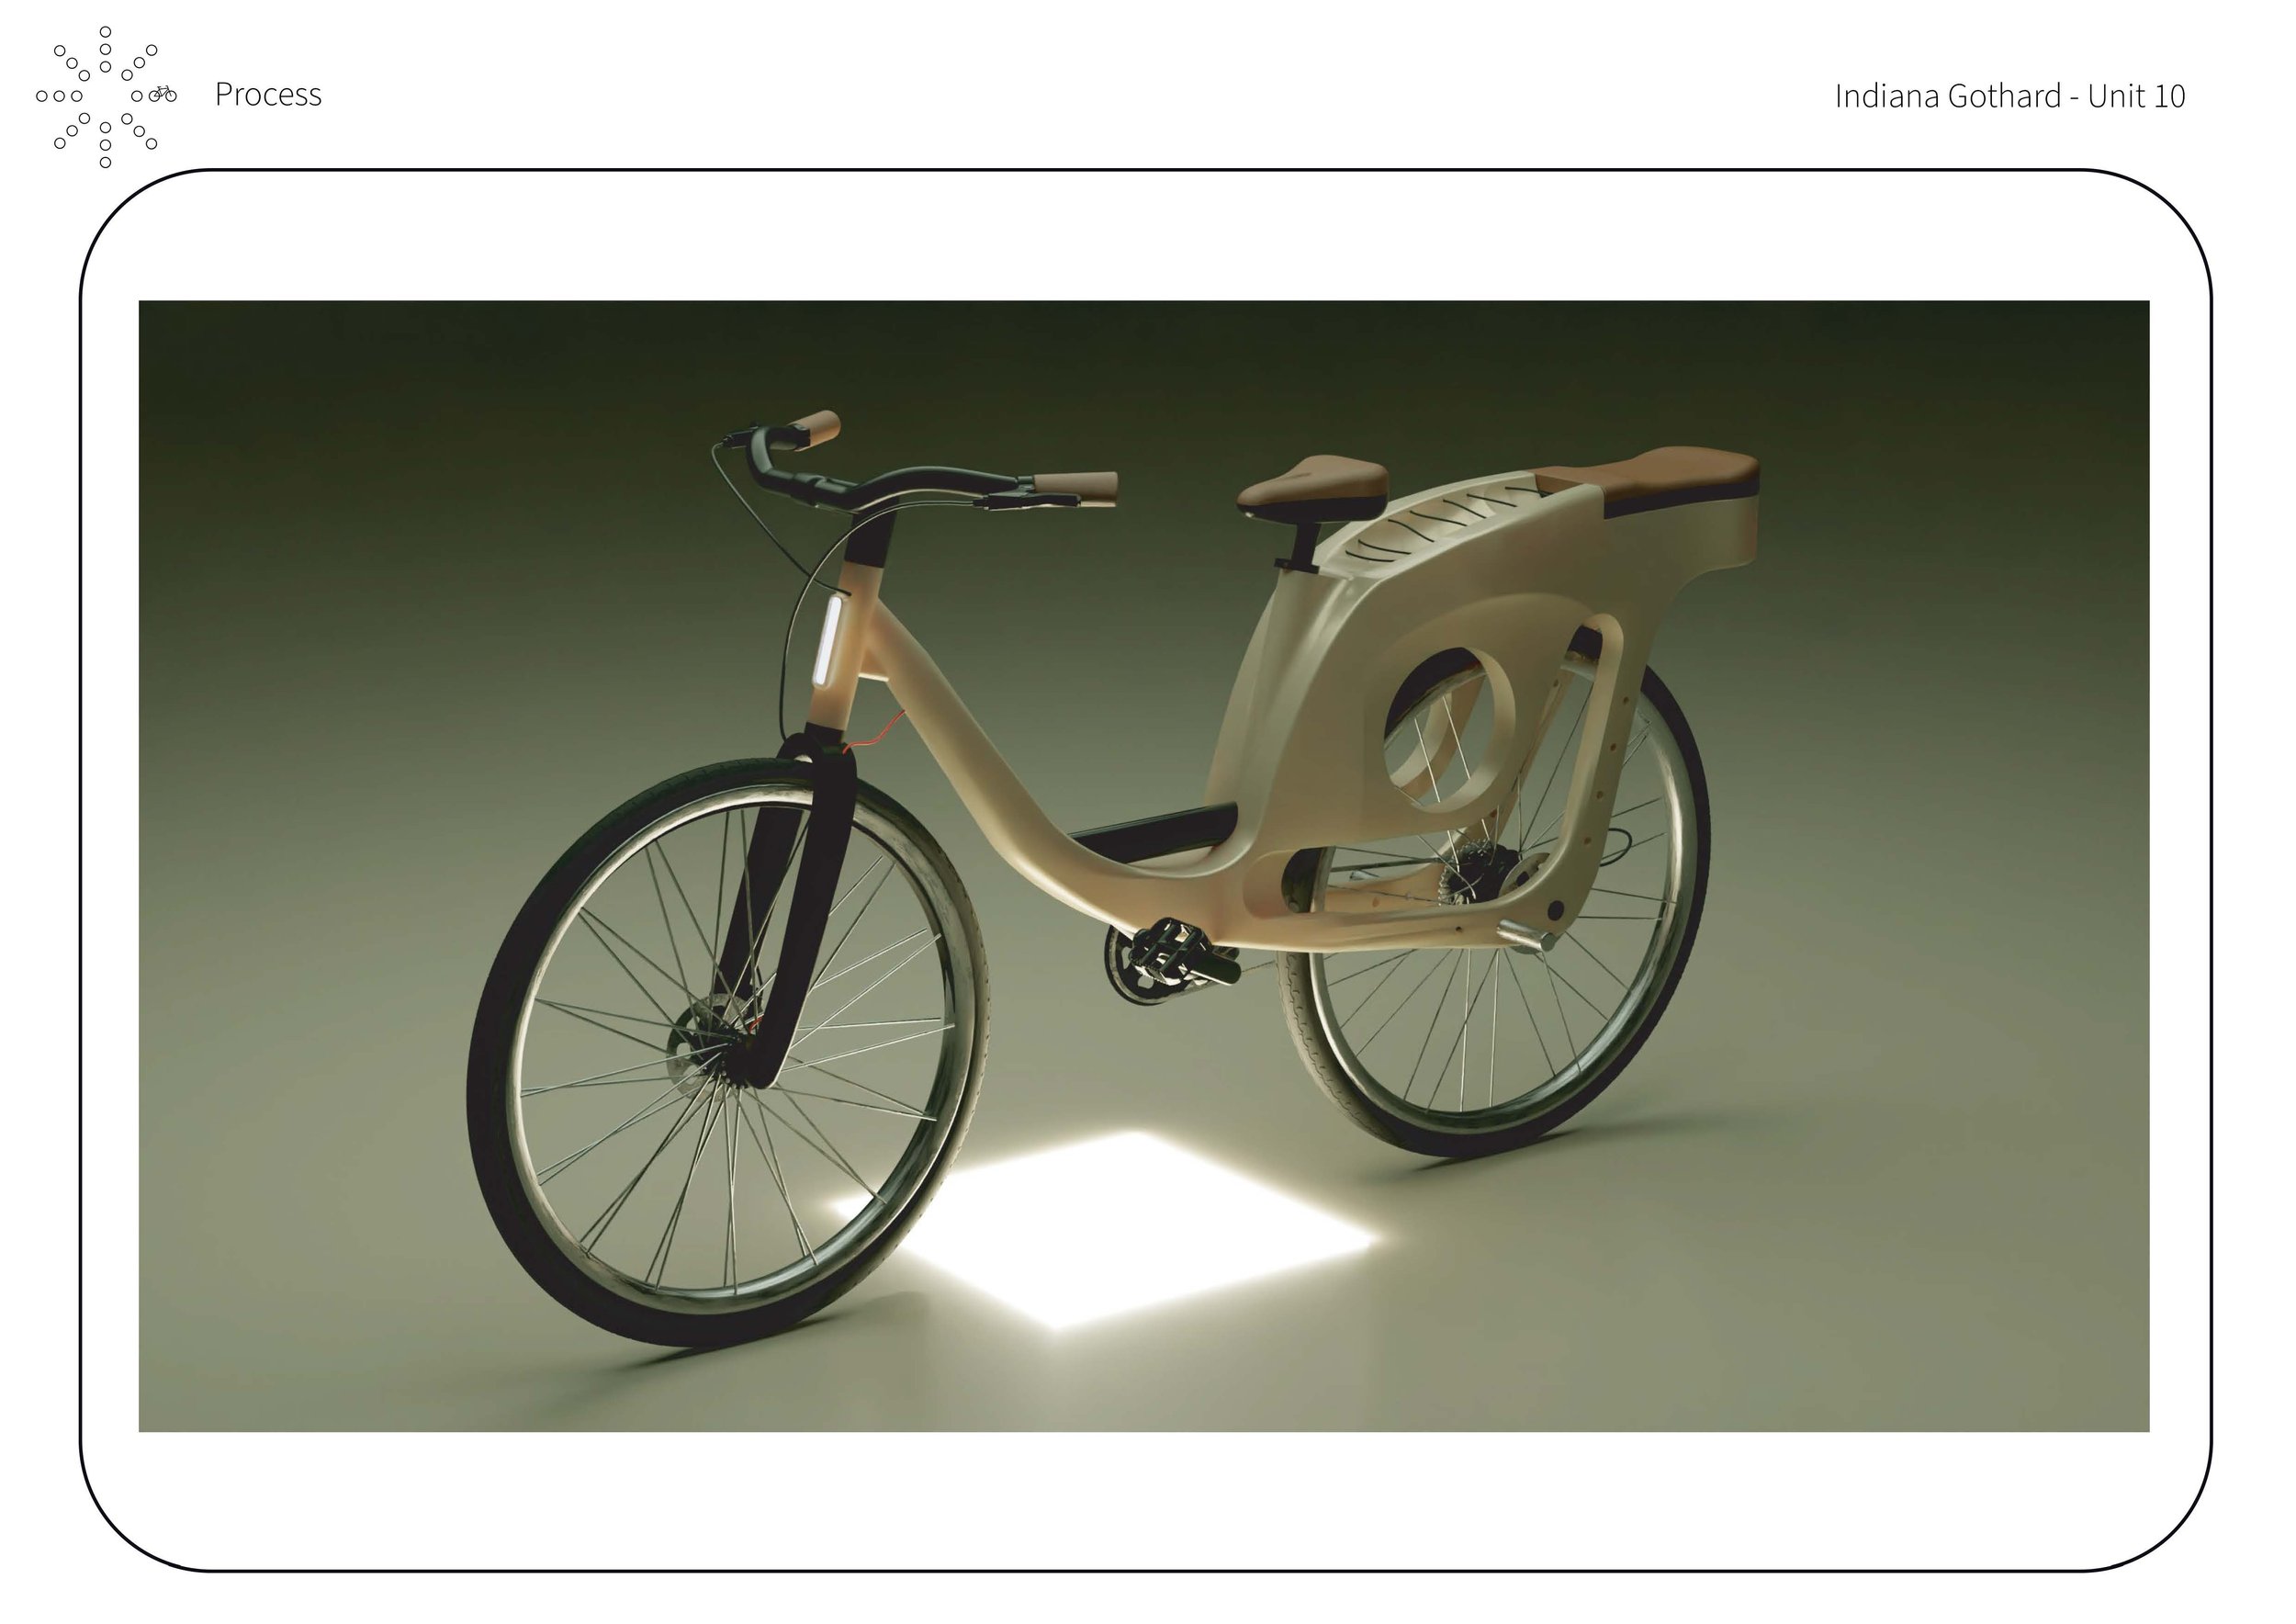
Kuwa is a city bike designed for two riders, integrating style, sustainability, and energy generation. I identified three key challenges in urban cycling: lack of collective travel options, limited access to renewable power, and the dominance of purely performance-focused e-bikes. To address these, I developed Kuwa, a lightweight injection-moulded composite frame bike with a dynamo hub motor that generates electricity while riding. The bike powers onboard devices and can store surplus energy for later use, creating independence from traditional charging infrastructure. Kuwa balances fashion and function, offering a practical yet expressive solution for modern urban commuters and digital nomads.


01 INTRO
INITIAL QUESTION
How can I design a product for Stem? (www.stemplayer.com)
STEM’S BRIEF
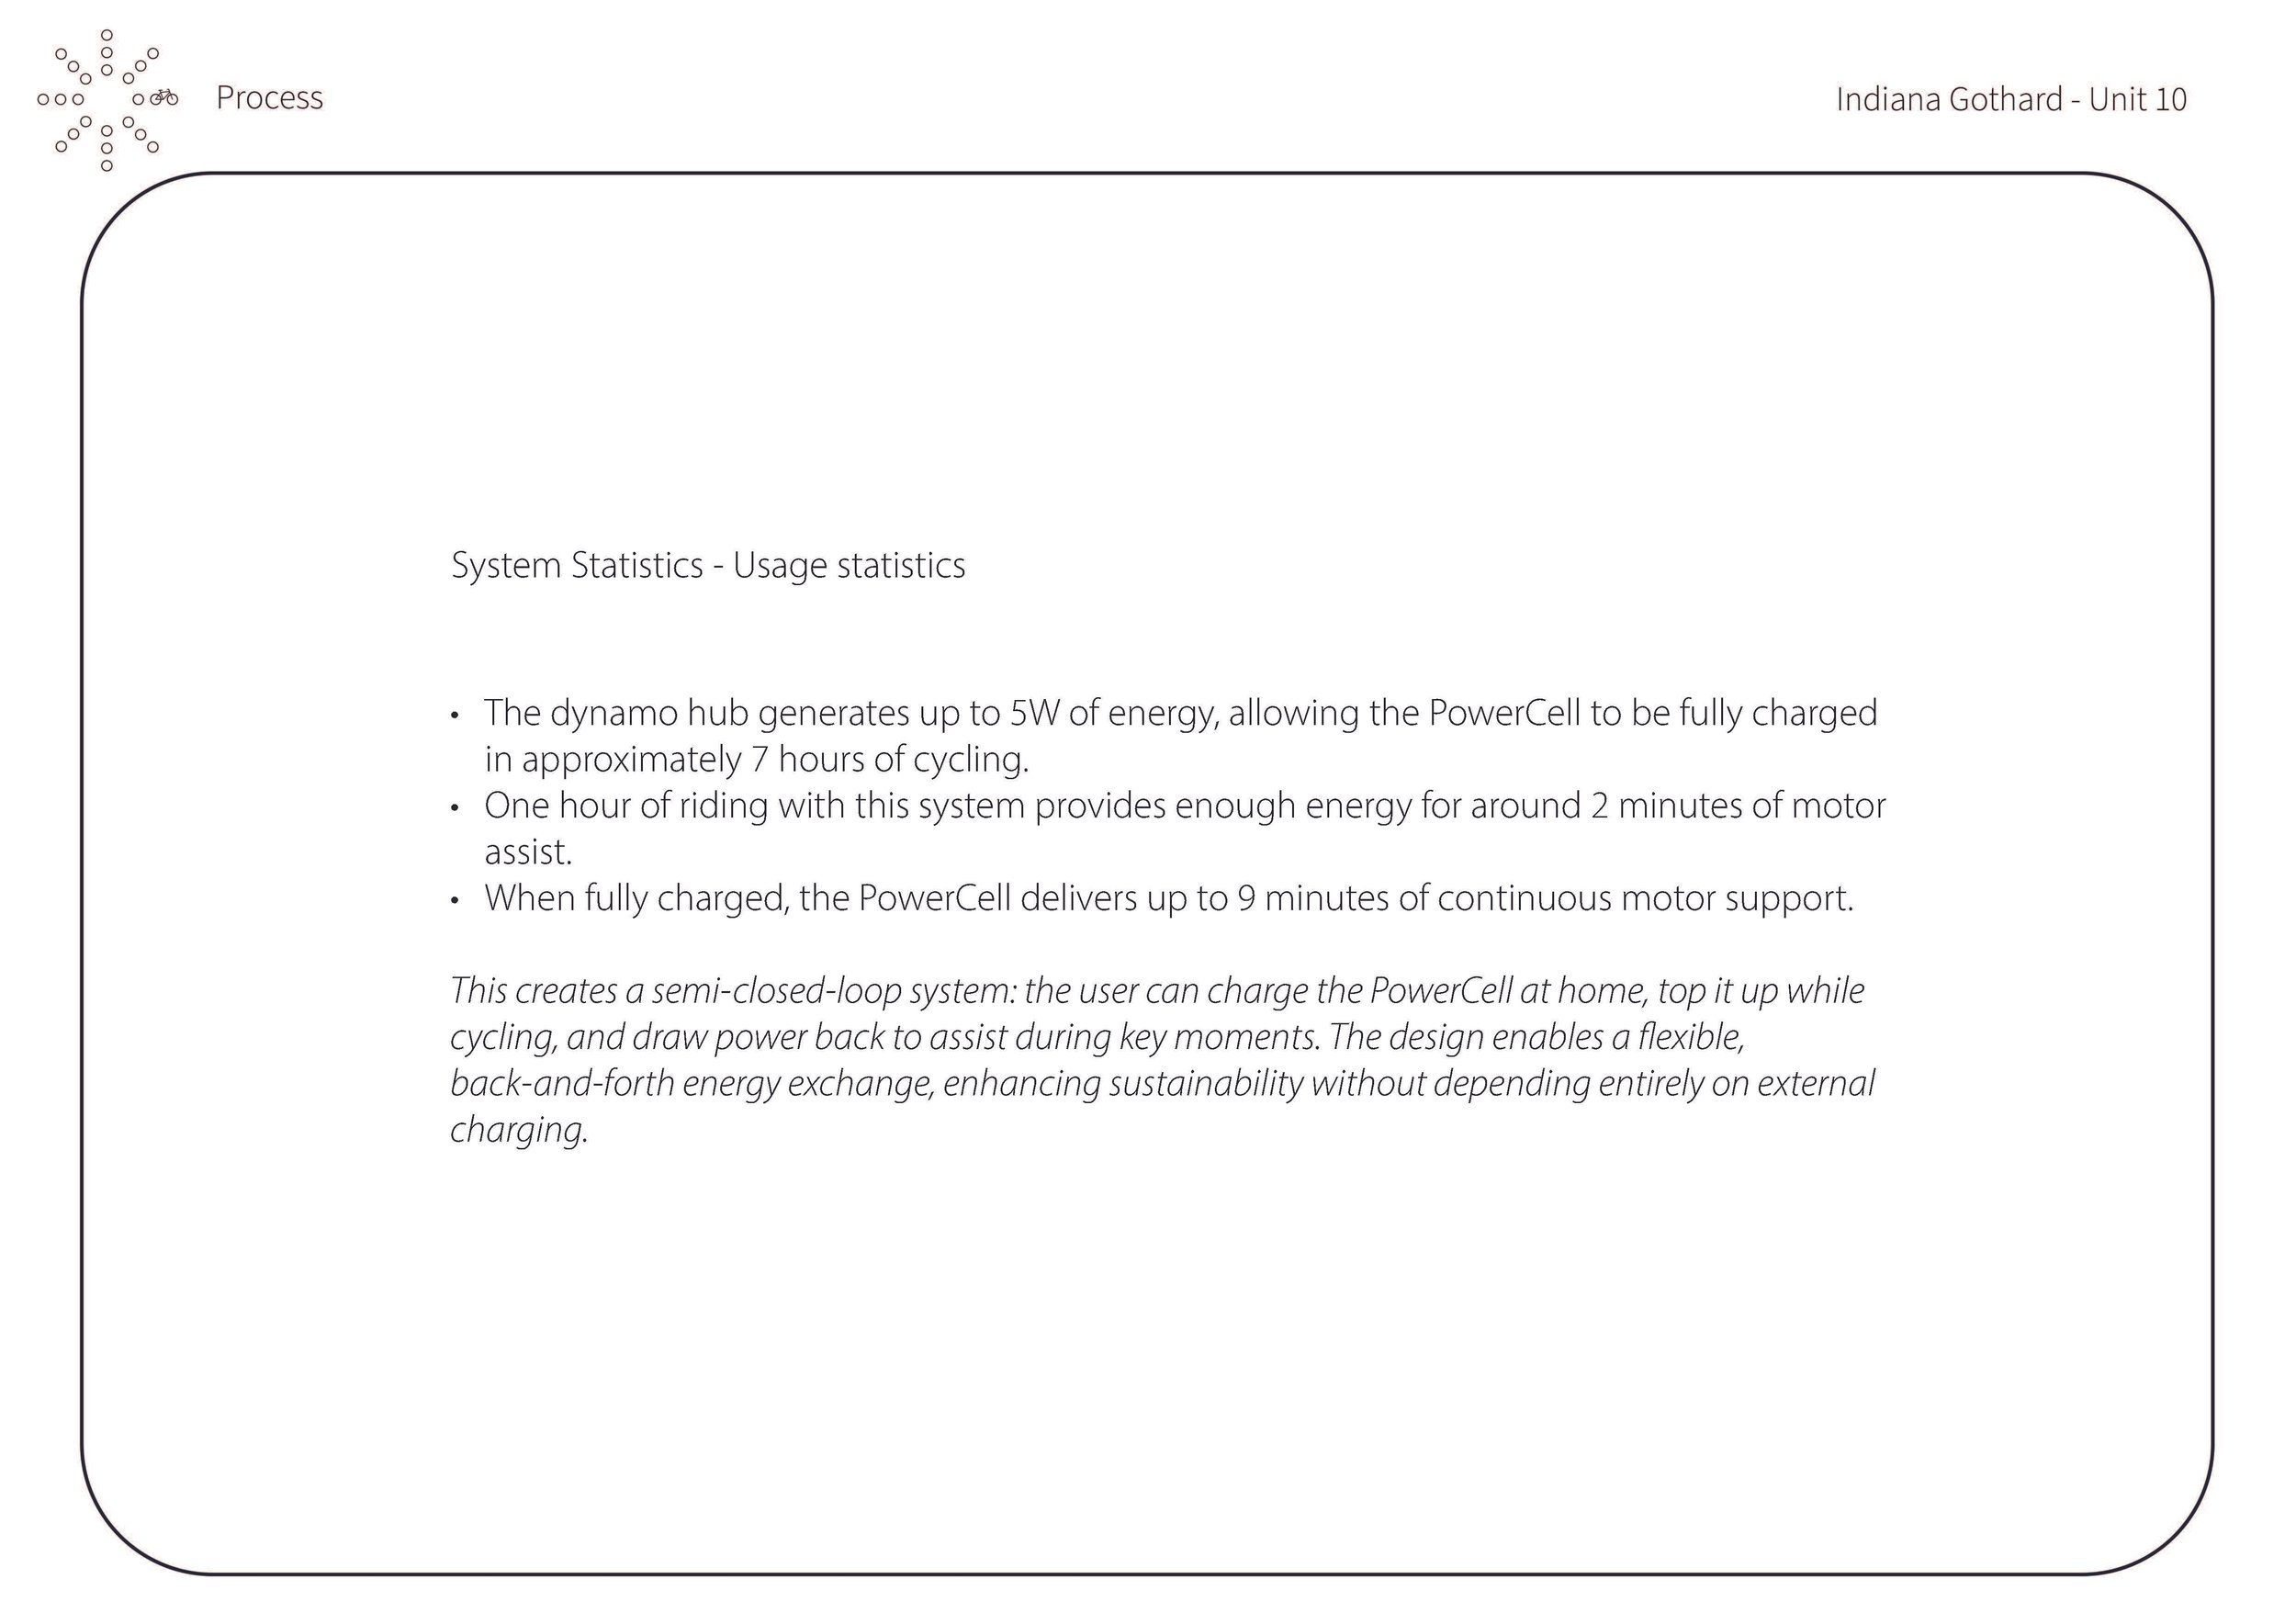
STEM's brief centers on the PowerCell, a portable energy bottle for off-grid living. The challenge is to design something that either creates energy or uses that stored power in a meaningful way.
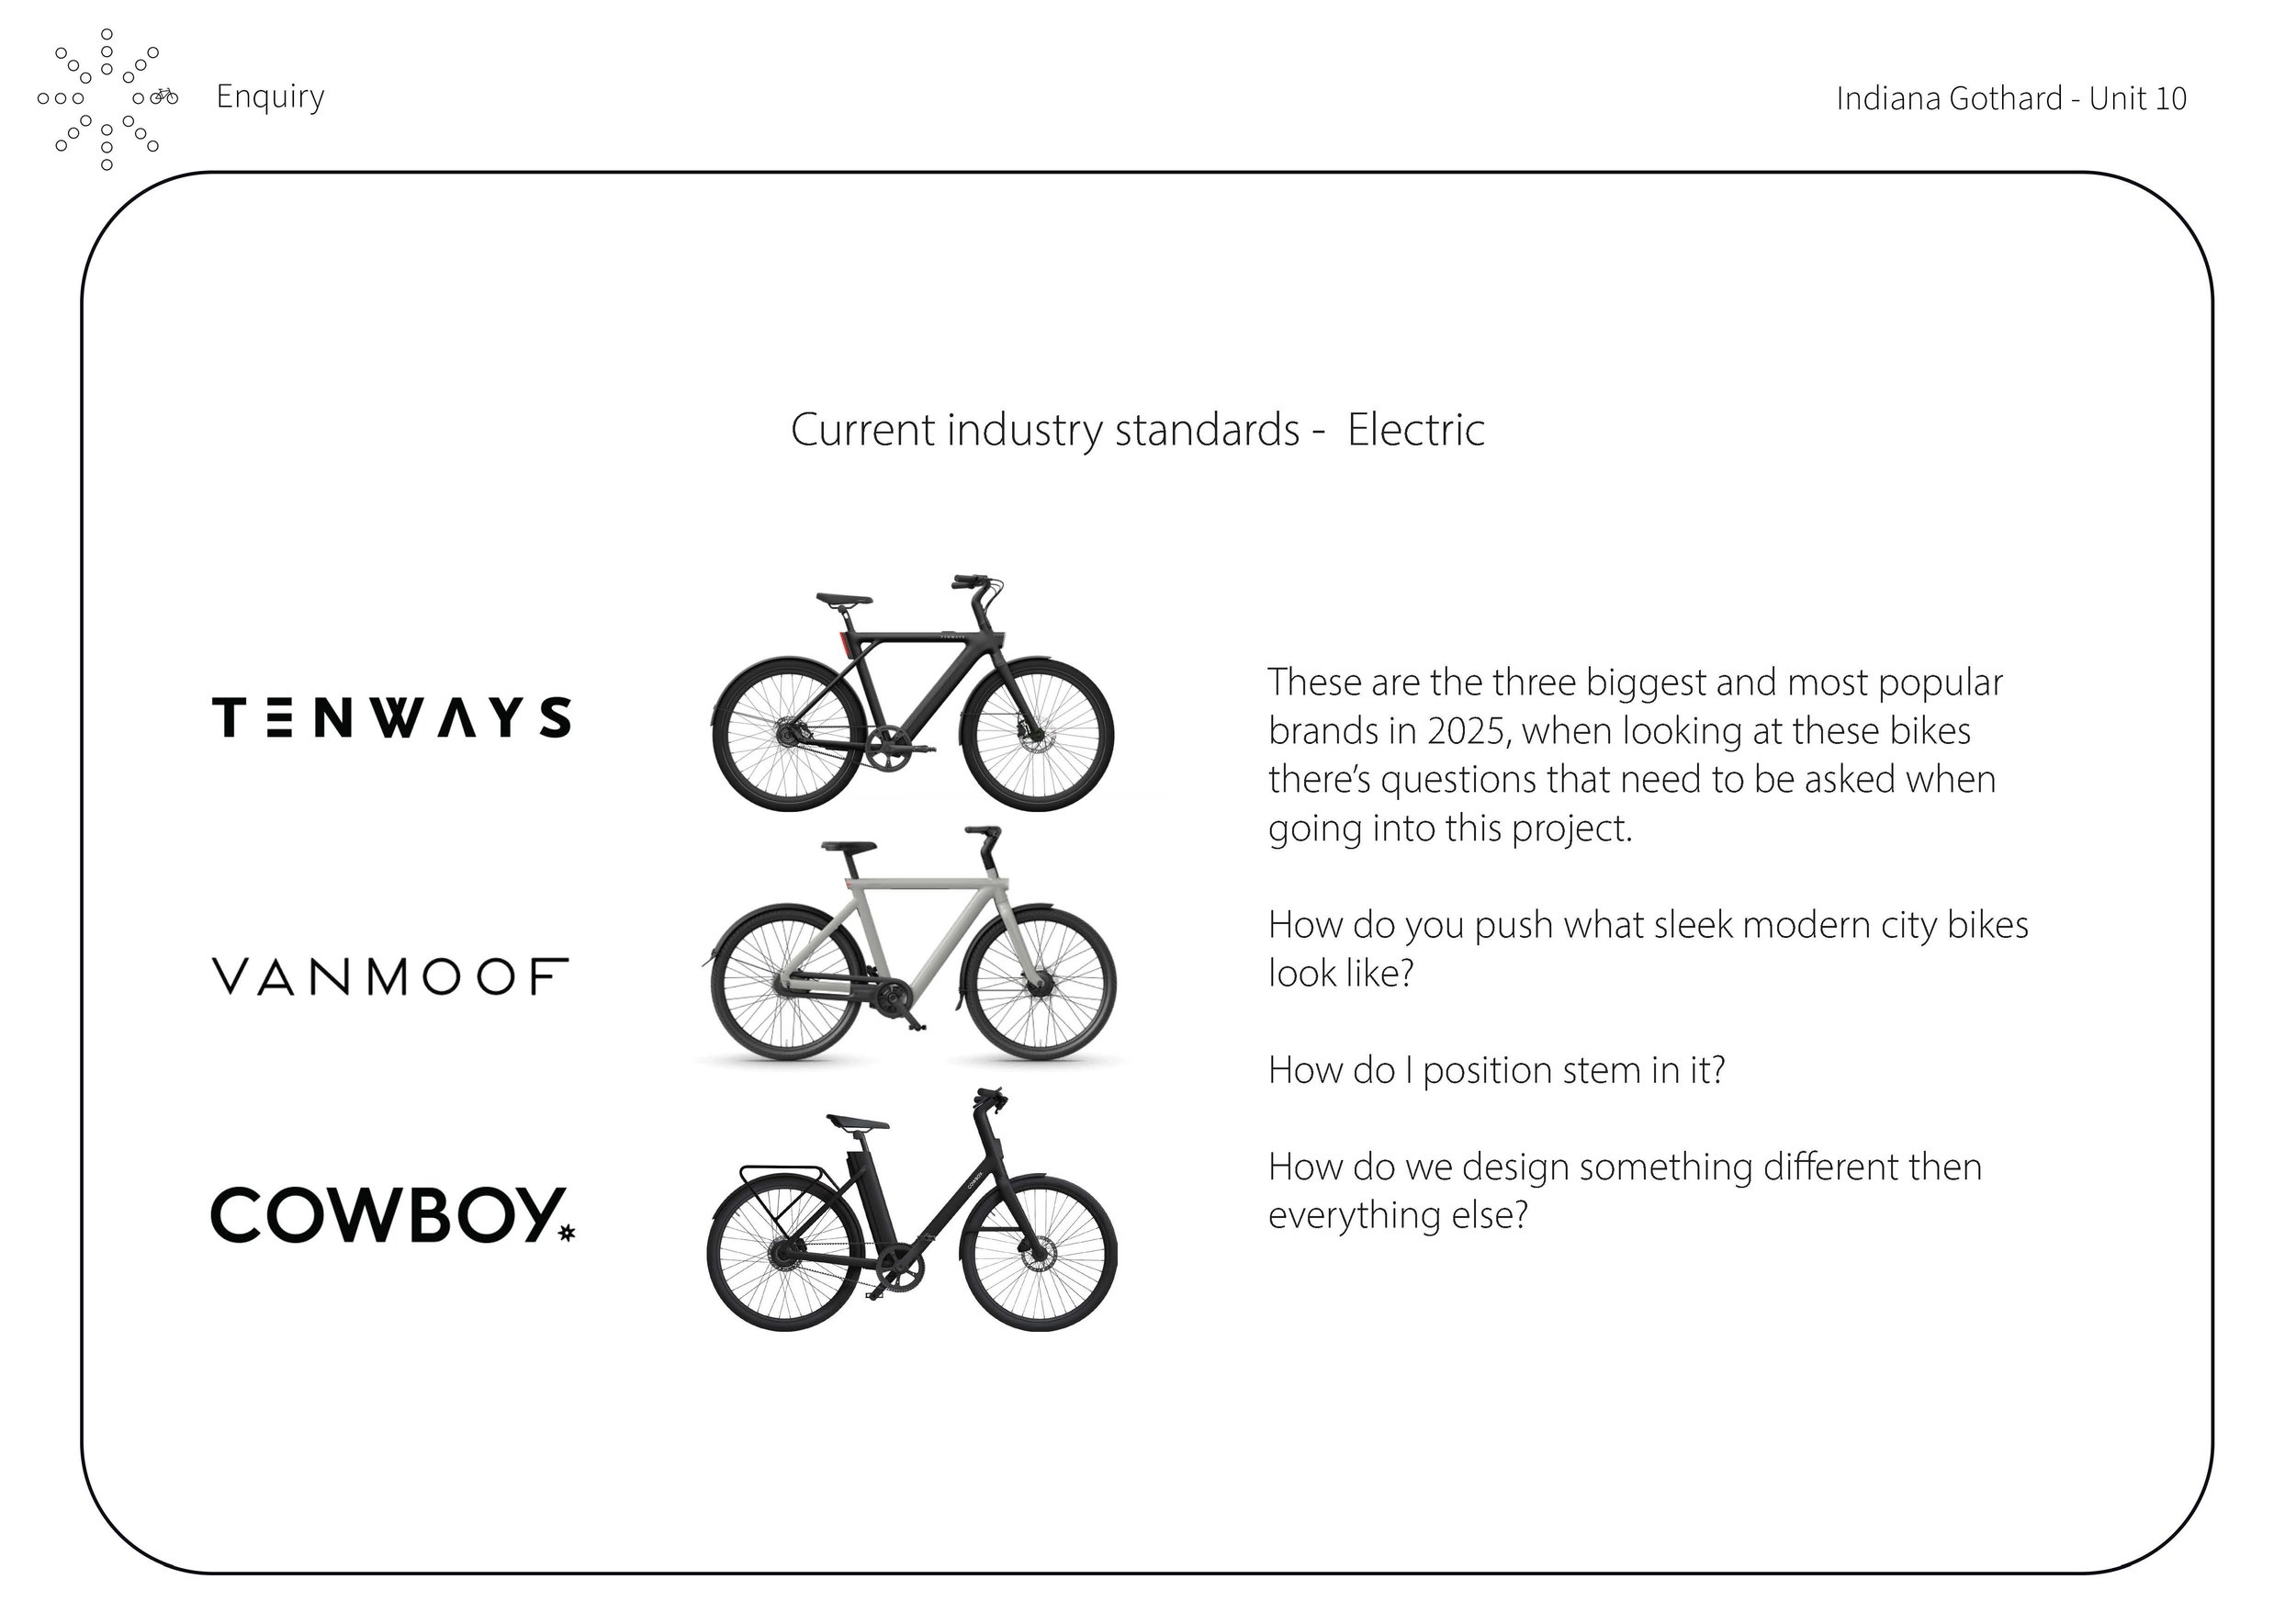
02 INSIGHTS
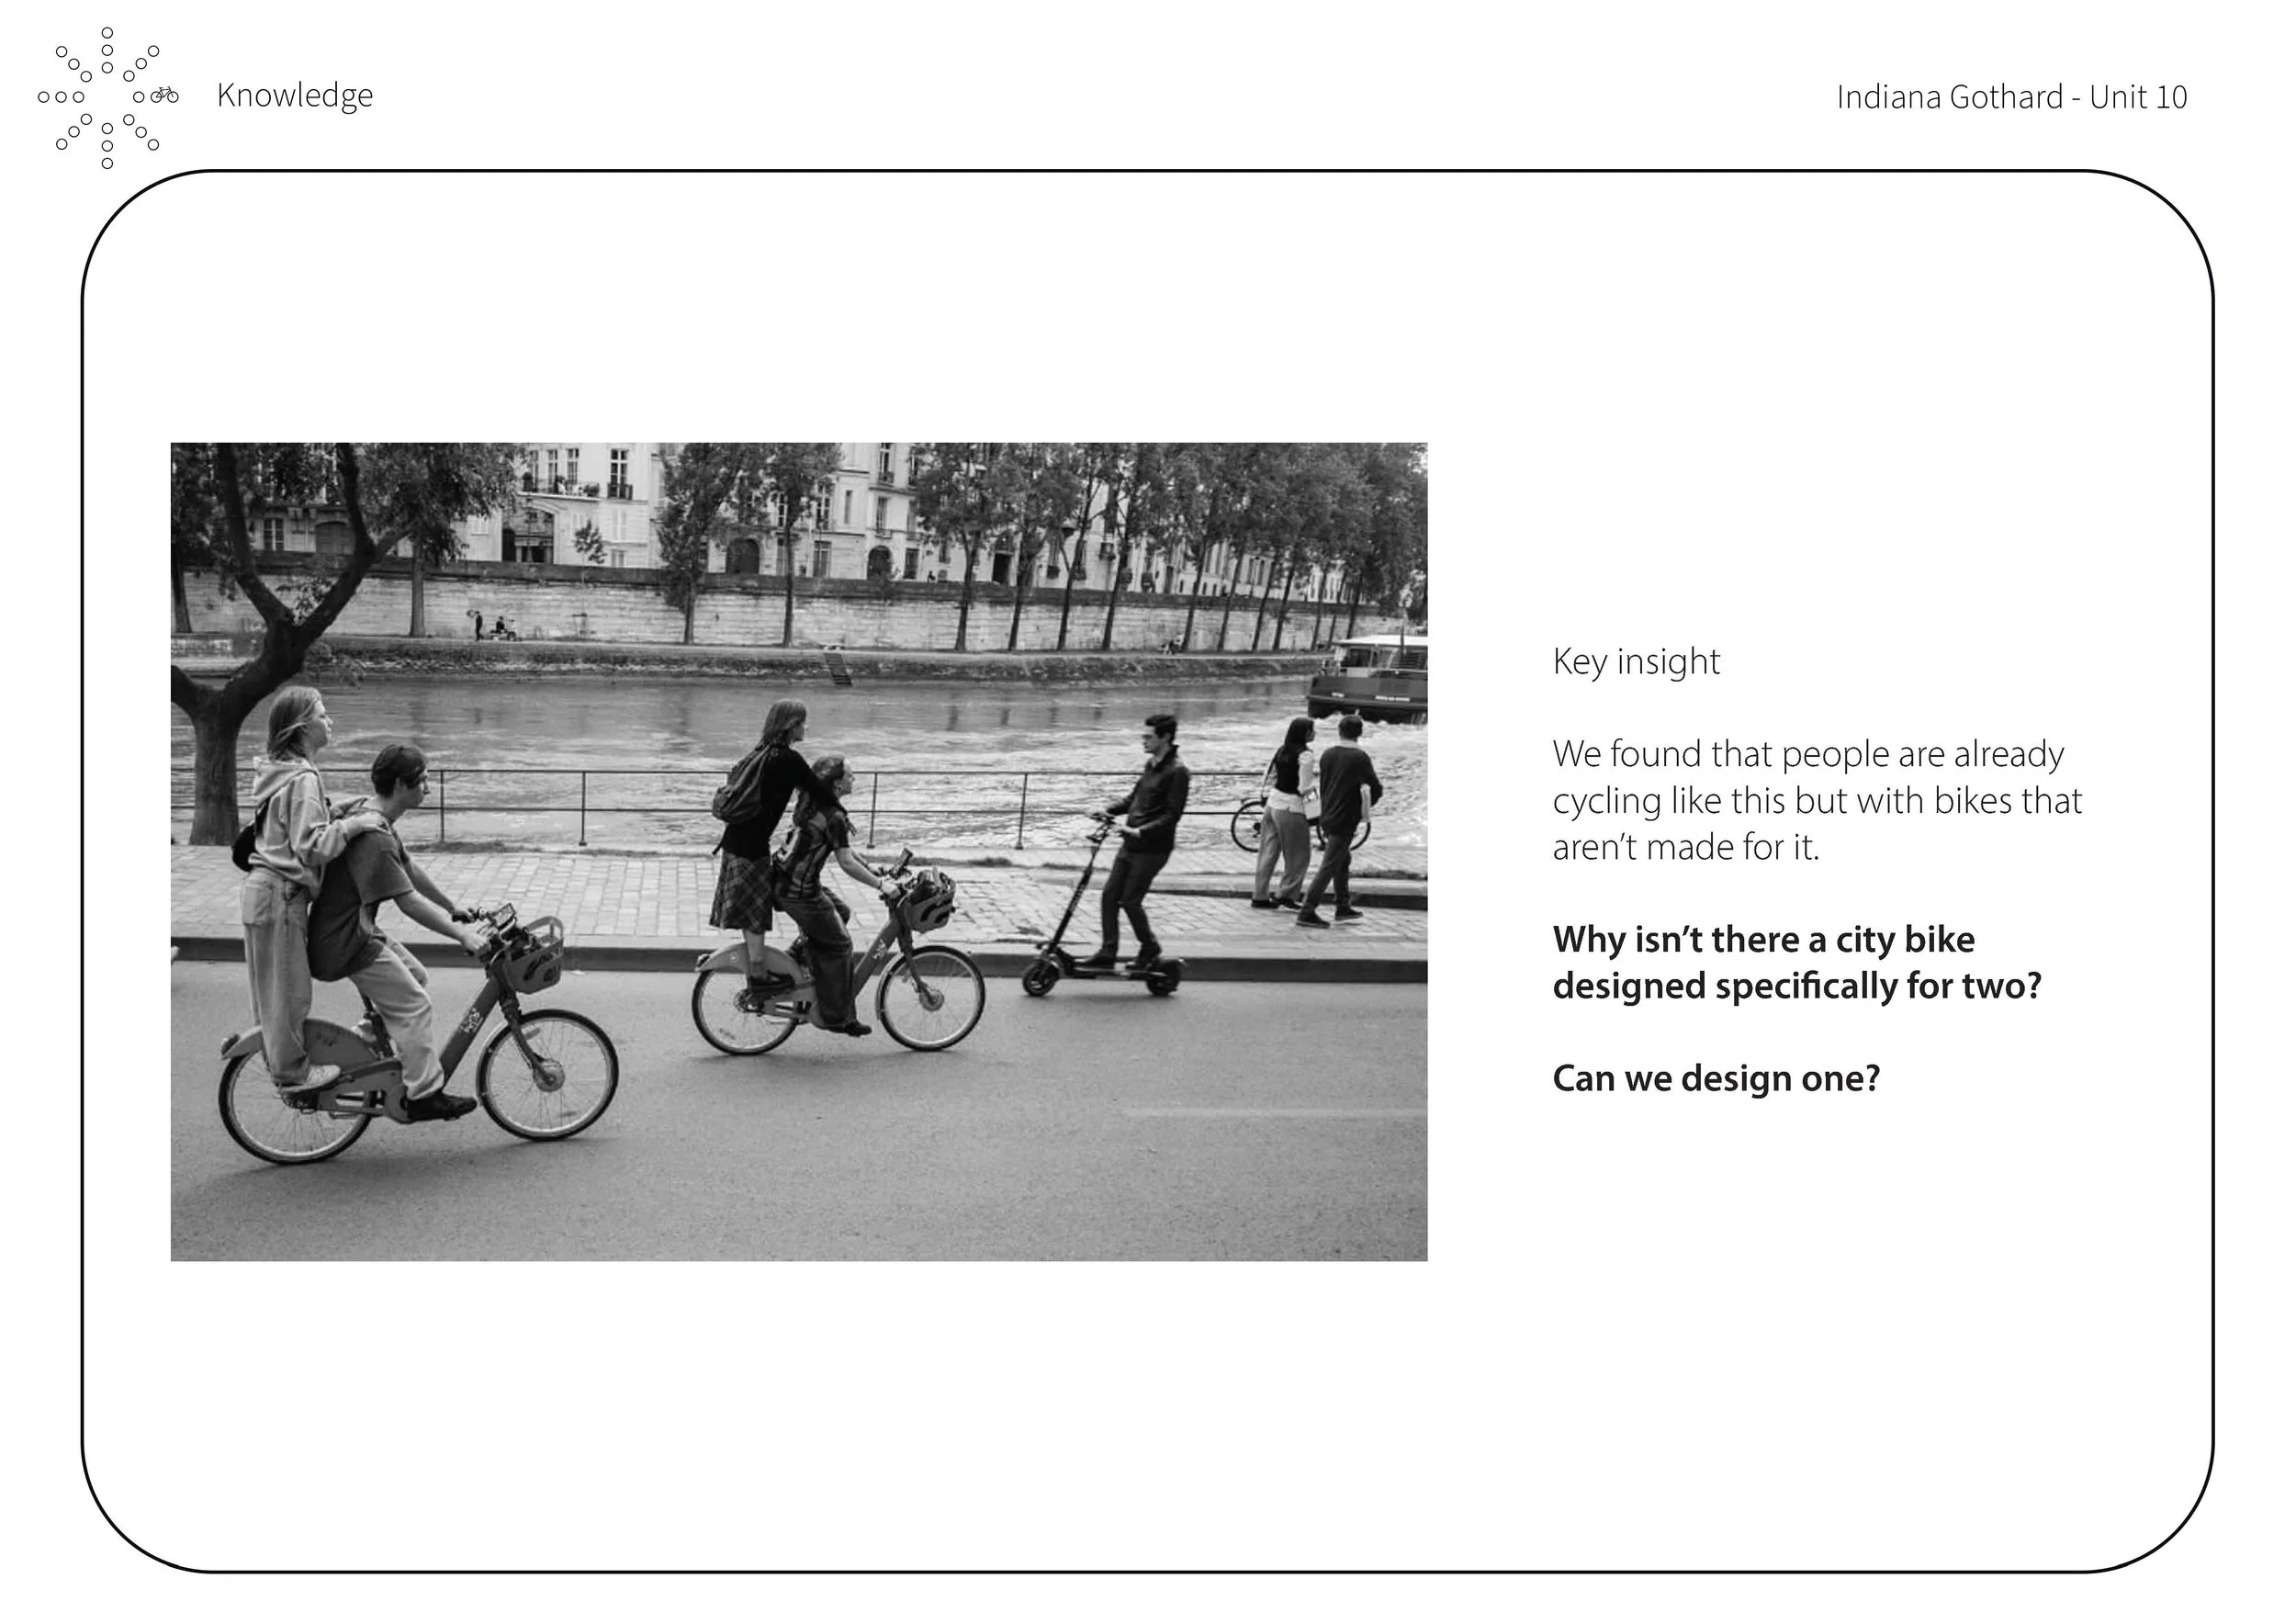
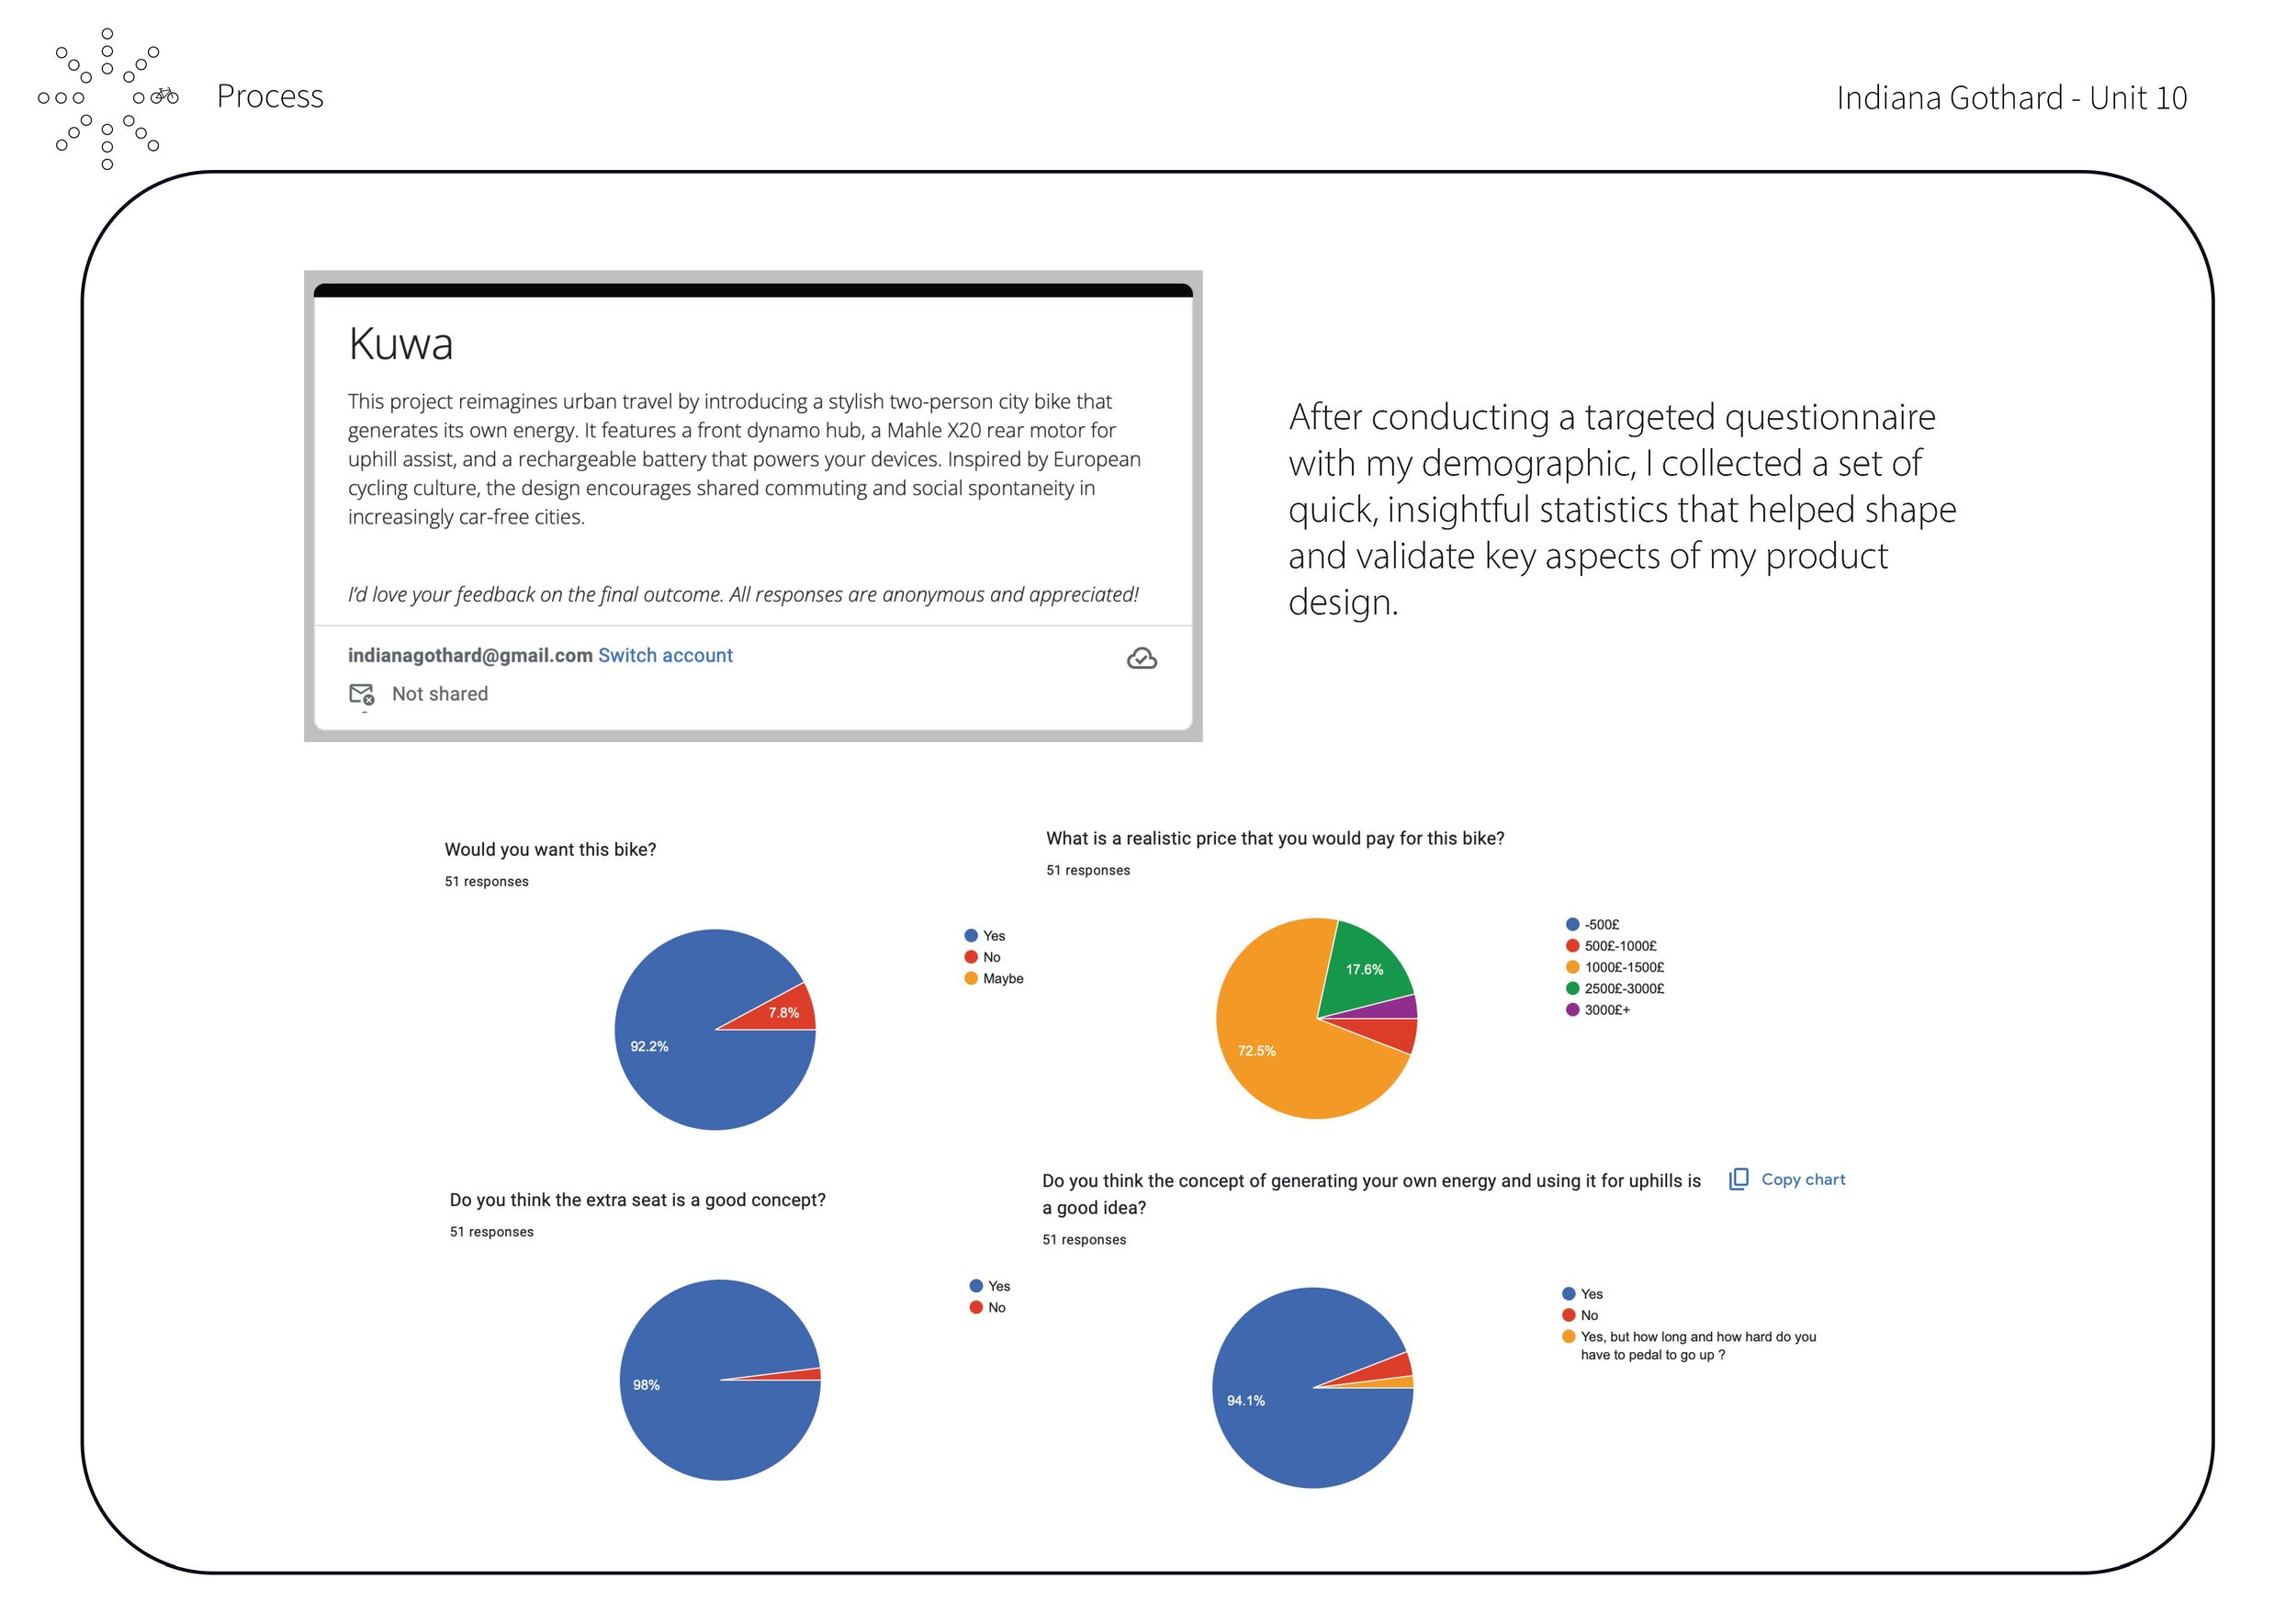
WHAT’S MY INSIGHT - No. 1
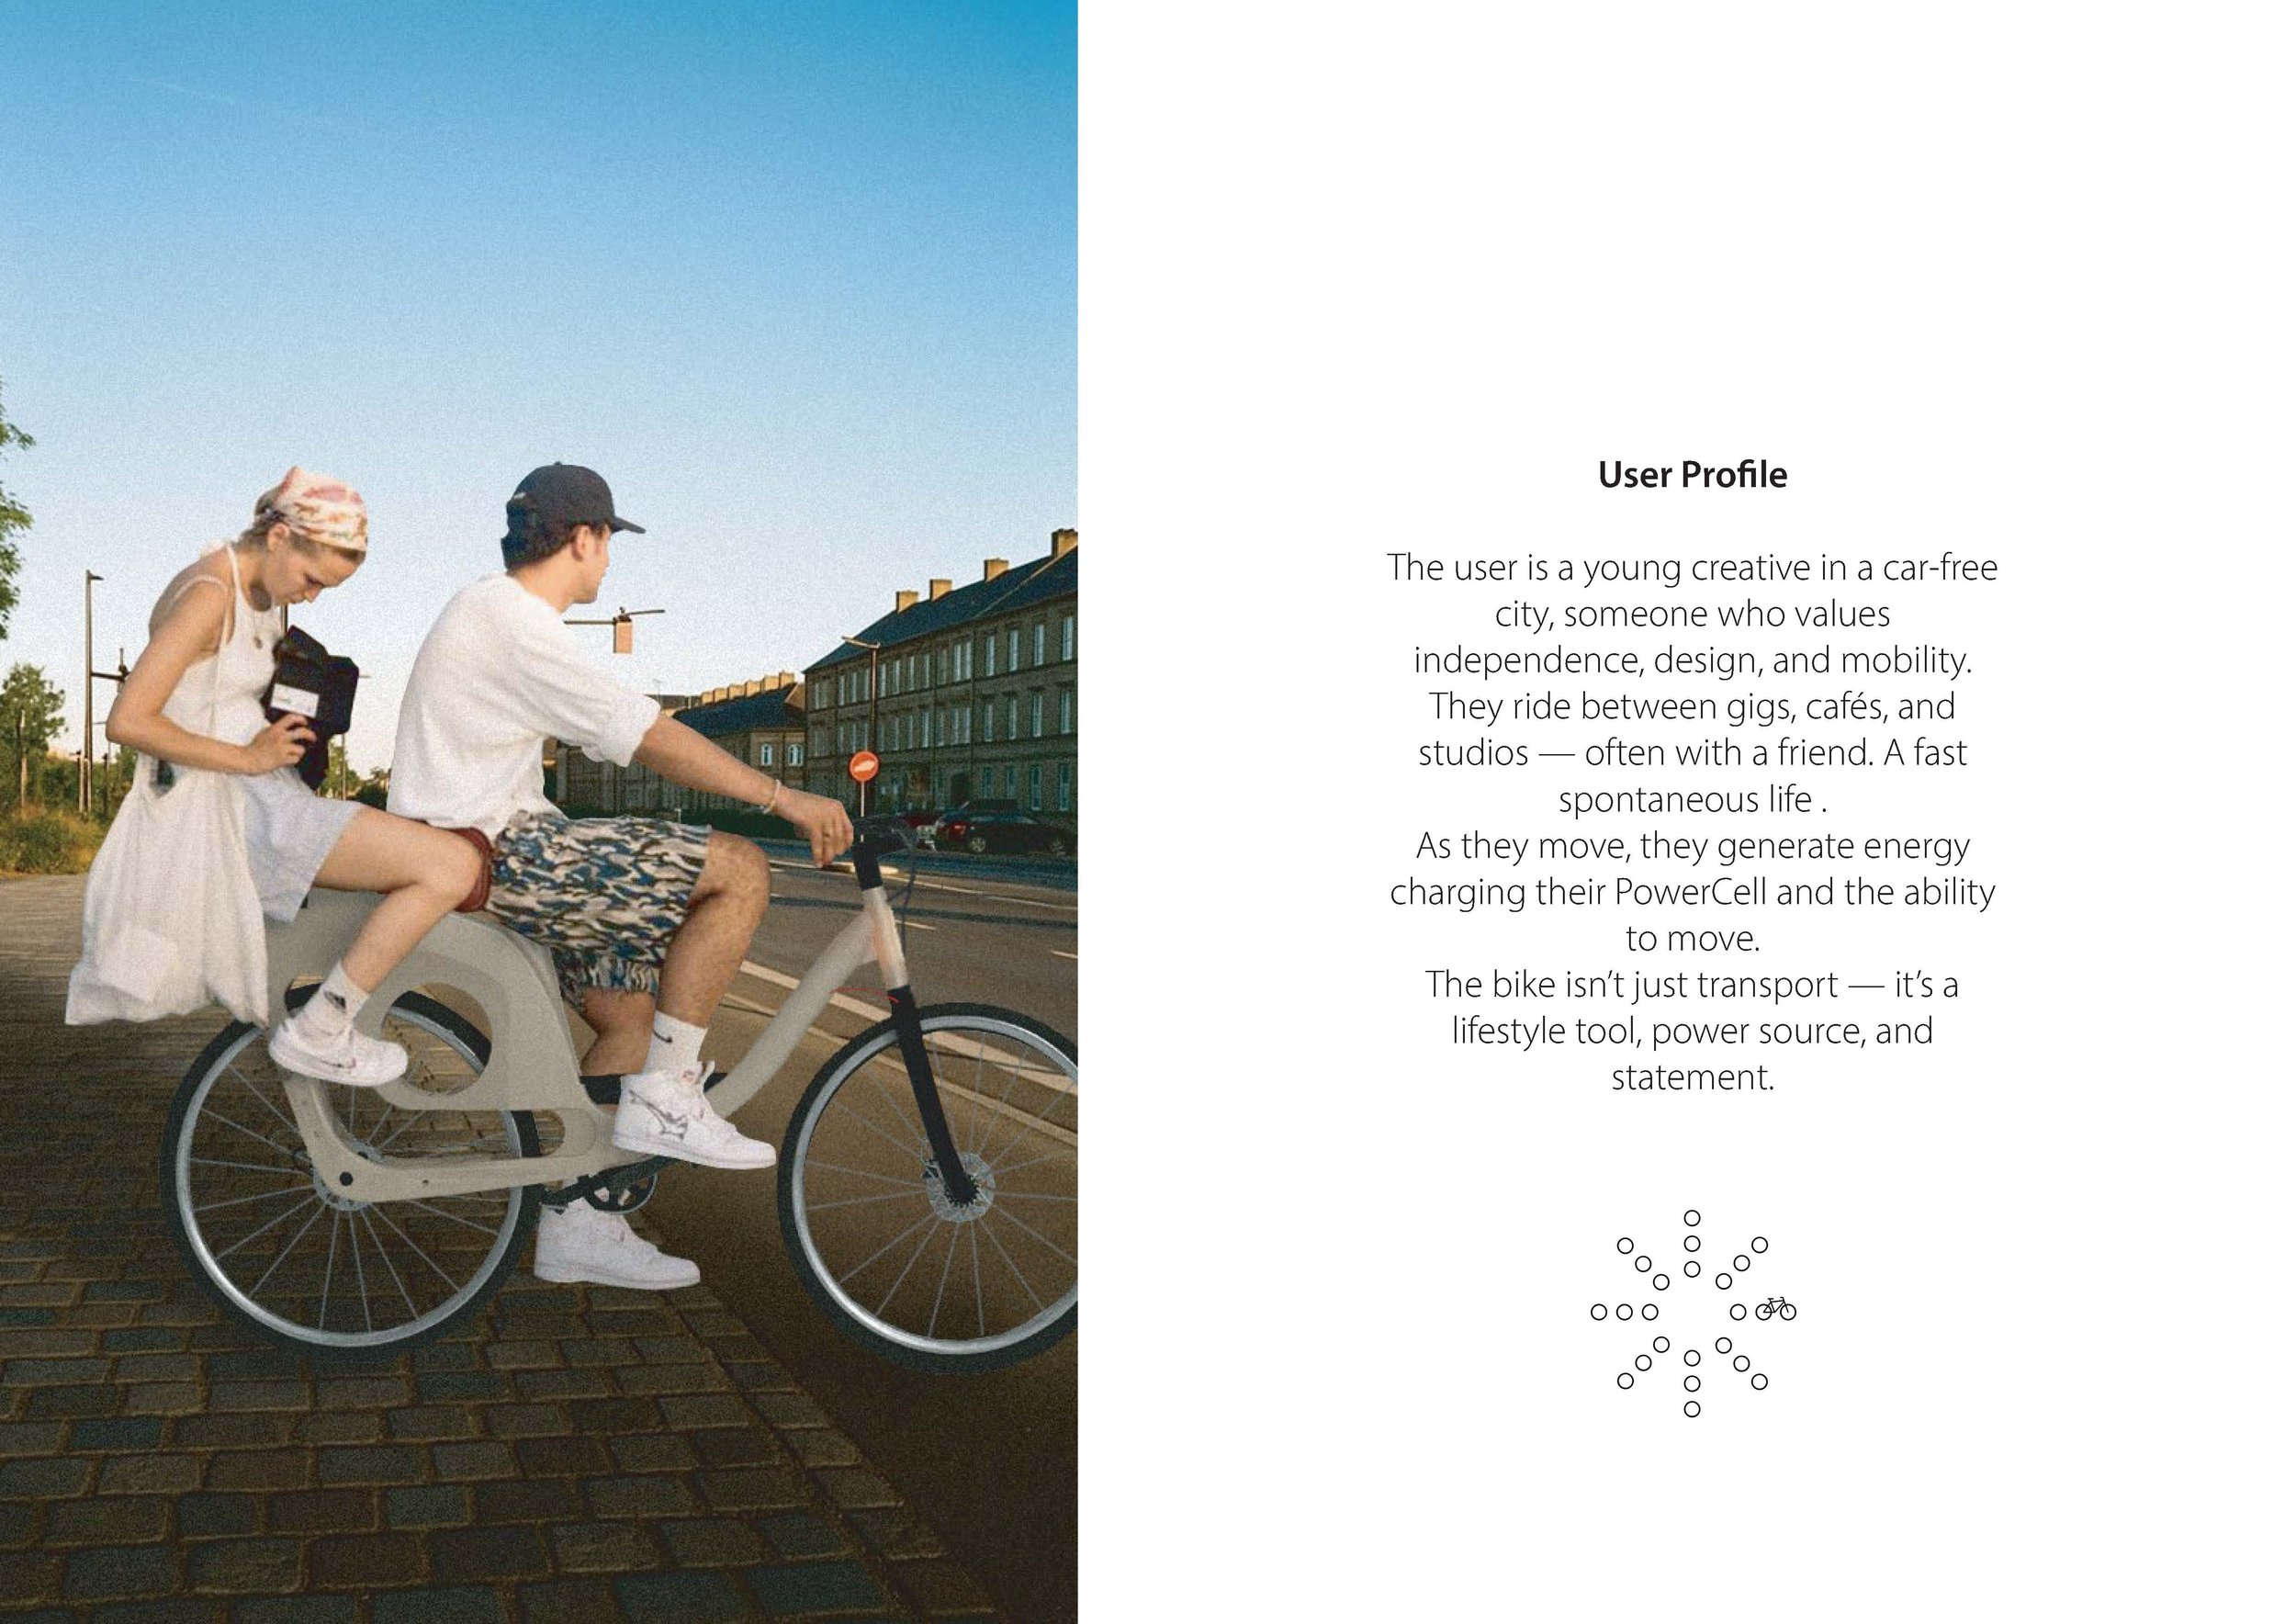
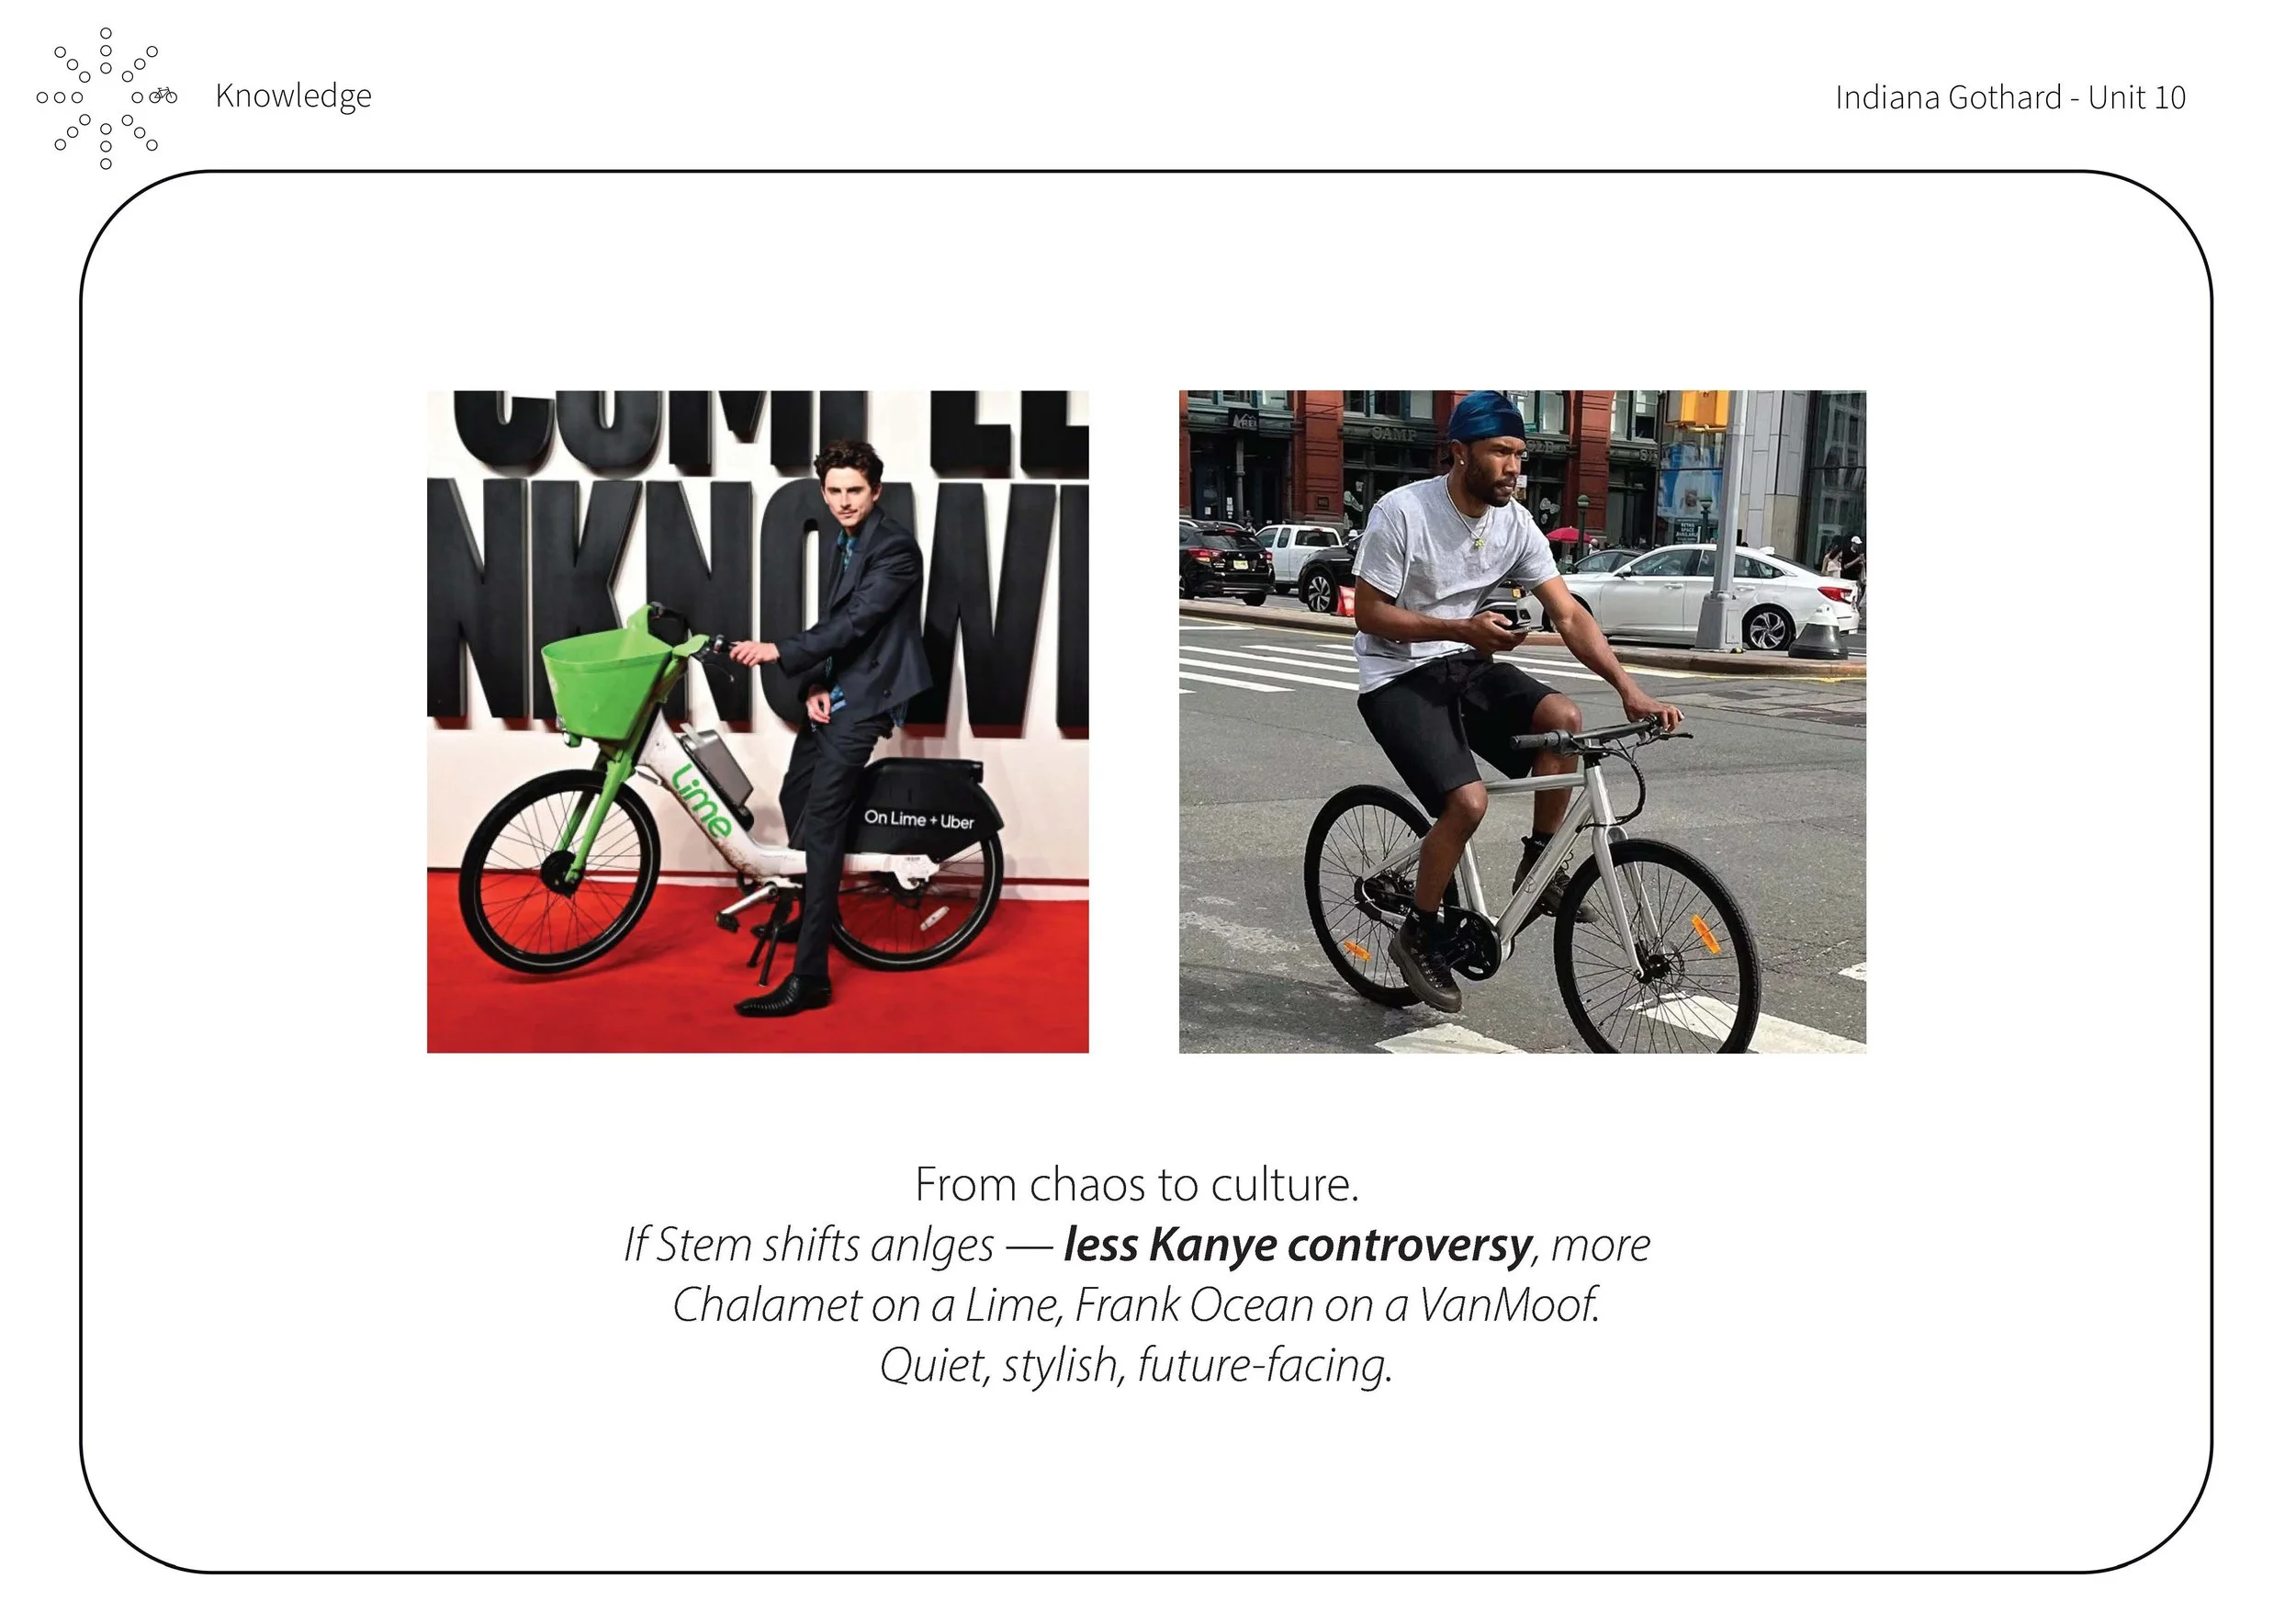
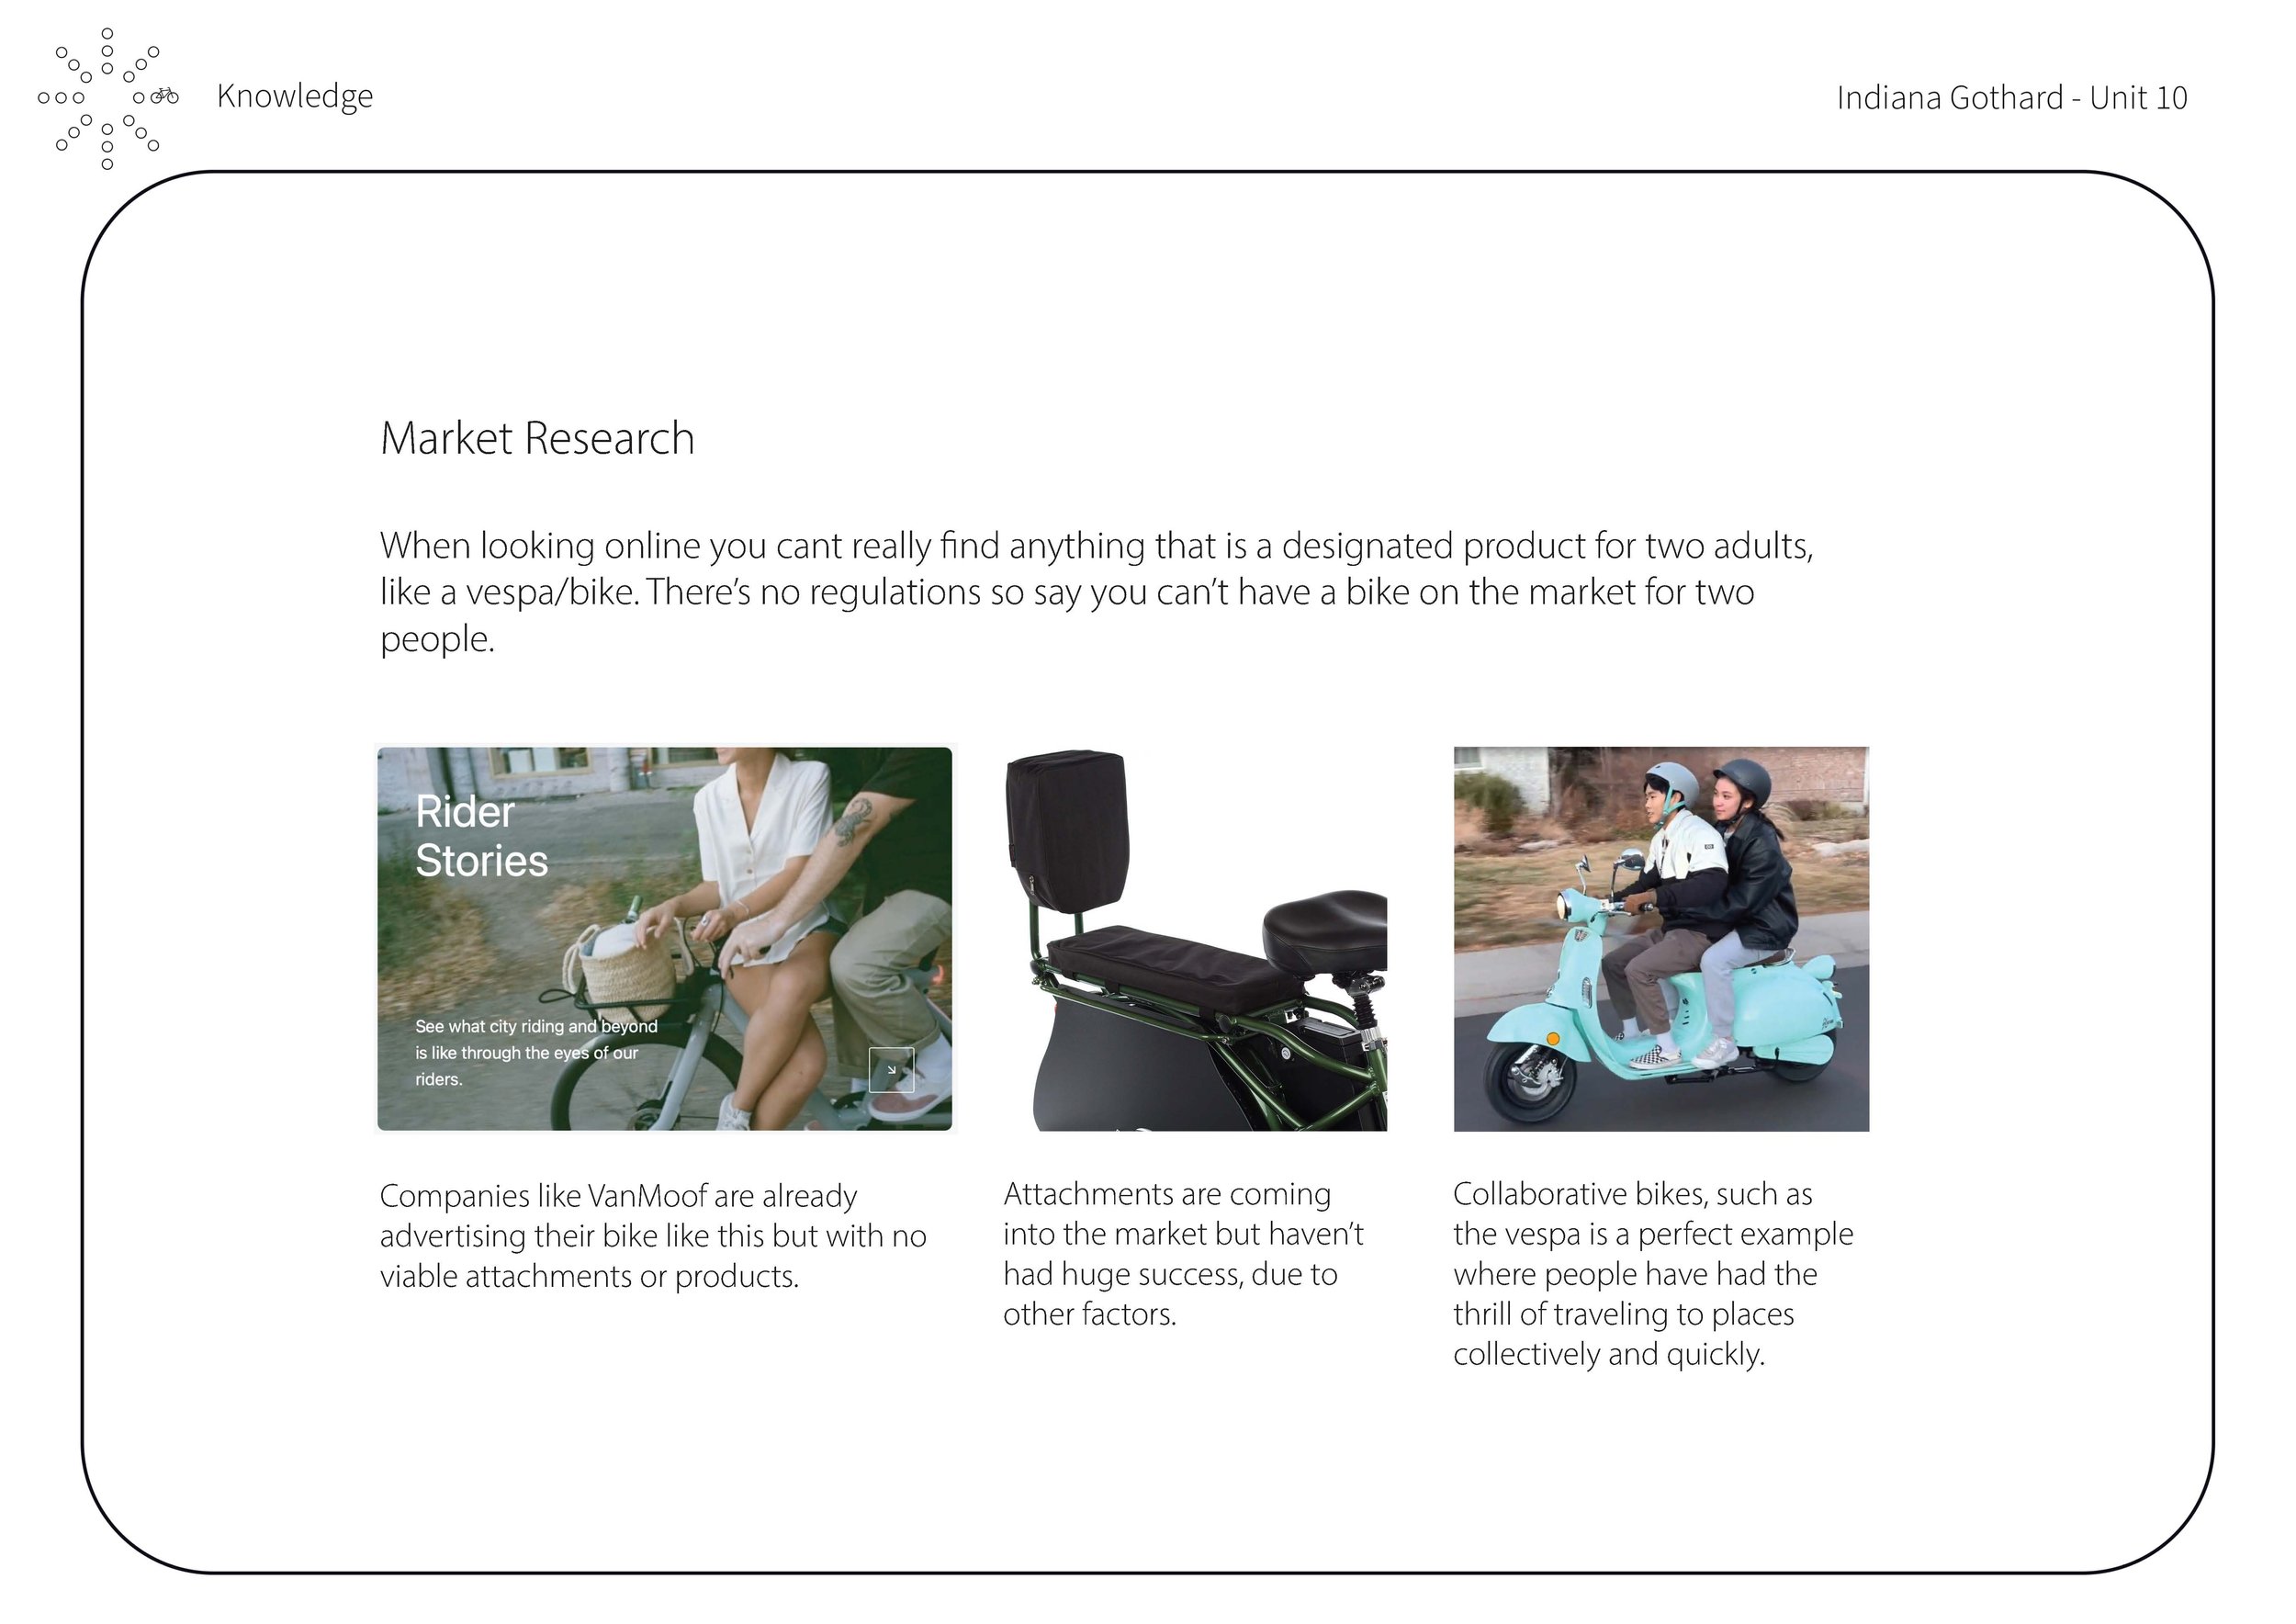
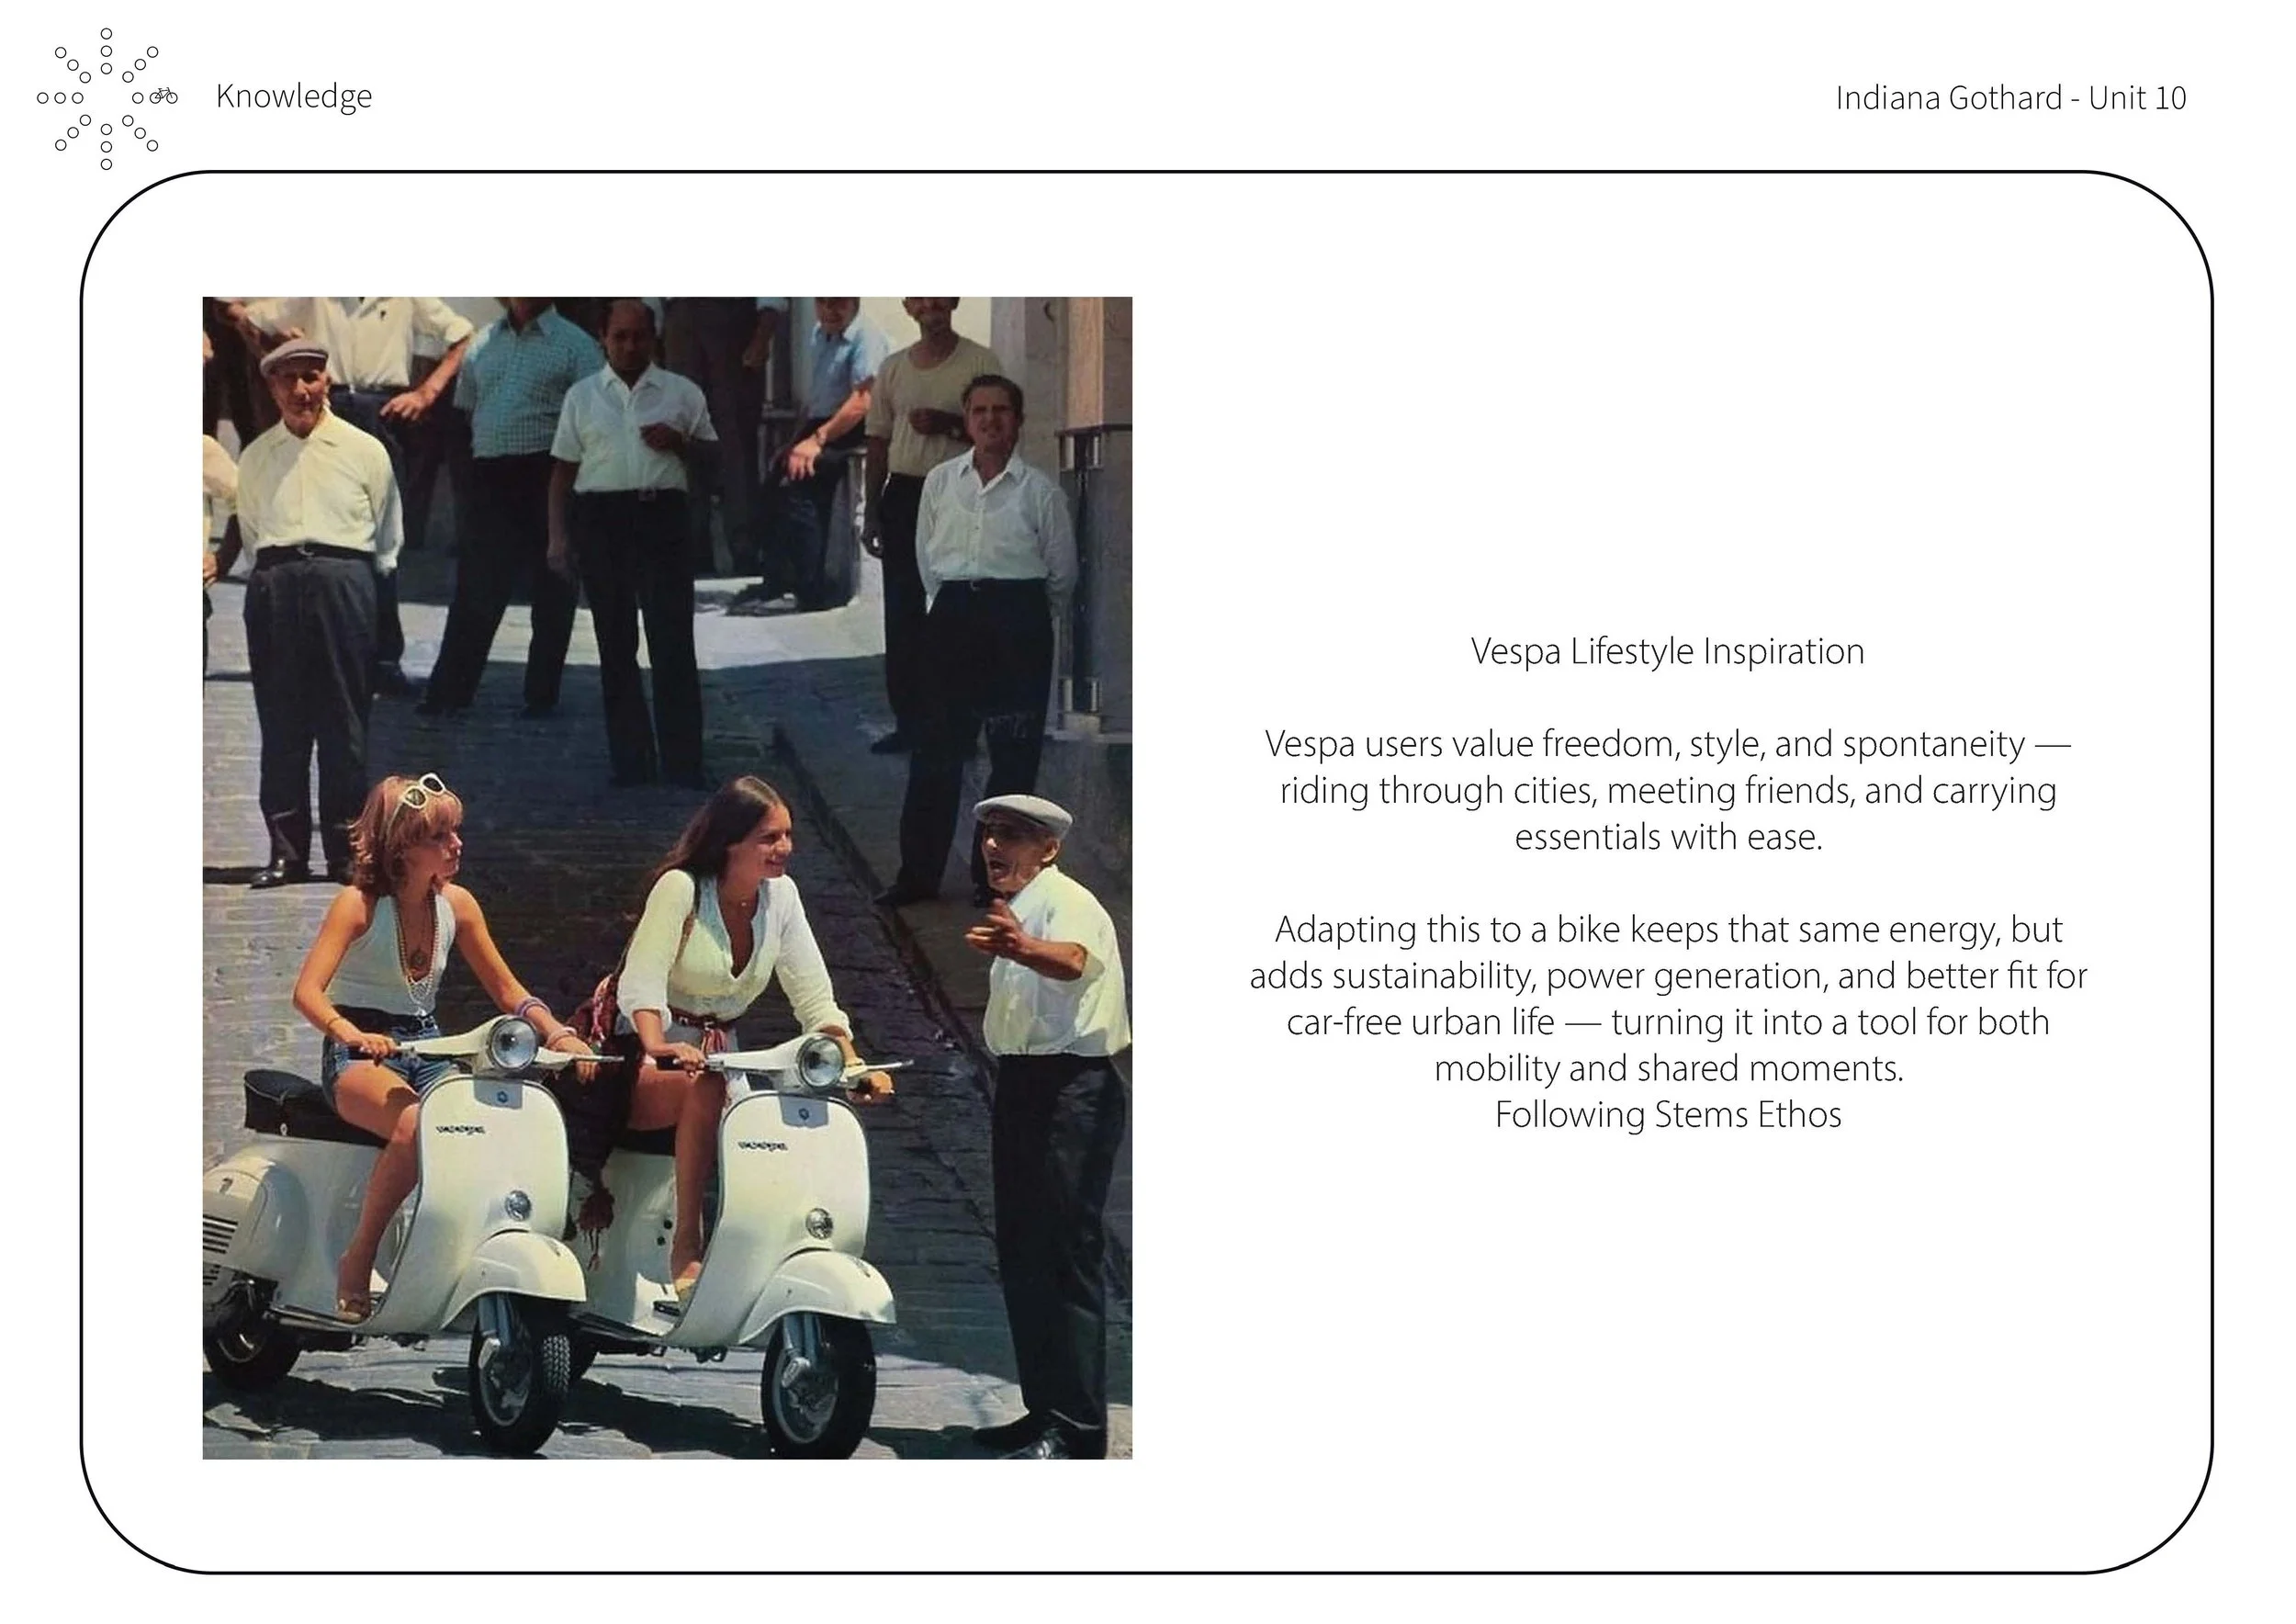
At the start of my Unit 10 project, I realised that people already ride with friends on the back of bikes and e-bikes, even though it’s technically illegal. This showed me there’s a real appetite for that “Vespa-style” spontaneous adventure—but no legal option that supports it. That gap in the market was where I saw potential. It also connected directly to STEM’s brief, which is about creating products that enable freedom and spontaneous lifestyles.
WHAT’S MY INSIGHT - No. 2
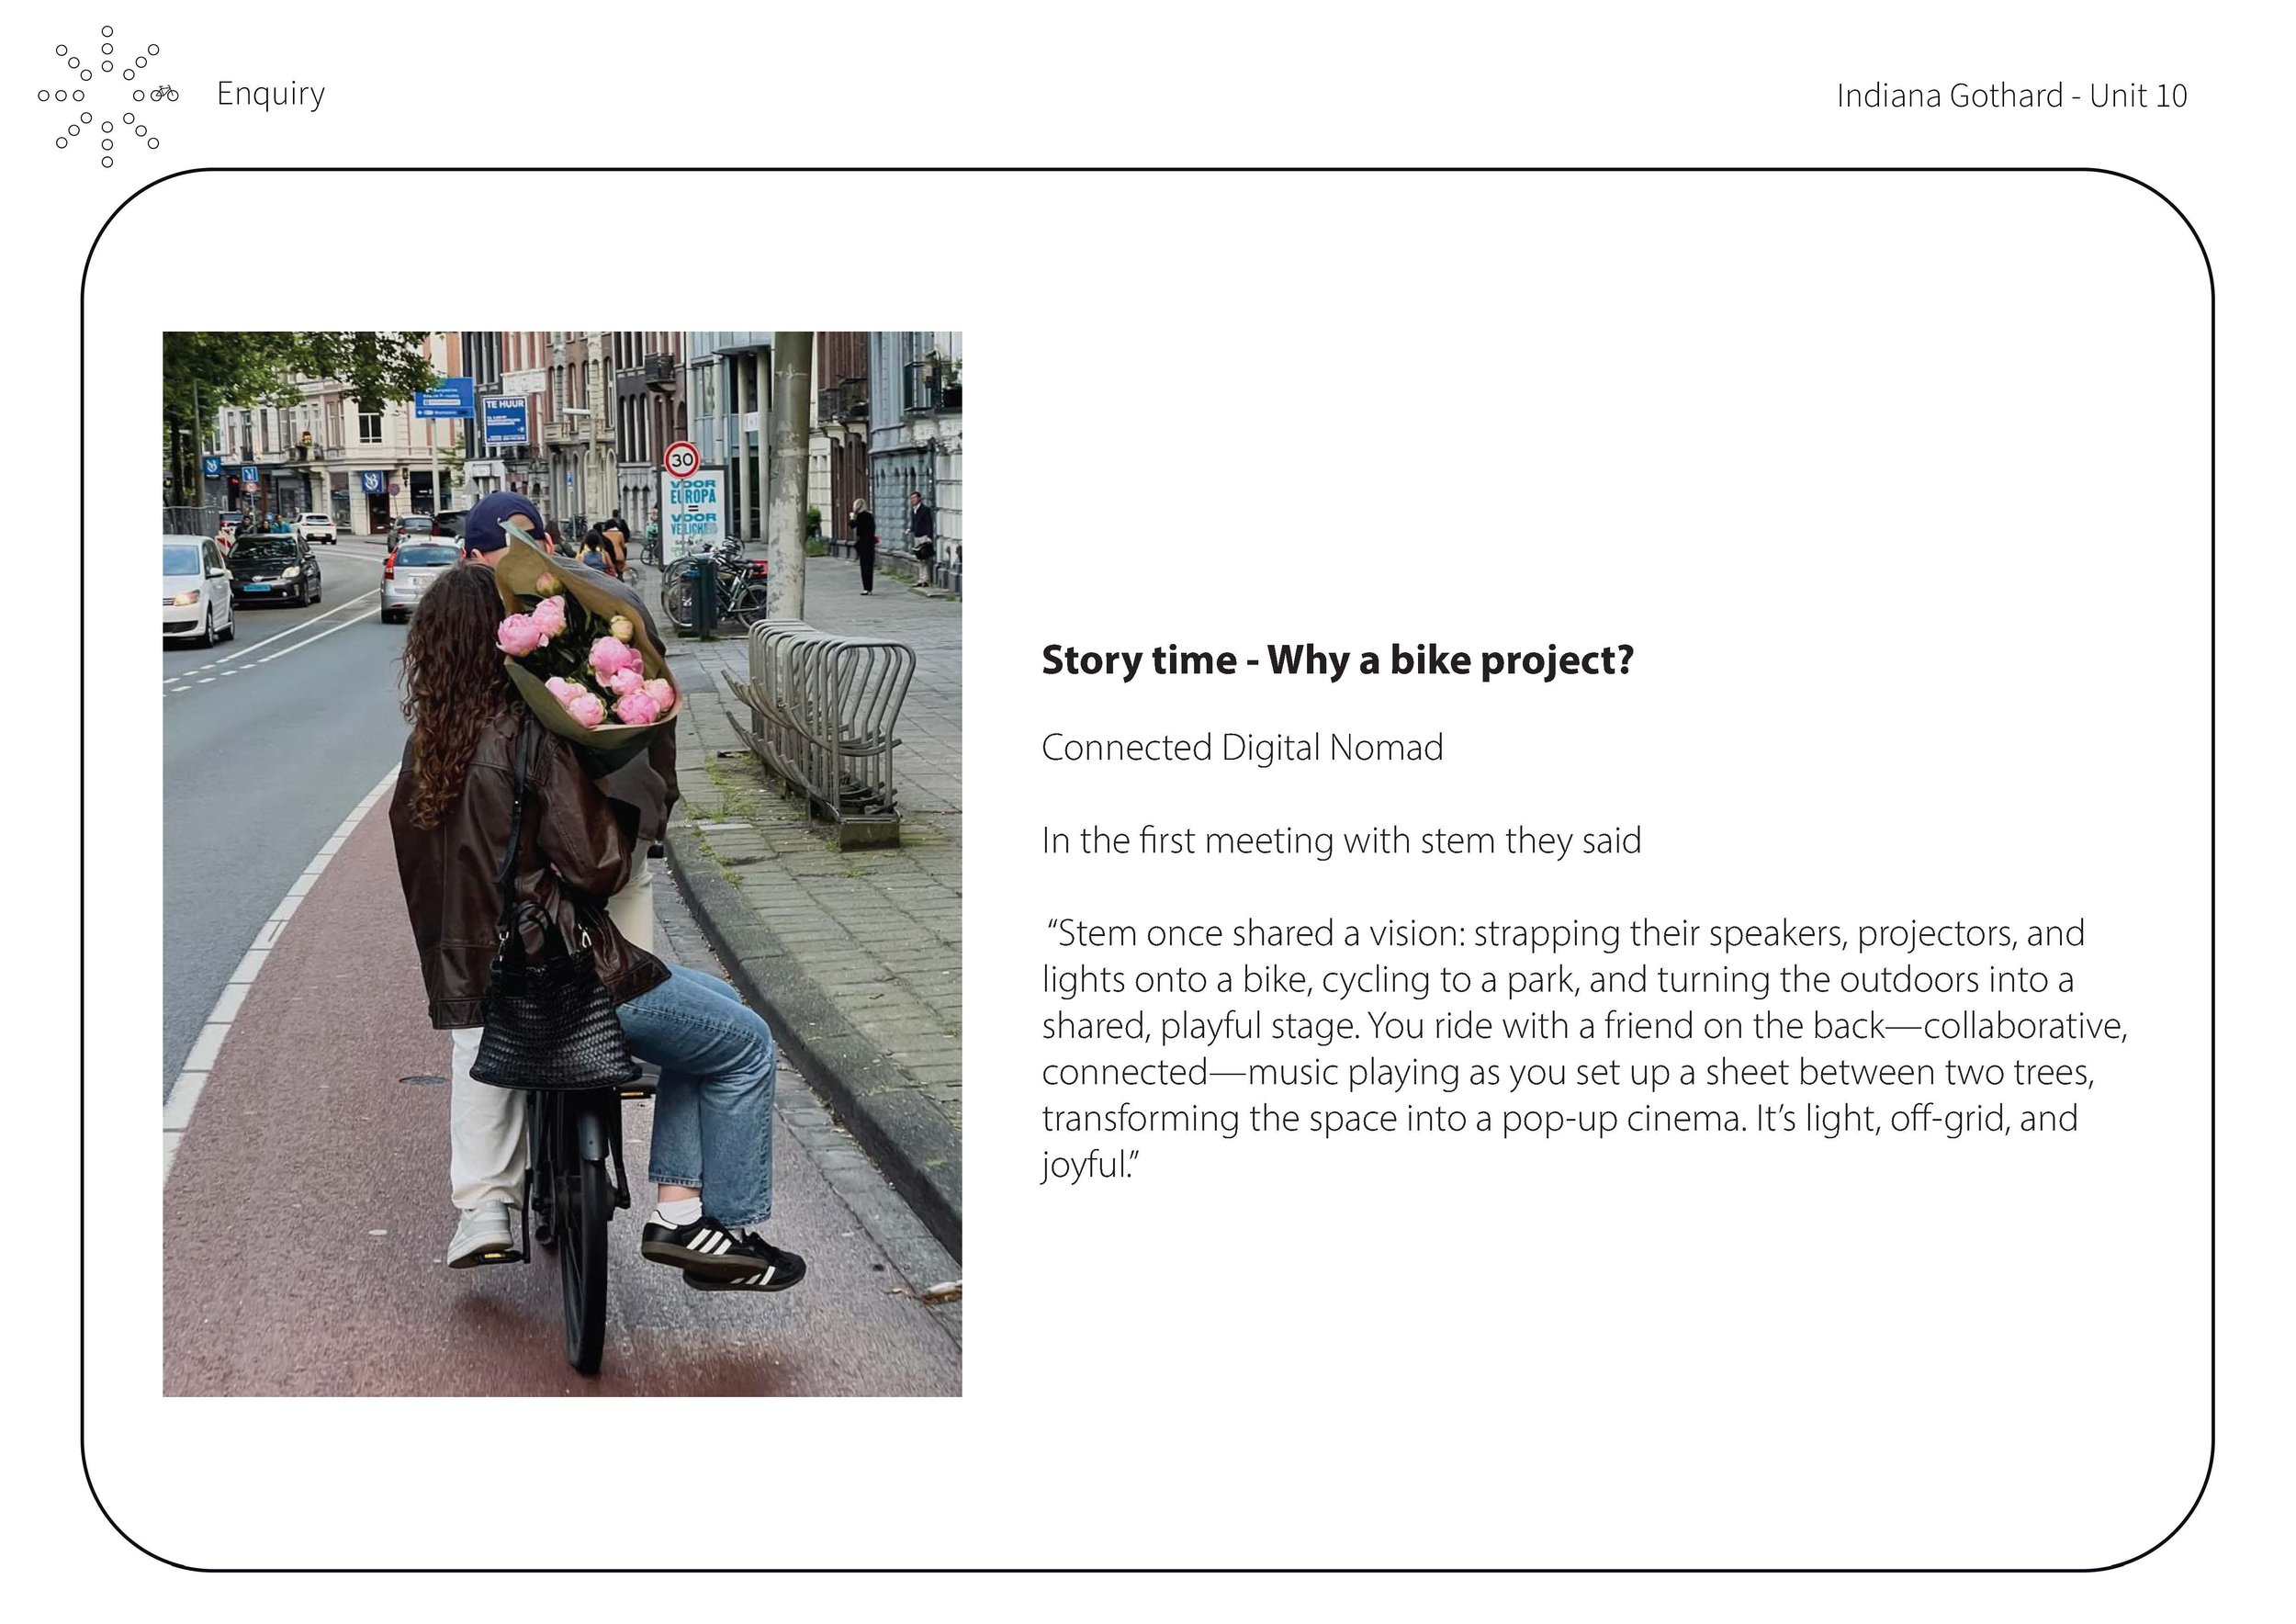
Another key insight came from my first meeting with STEM. They described their vision of a group strapping speakers, projectors, and lights to a bike, cycling into a park, and transforming the outdoors into a shared stage. You ride with a friend on the back, music playing, setting up a sheet between two trees to create a pop-up cinema. It’s light, off-grid, and joyful. Hearing this helped me understand how they see their products living in the world—supporting connection, spontaneity, and playful, collective experiences.
03 MY DESIGN CHALLENGE
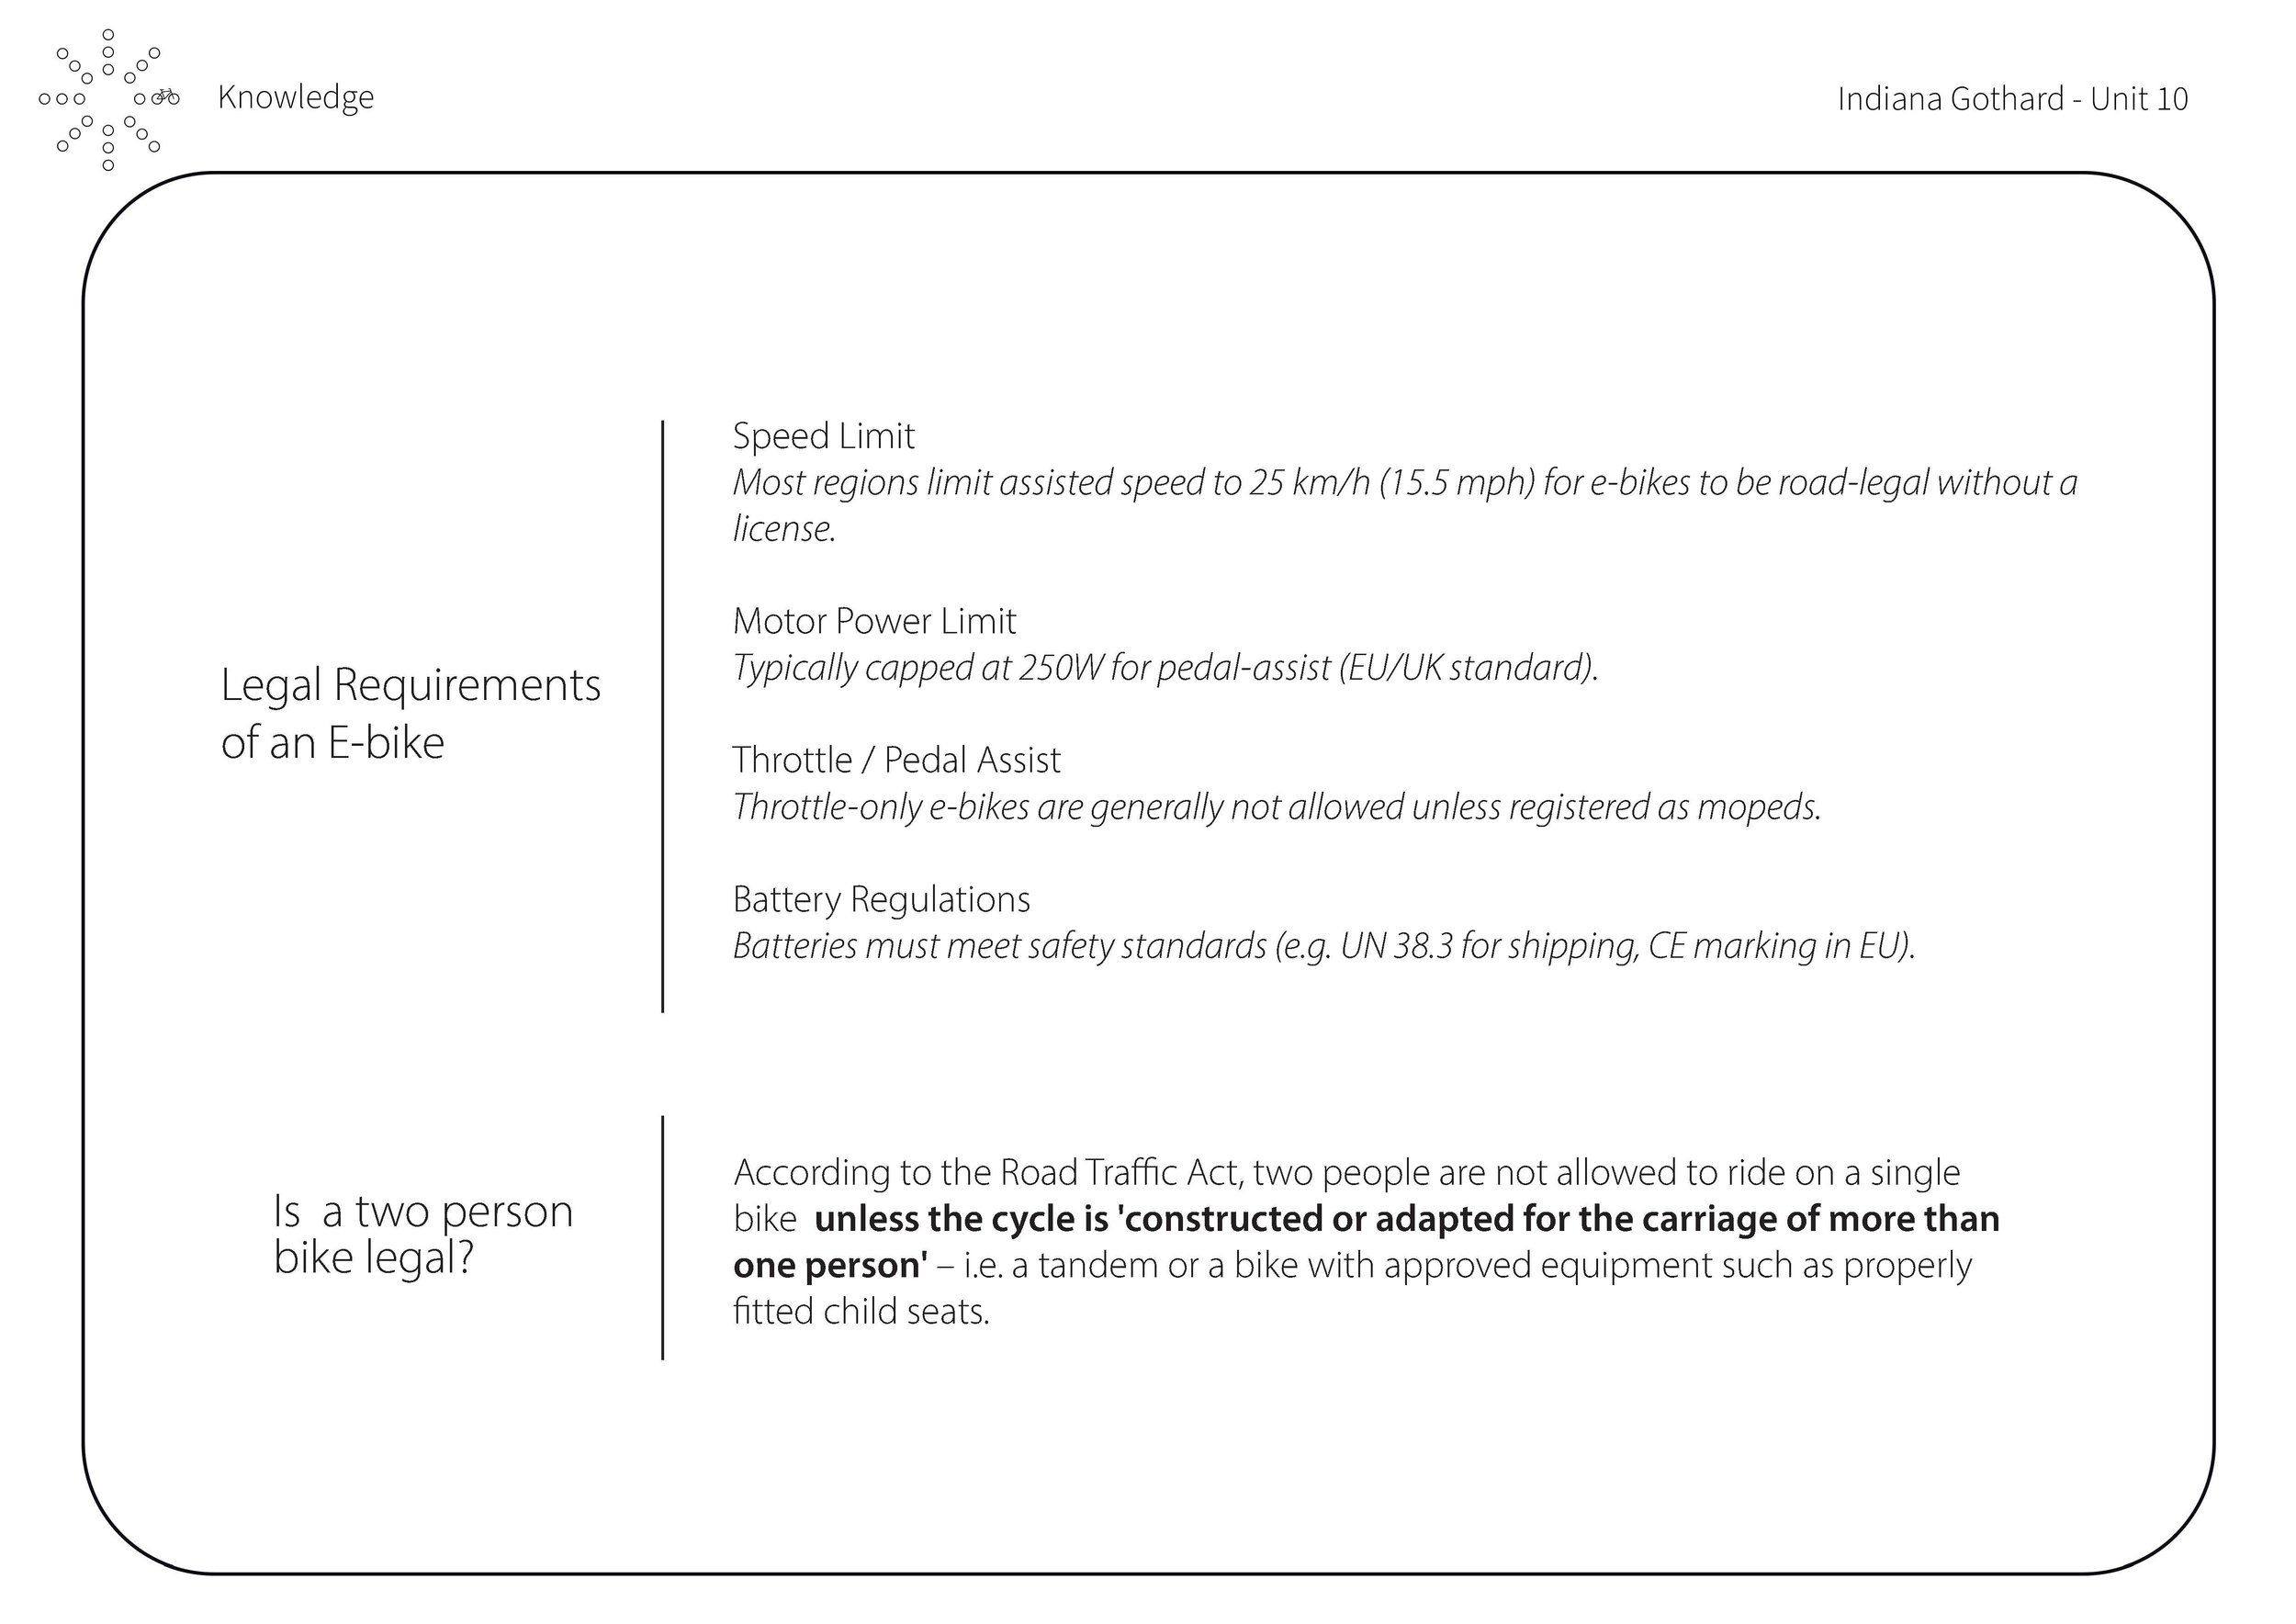
How might I design a legal, sustainable two-person bike that captures the freedom and spontaneity of riding with a friend, while generating its own energy and reducing reliance on plug-in charging?
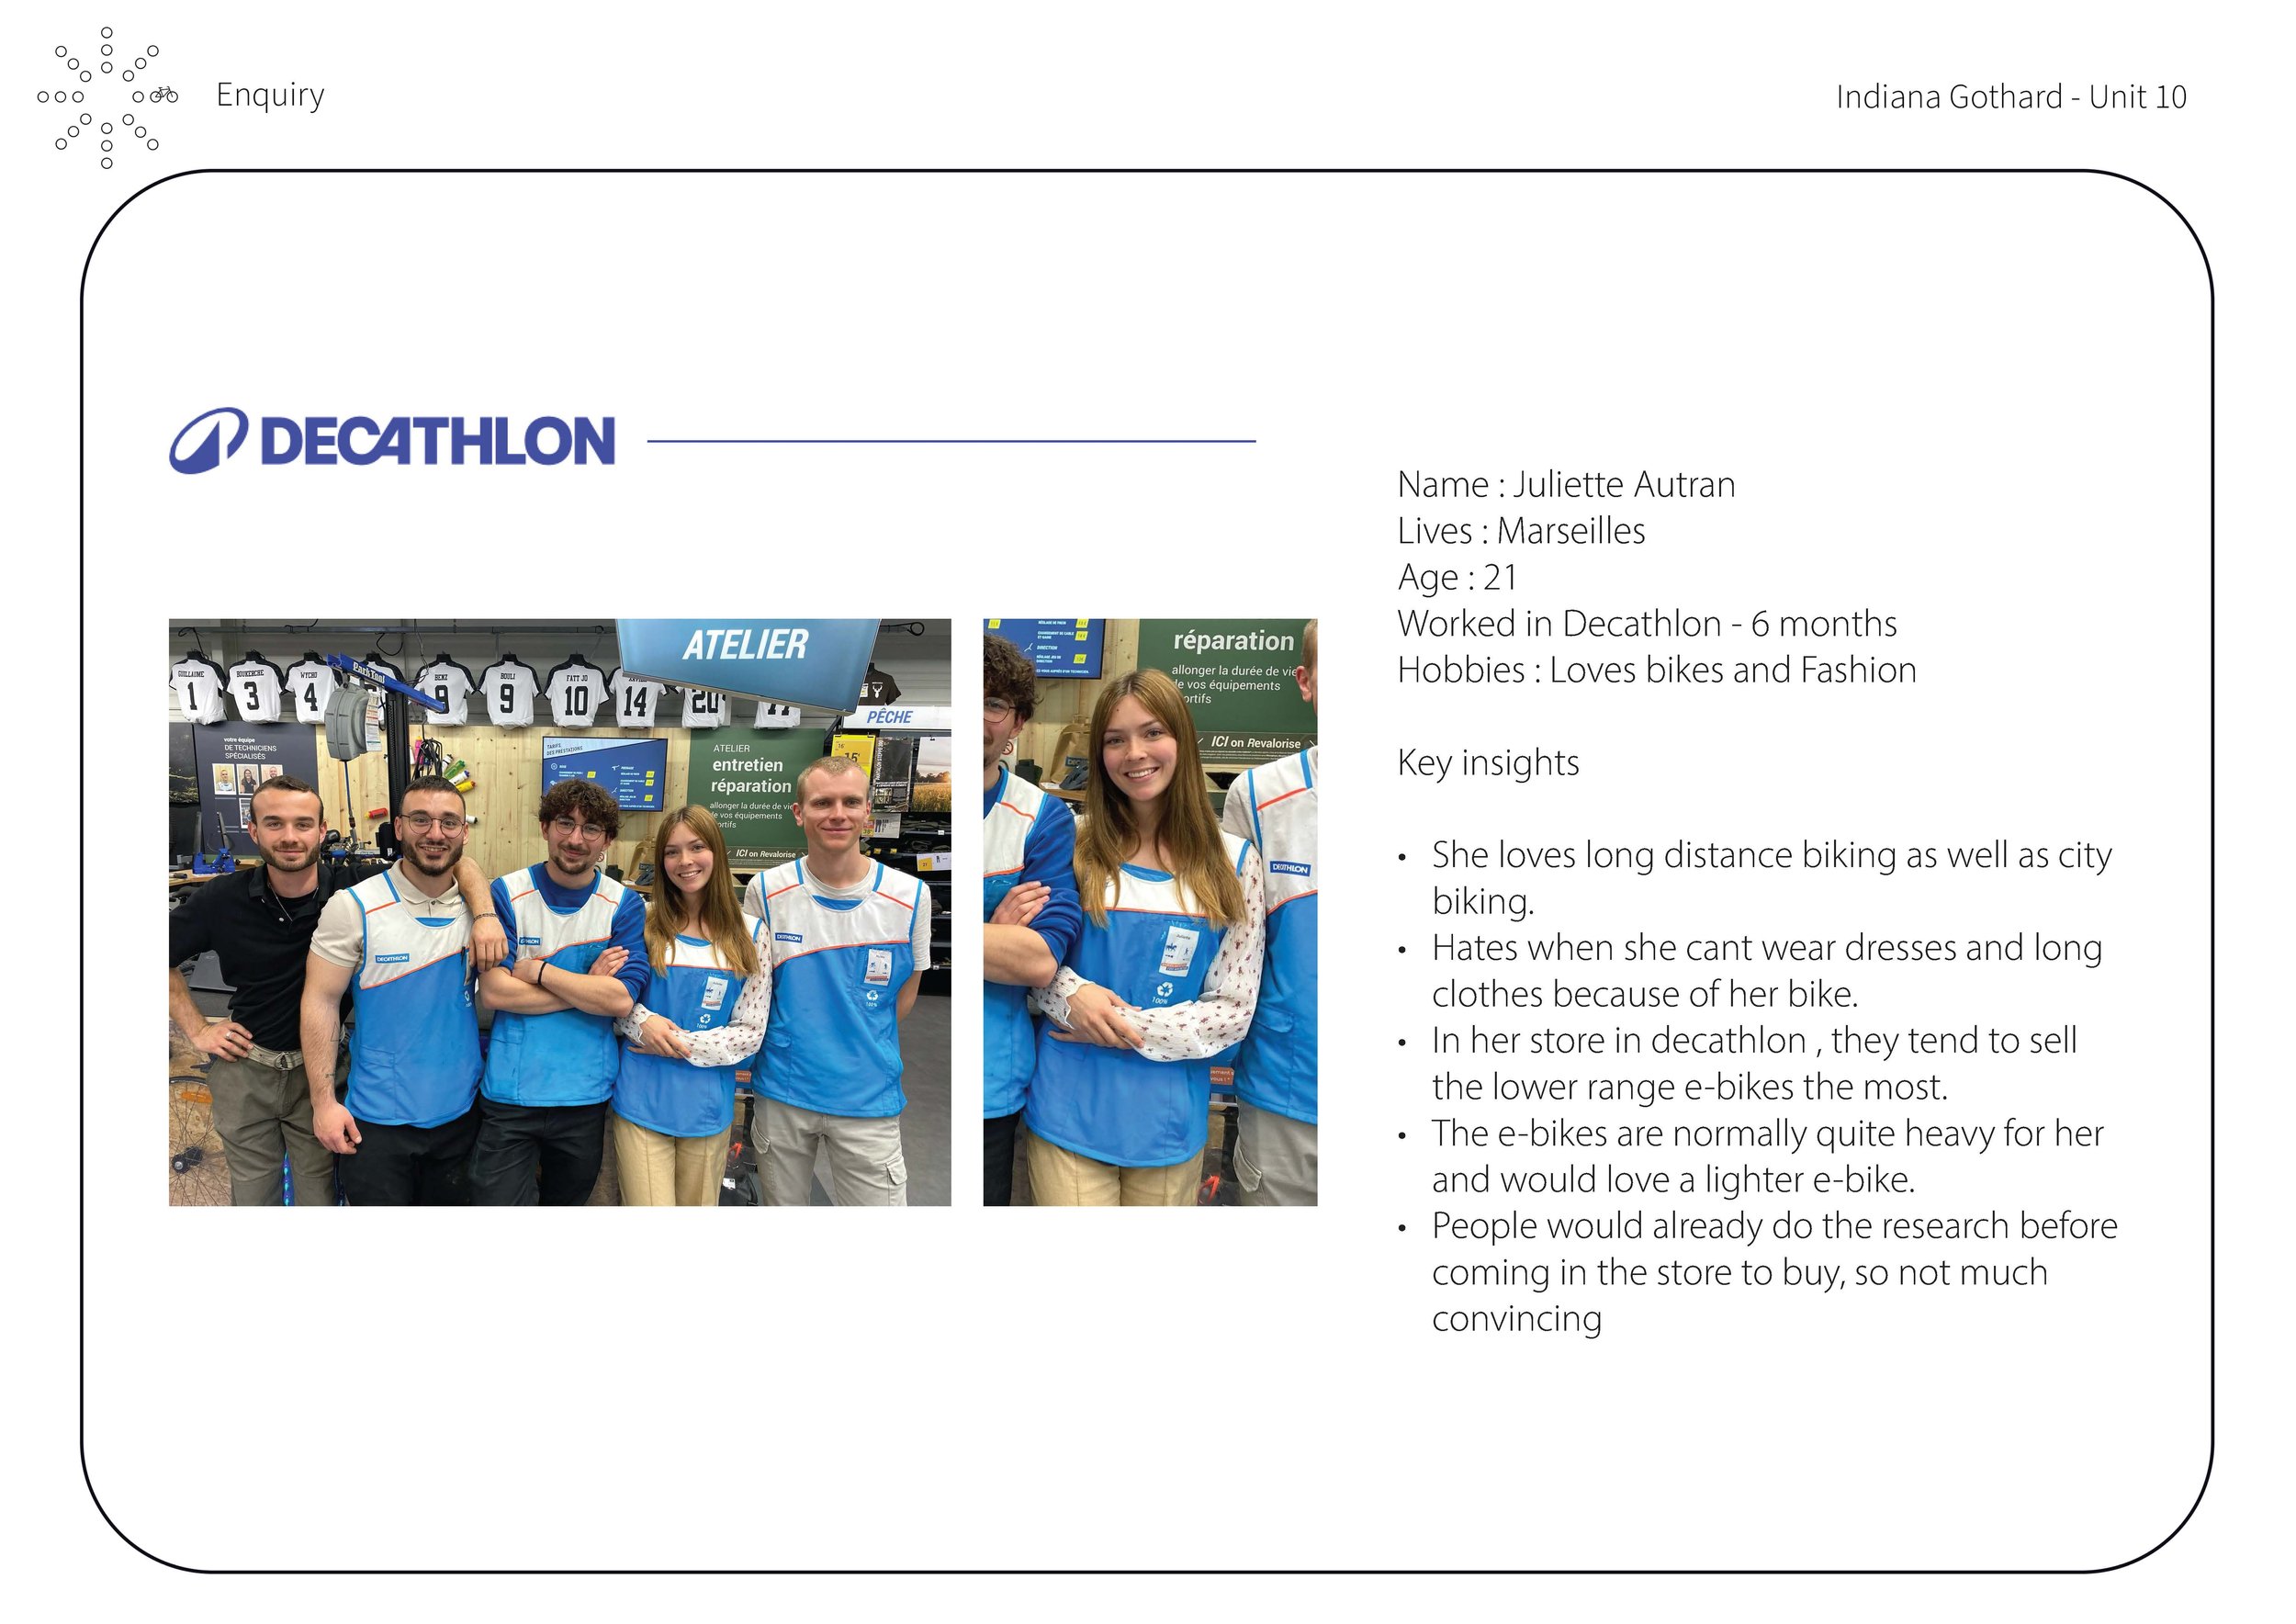
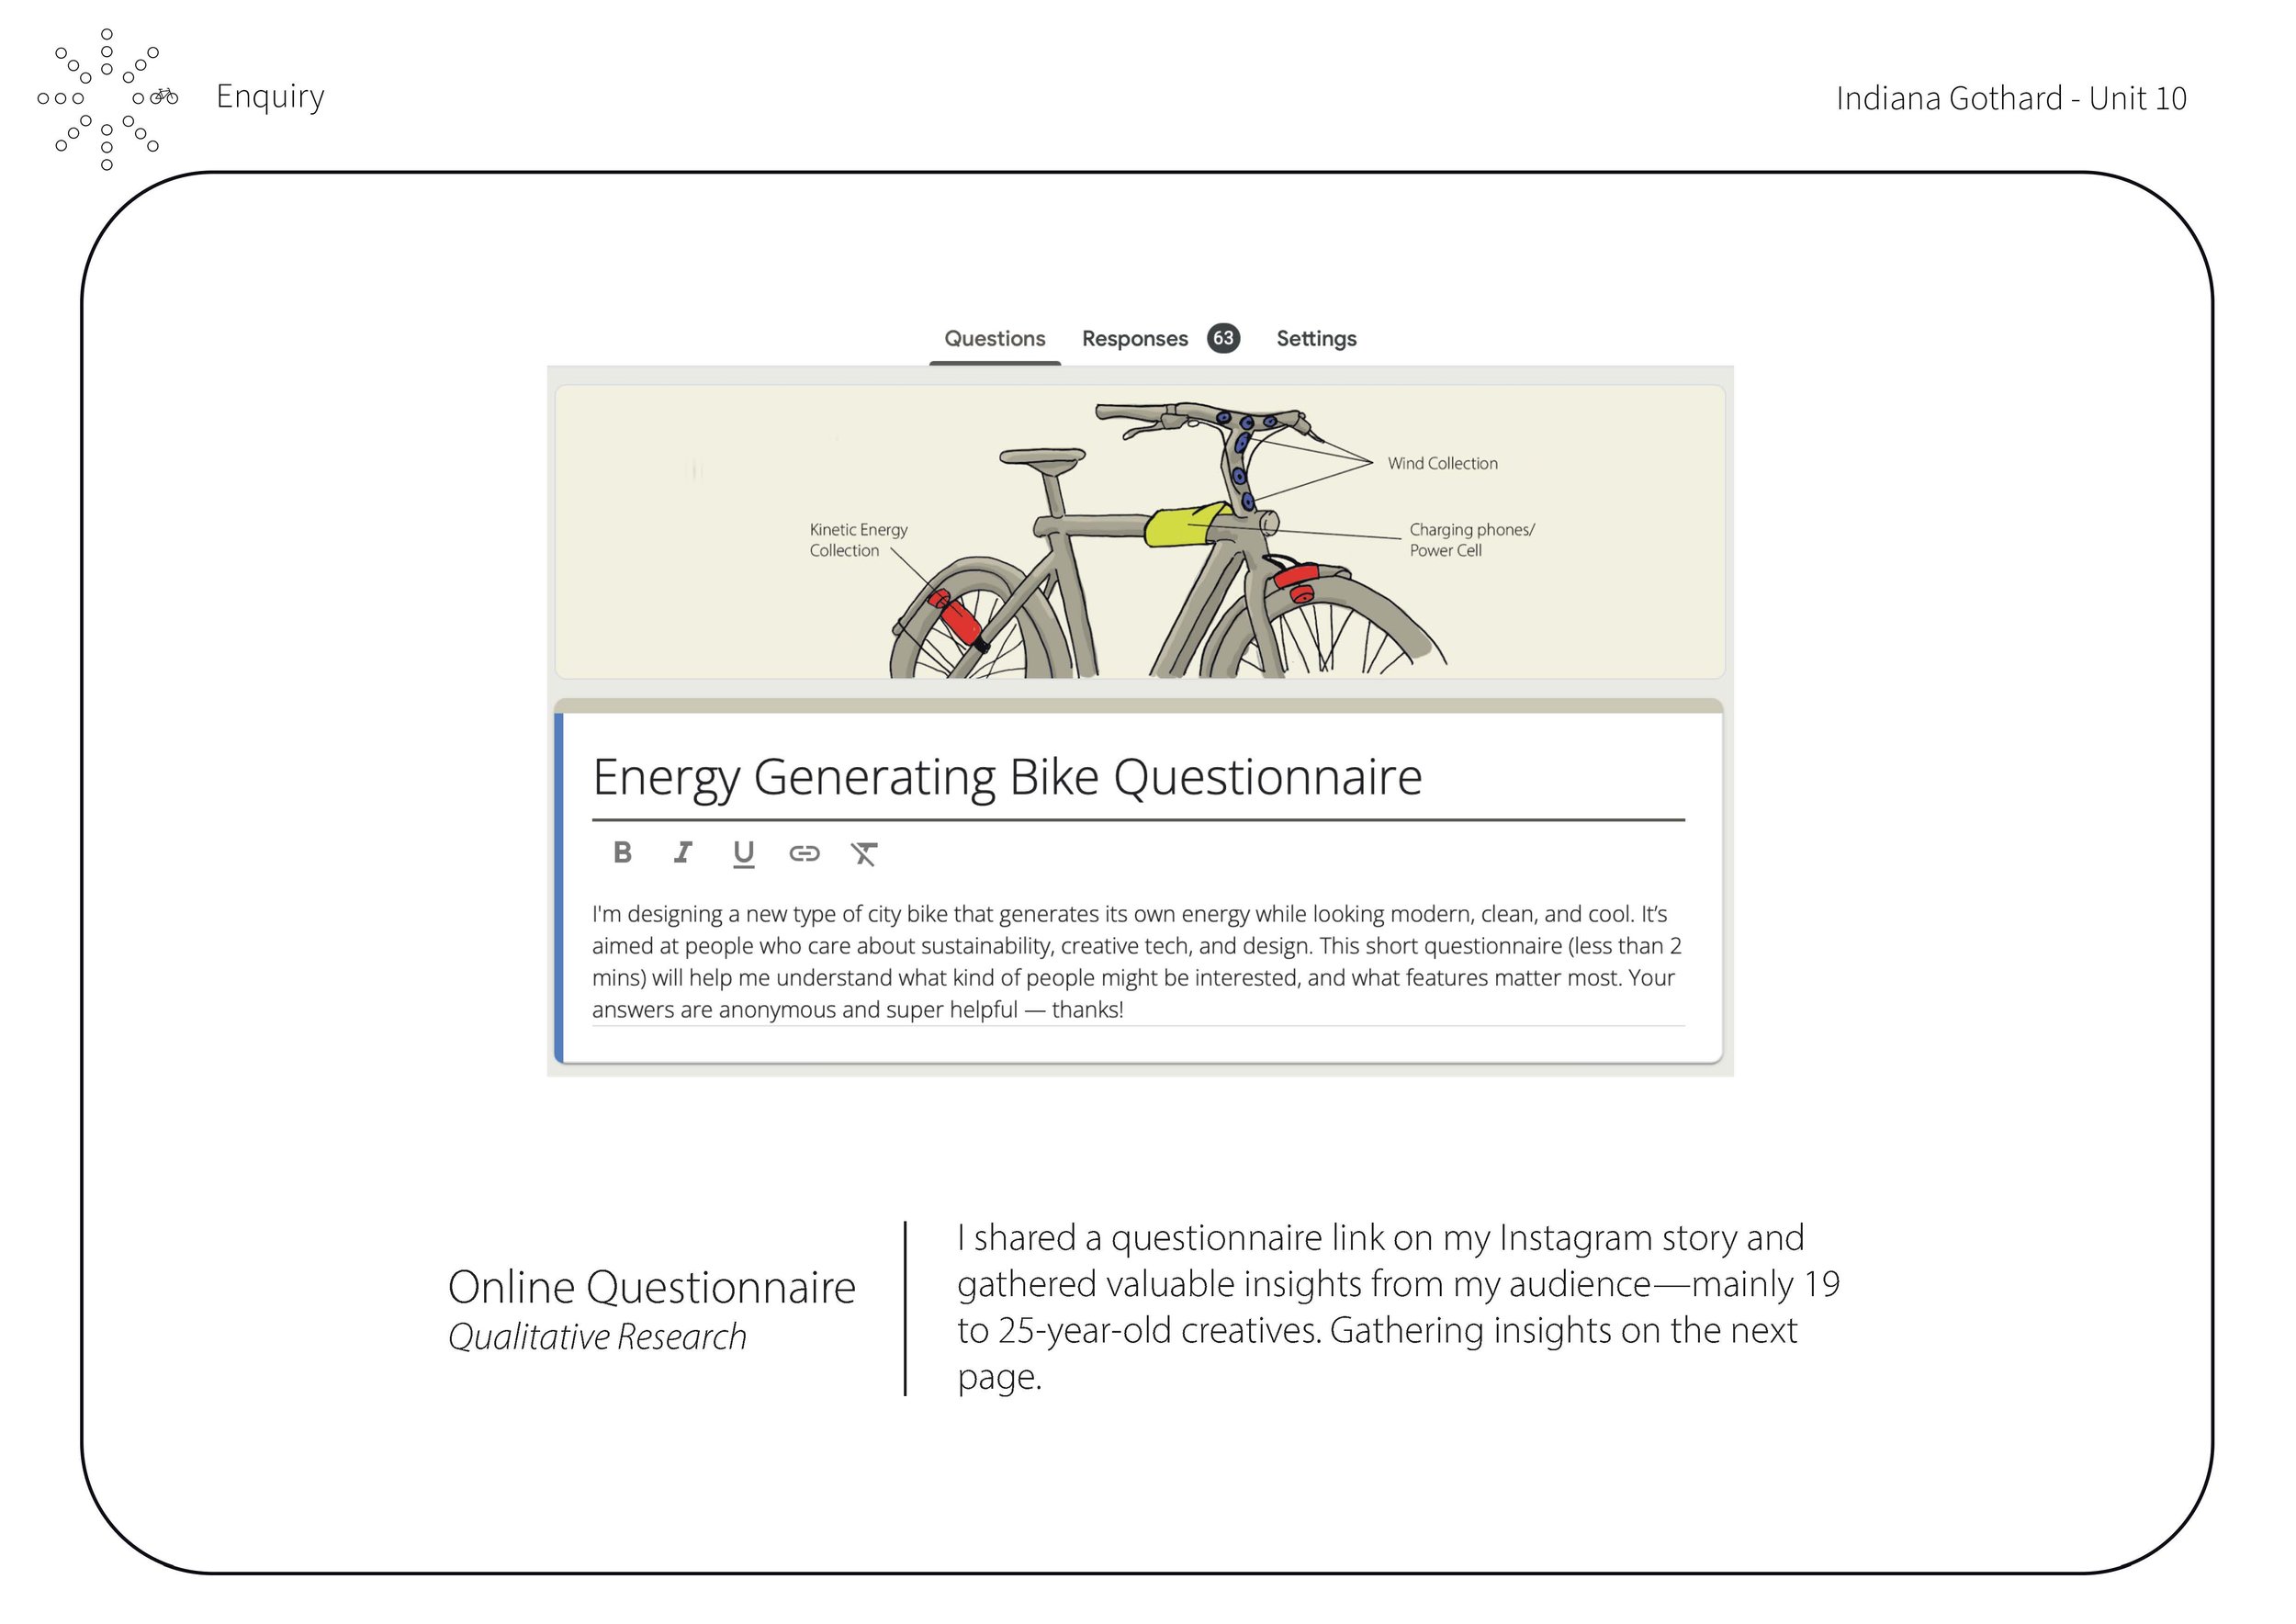
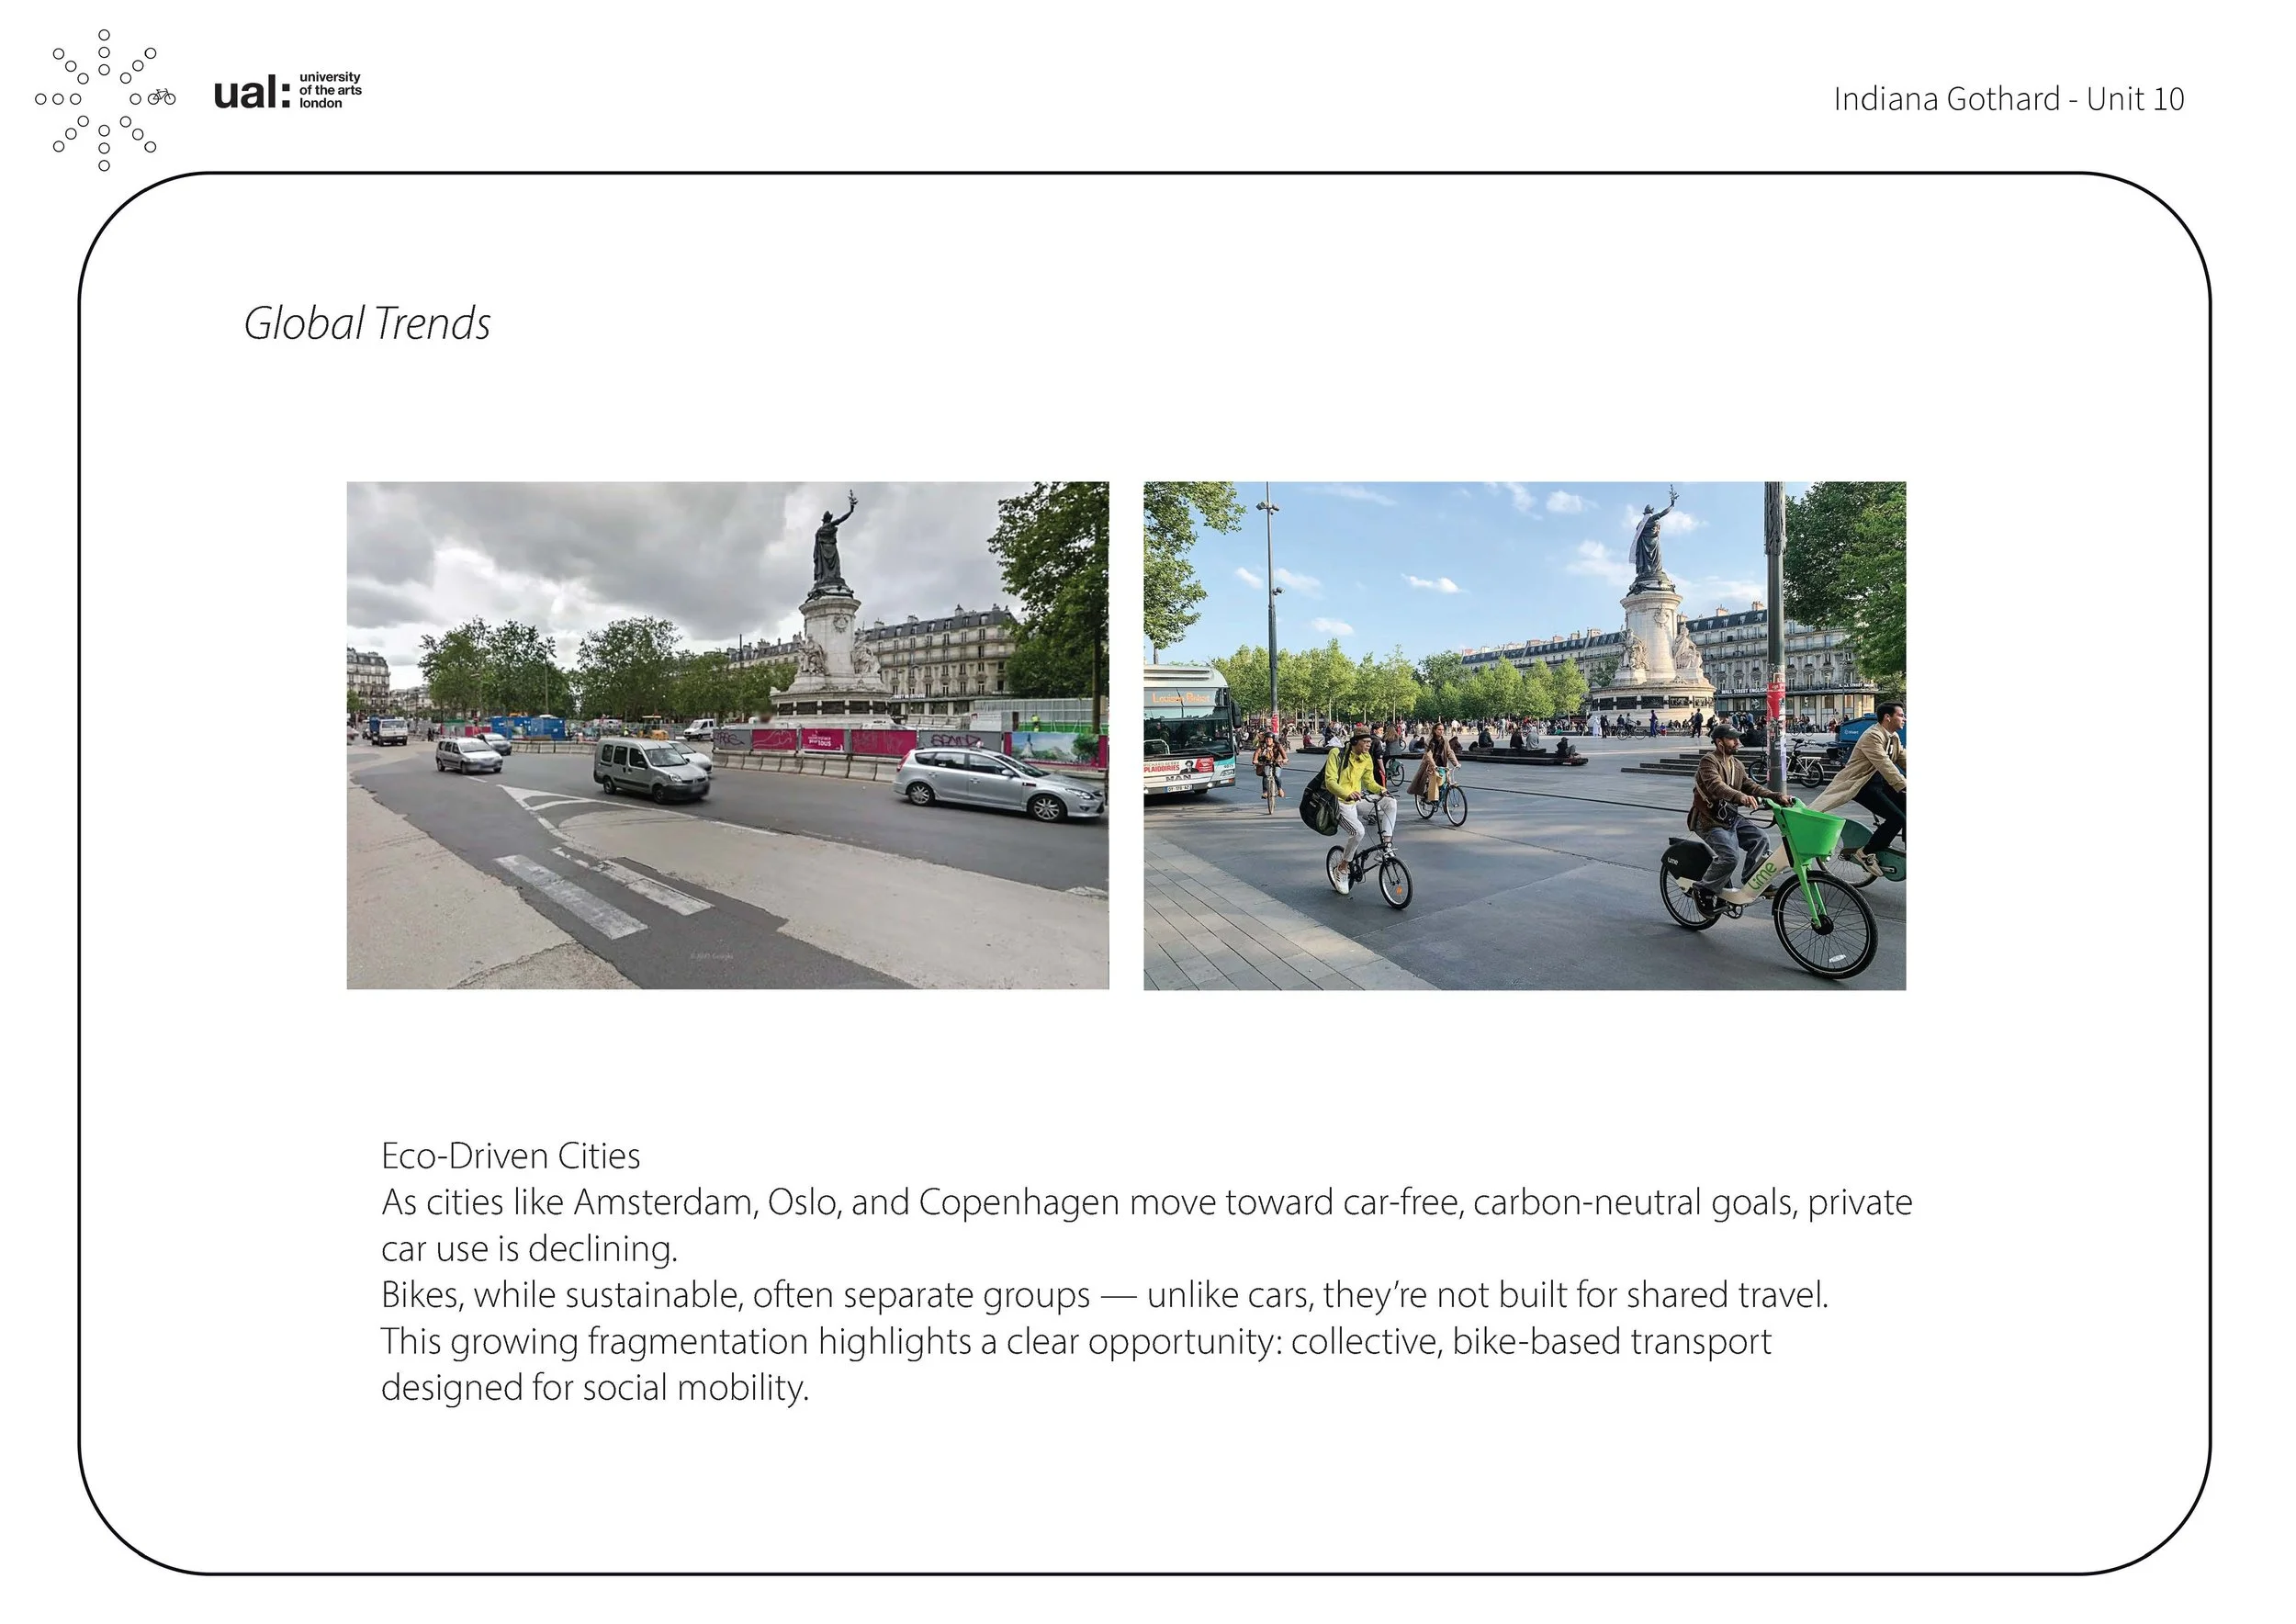
04 RESEARCH


05 IDEATION
DESIGNING IN A GROUP
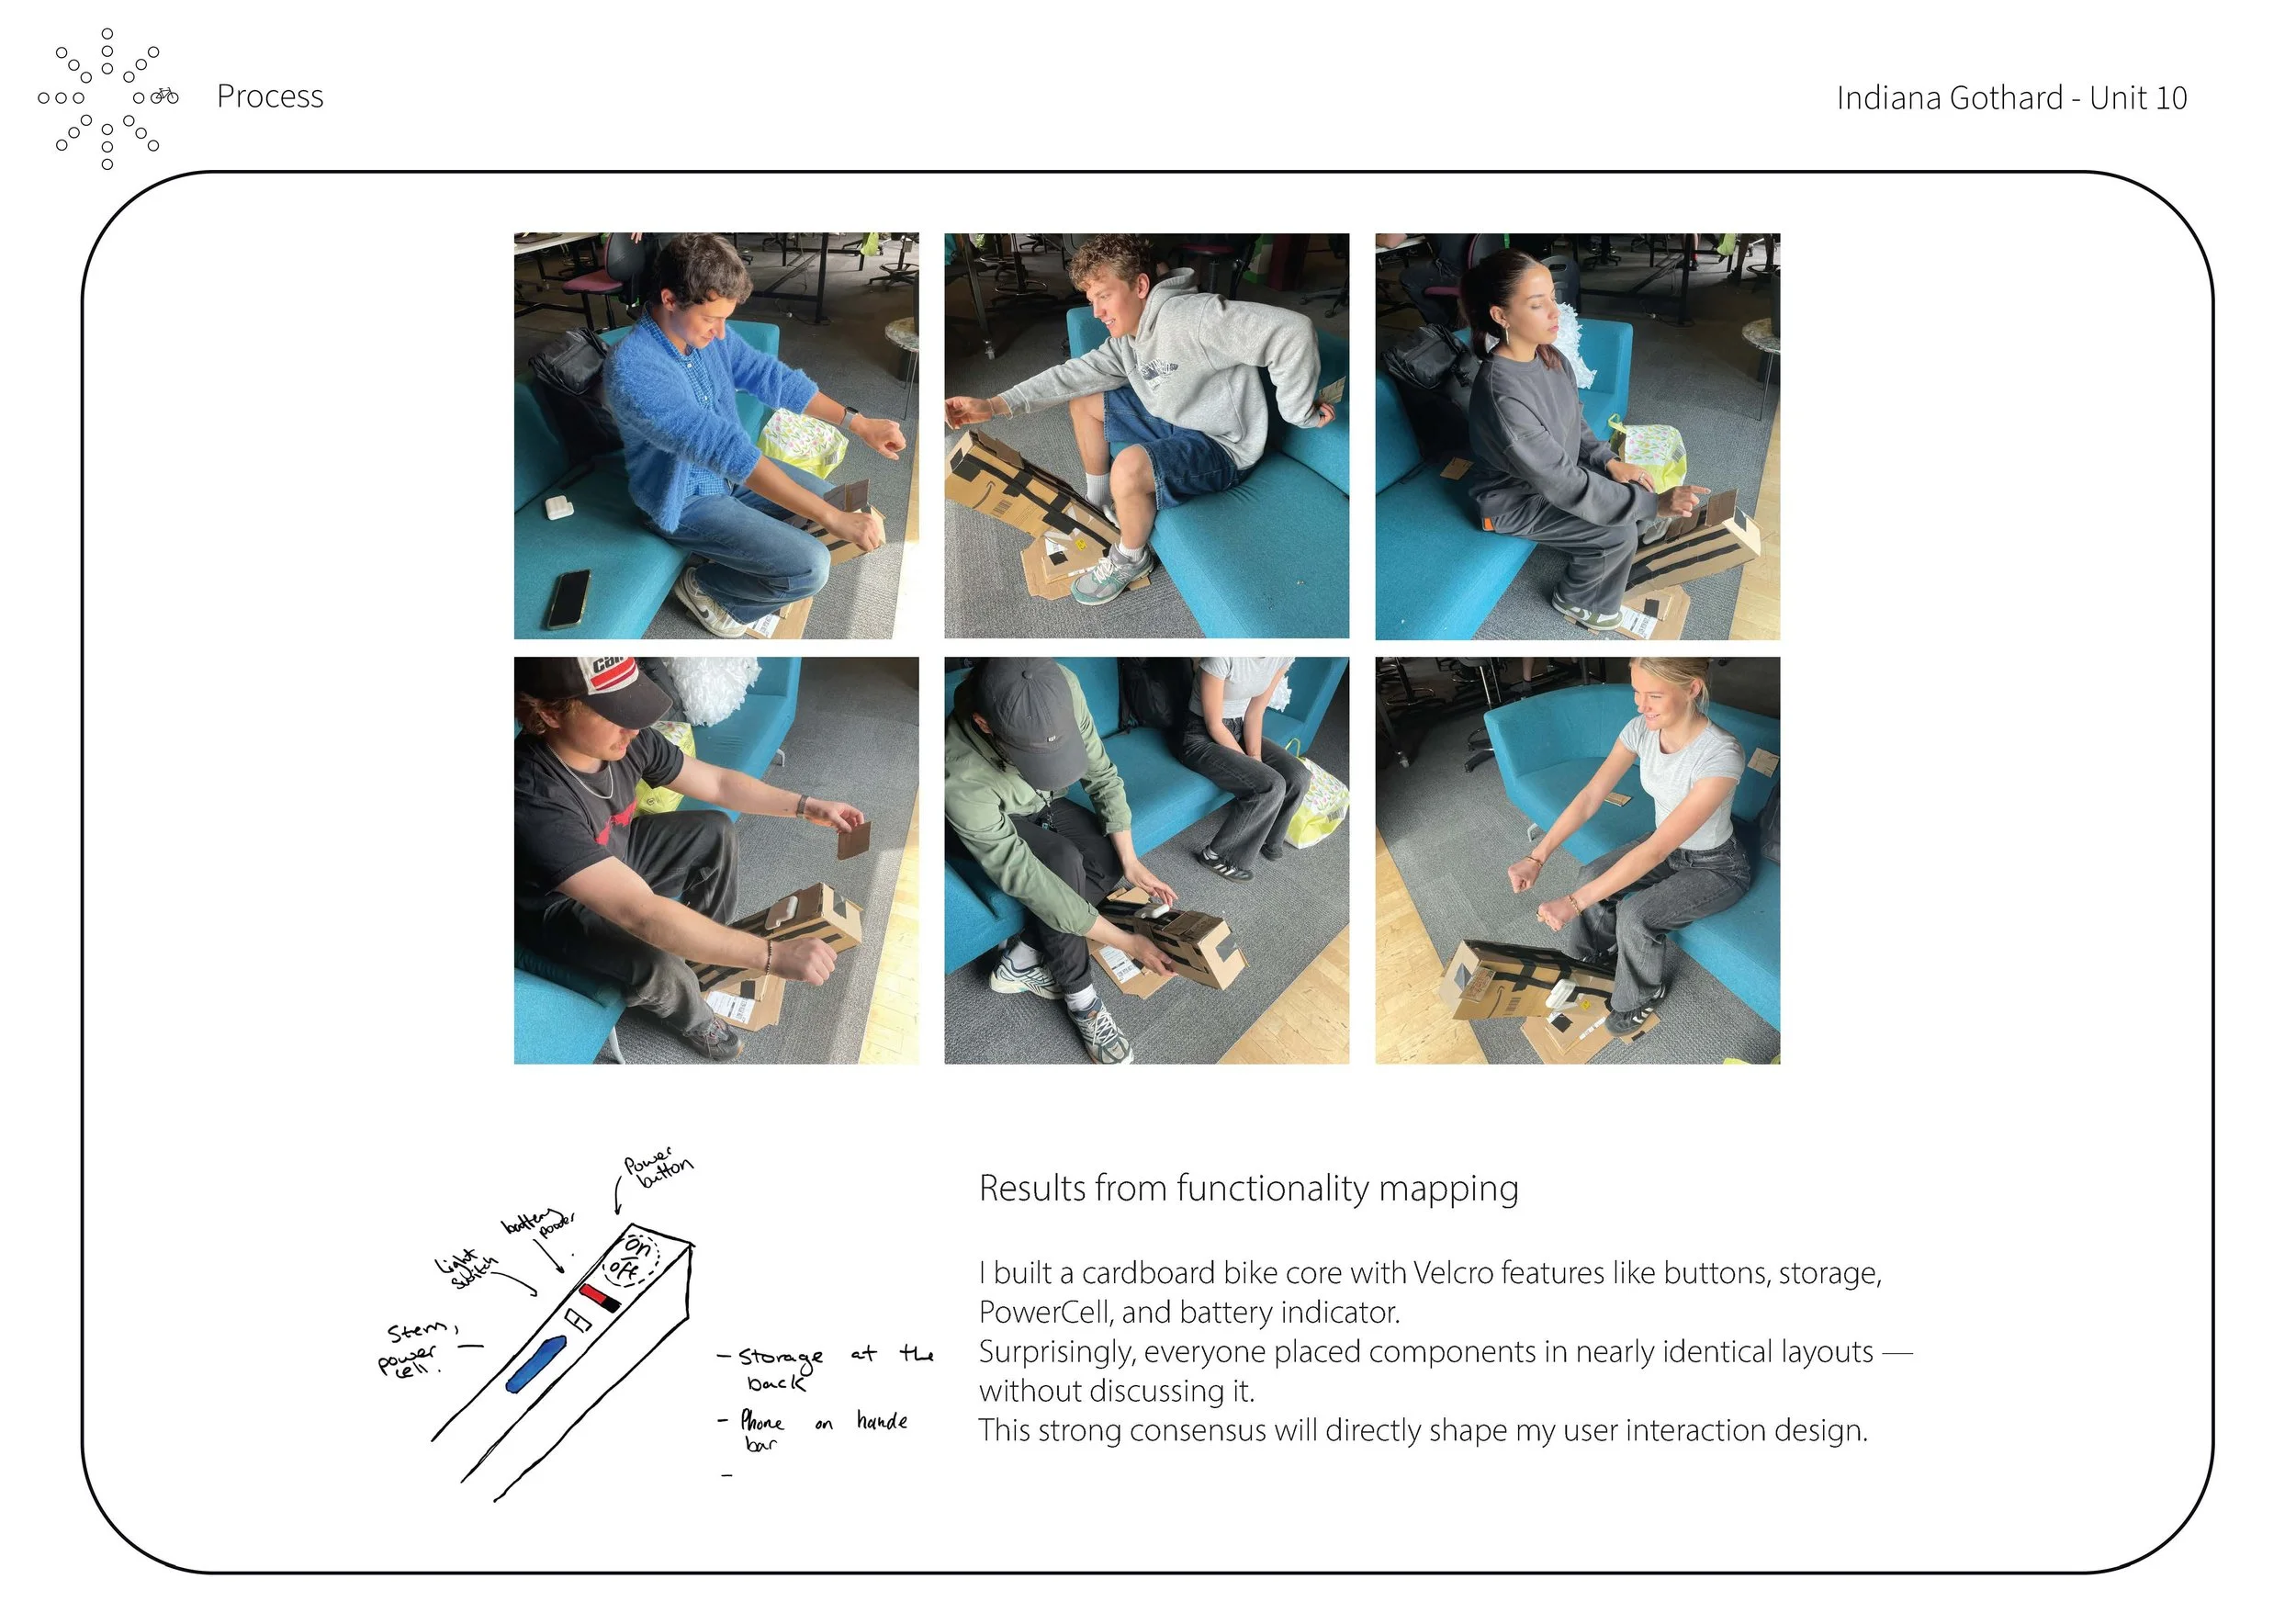
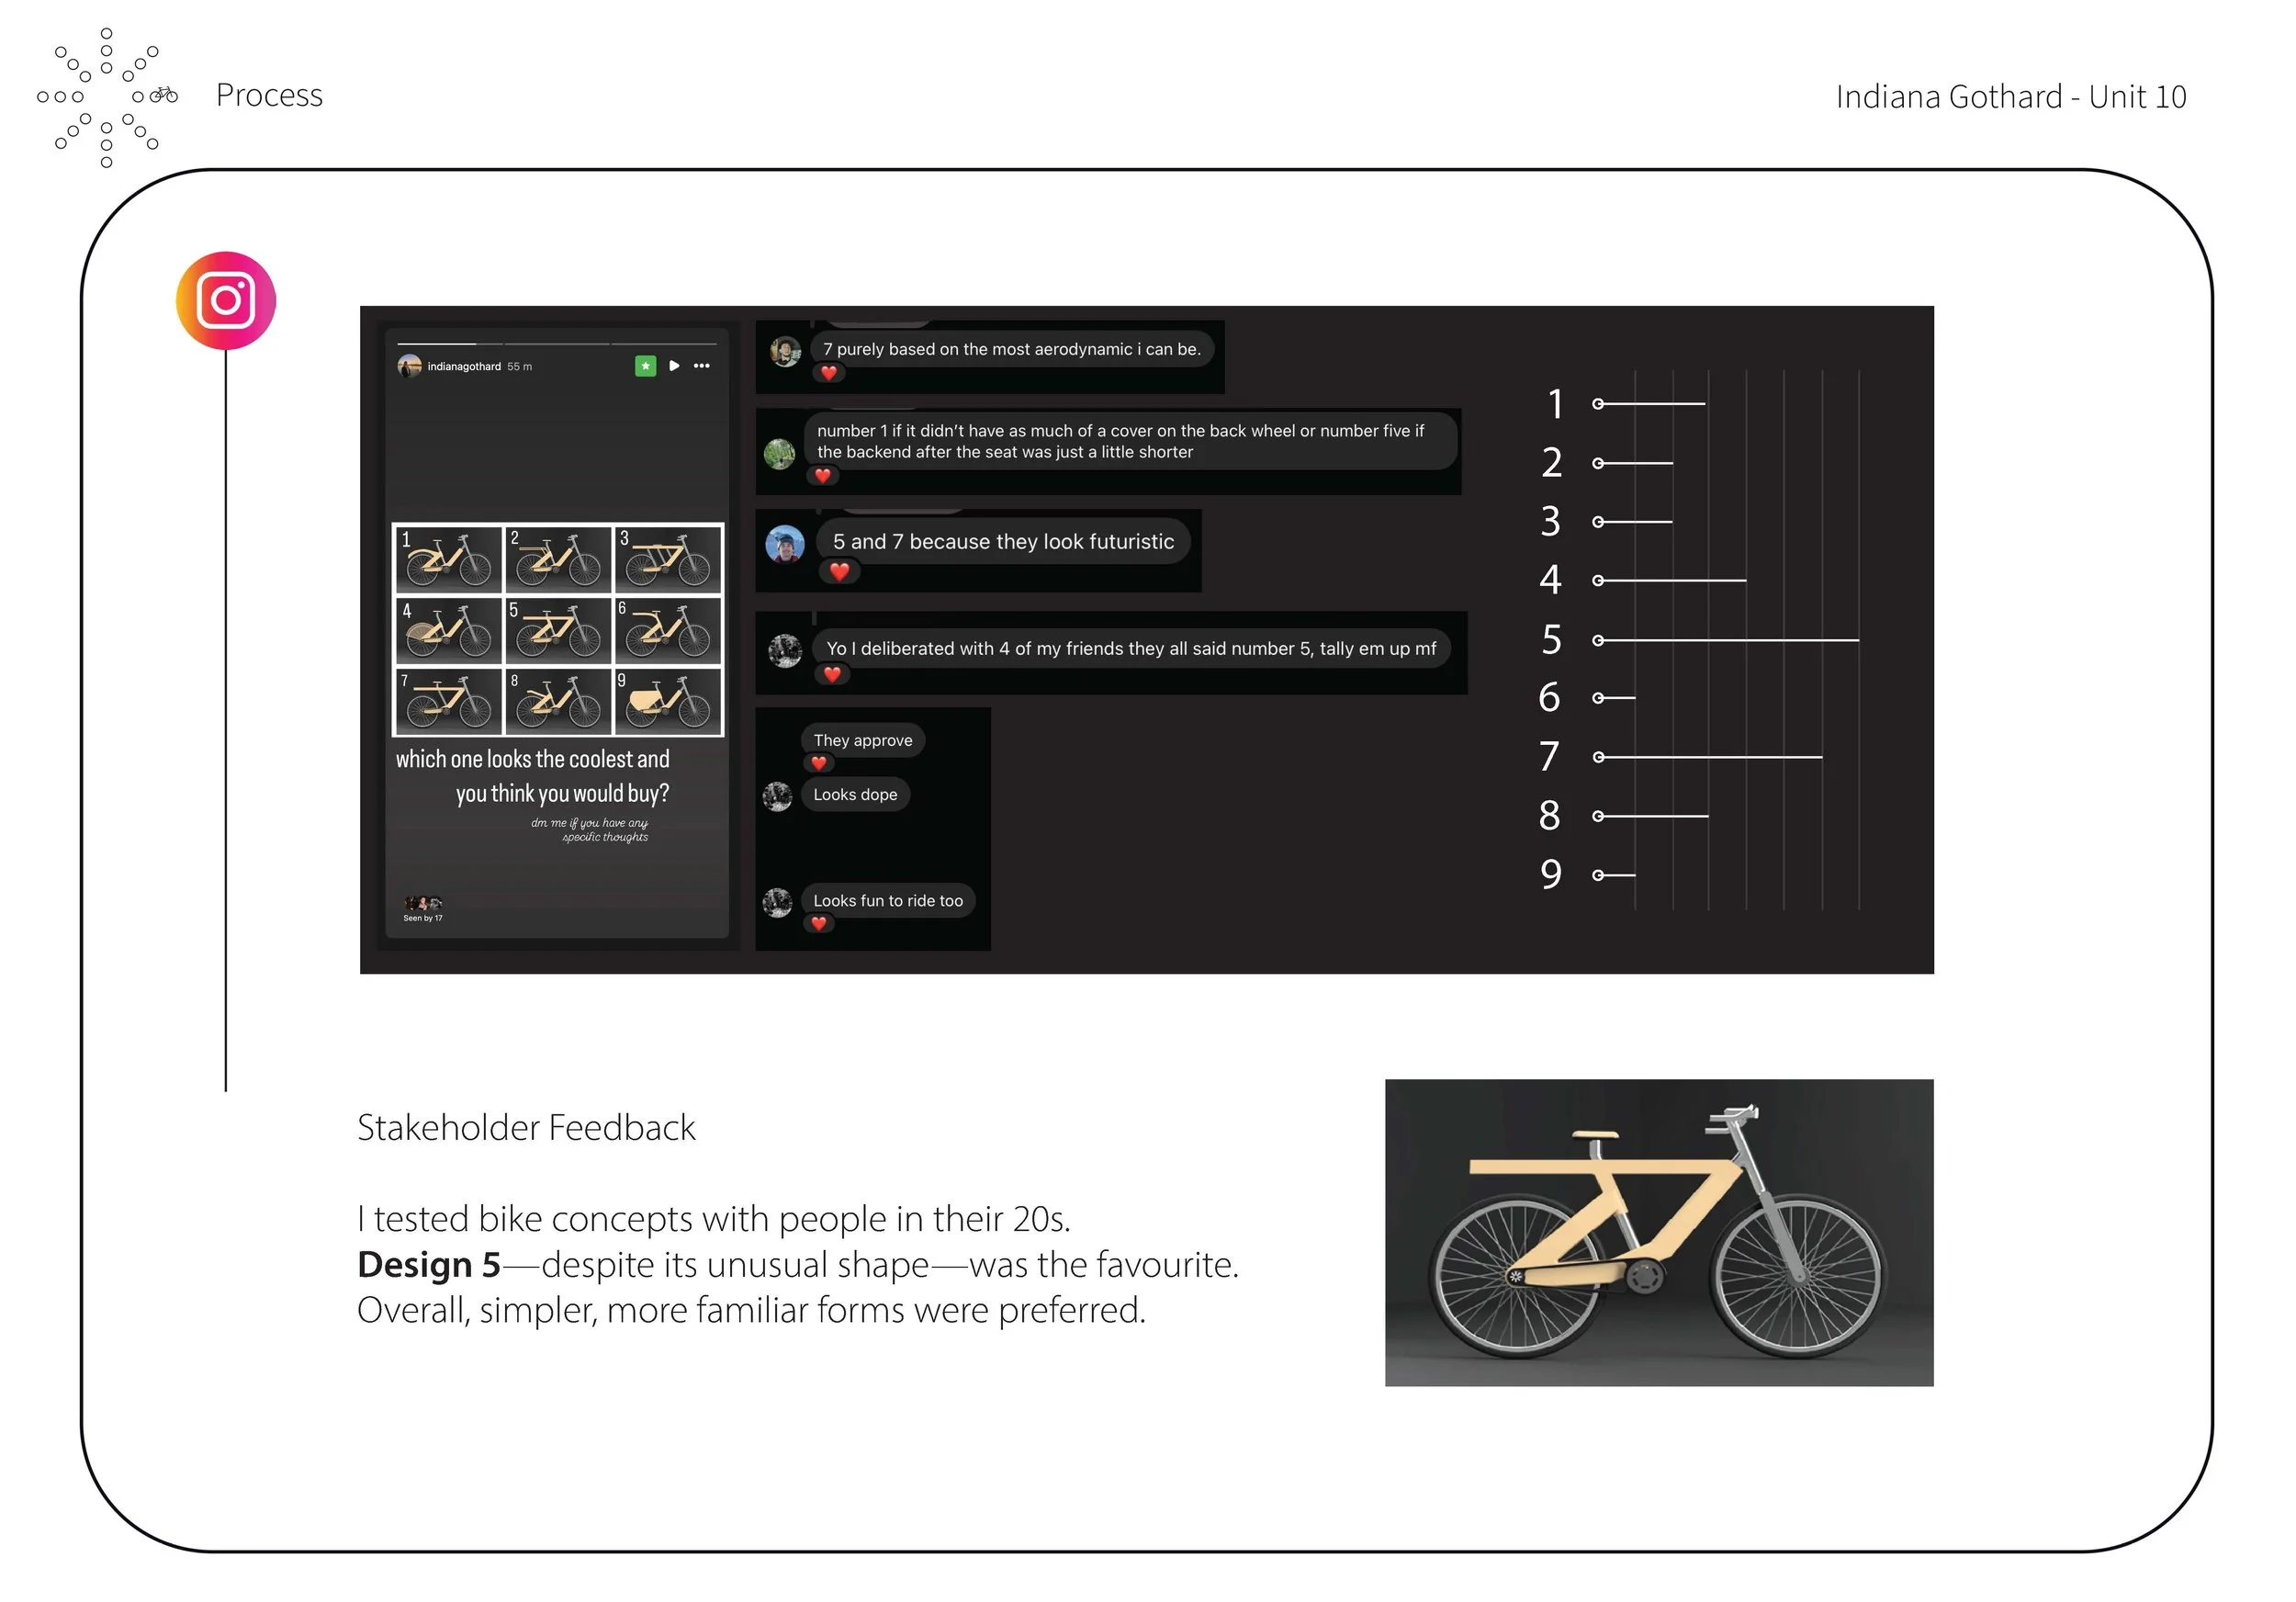
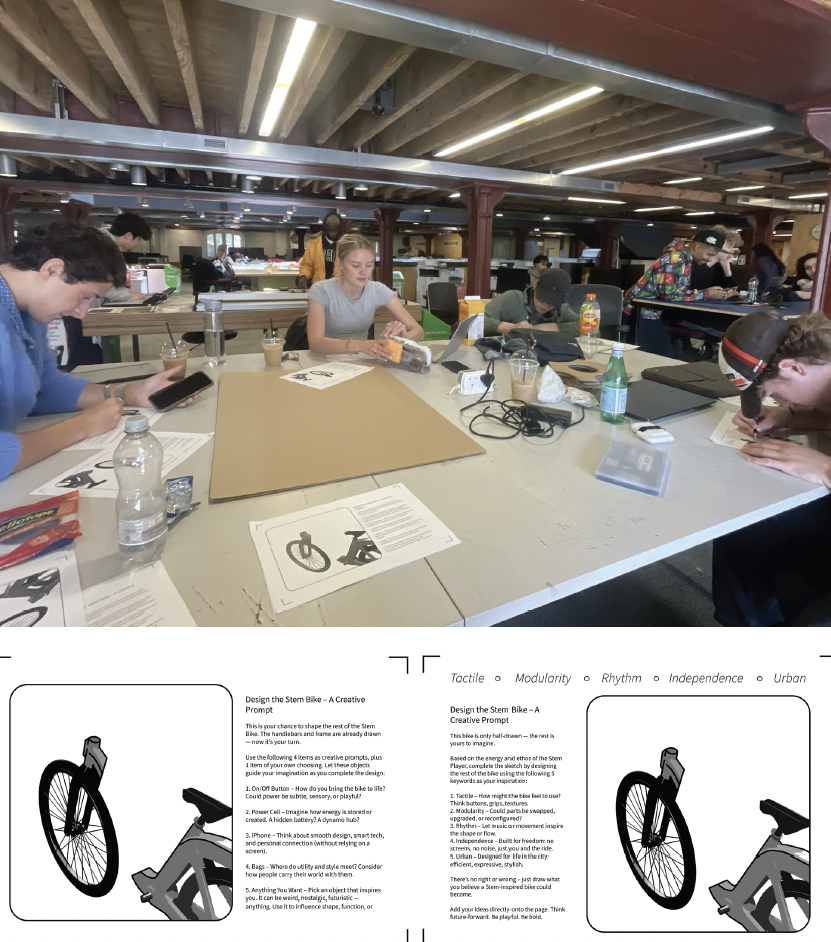
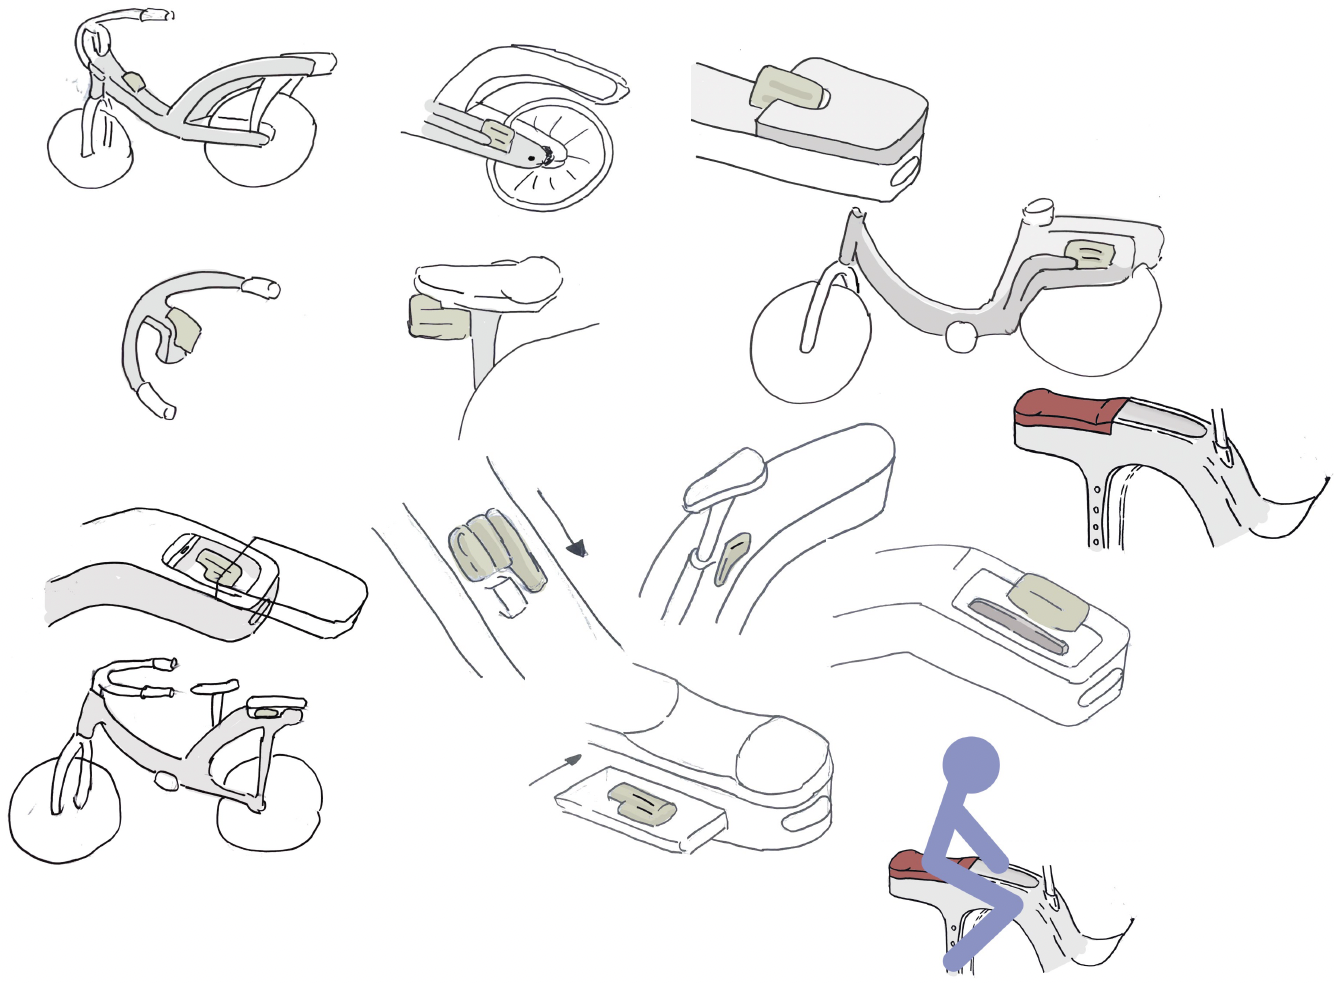
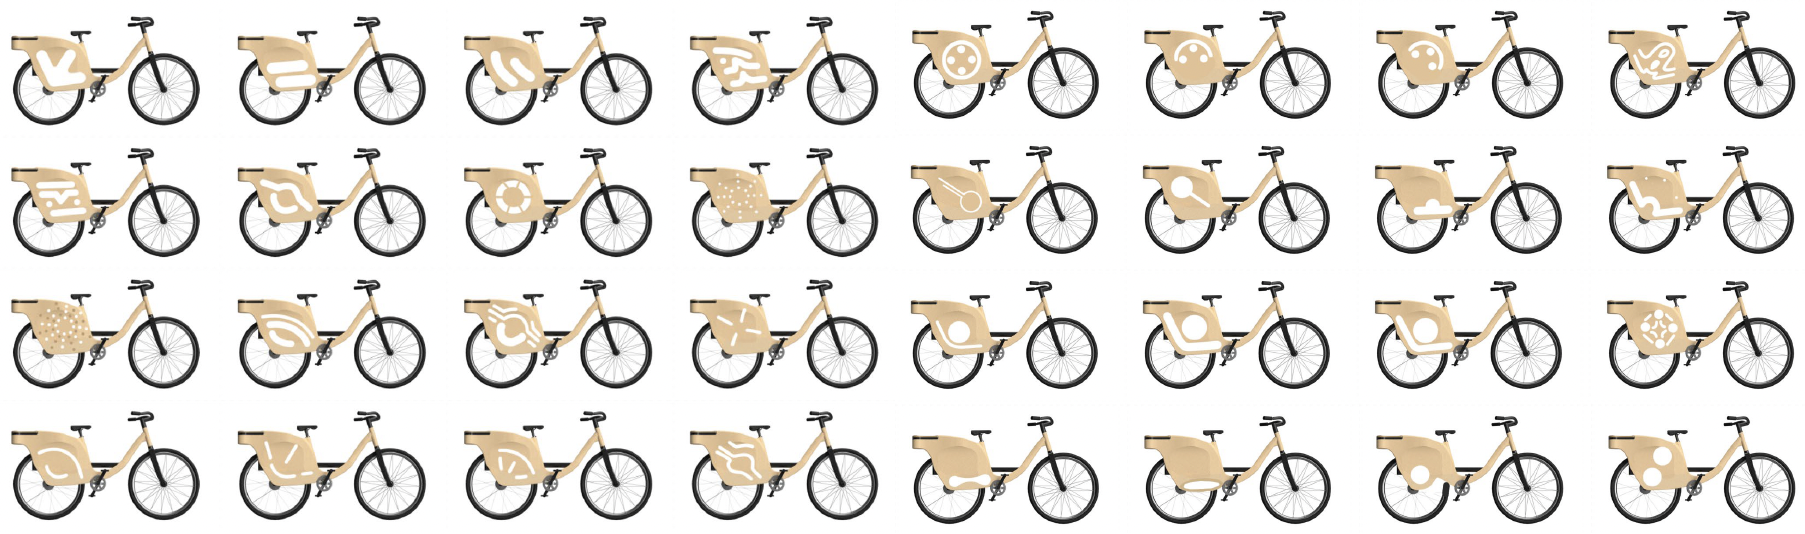
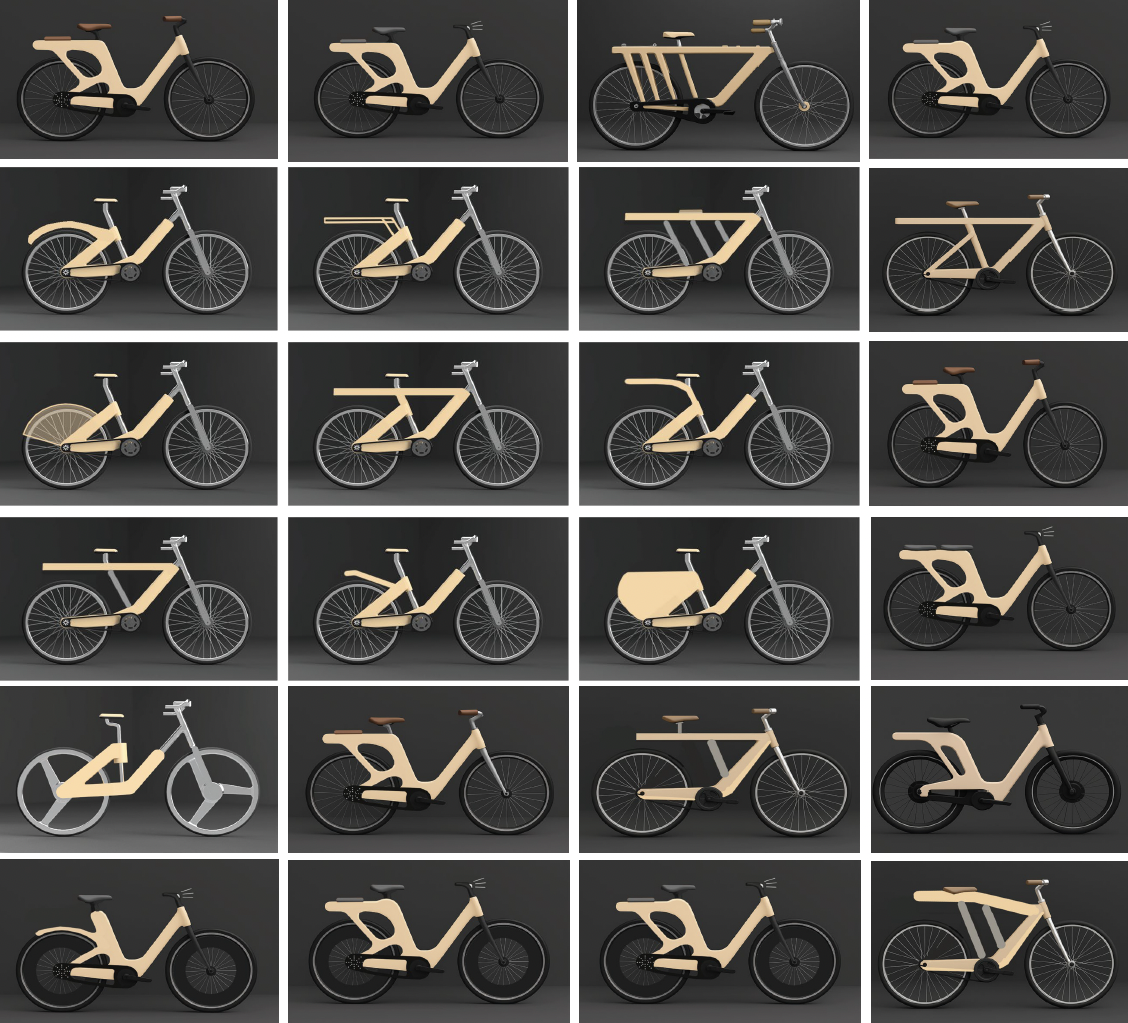
Early in the design process, I explored different bike shapes and aesthetics, sharing sketches on Instagram to gather feedback. Alongside this, I used Velcro strapping to map how people might customise their bike testing where they would place a Stem Player, bell, or other personal items.
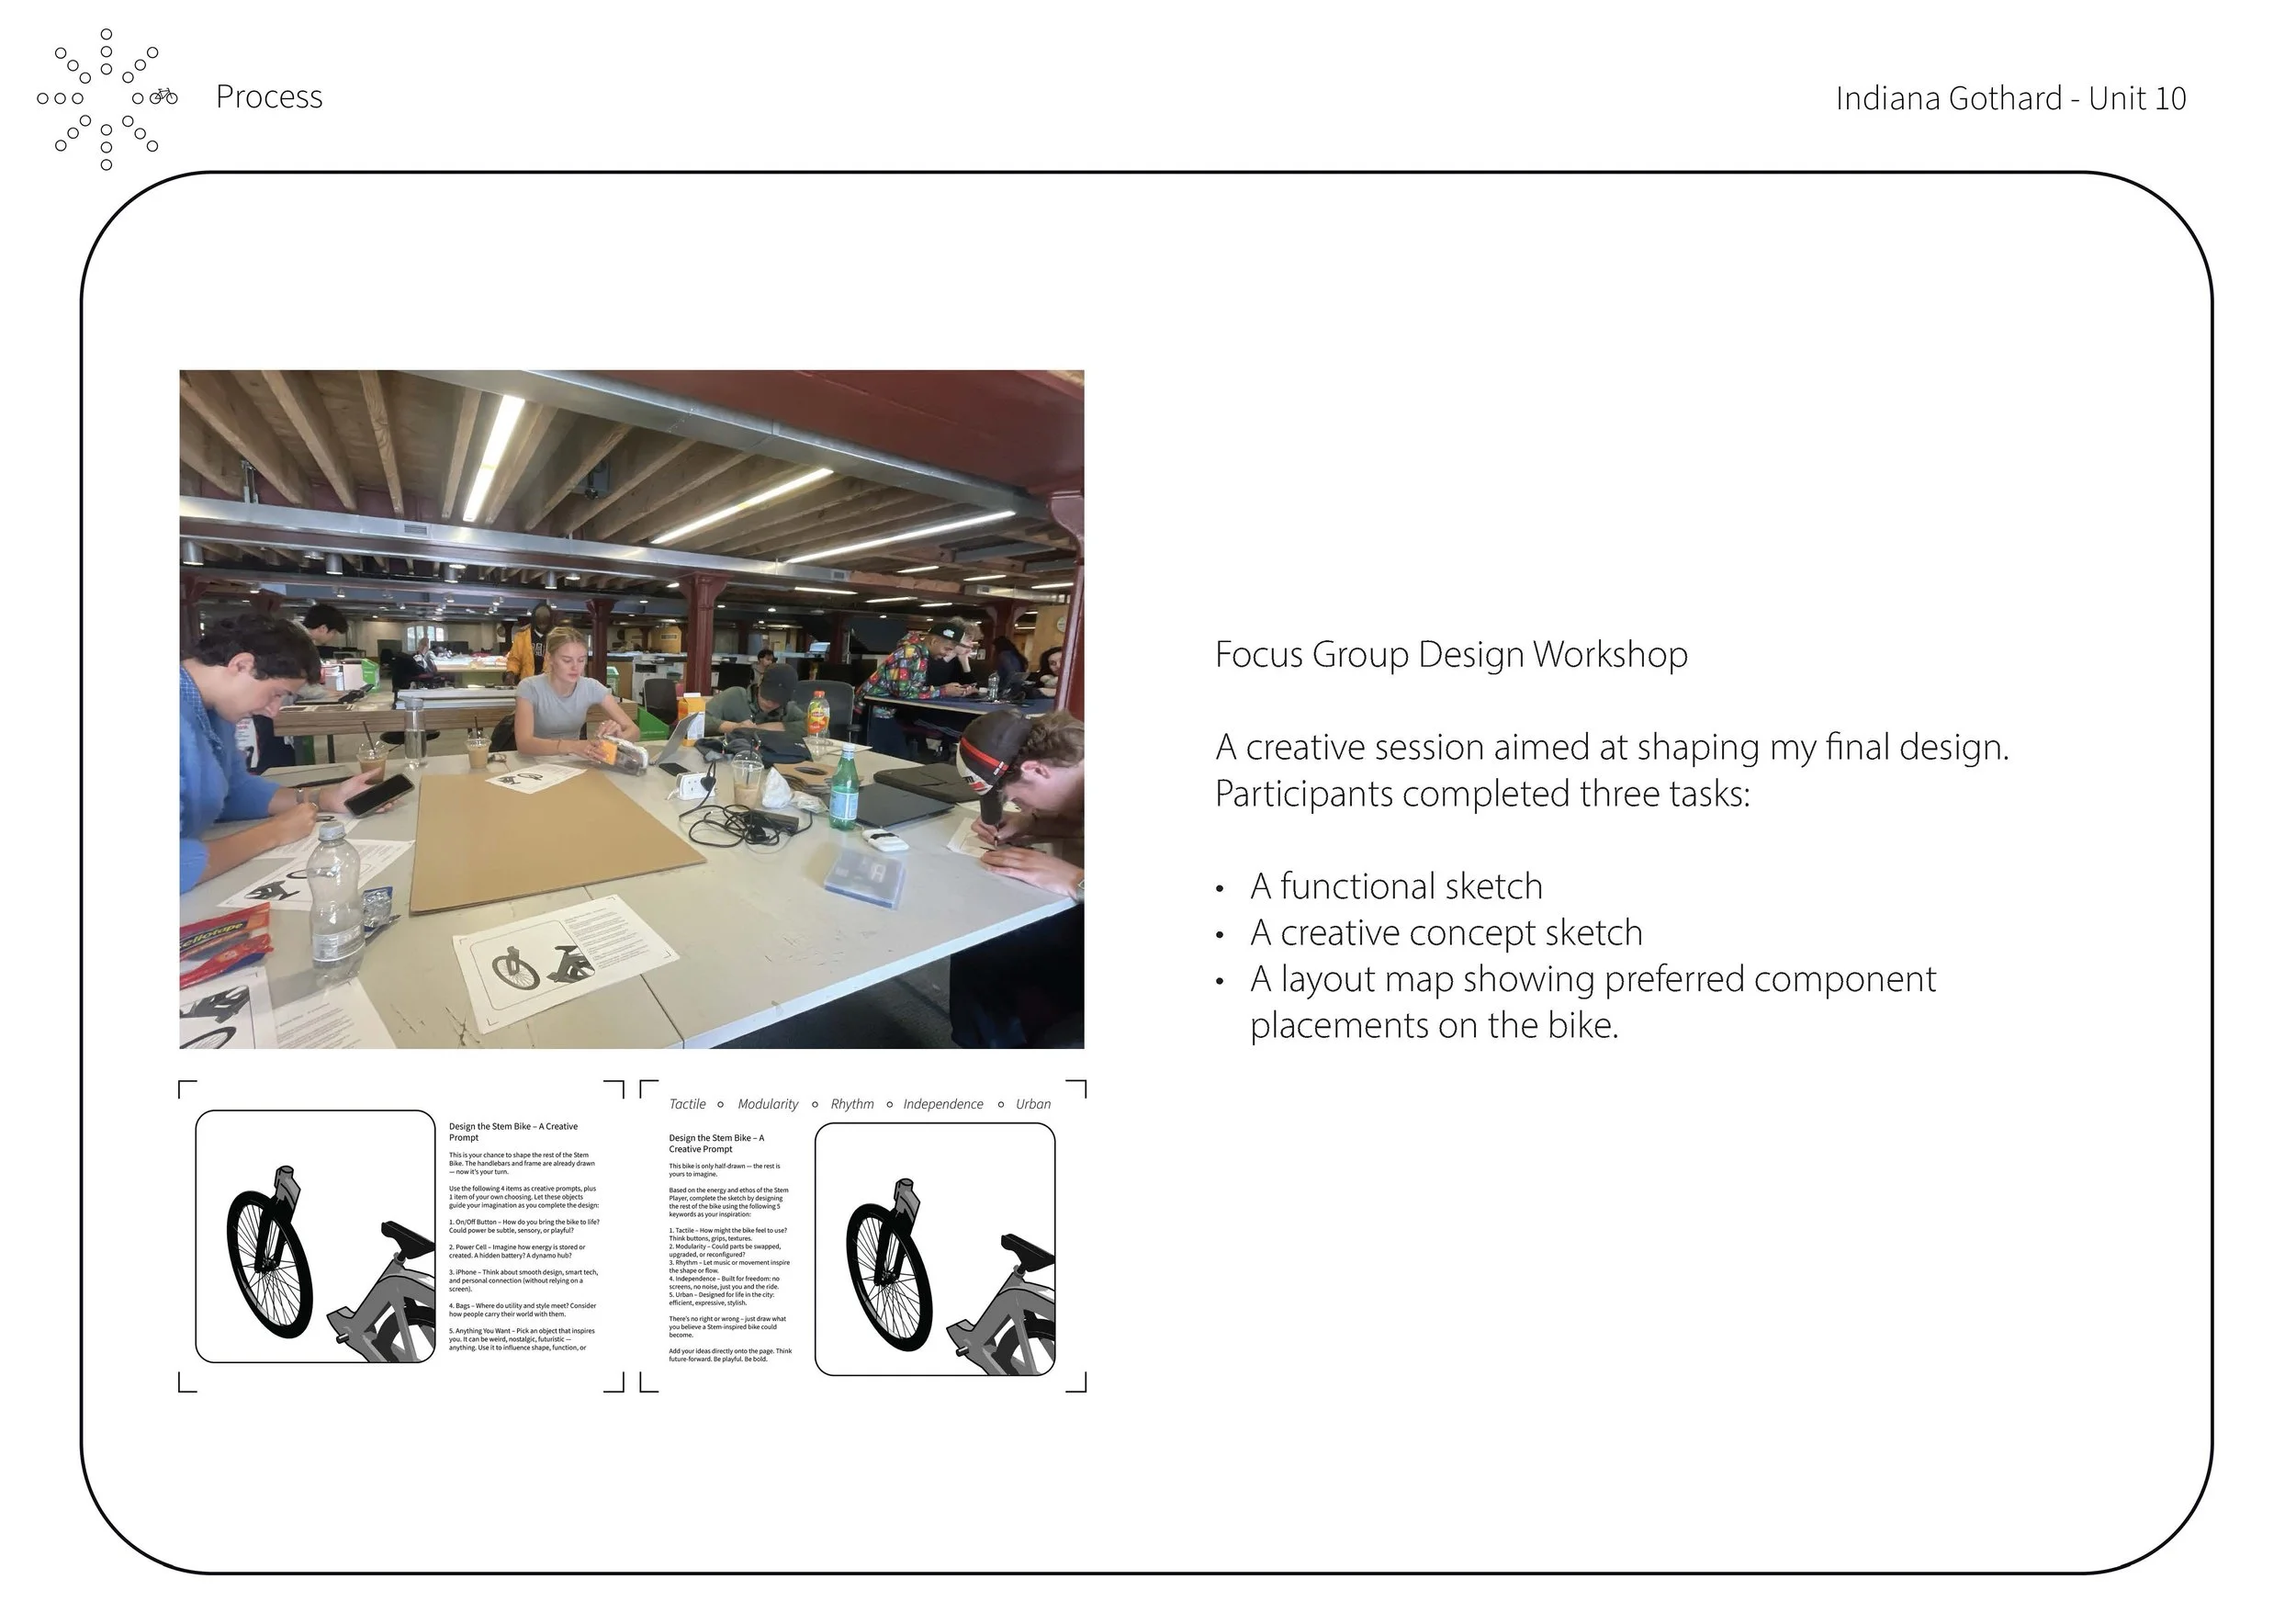
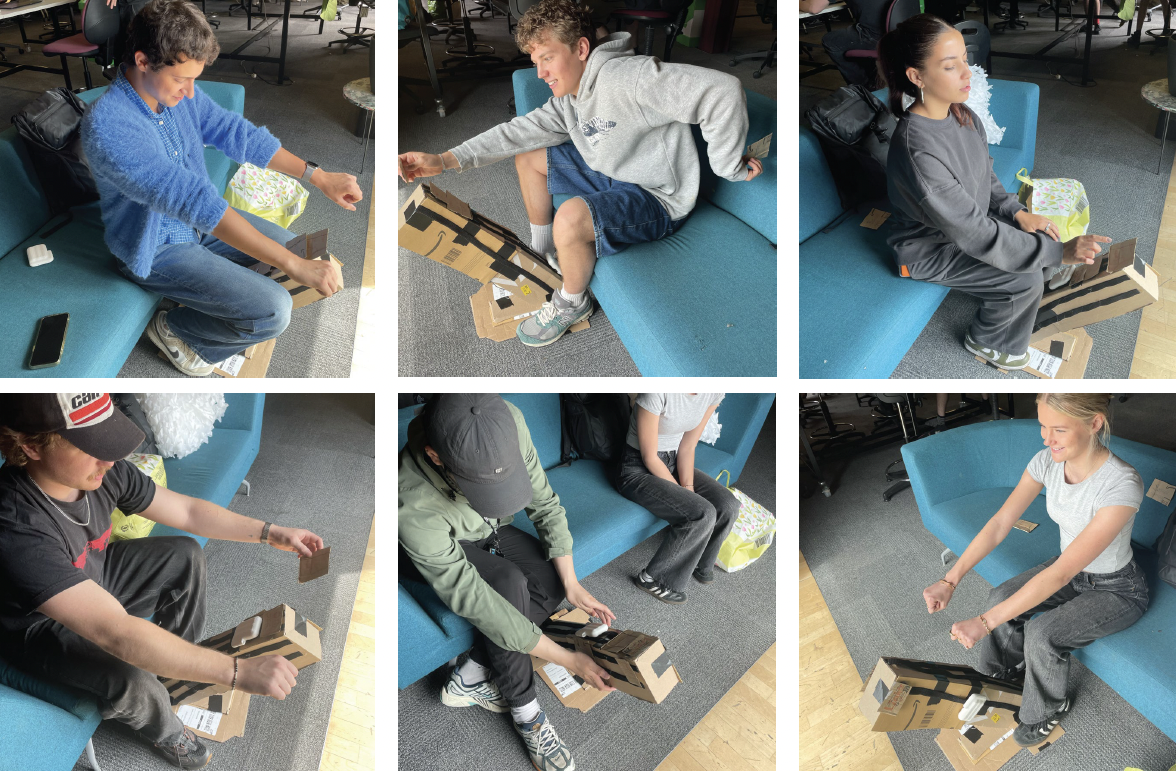
Focus Group
I began the Unit 10 project by running a focus group, where I presented two blank bike outlines alongside the project brief. This open format encouraged participants to sketch freely, generating early ideas and sparking creativity at the very start of the process.
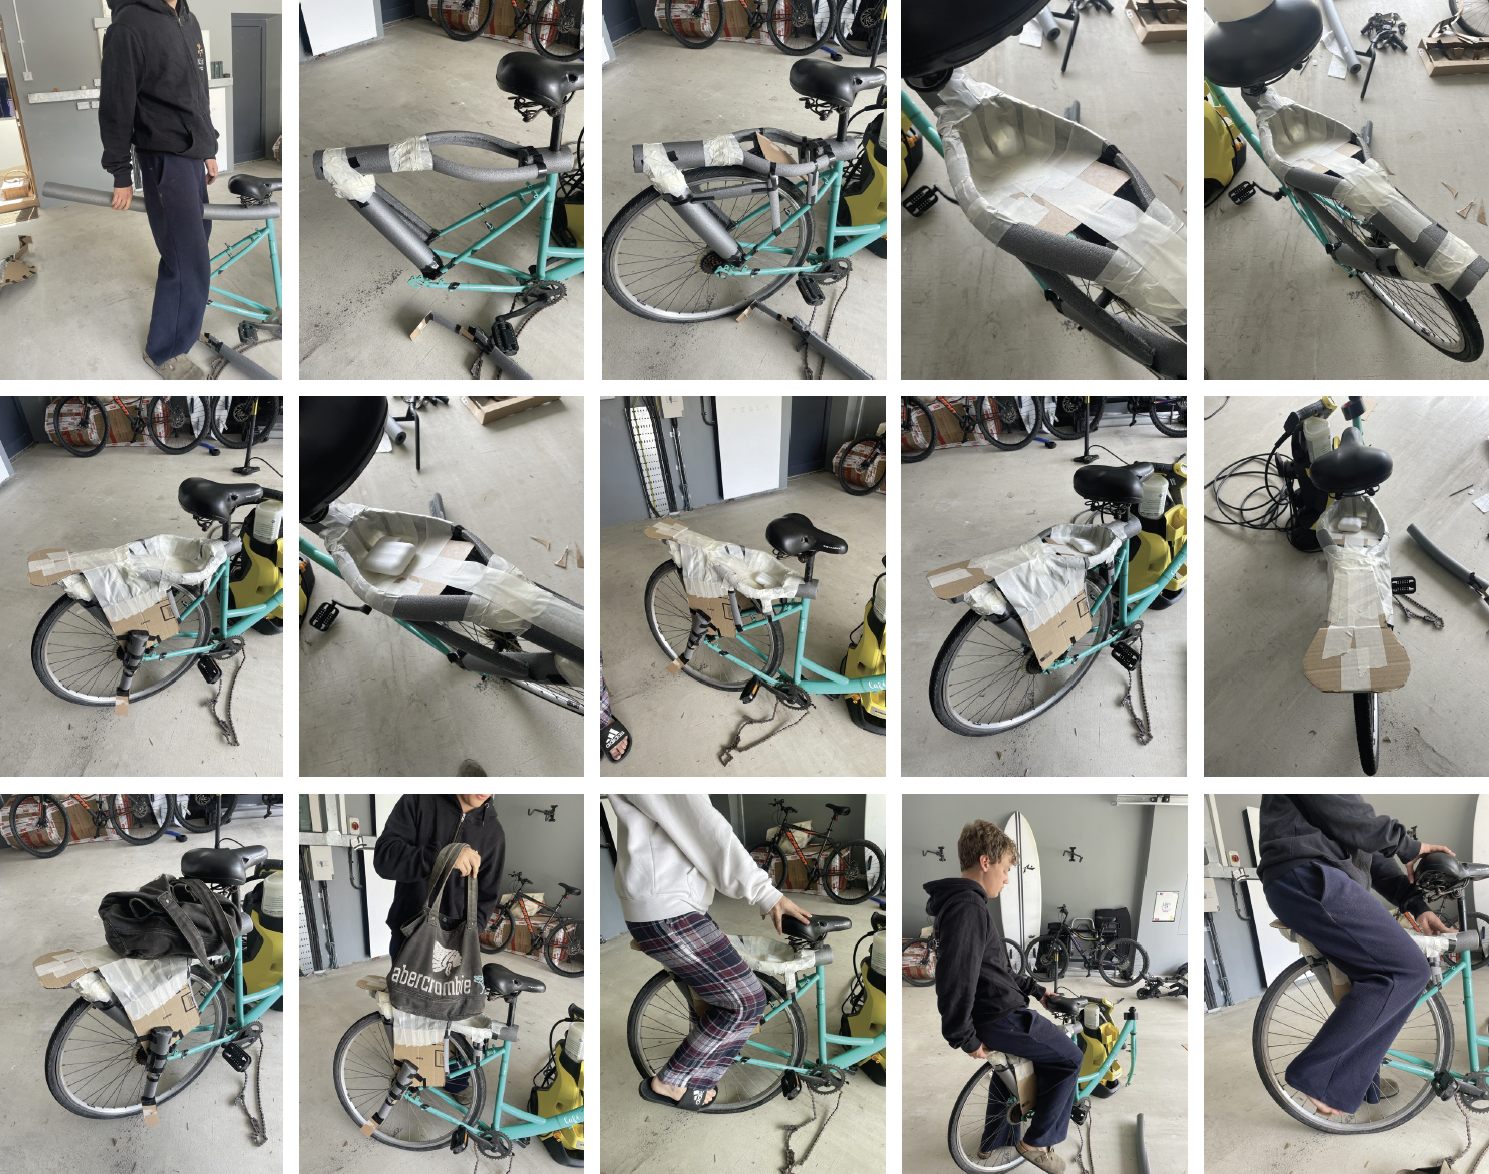
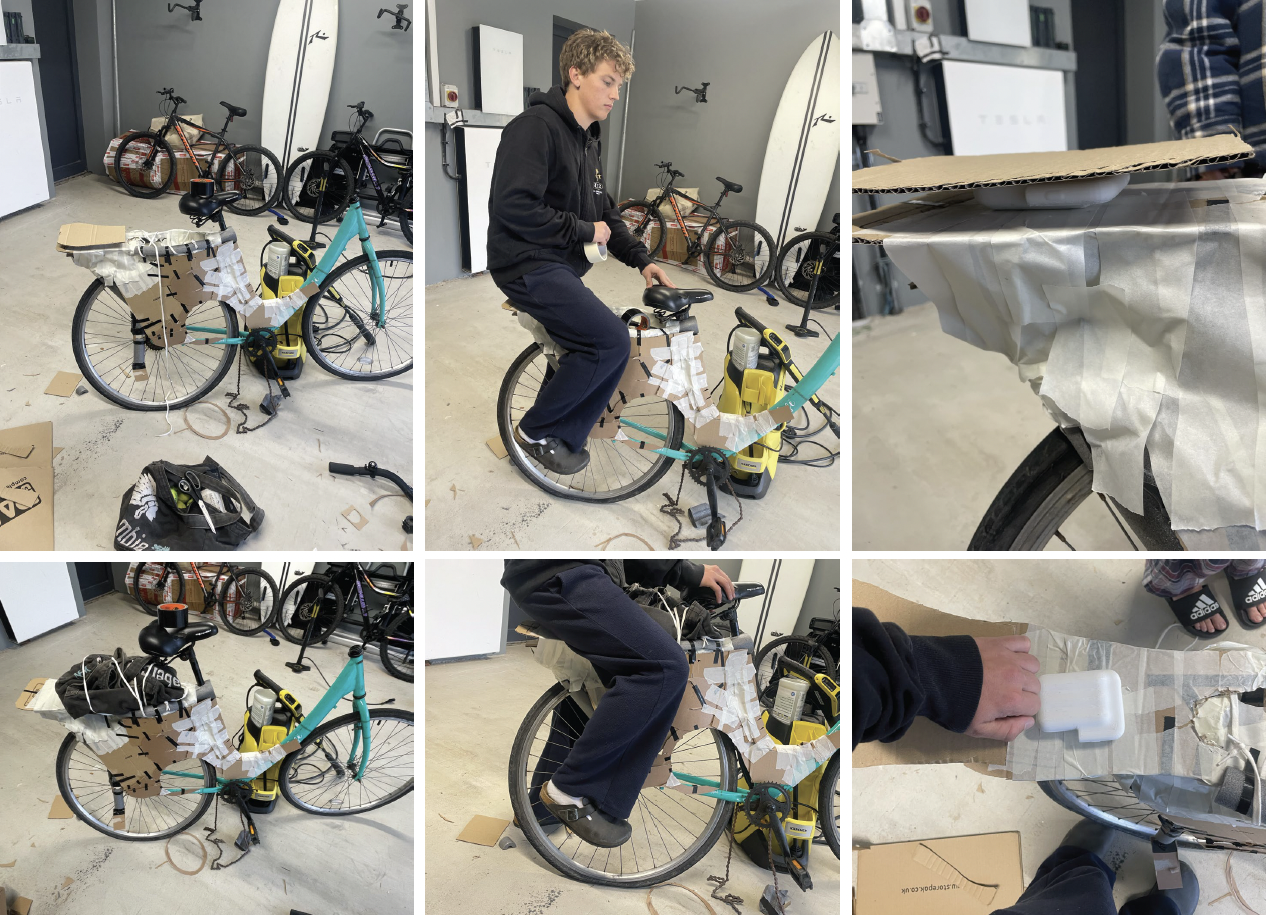
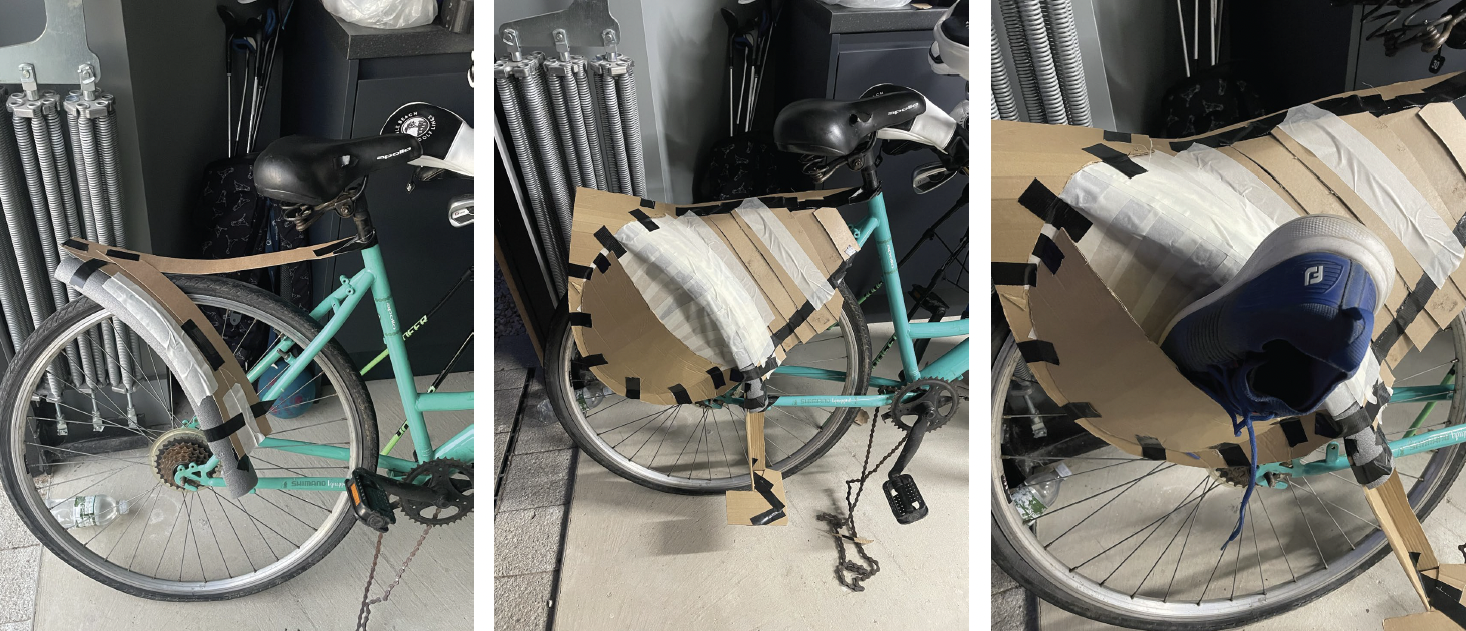
SKETCH MODELLING
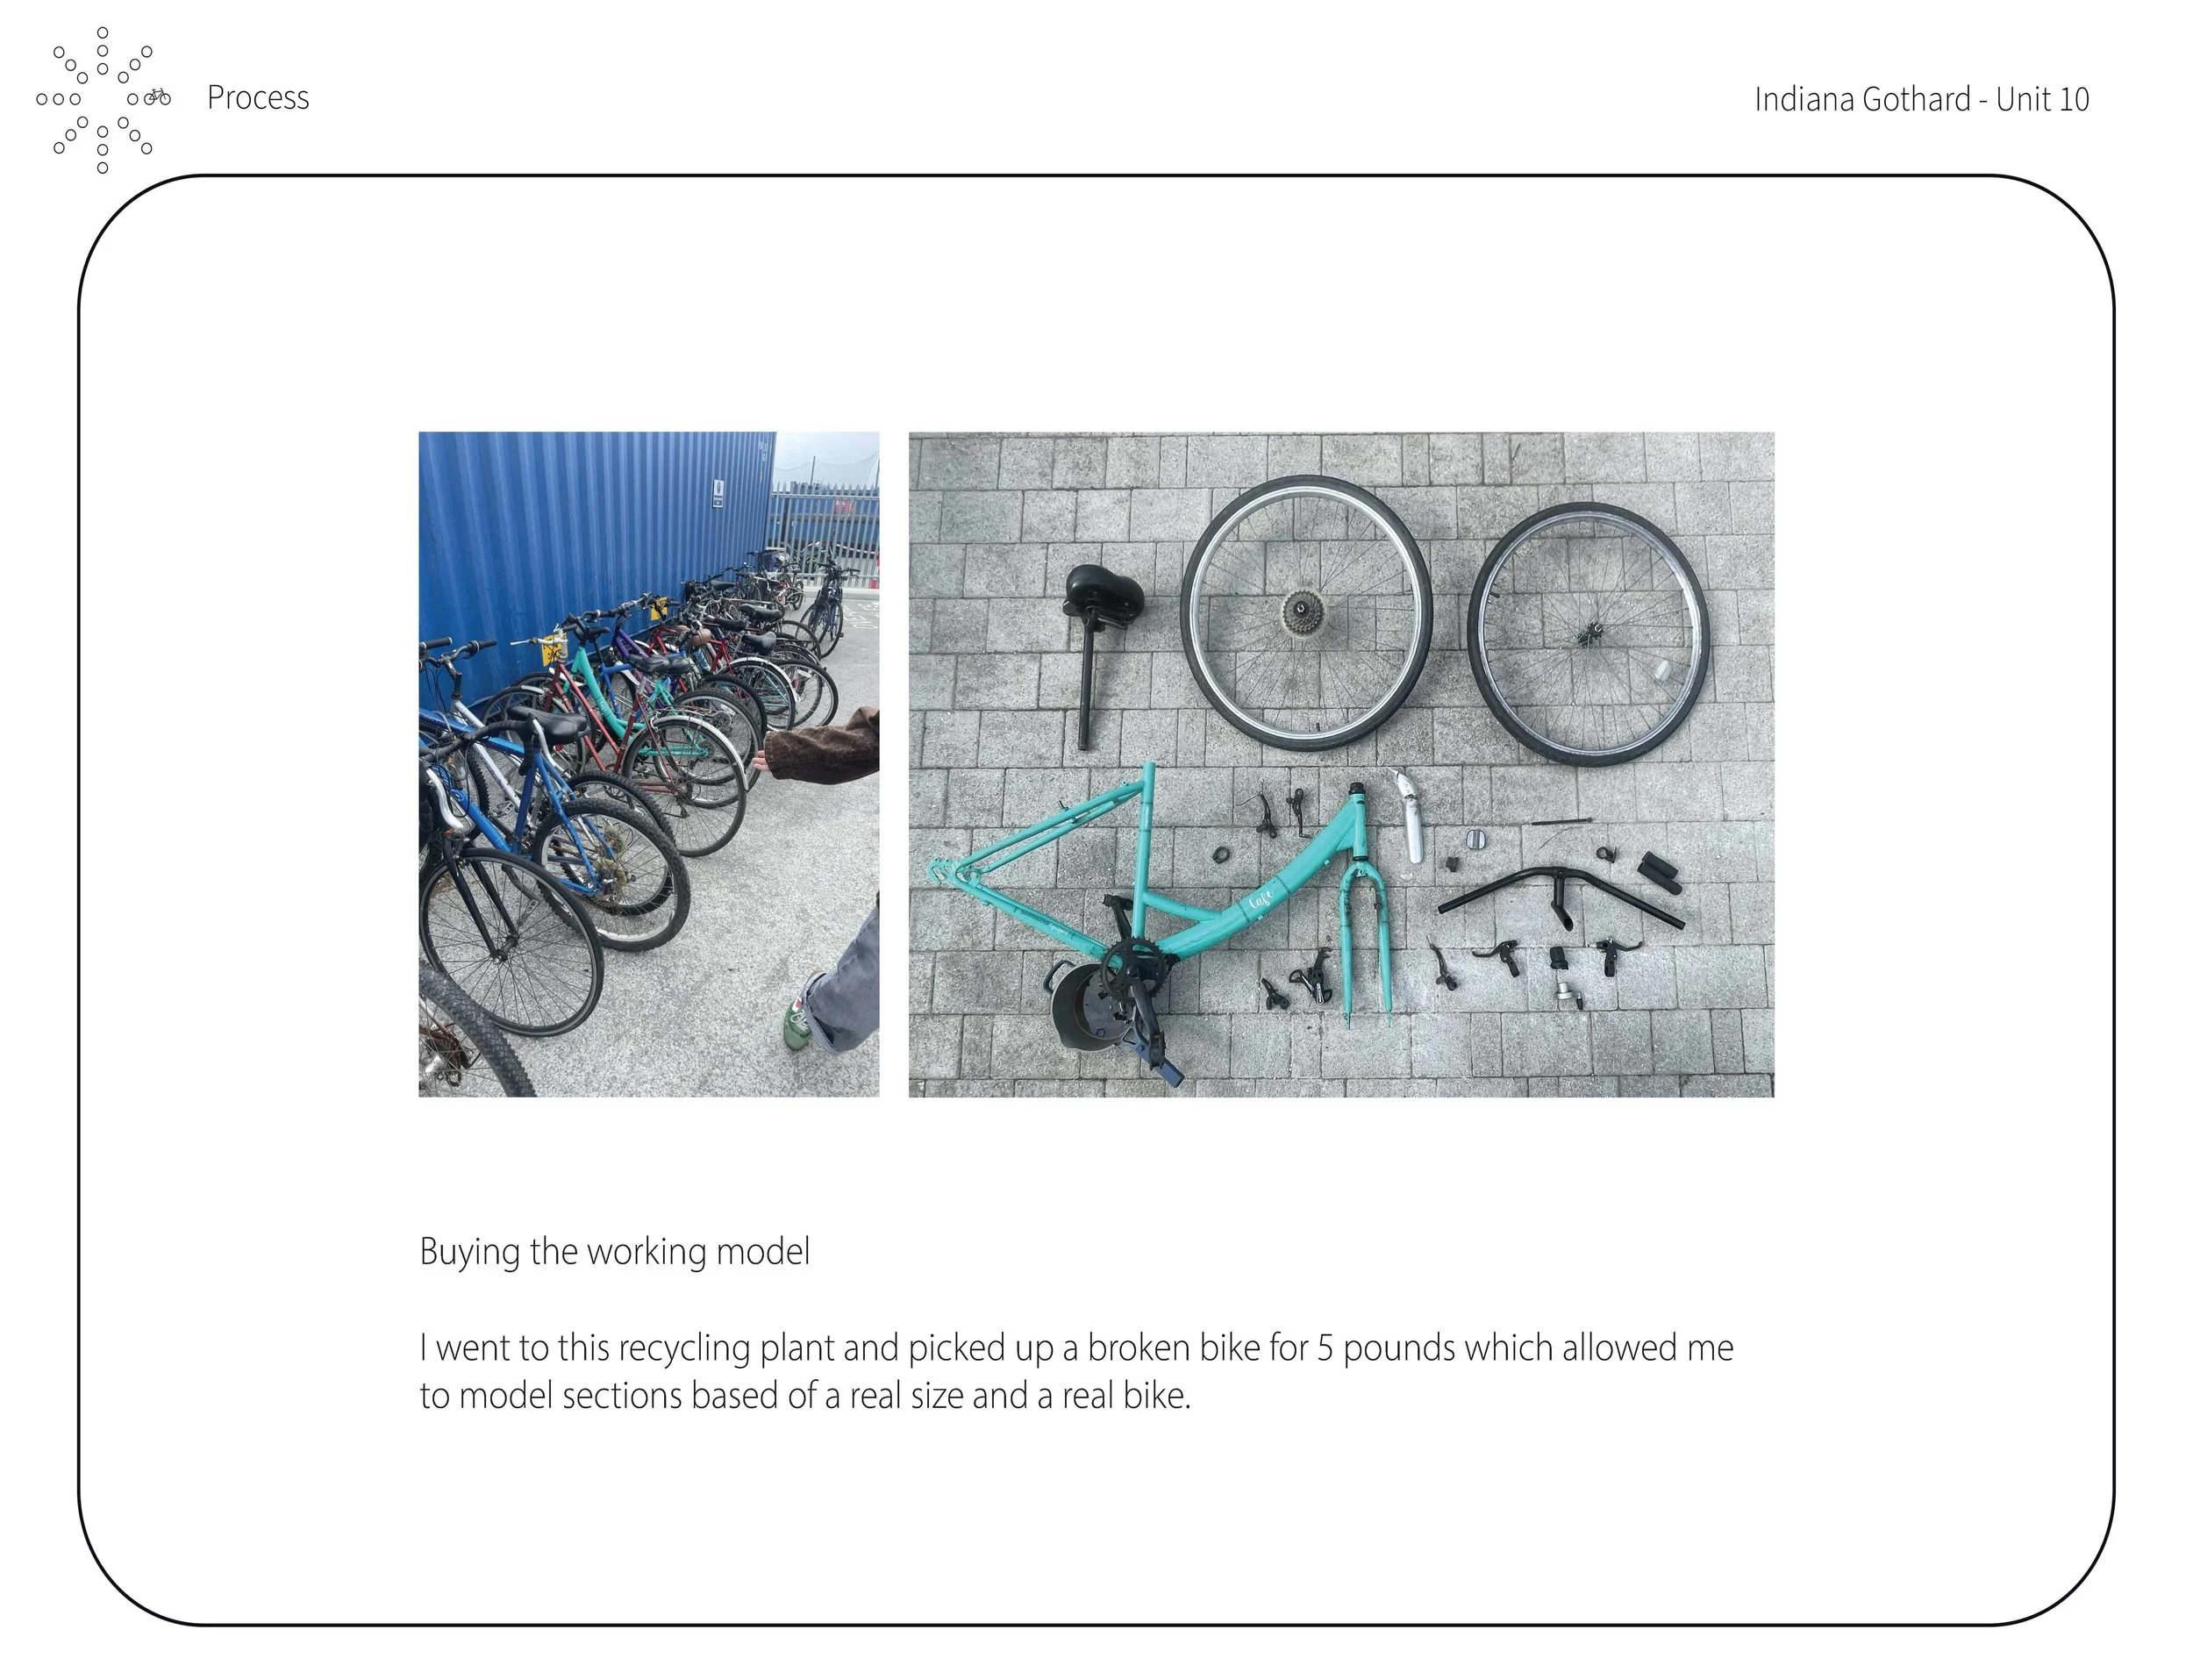
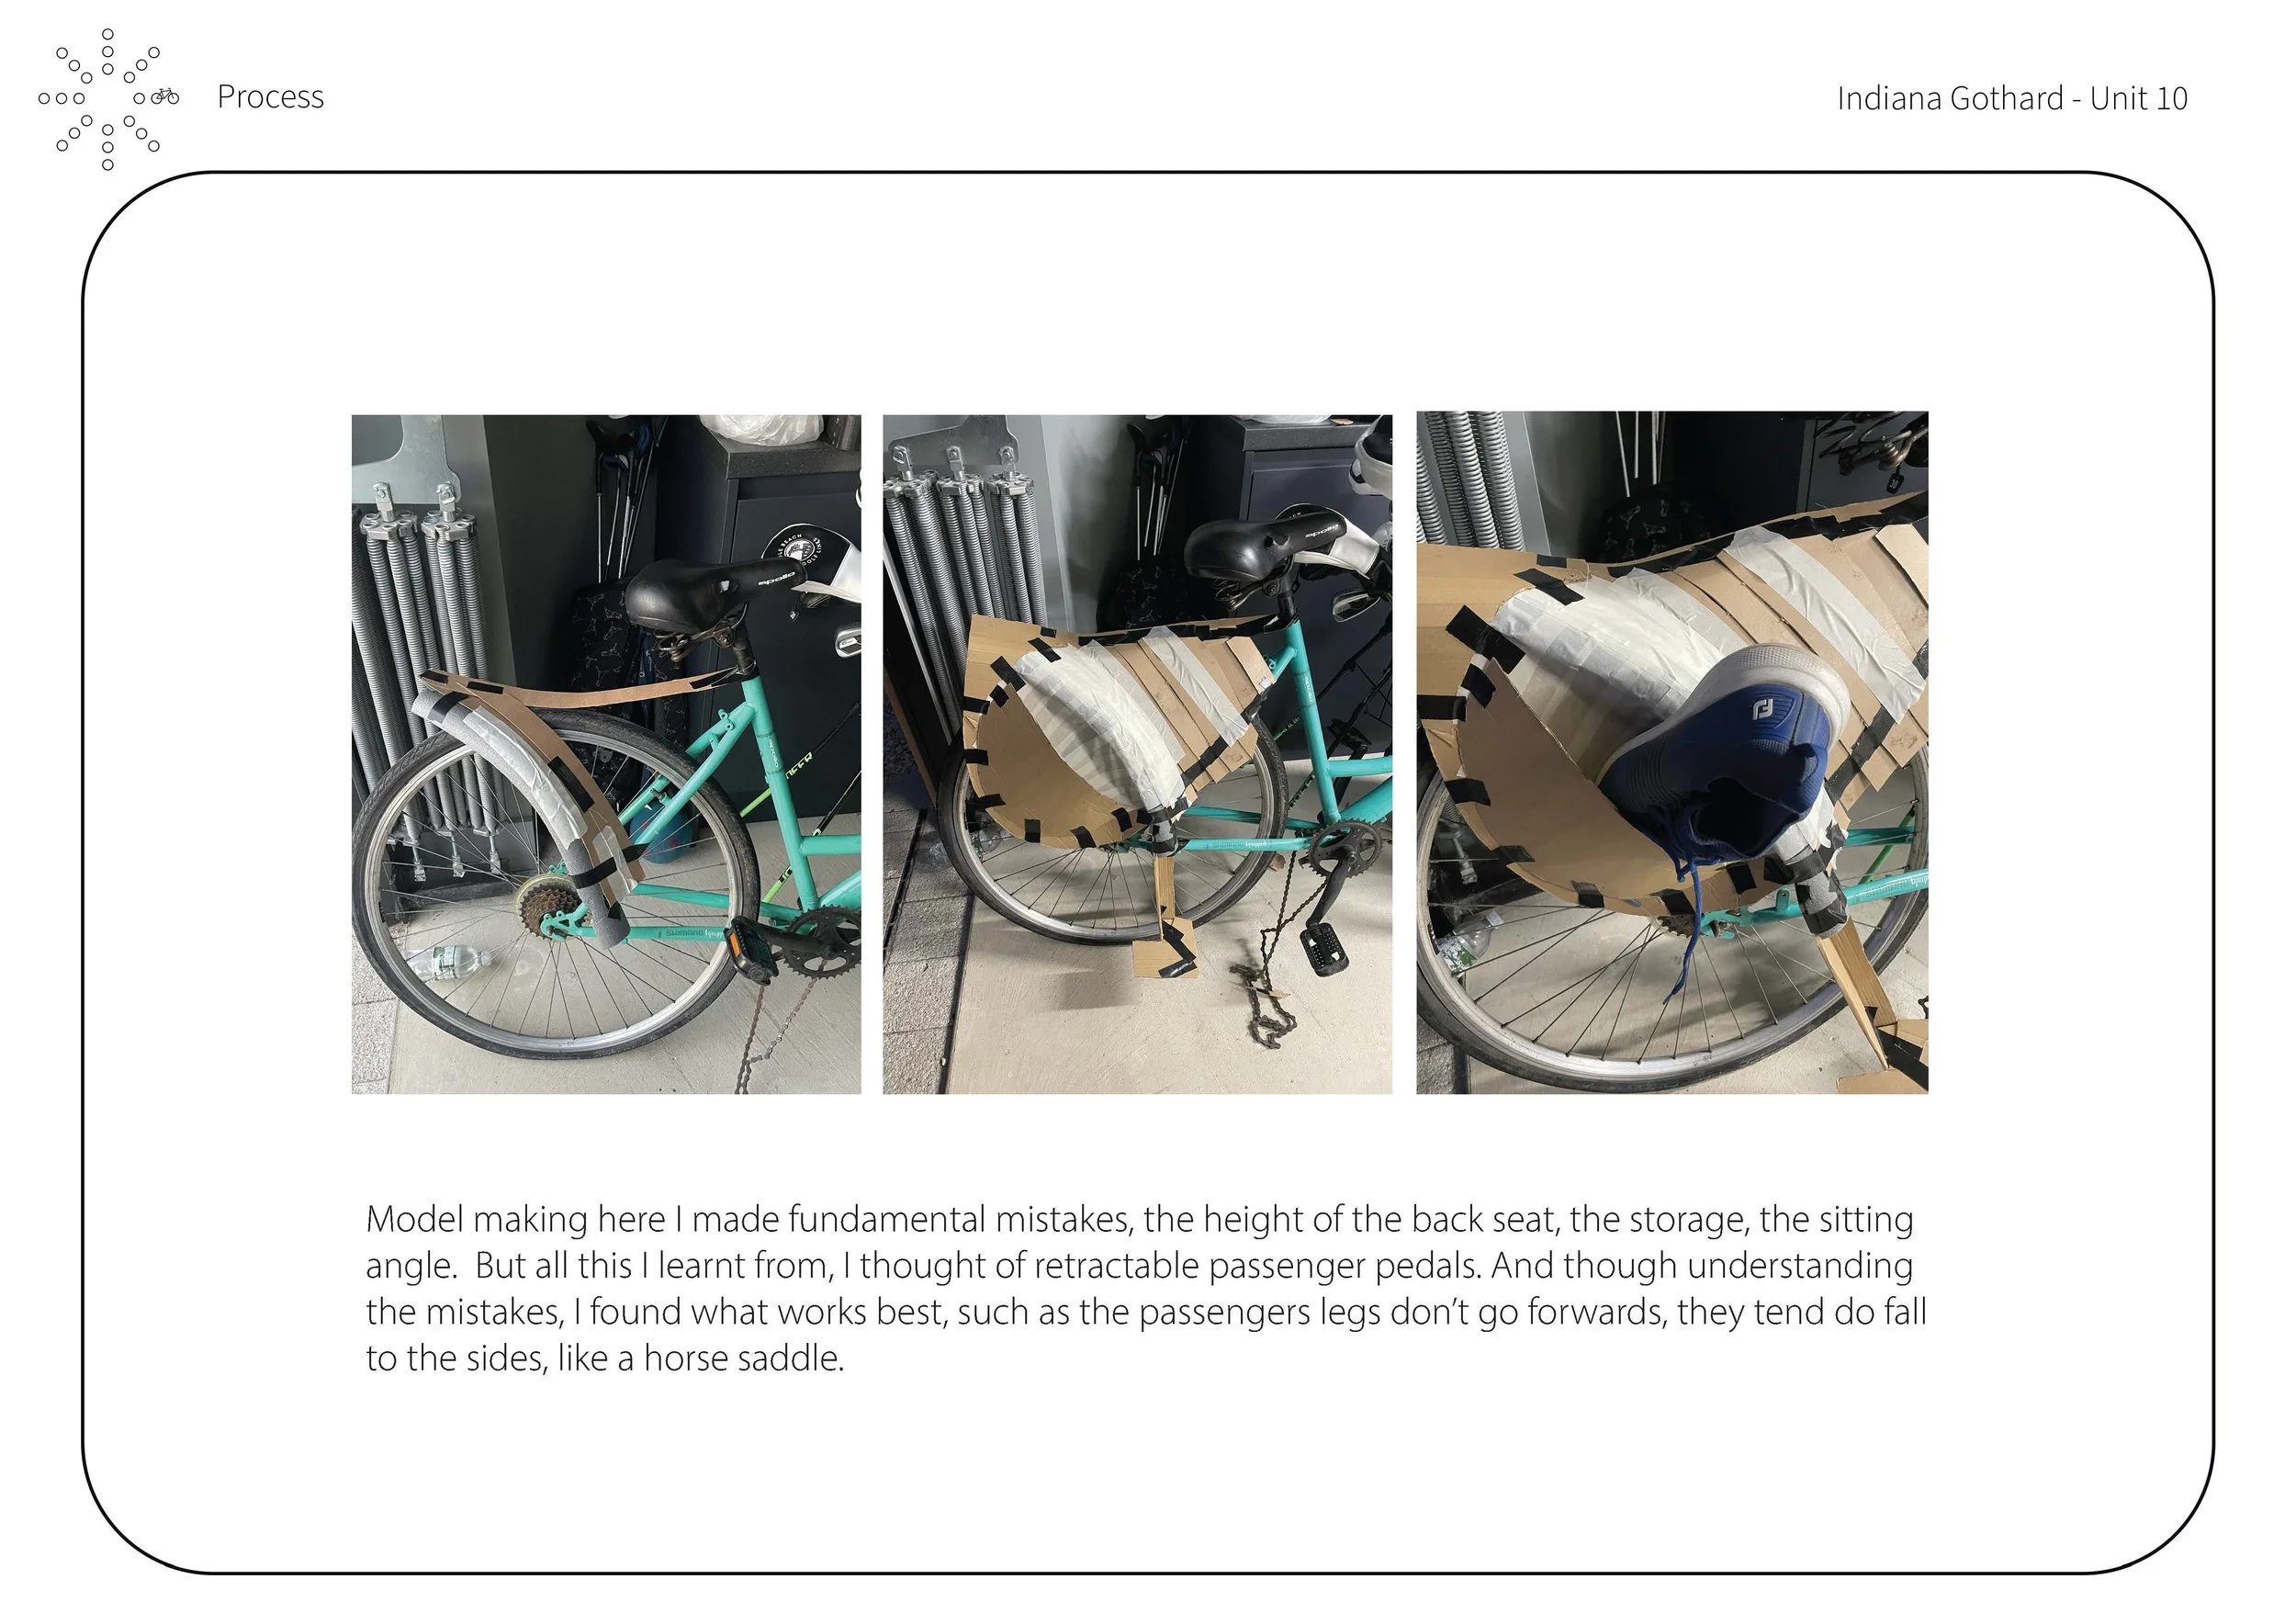
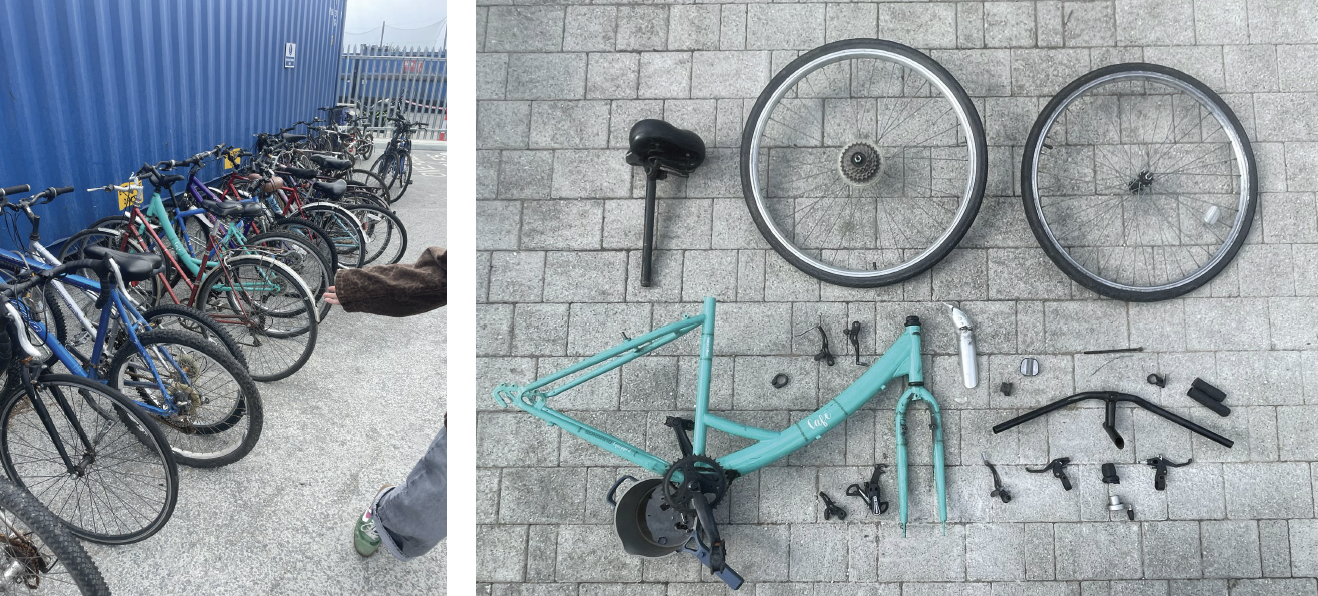
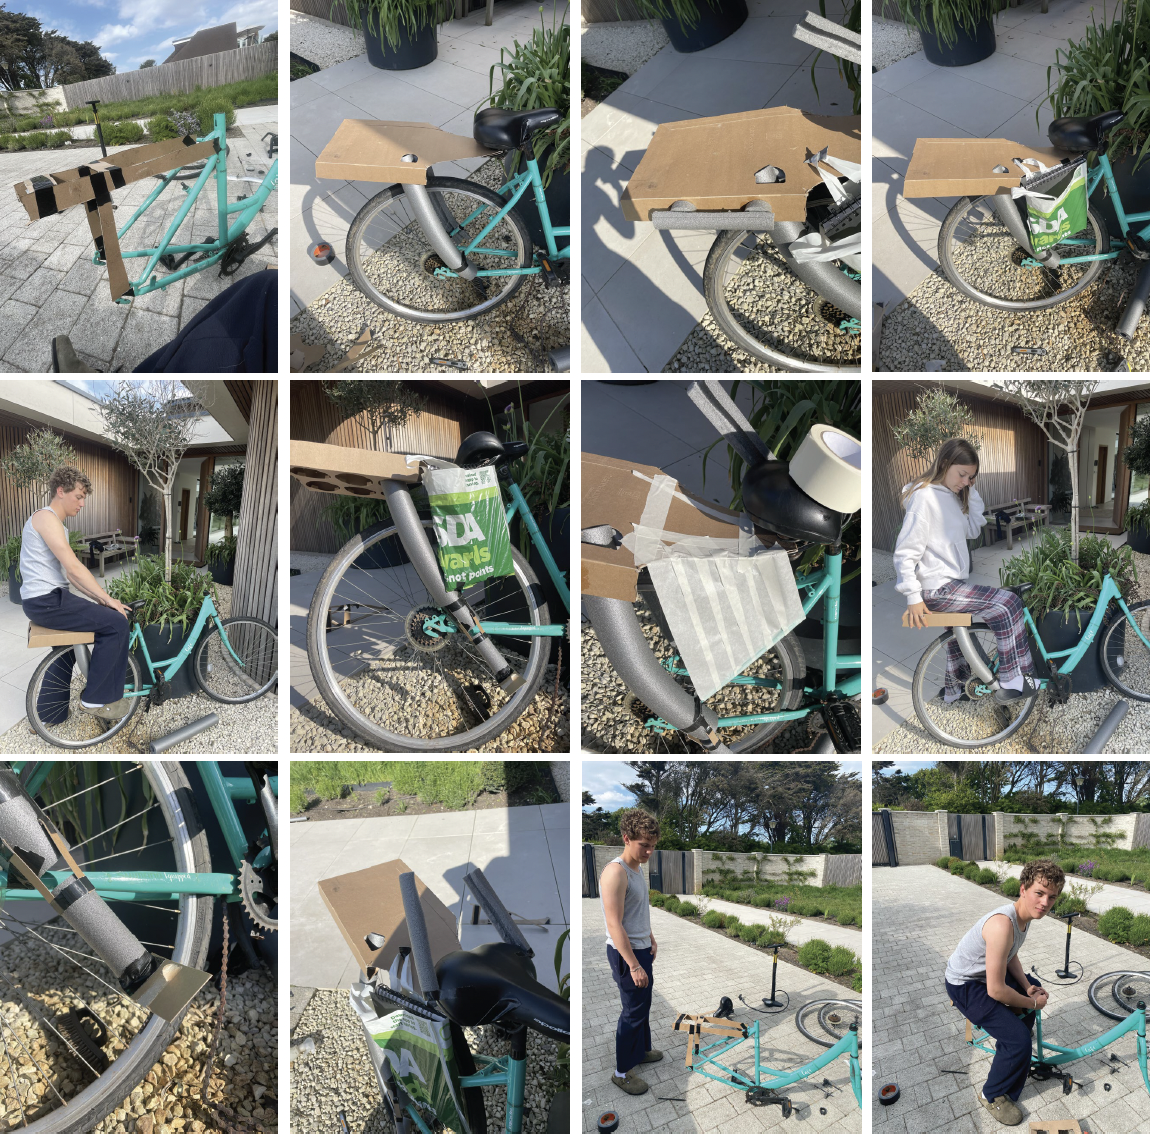
I began modelling by repurposing a bike frame from a recycling centre, using it as a foundation to test seating layouts. Through full-scale mock-ups with cardboard and live body positioning, I explored how a passenger could sit, what they would hold onto, and the ergonomic challenges introduced by adding extra seats at the back.
IDEATION AND TESTING
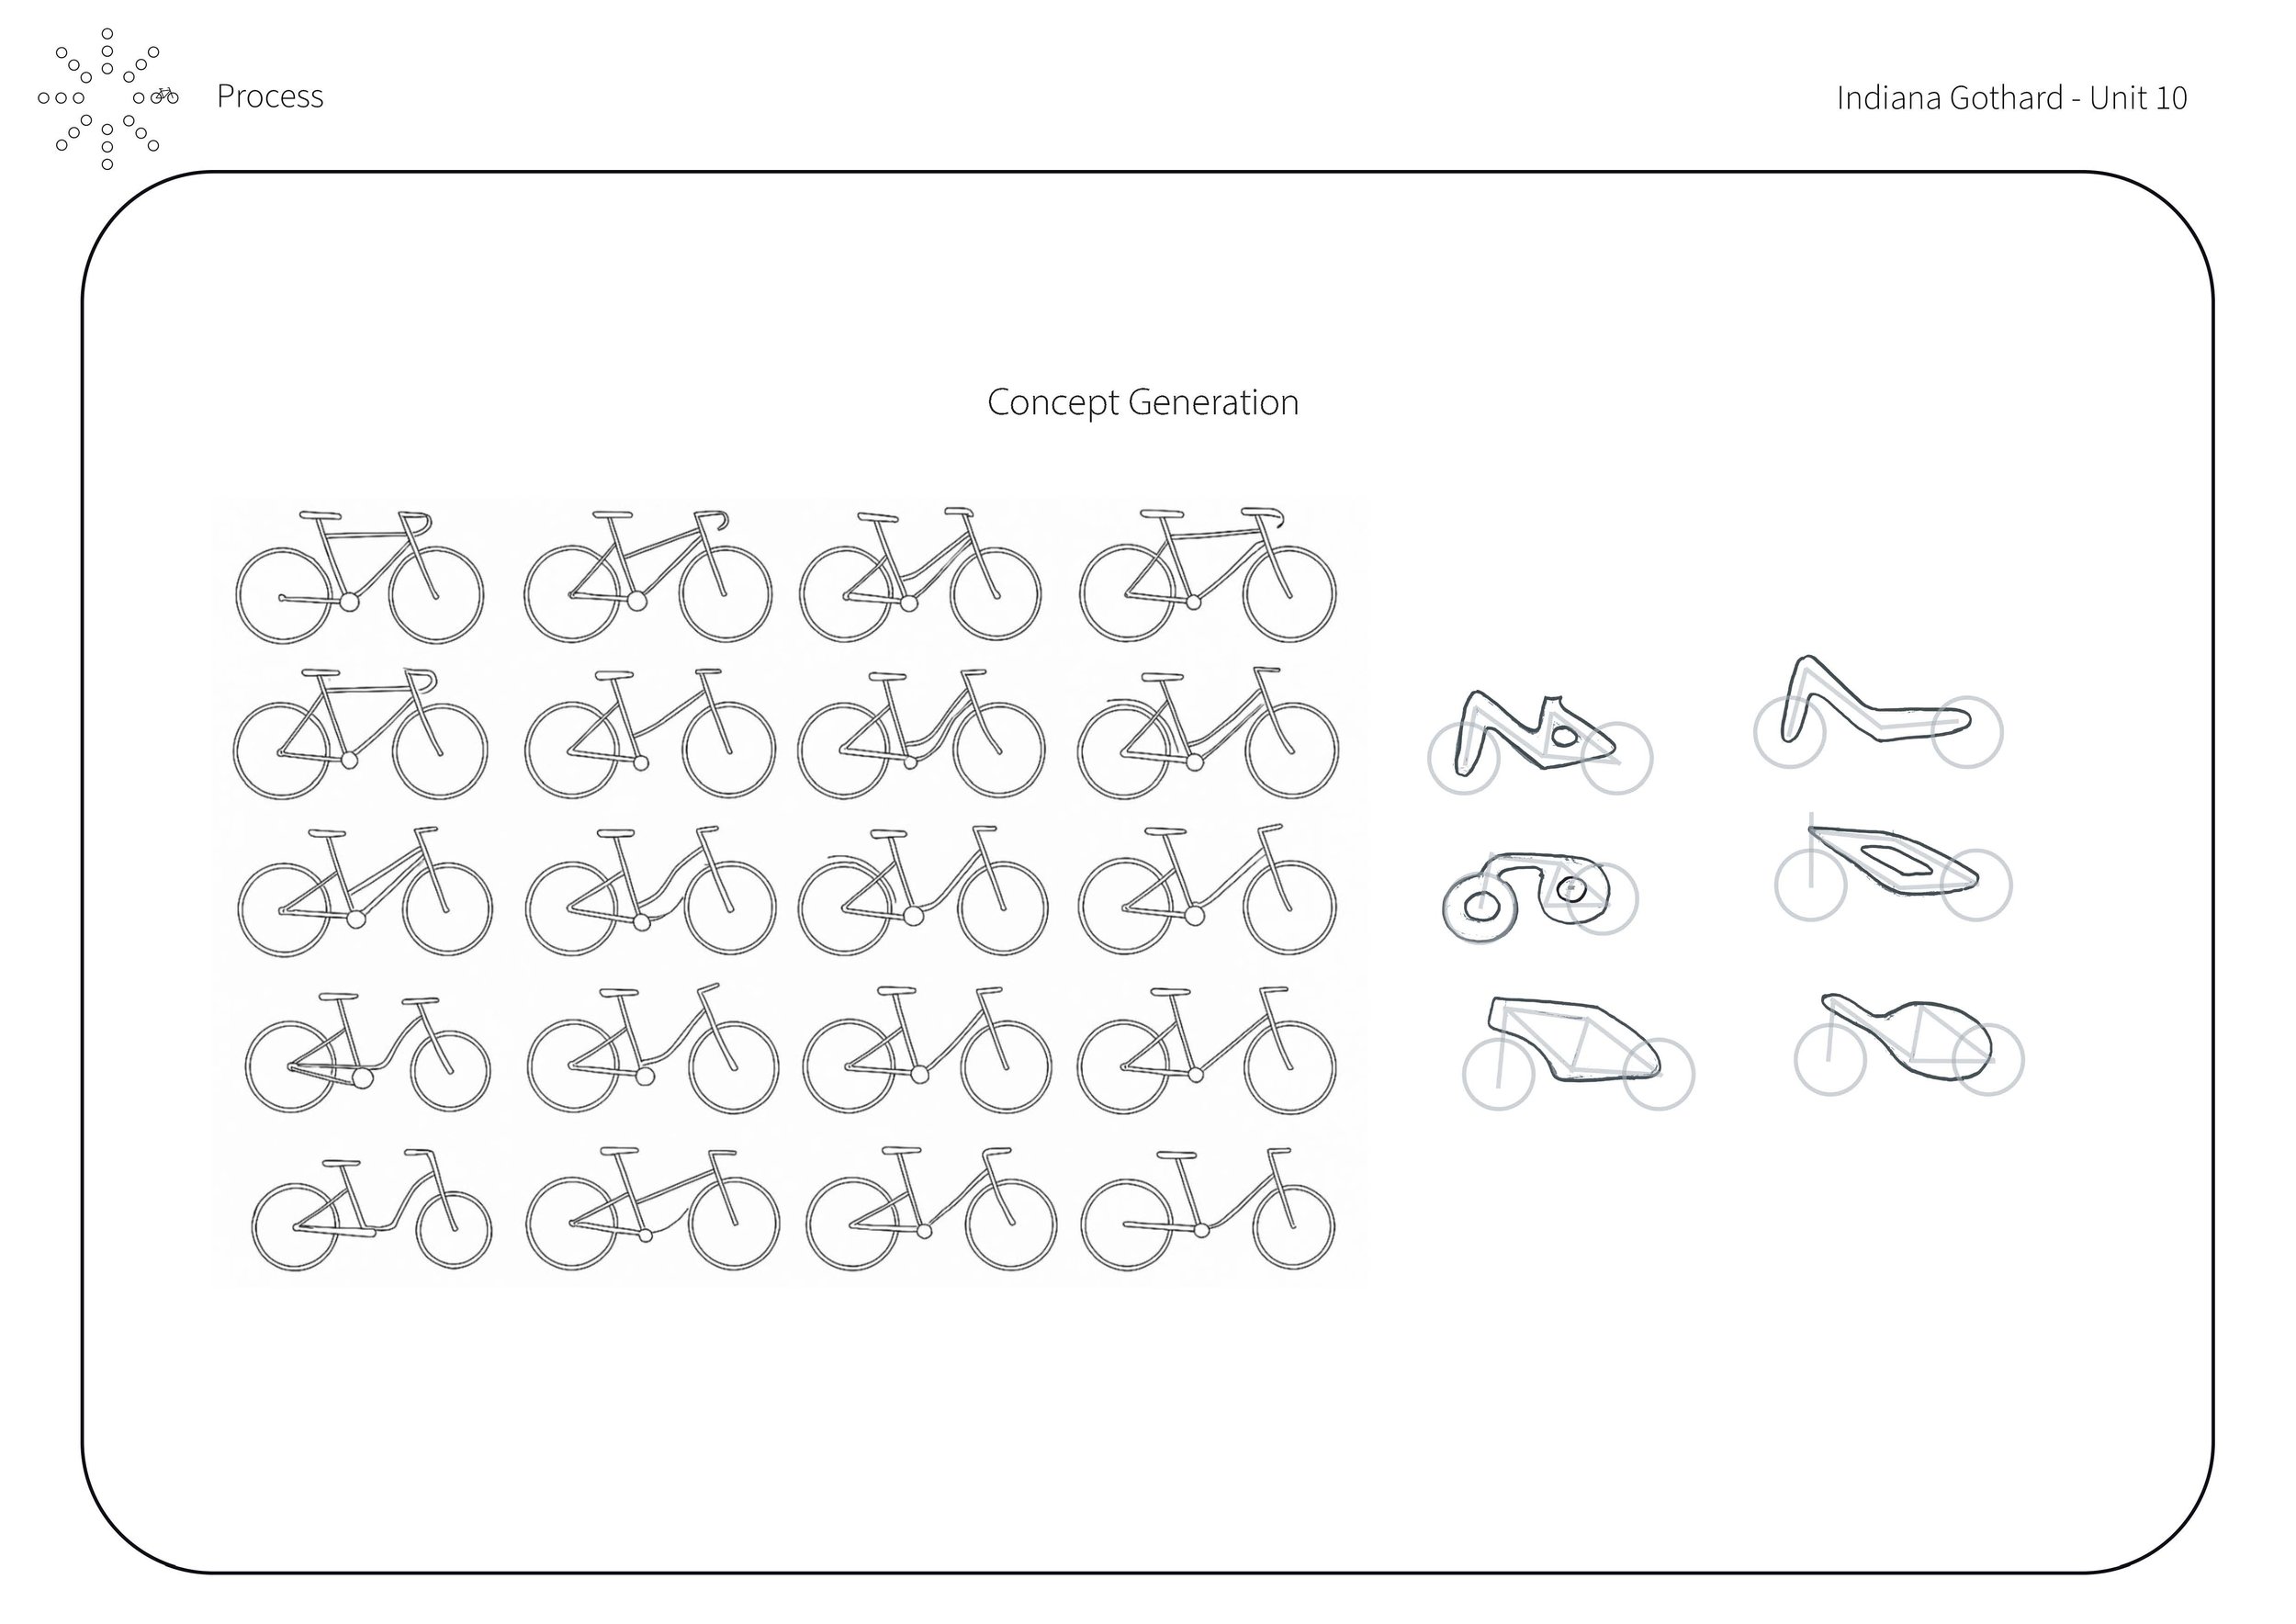
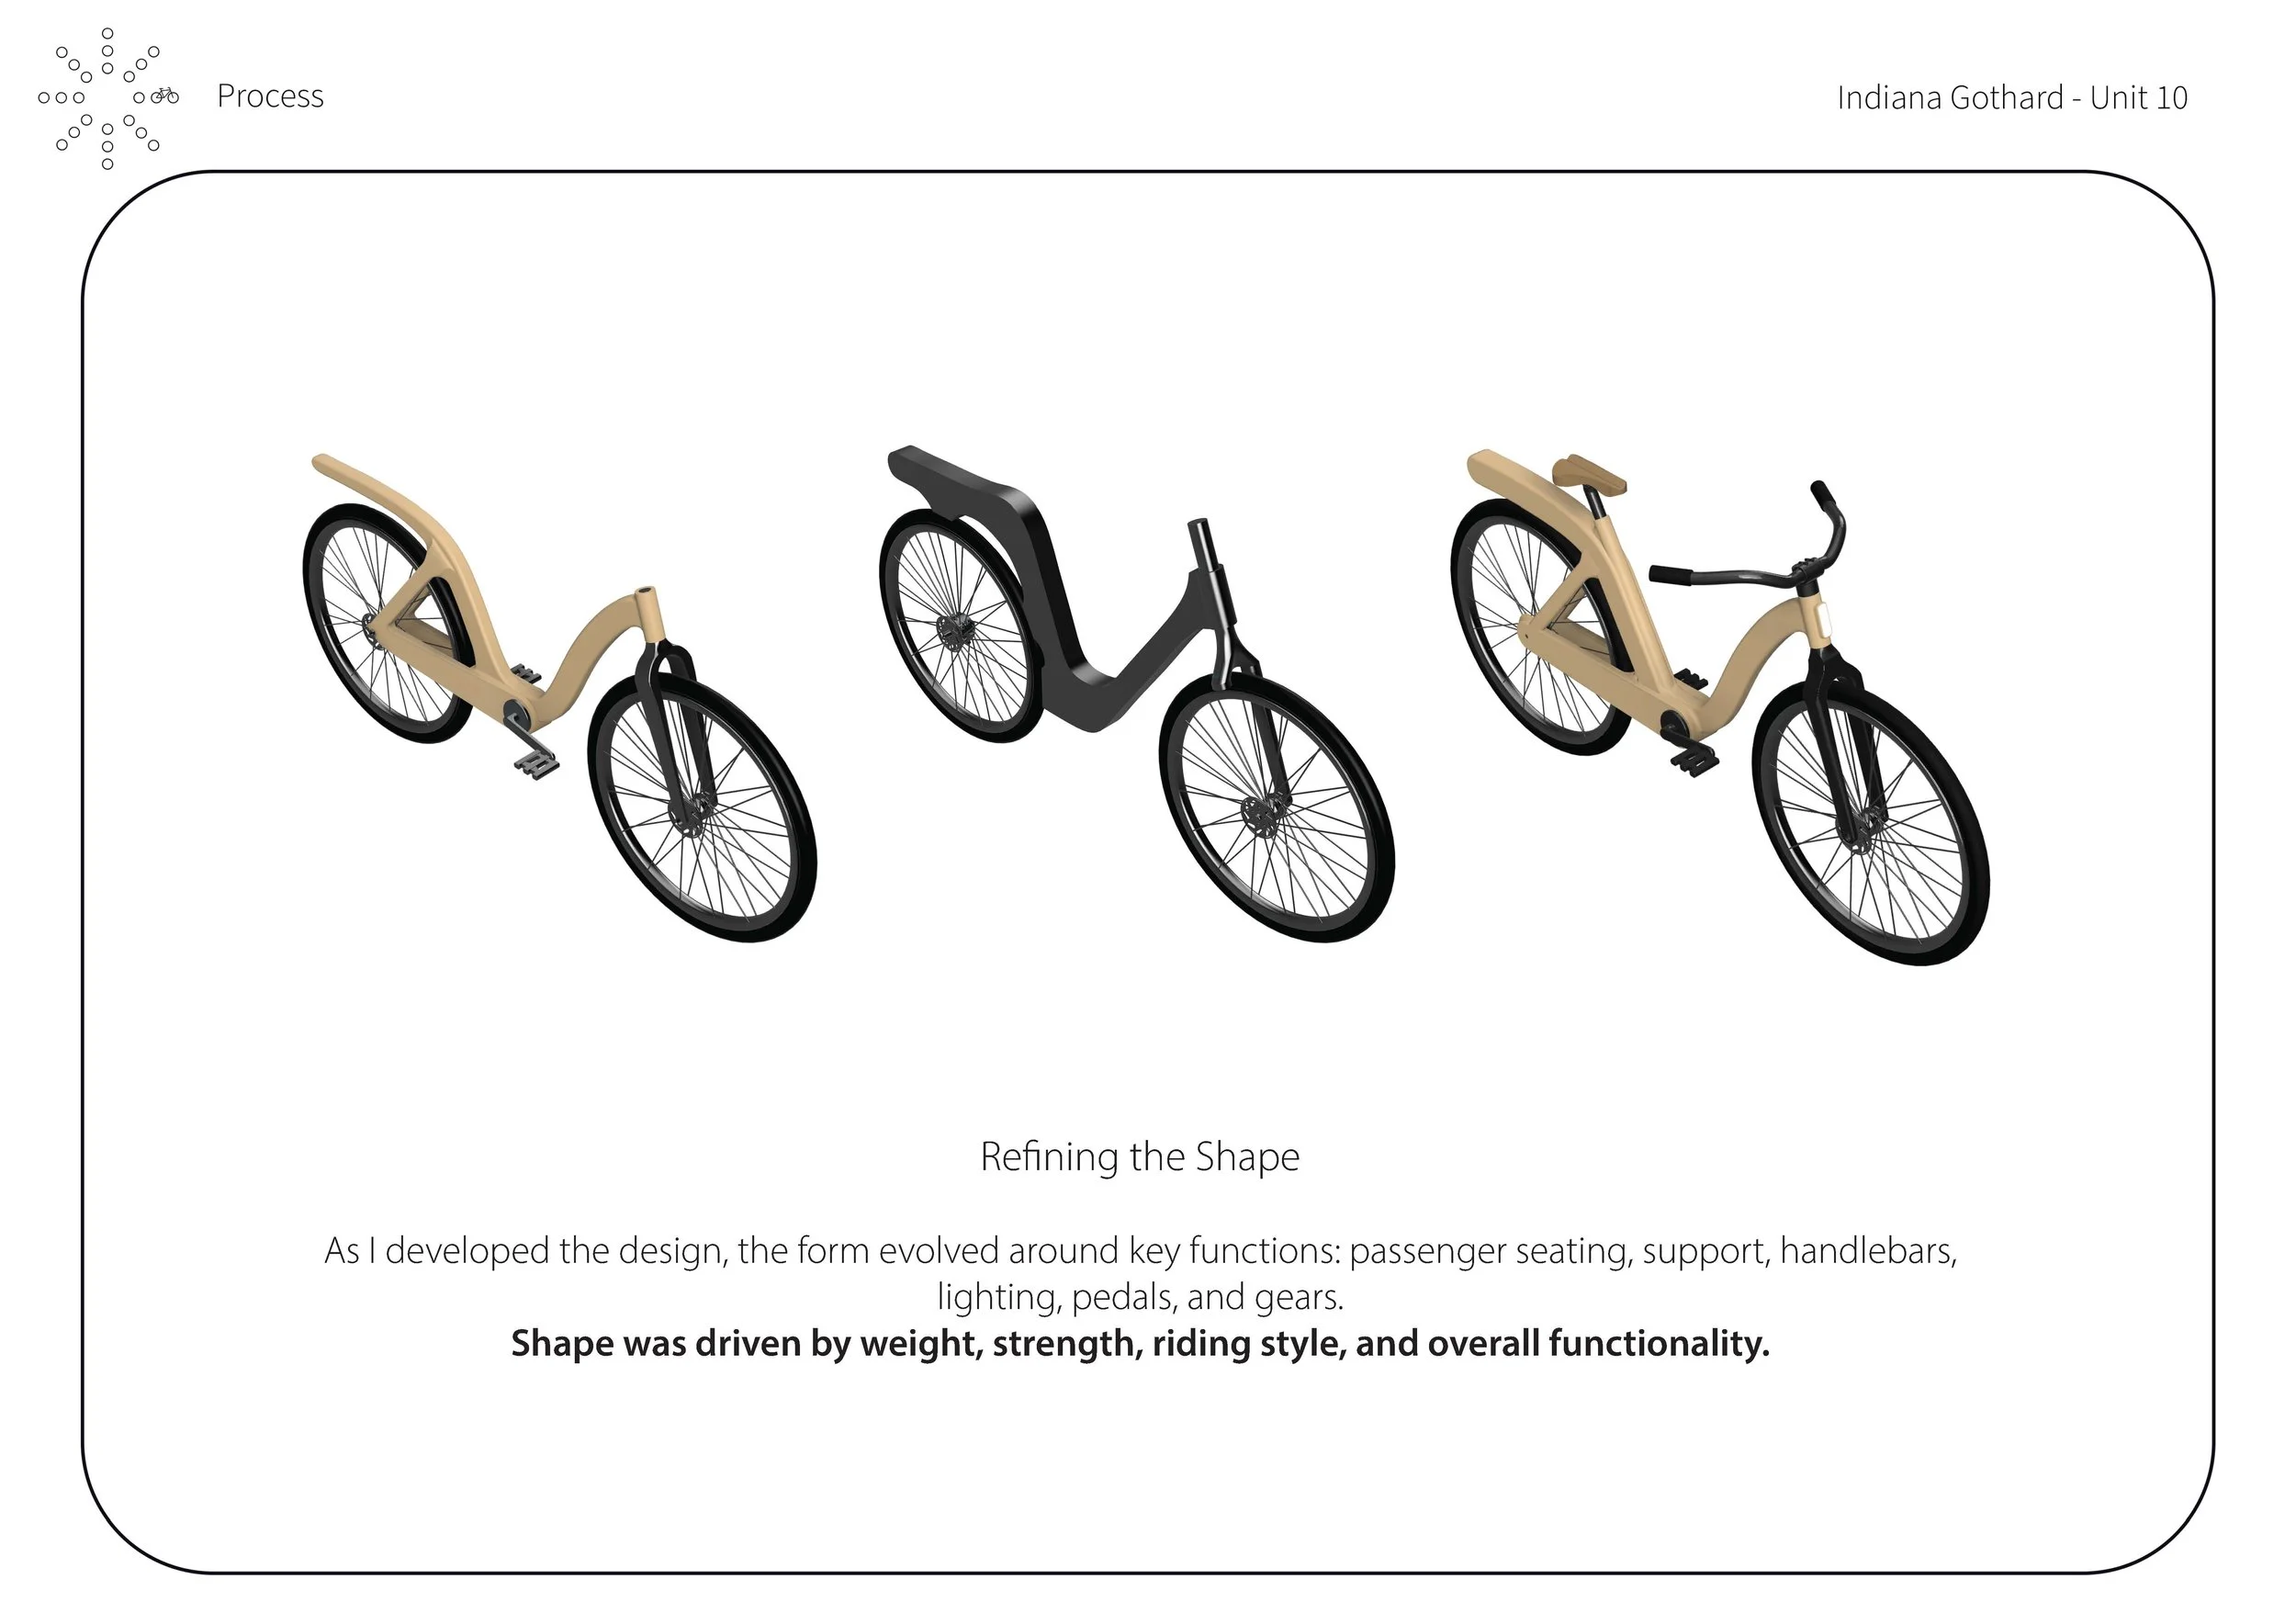
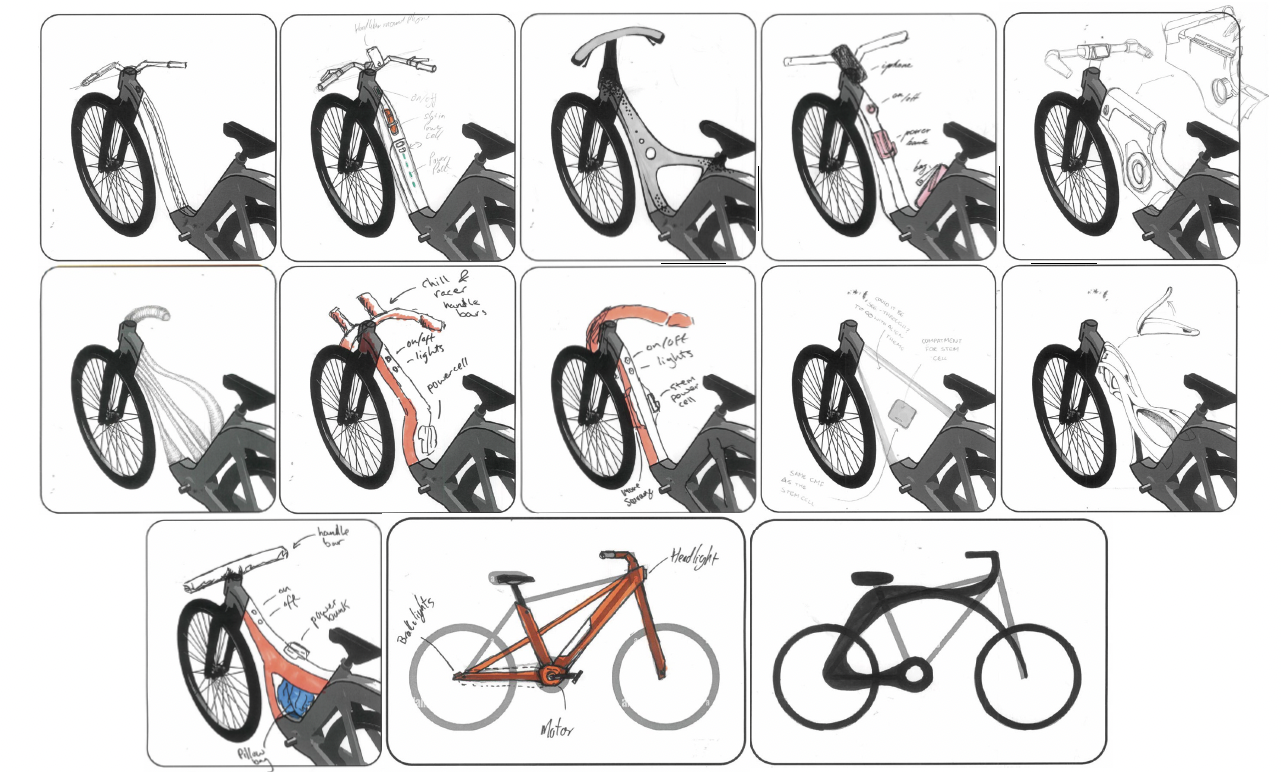
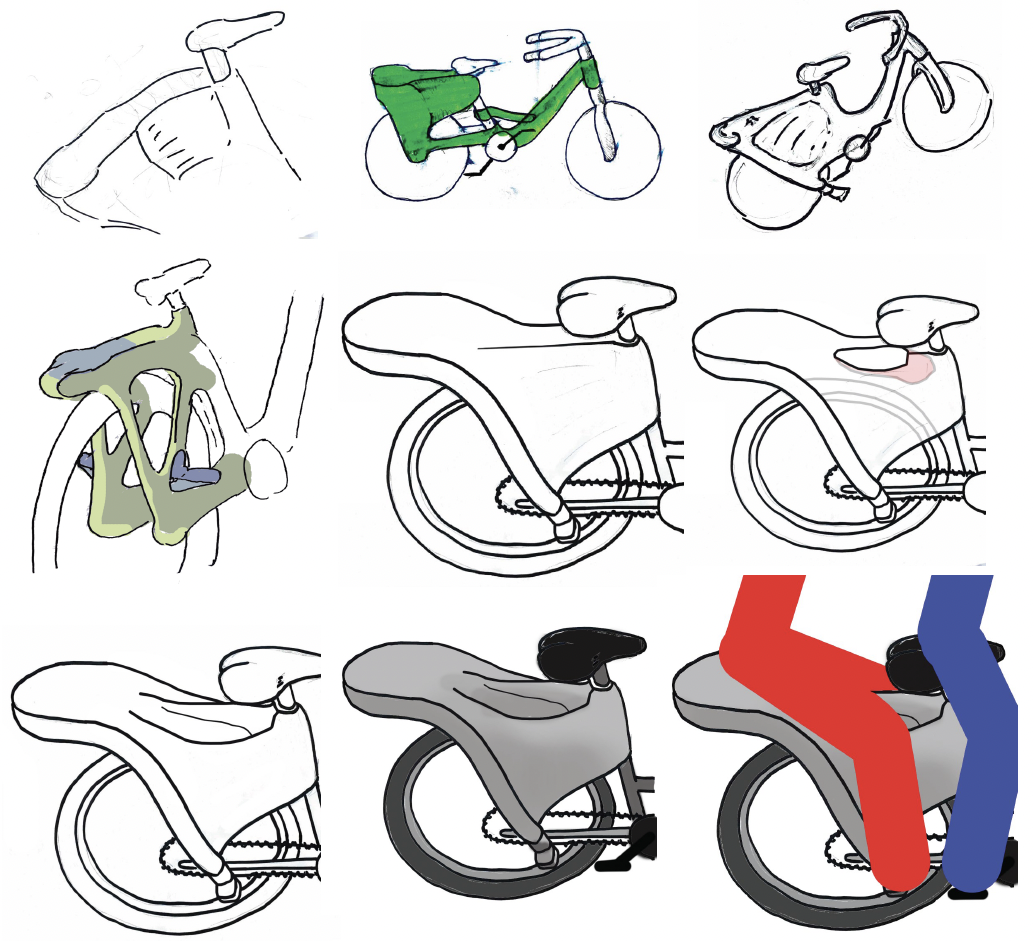
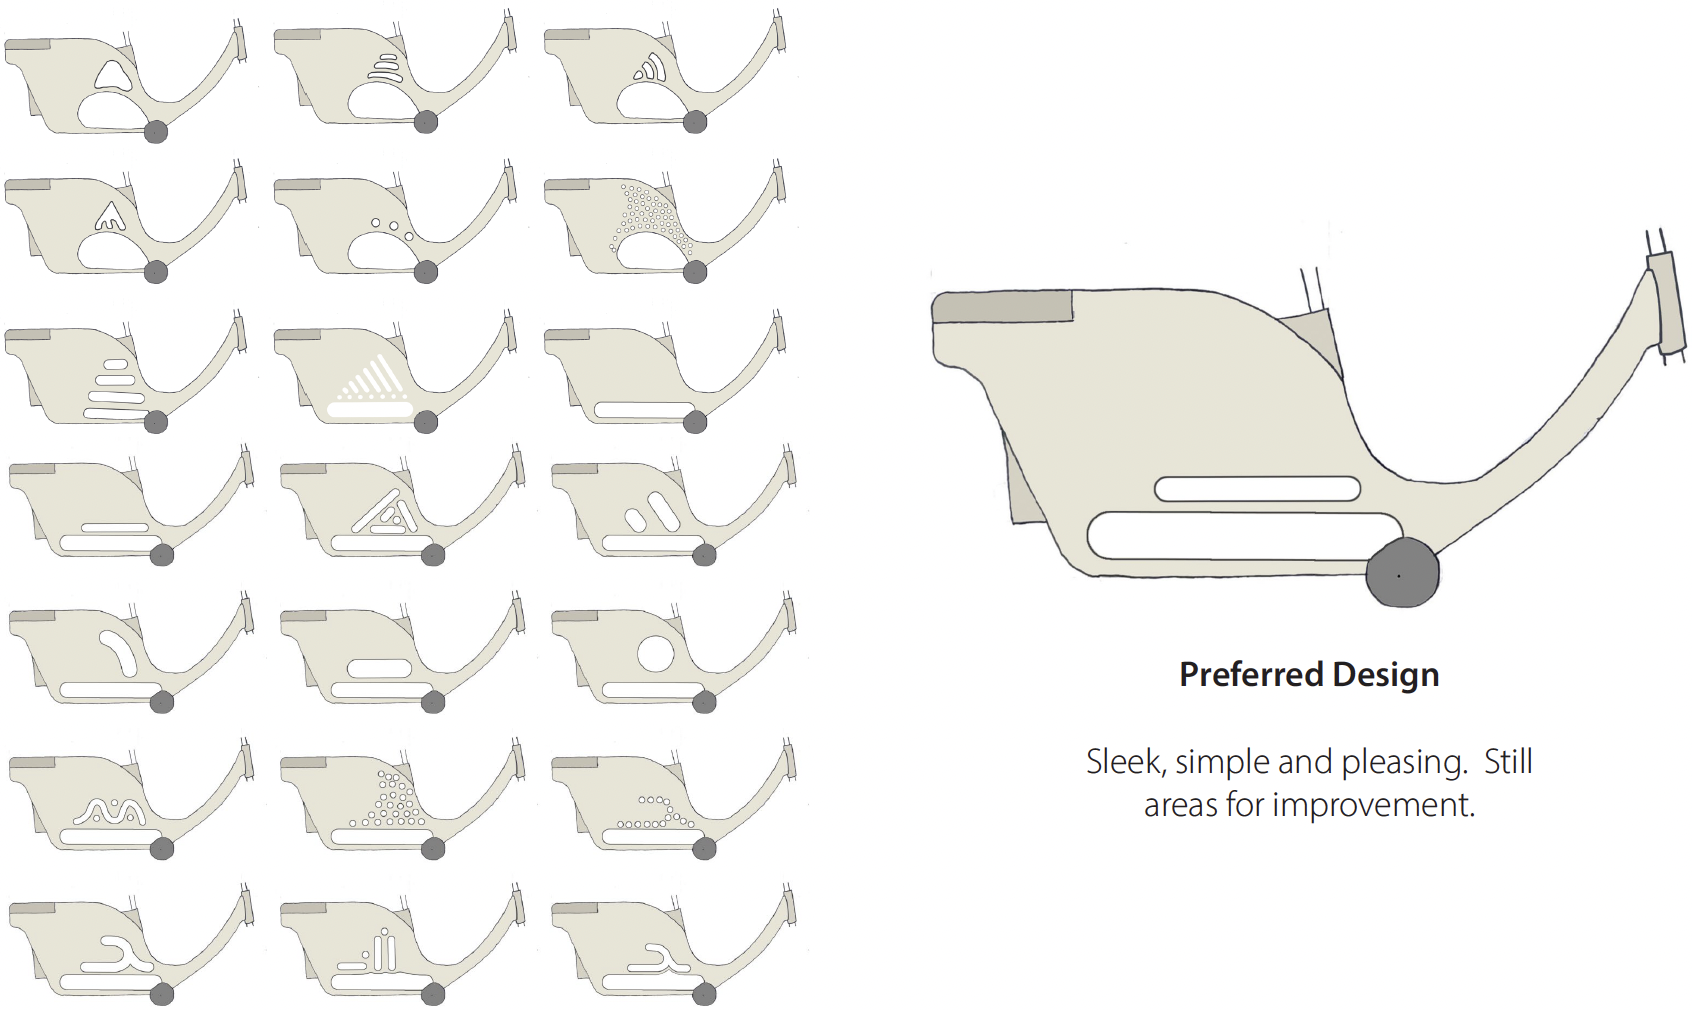
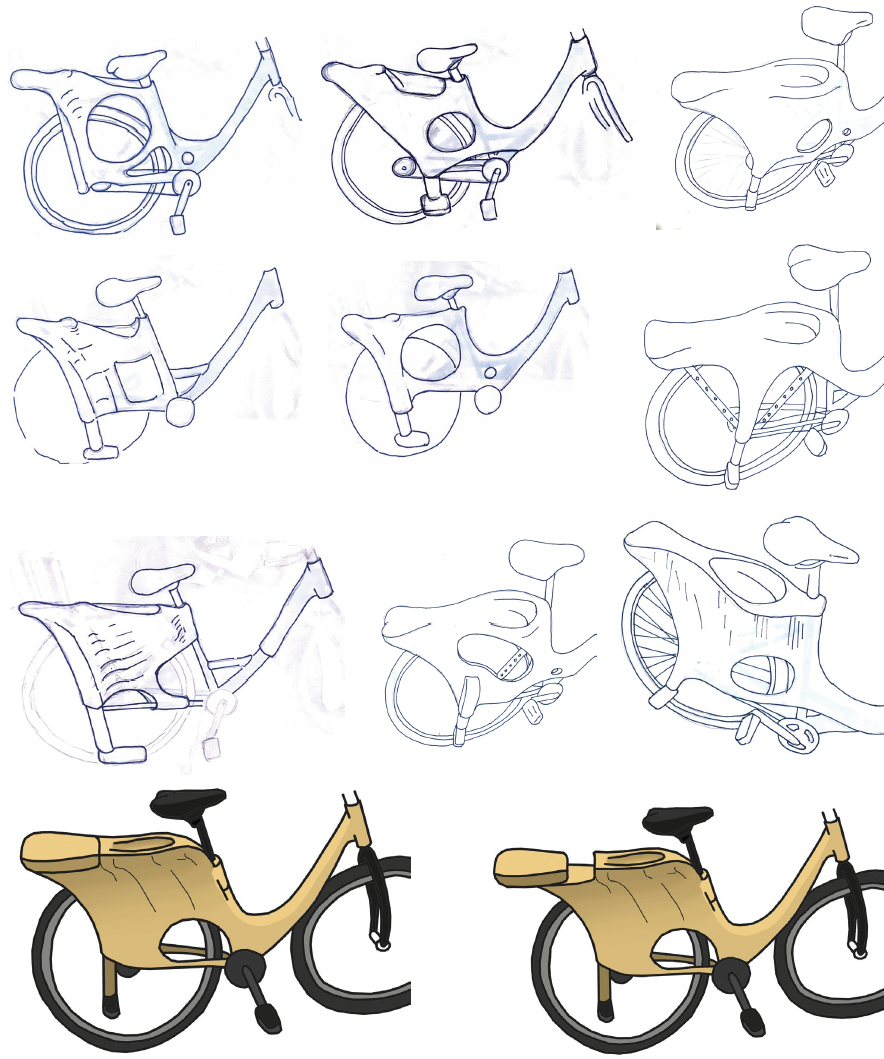
Building on my earlier sketch models and mock-ups, I began sketching more organically, exploring both the aesthetic language and functional possibilities of the bike’s form.
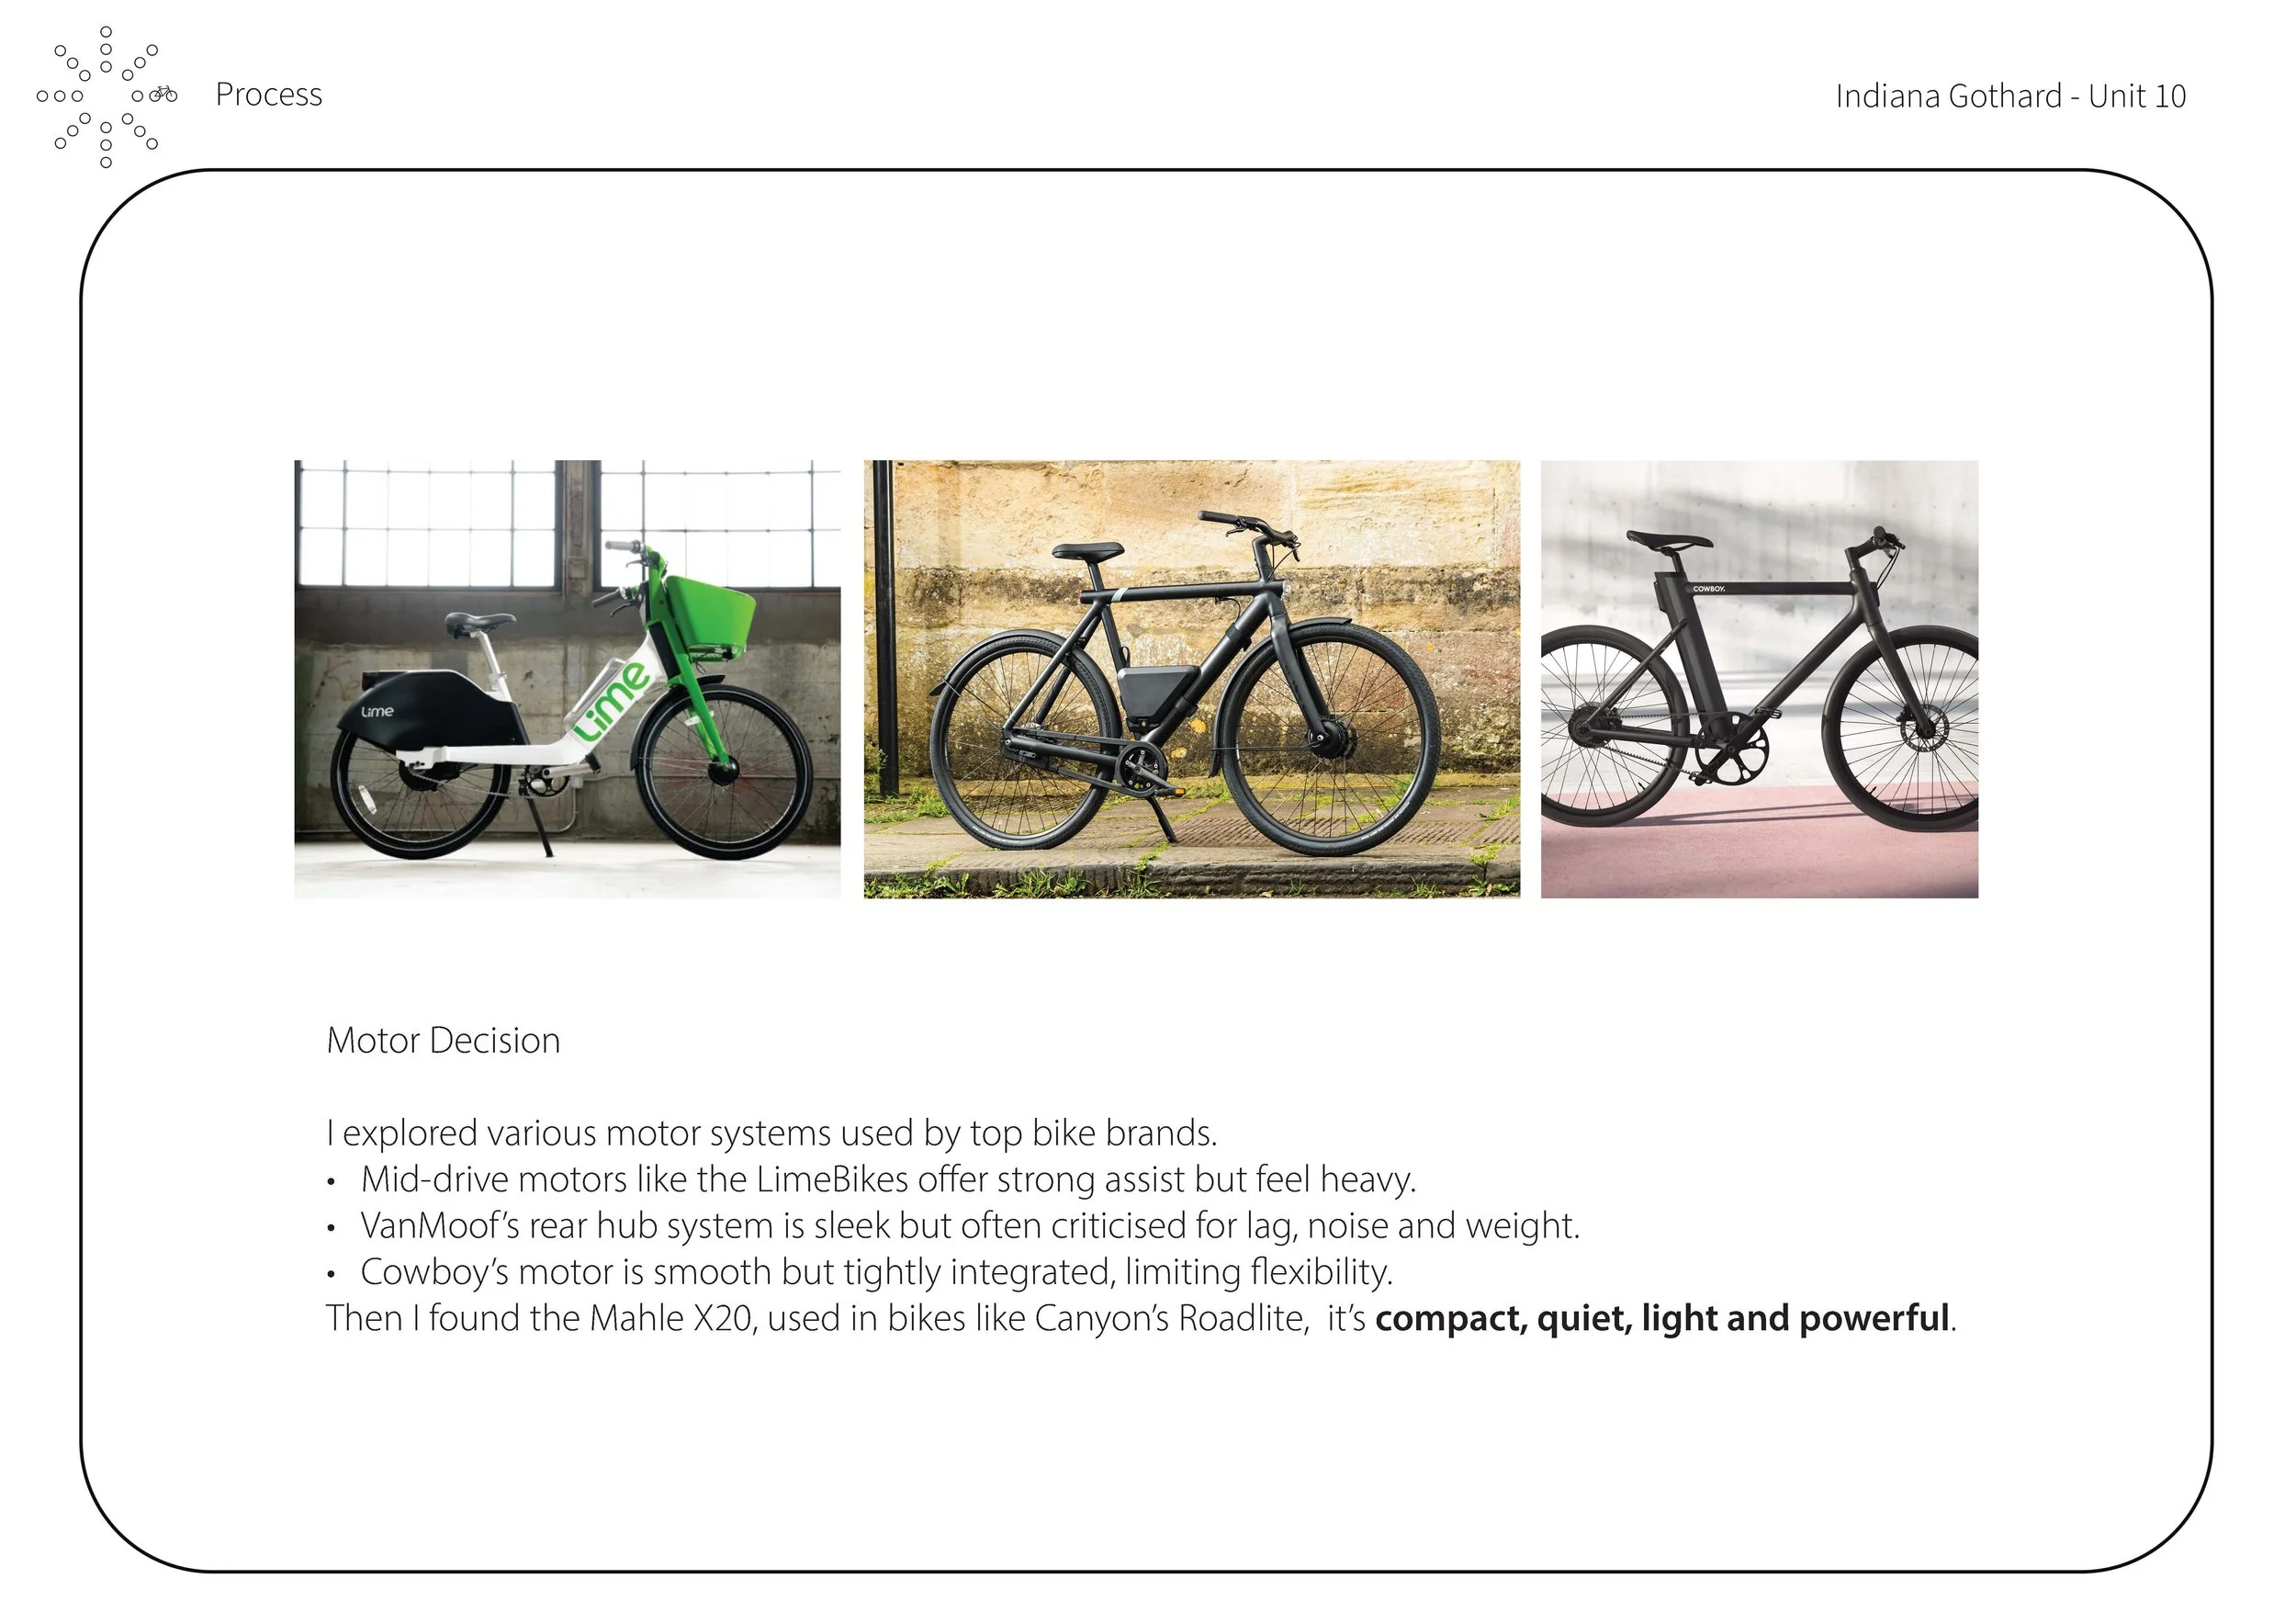
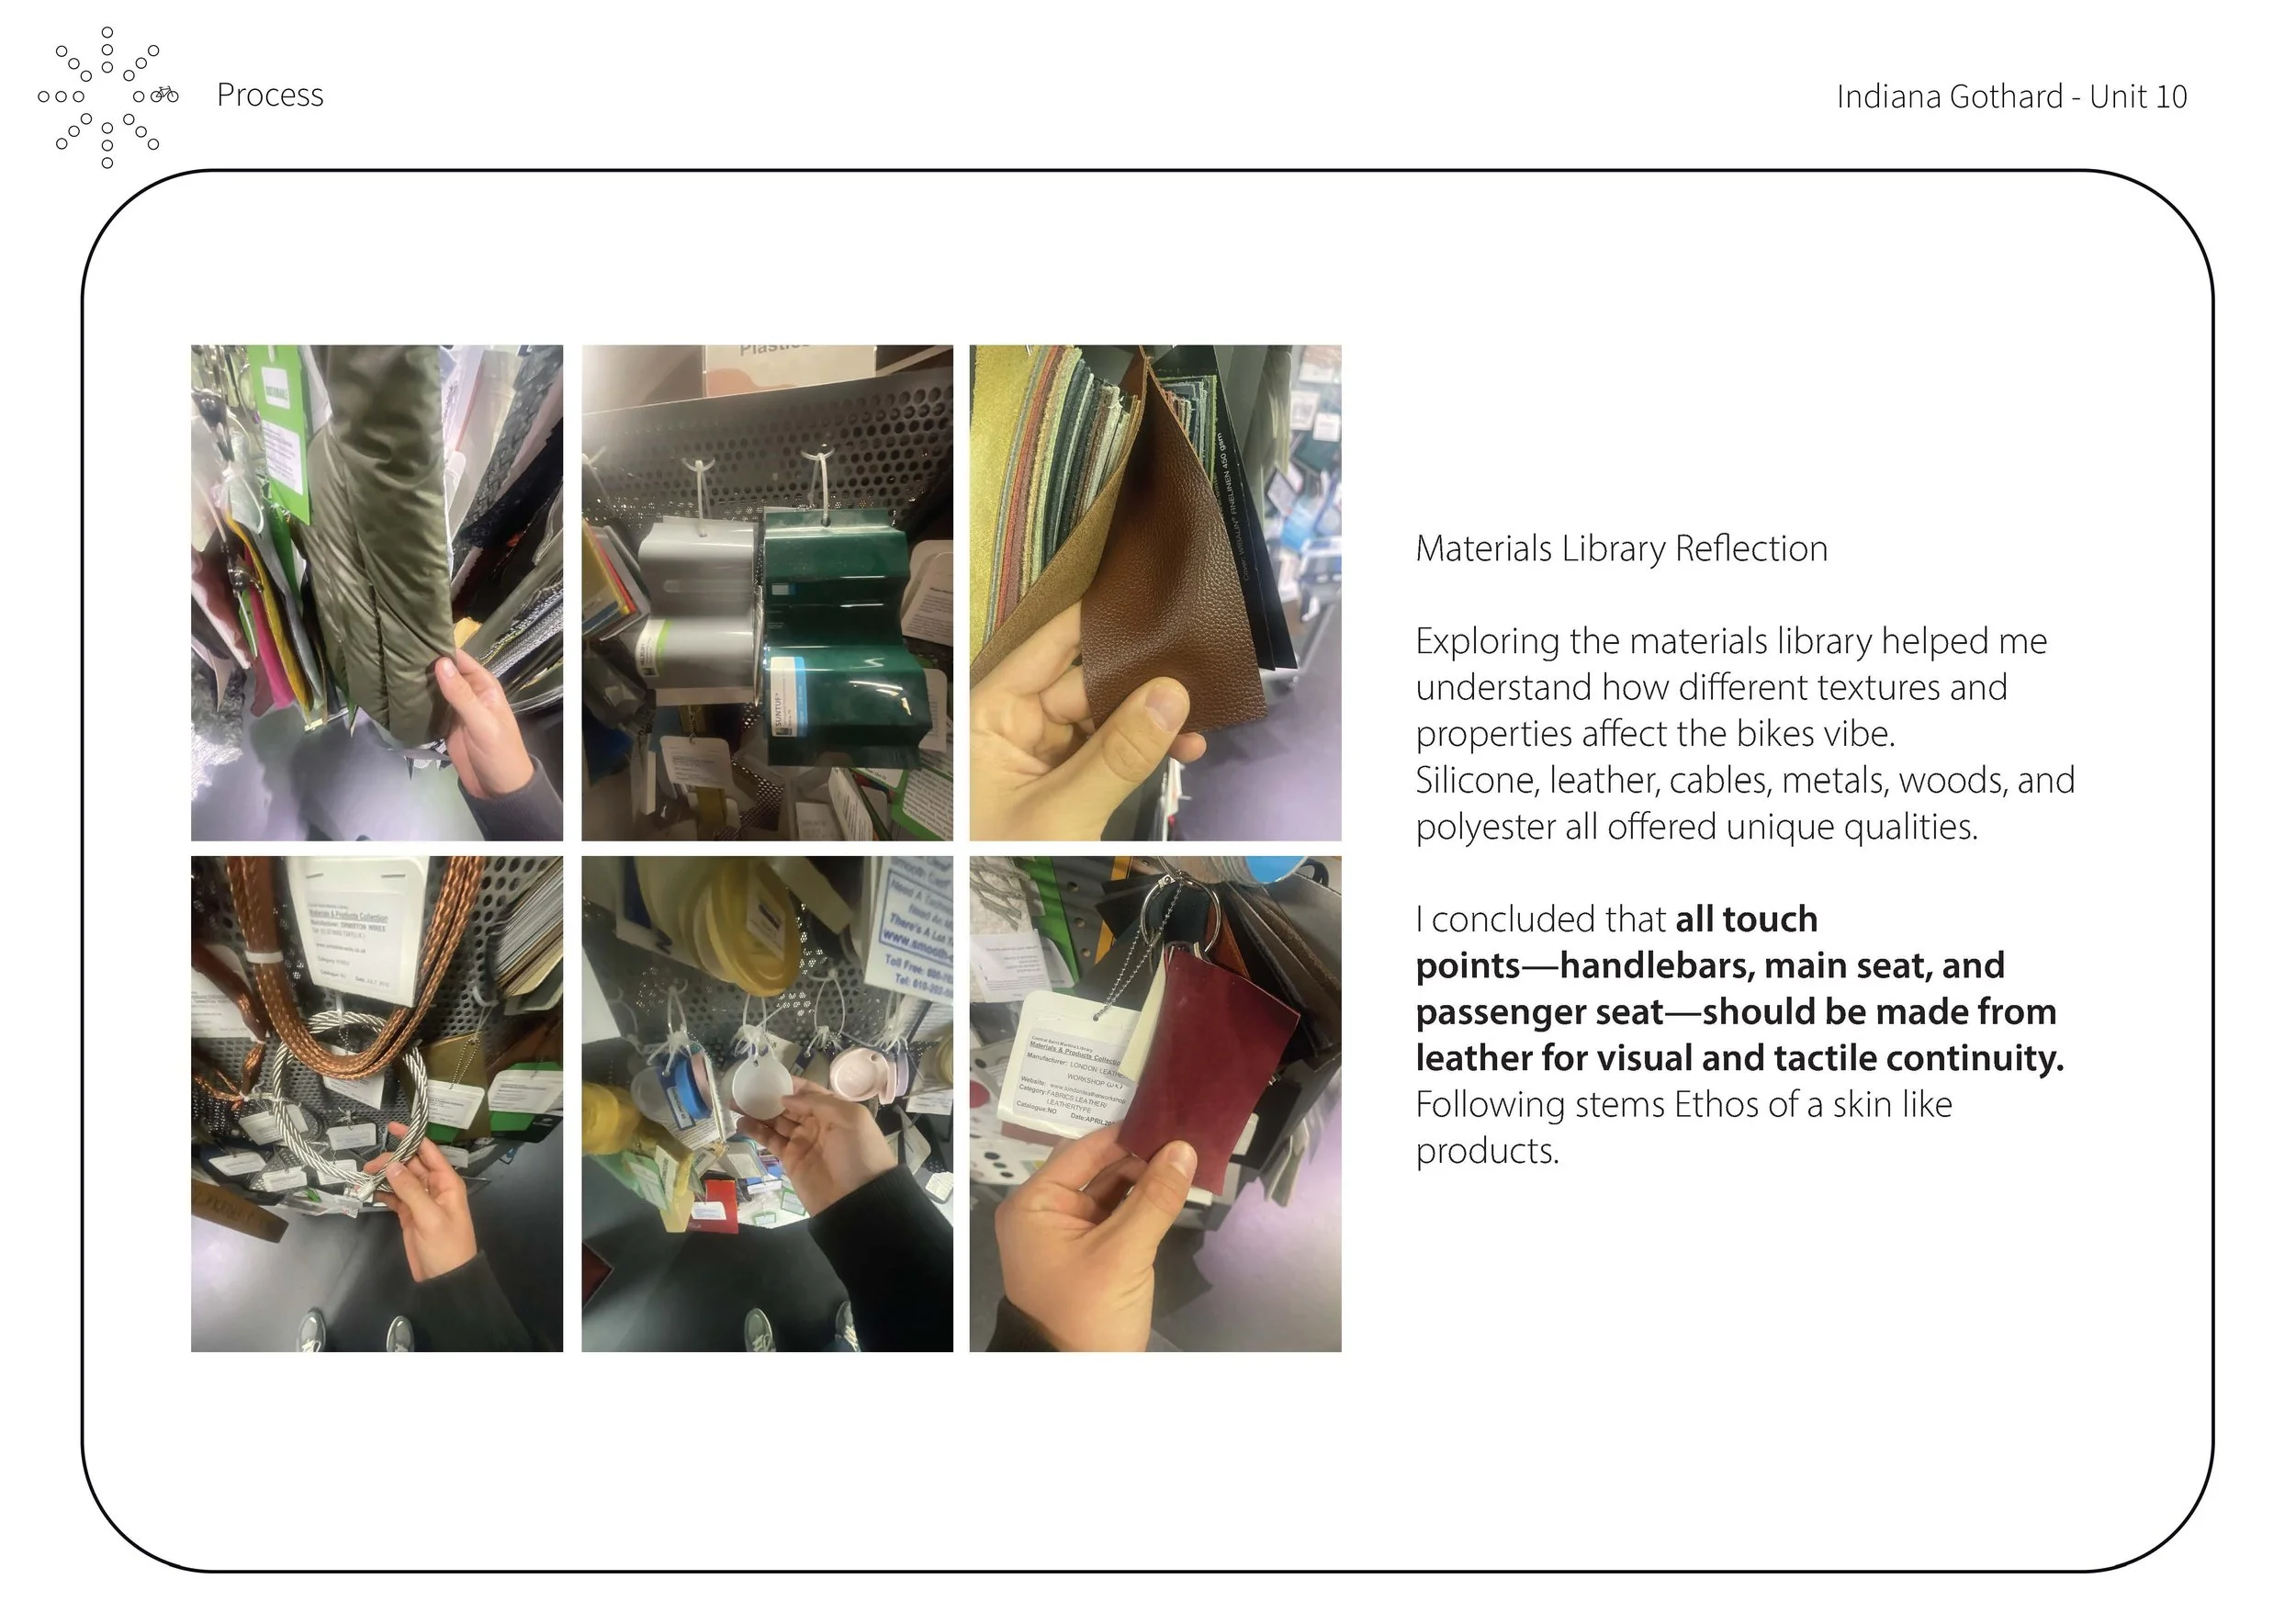
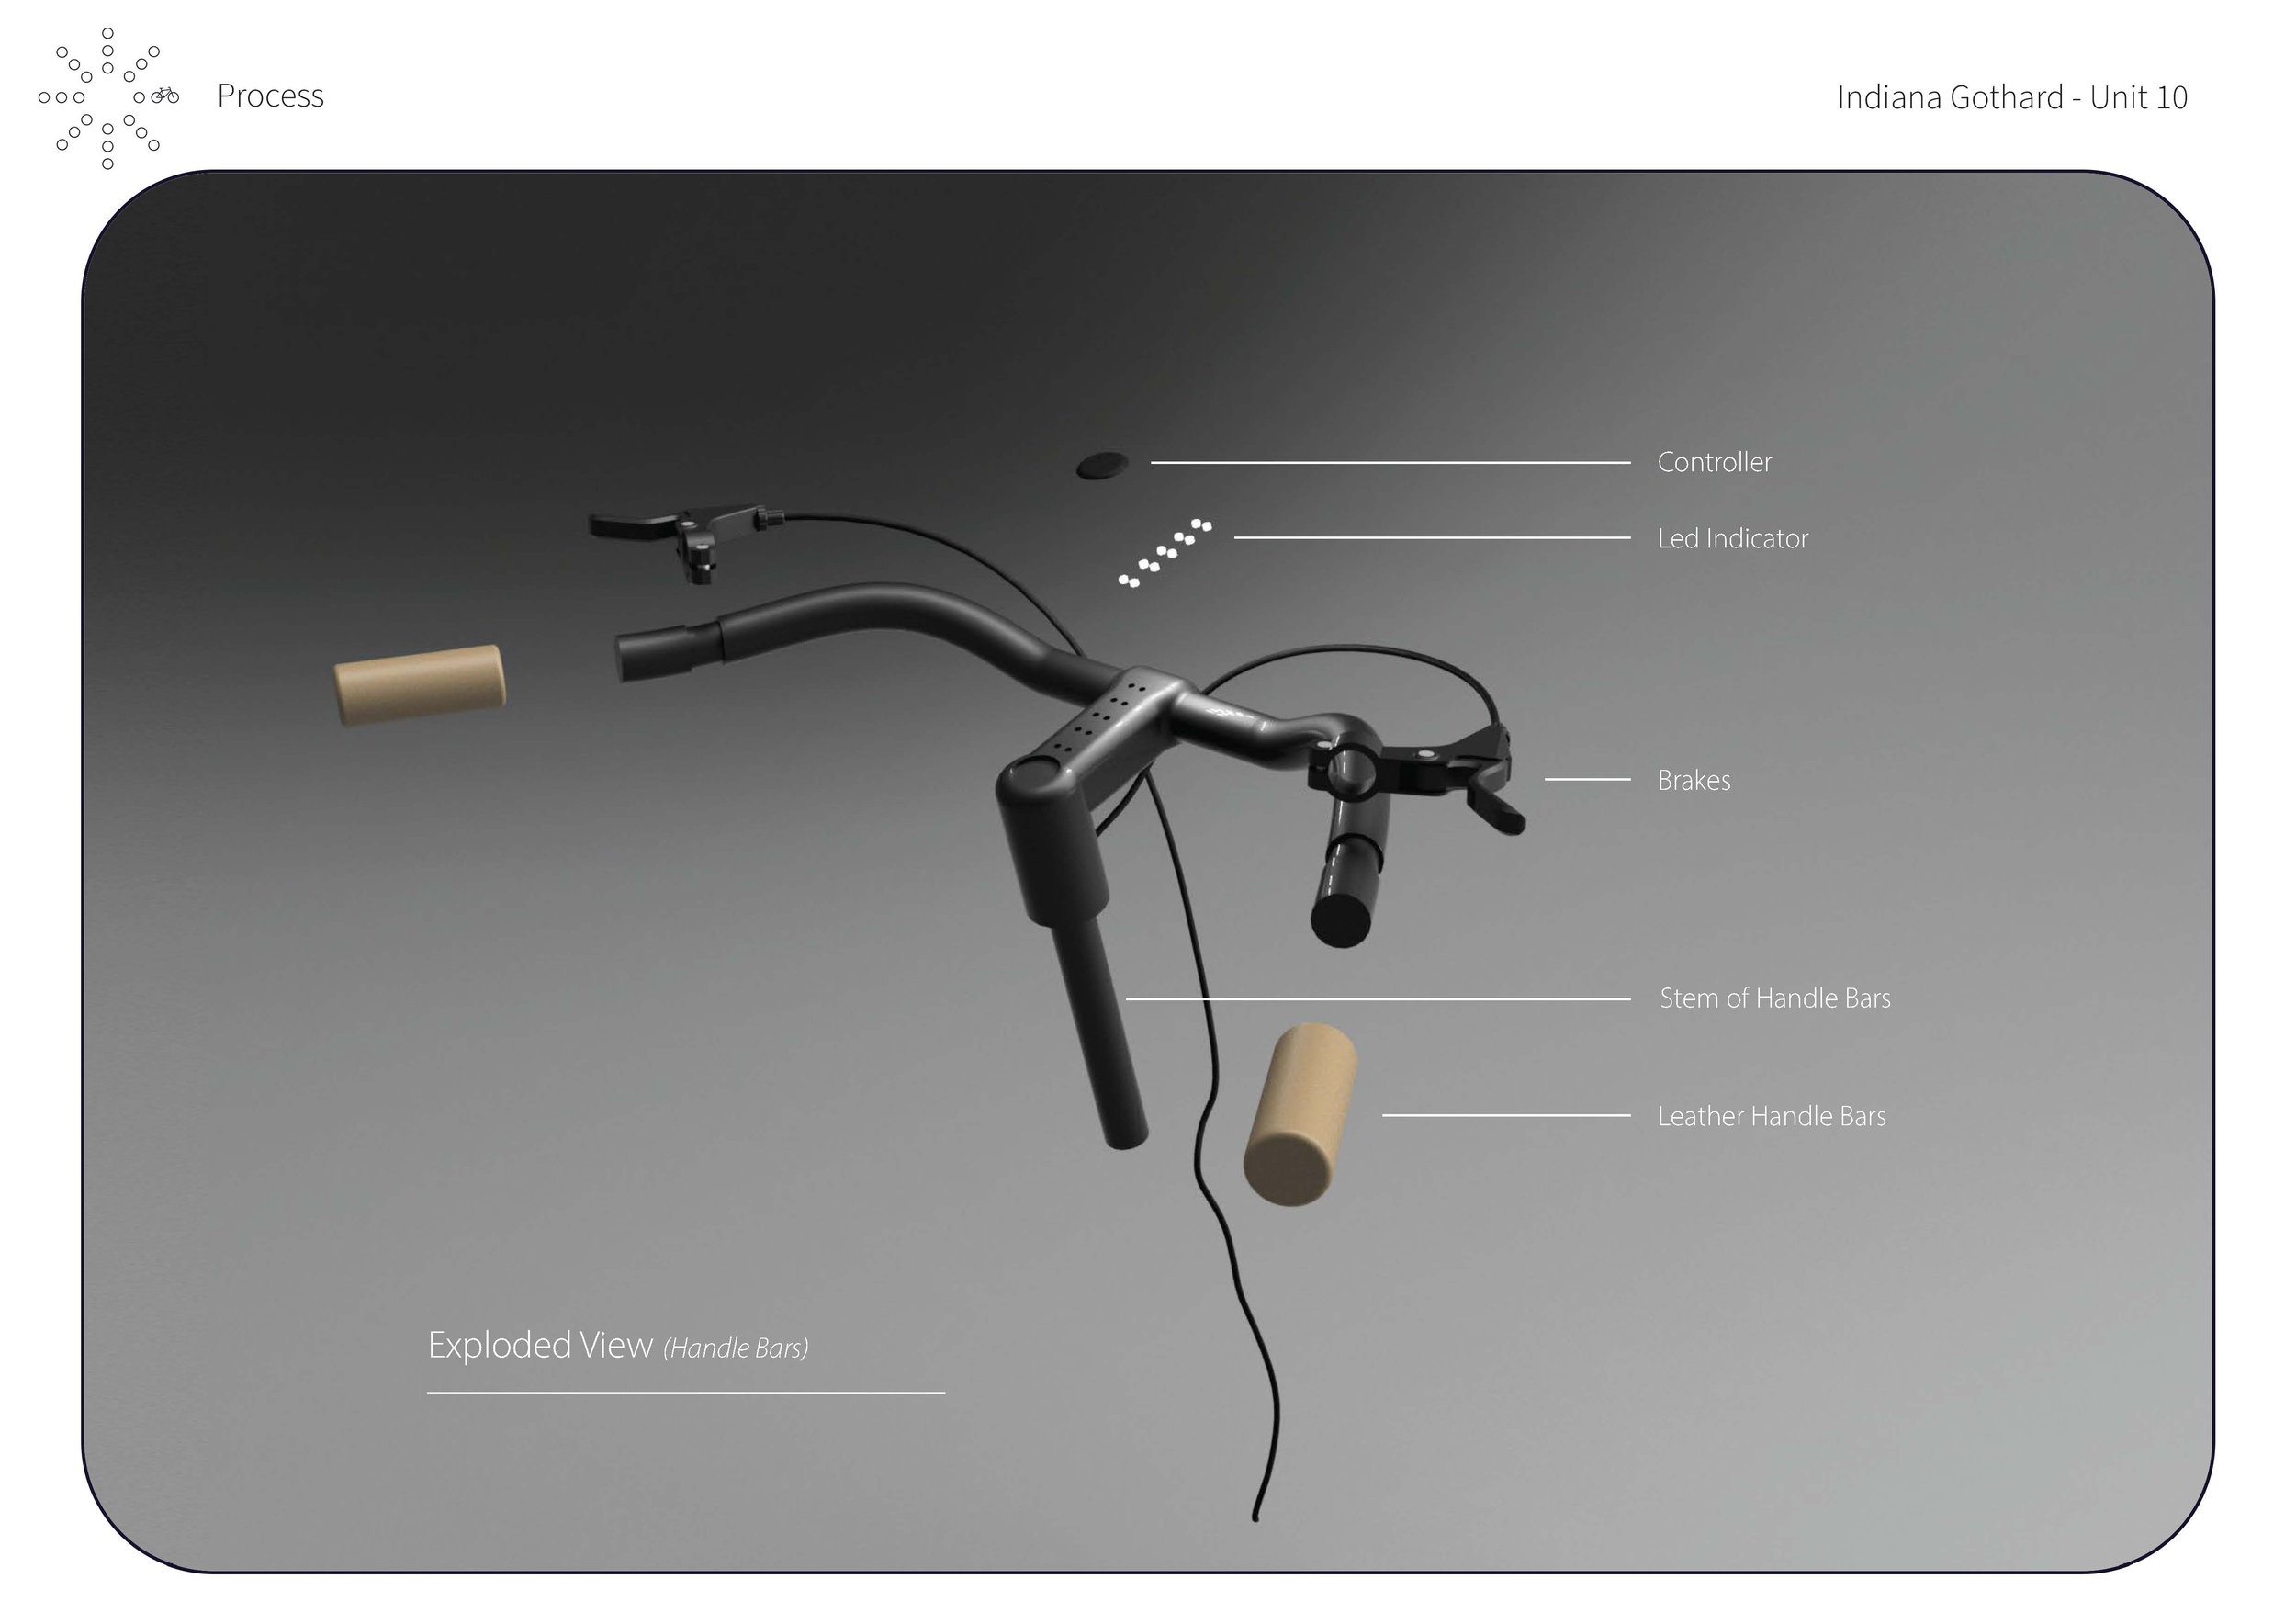
COMPONENT RESEARCH
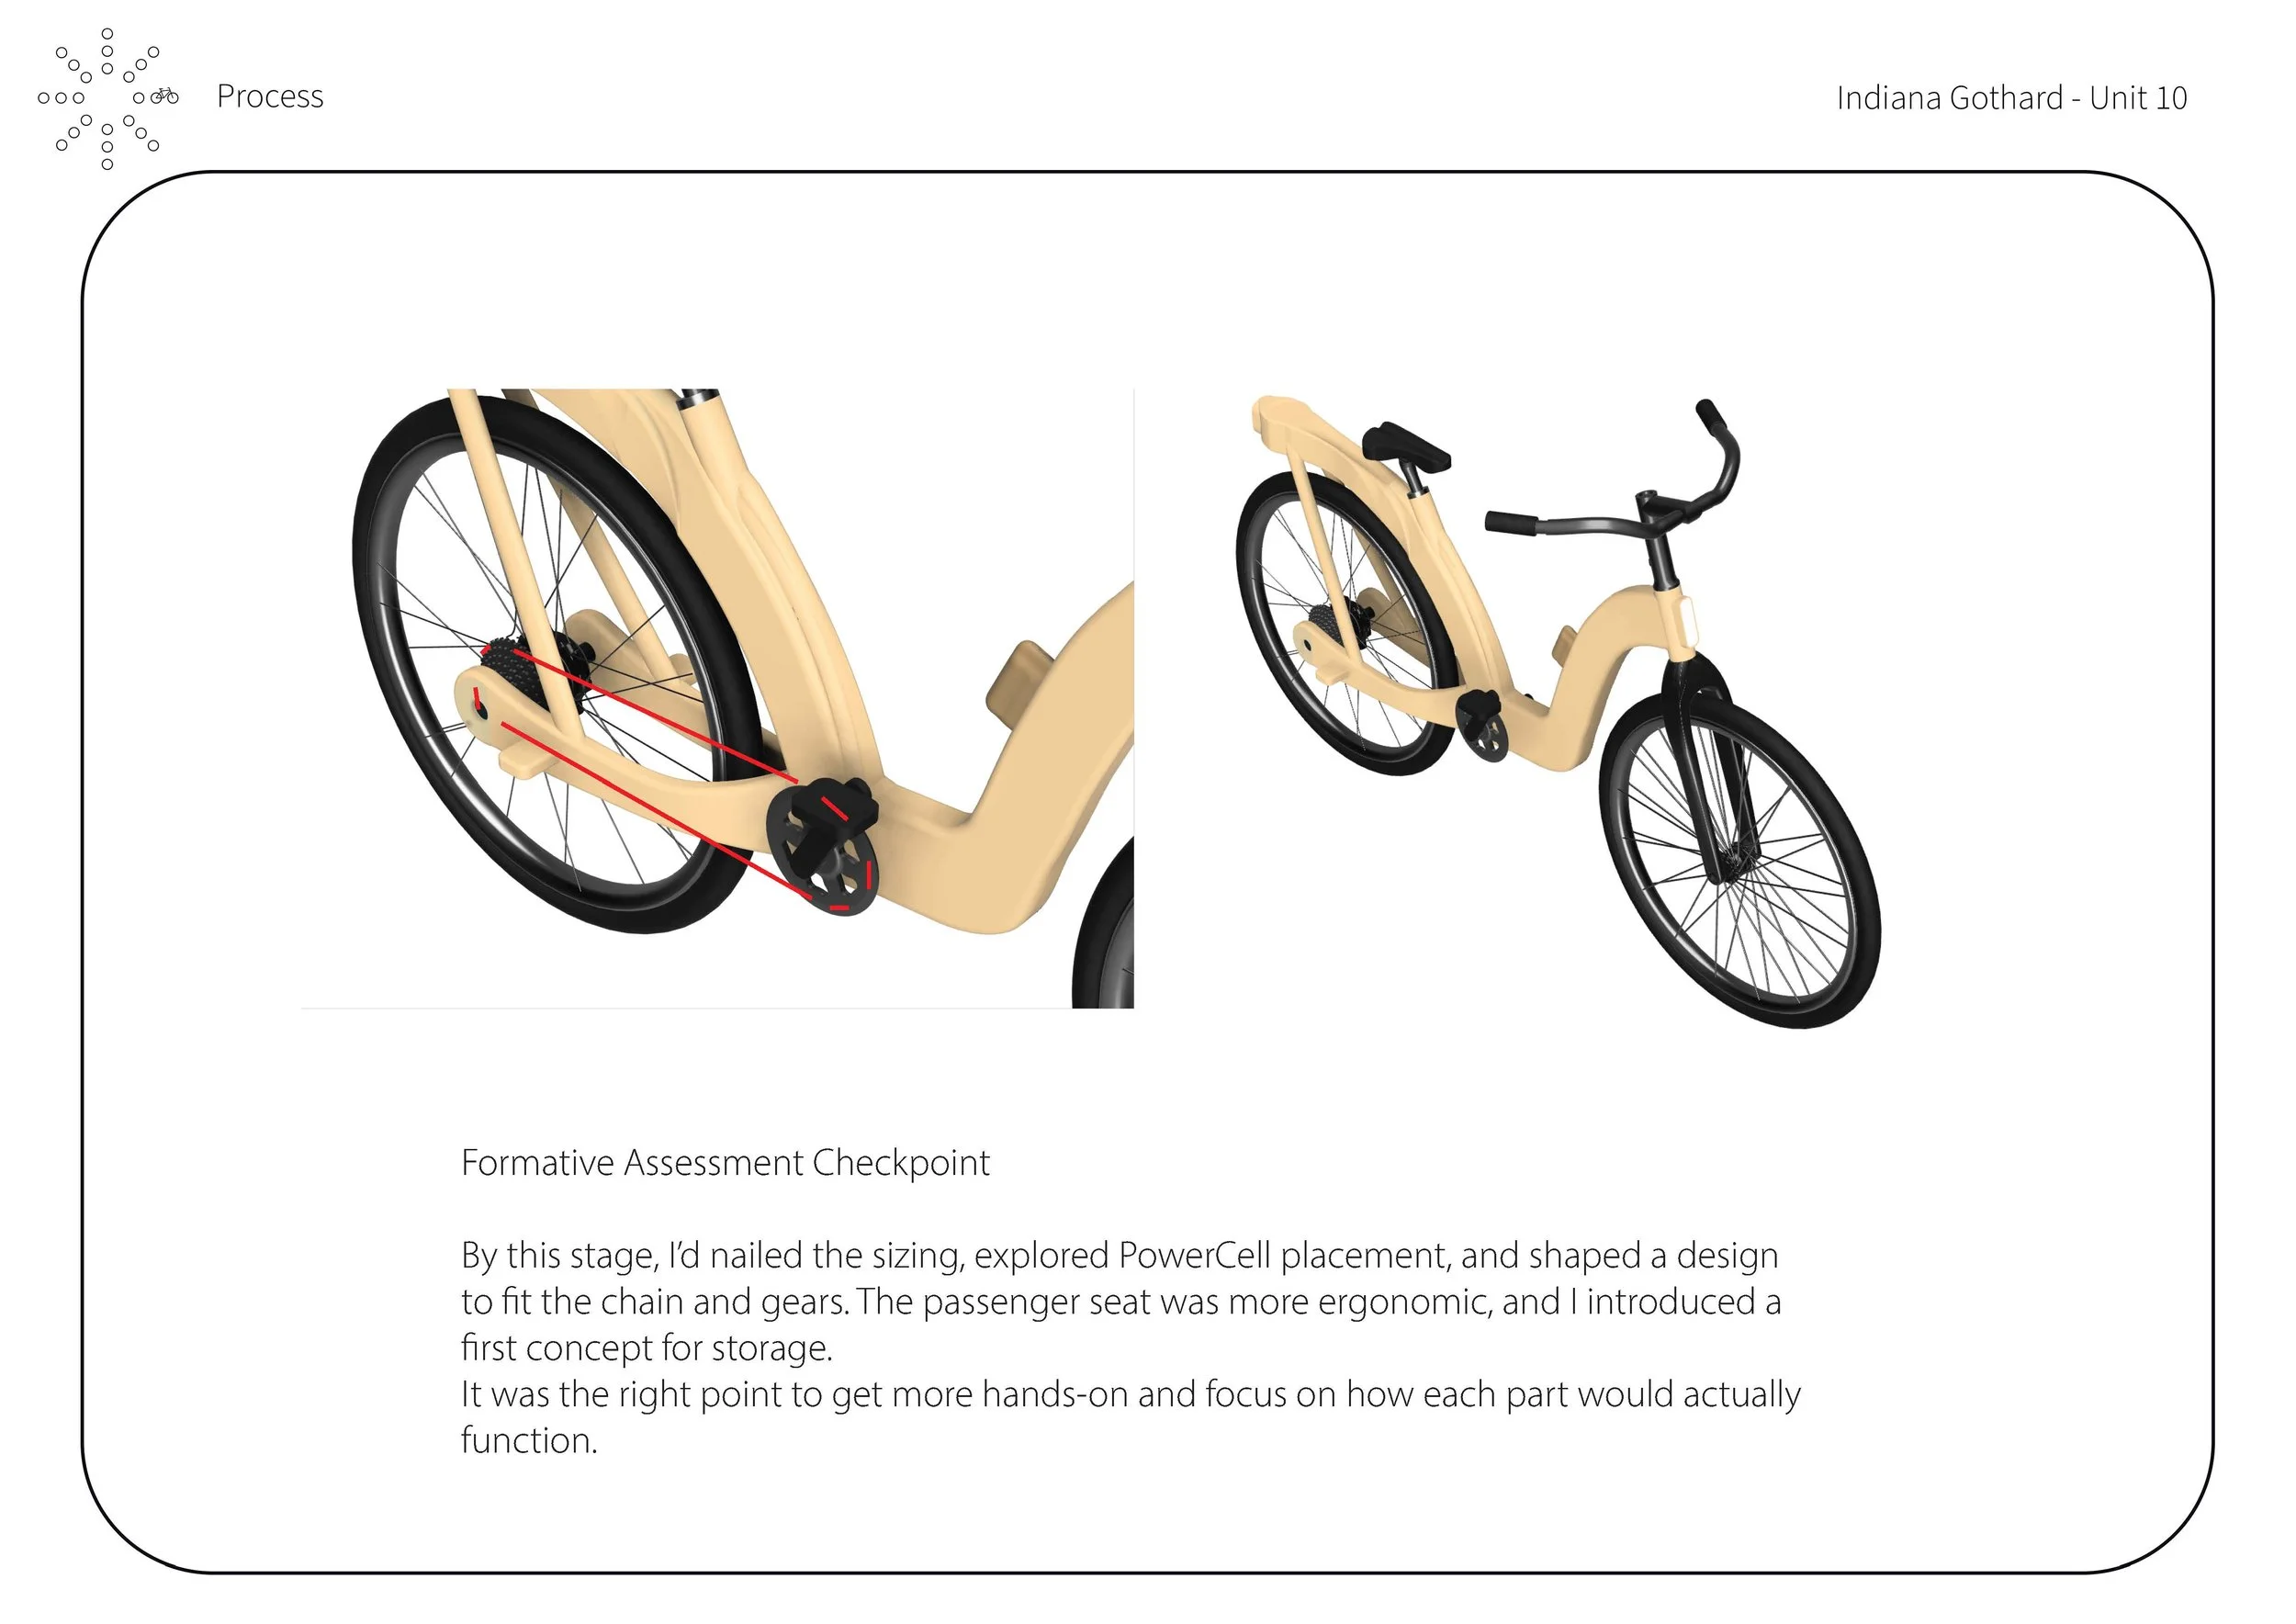
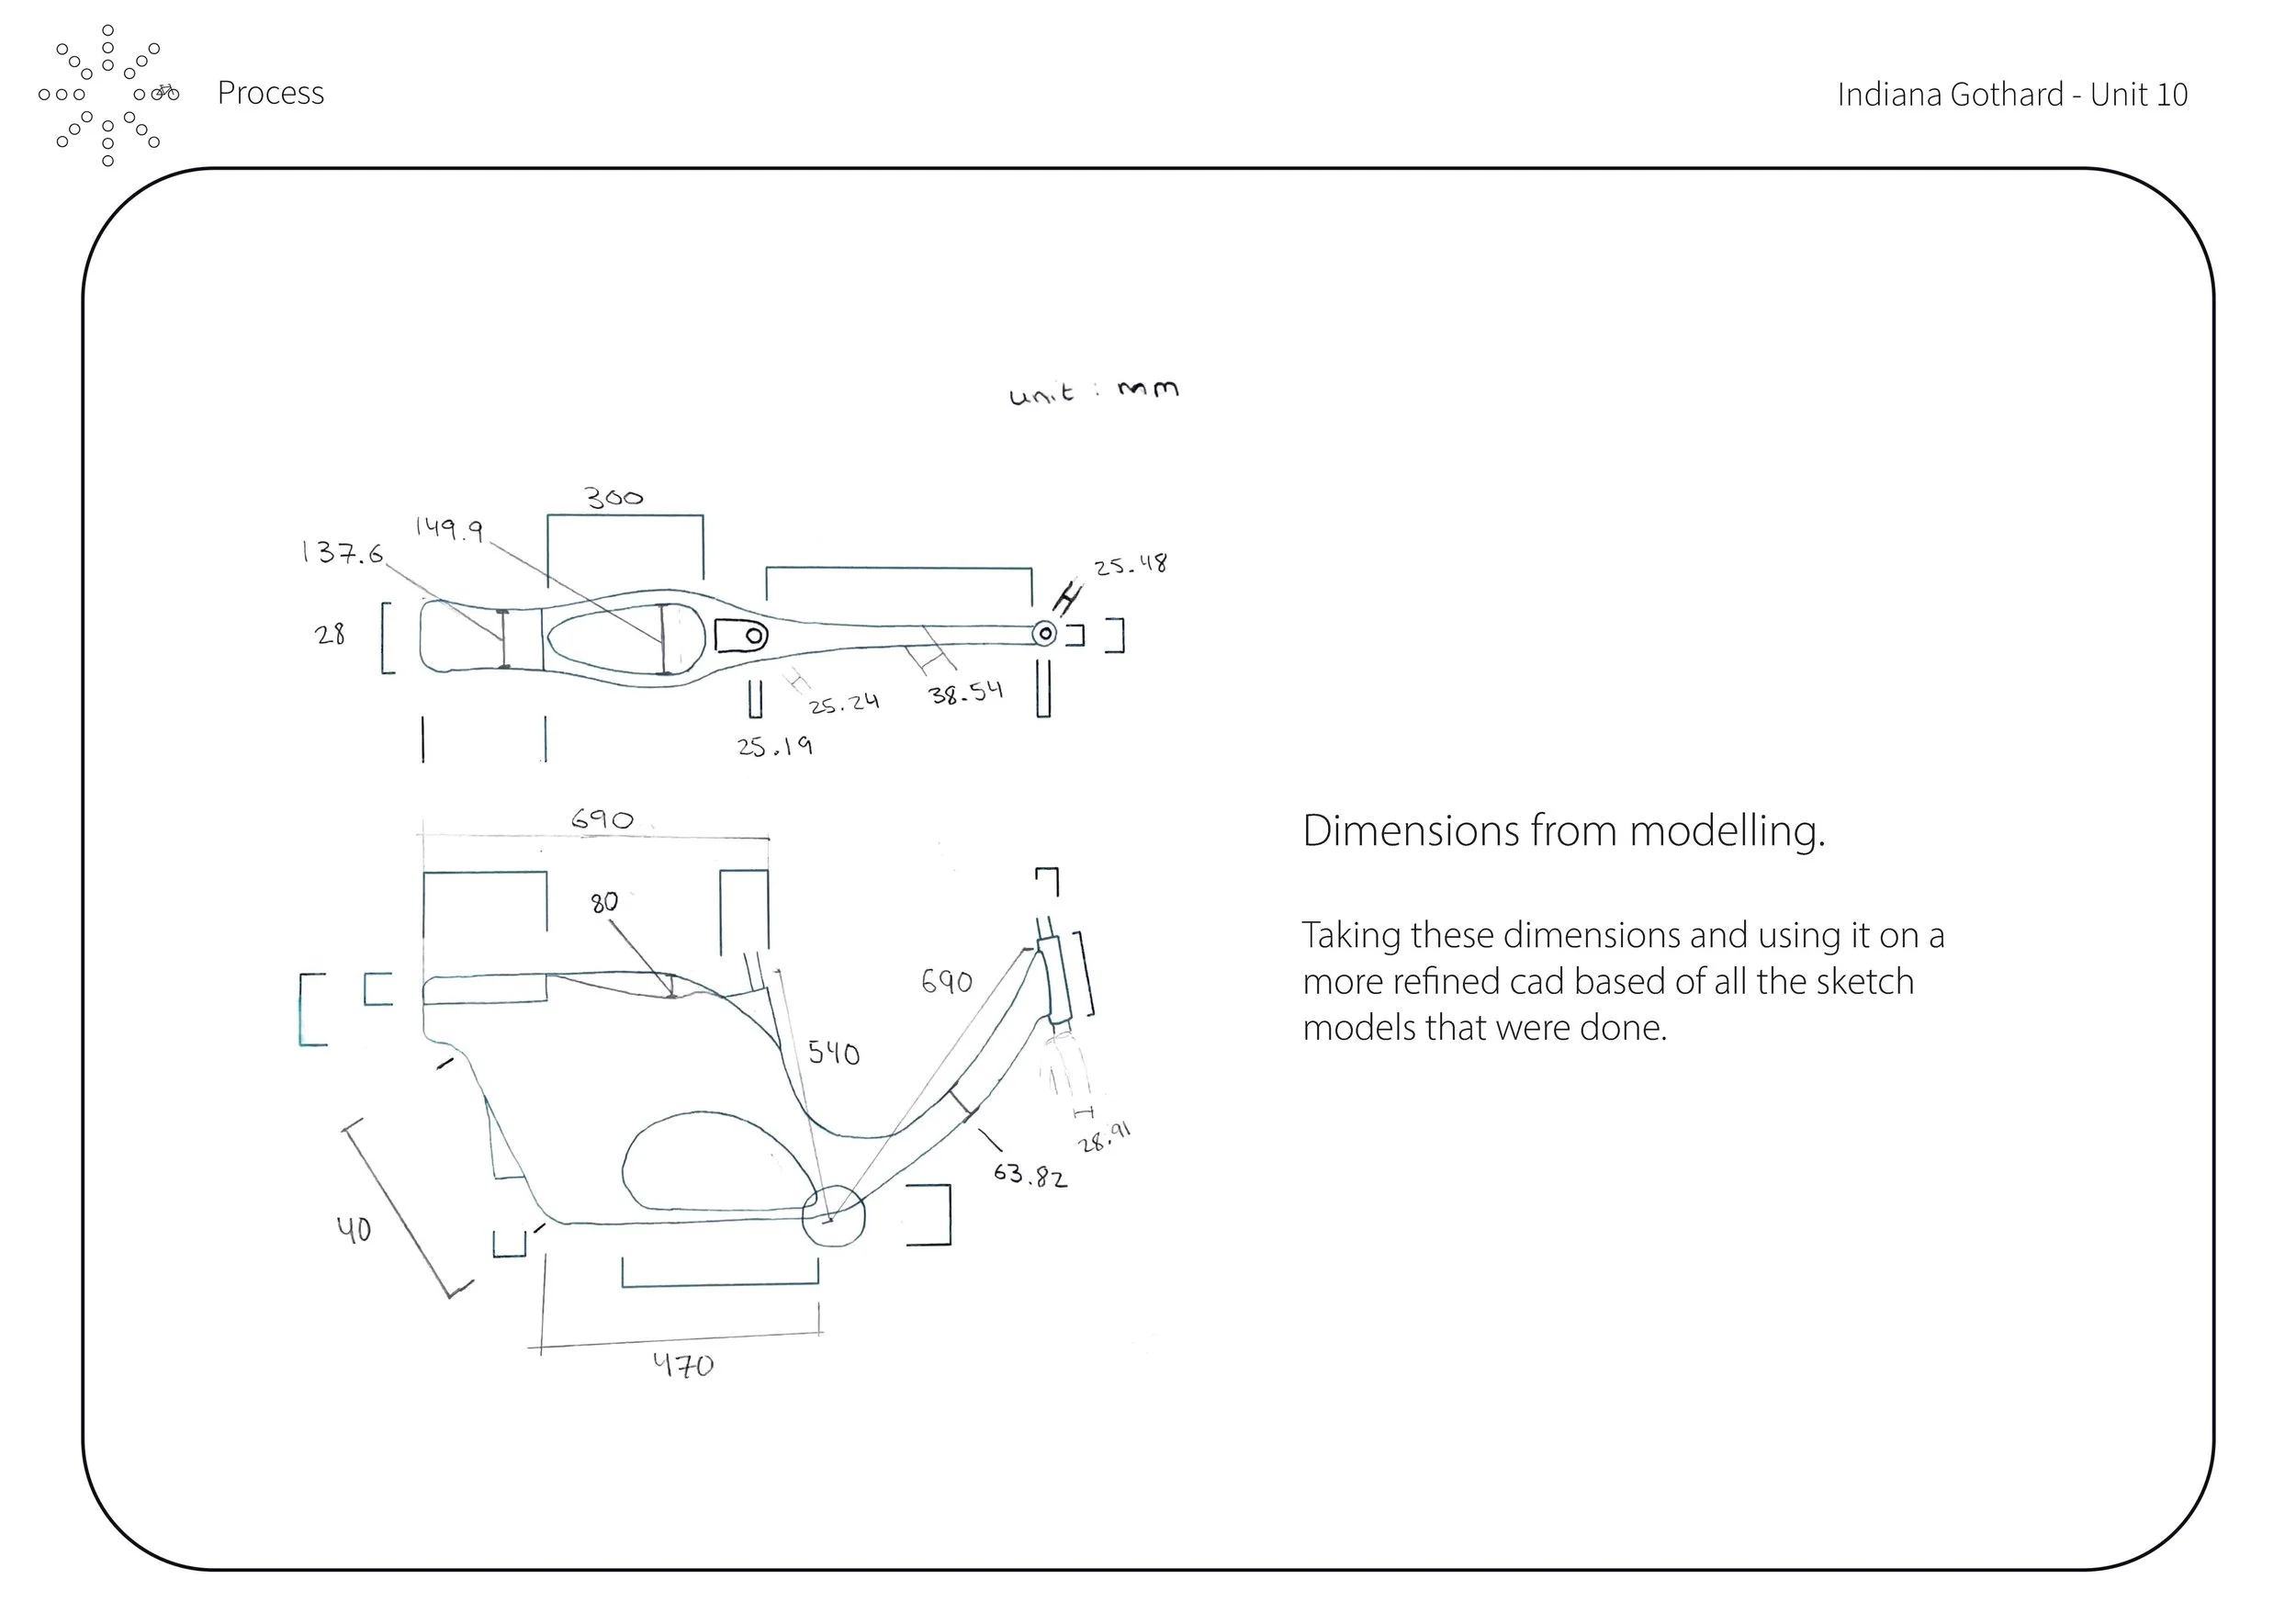
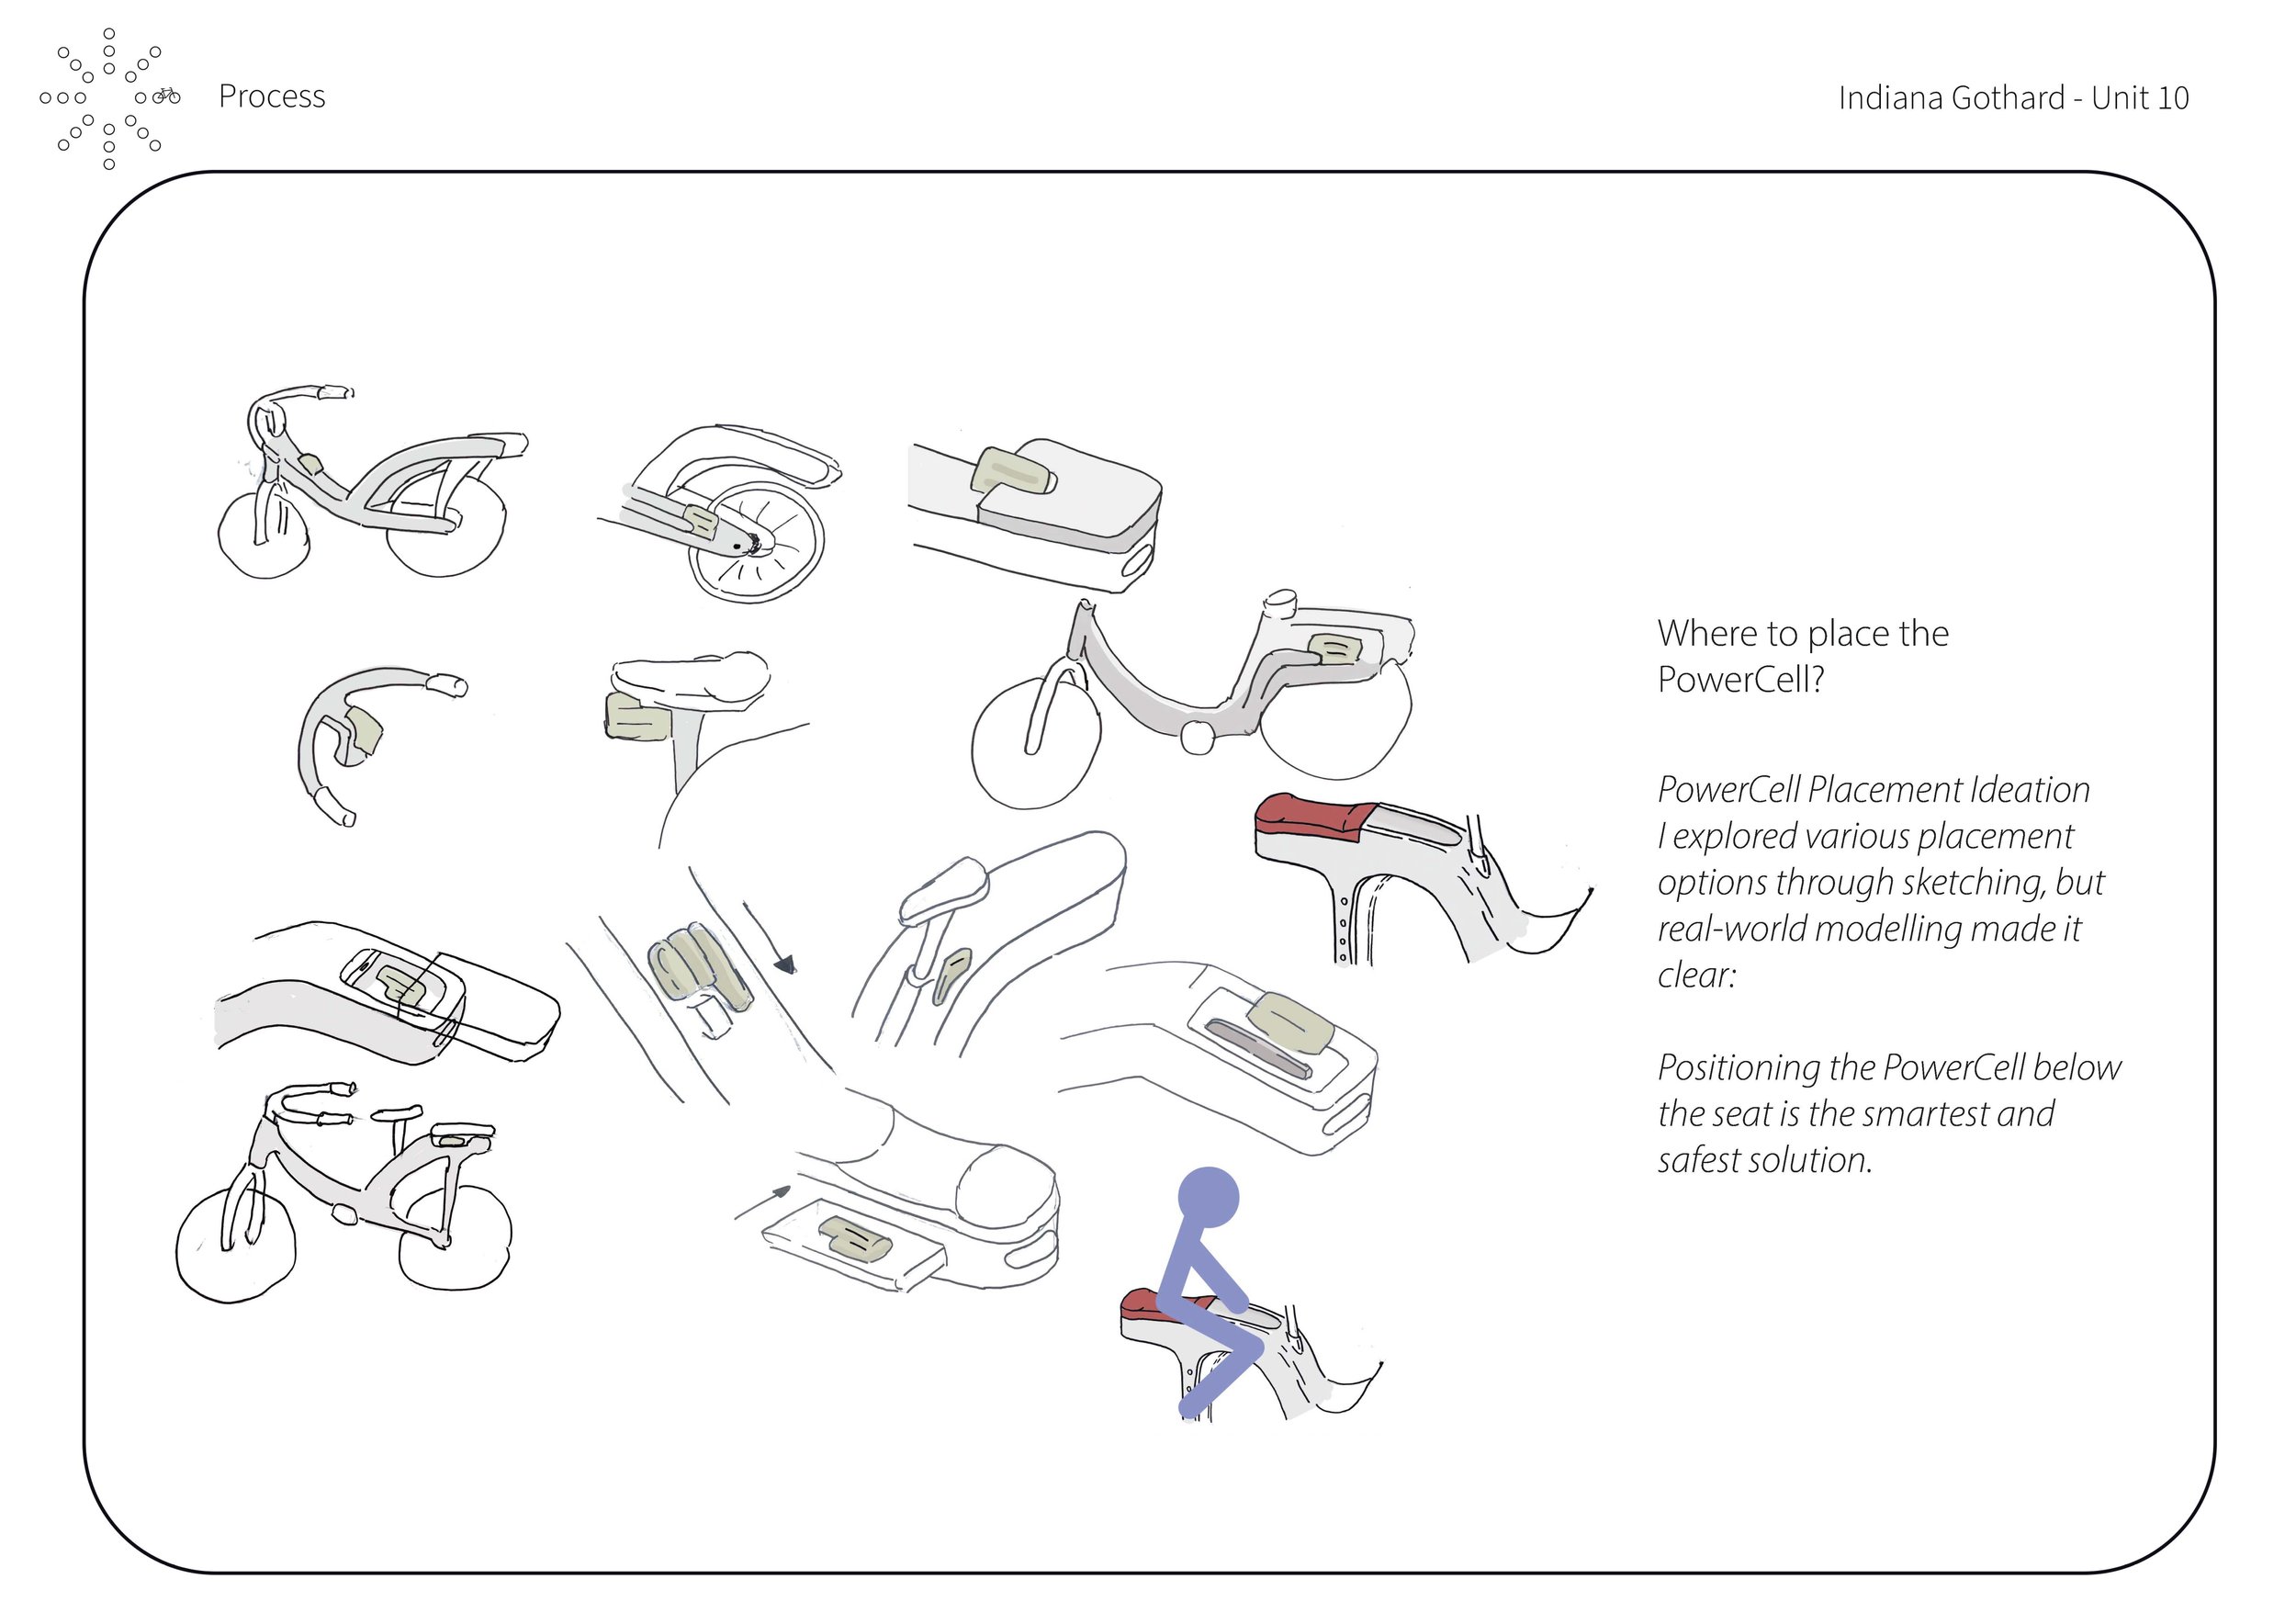
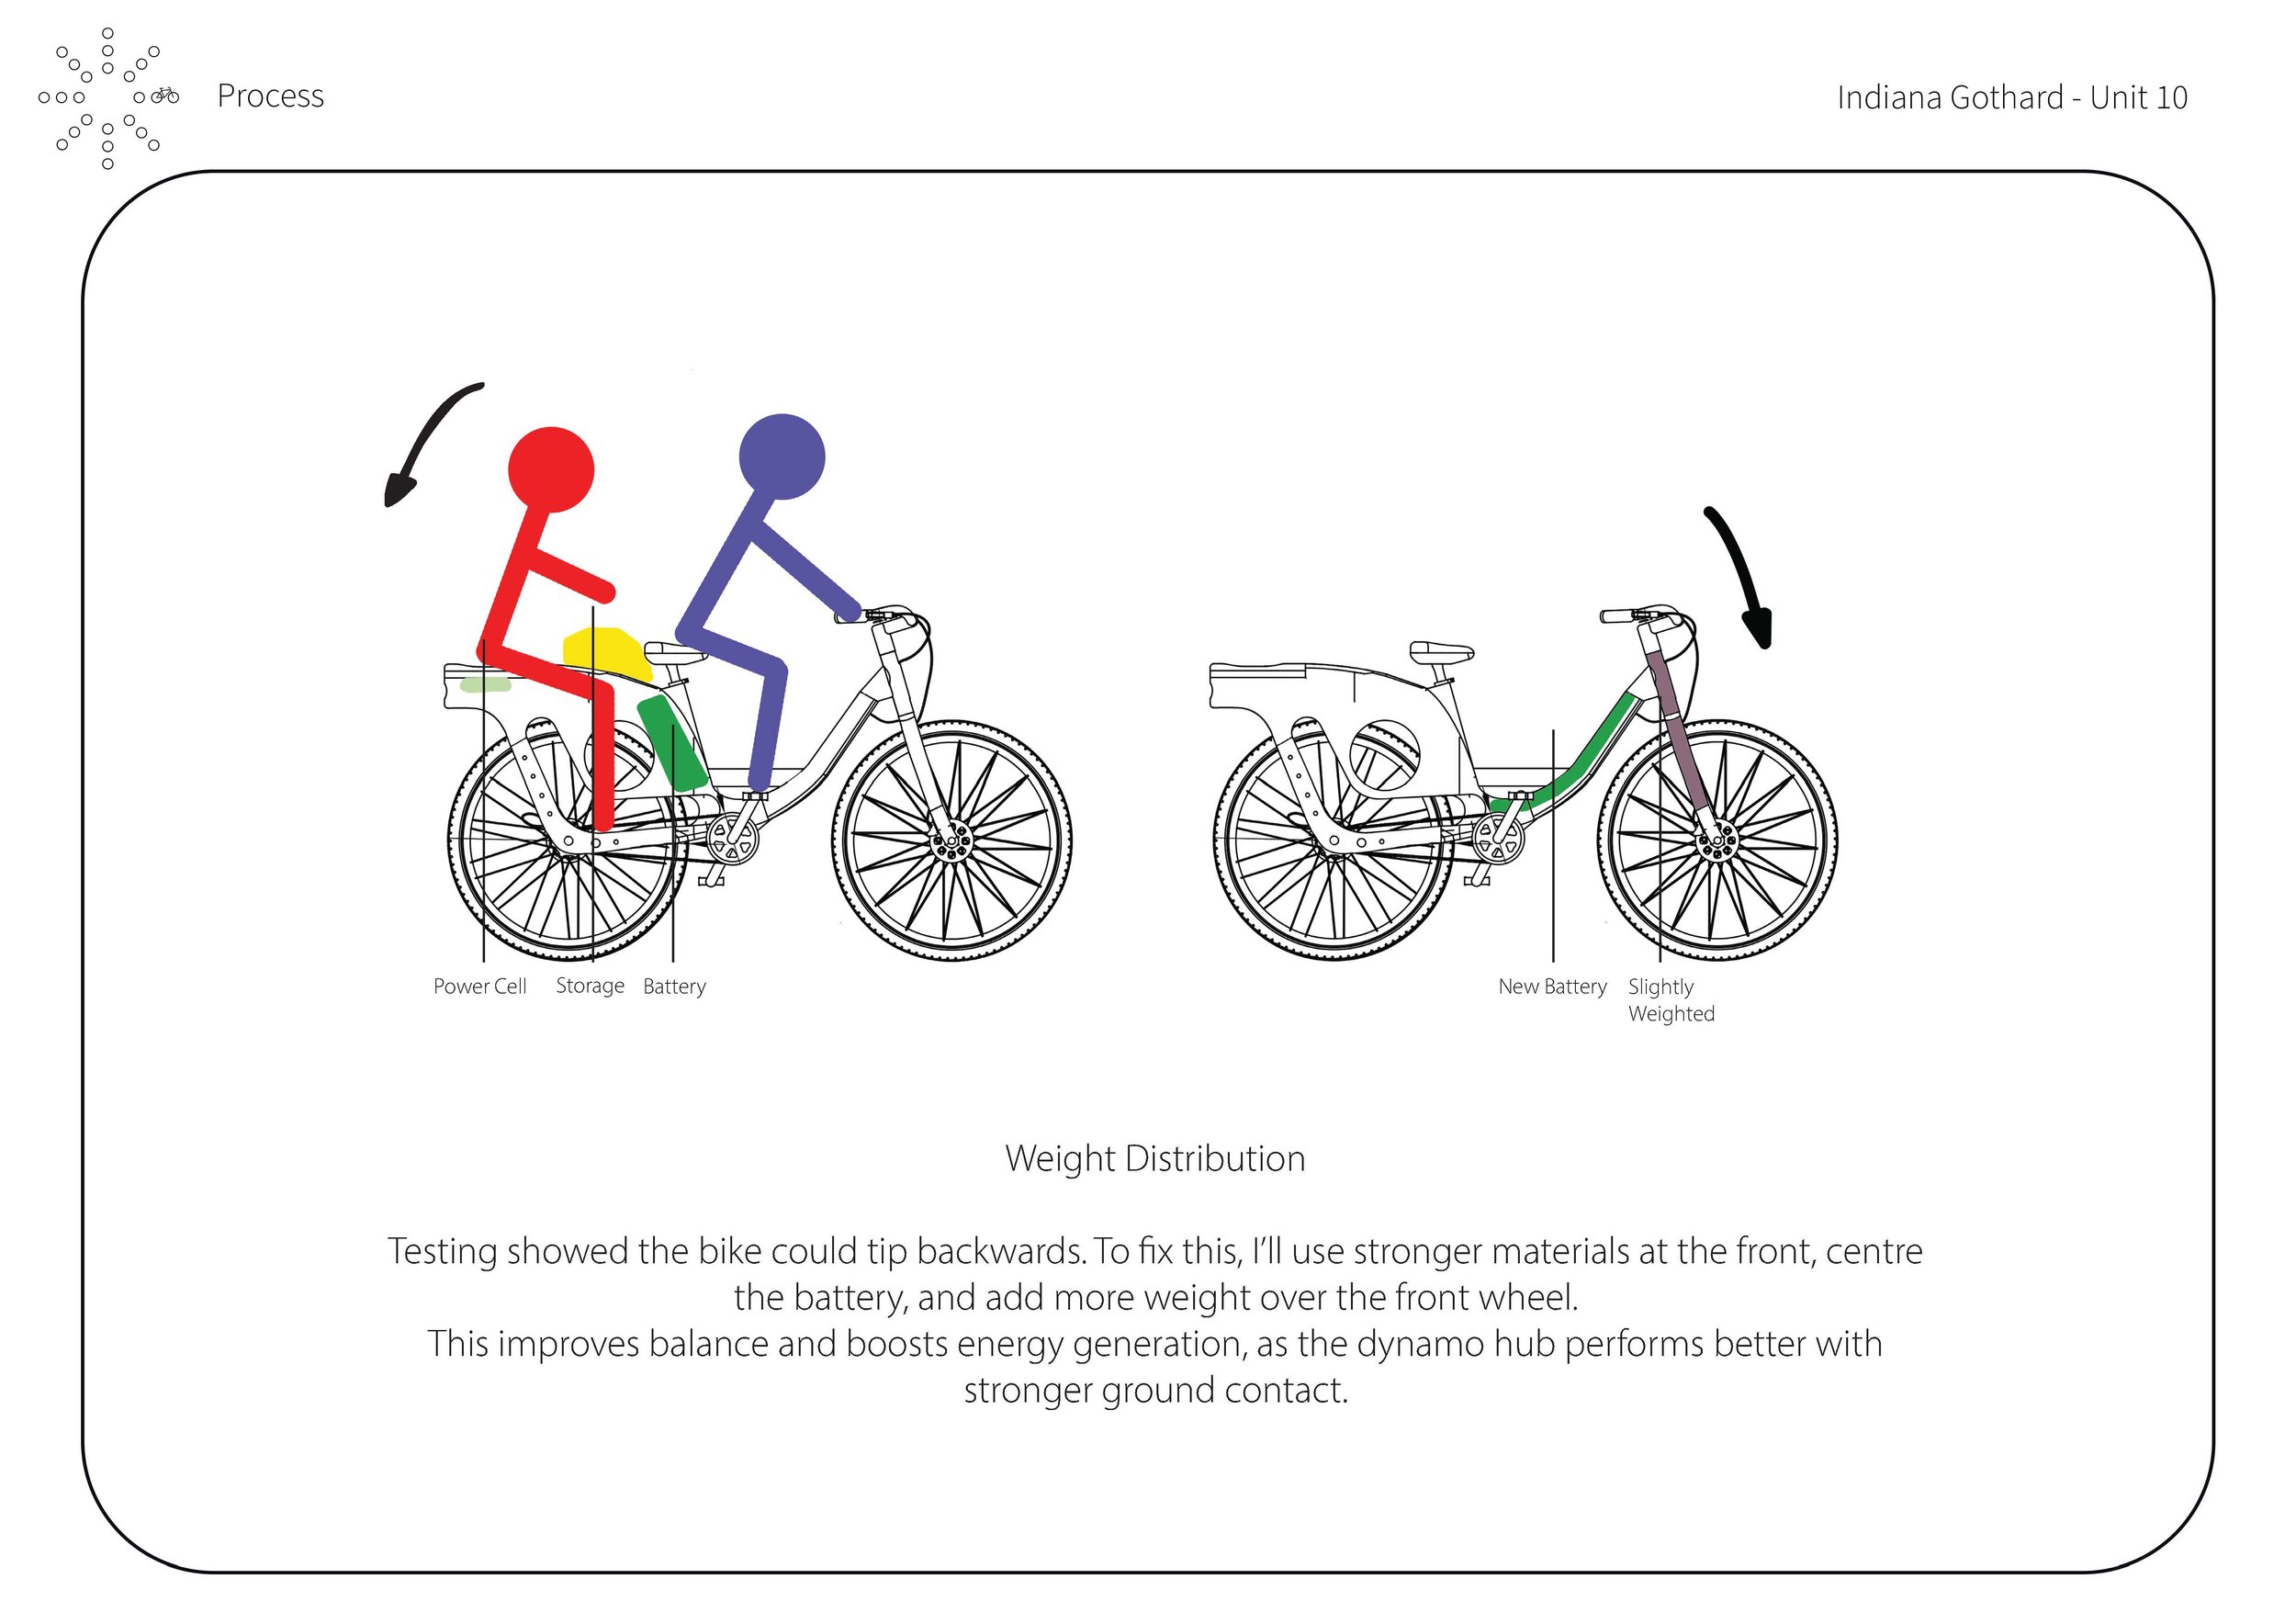
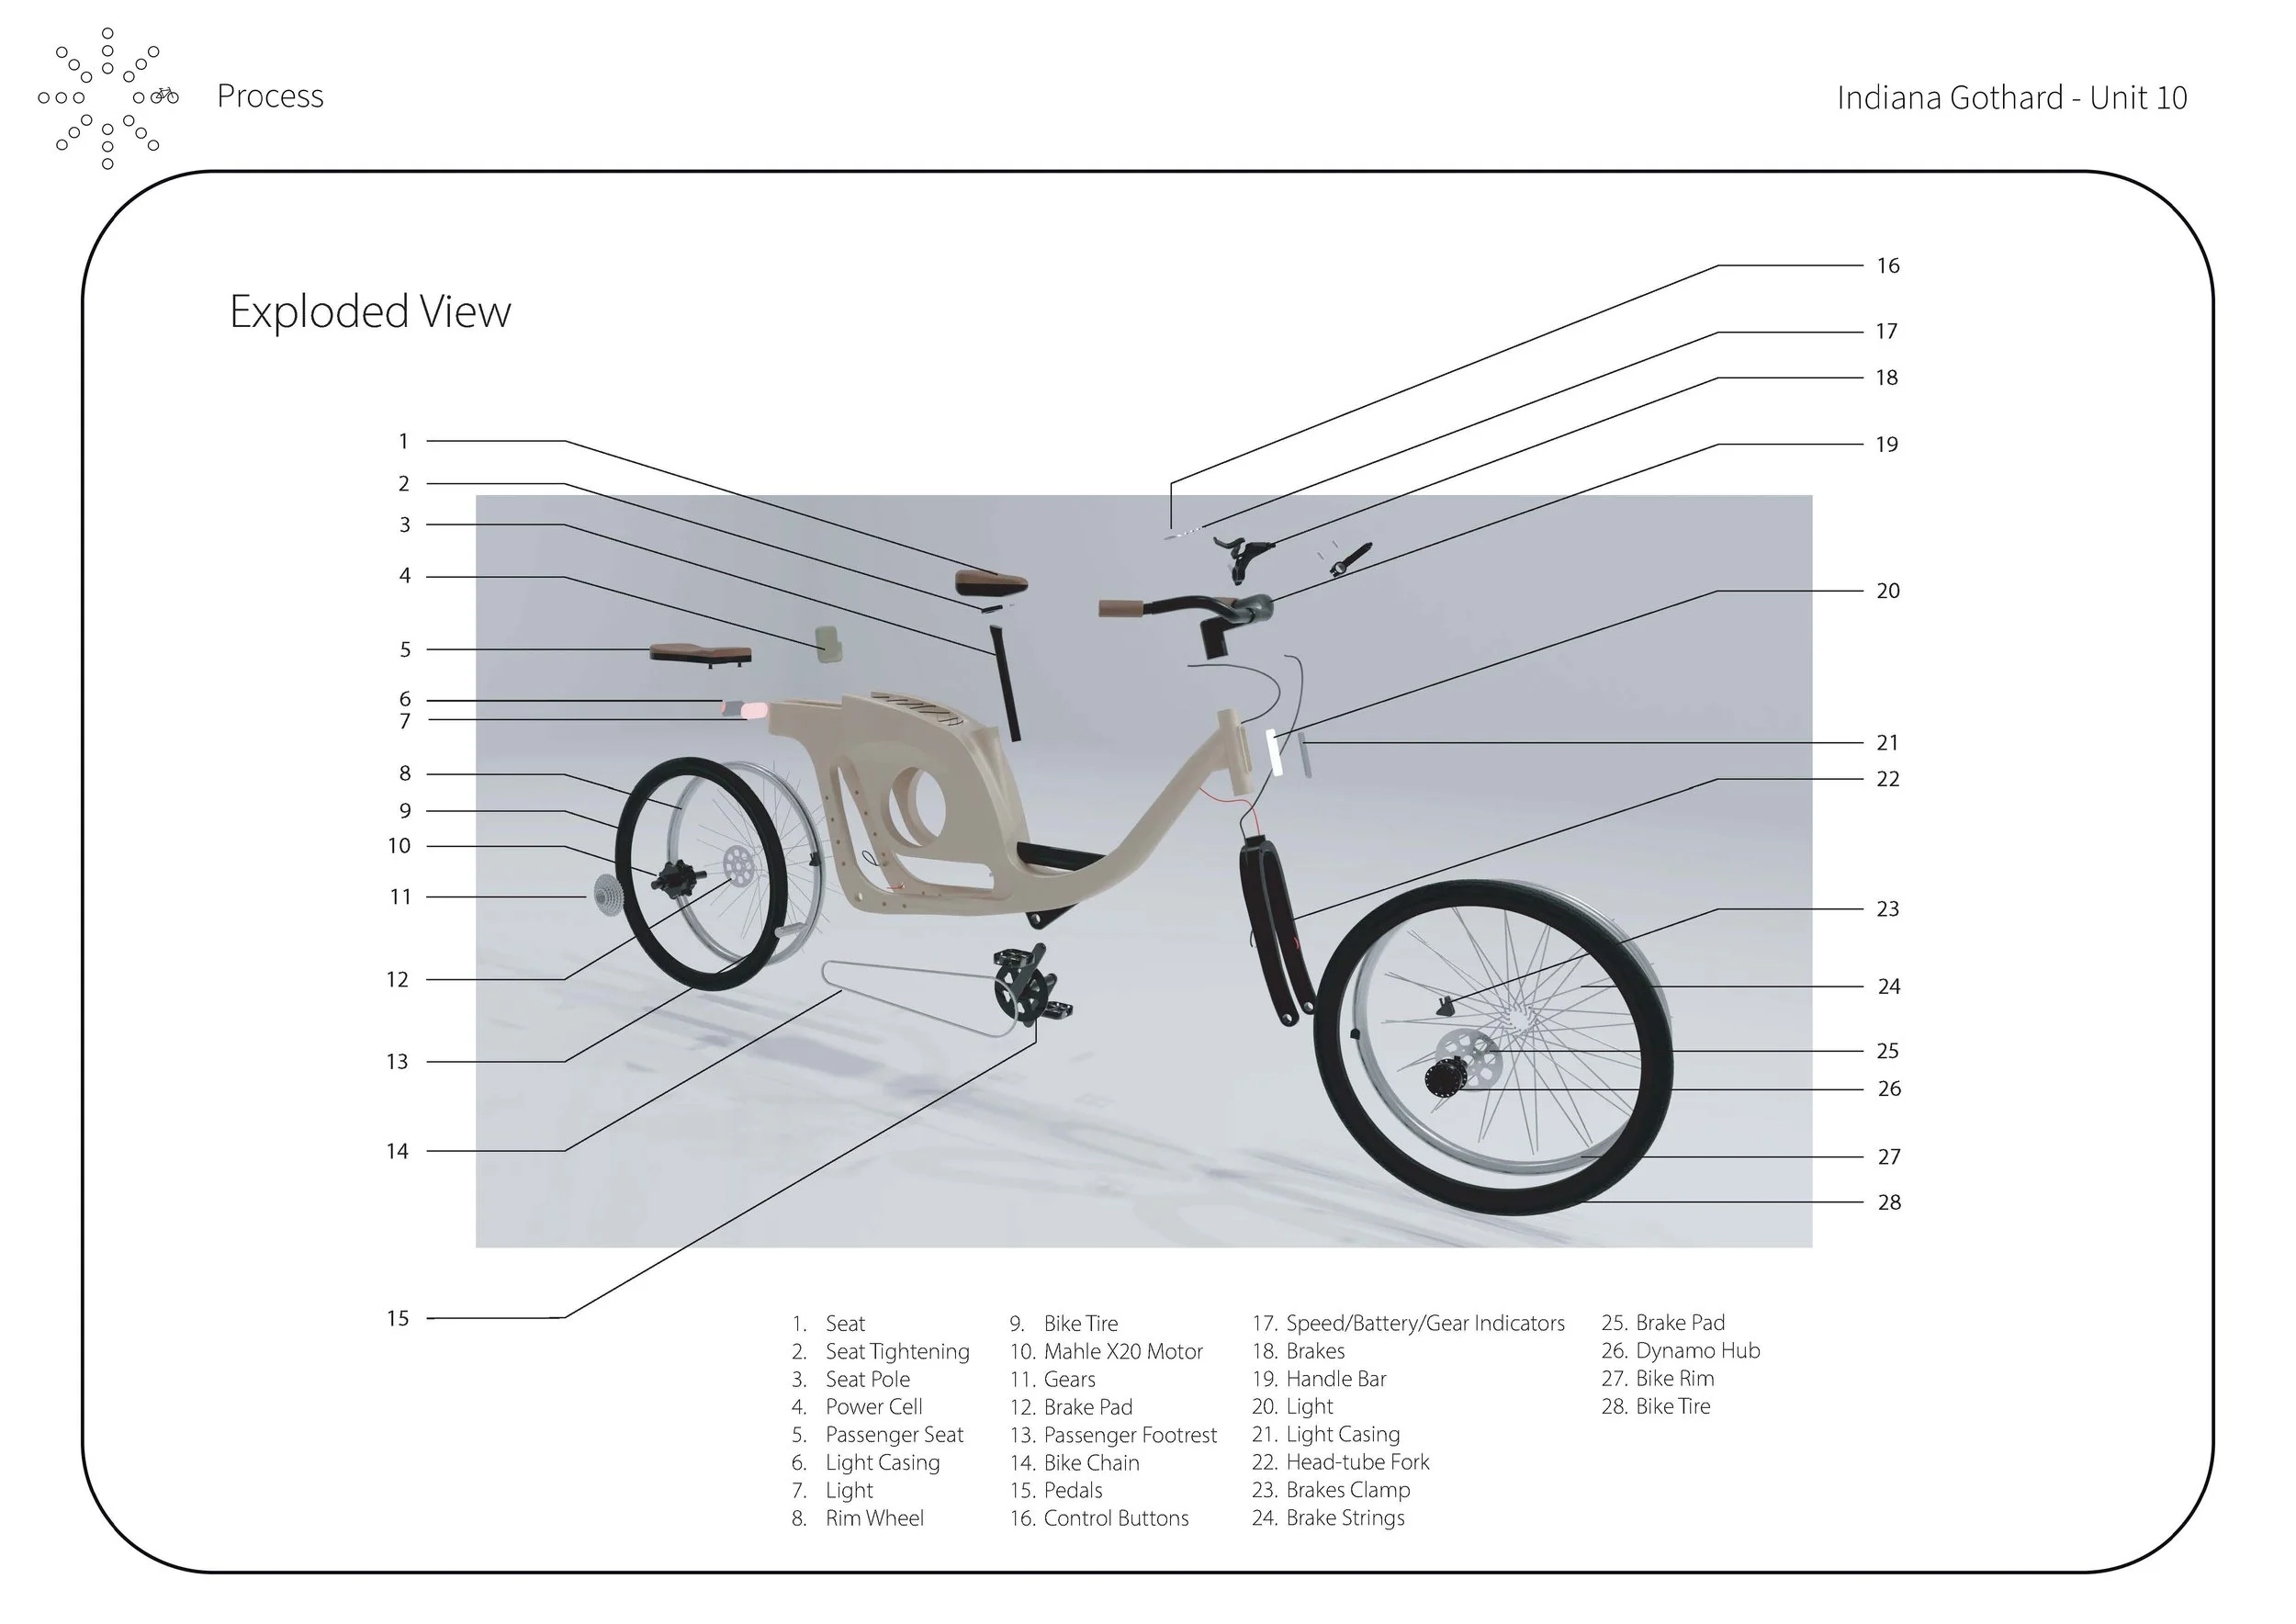
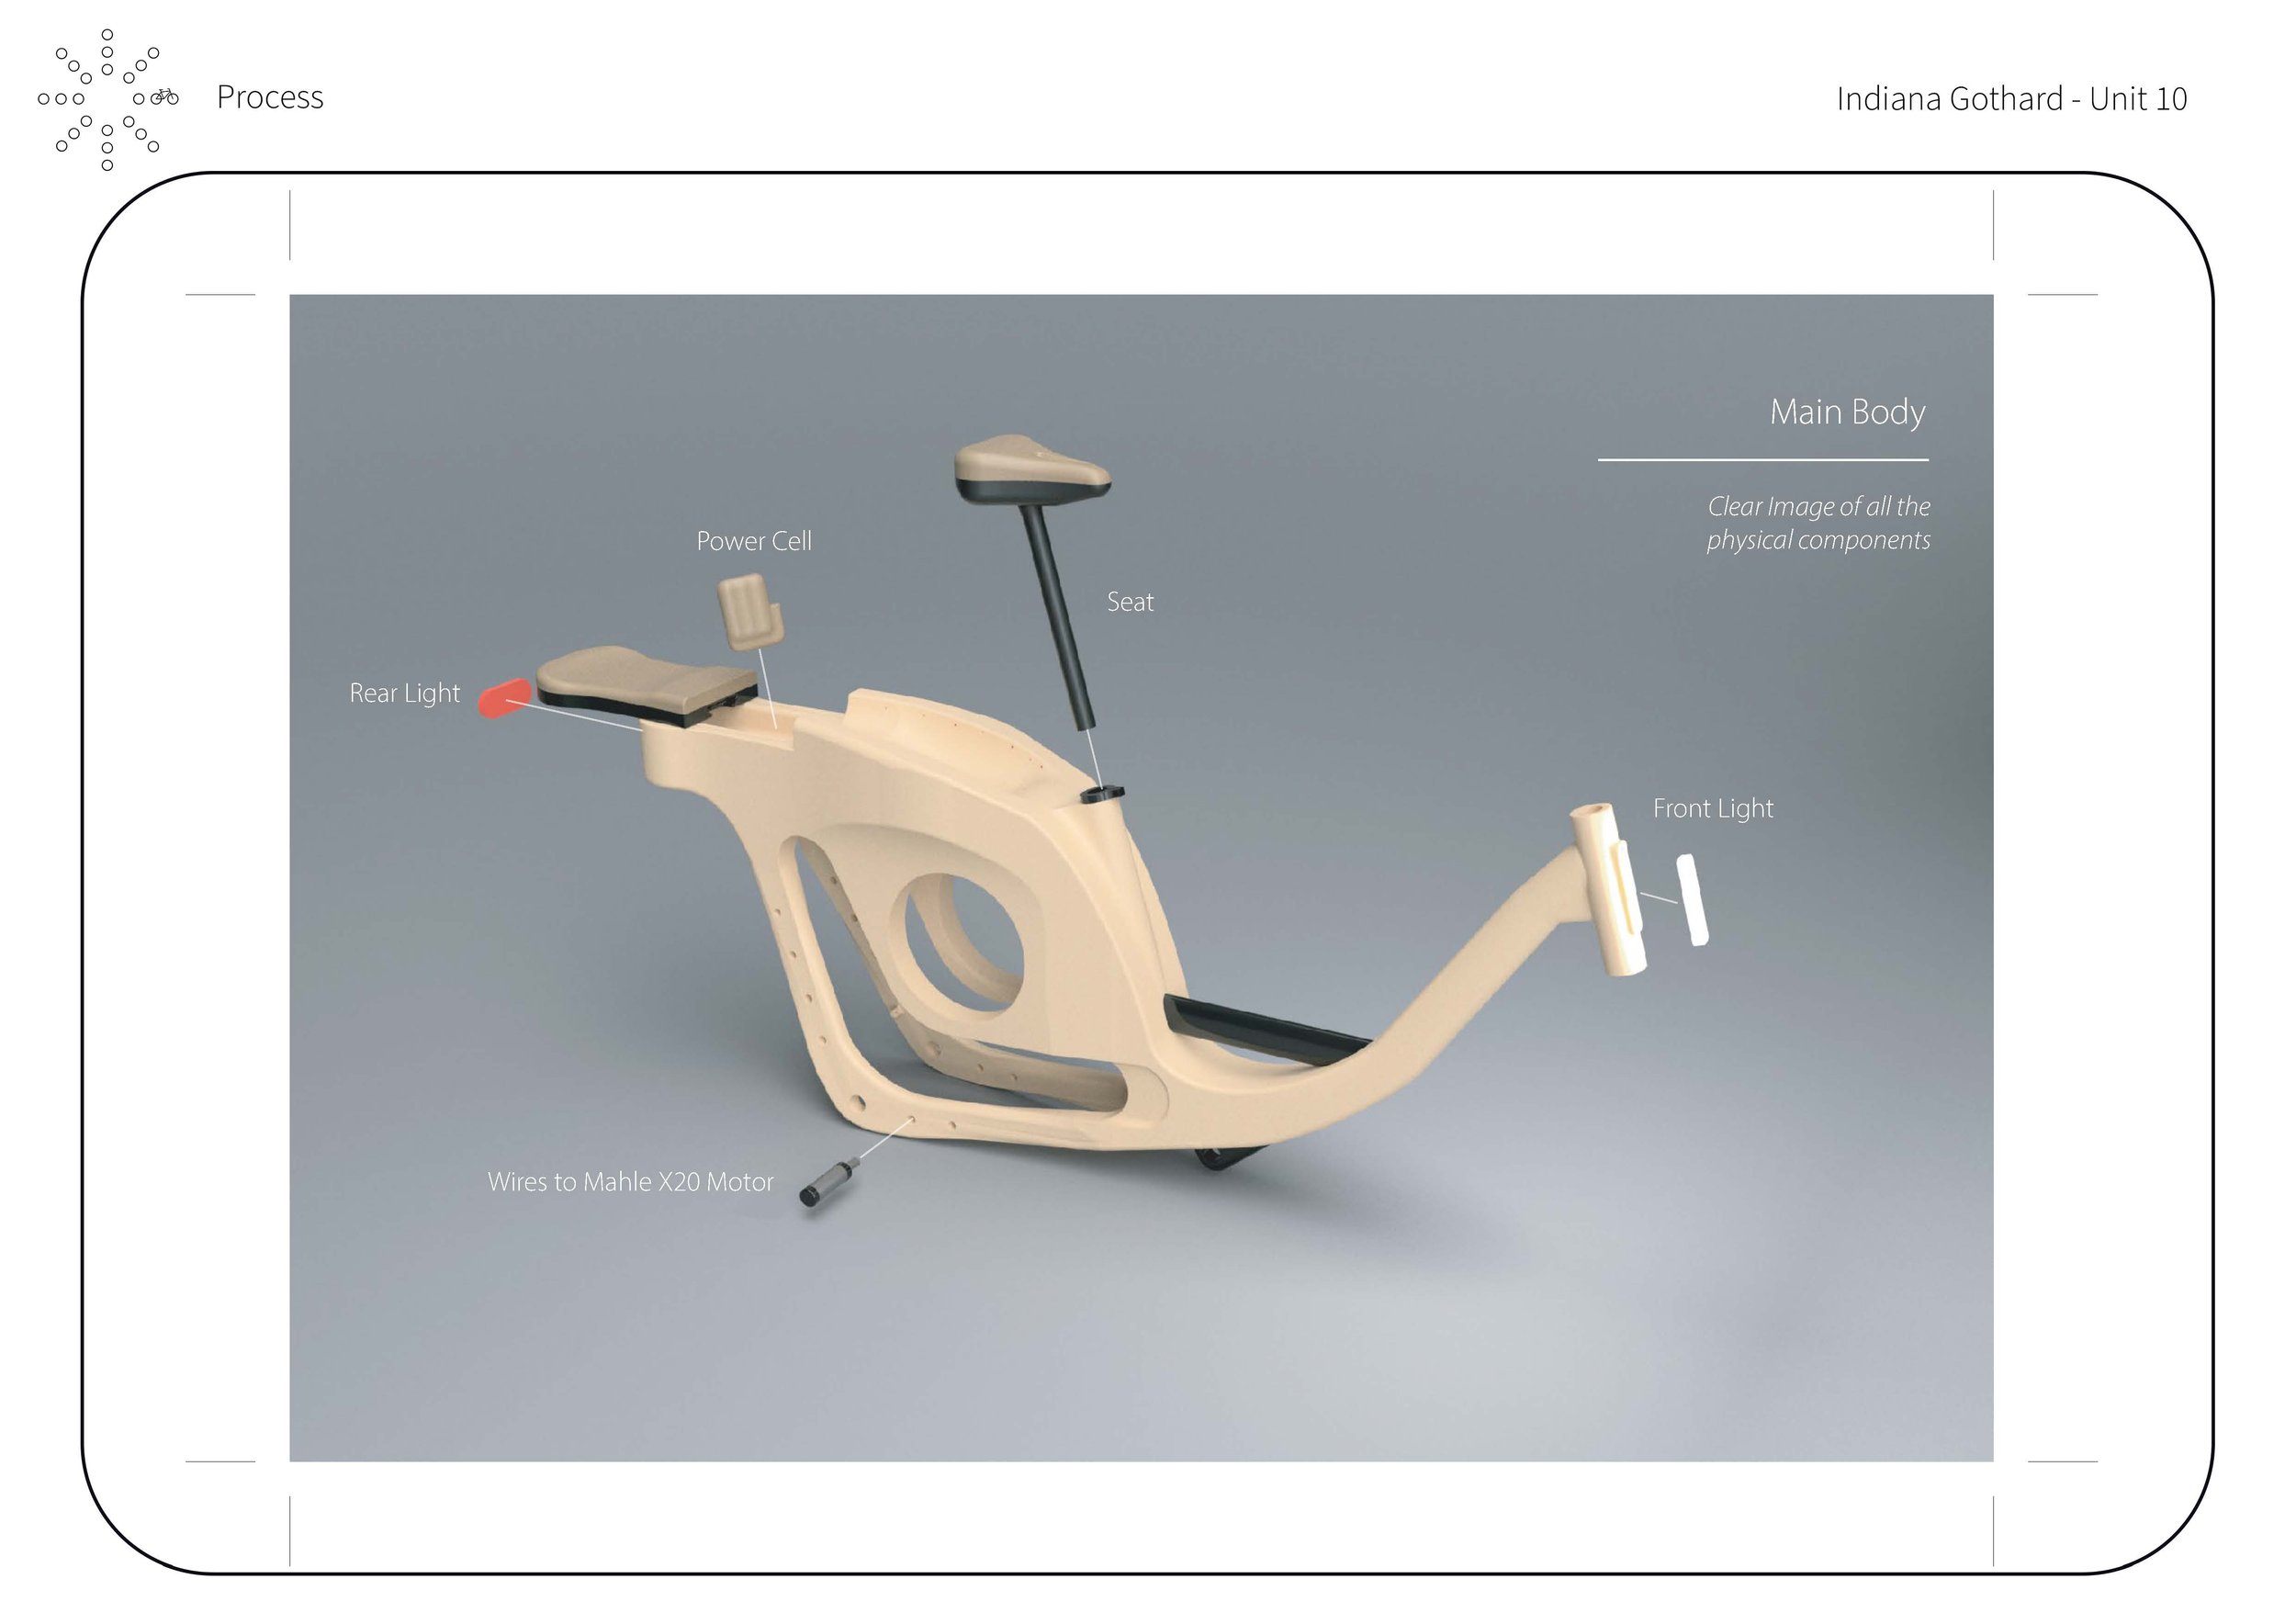
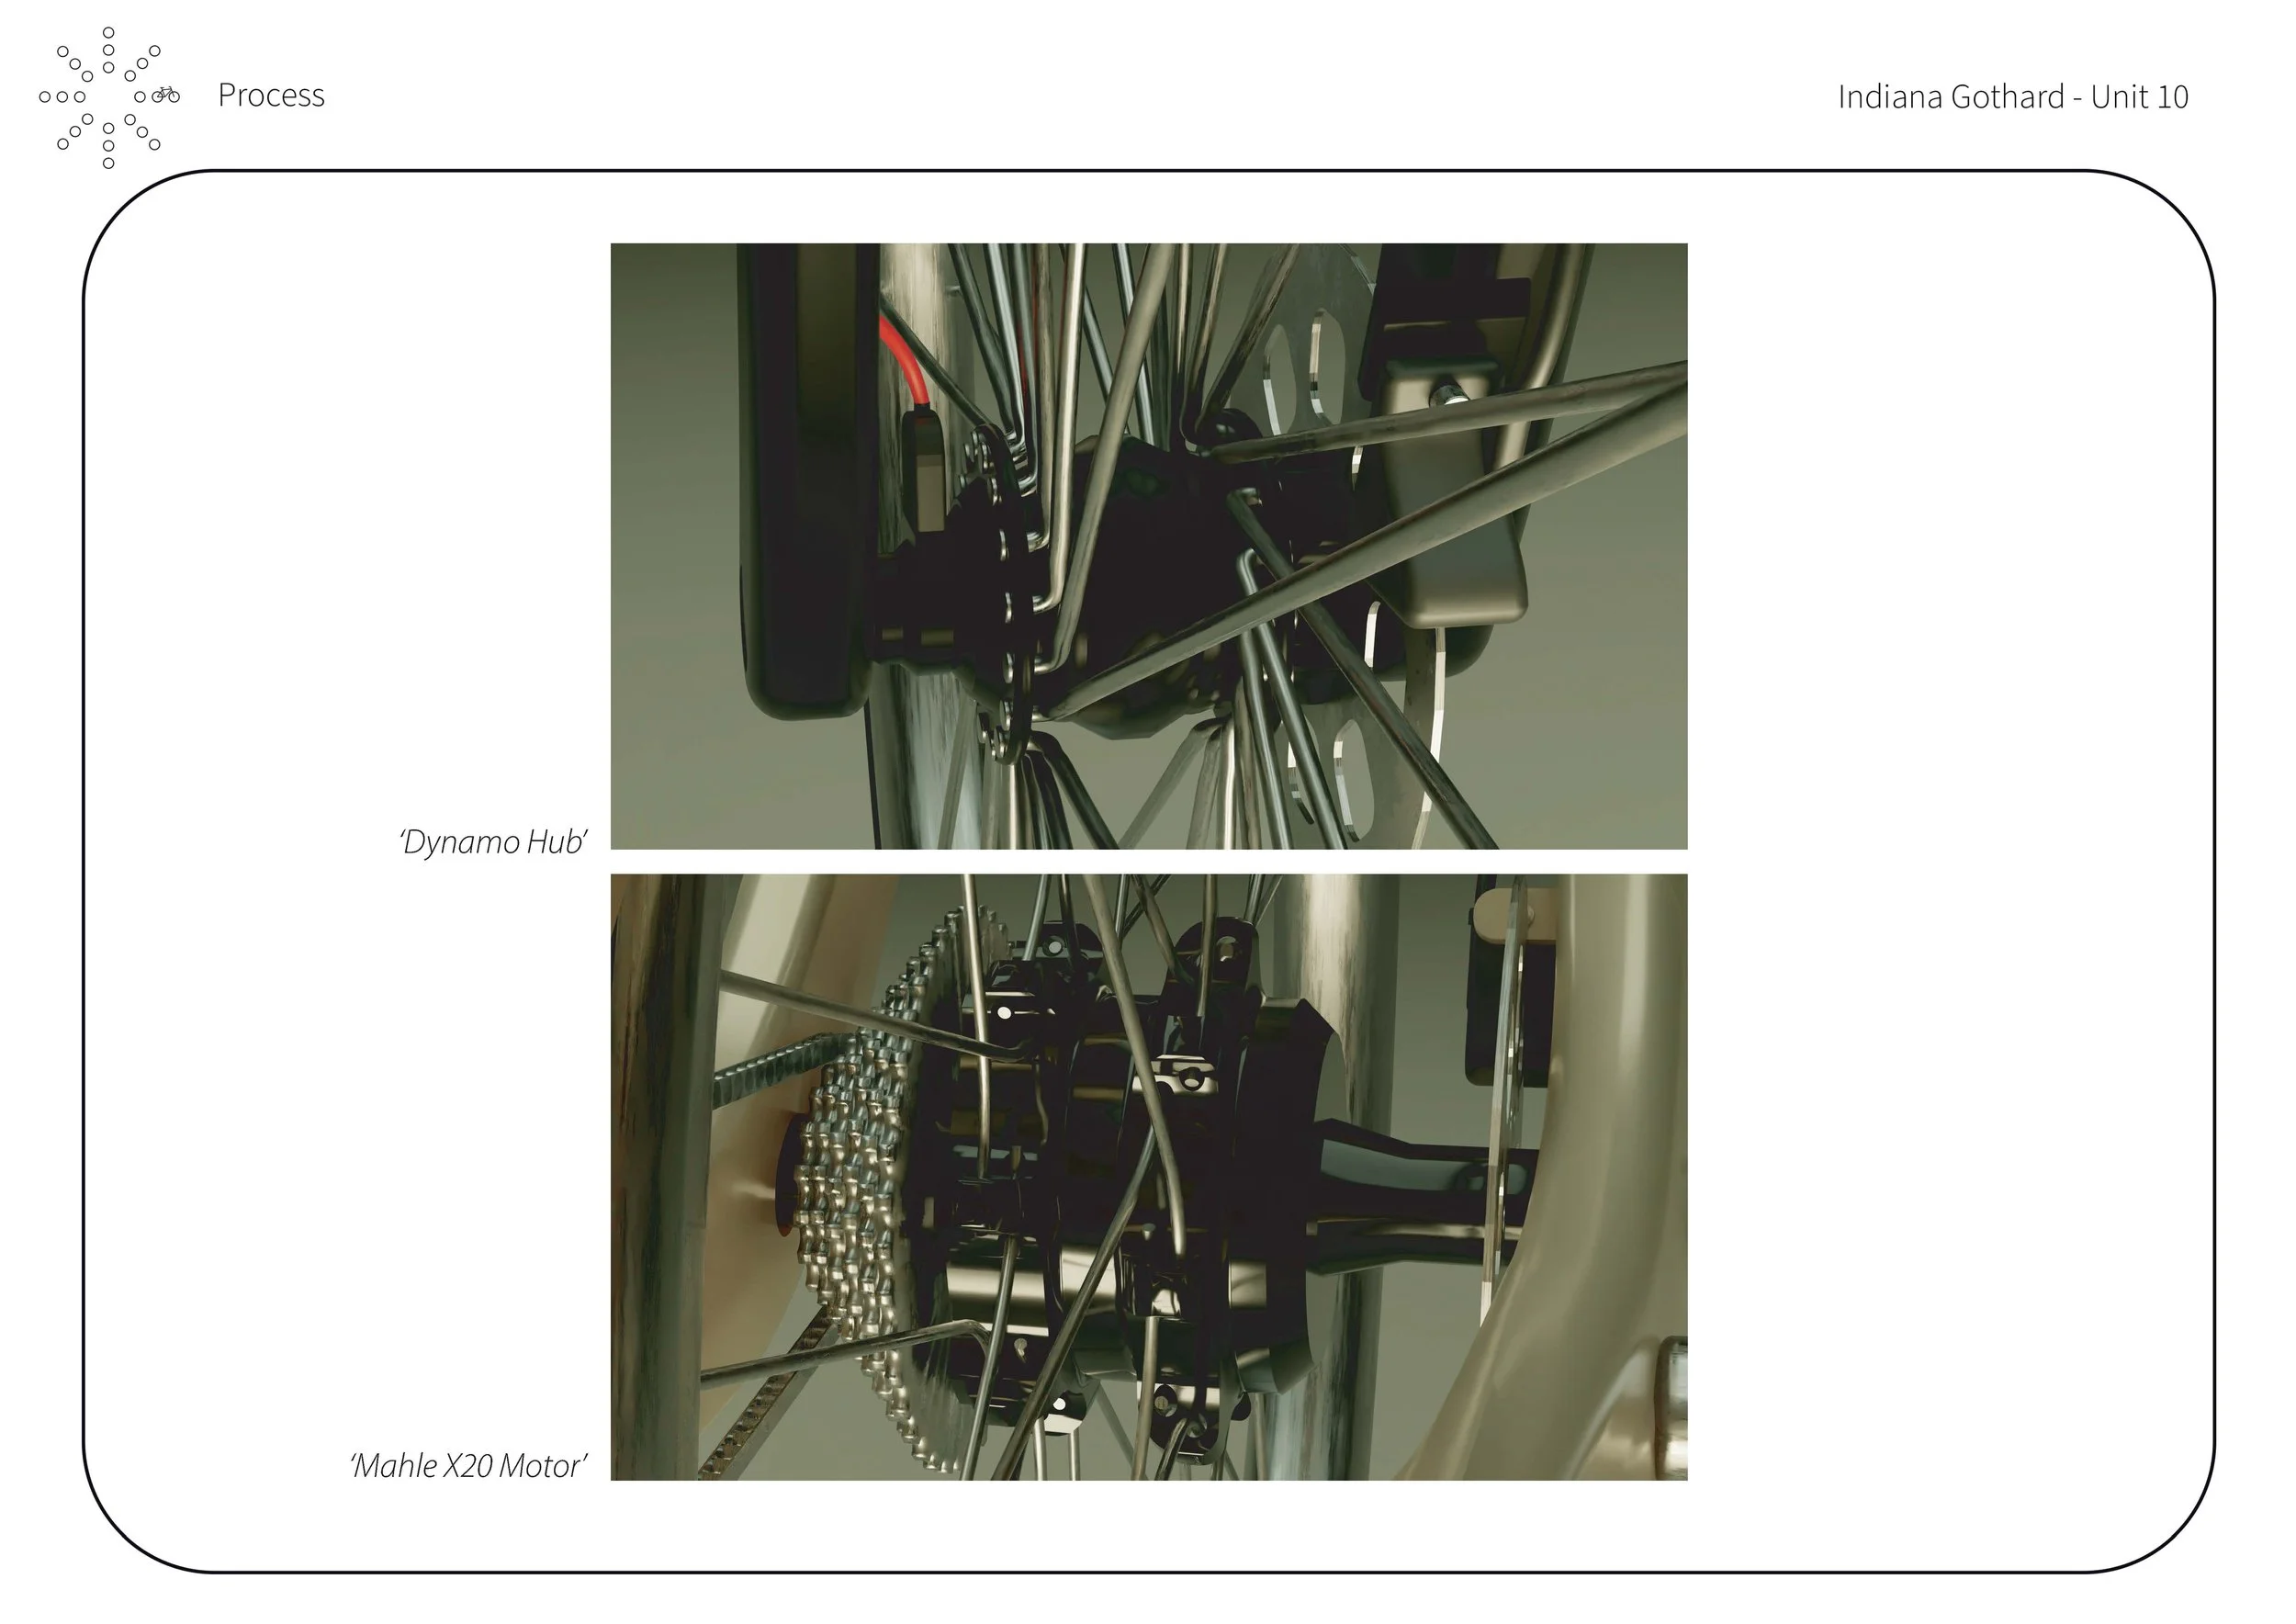
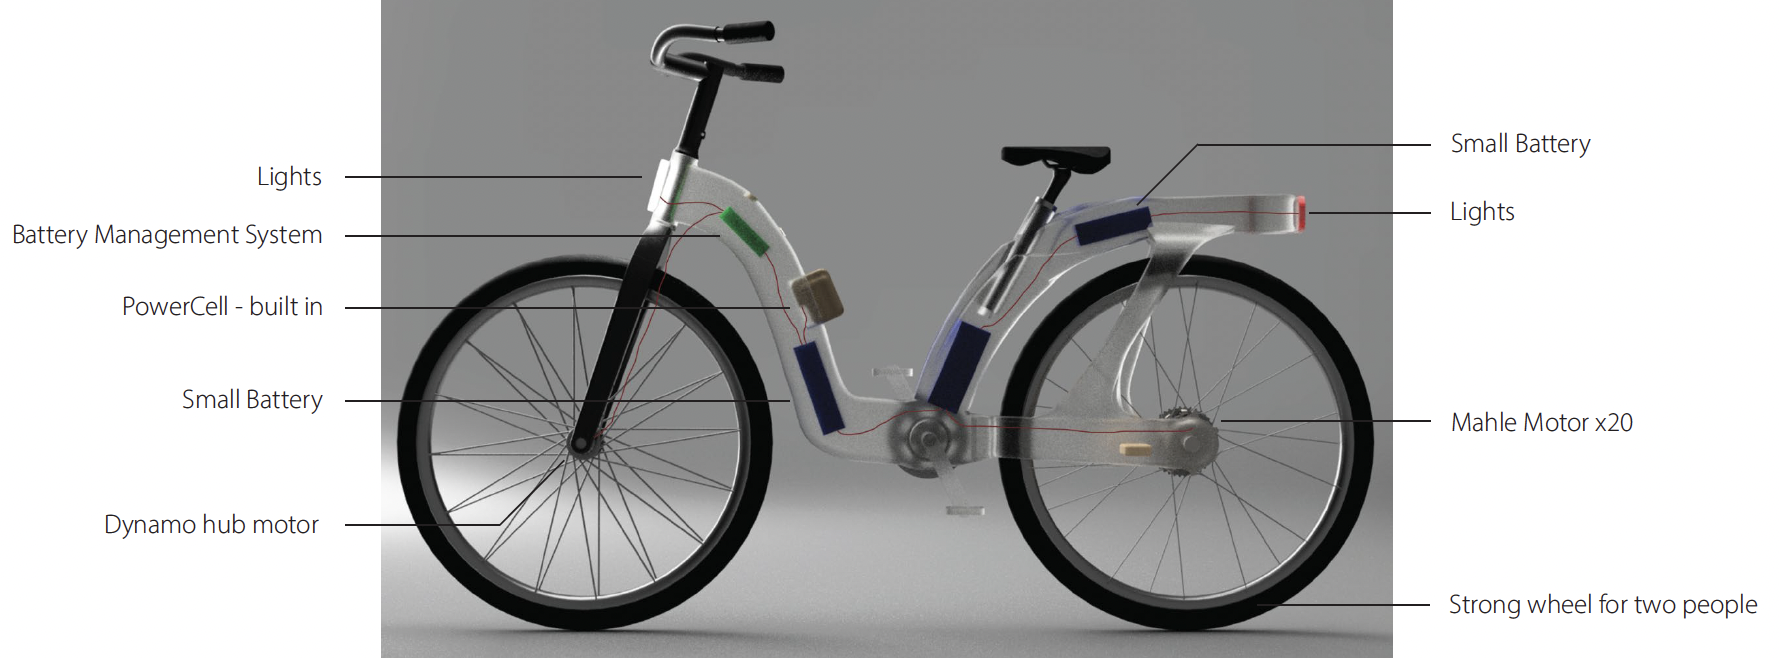
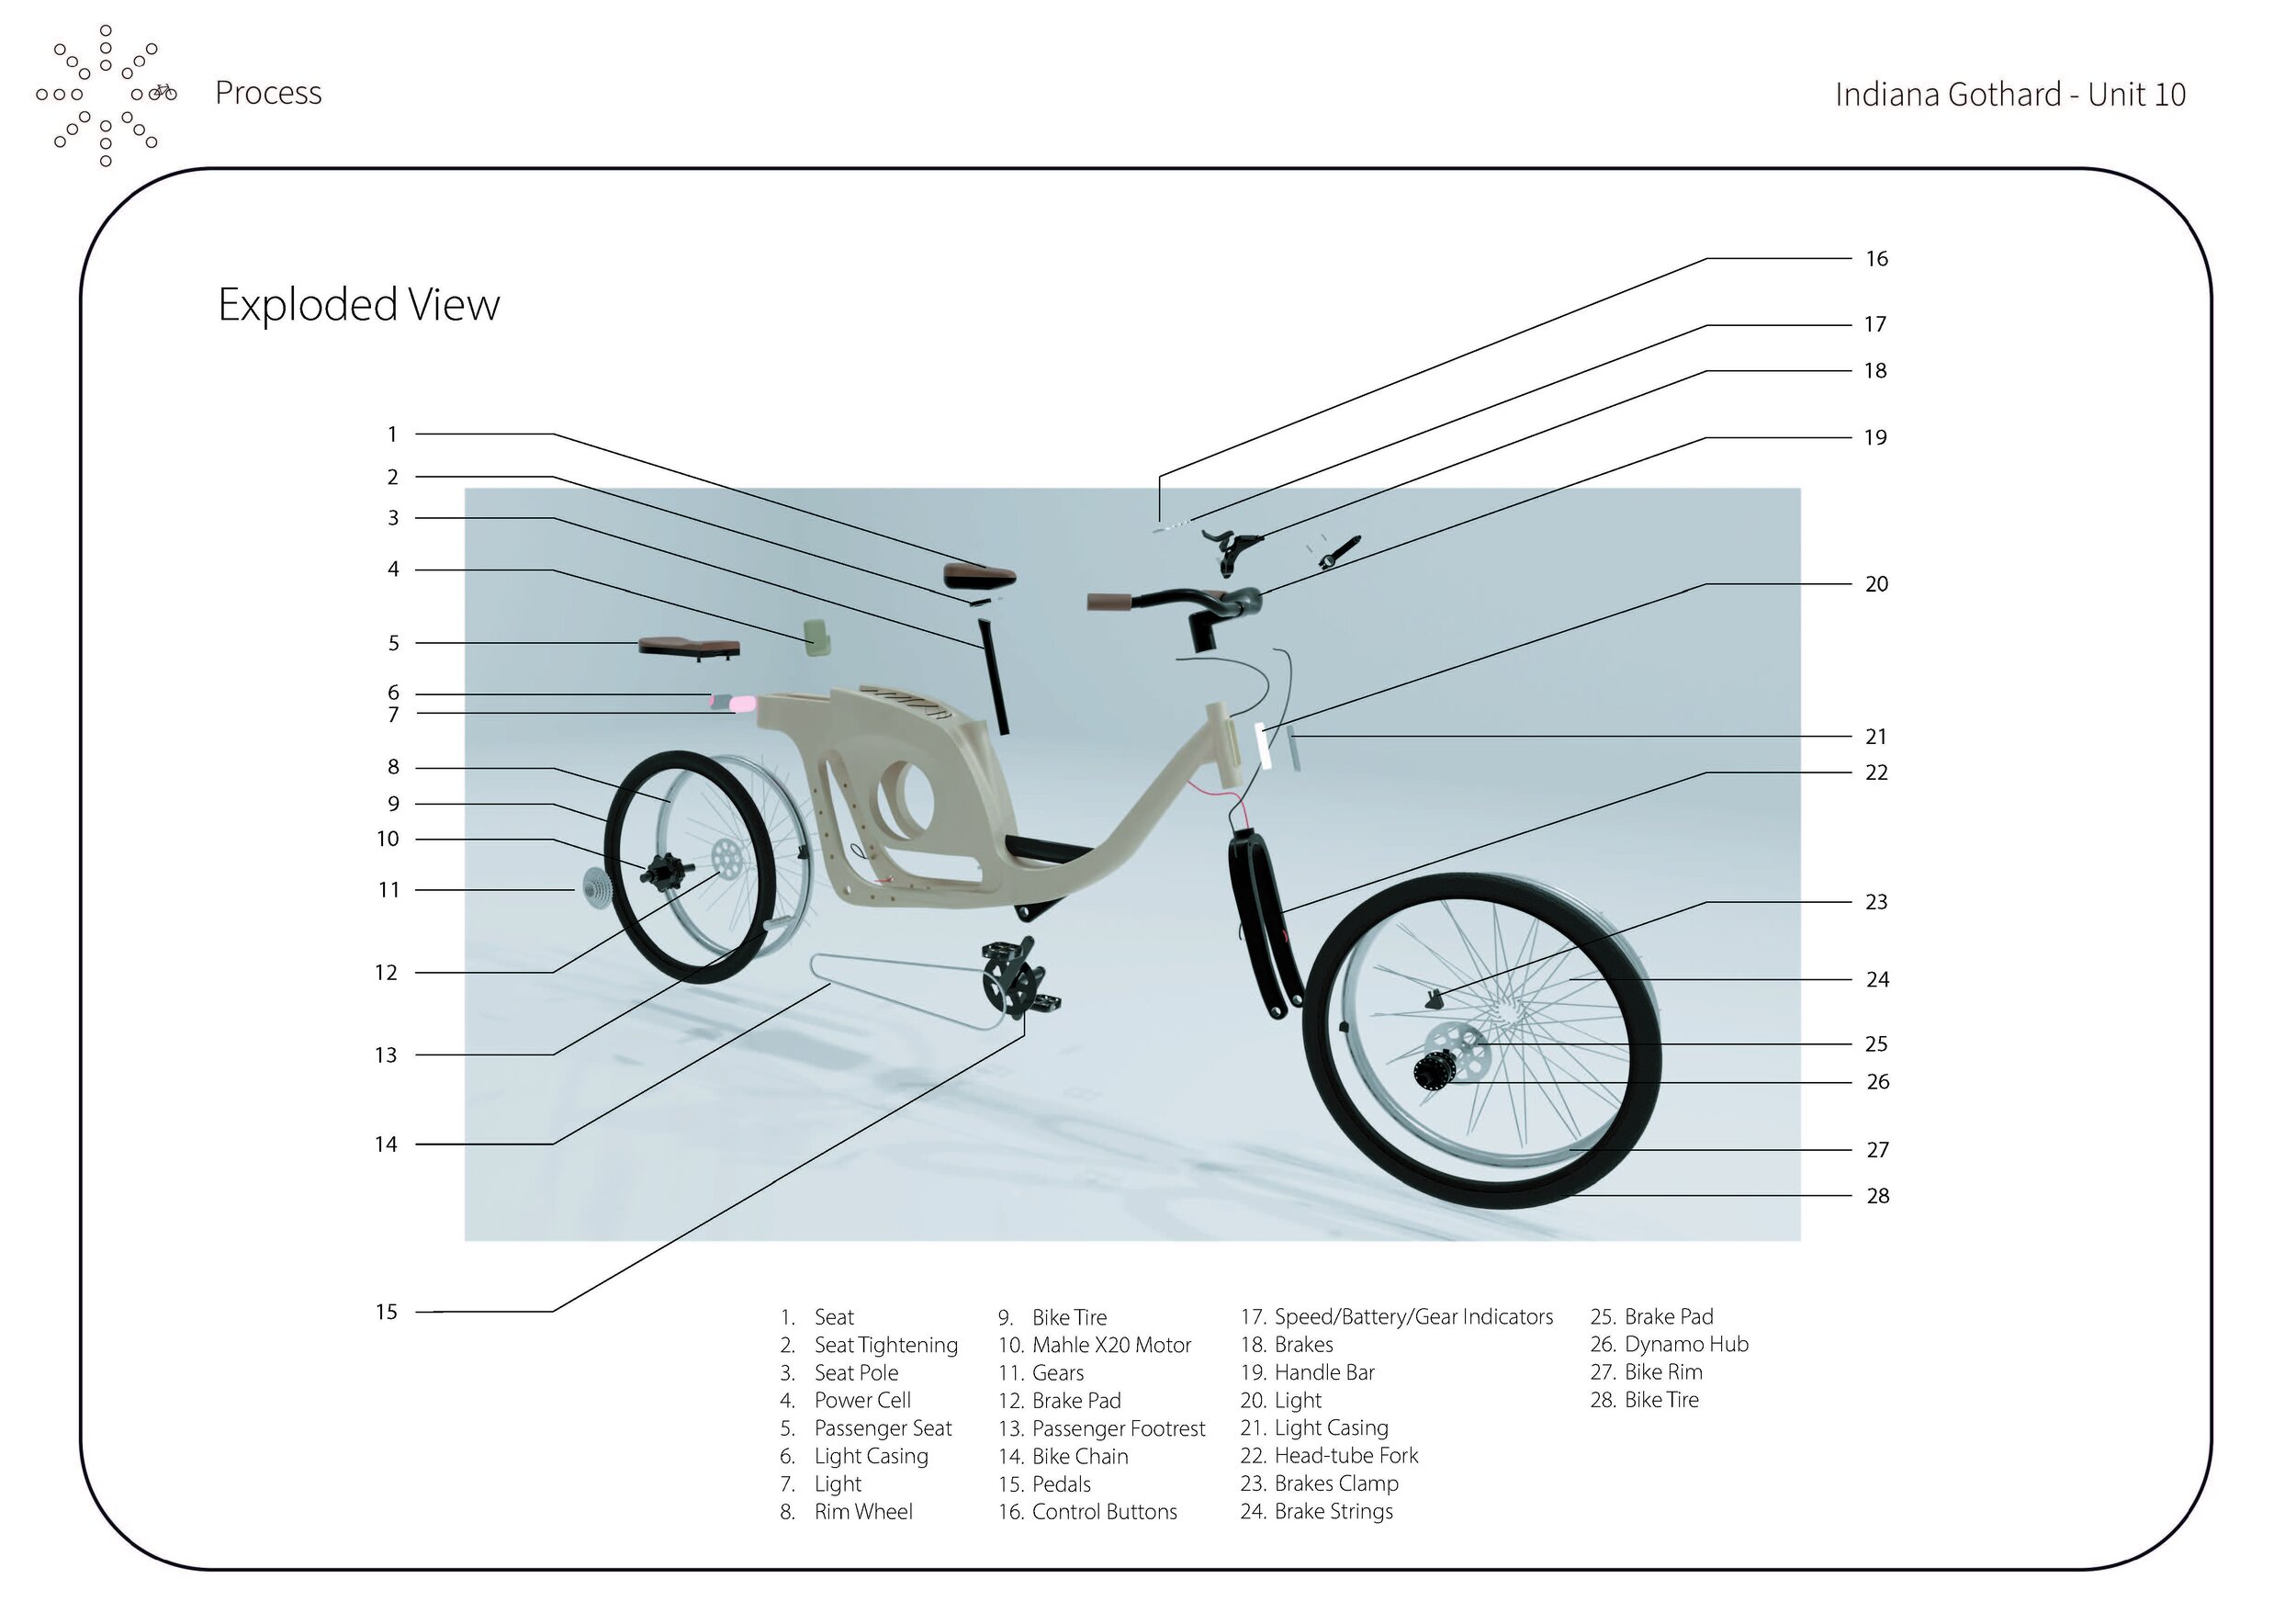
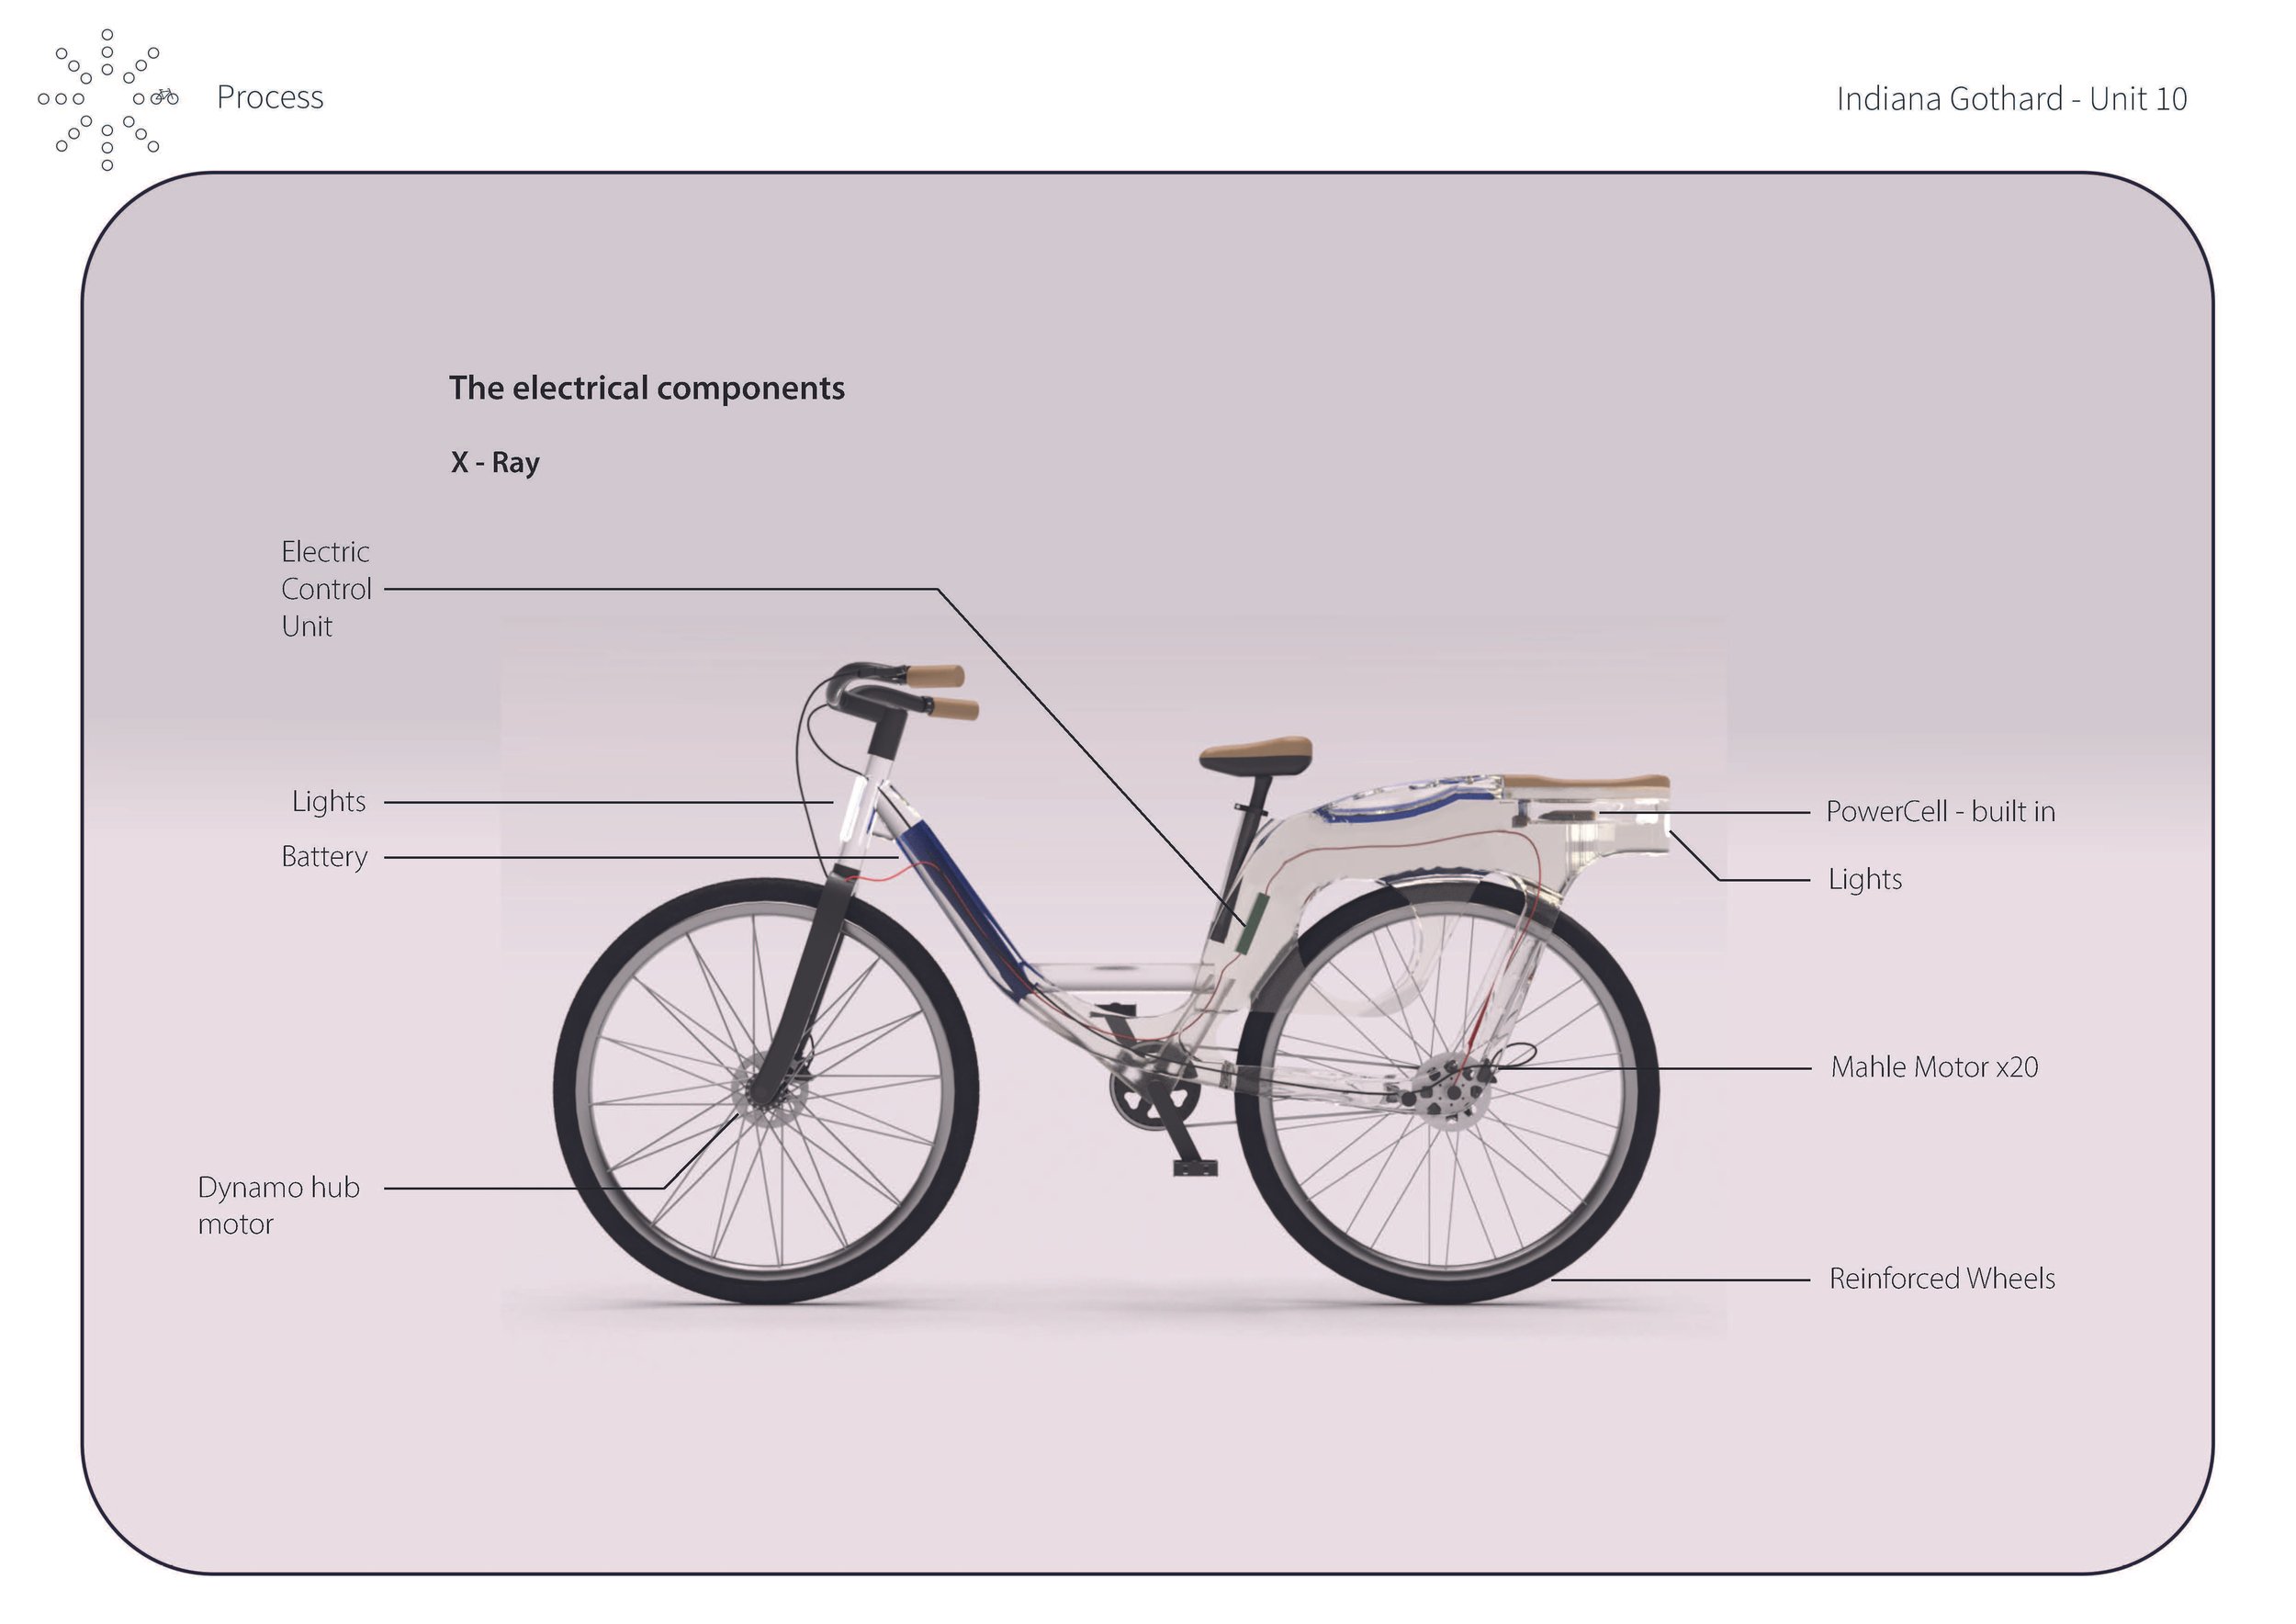
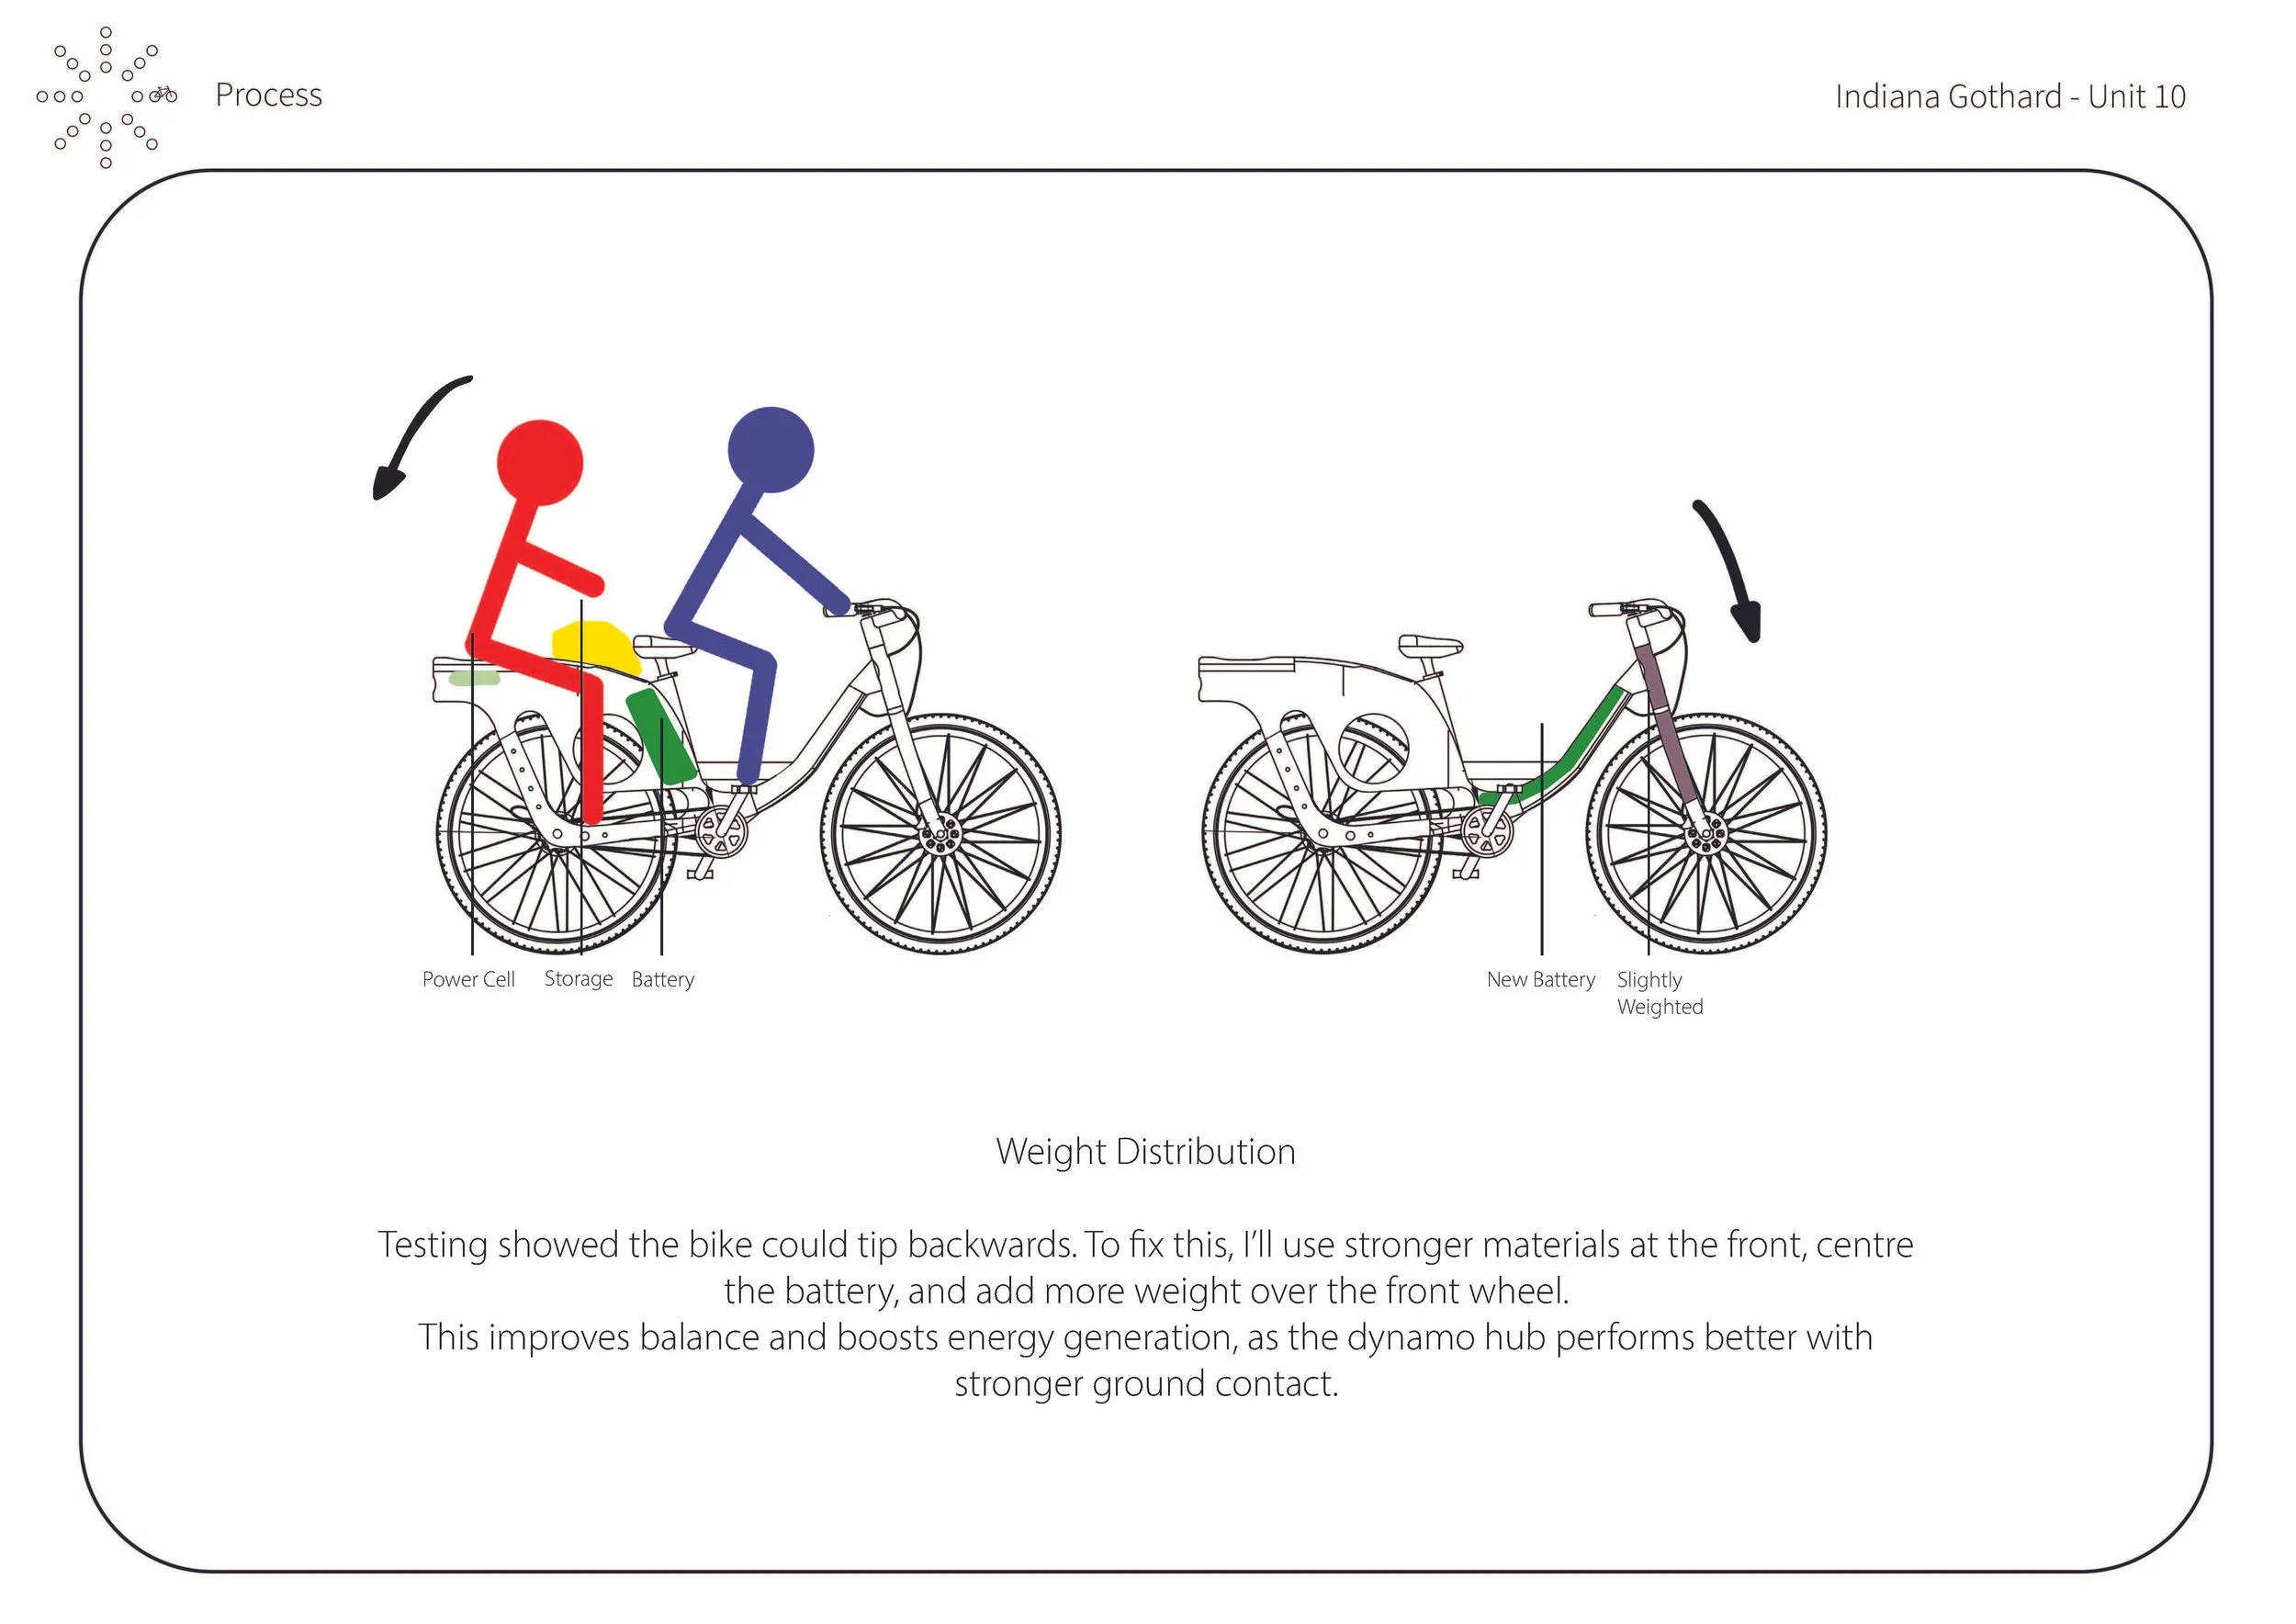
In the full portfolio below, I explore the components and design decisions in greater depth. This initial CAD focused on positioning the PowerCell, dynamo hub, Mahle X20 motor, and wiring channels, while balancing weight distribution across the frame. It also established clear zones for the wet section, rider seat, and passenger integration. By mapping these elements early, I was able to test ergonomic constraints, structural feasibility, and the visual coherence of the overall system—laying the foundation for later iterations.
06 COMPONENT AWARNESS
07 PROTOTYPING
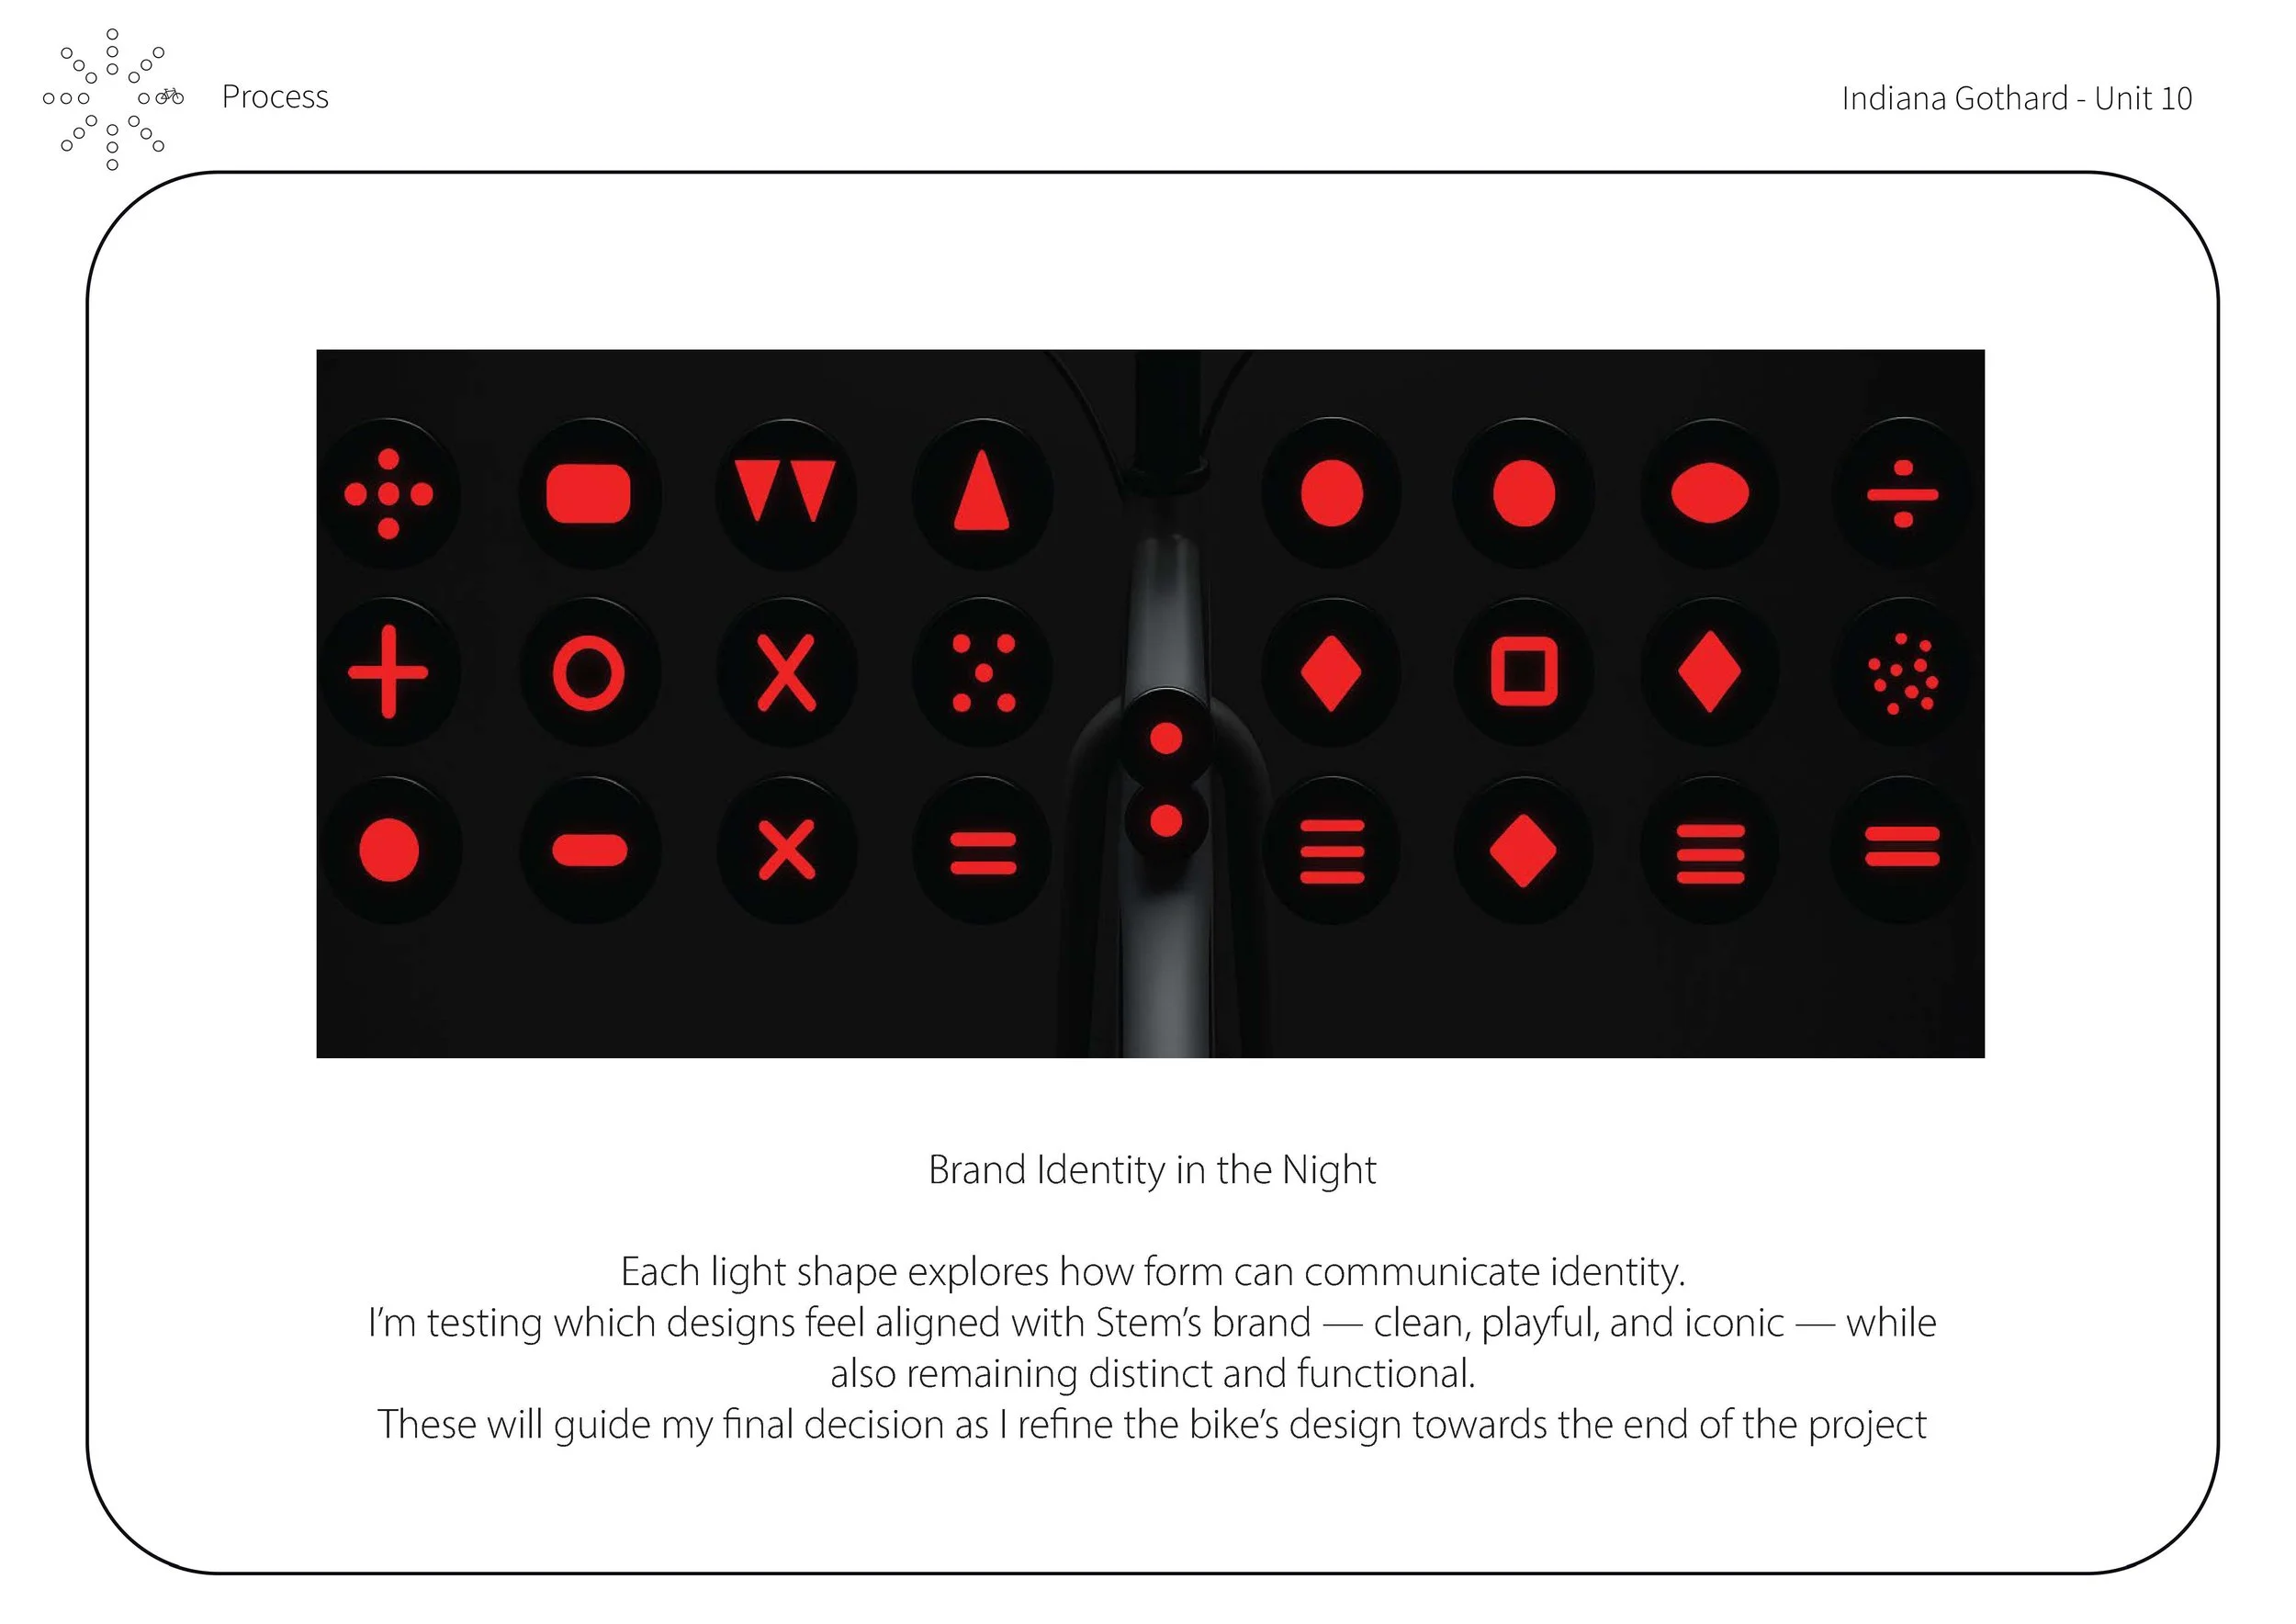
DESIGN IDEATION - BRAND IDENTITY
Brand identity was central to my process, alongside functionality, gears, weight, distribution, aesthetics, and overall vibe. While sketch modelling I concentrated on components, wiring, ergonomics, usability, and safety. A key part was holding to the restrictions I set from ergonomic studies, embedding both brand identity and function directly into the design.
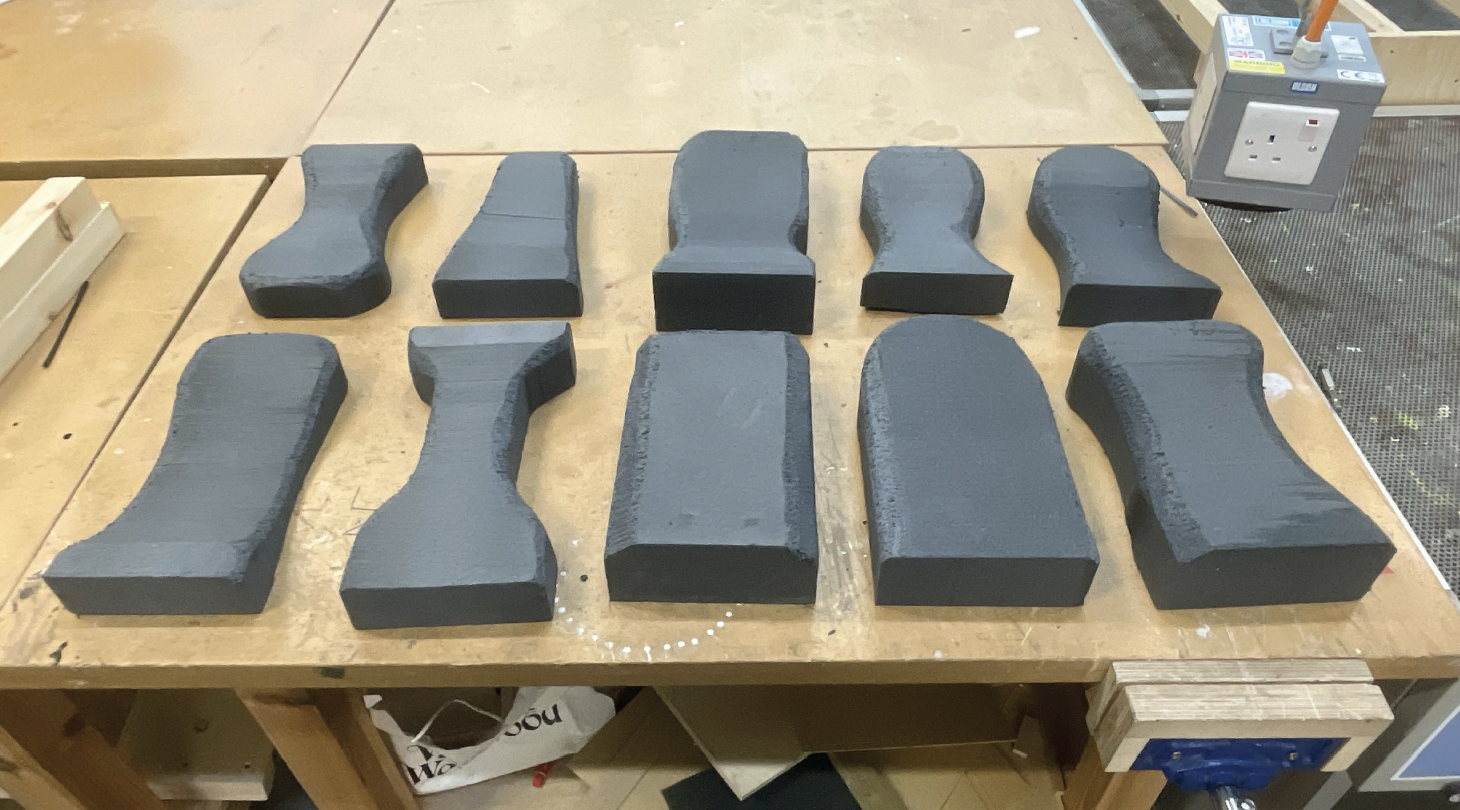
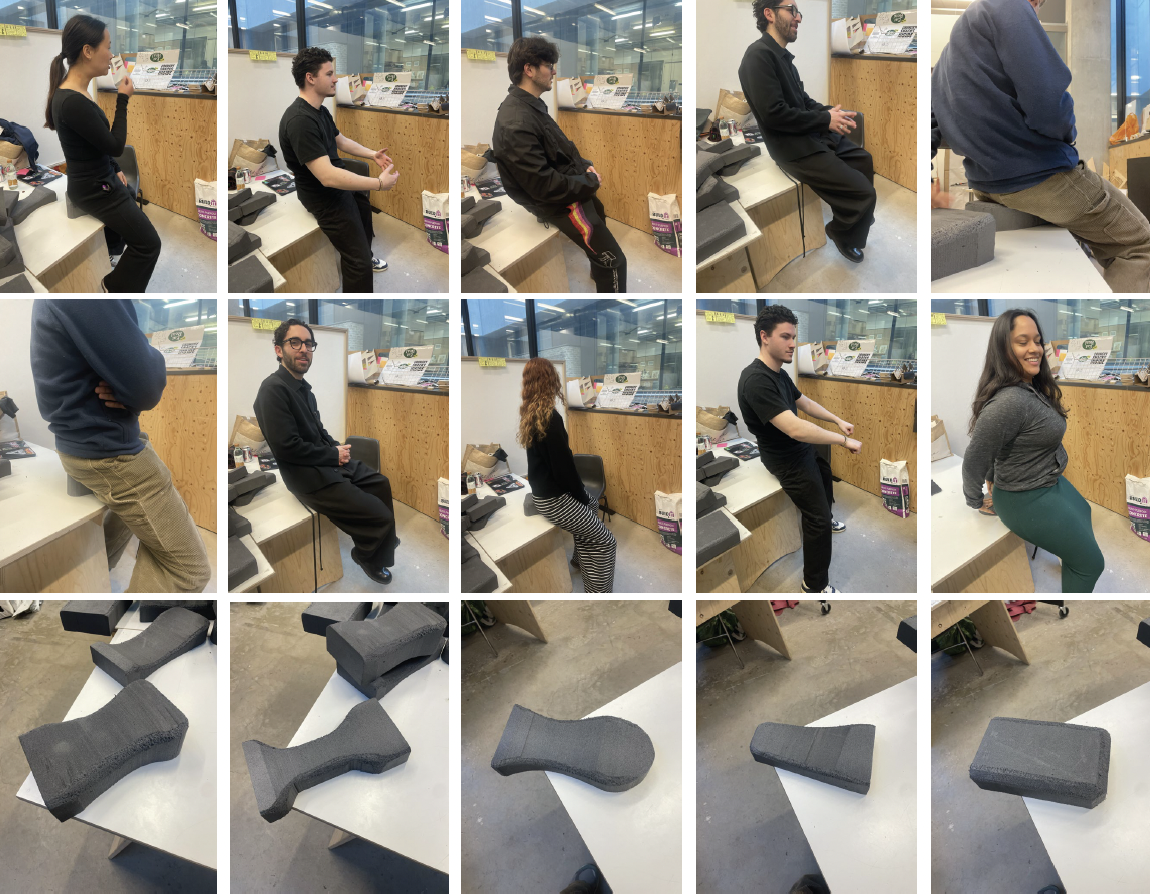
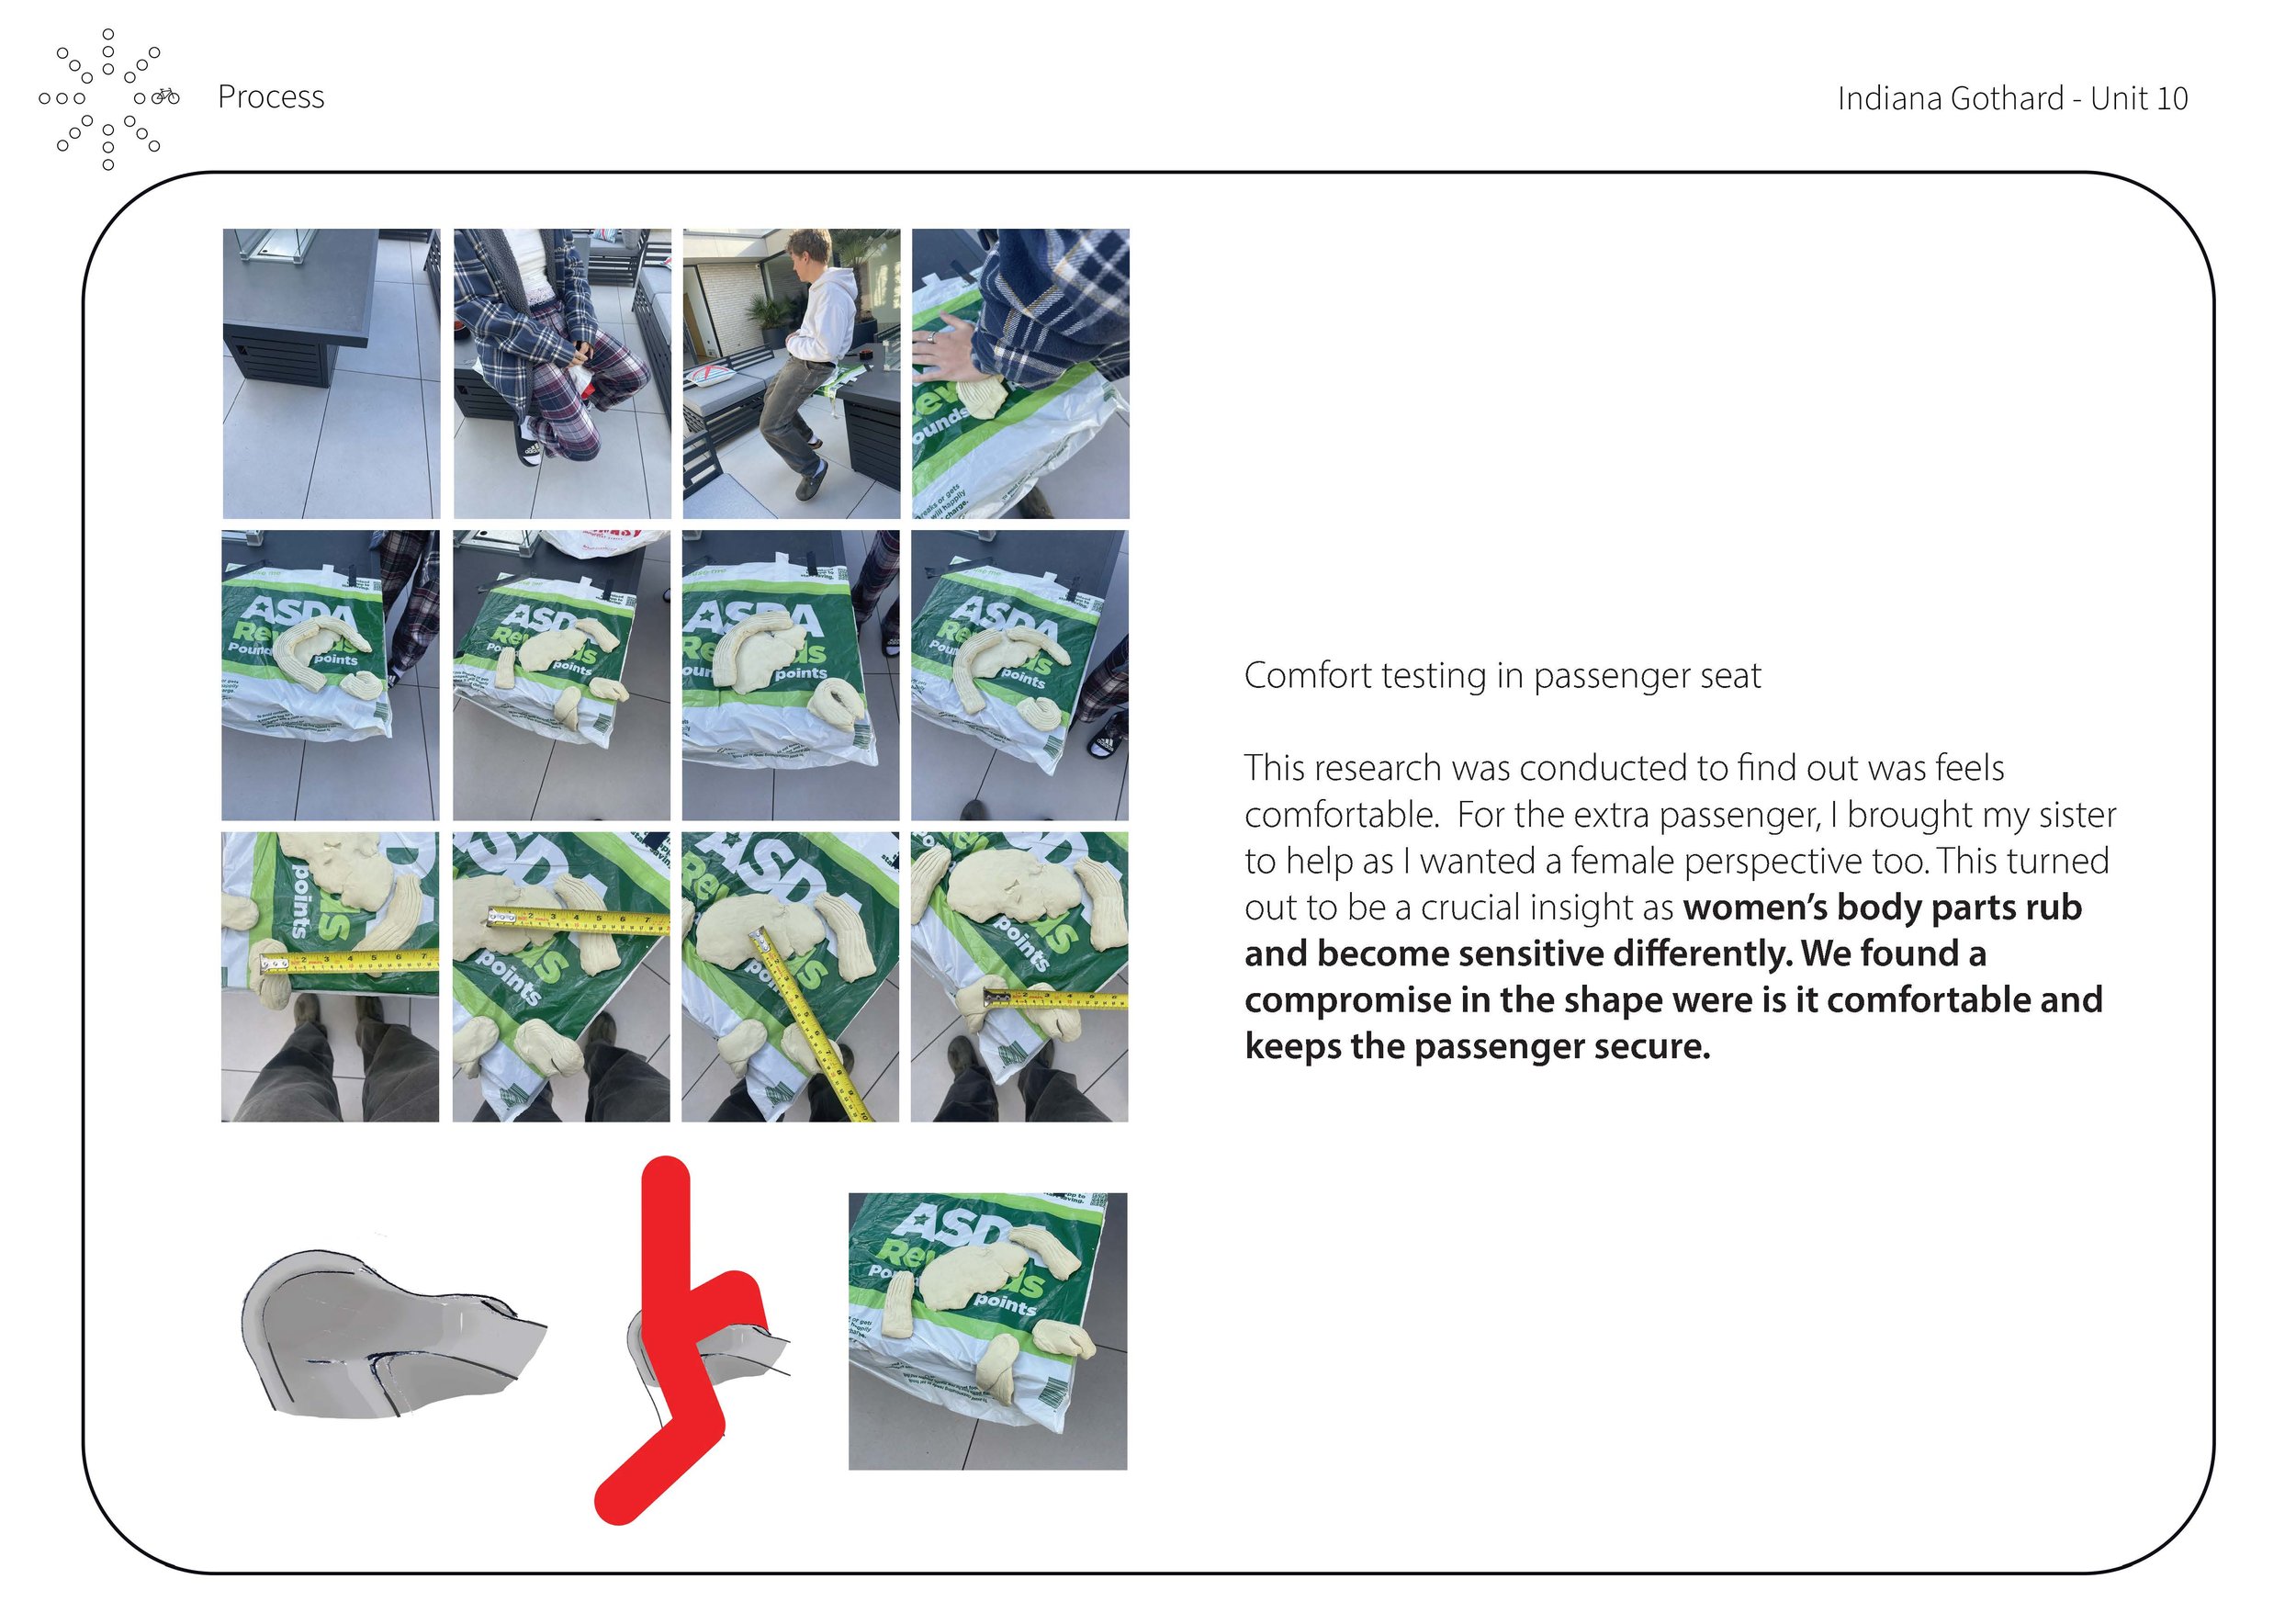
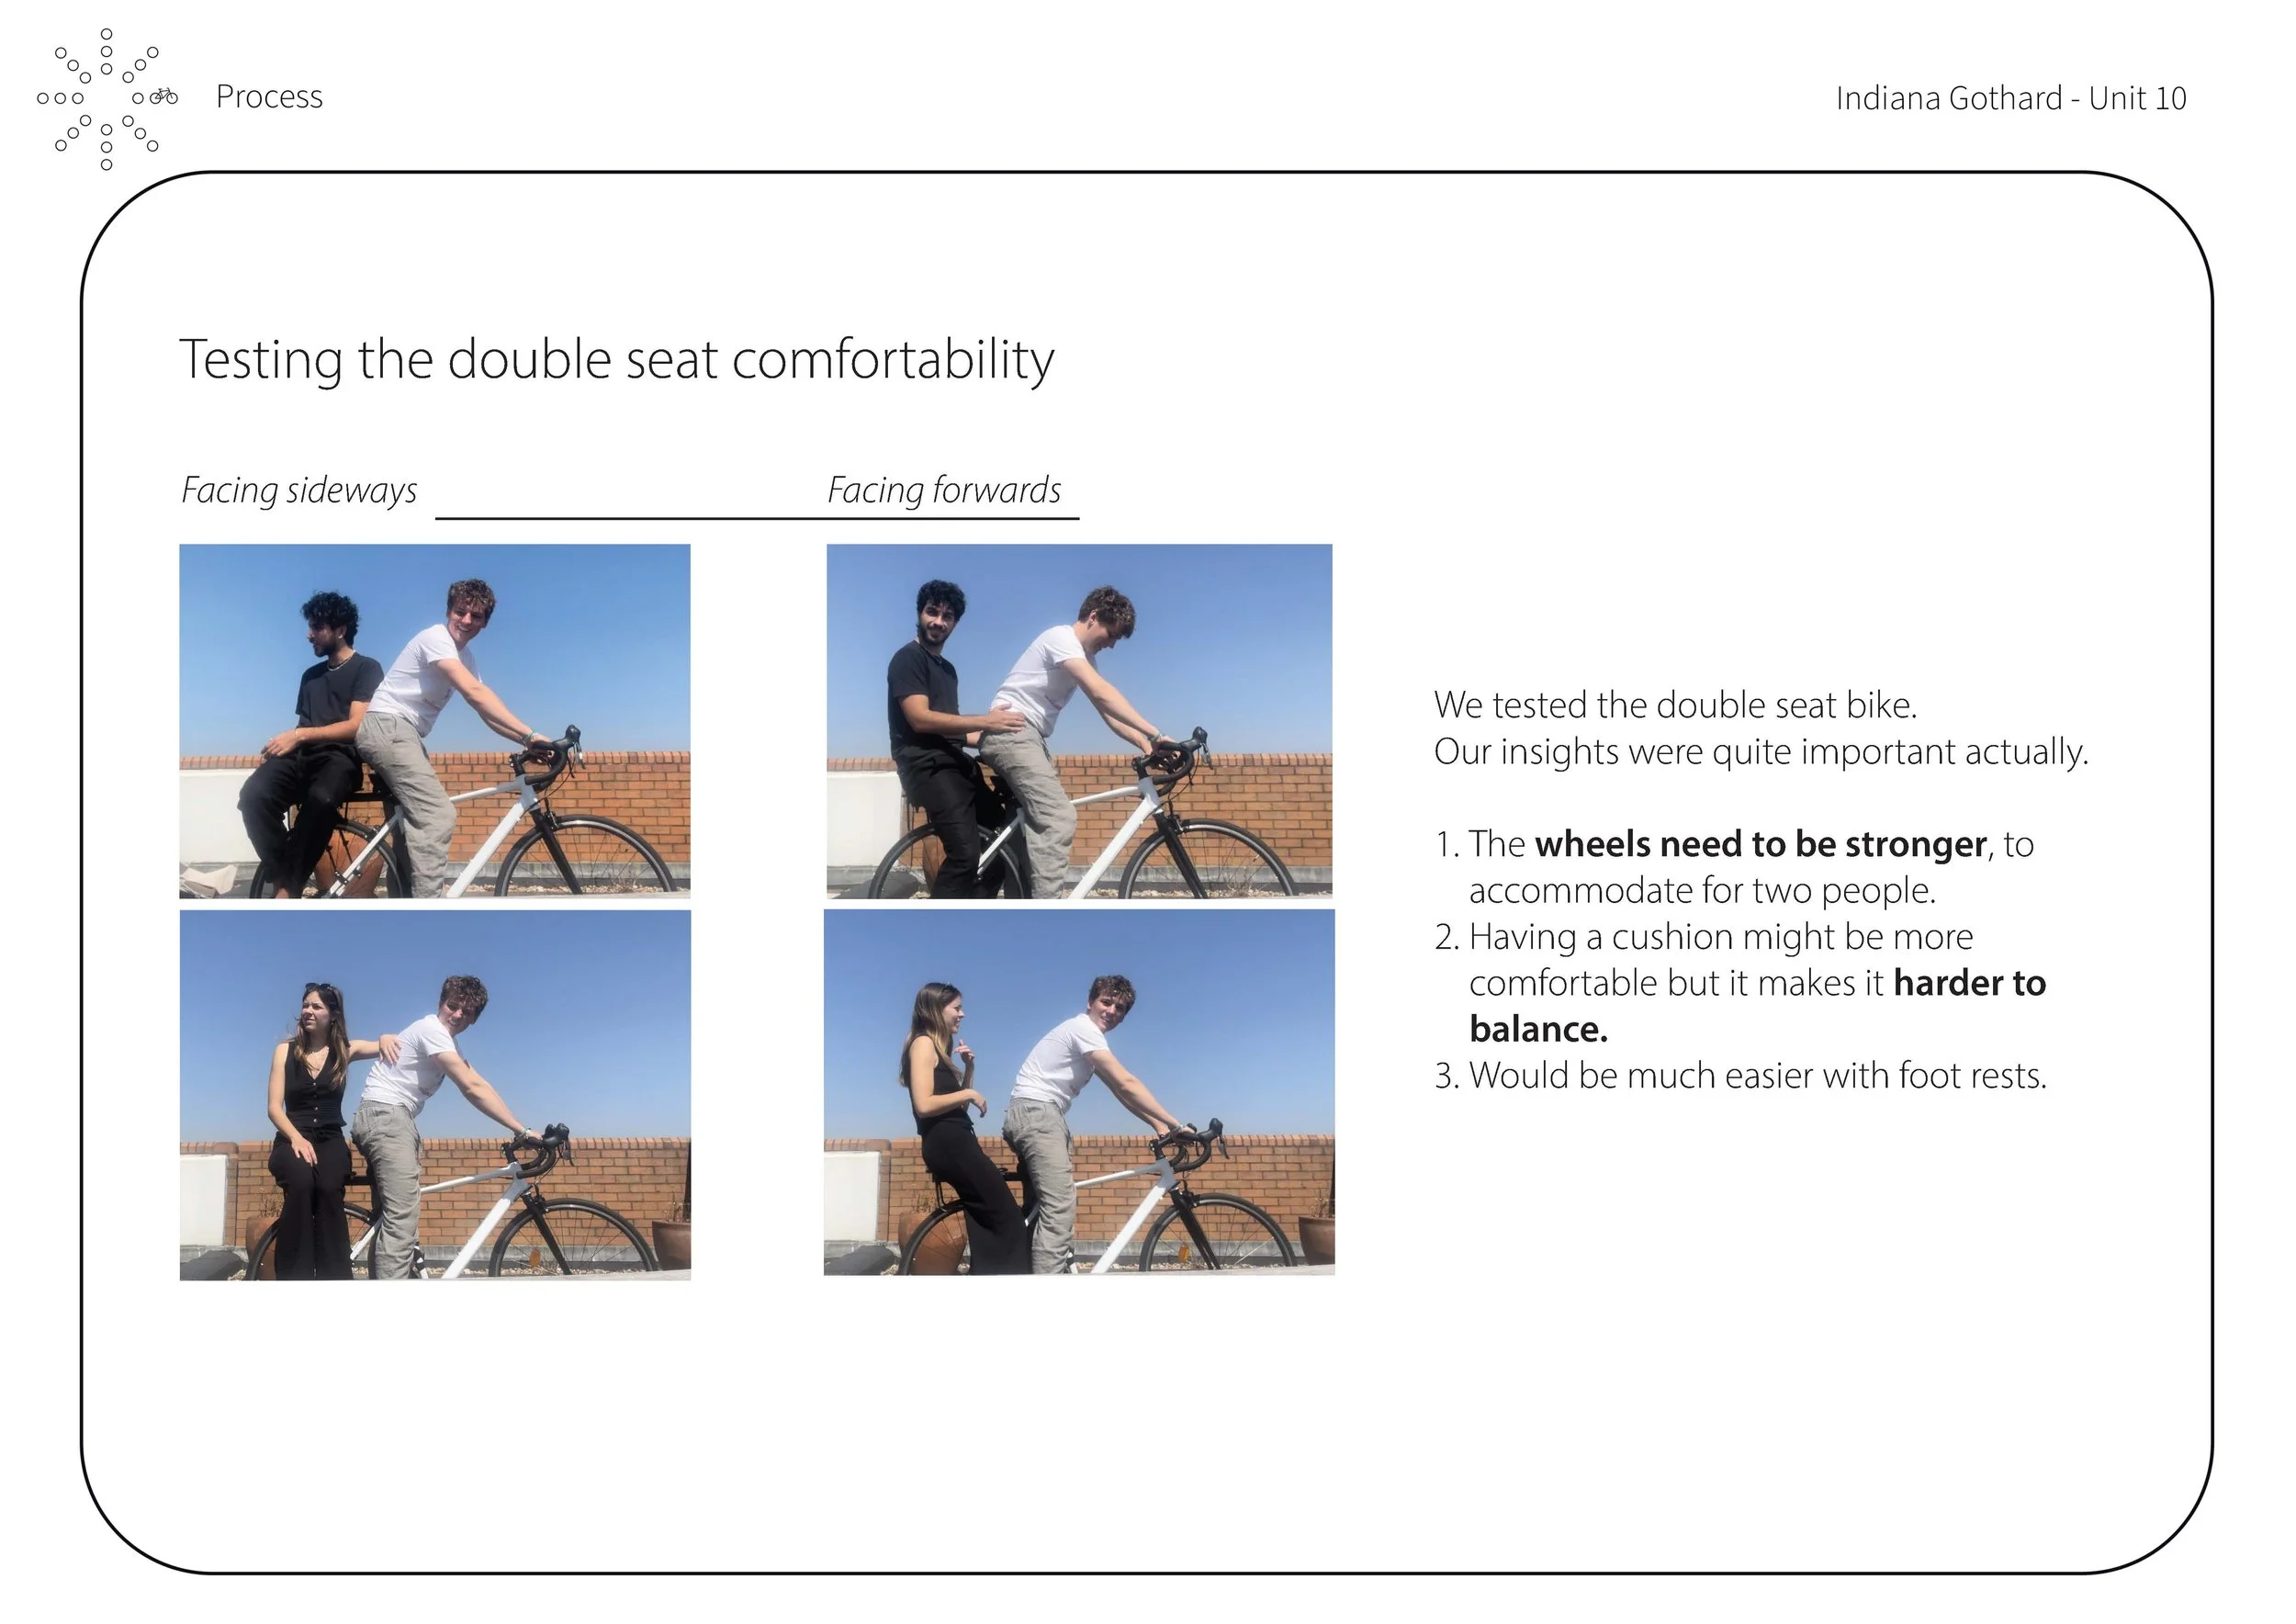
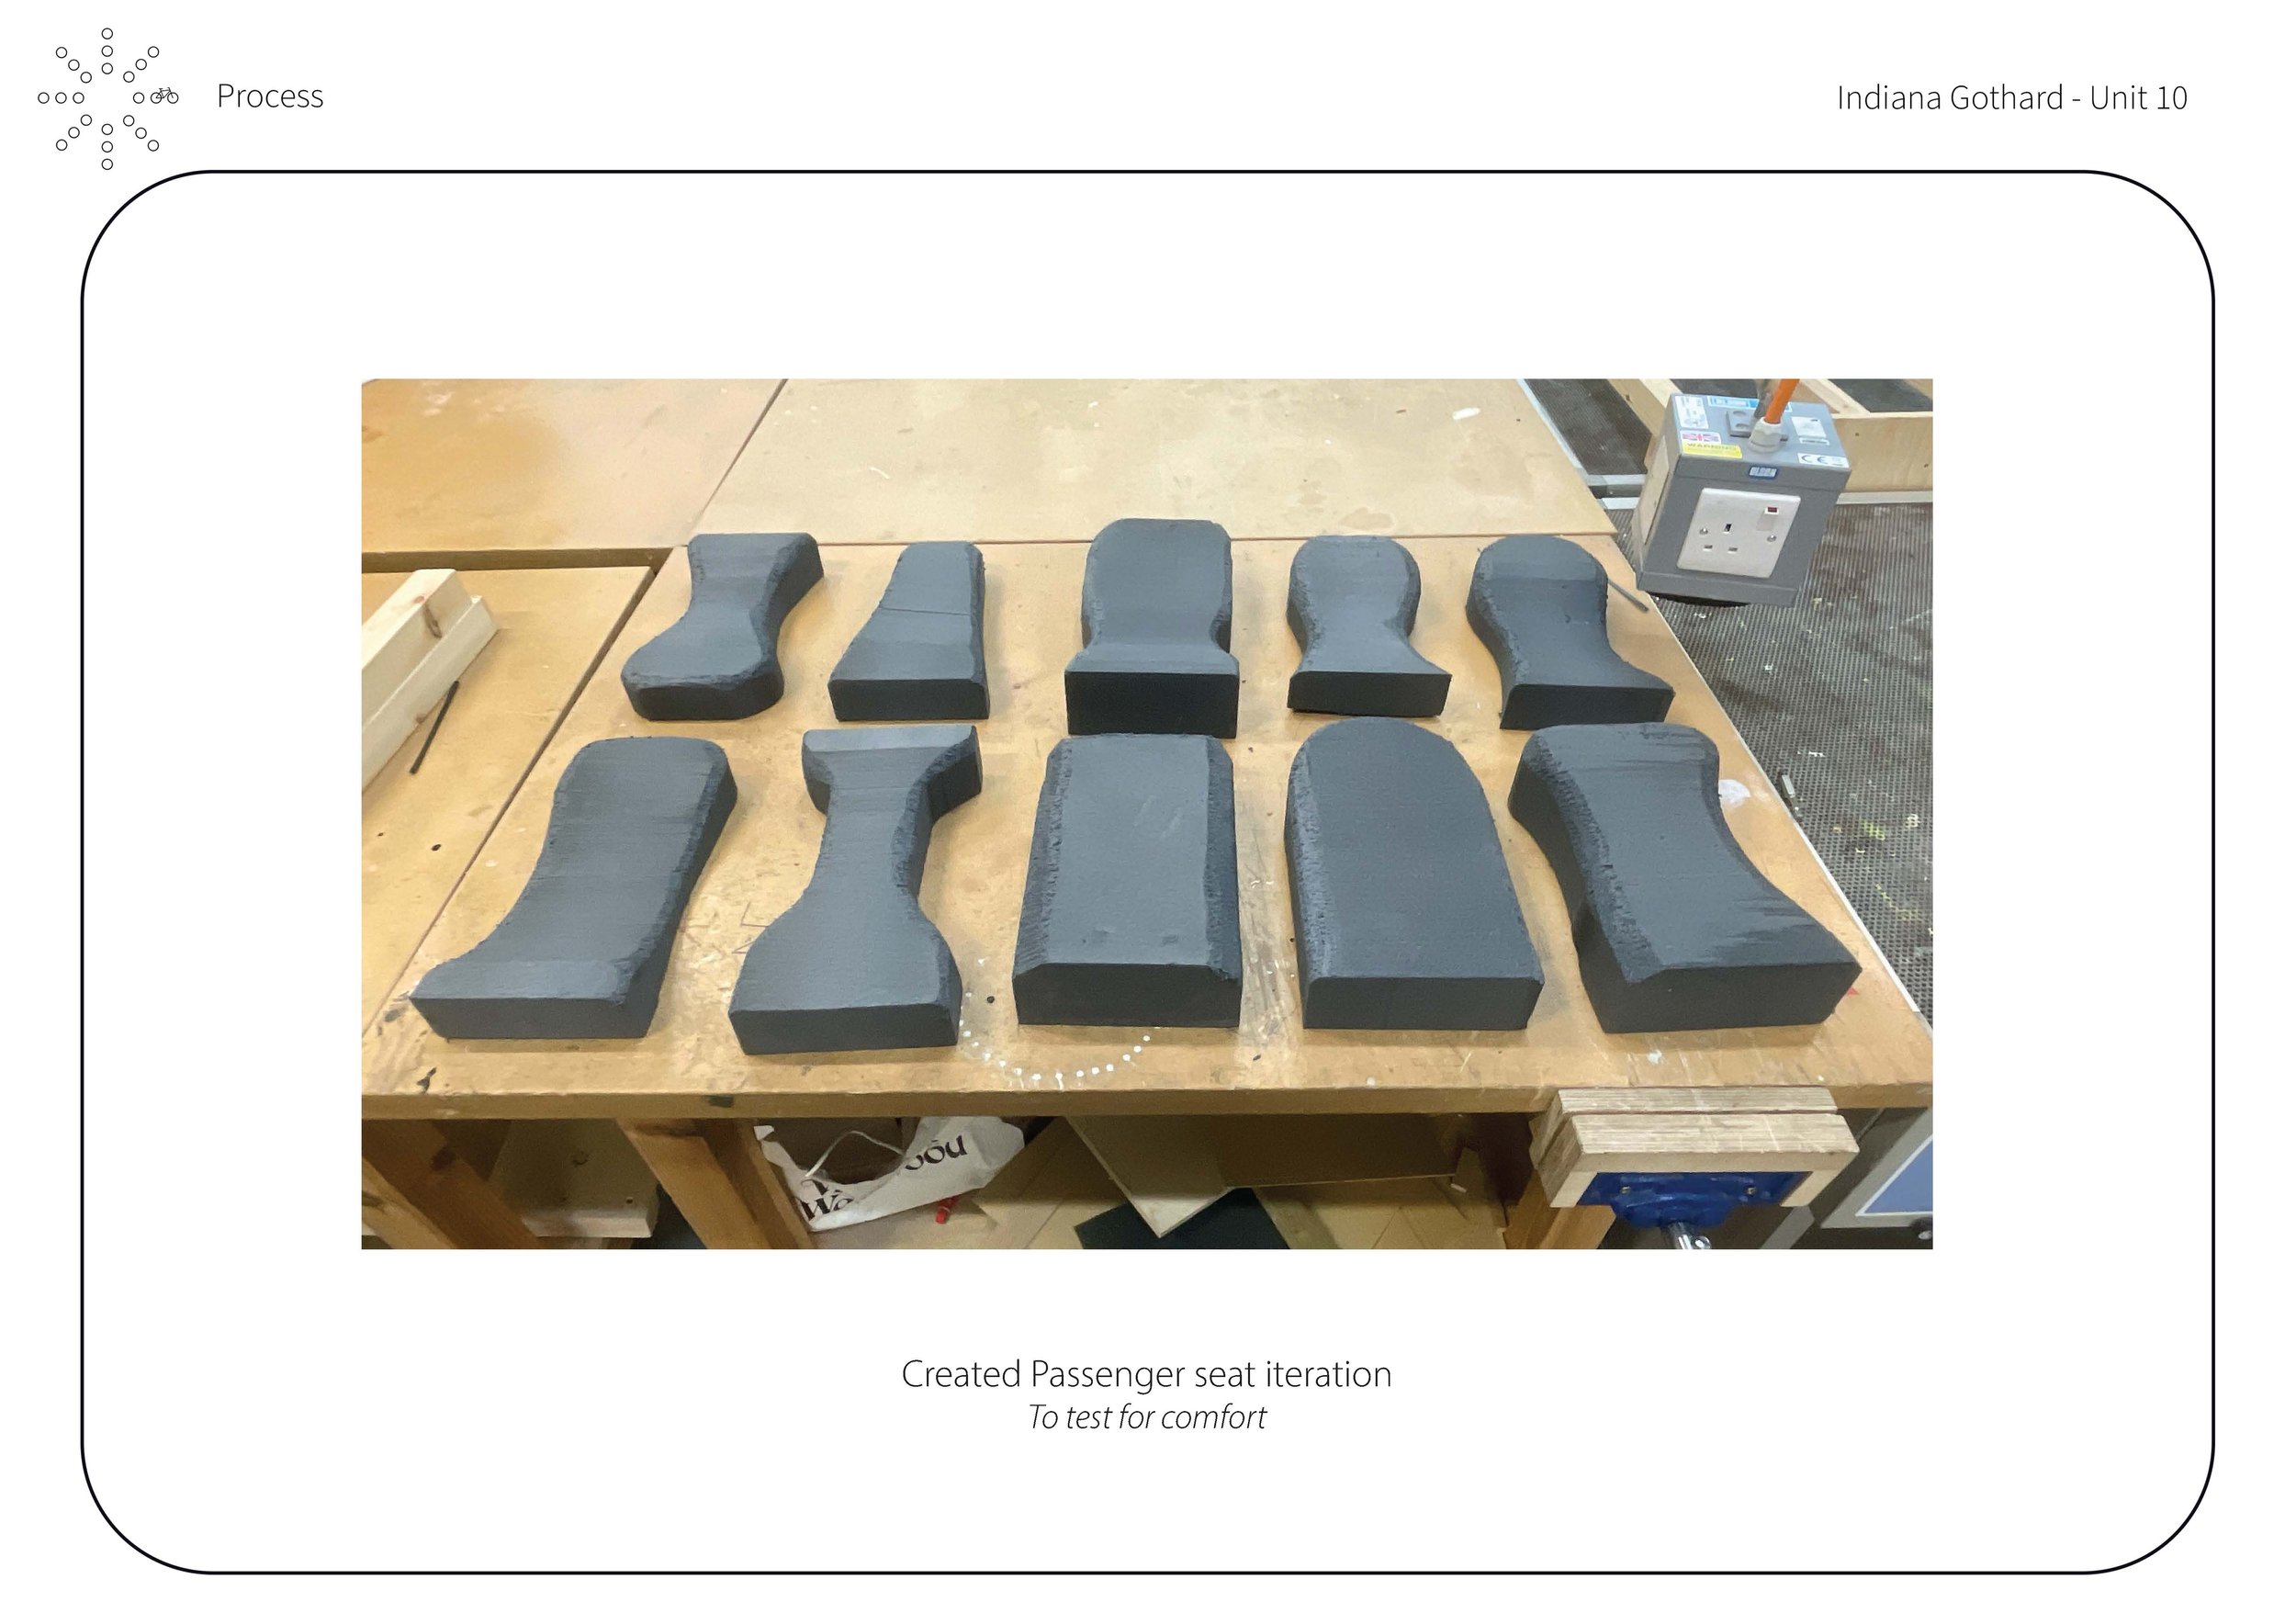
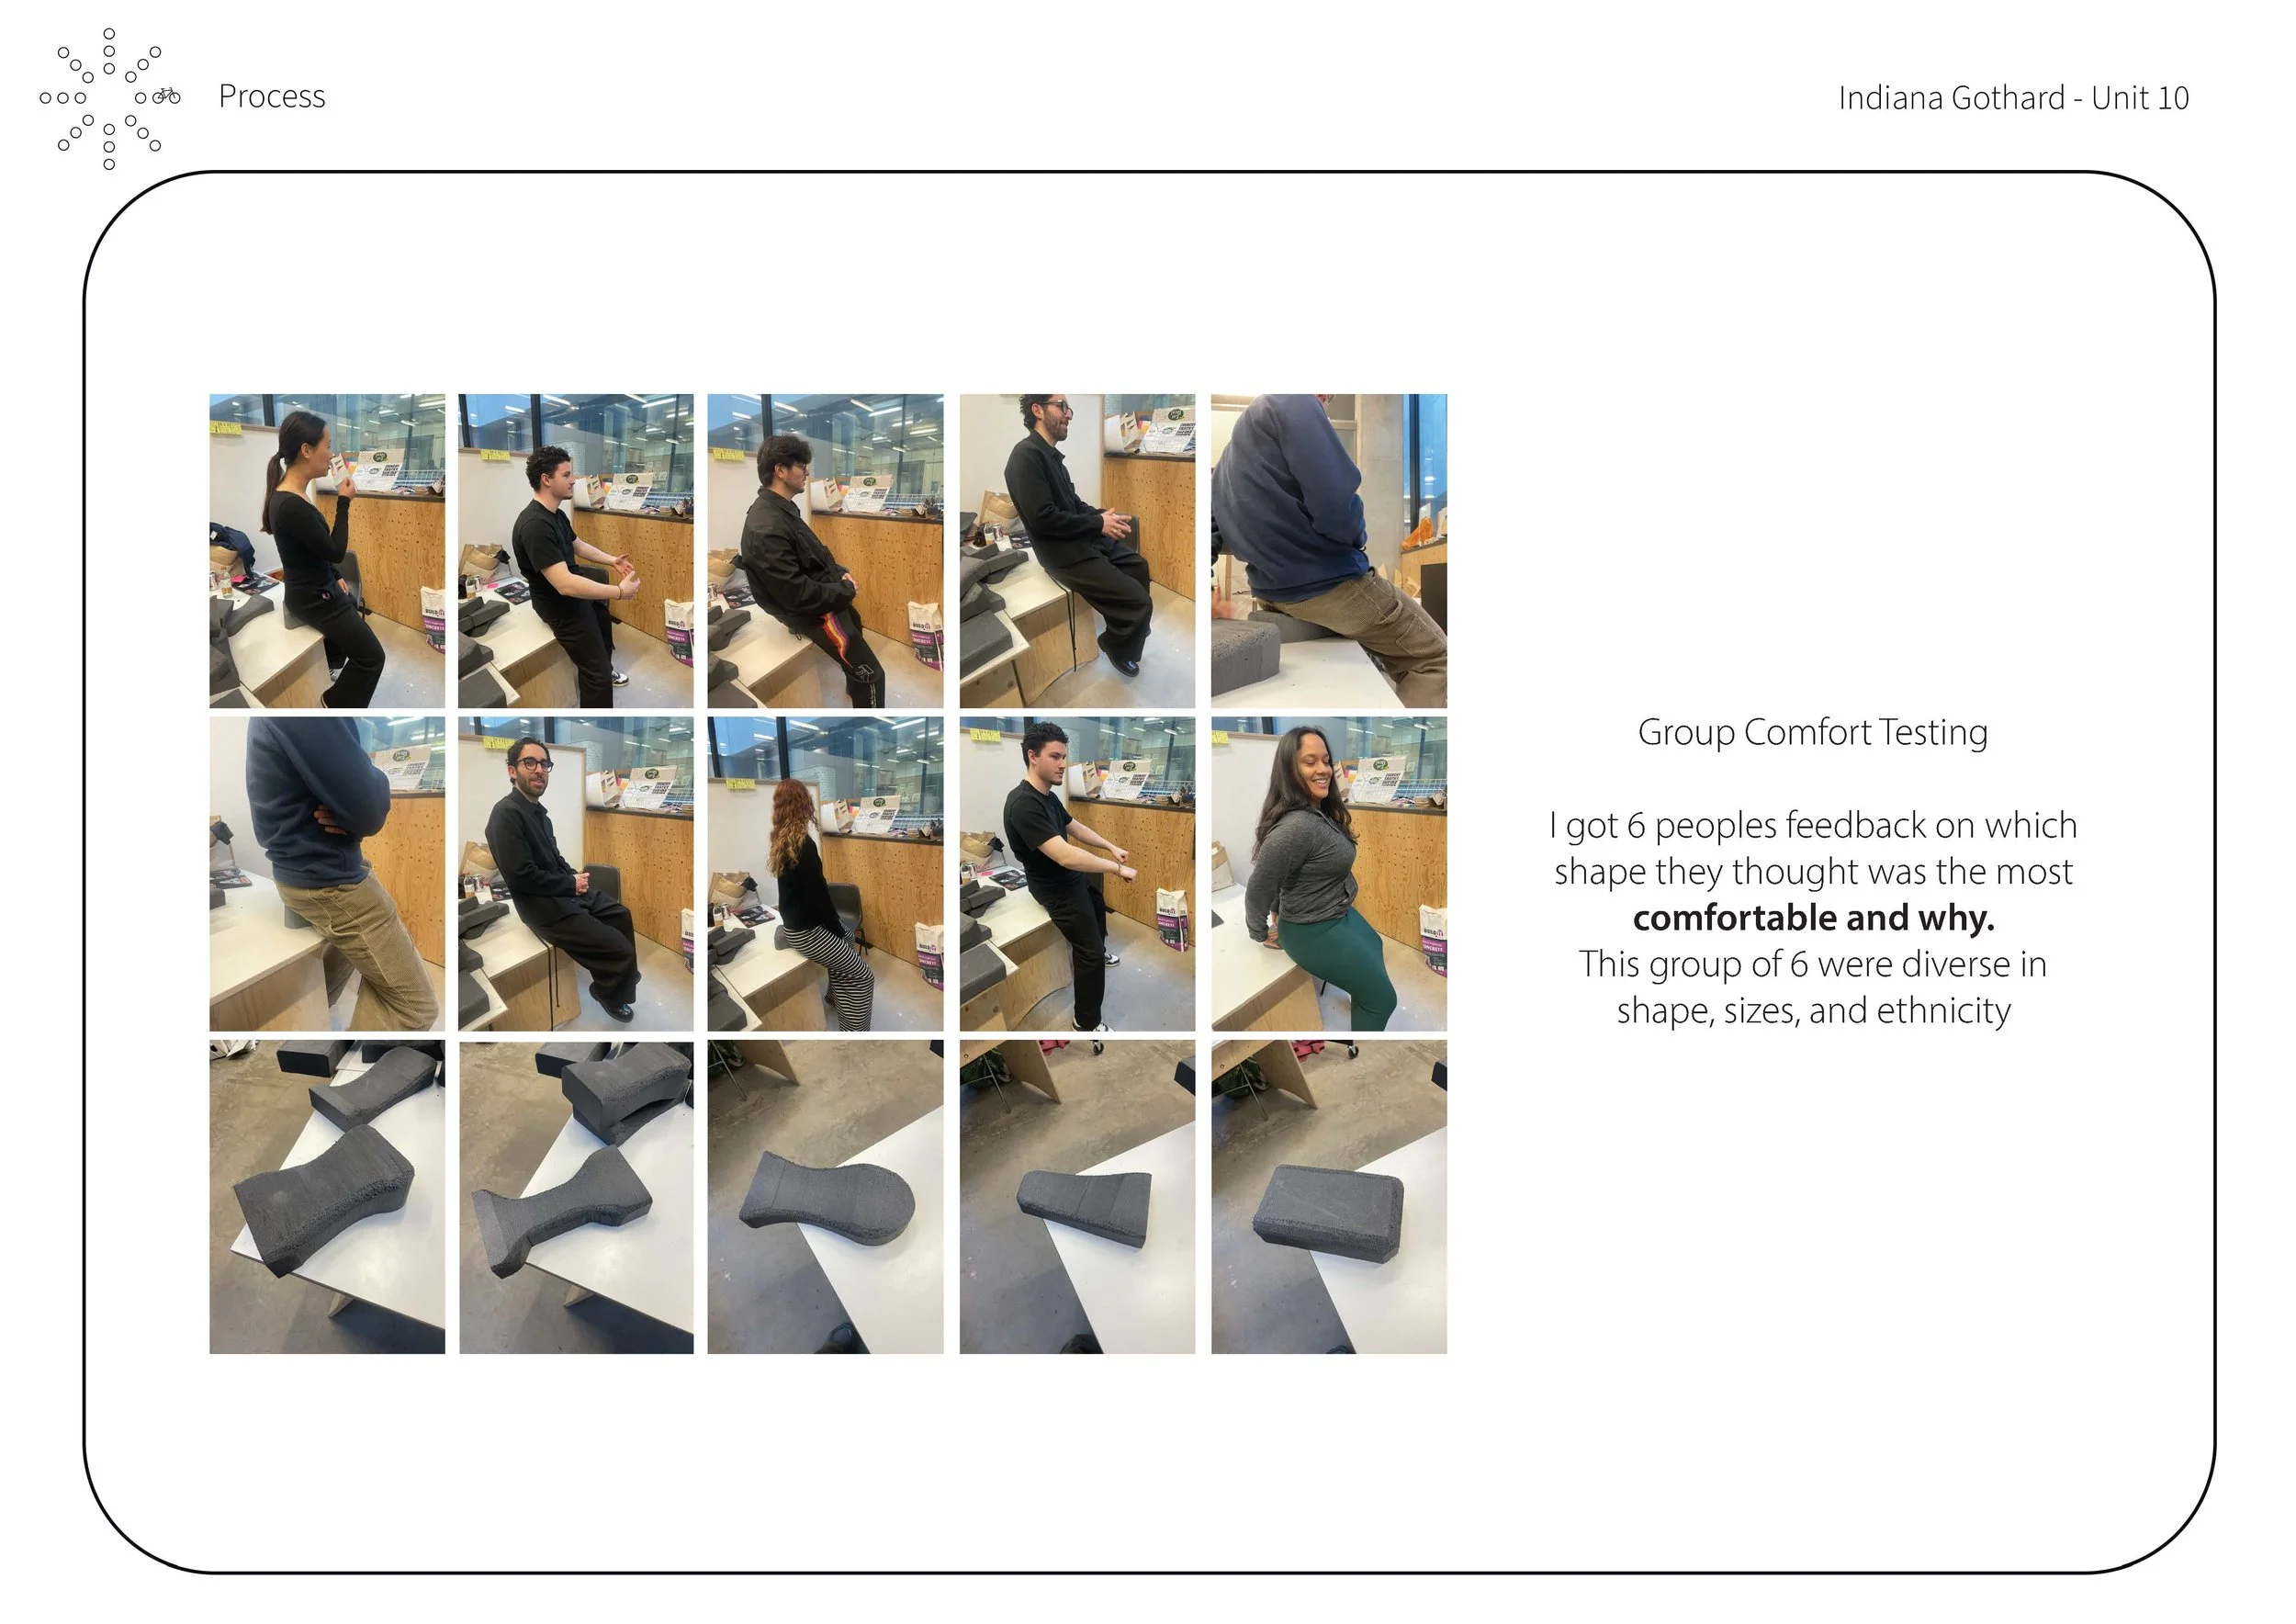
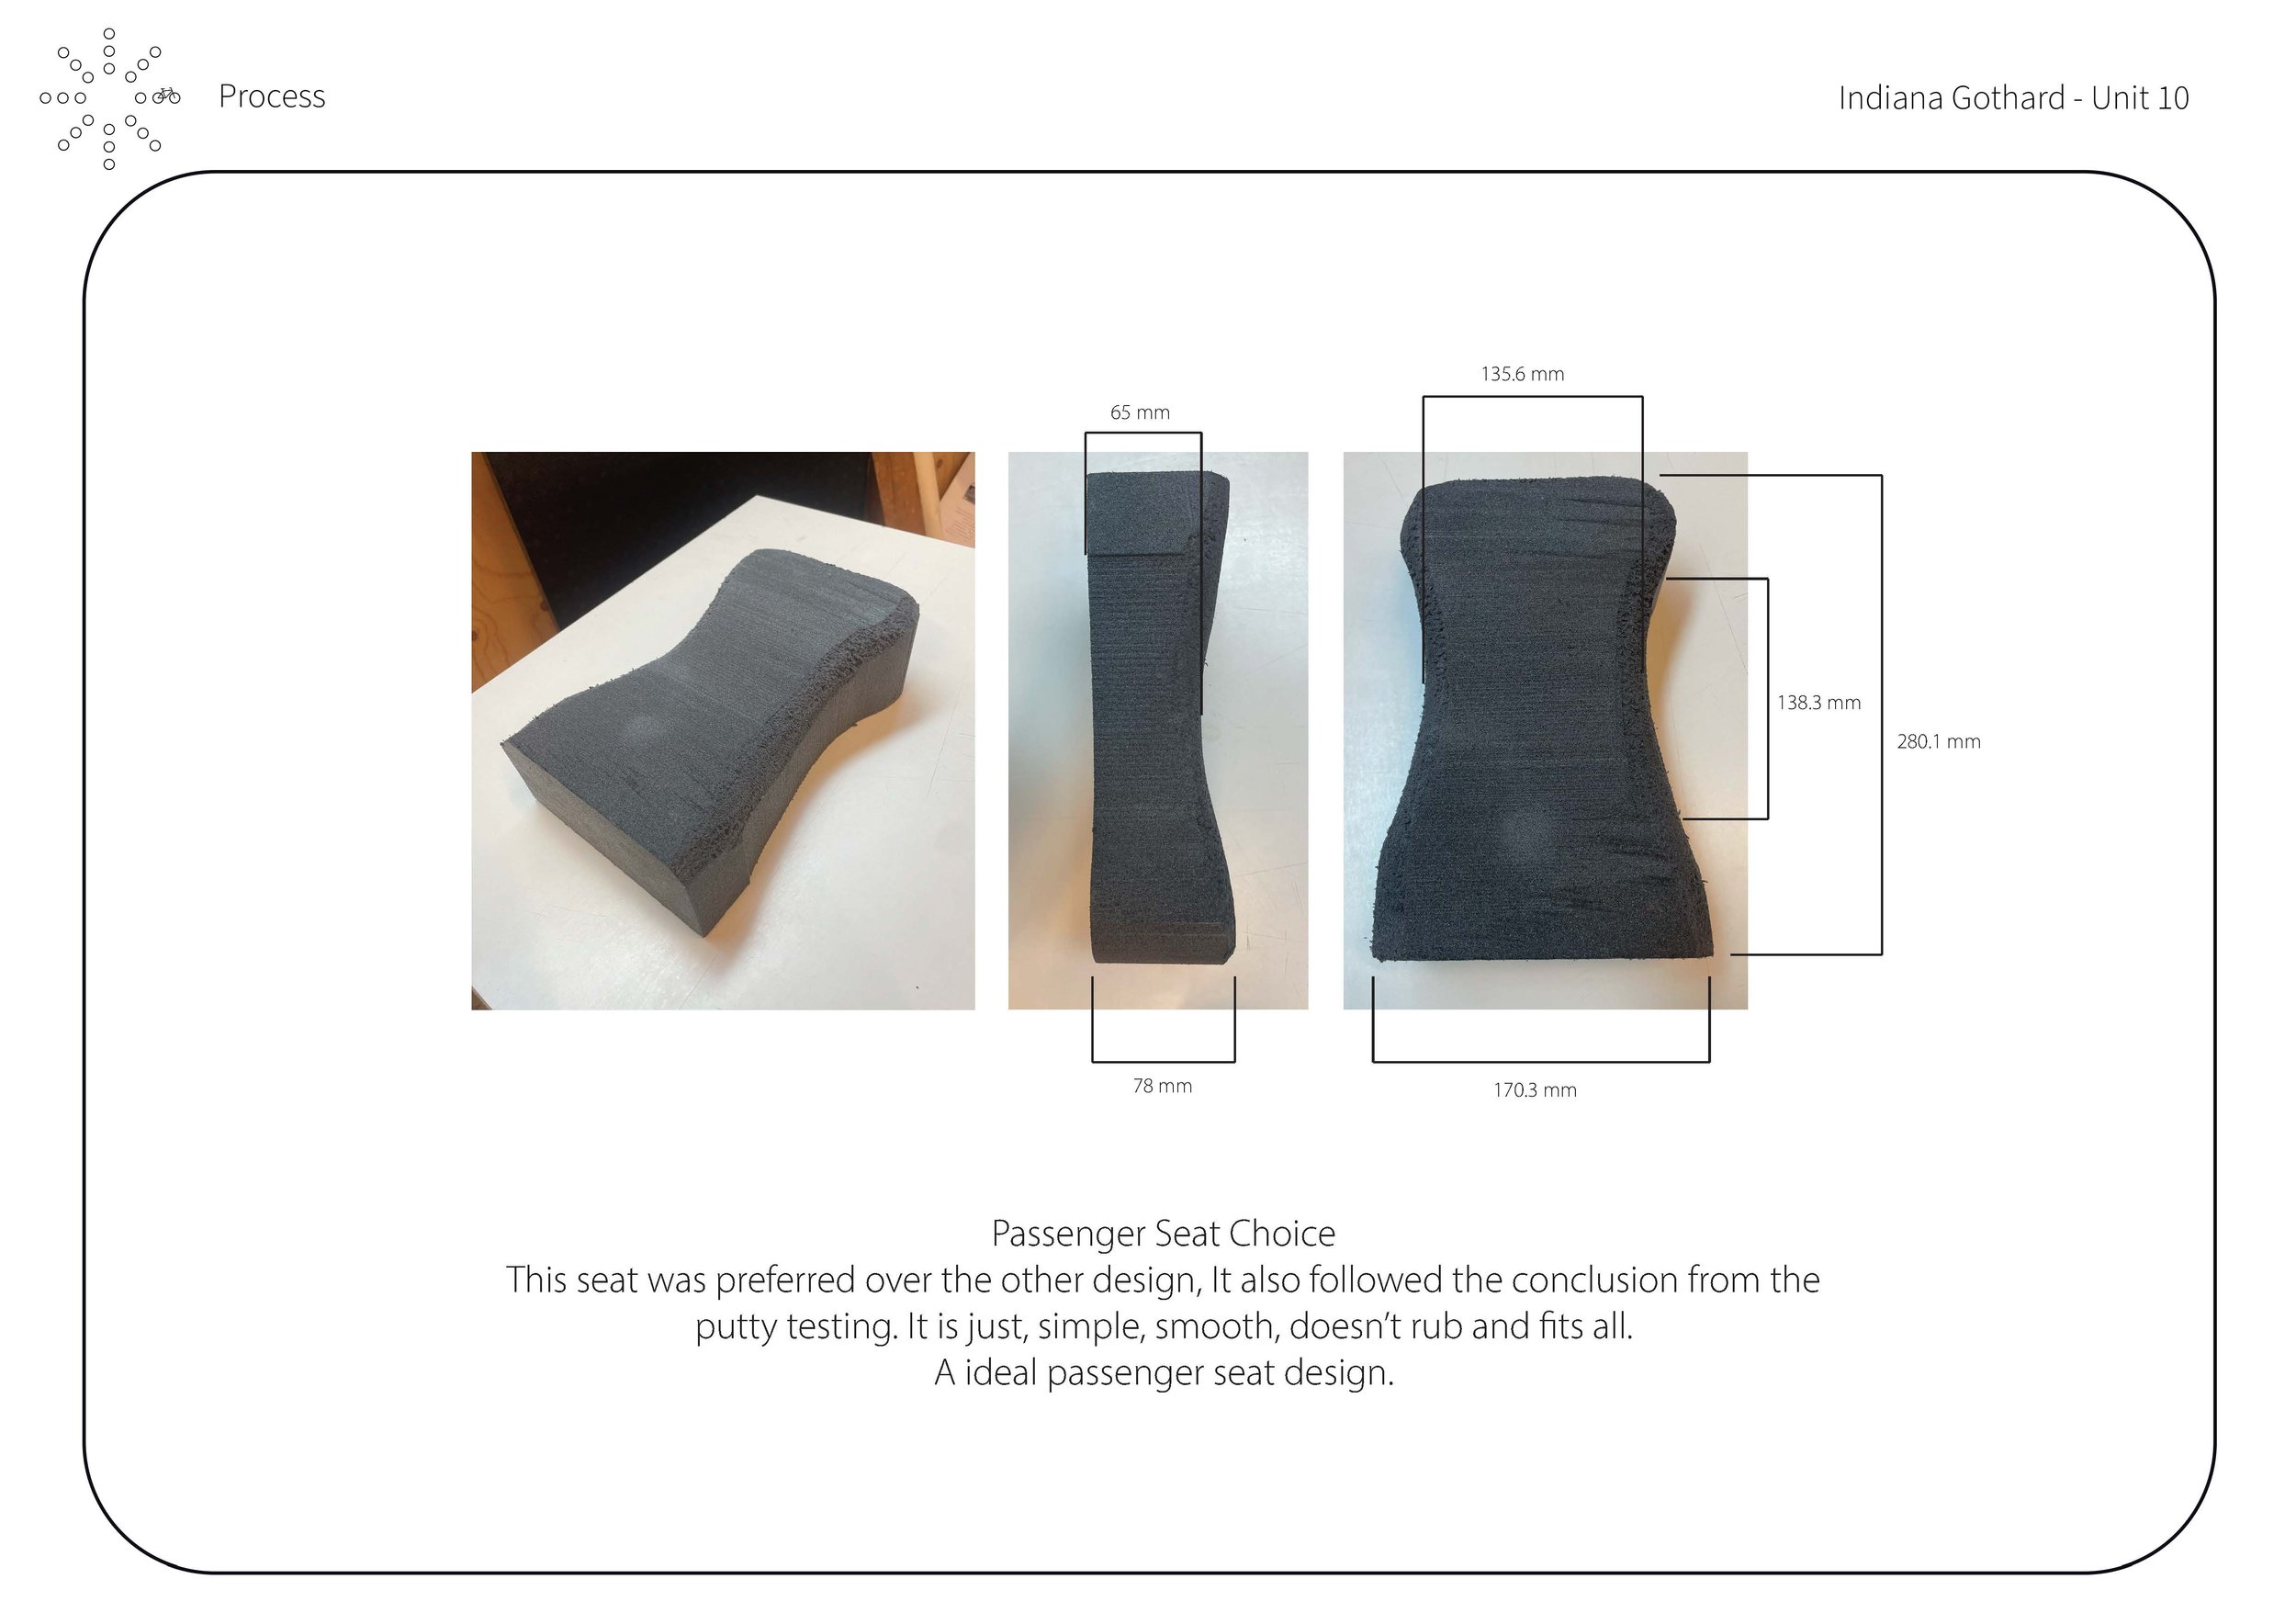
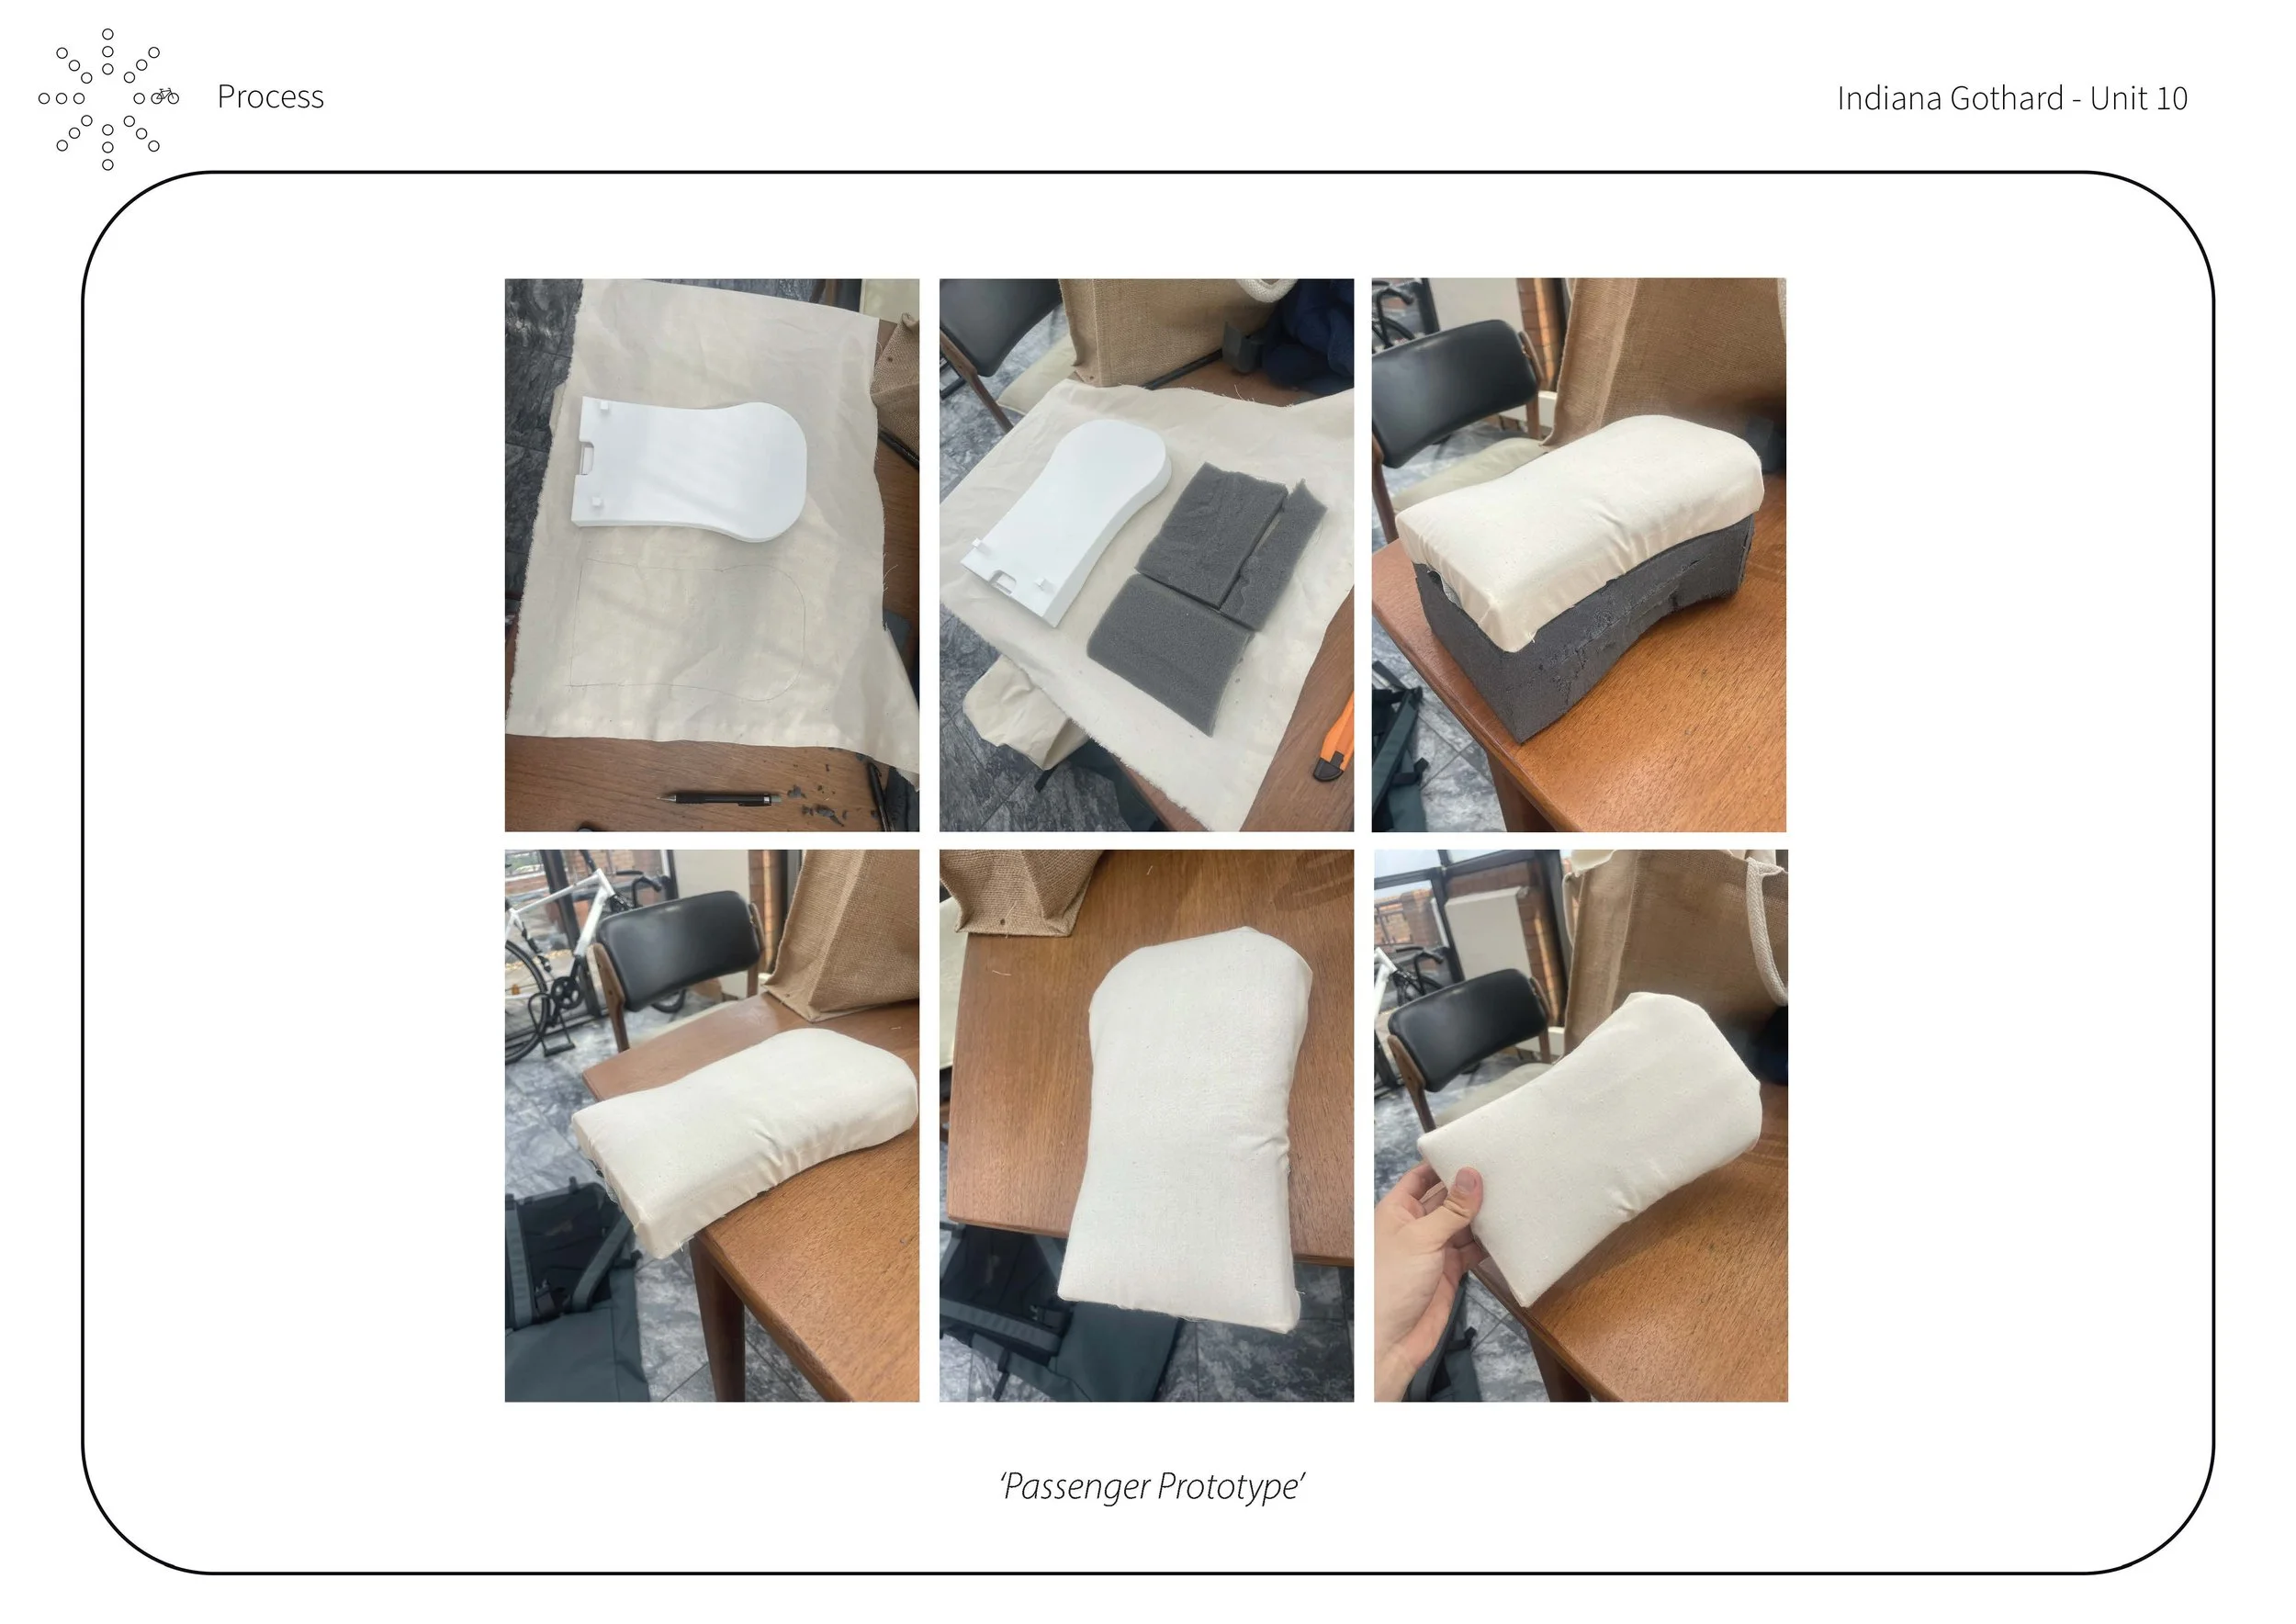
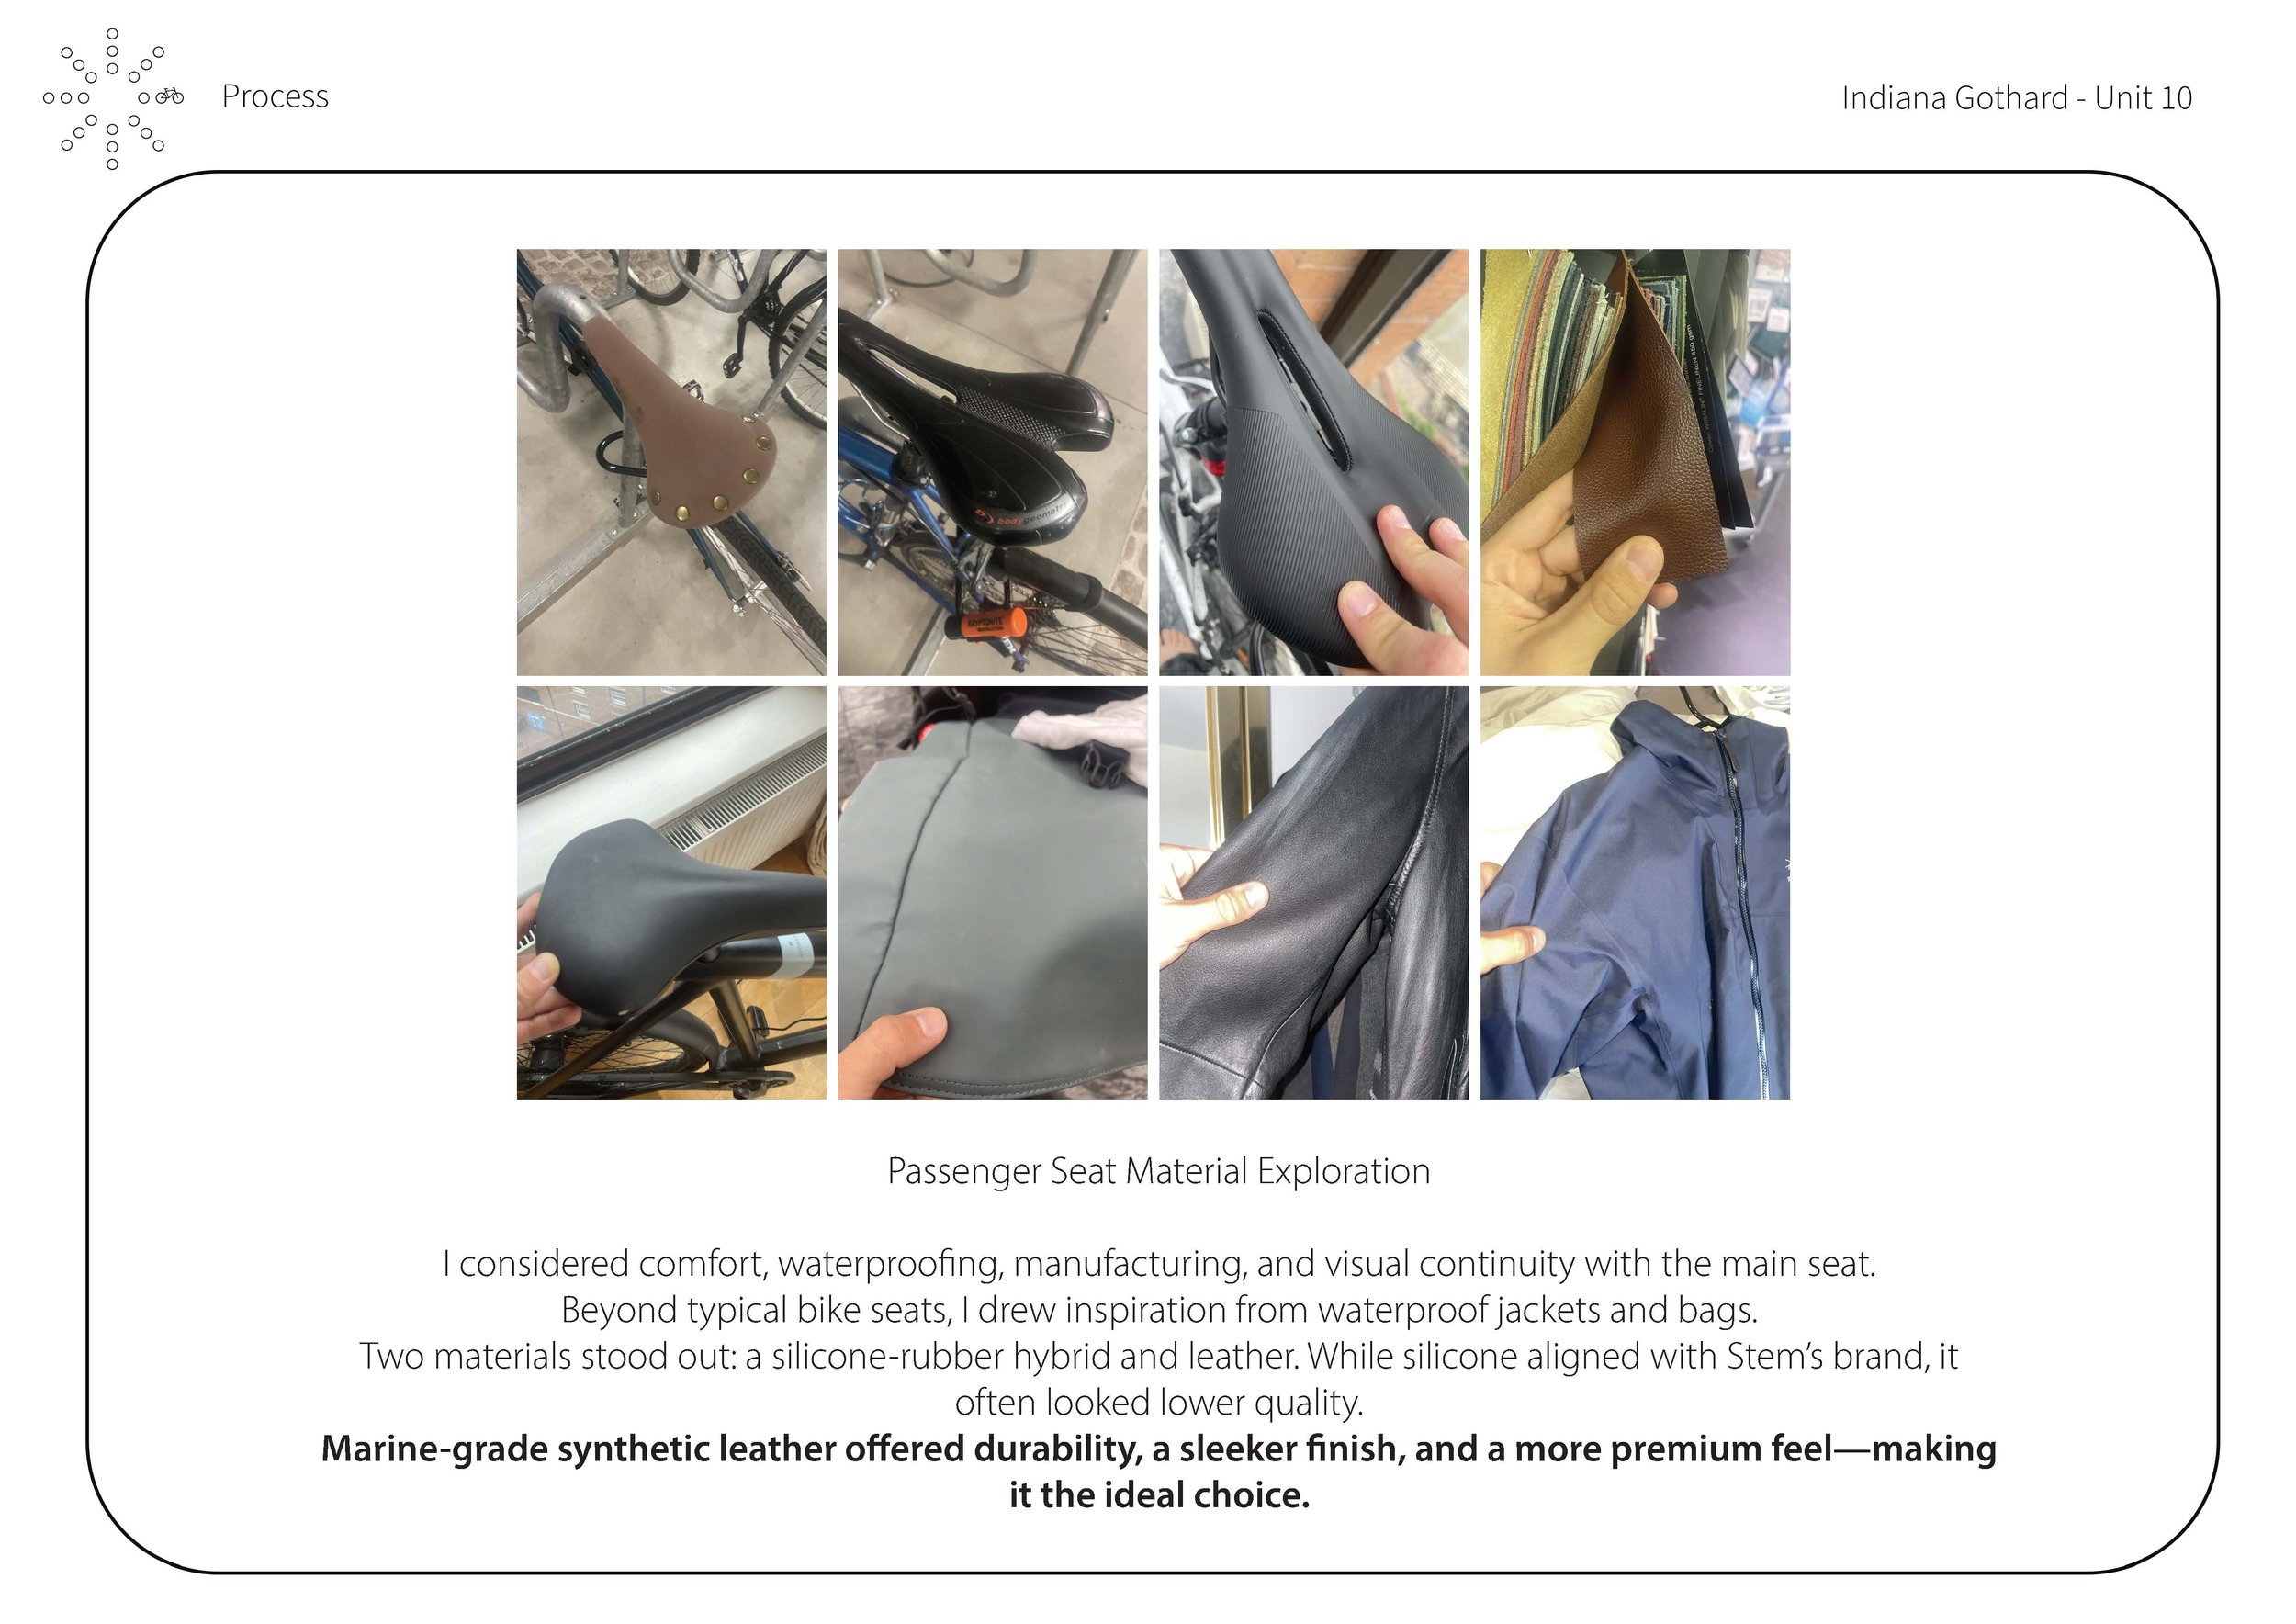
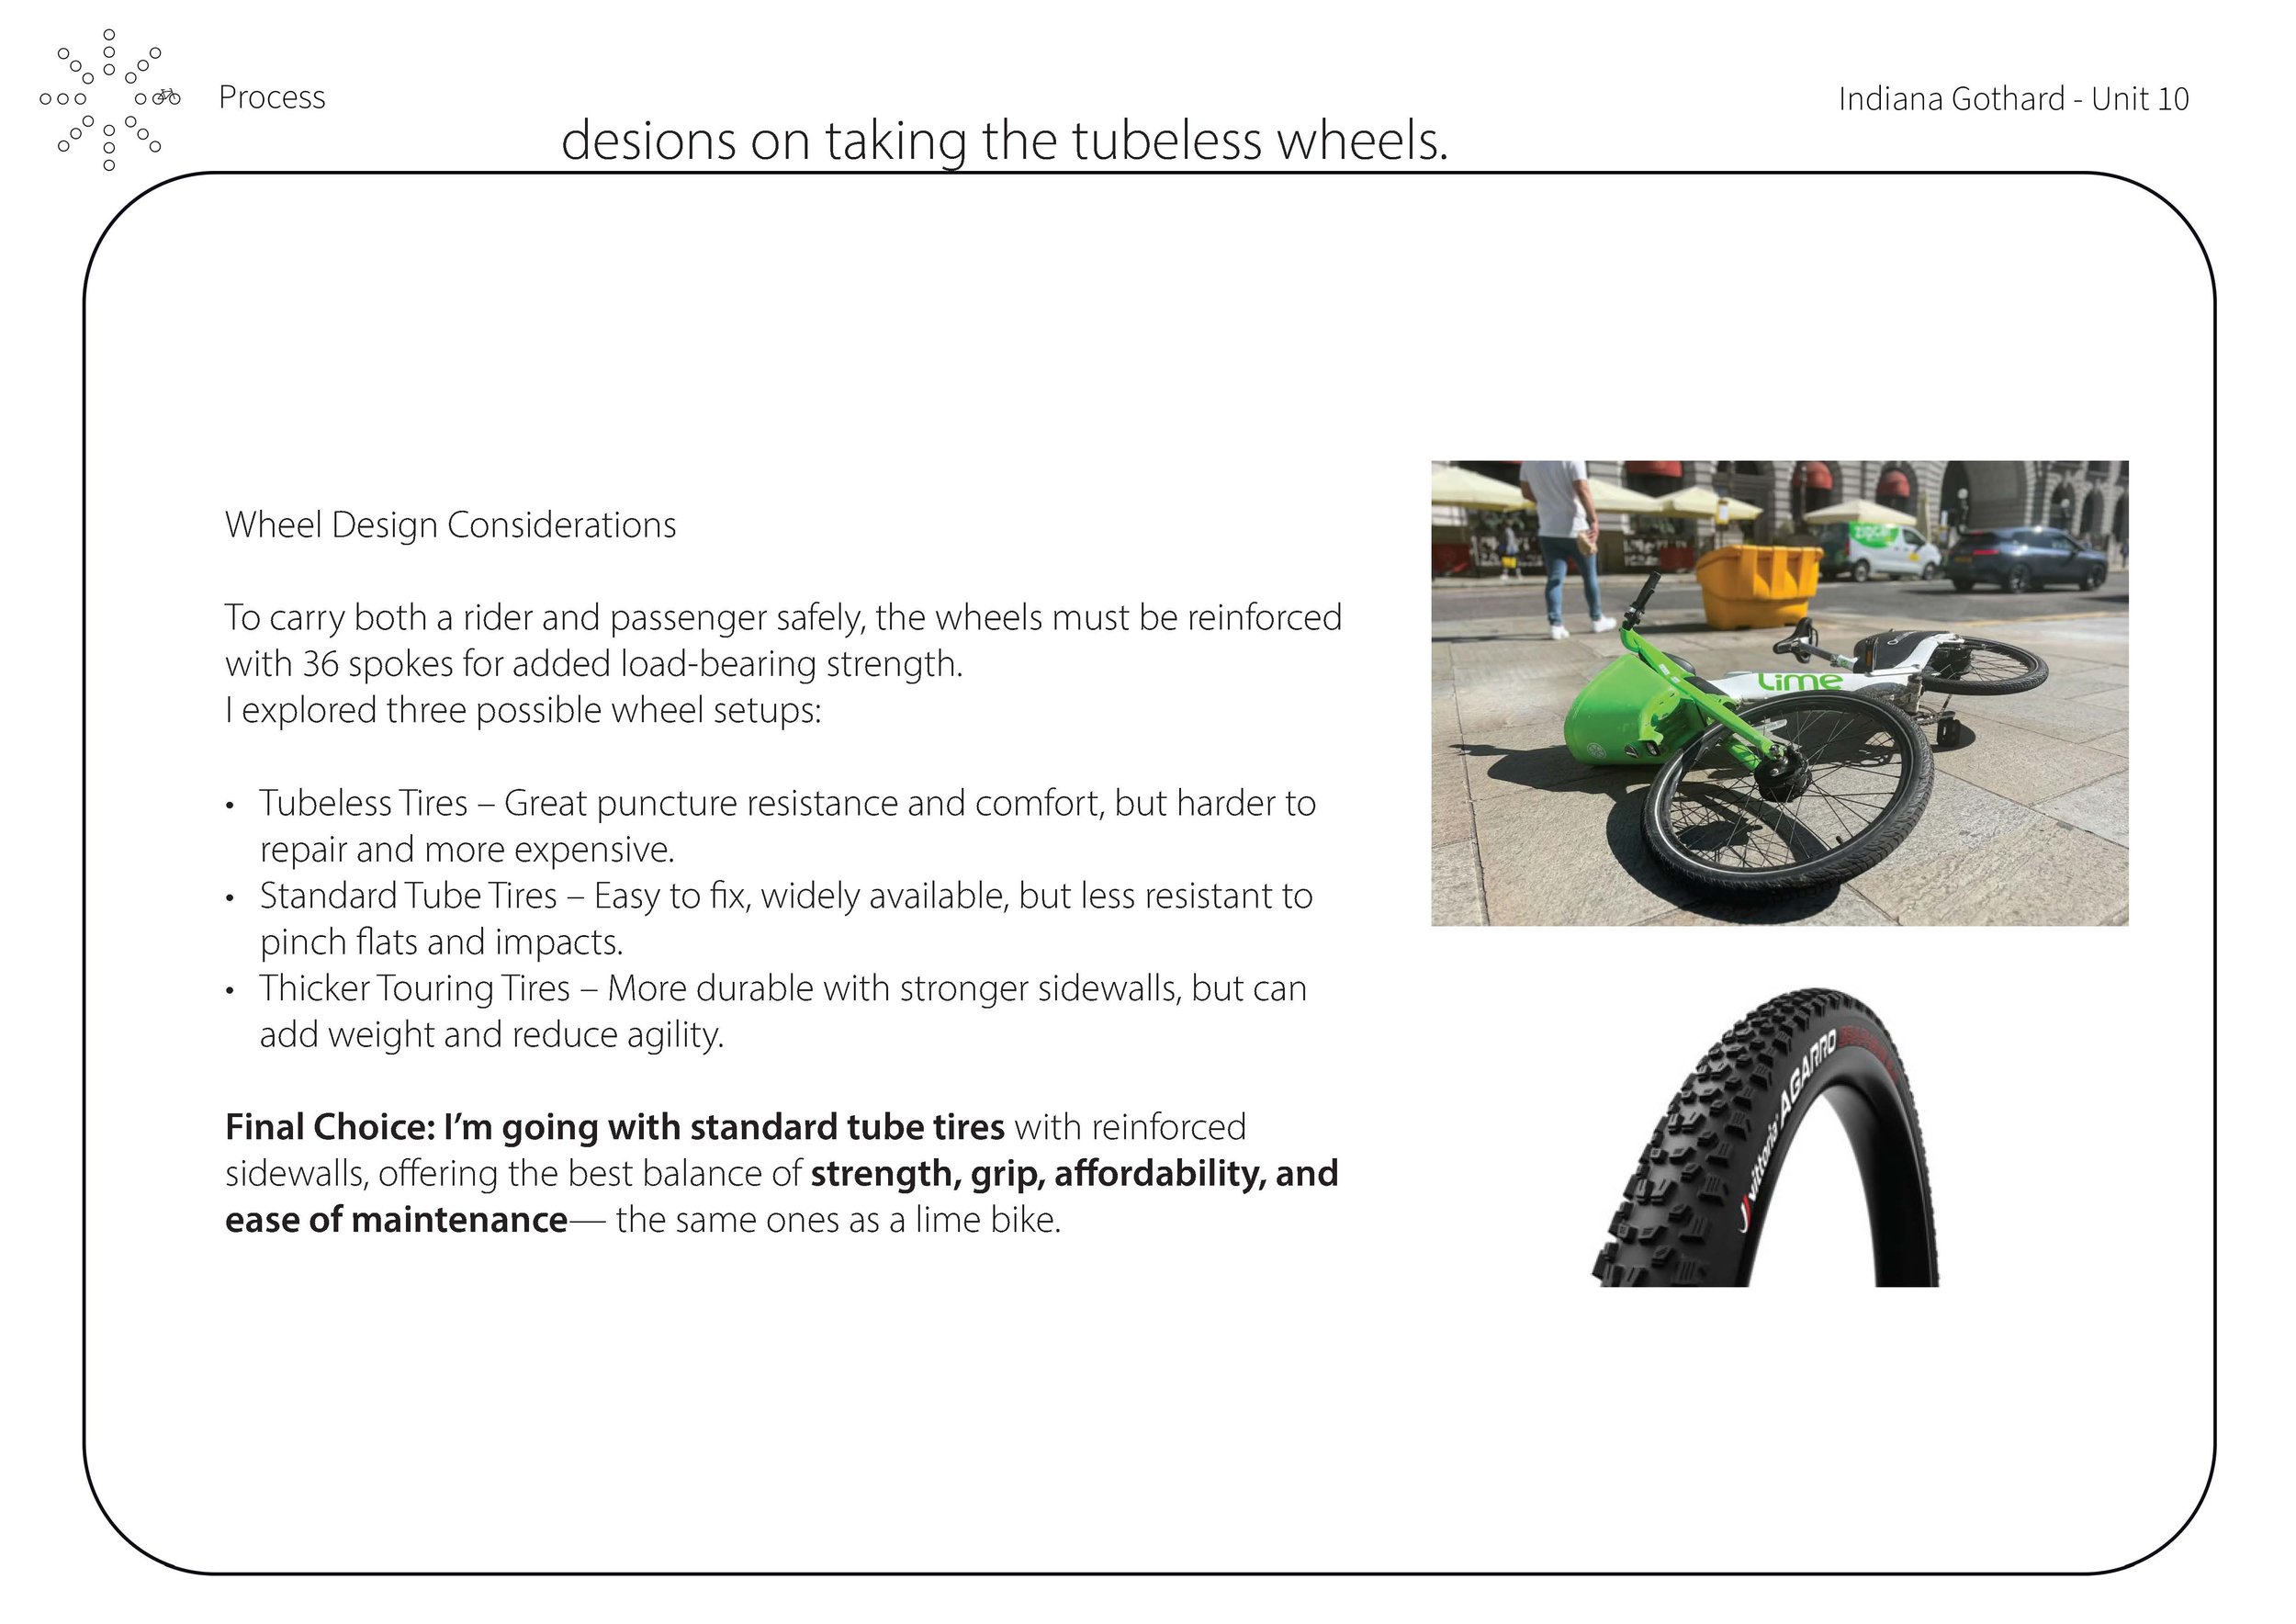
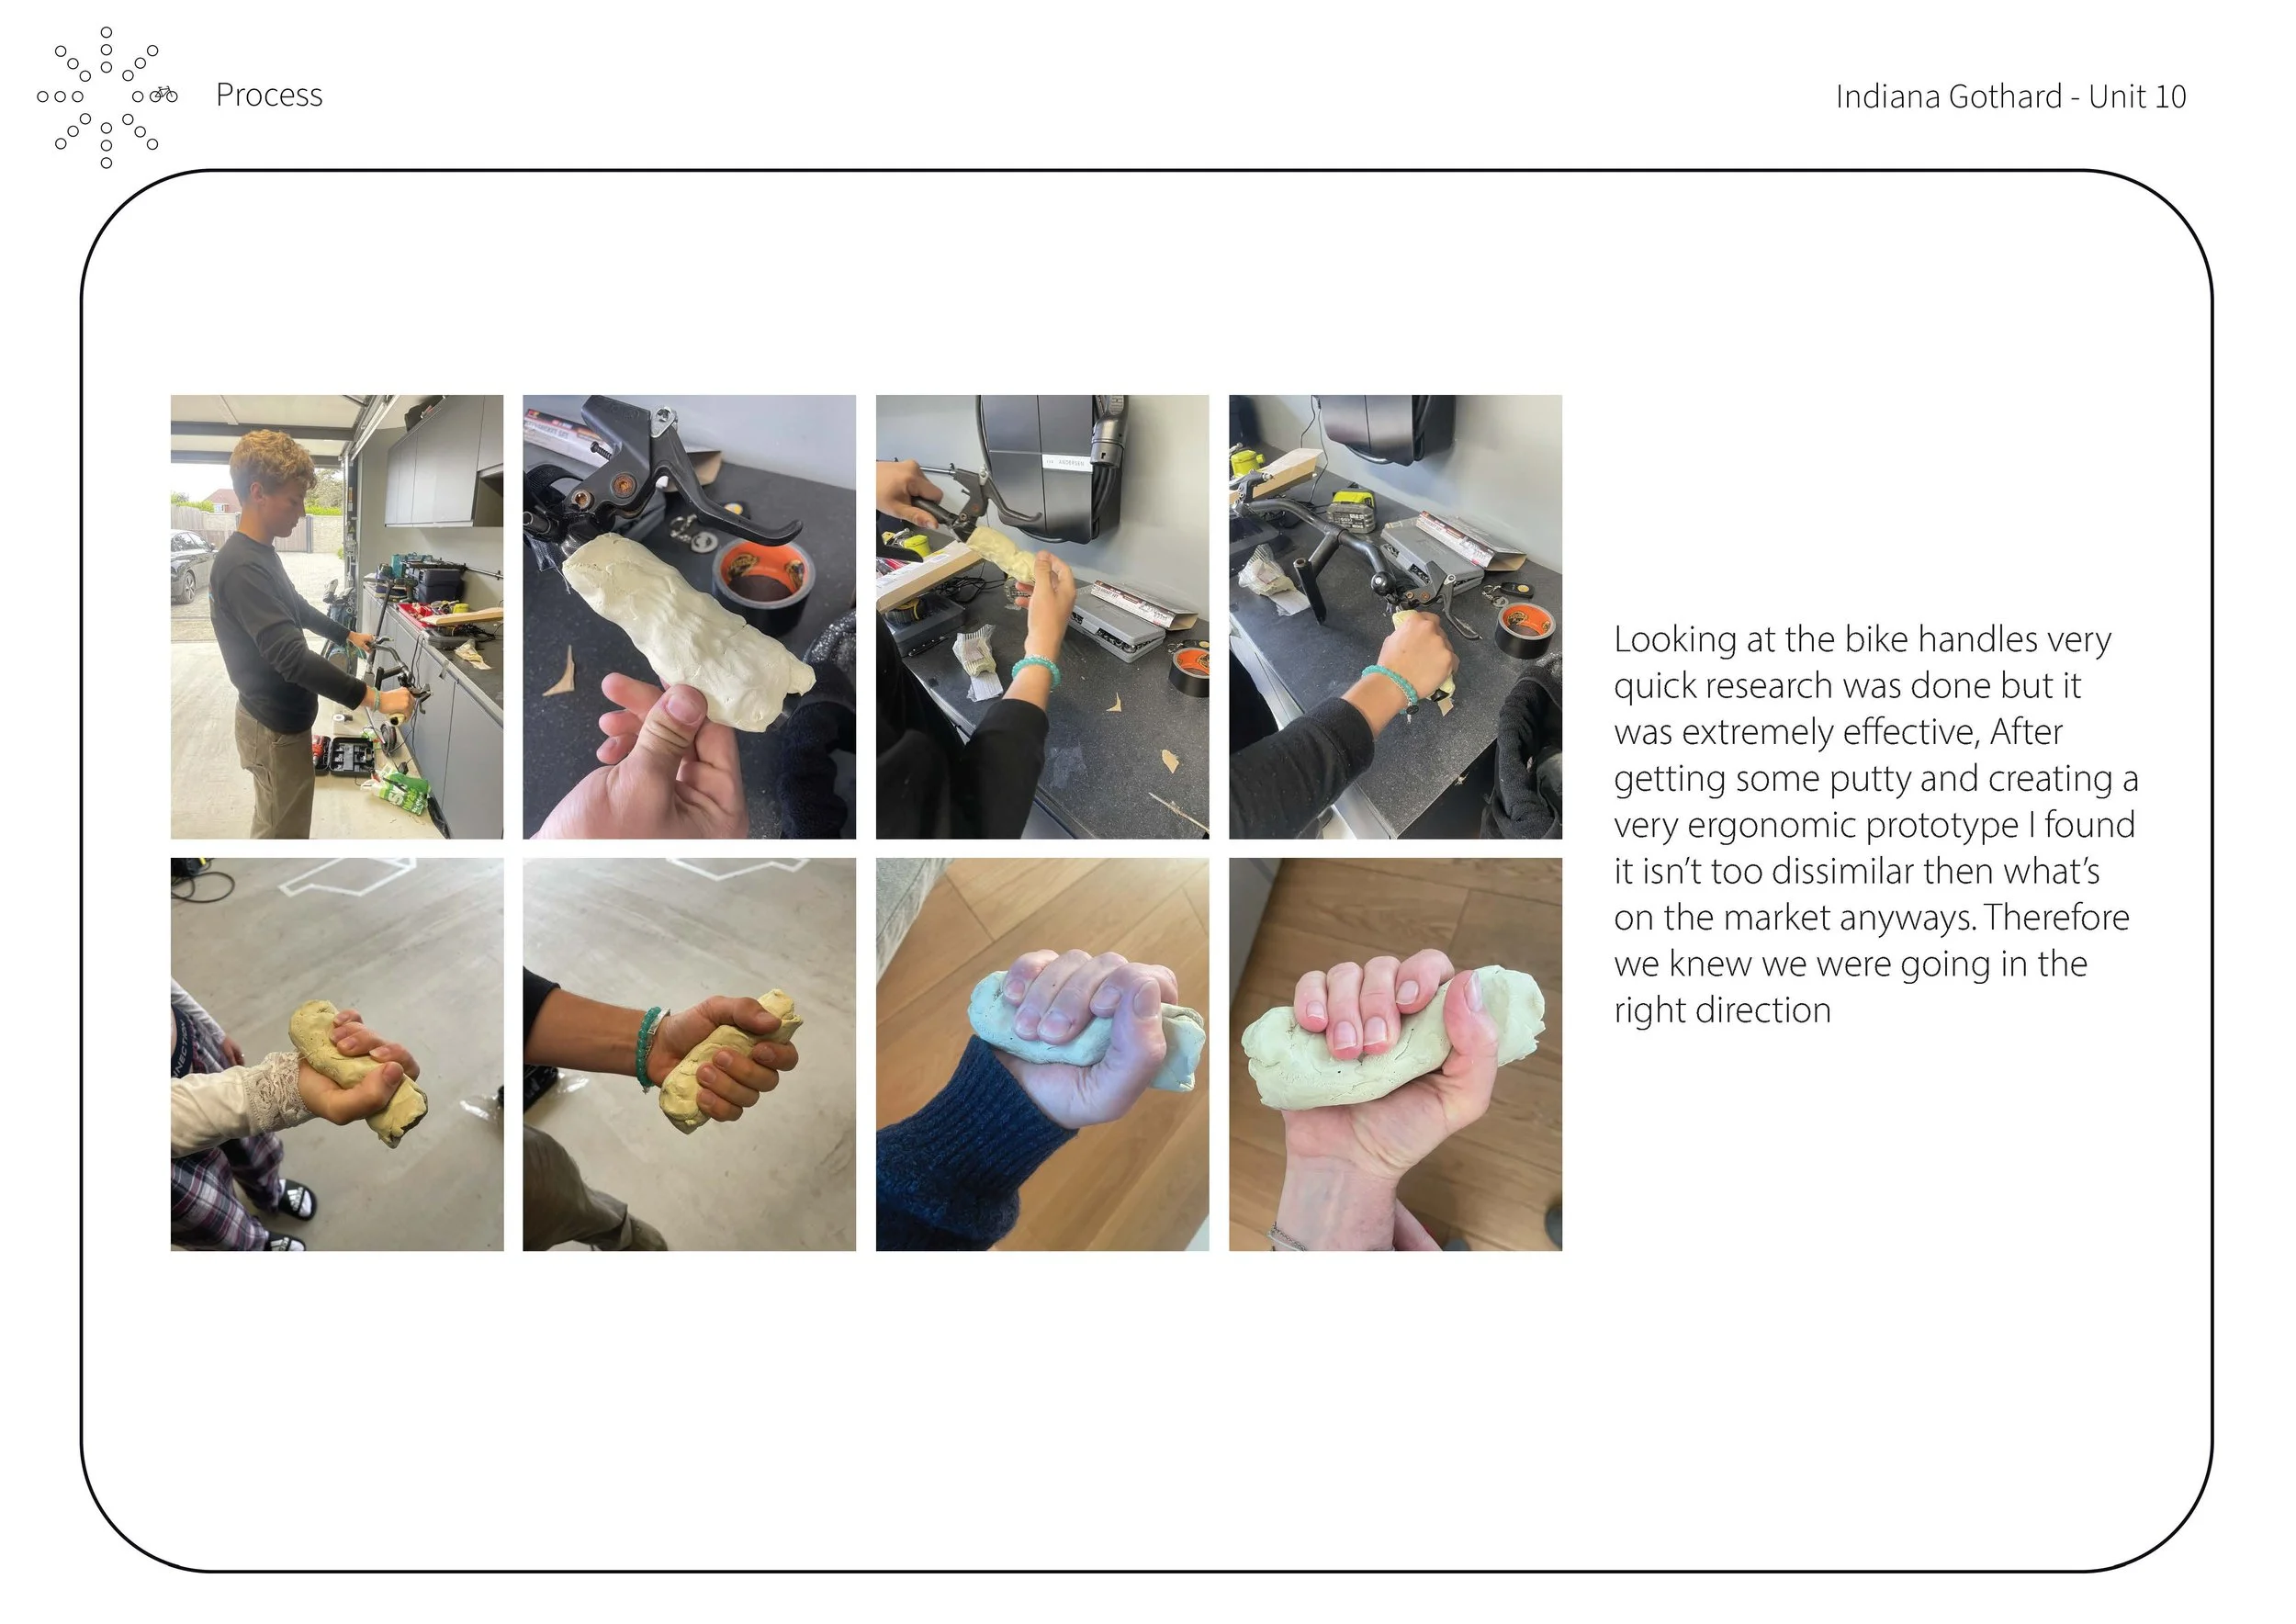
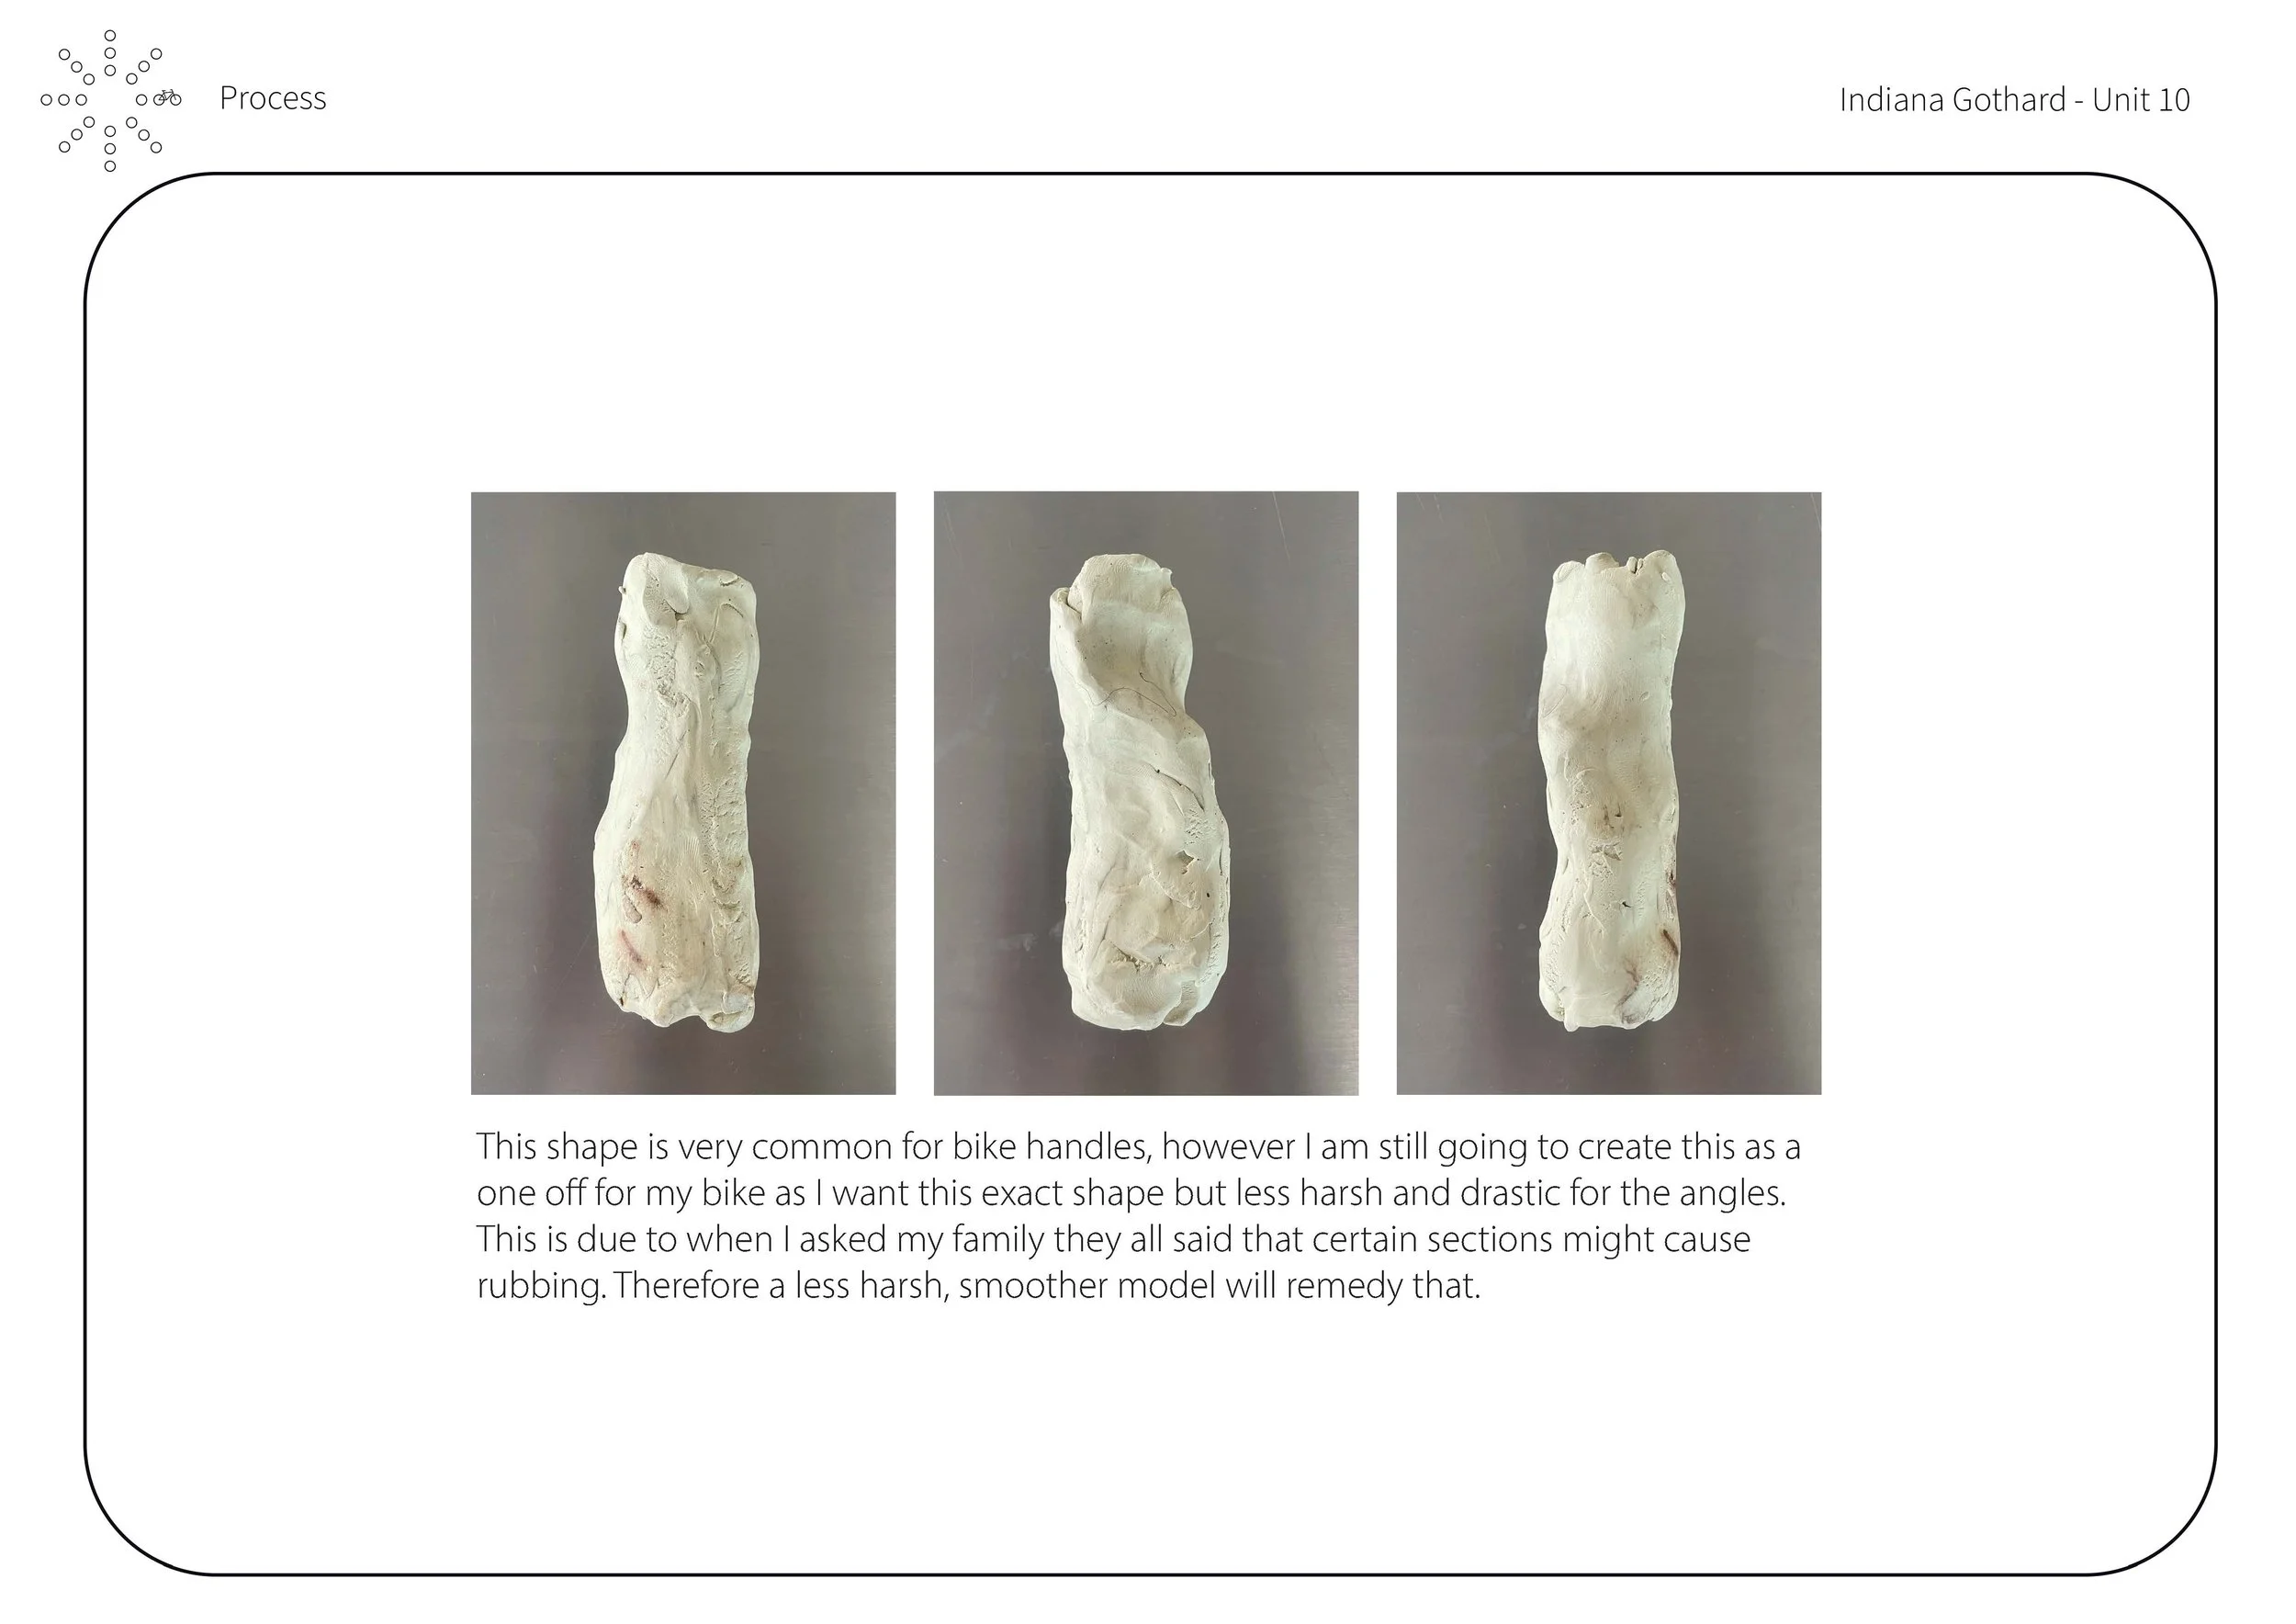
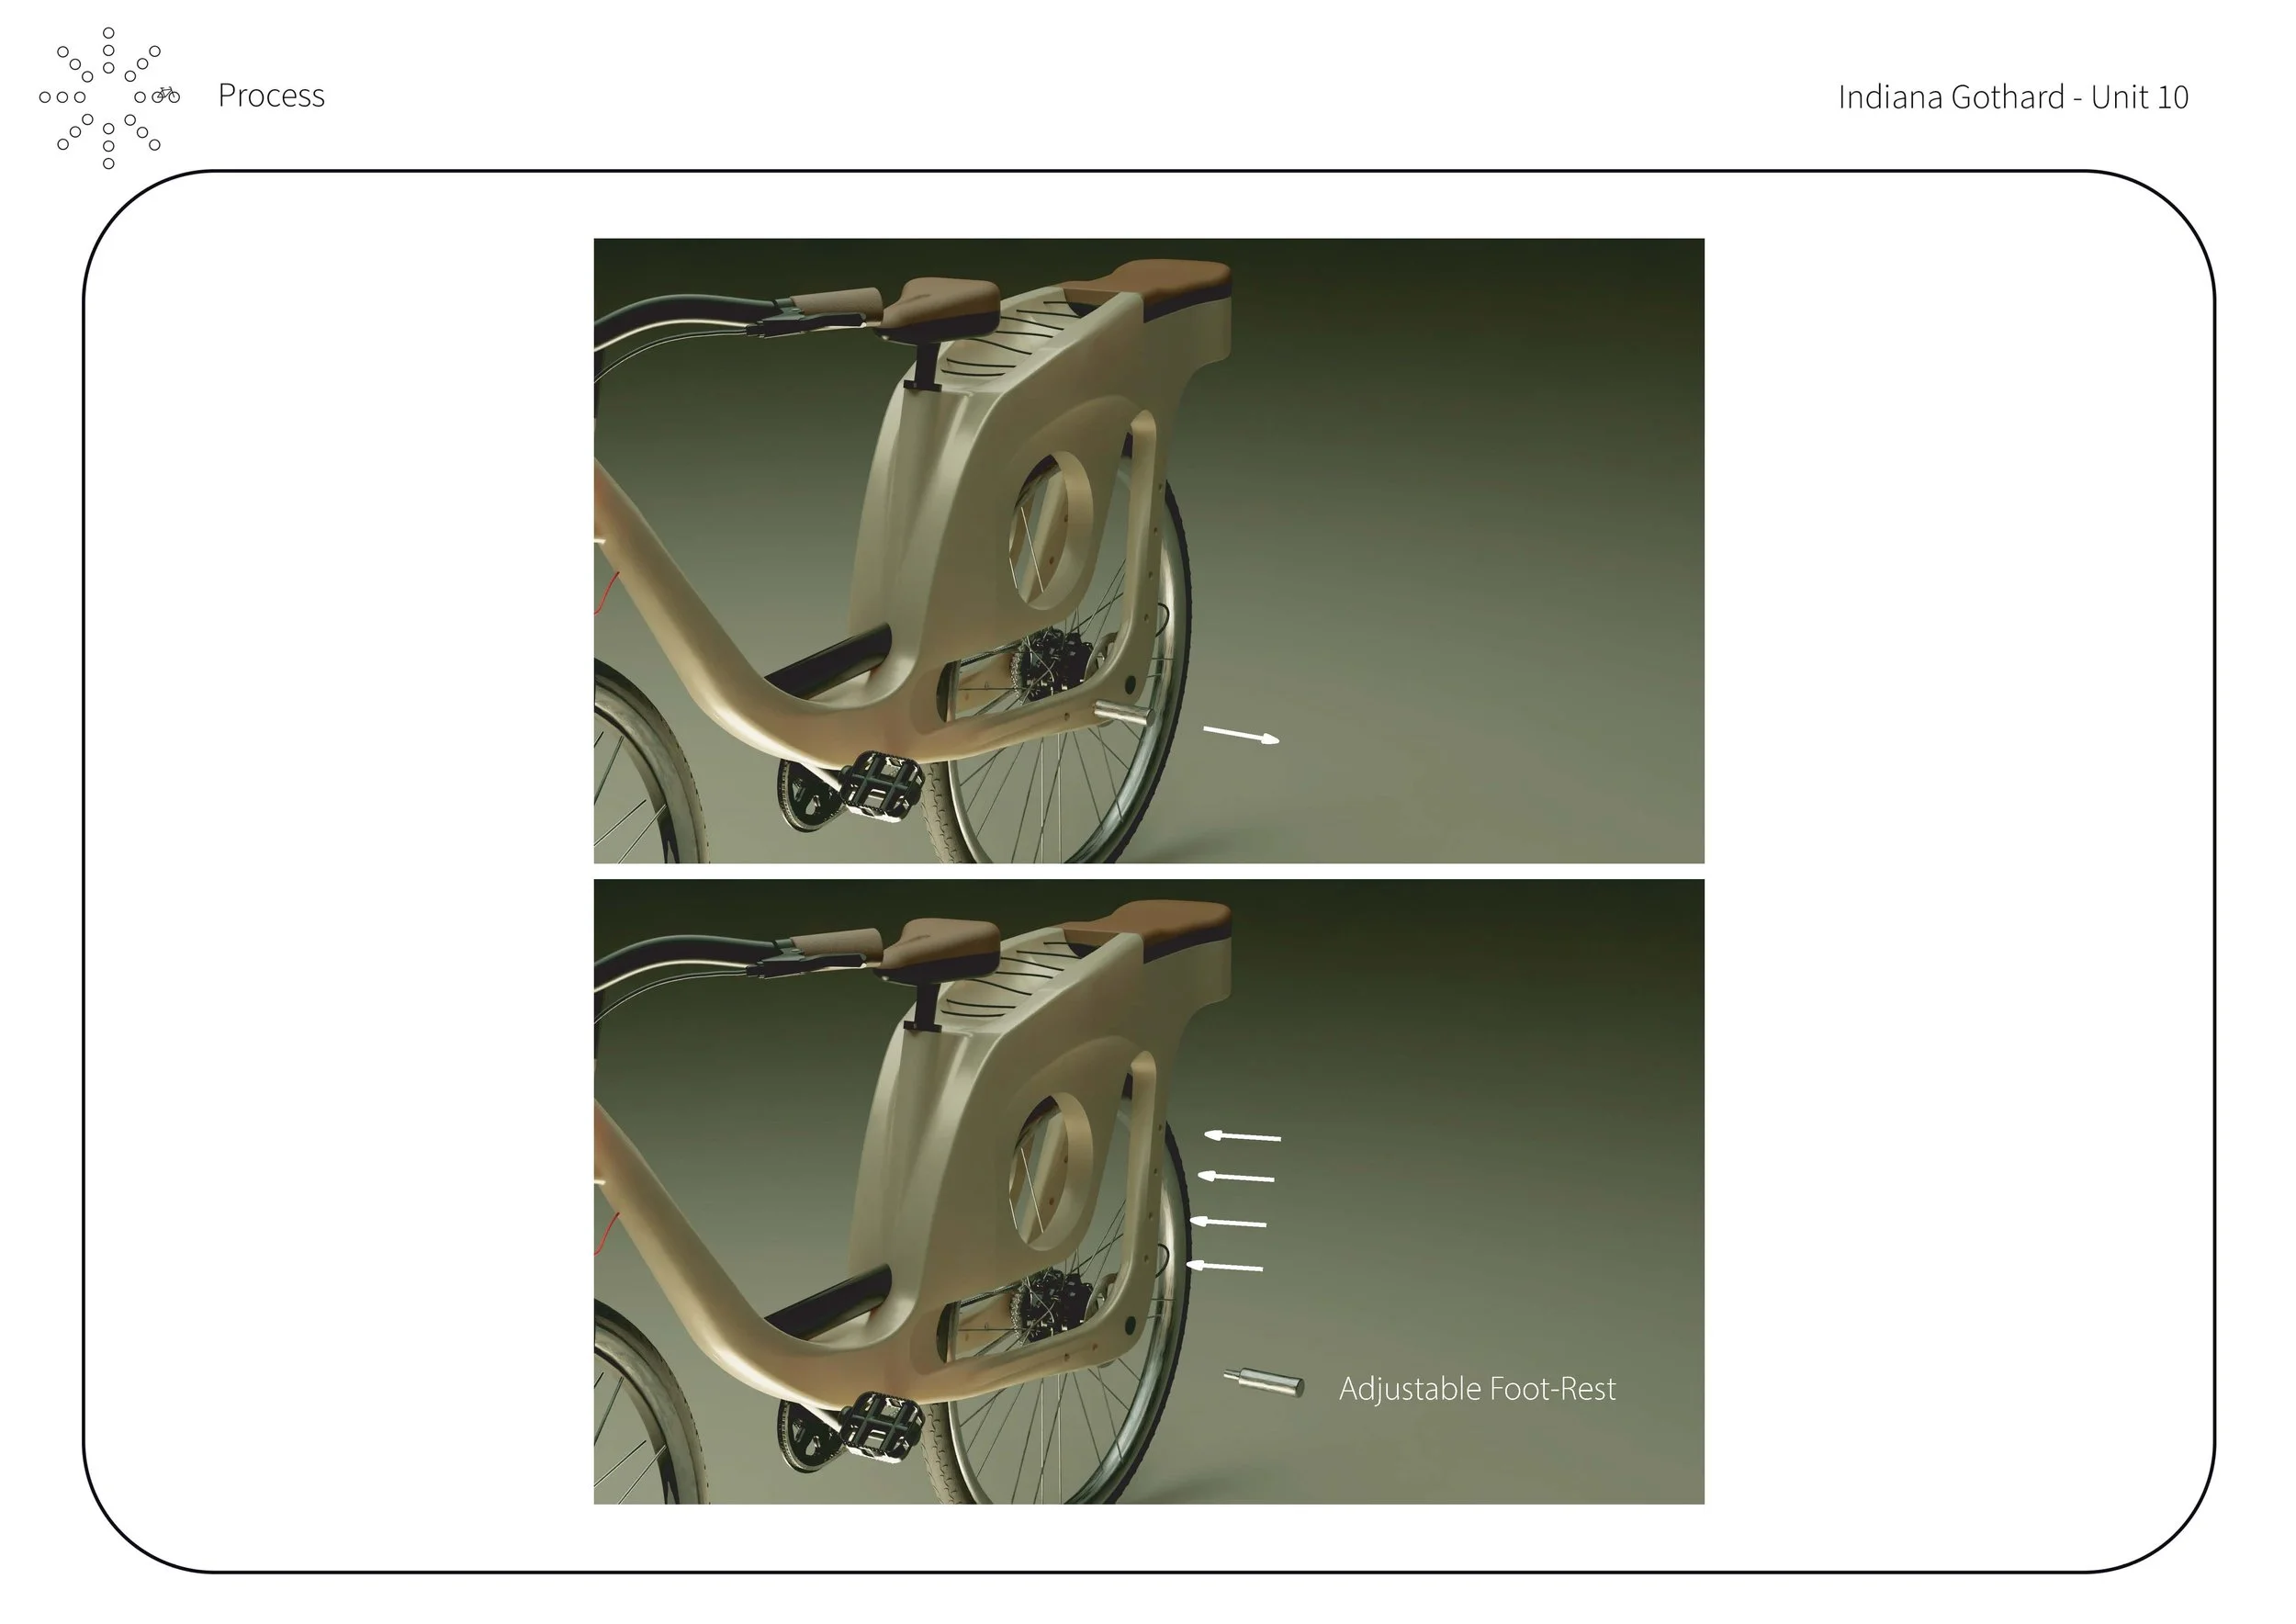
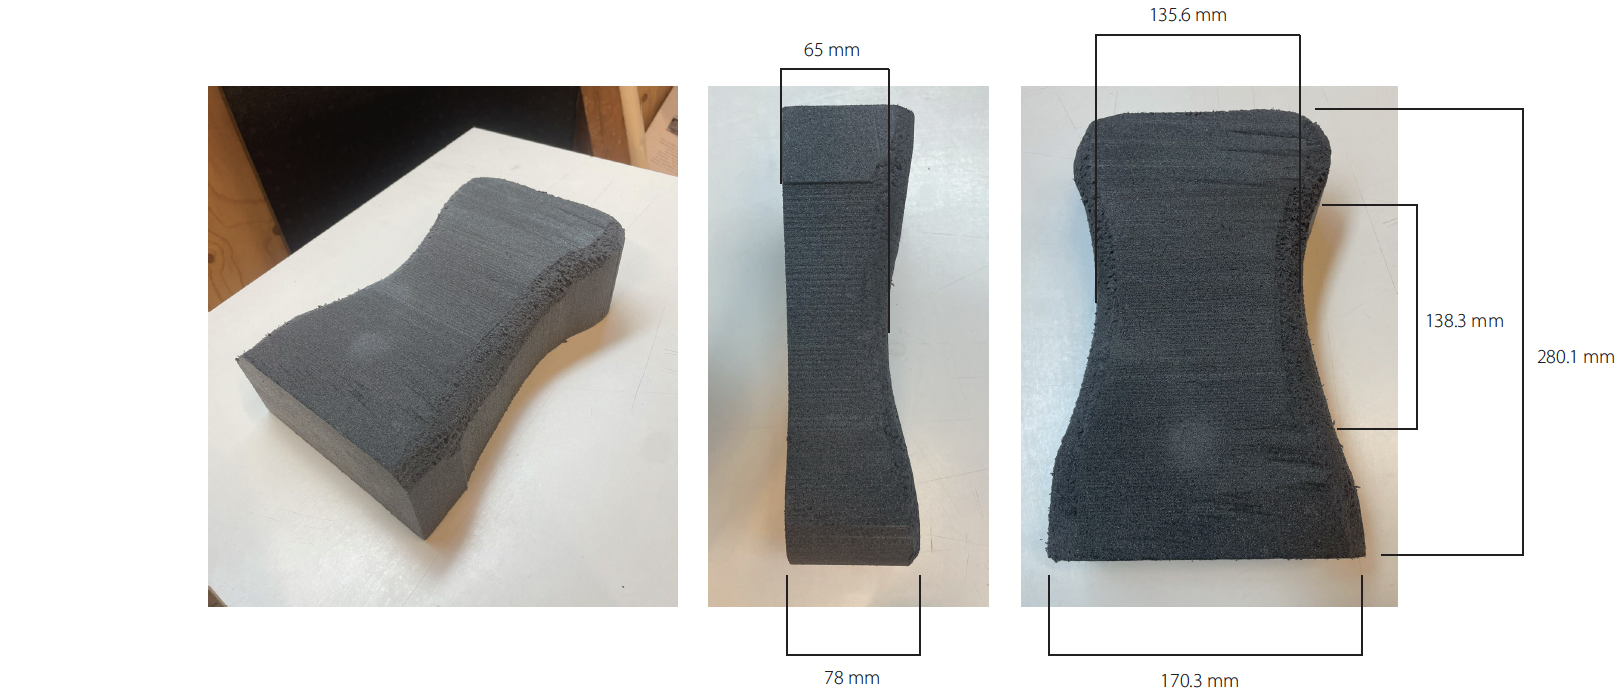
COMFORT AND FUNCTIONALITY
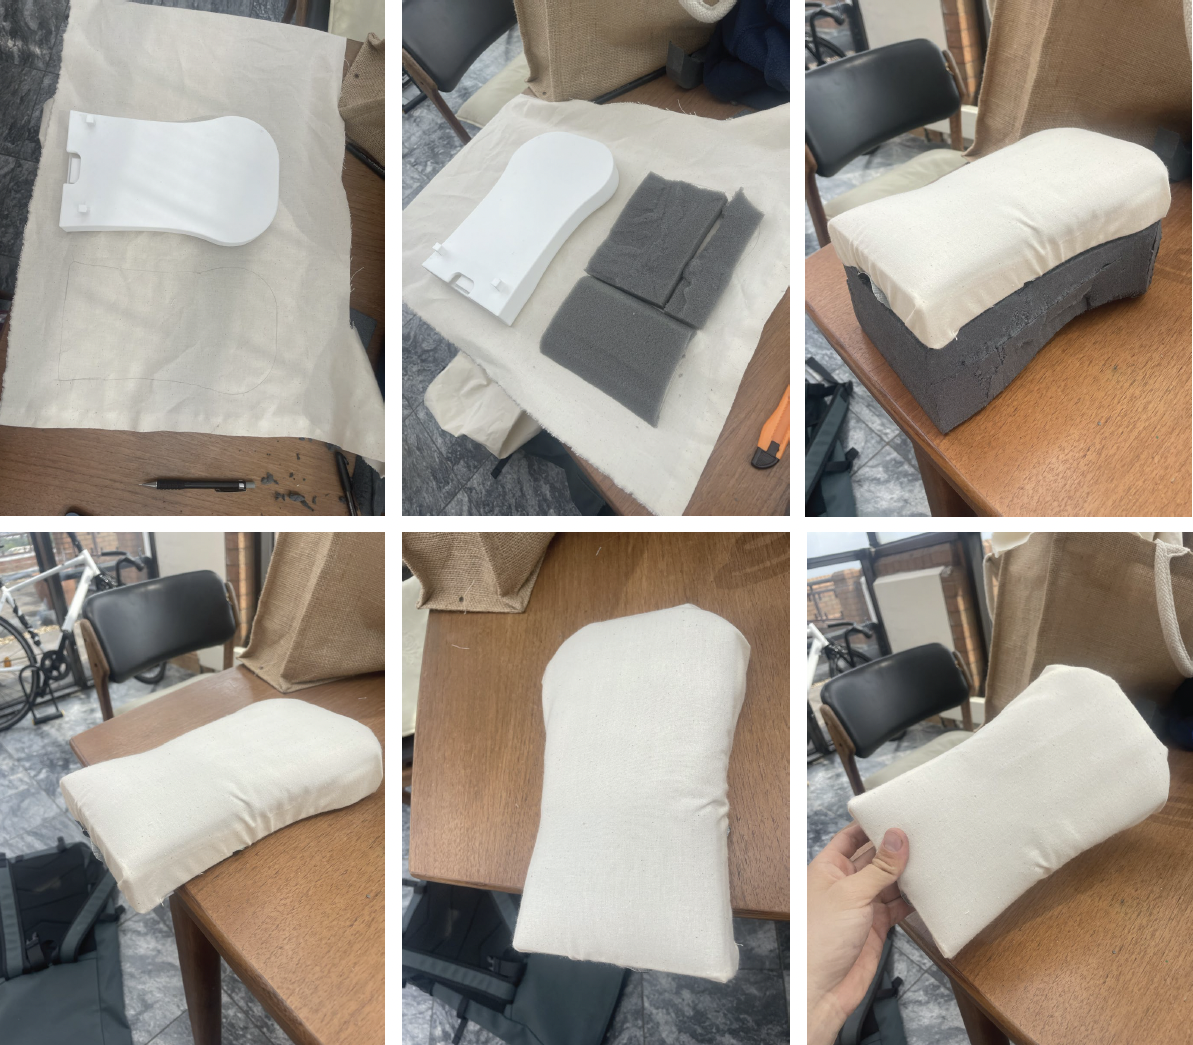
In evaluating passenger ergonomics, I identified two essentials, as evidenced in motorcycle design: a contoured seat that prevents slippage and a stable footrest, both critical for safety. Testing across varied body types to determine which configuration offered the greatest comfort and stability provided valuable insights that directly informed the design direction.
09 BRAND IDENTITY
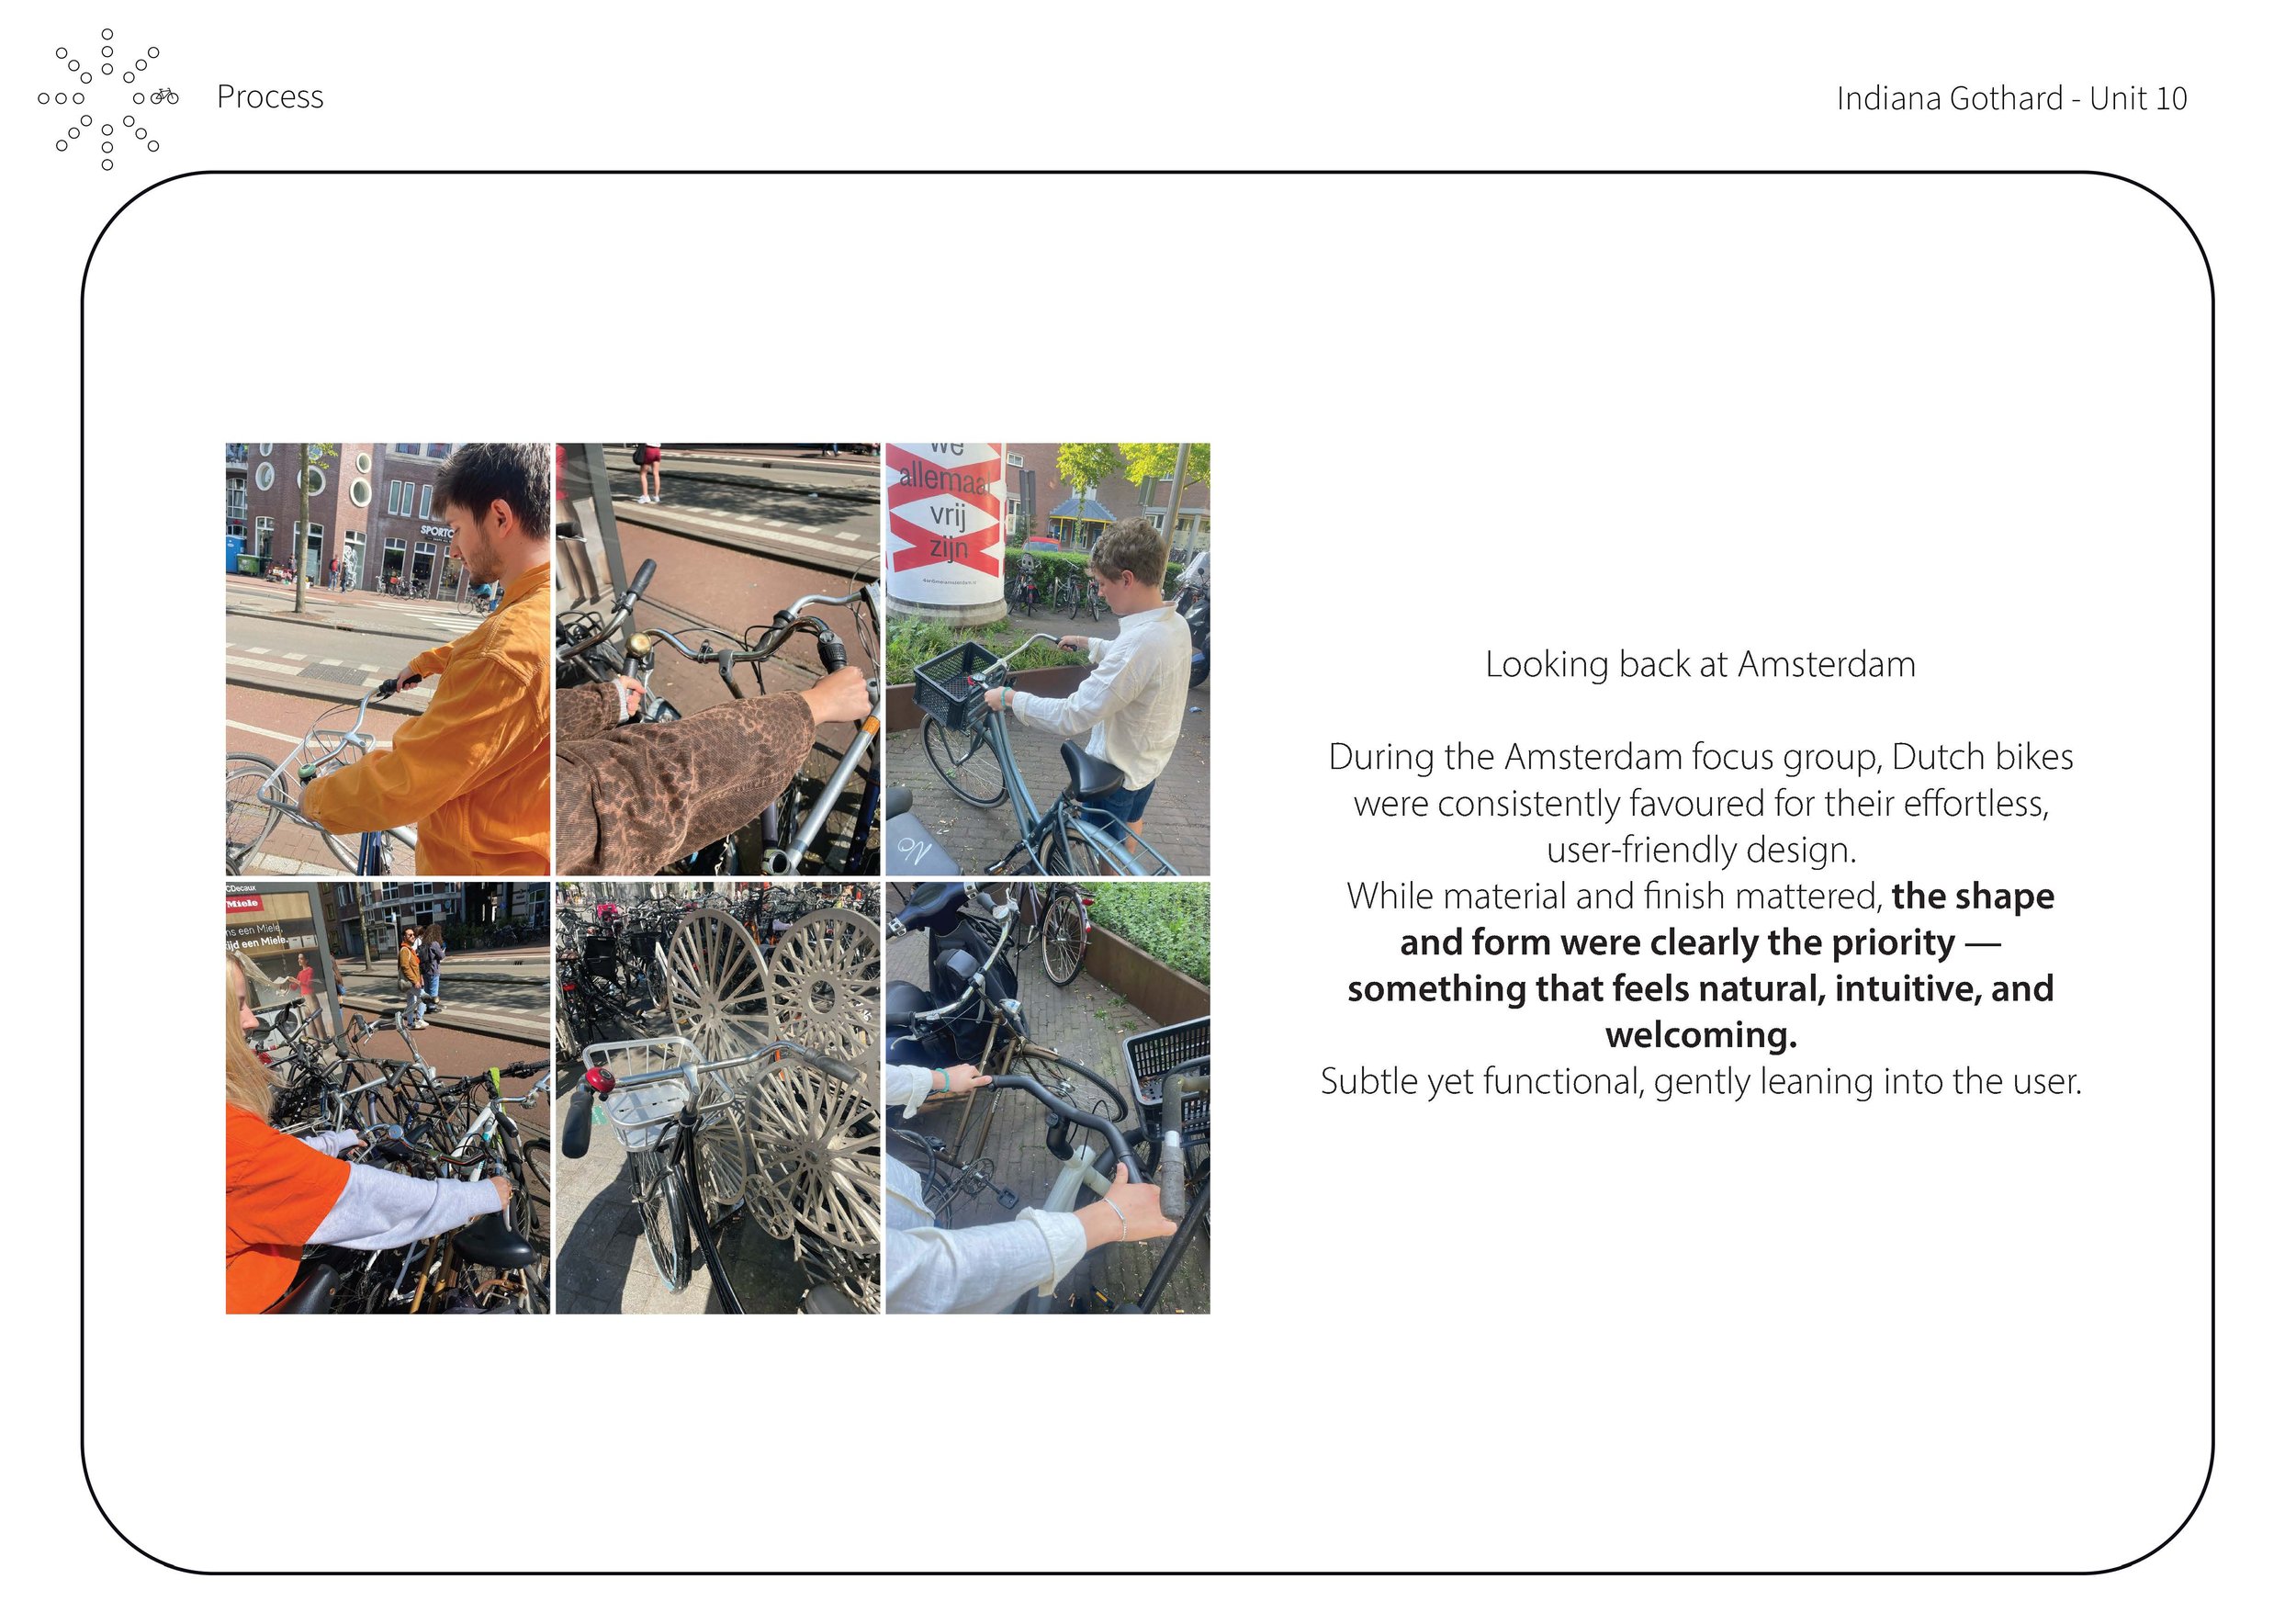
BRANDING AND FINALISATION
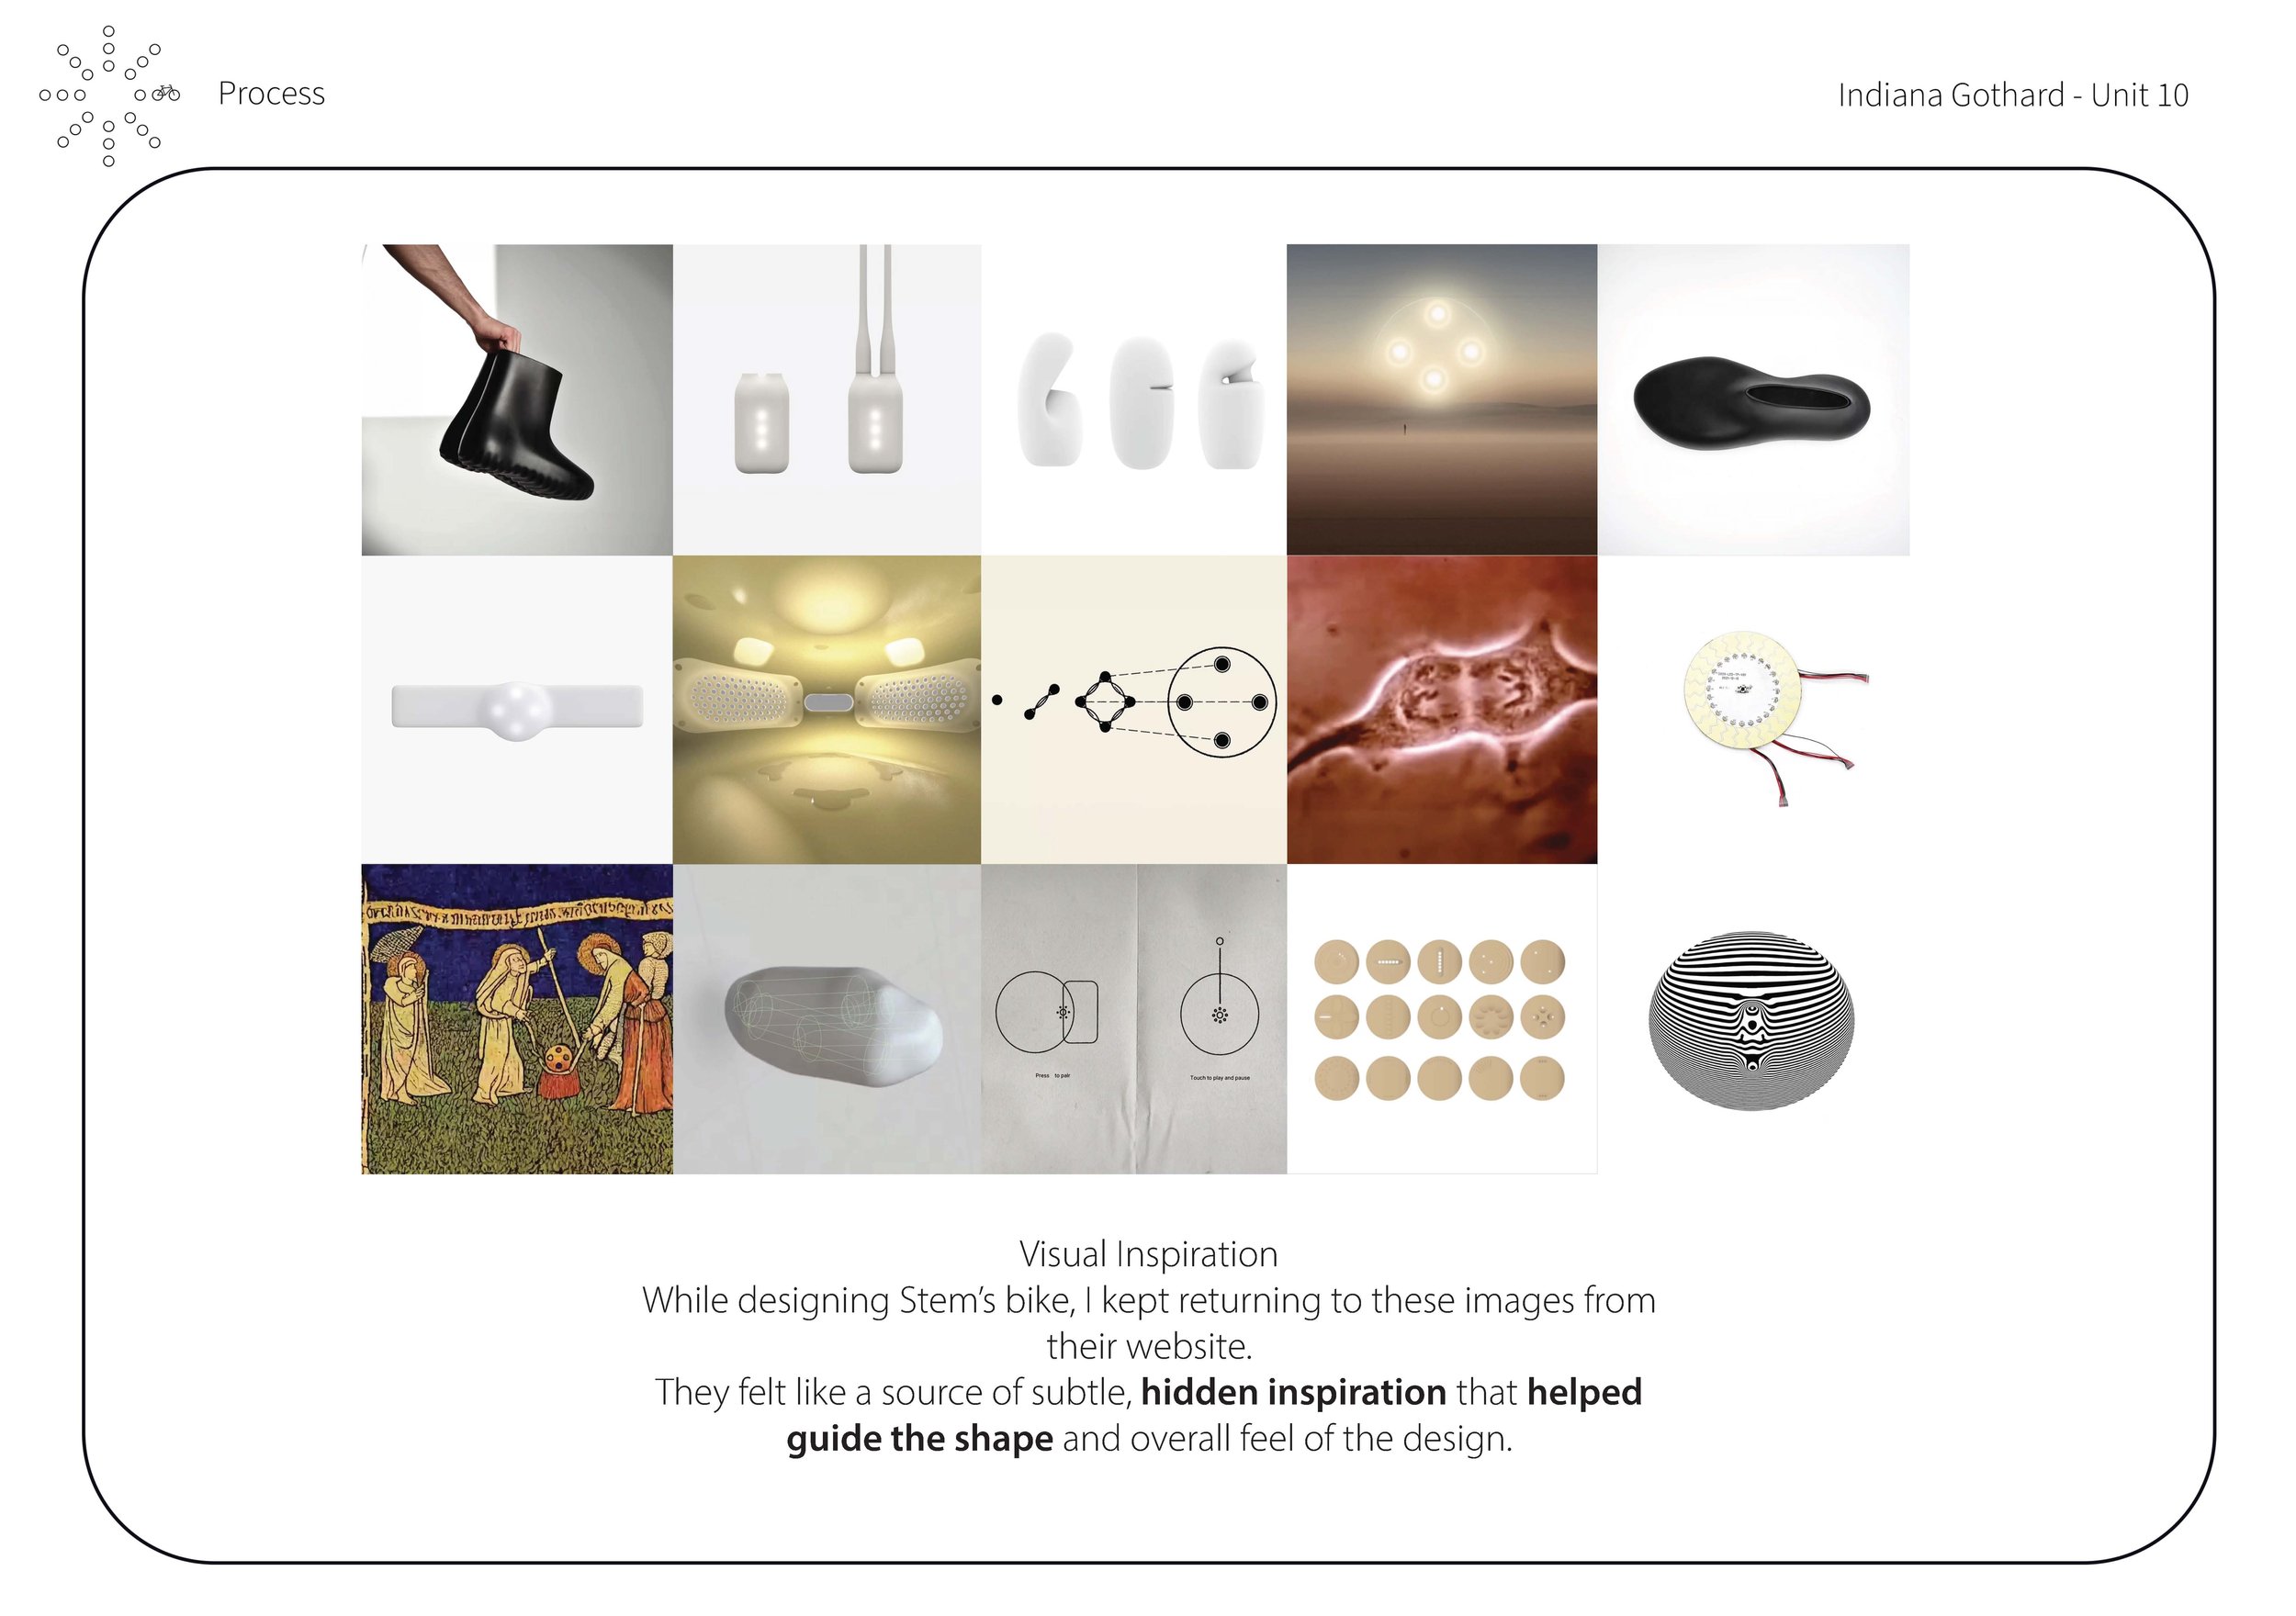
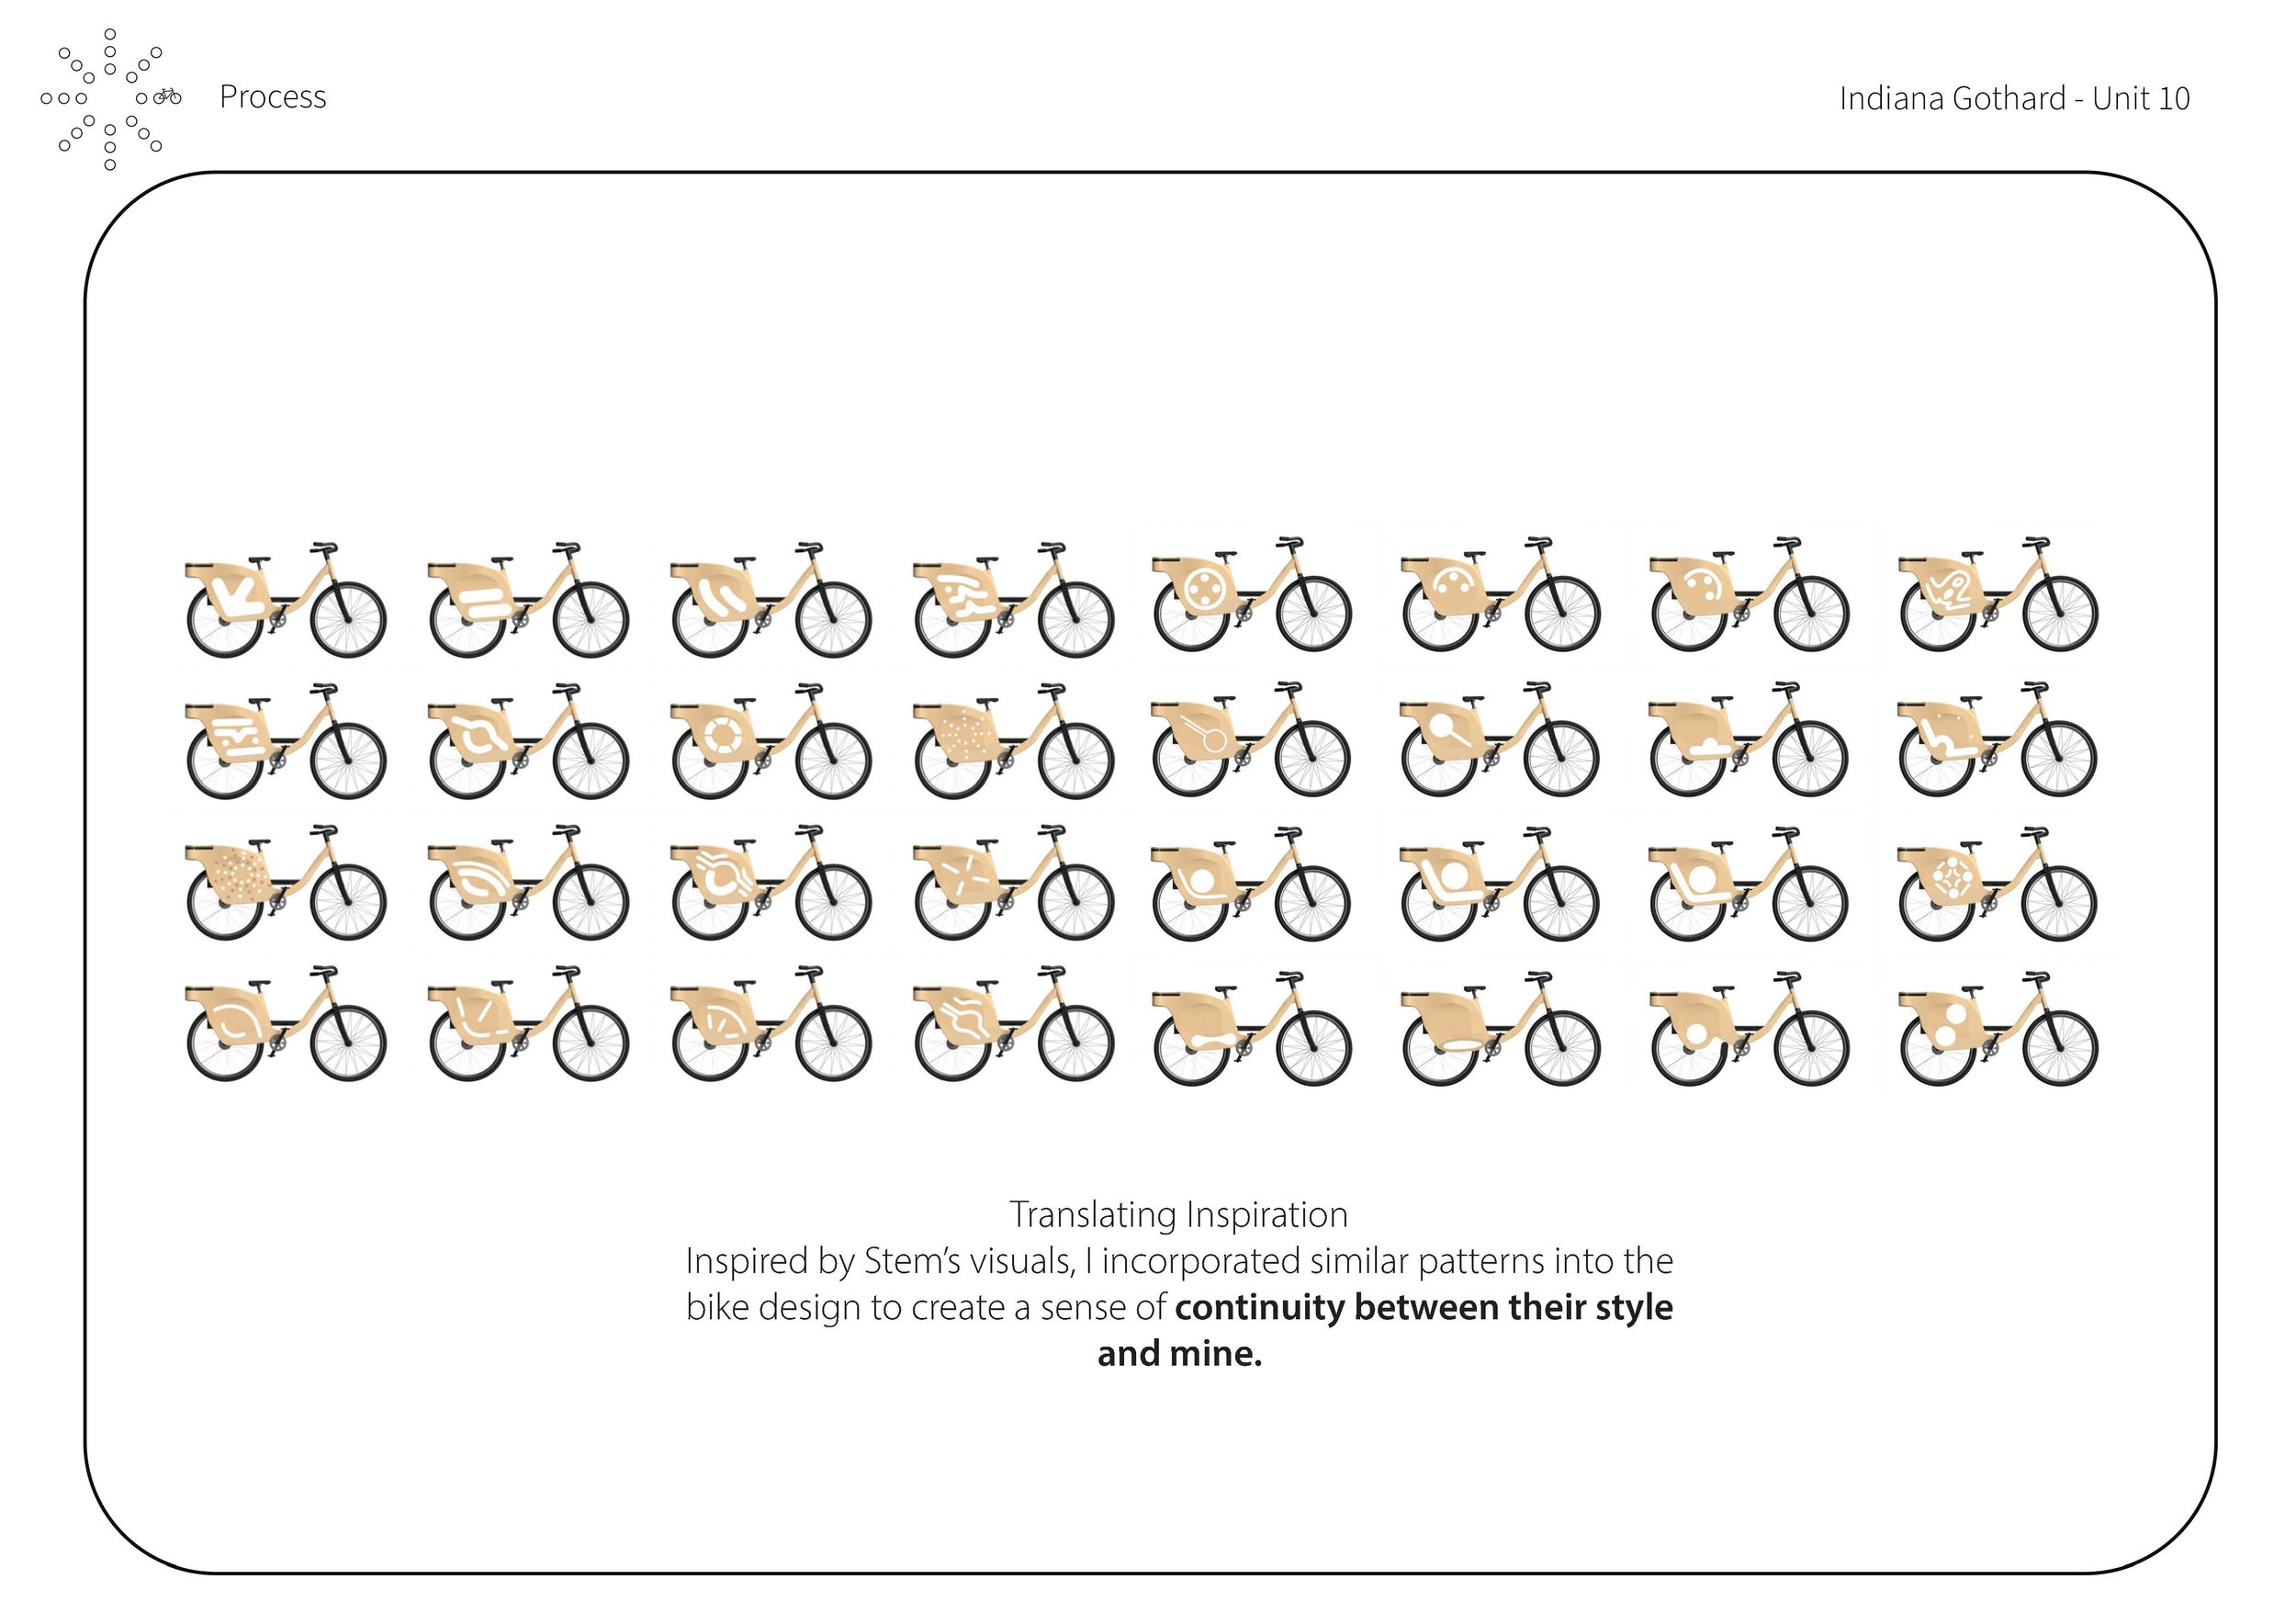
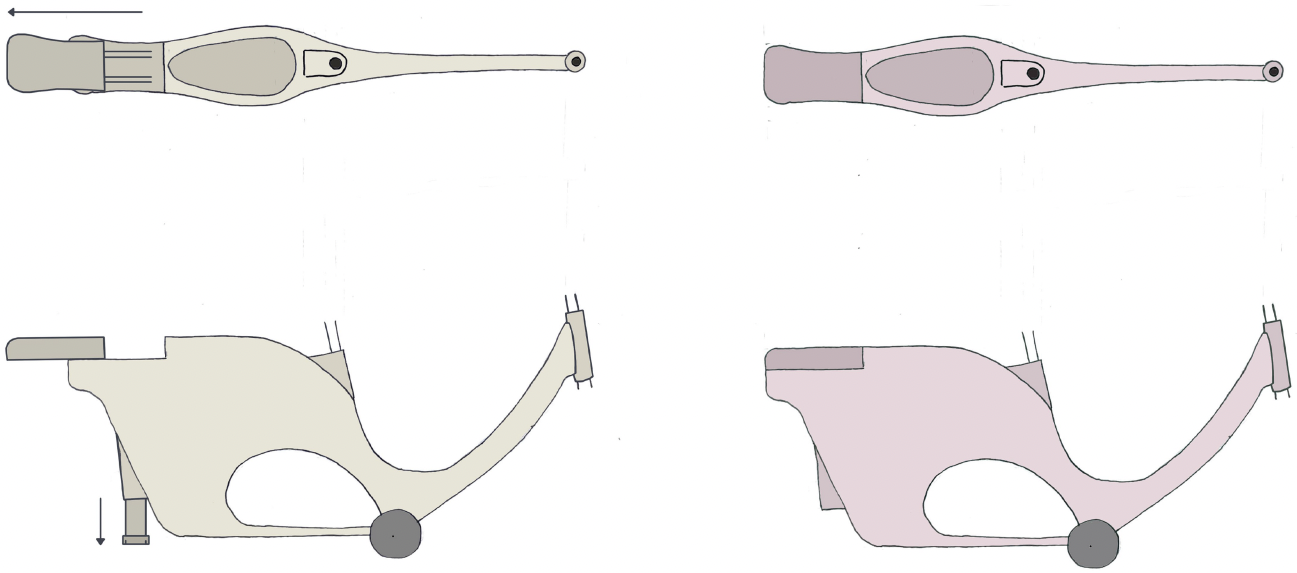
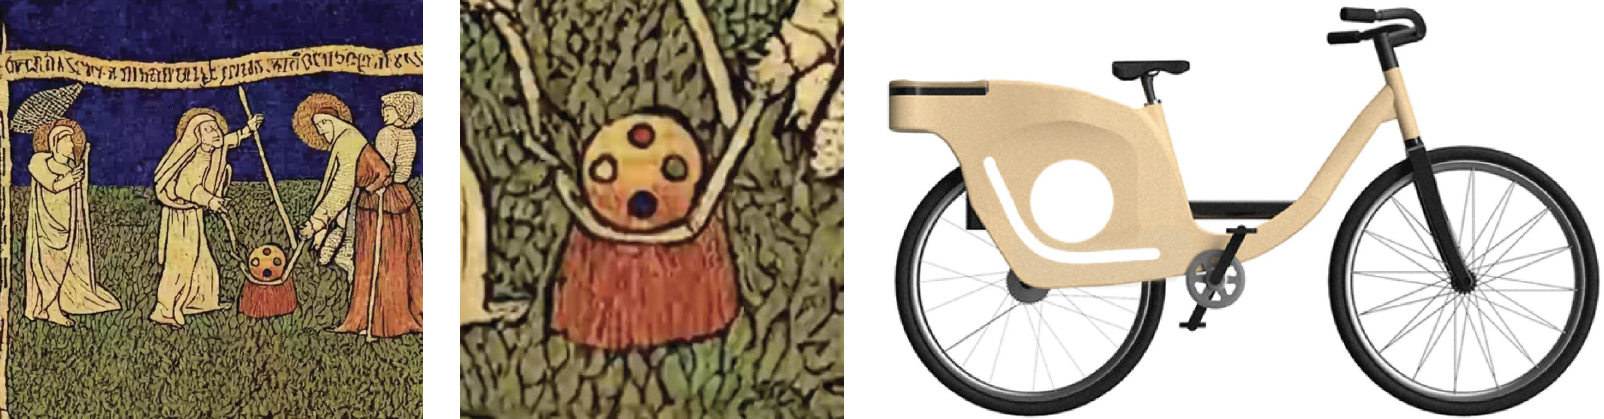
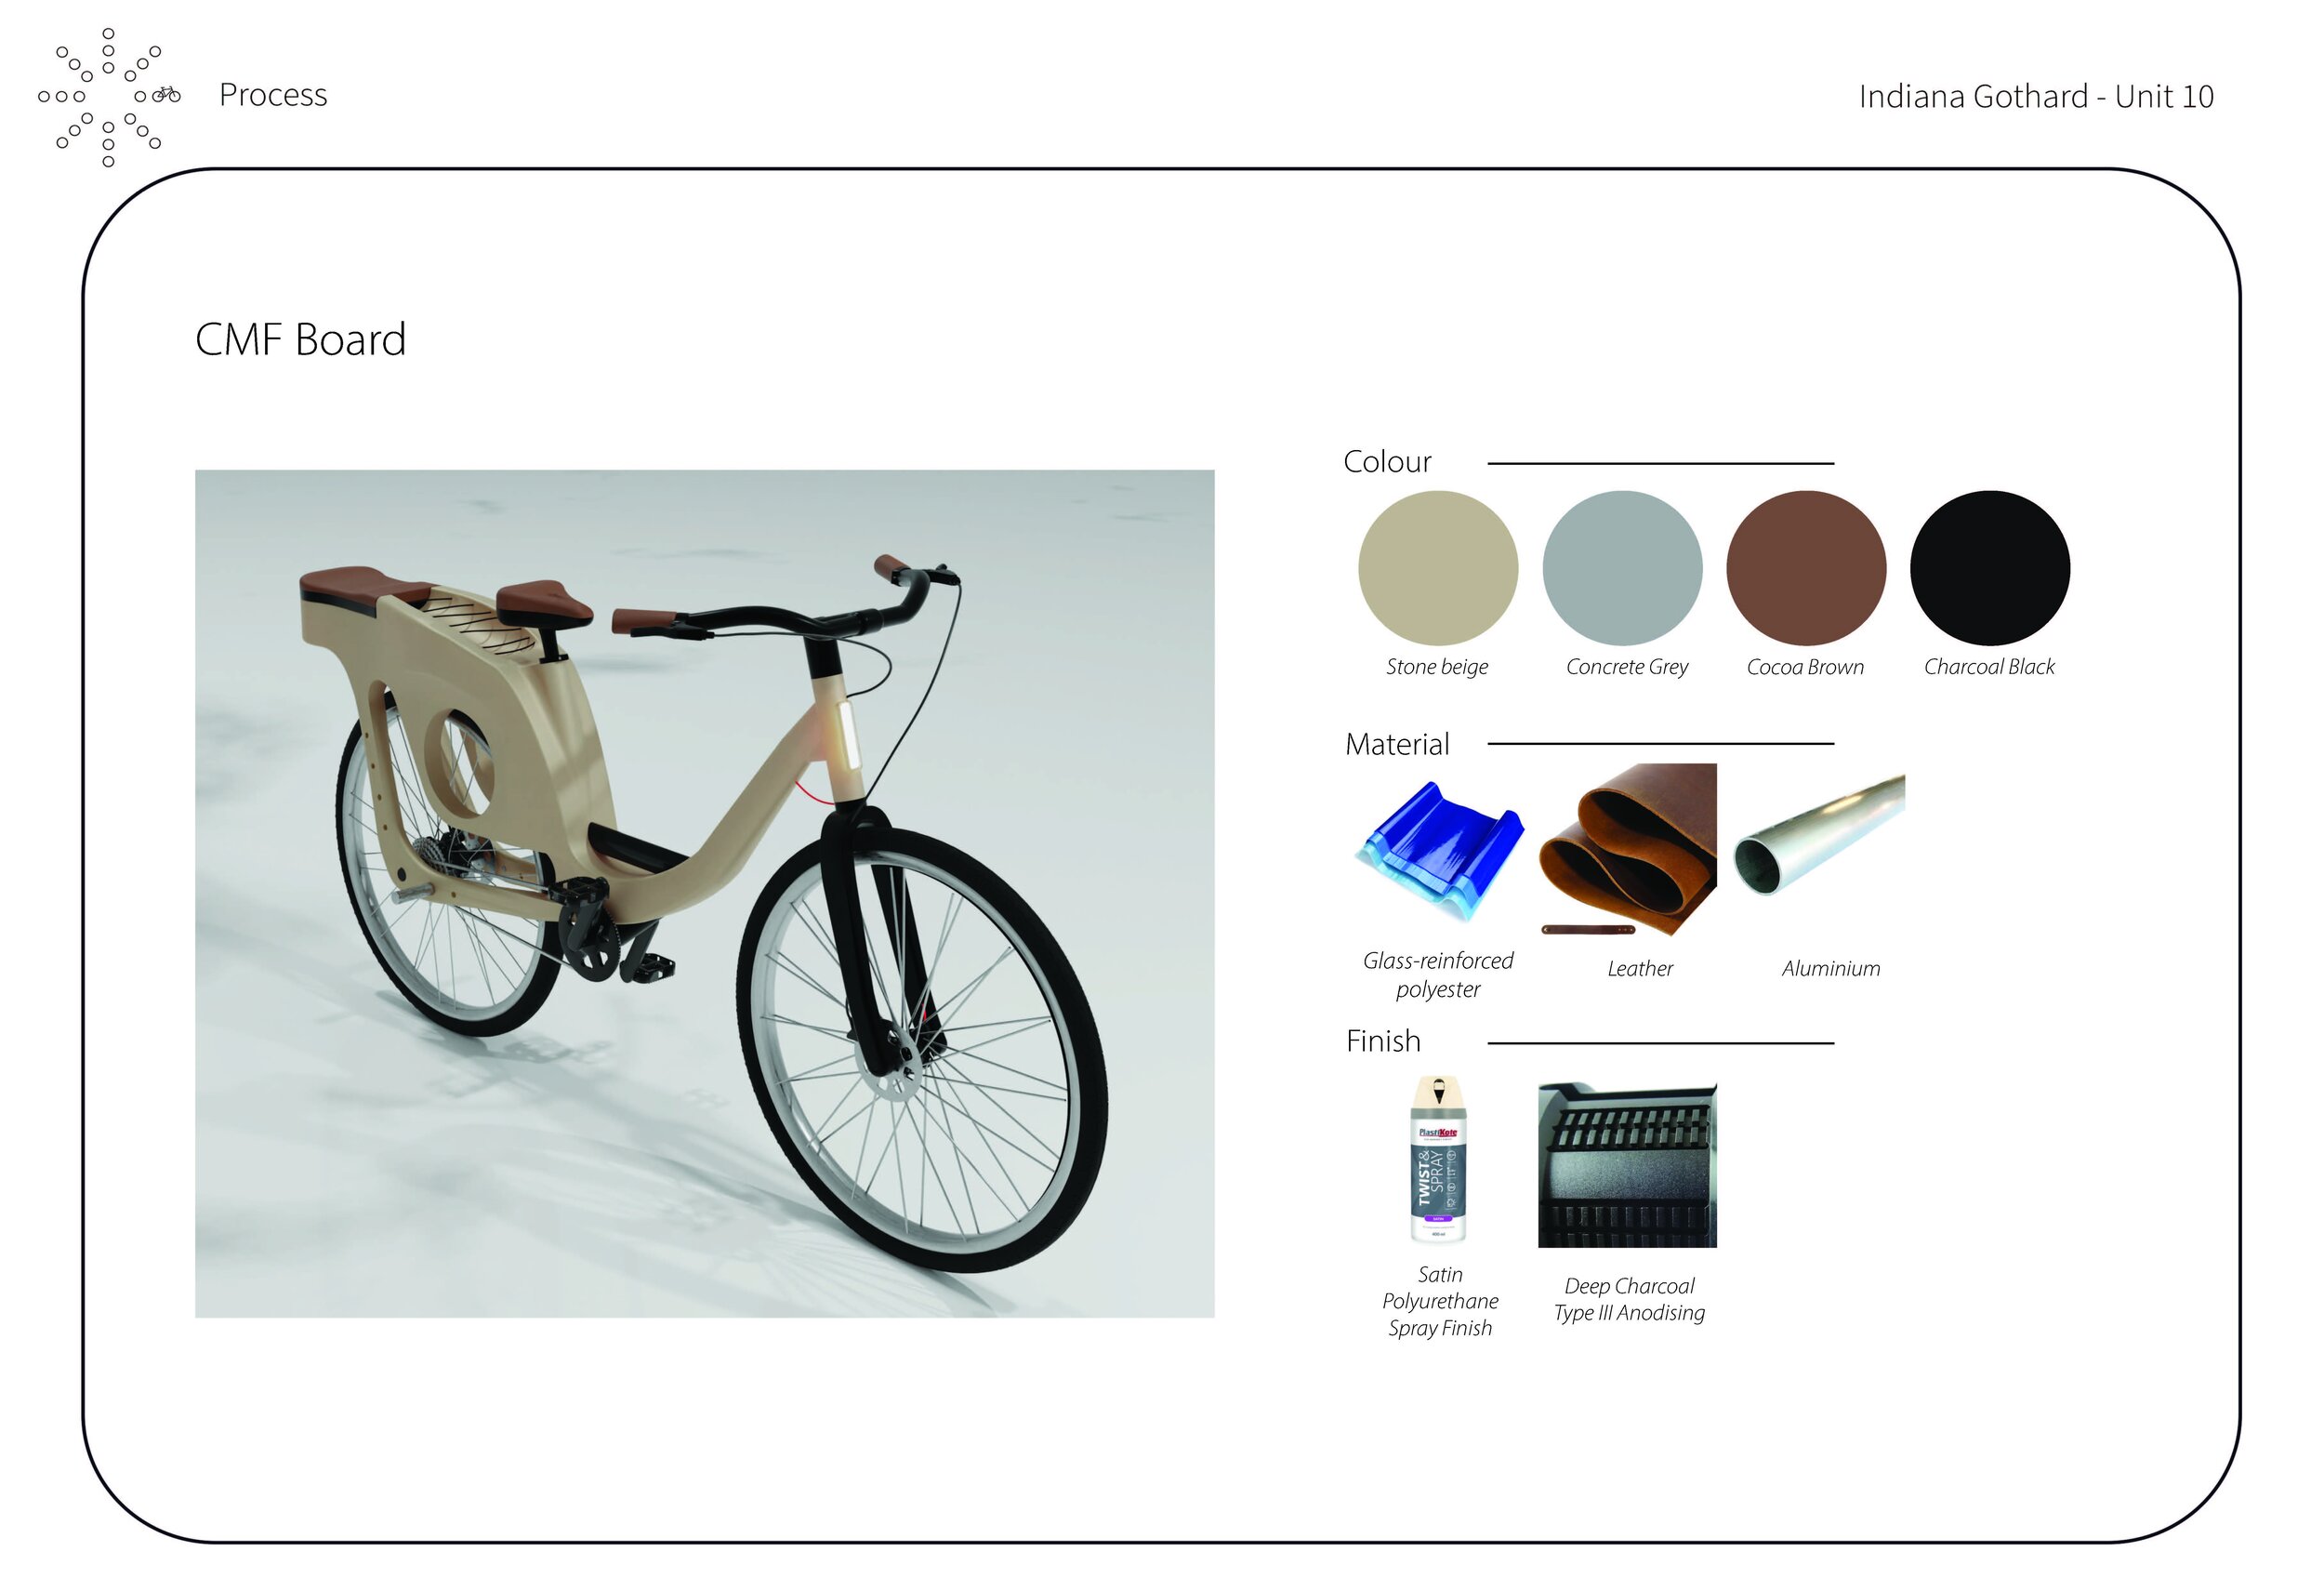
I found it challenging to design a bike for a company outside the transport space, so I turned to their website for inspiration. By studying their design language, I adapted my CMF and reworked the rear section, drawing directly from one of their artworks. After multiple iterations, I refined the proportions and concept, which led to the final drawing. From there, I developed the CAD, graphics, and ultimately the full project.

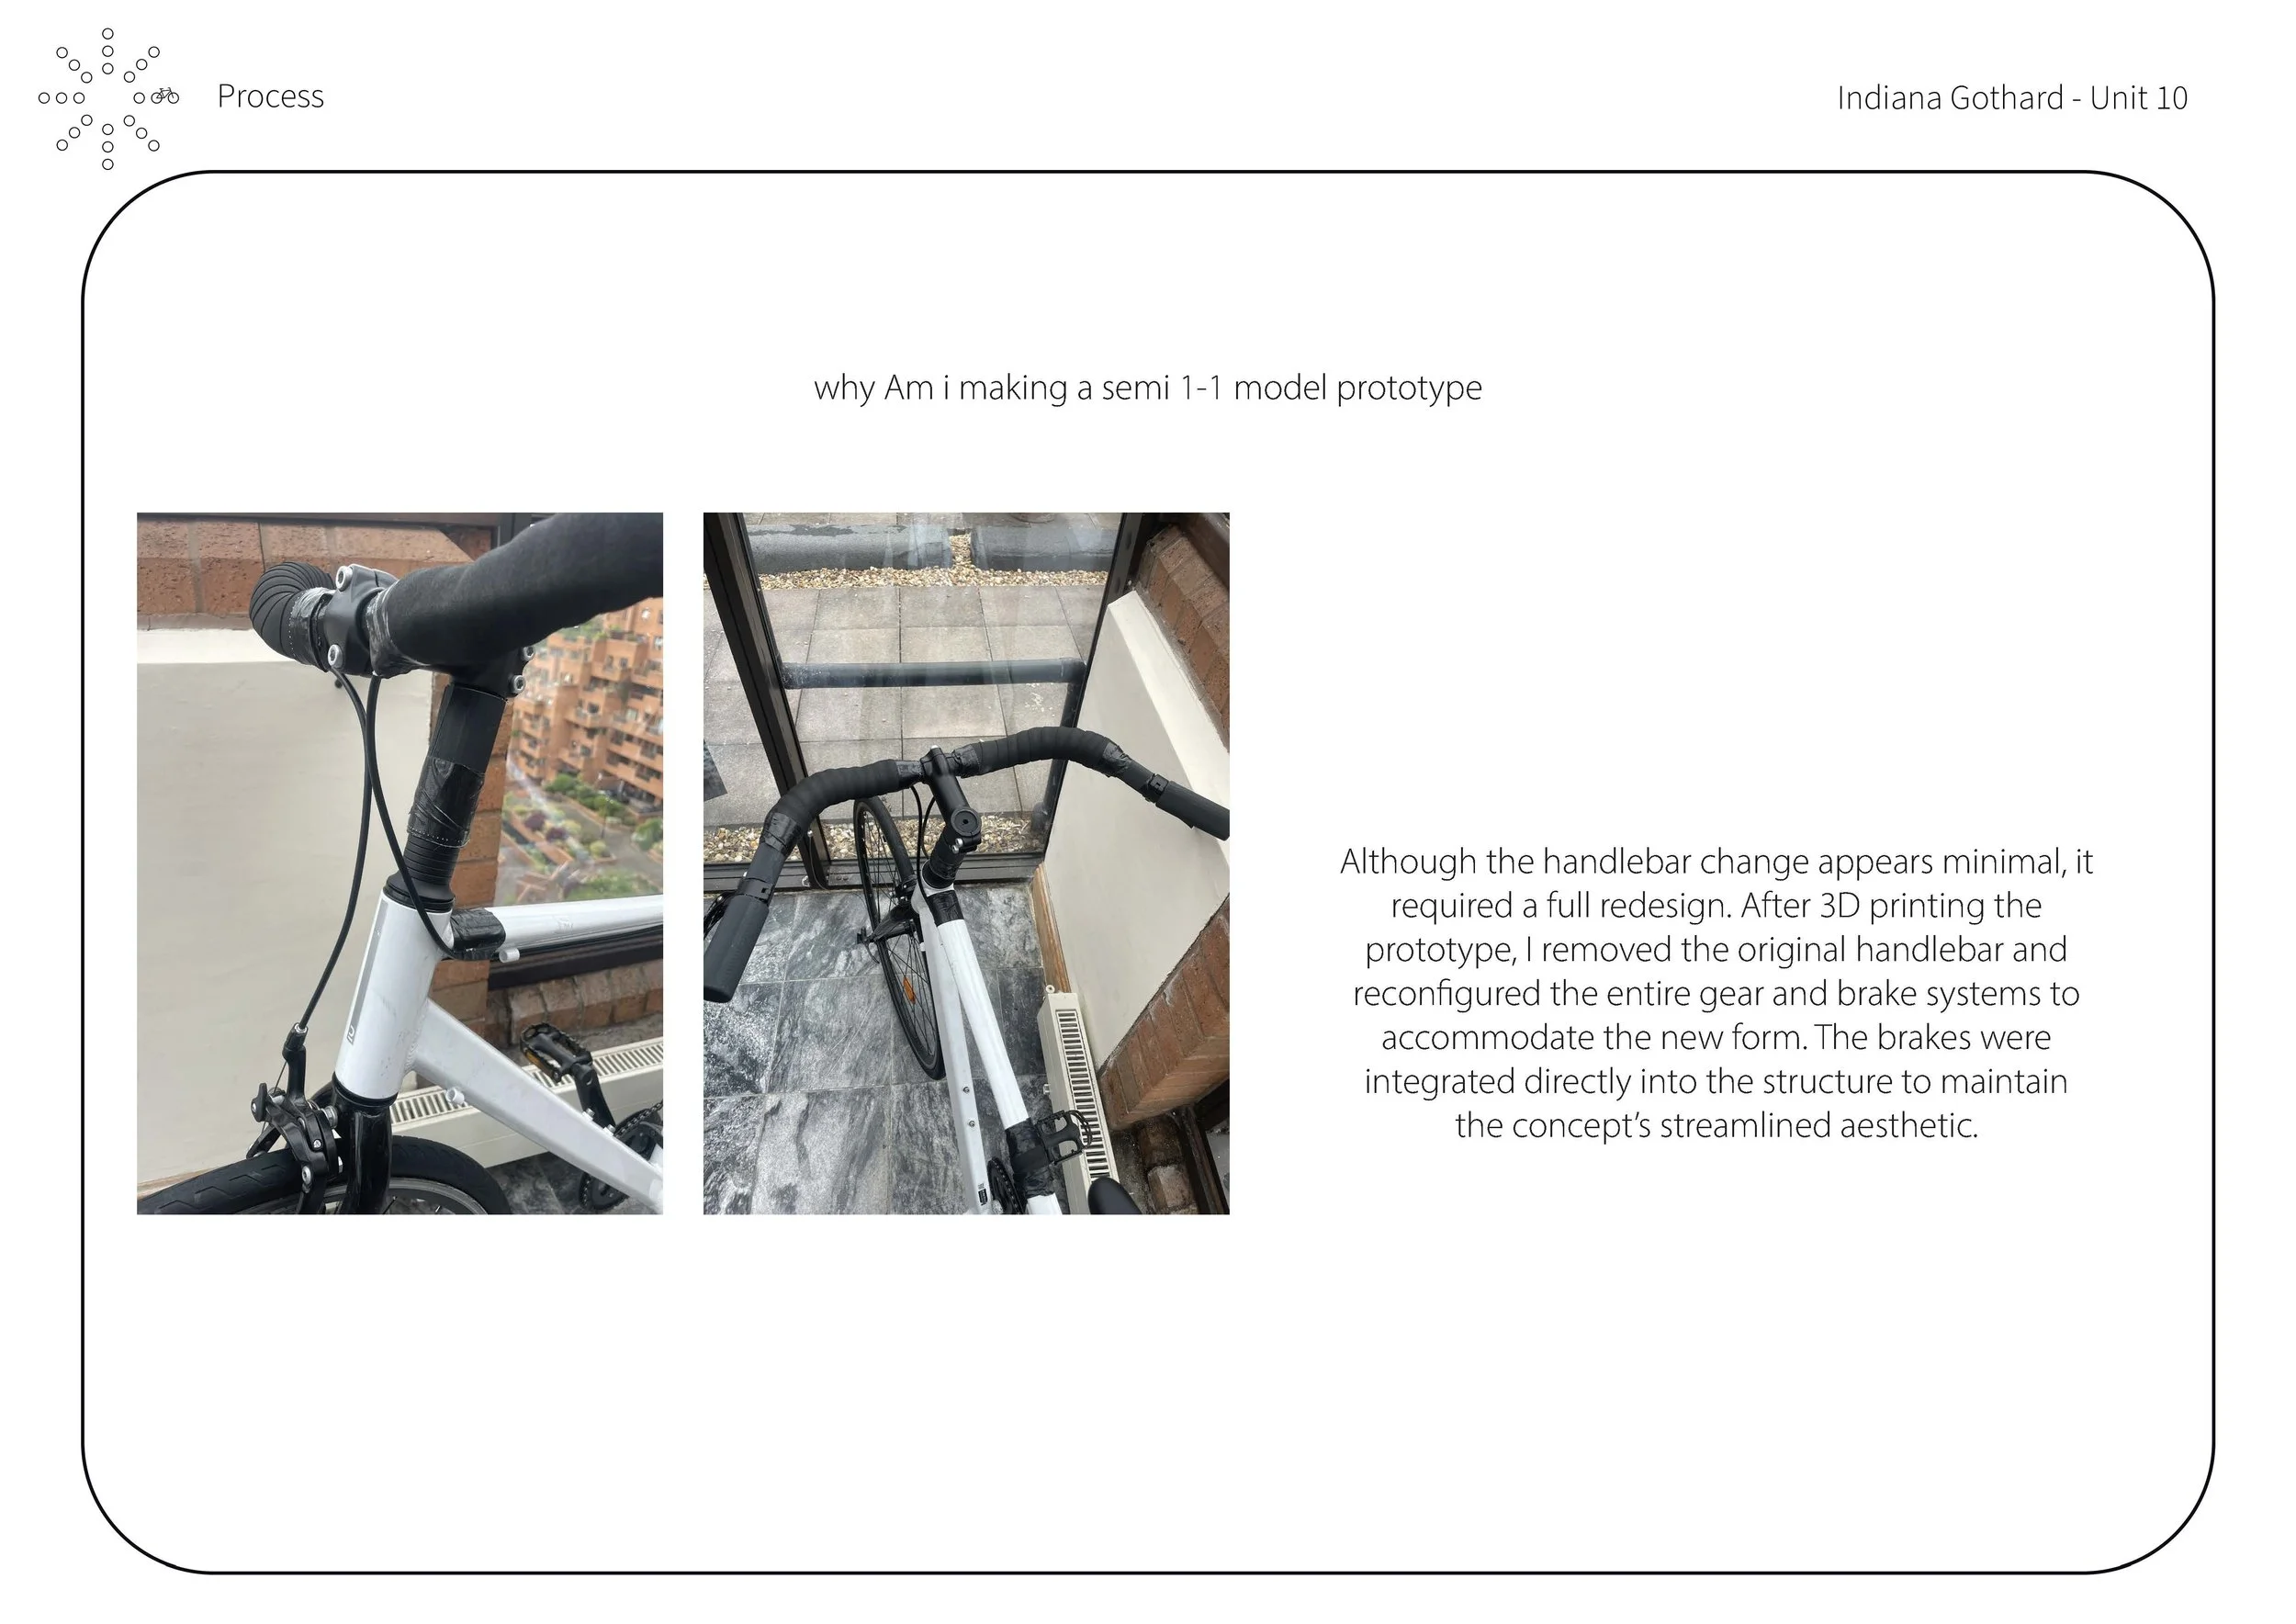
07 ONE TO ONE MODEL


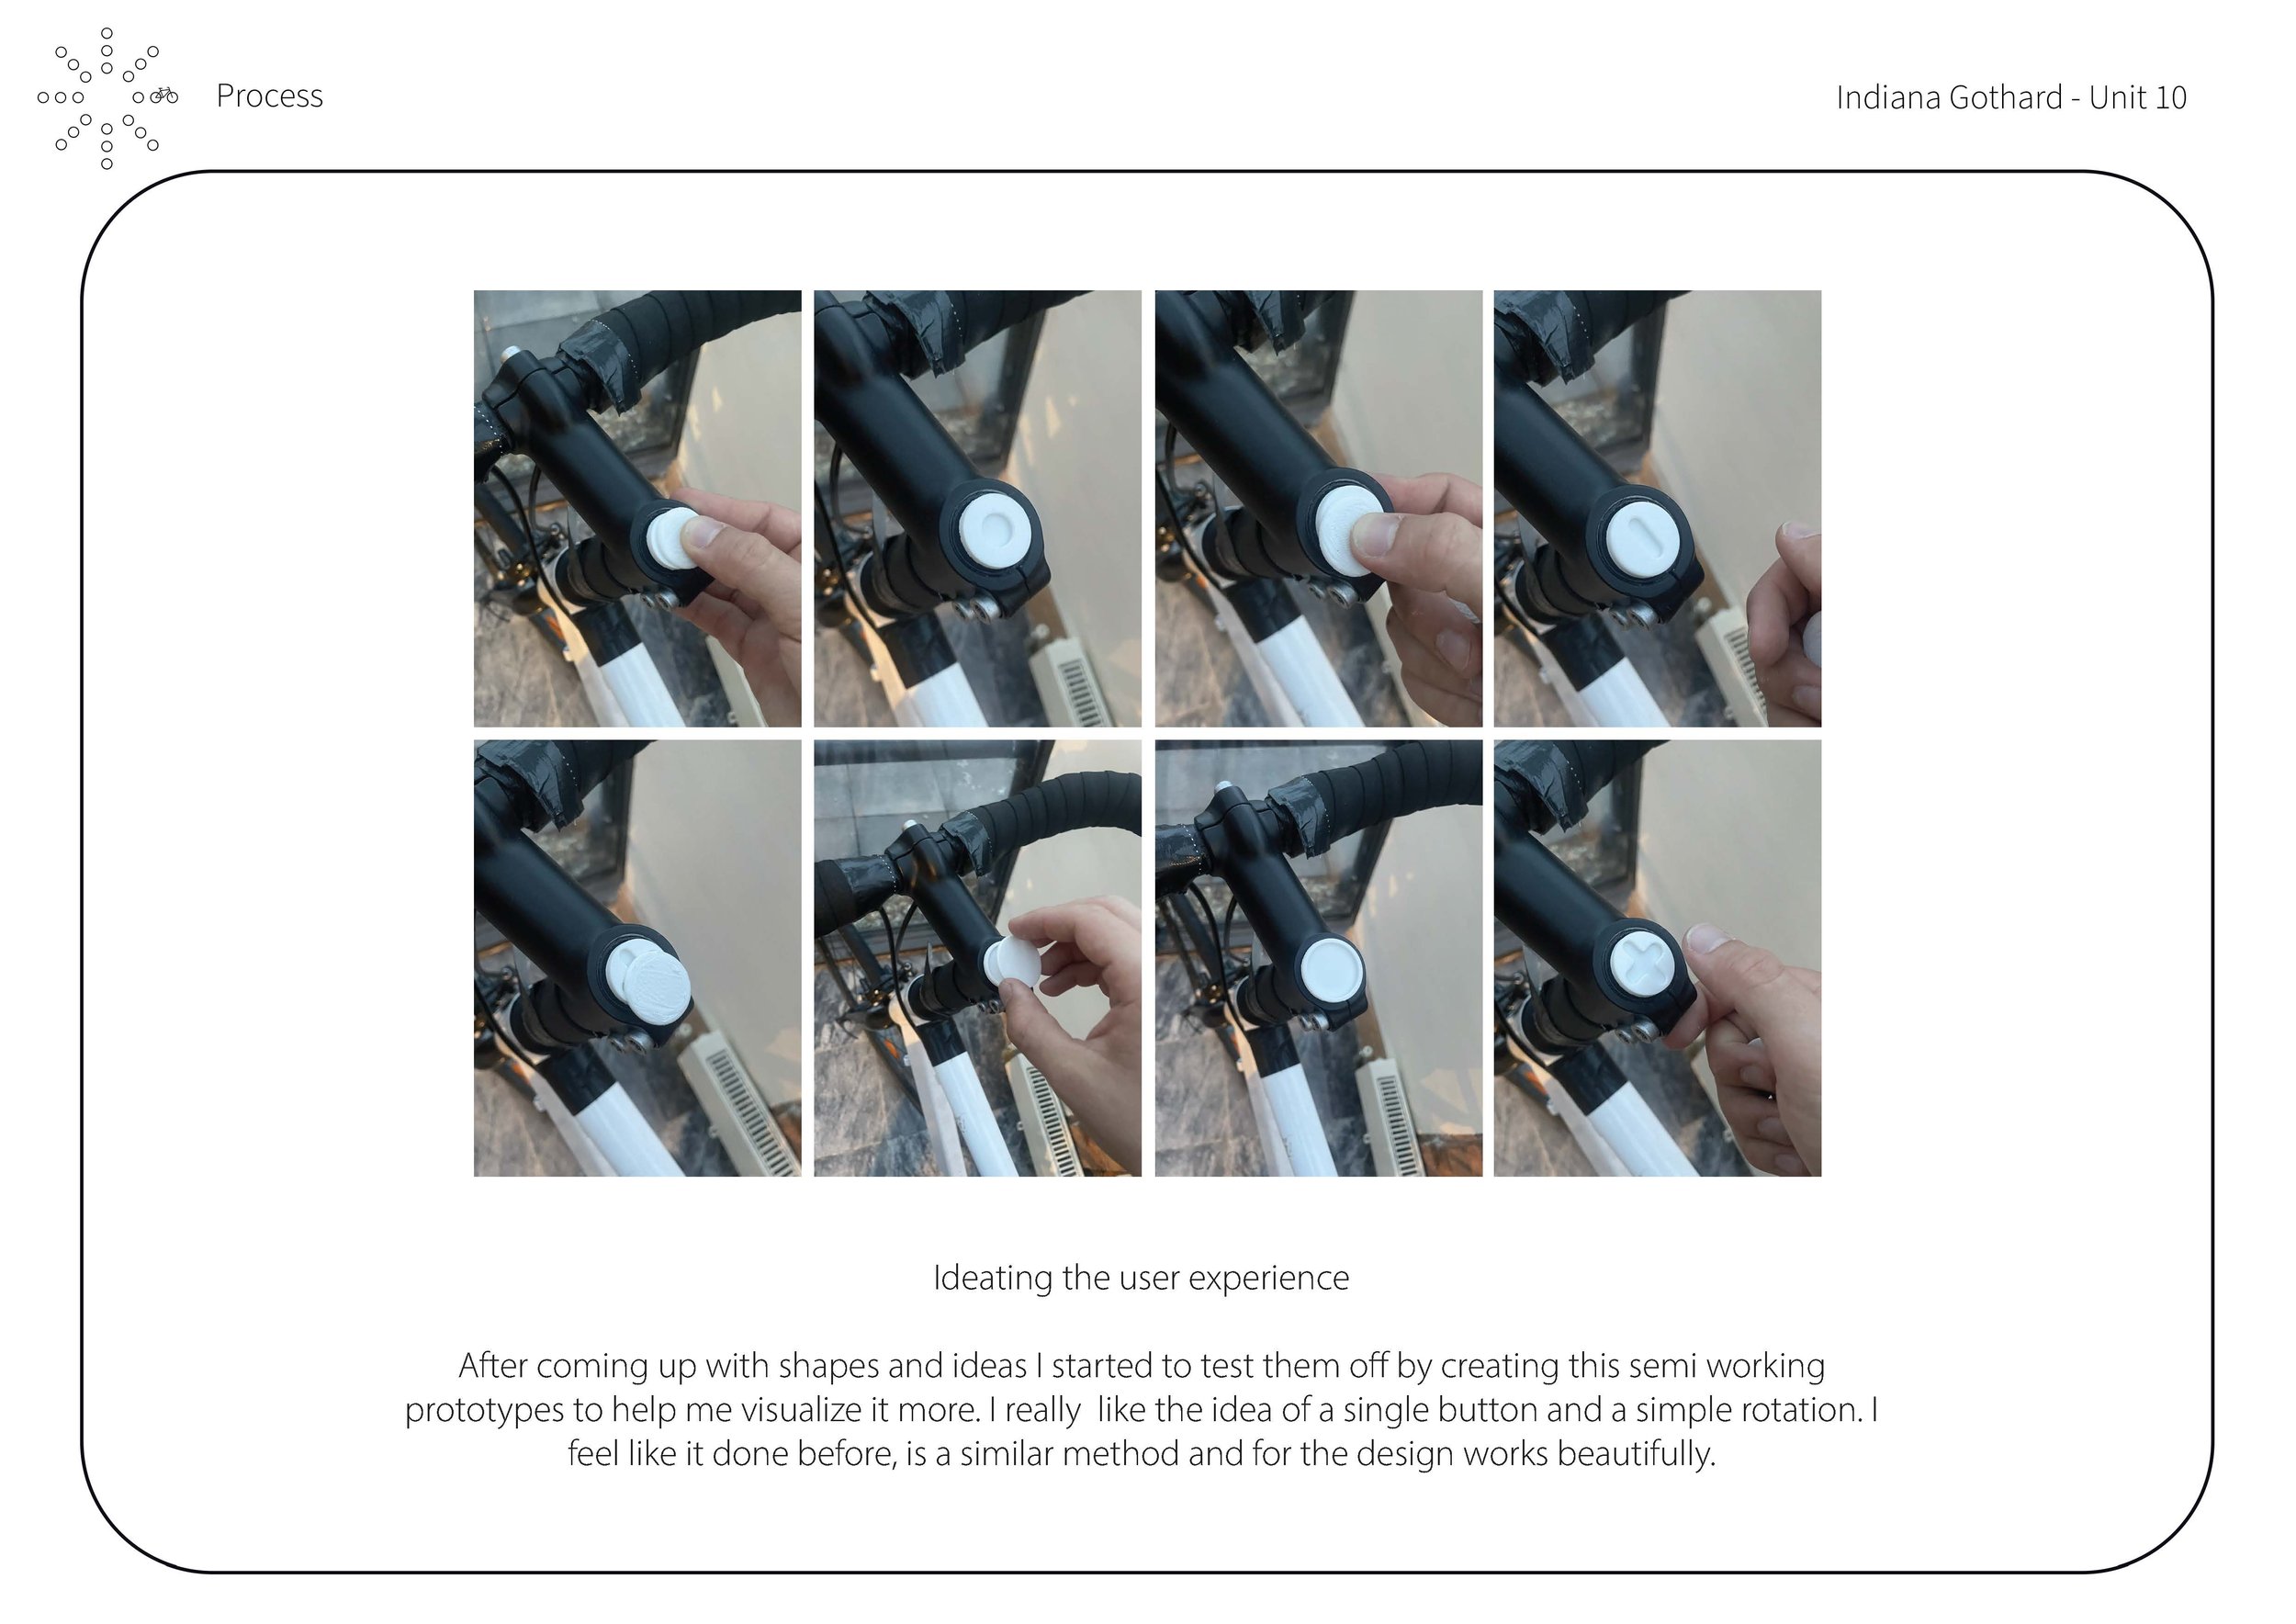
BUILDING A MODEL . 1
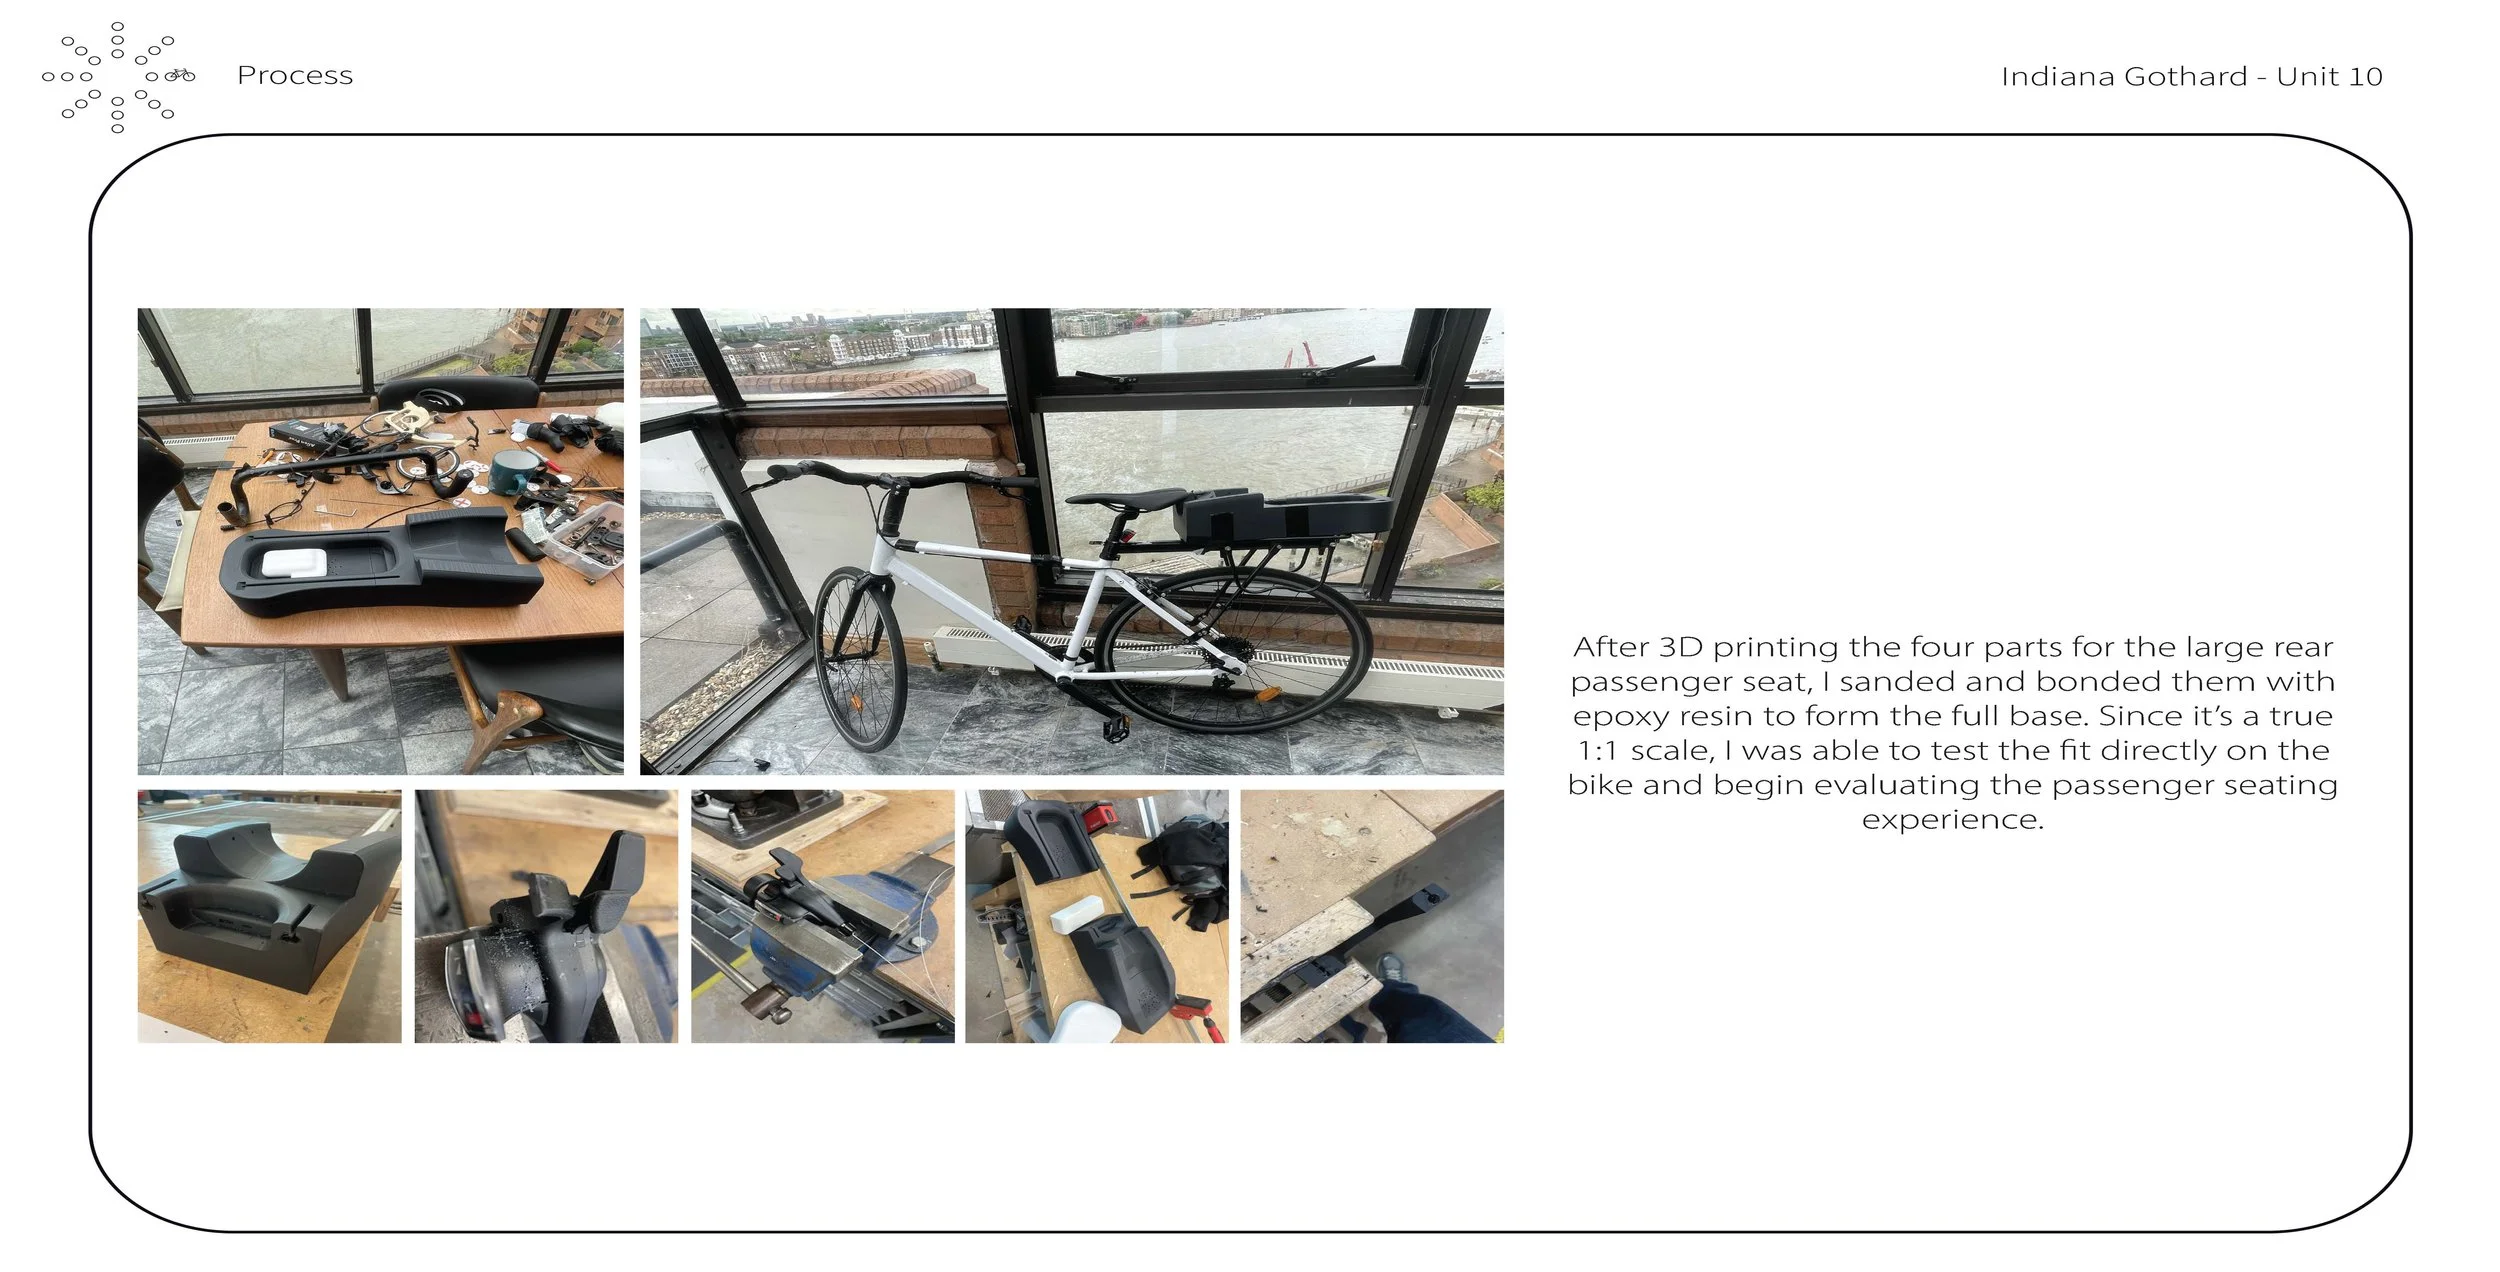
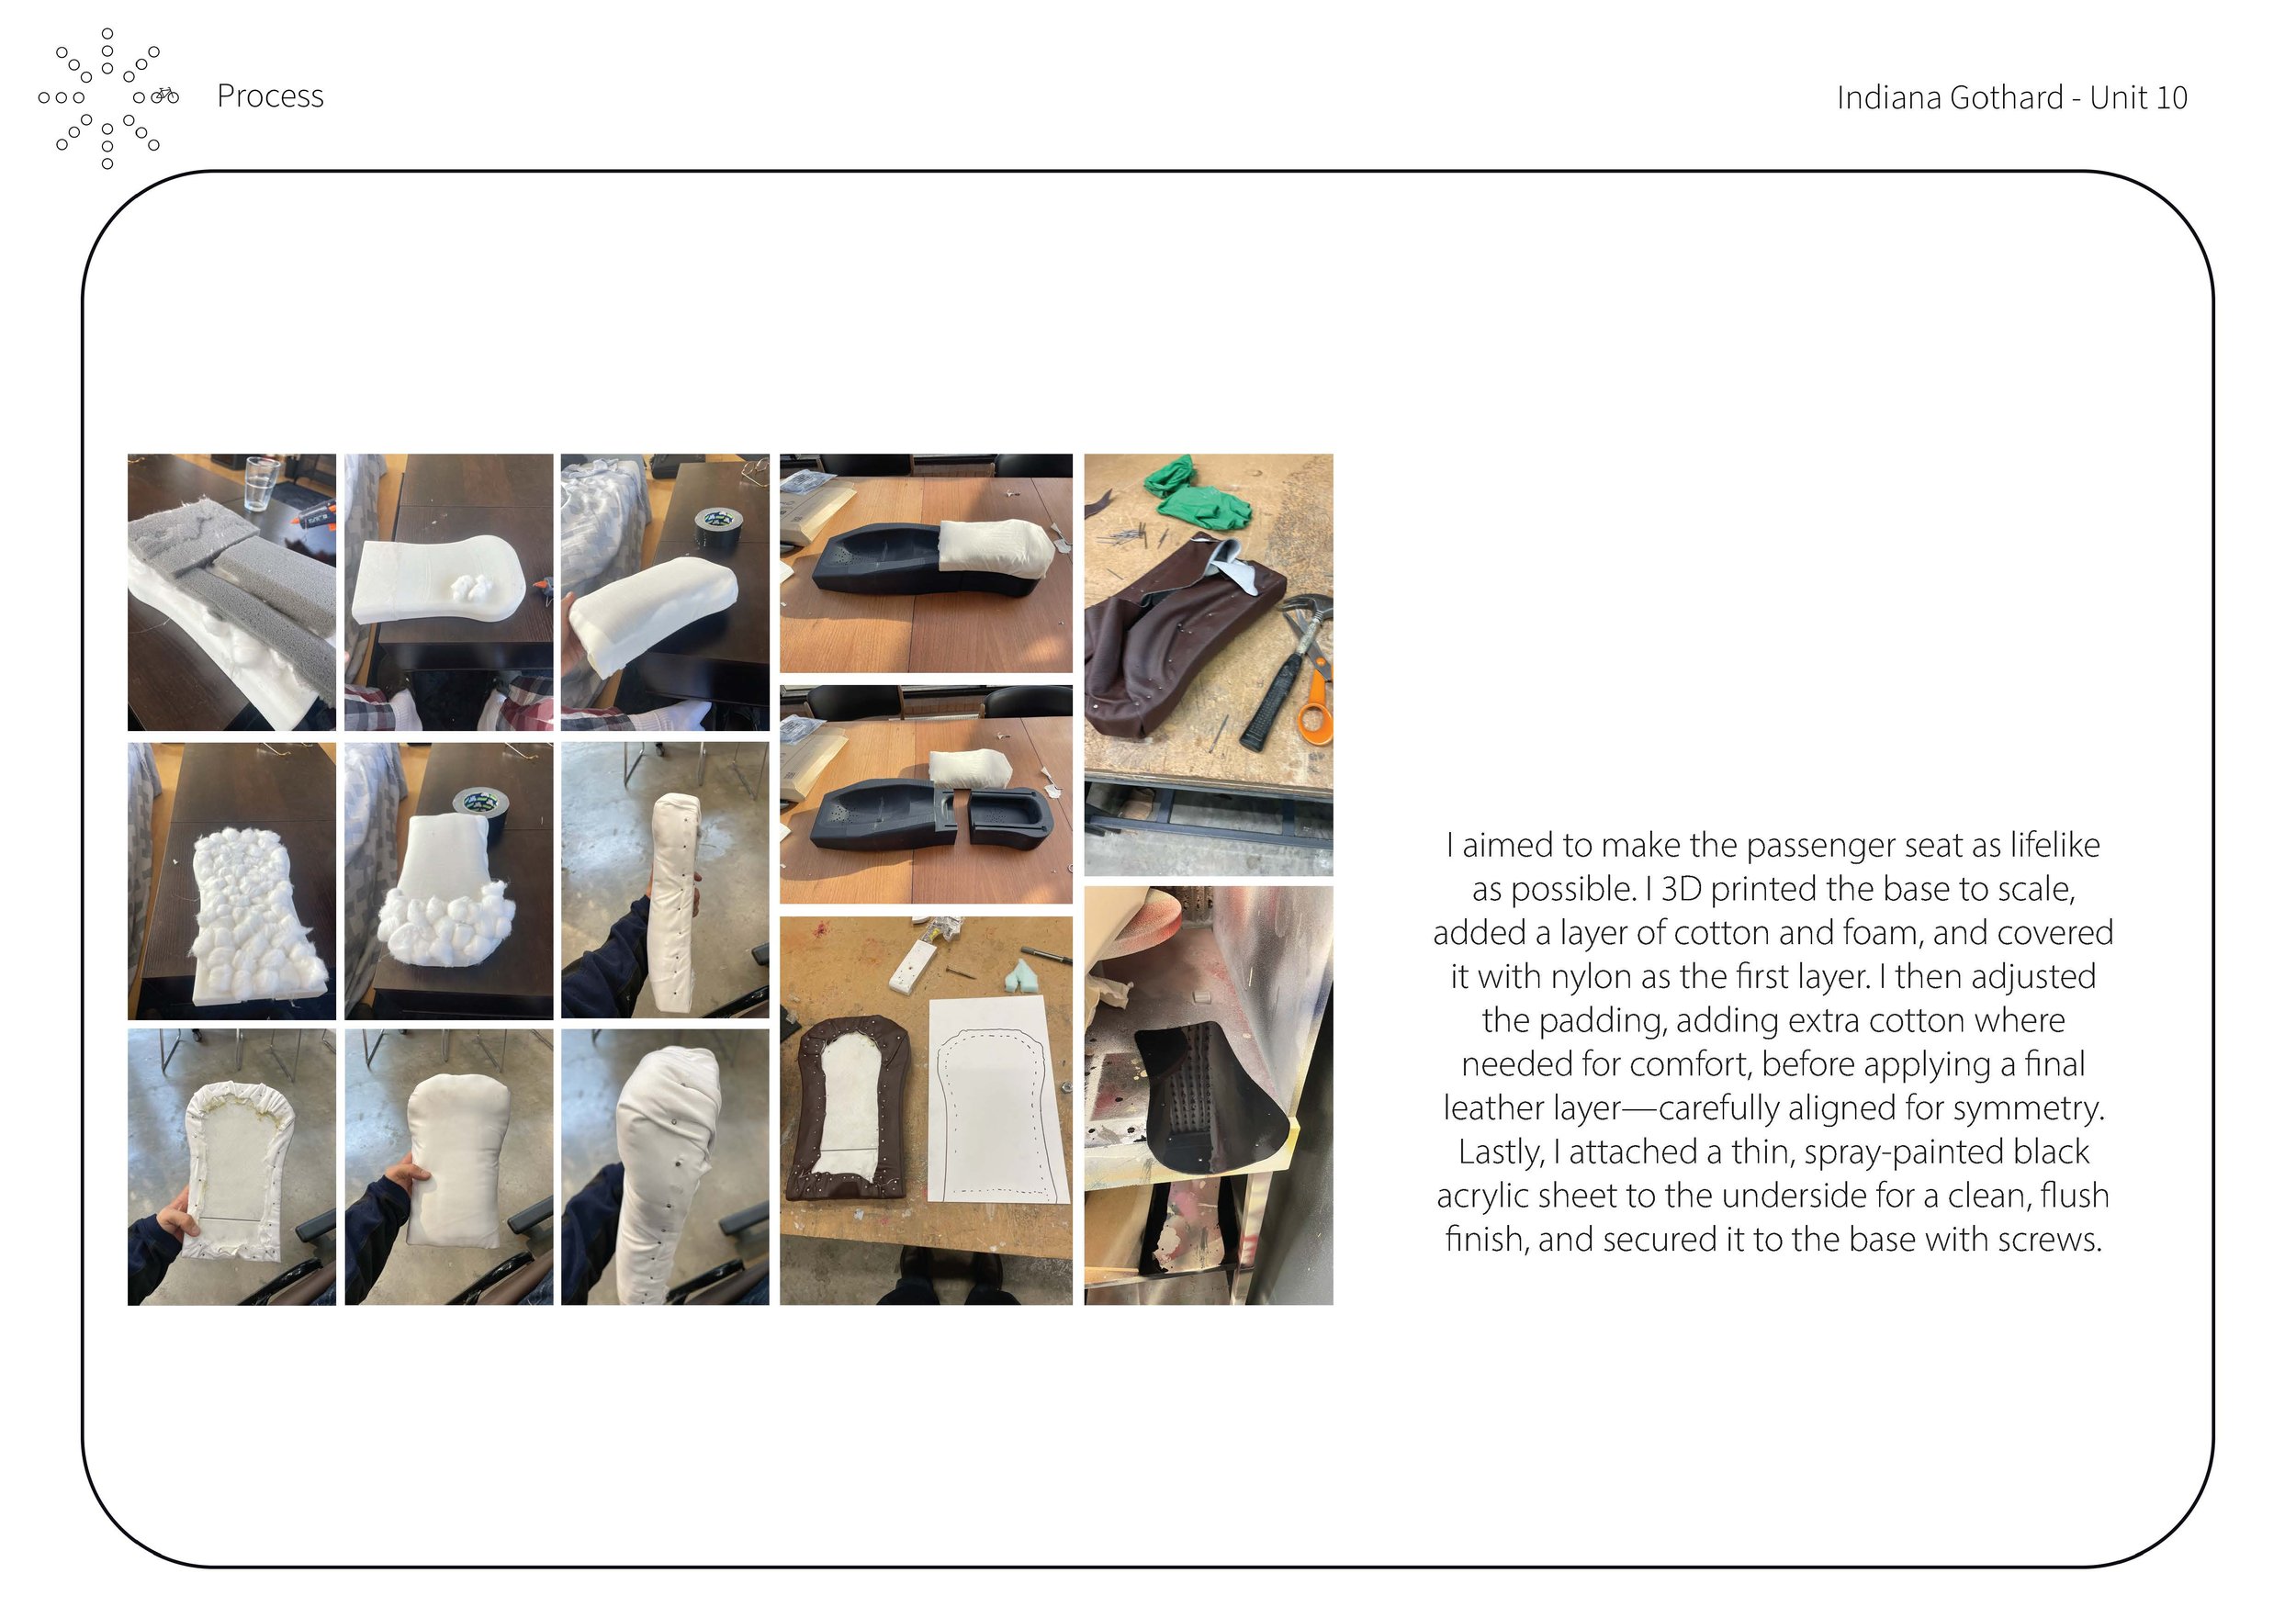
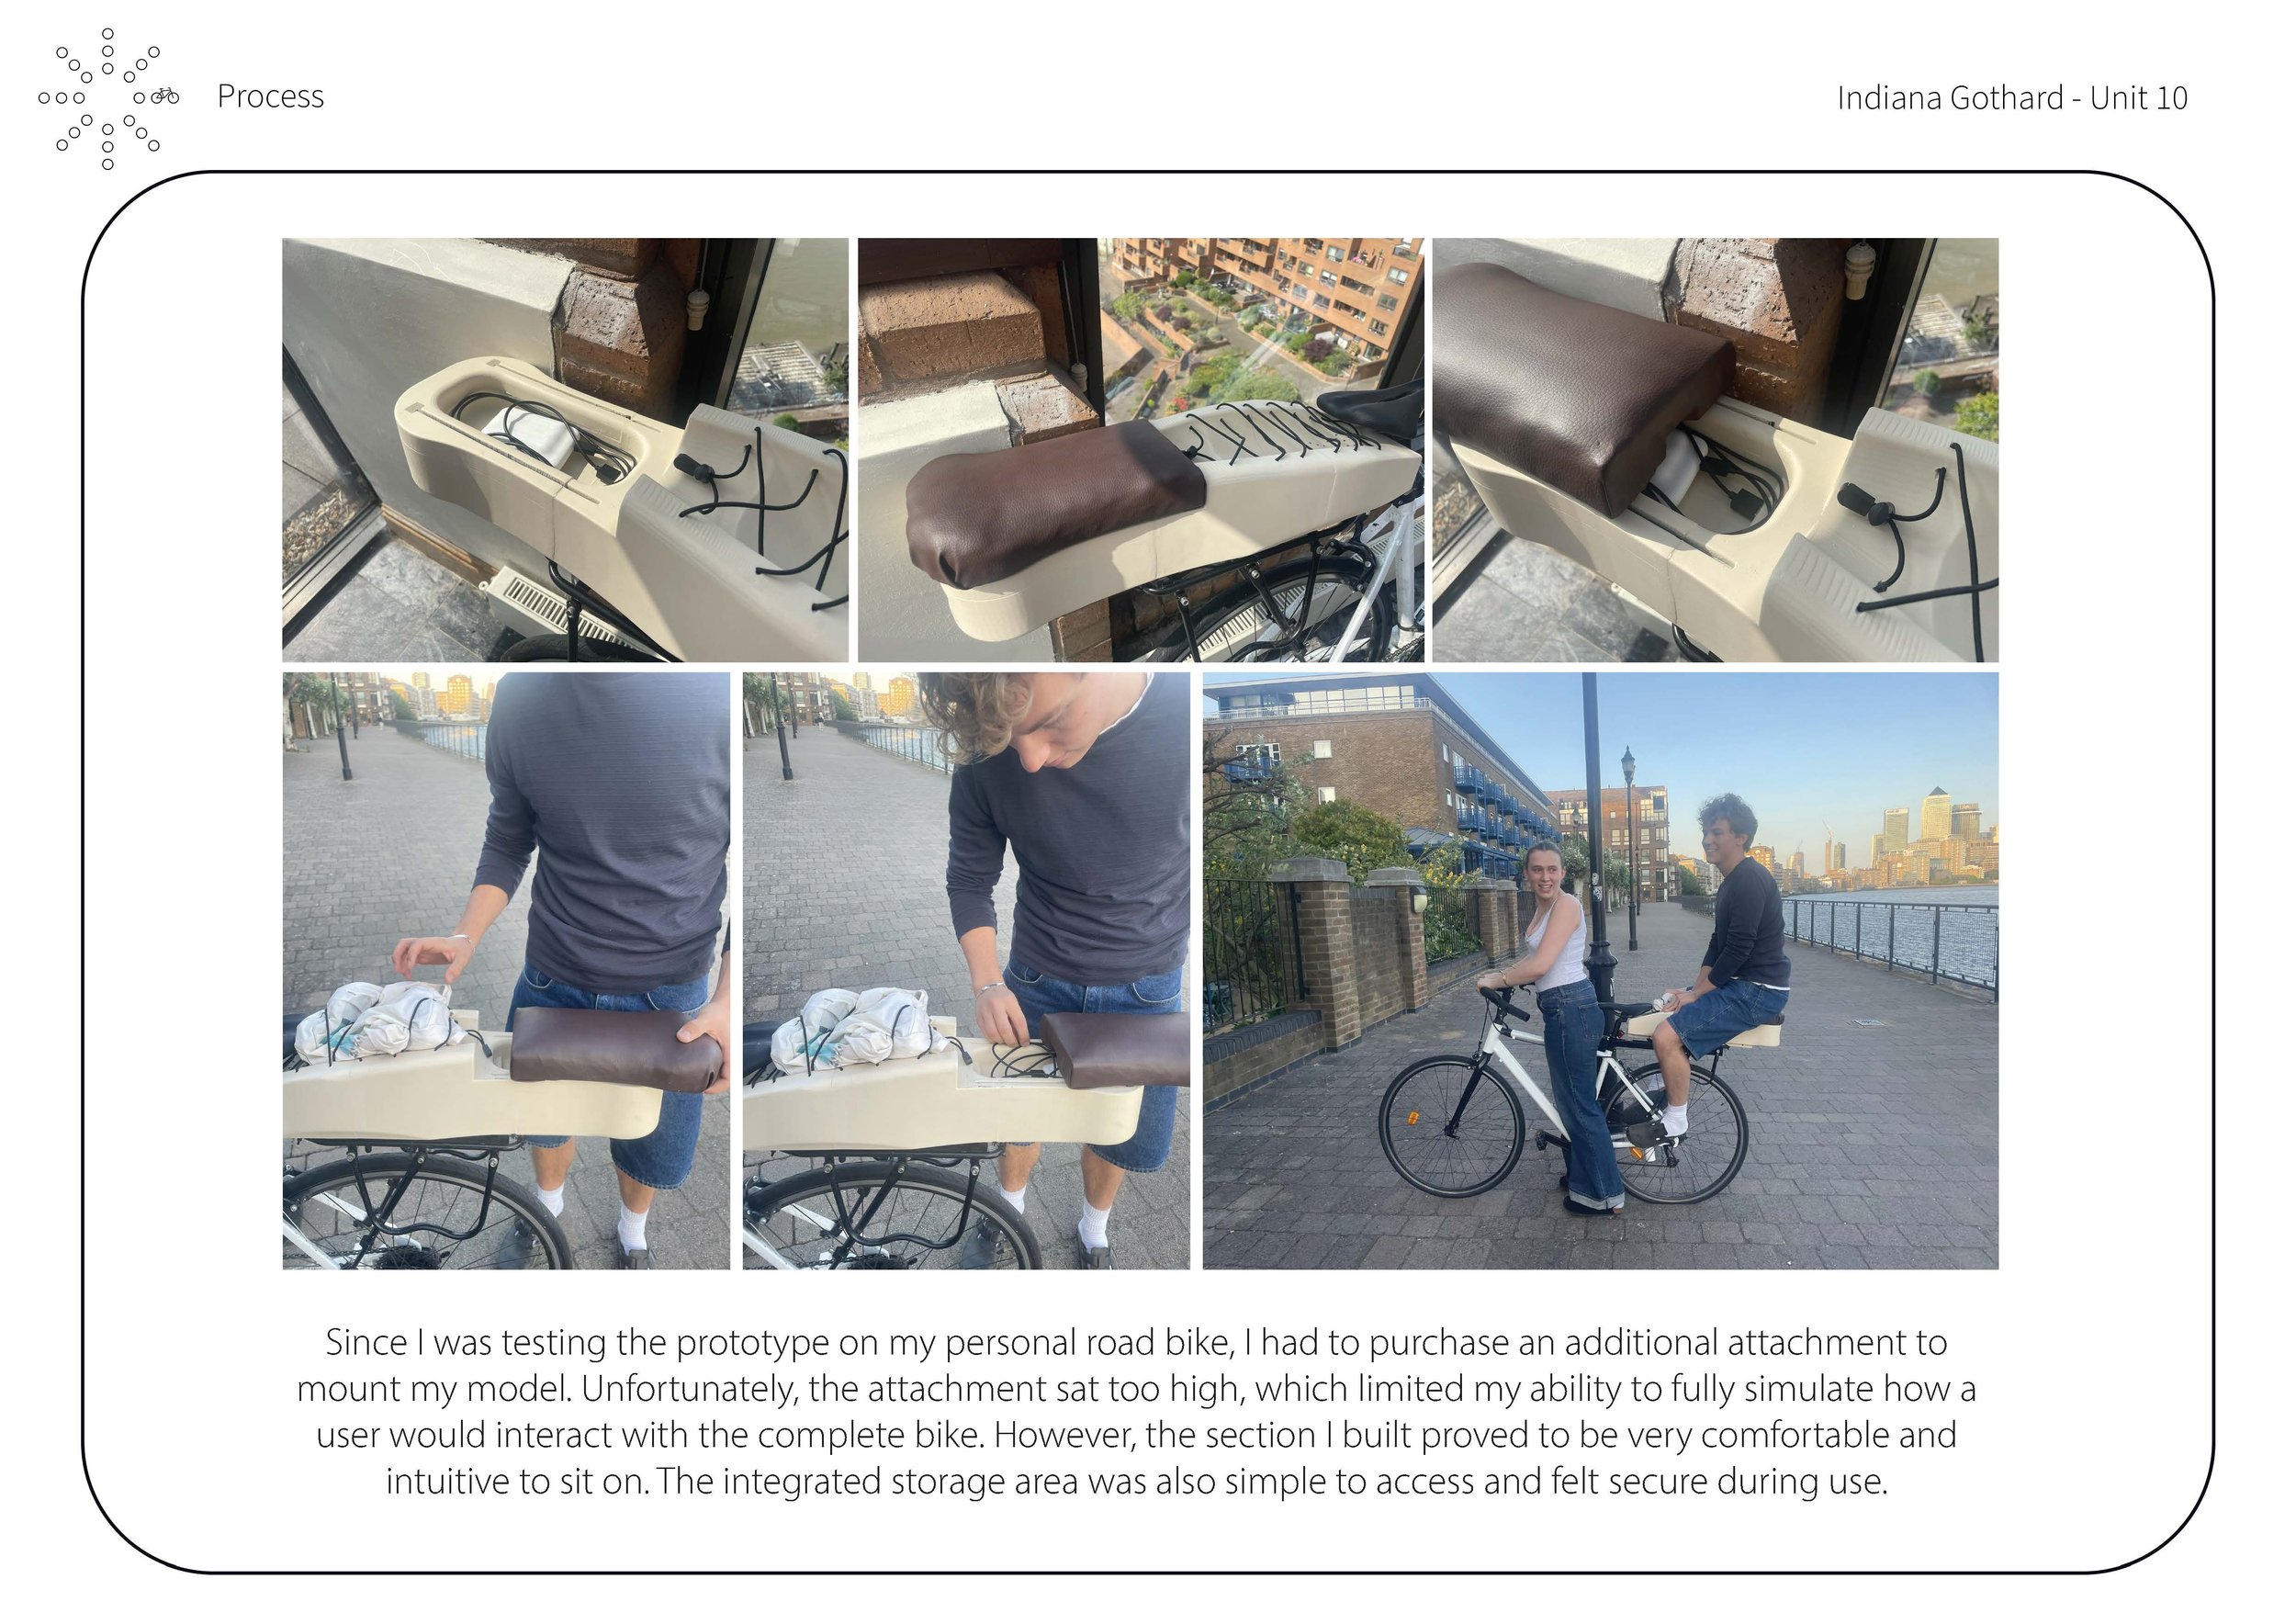
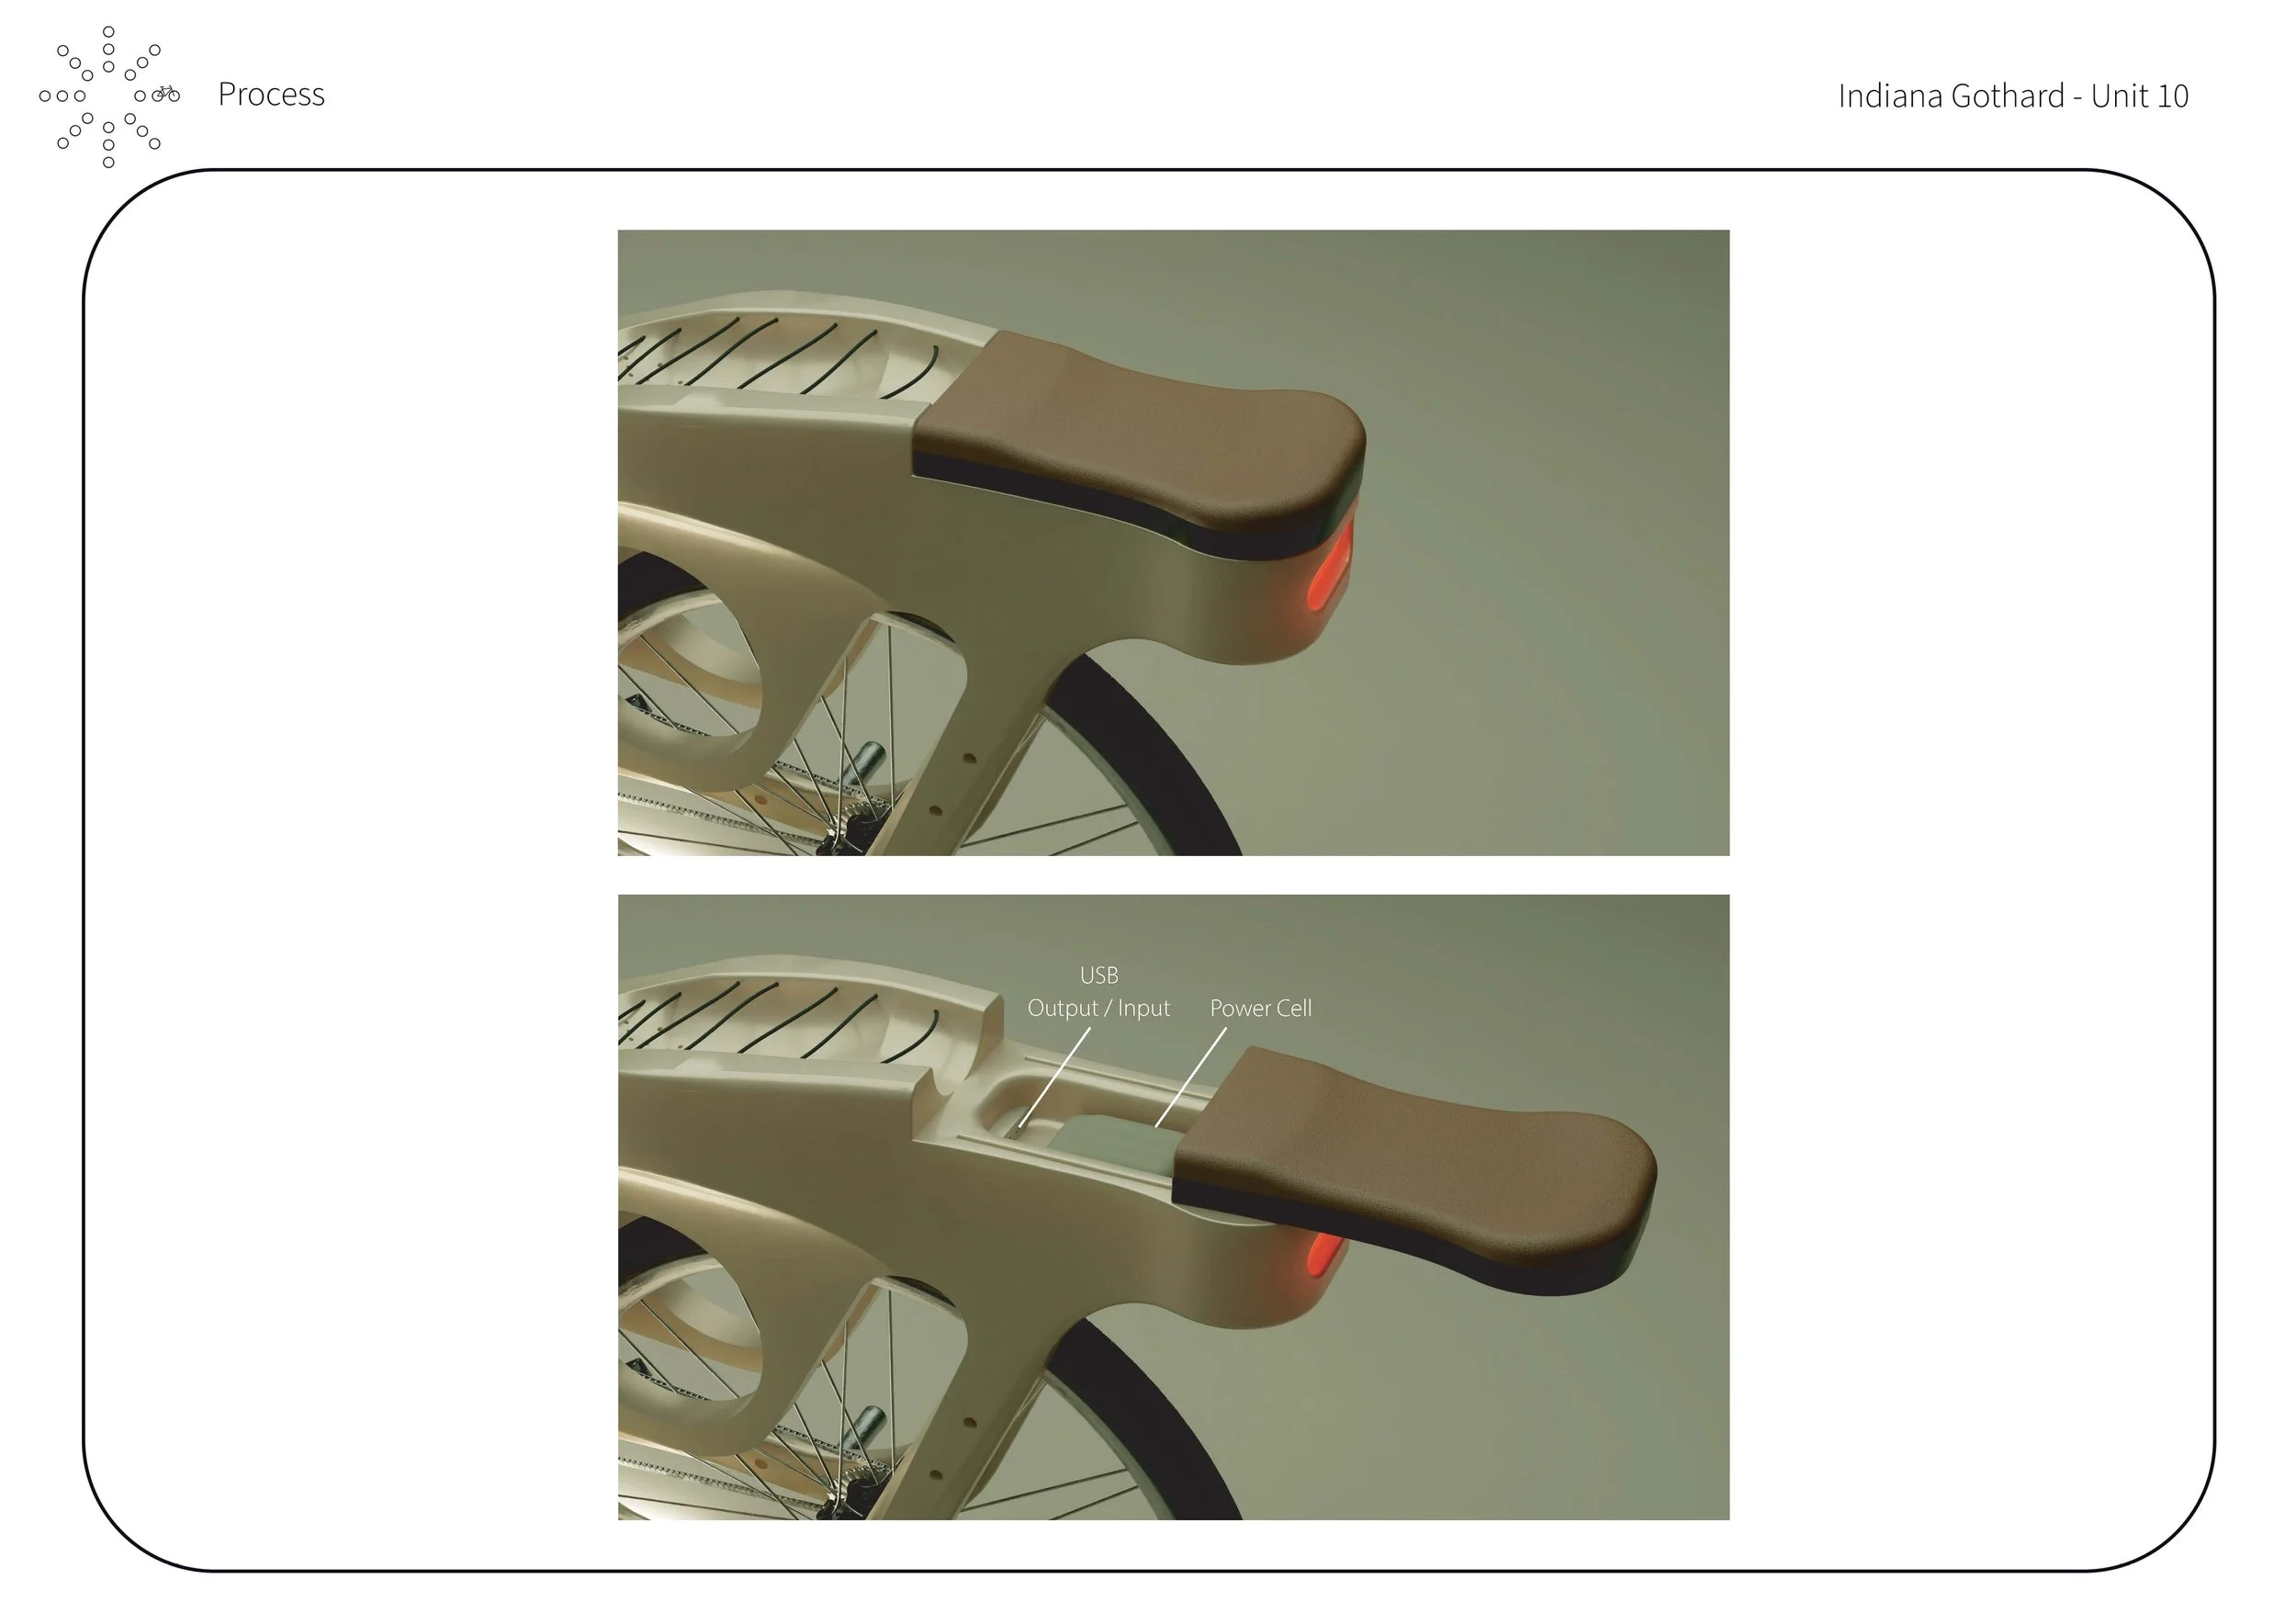
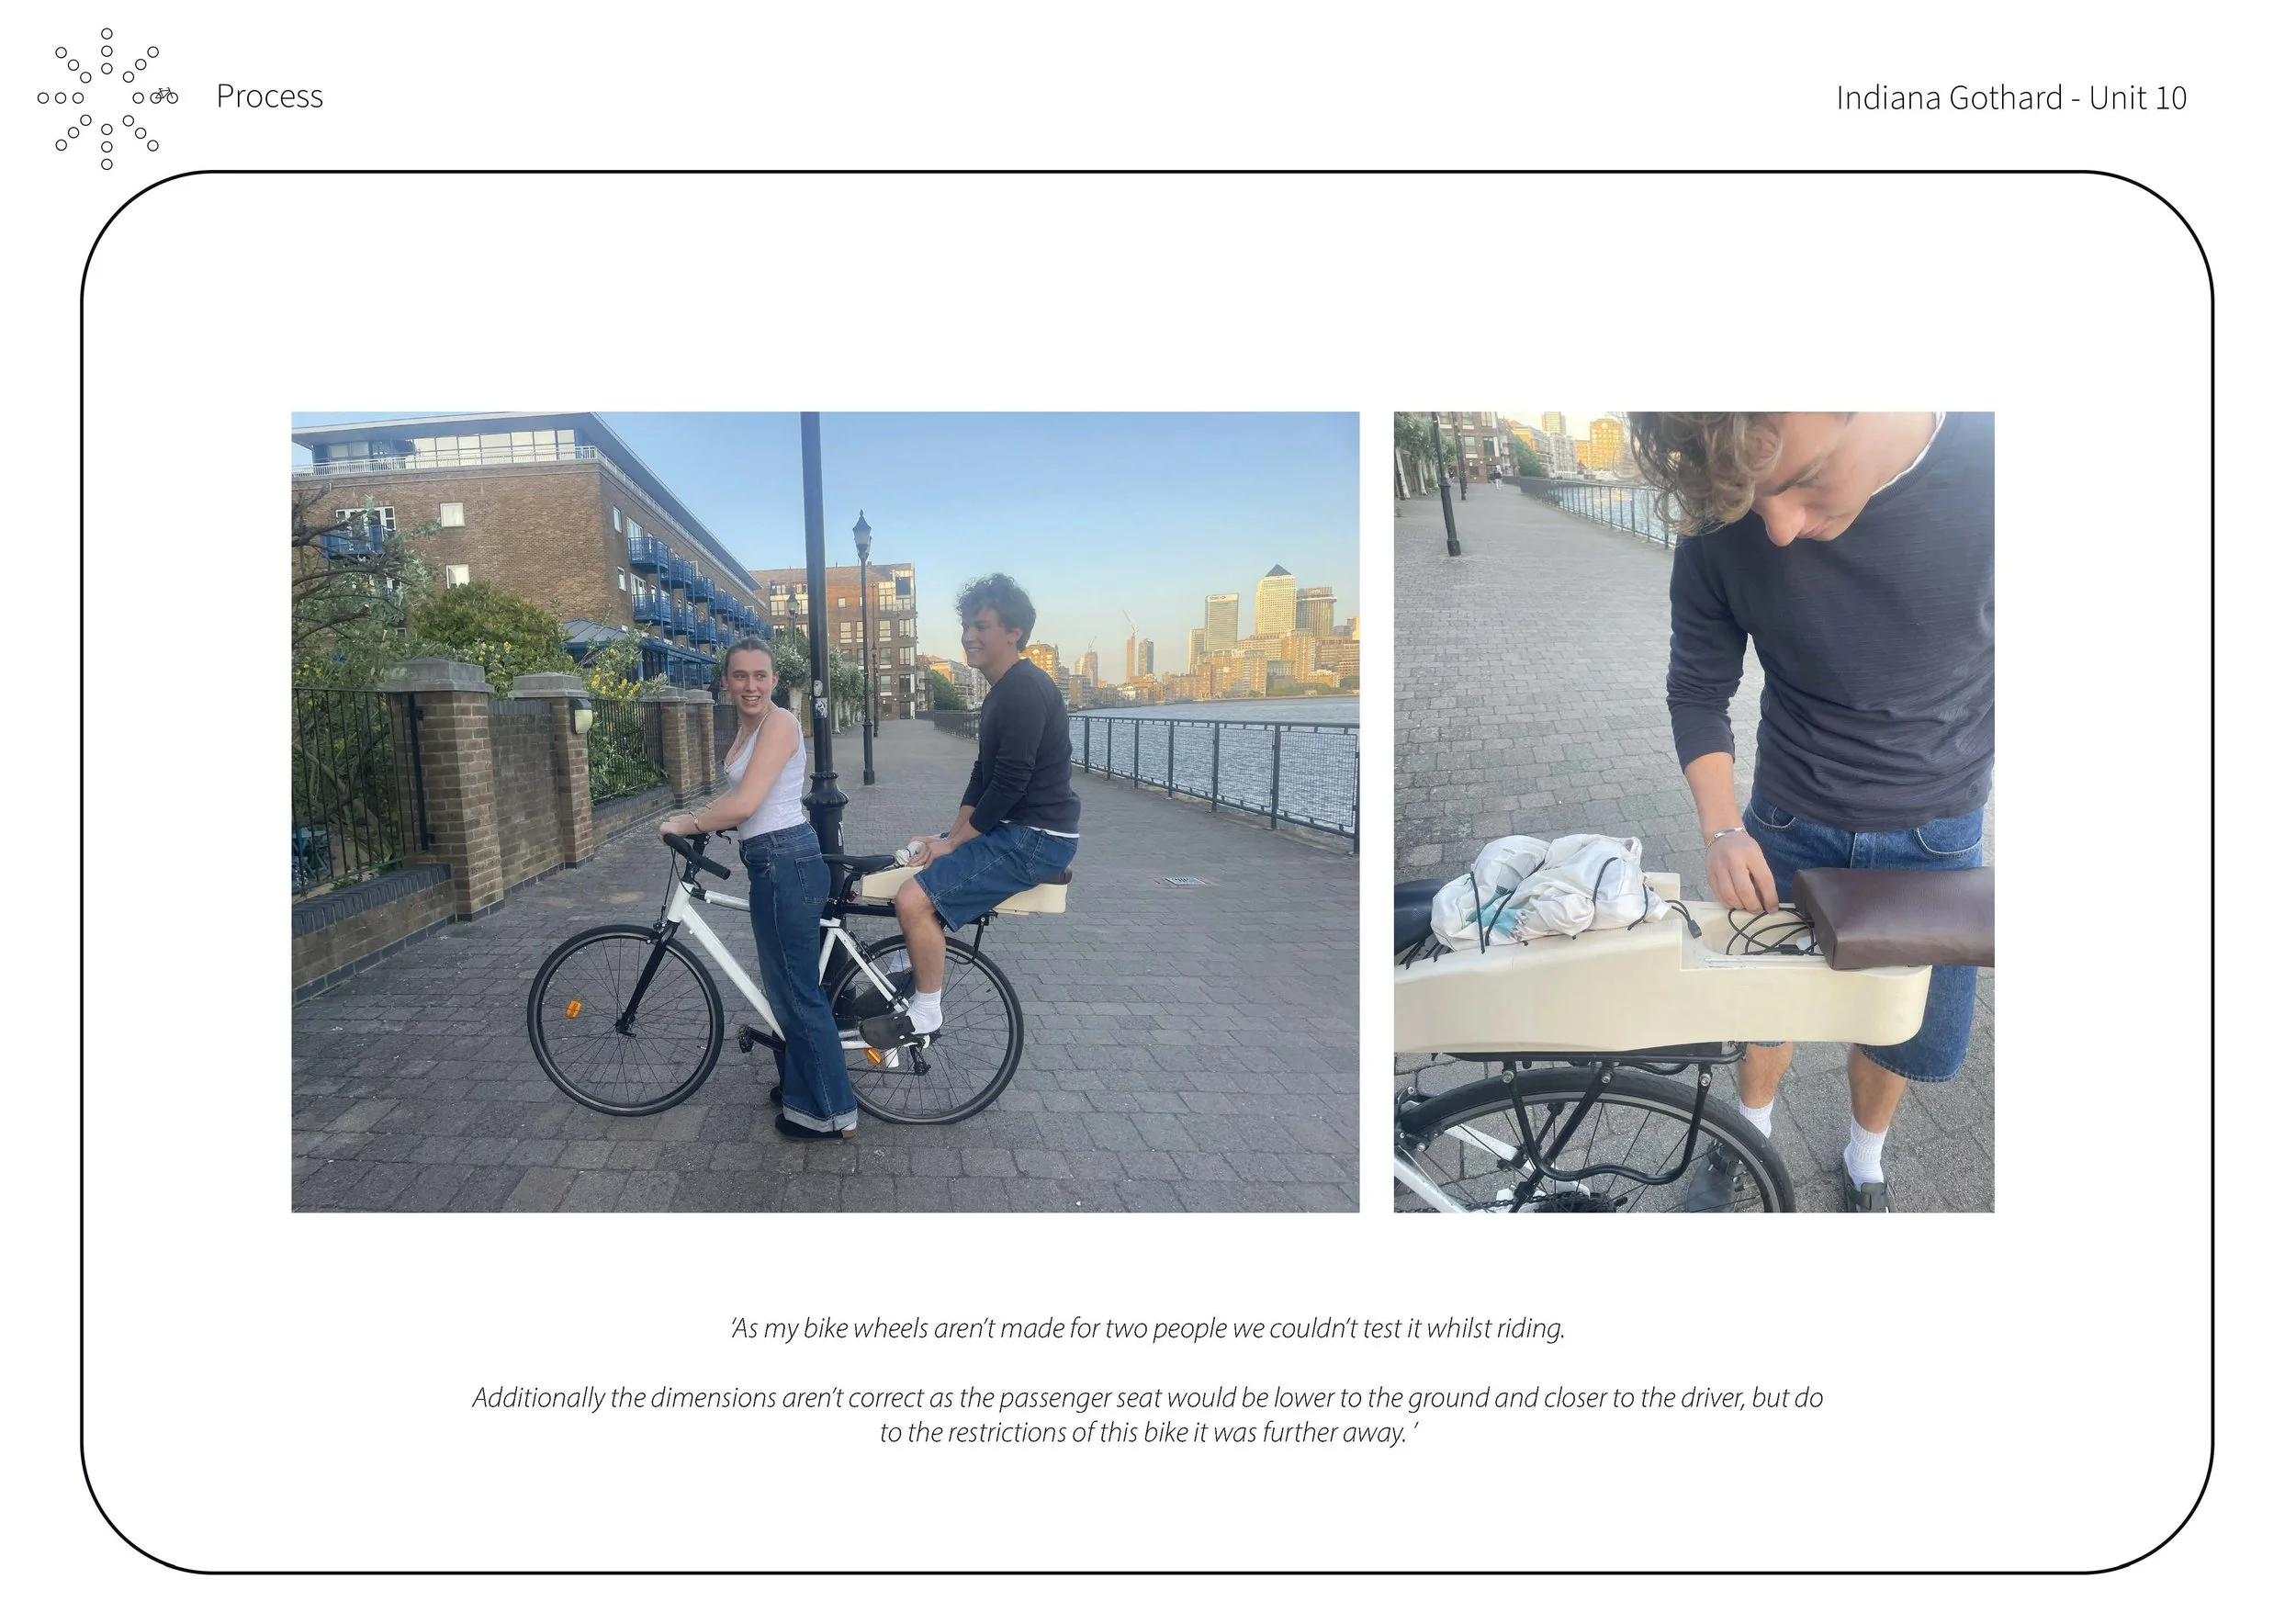
I produced a 1:1 model by 3D printing it in three sections, bonding them with epoxy resin, then sanding and painting. The seat was 3D printed in a rough form, then finished with padding and leather. This model allowed me to test how the PowerCell integrated into the bike and compare it with a LimeBike. Seeing it at full scale was invaluable, though limited student funding prevented me from building the complete bike.

BUILDING A MODEL . 2
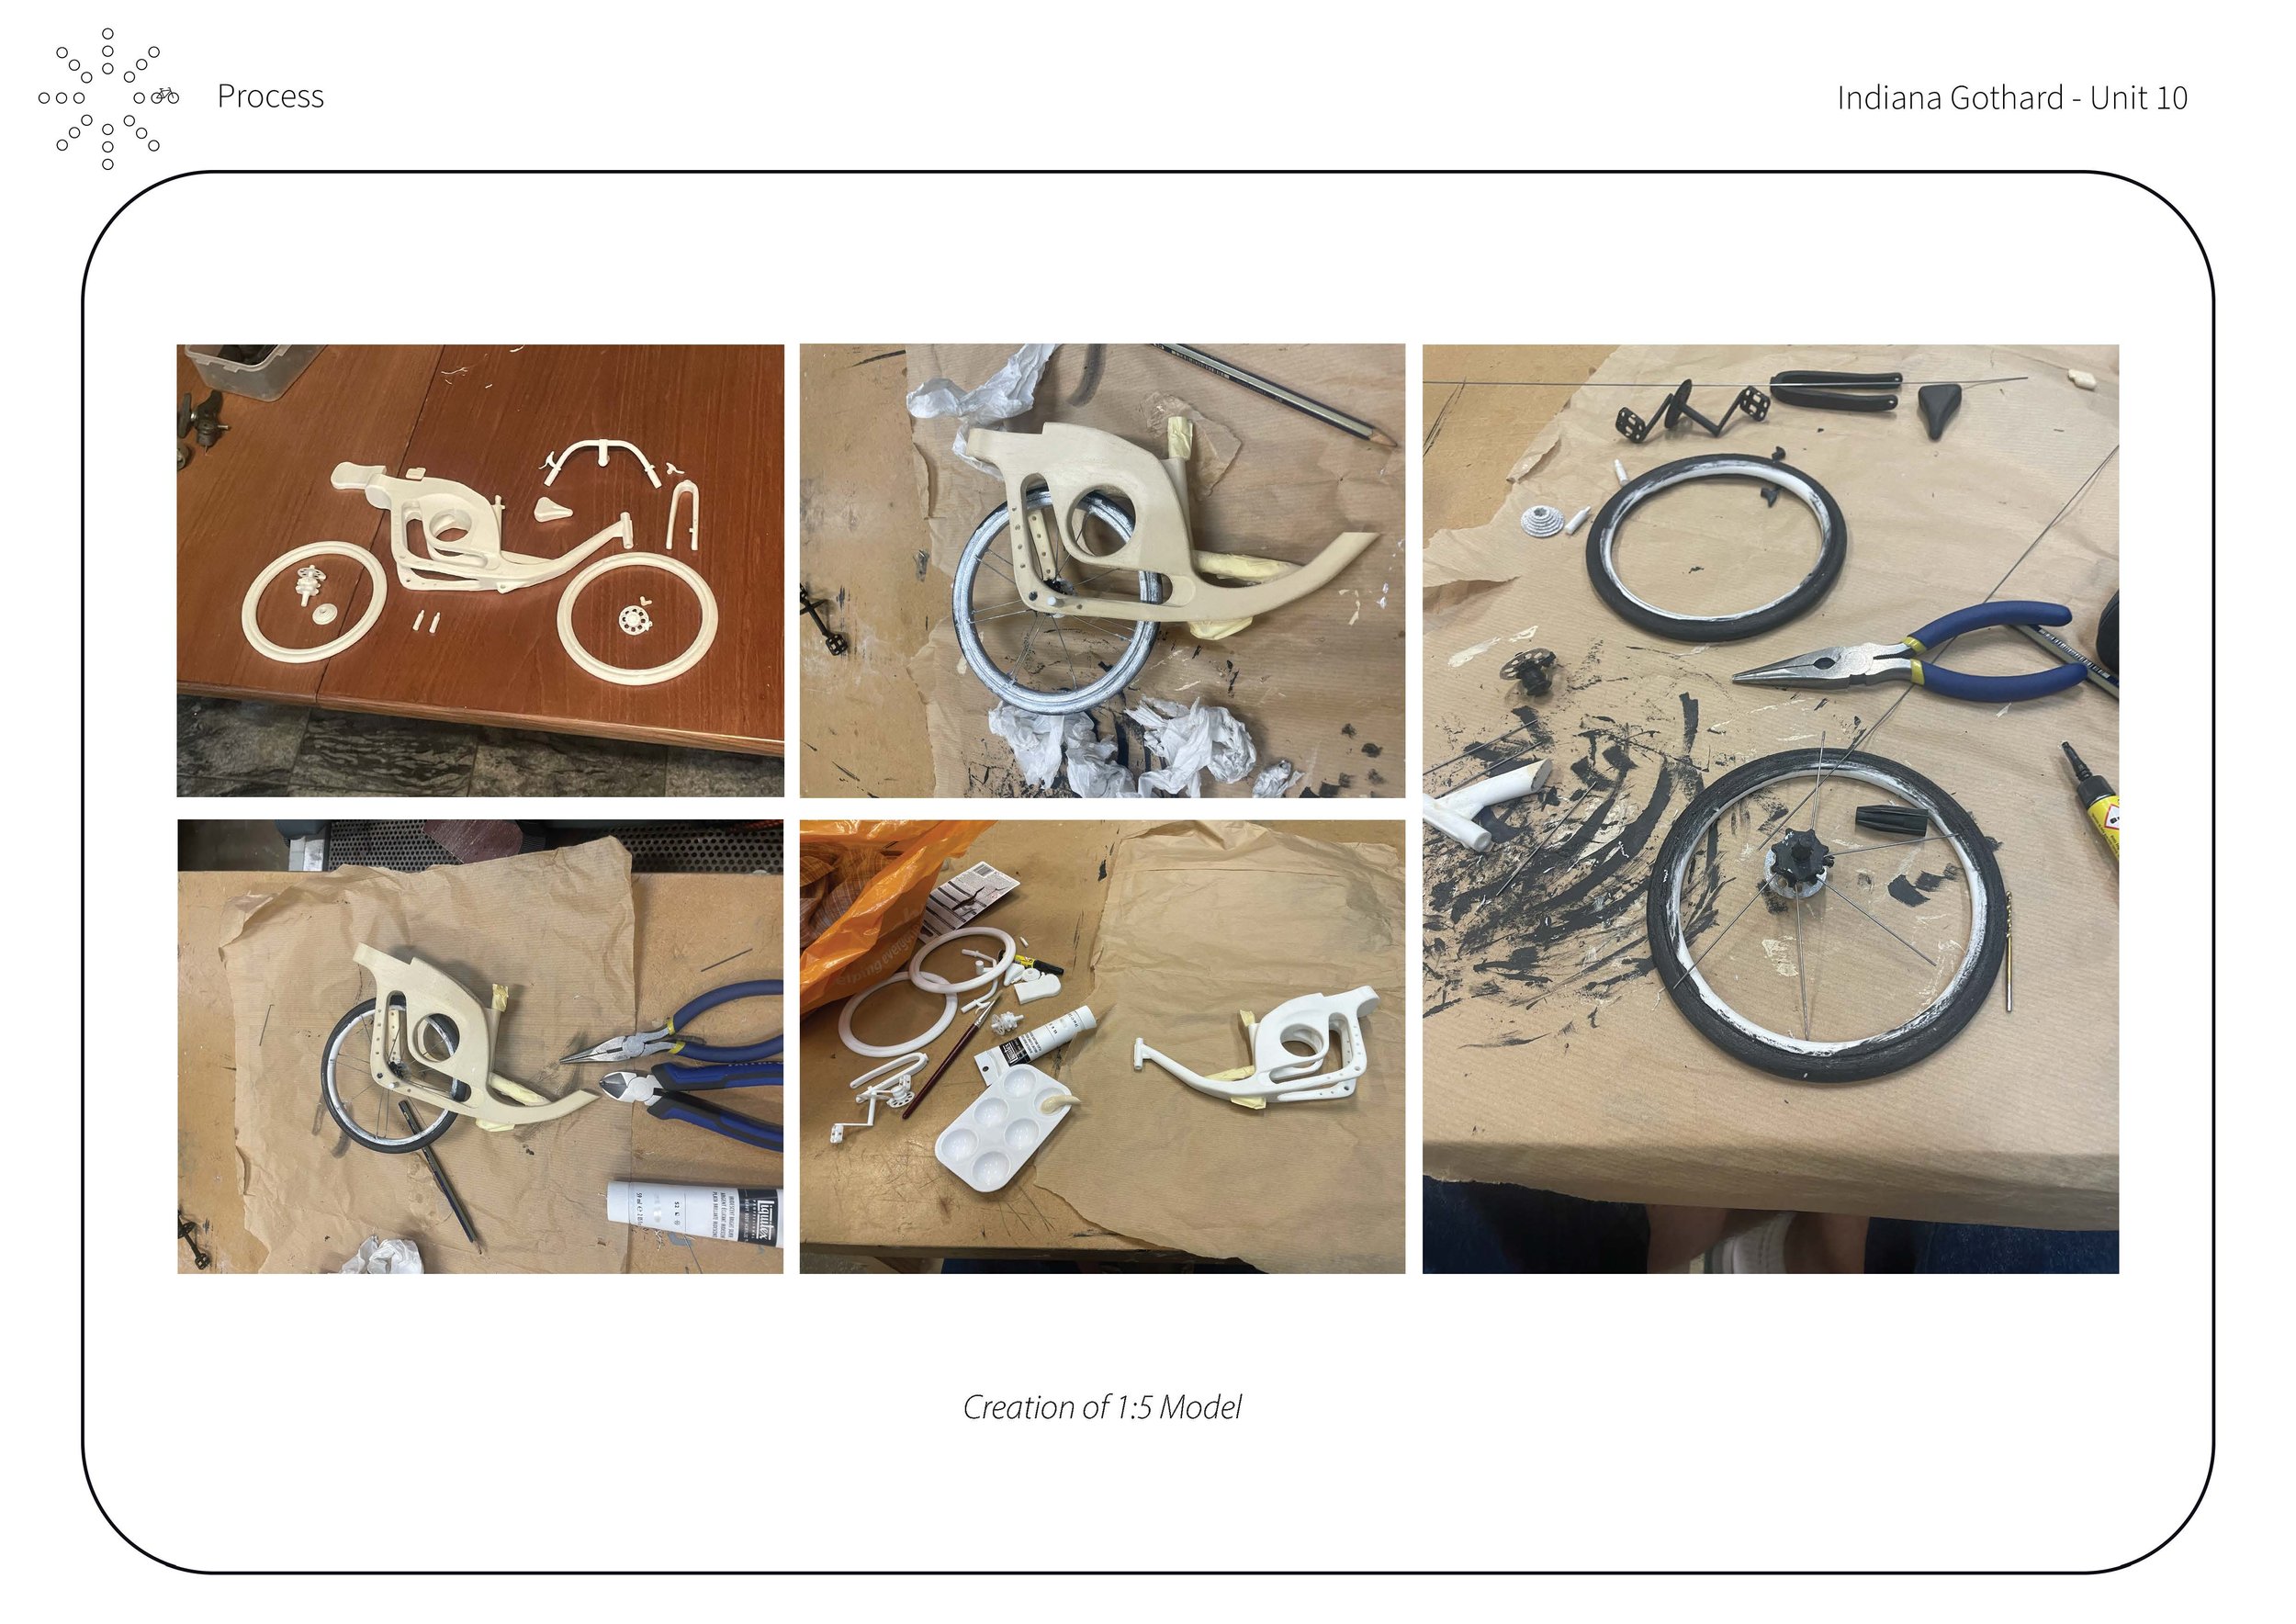
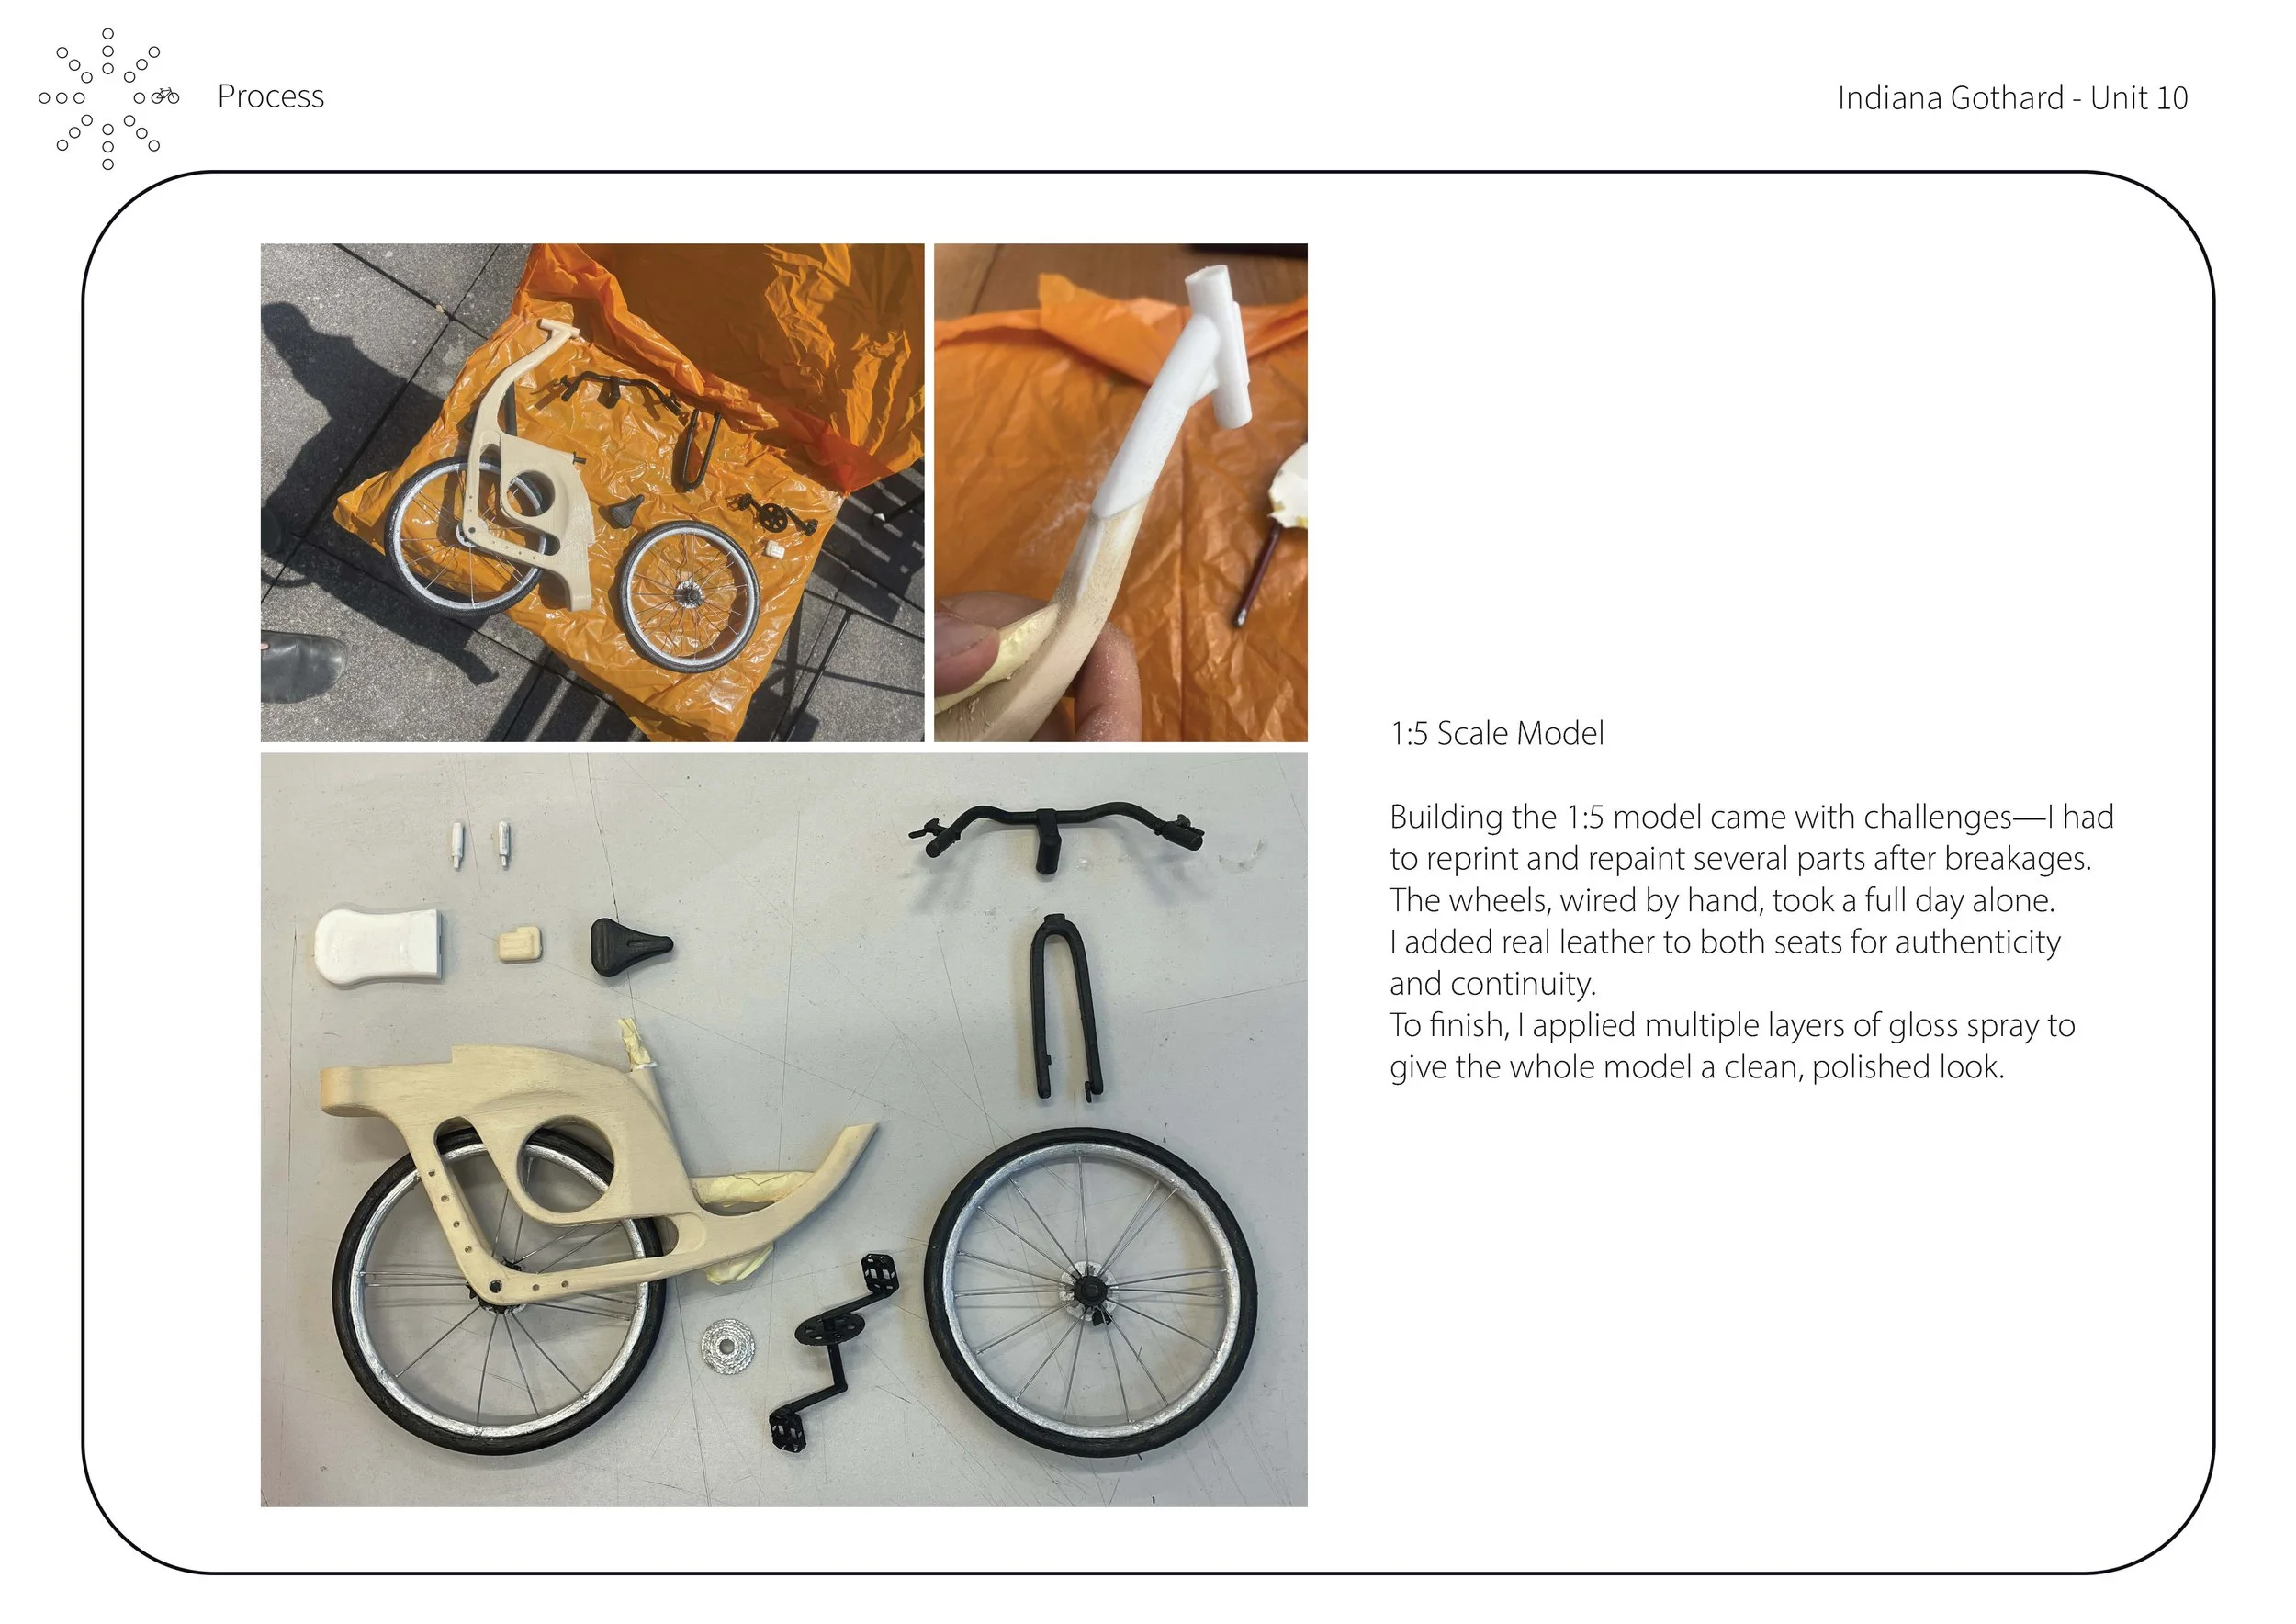
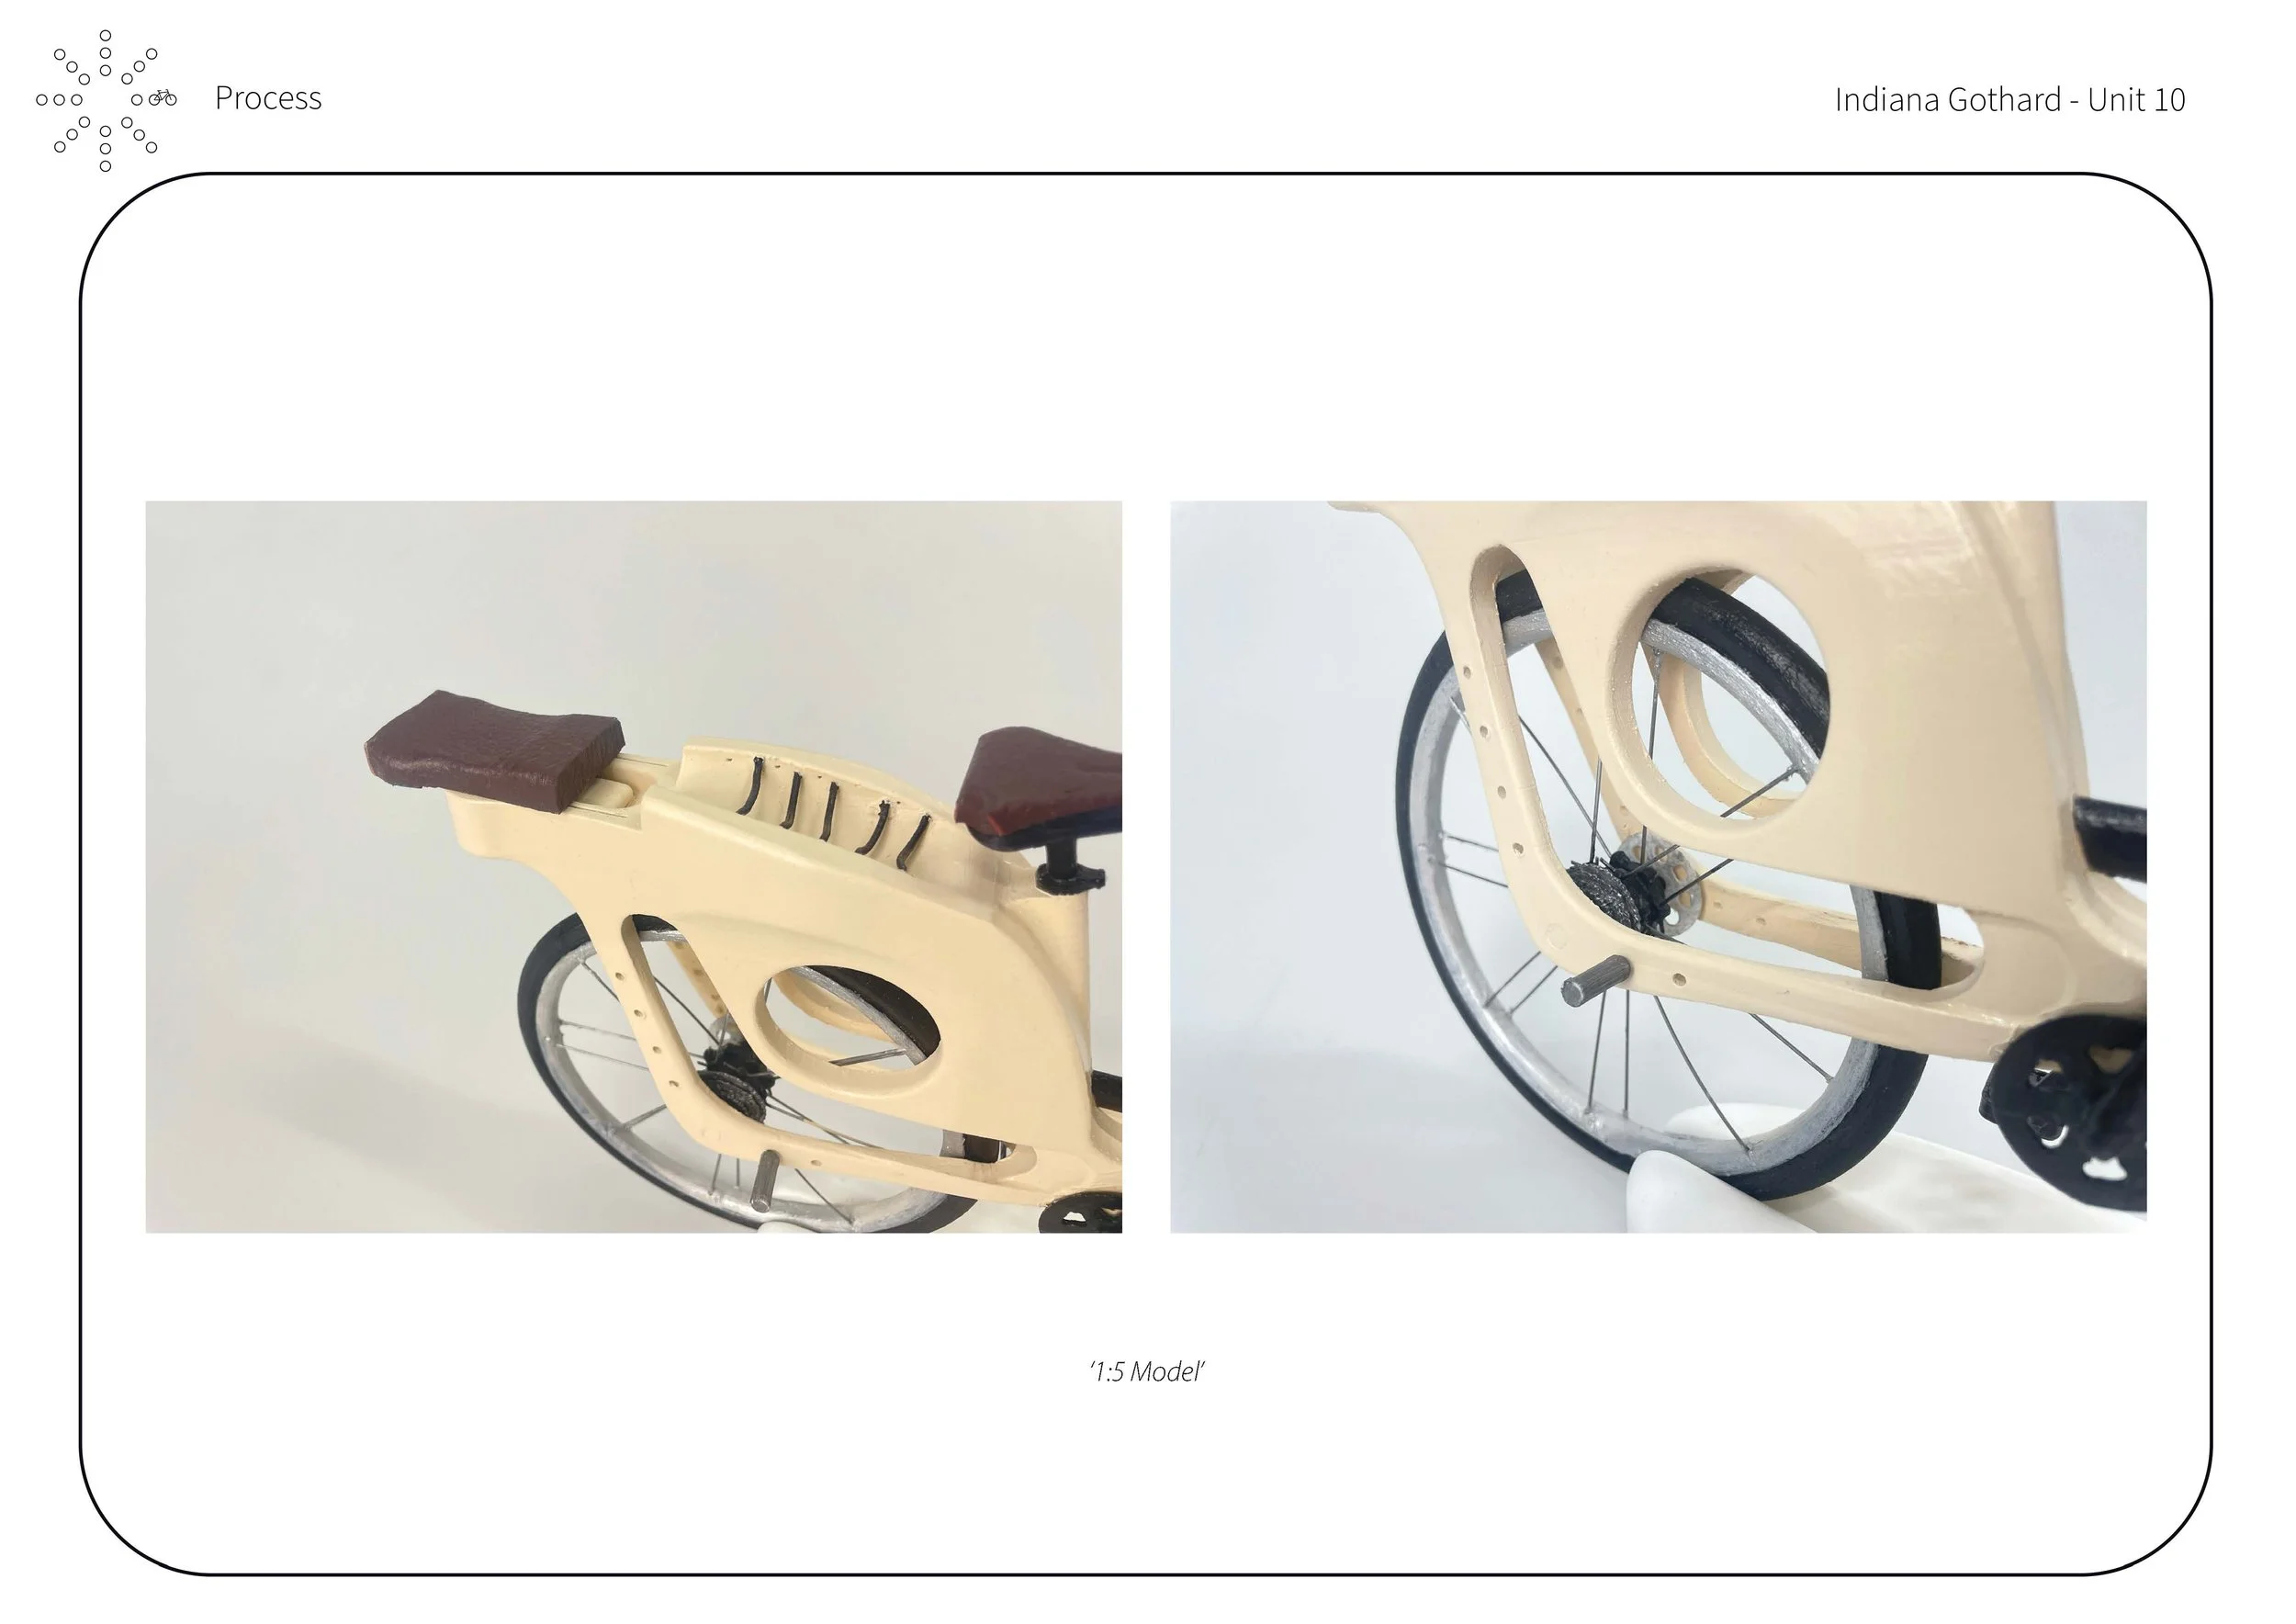
I needed a scaled model, at least 1:5, so I built one with detailed wiring and precise paintwork on each component, including the dynamo hub and gears. The result was clean, accurate, and captured the design well.

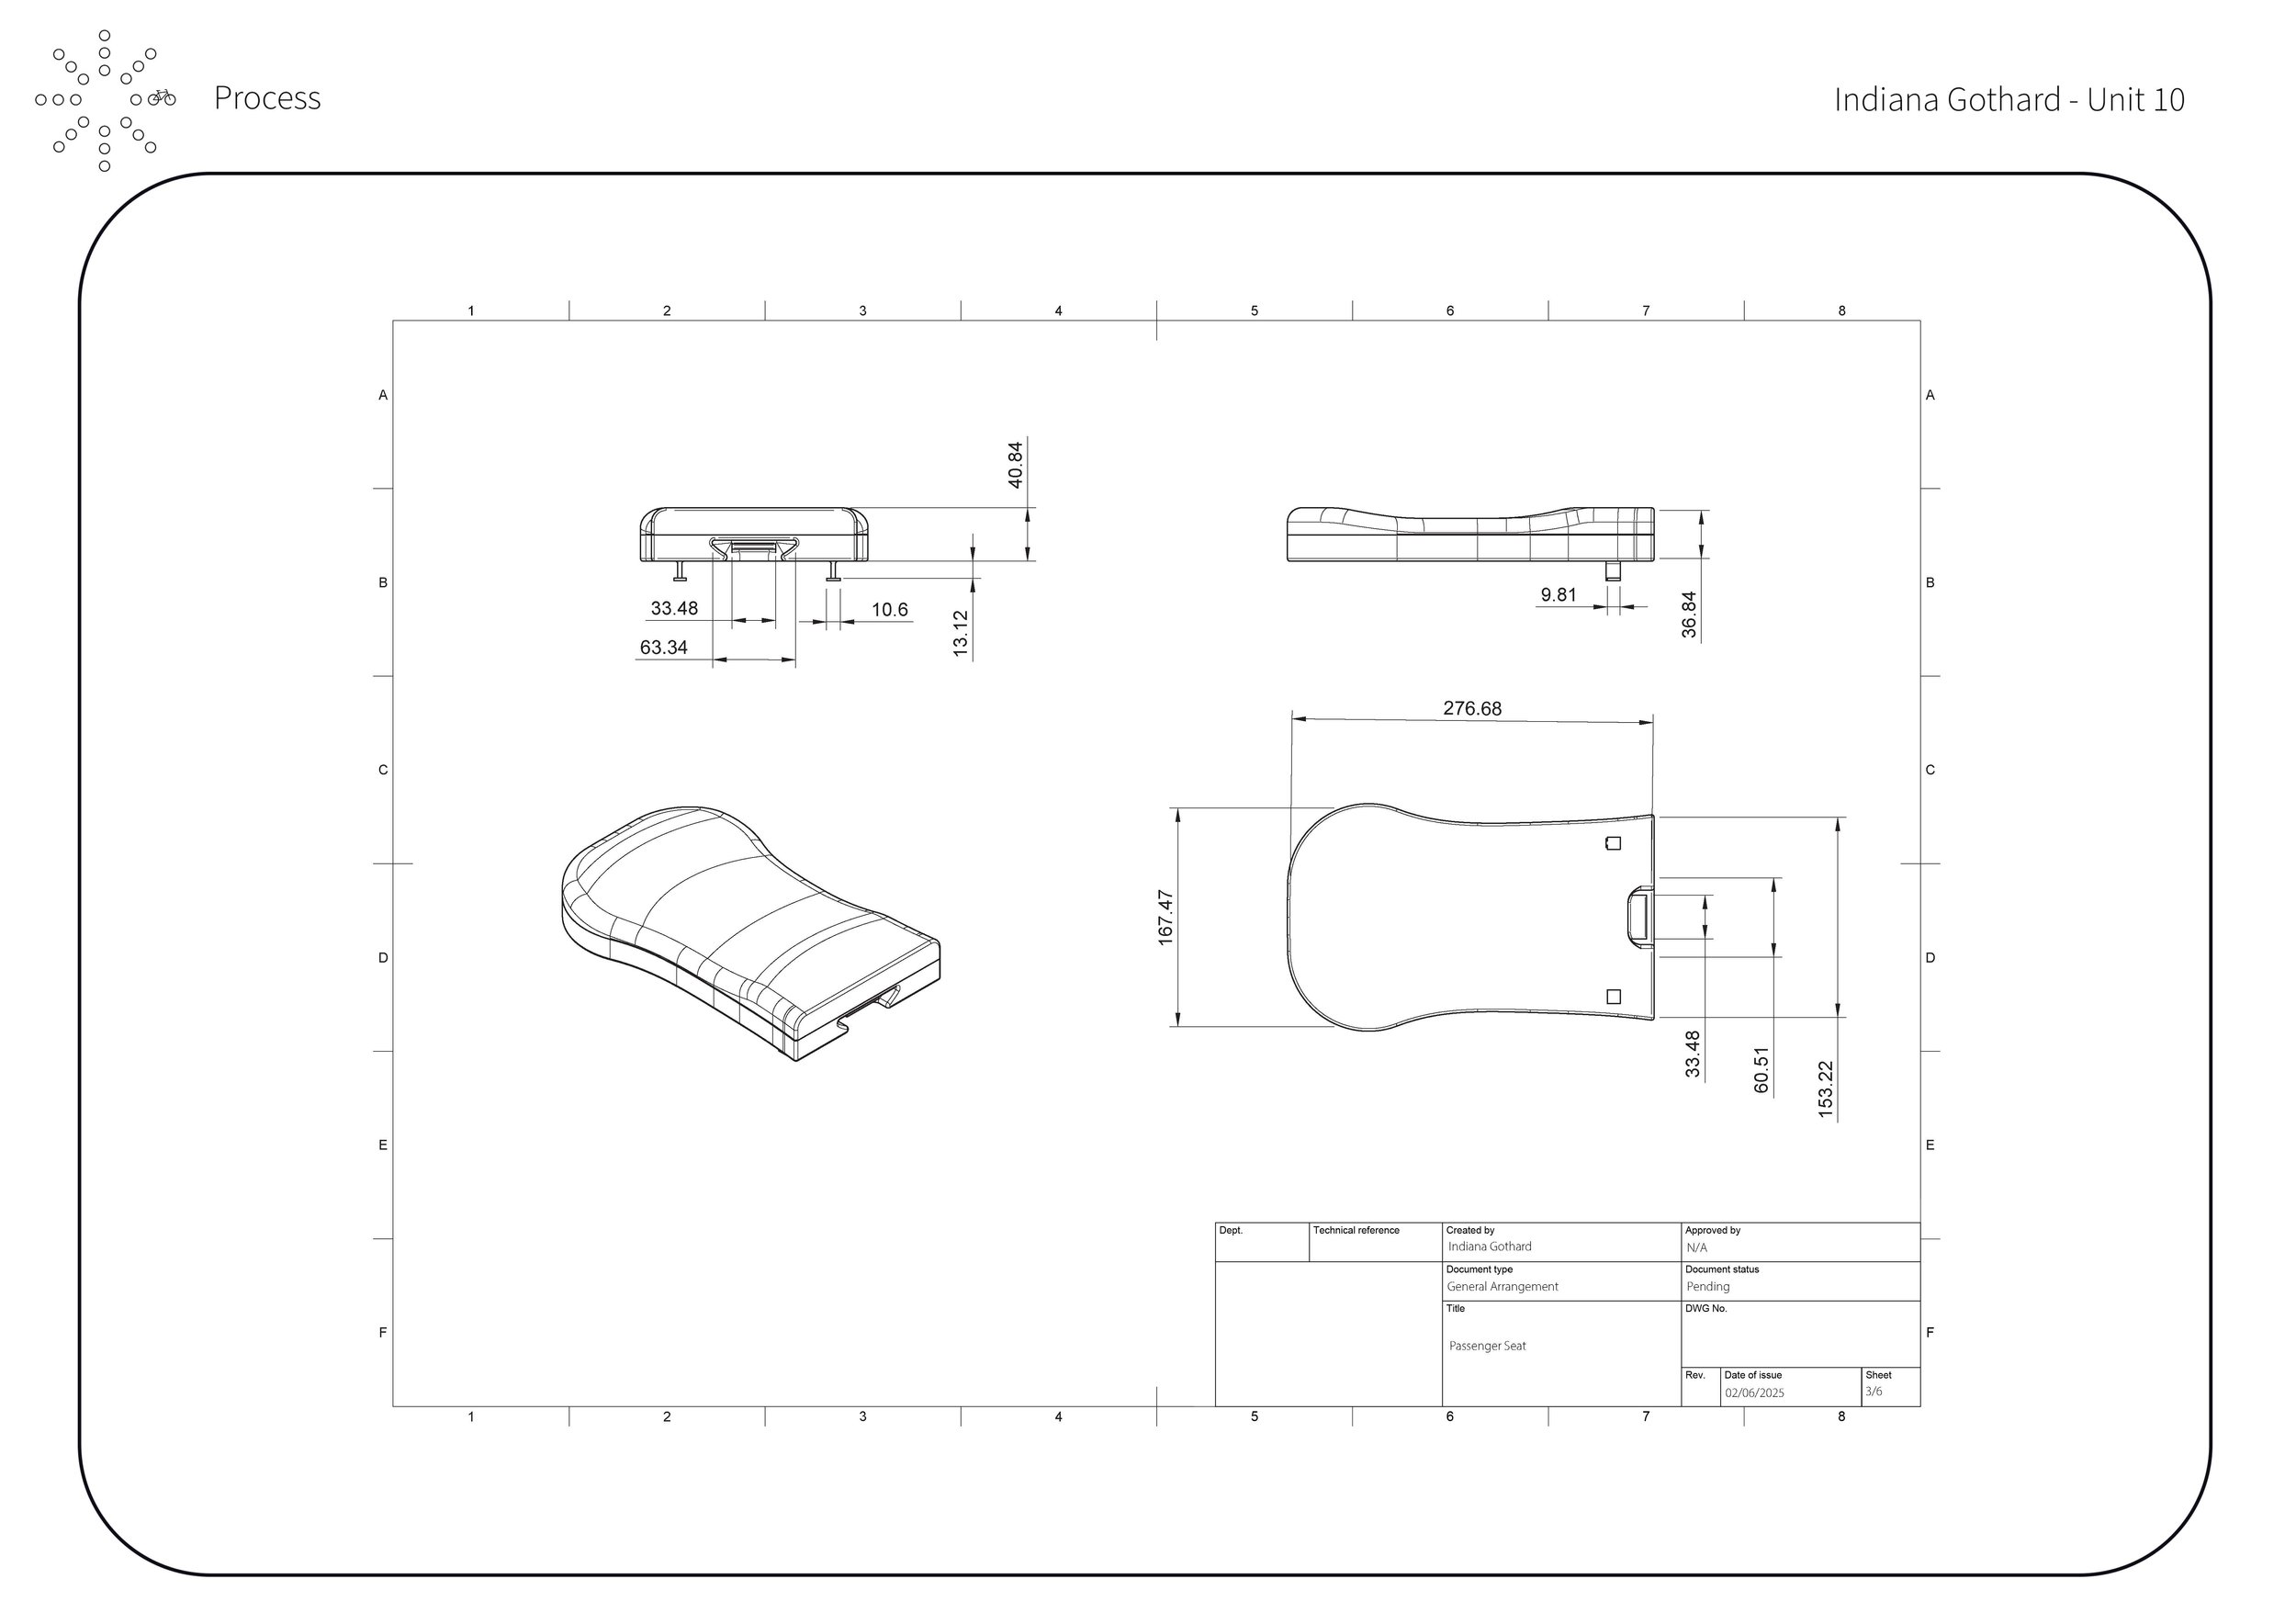
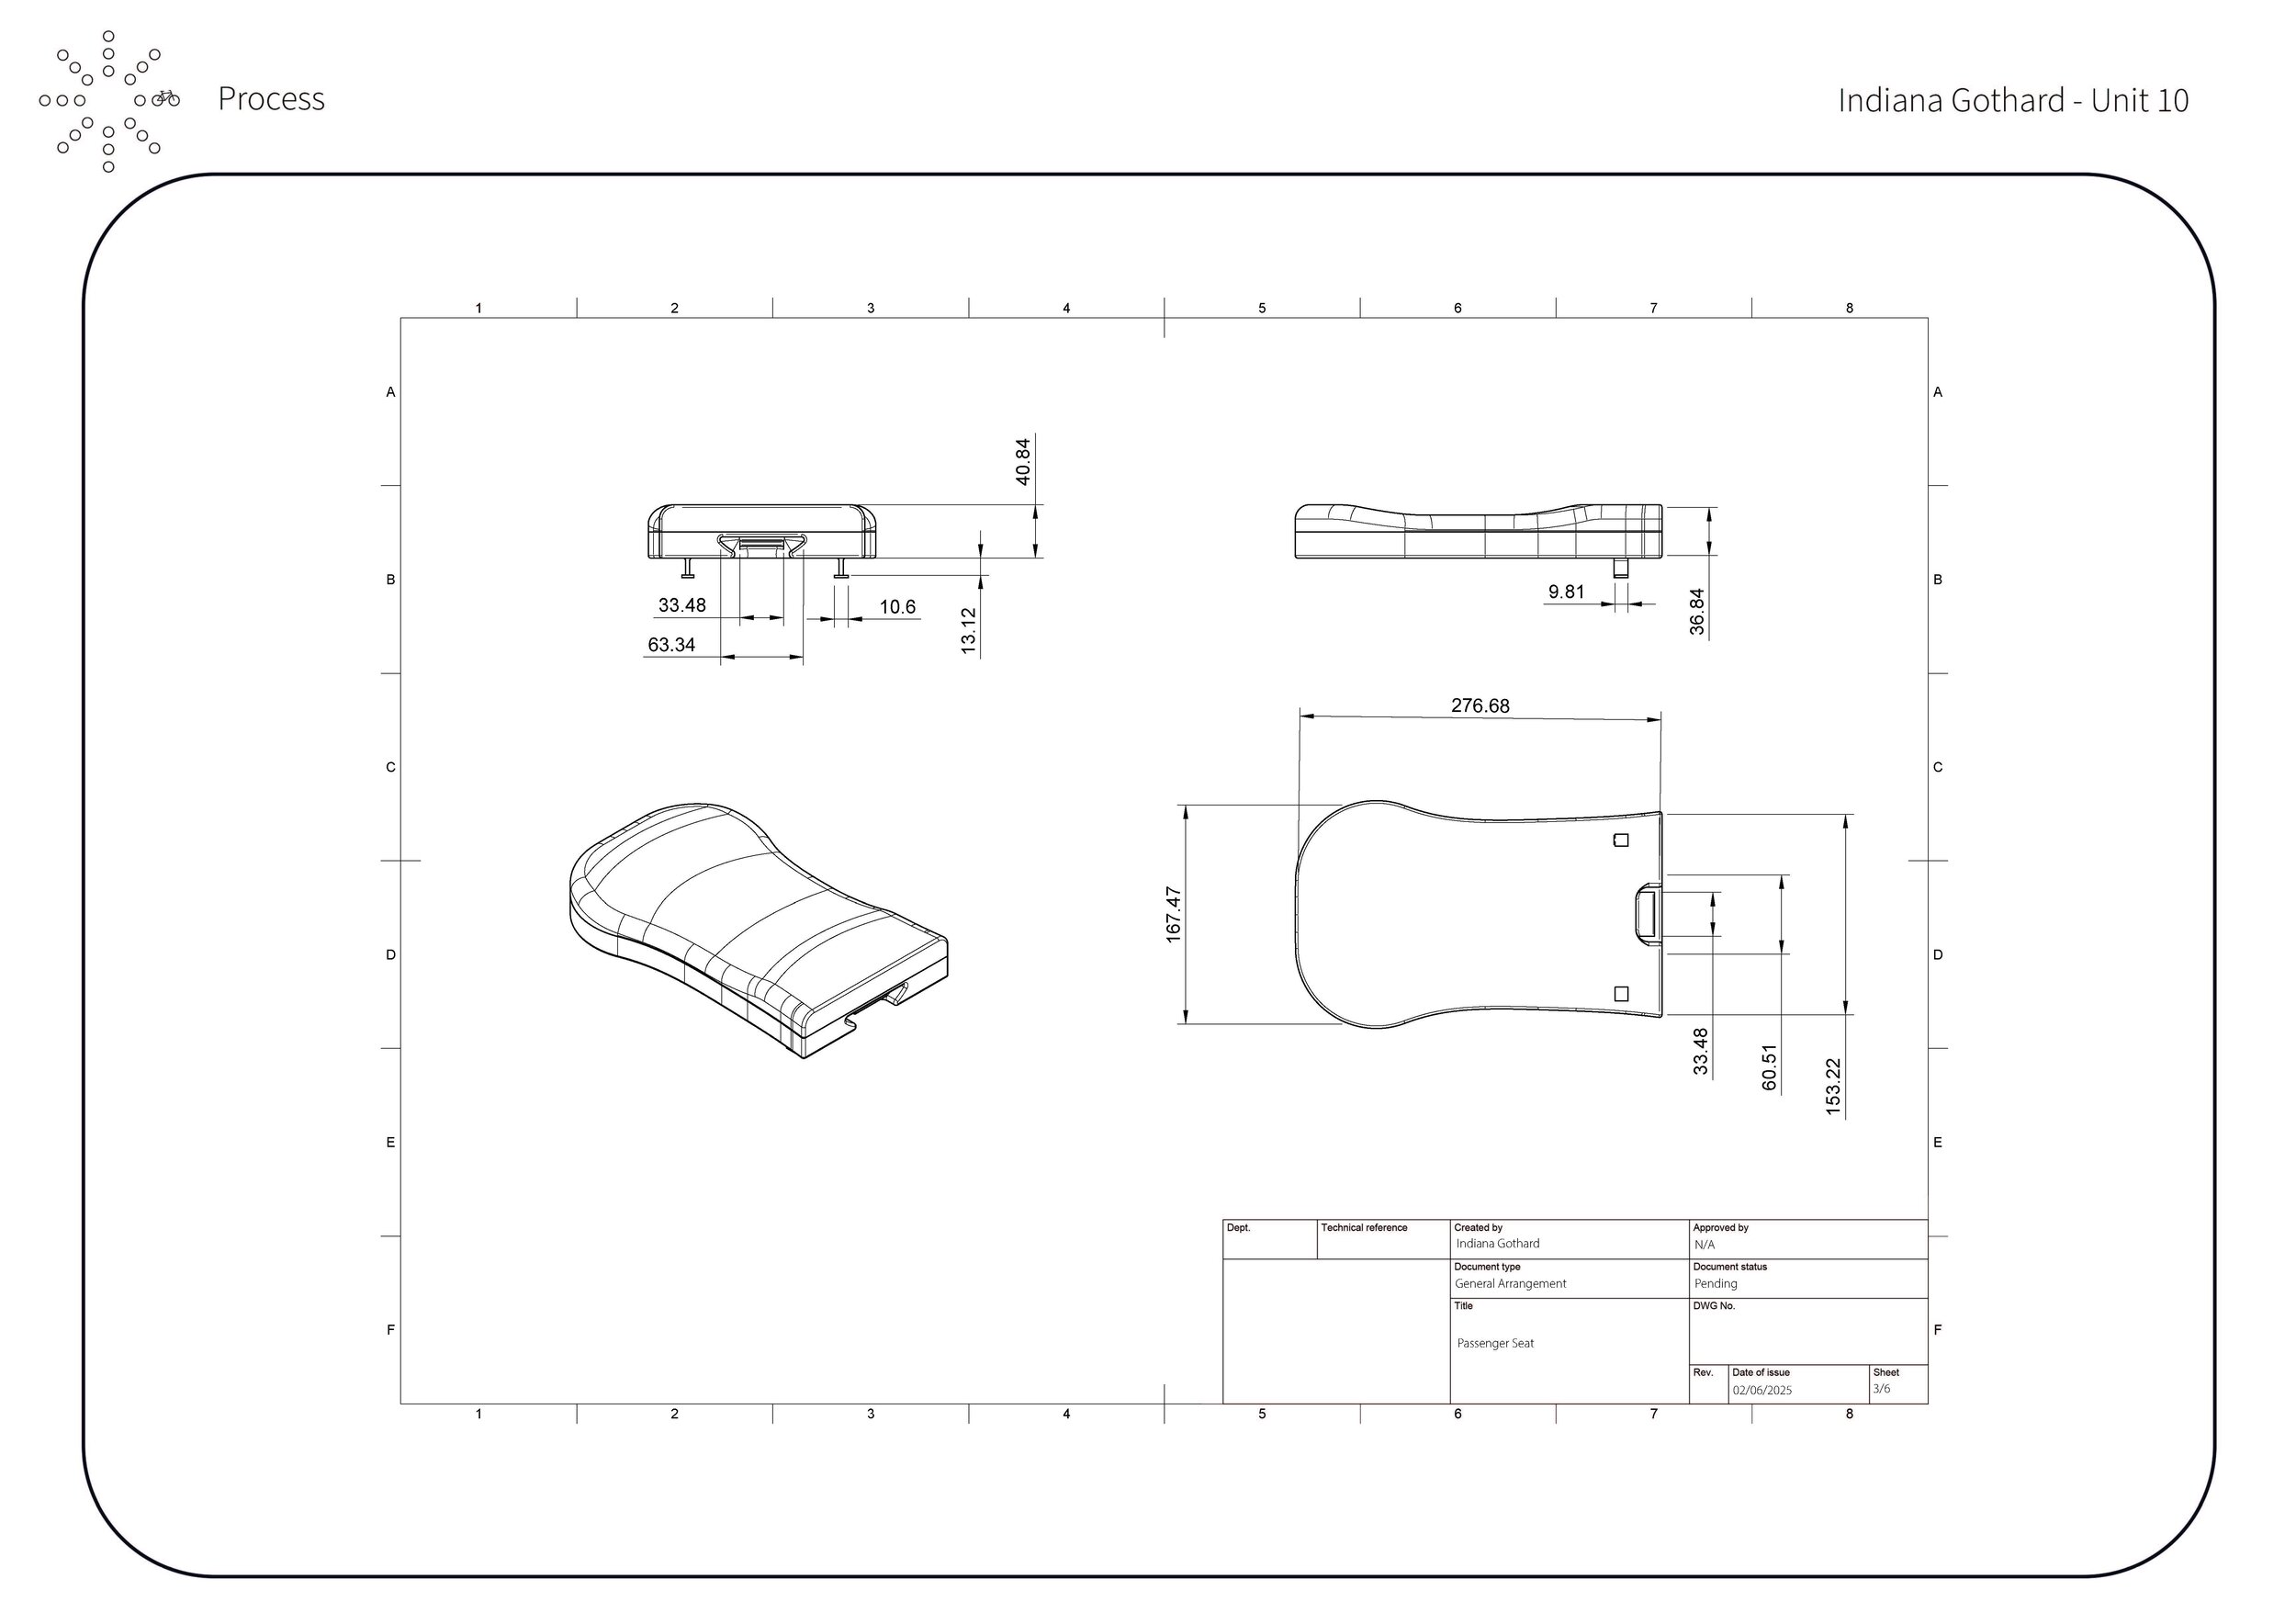
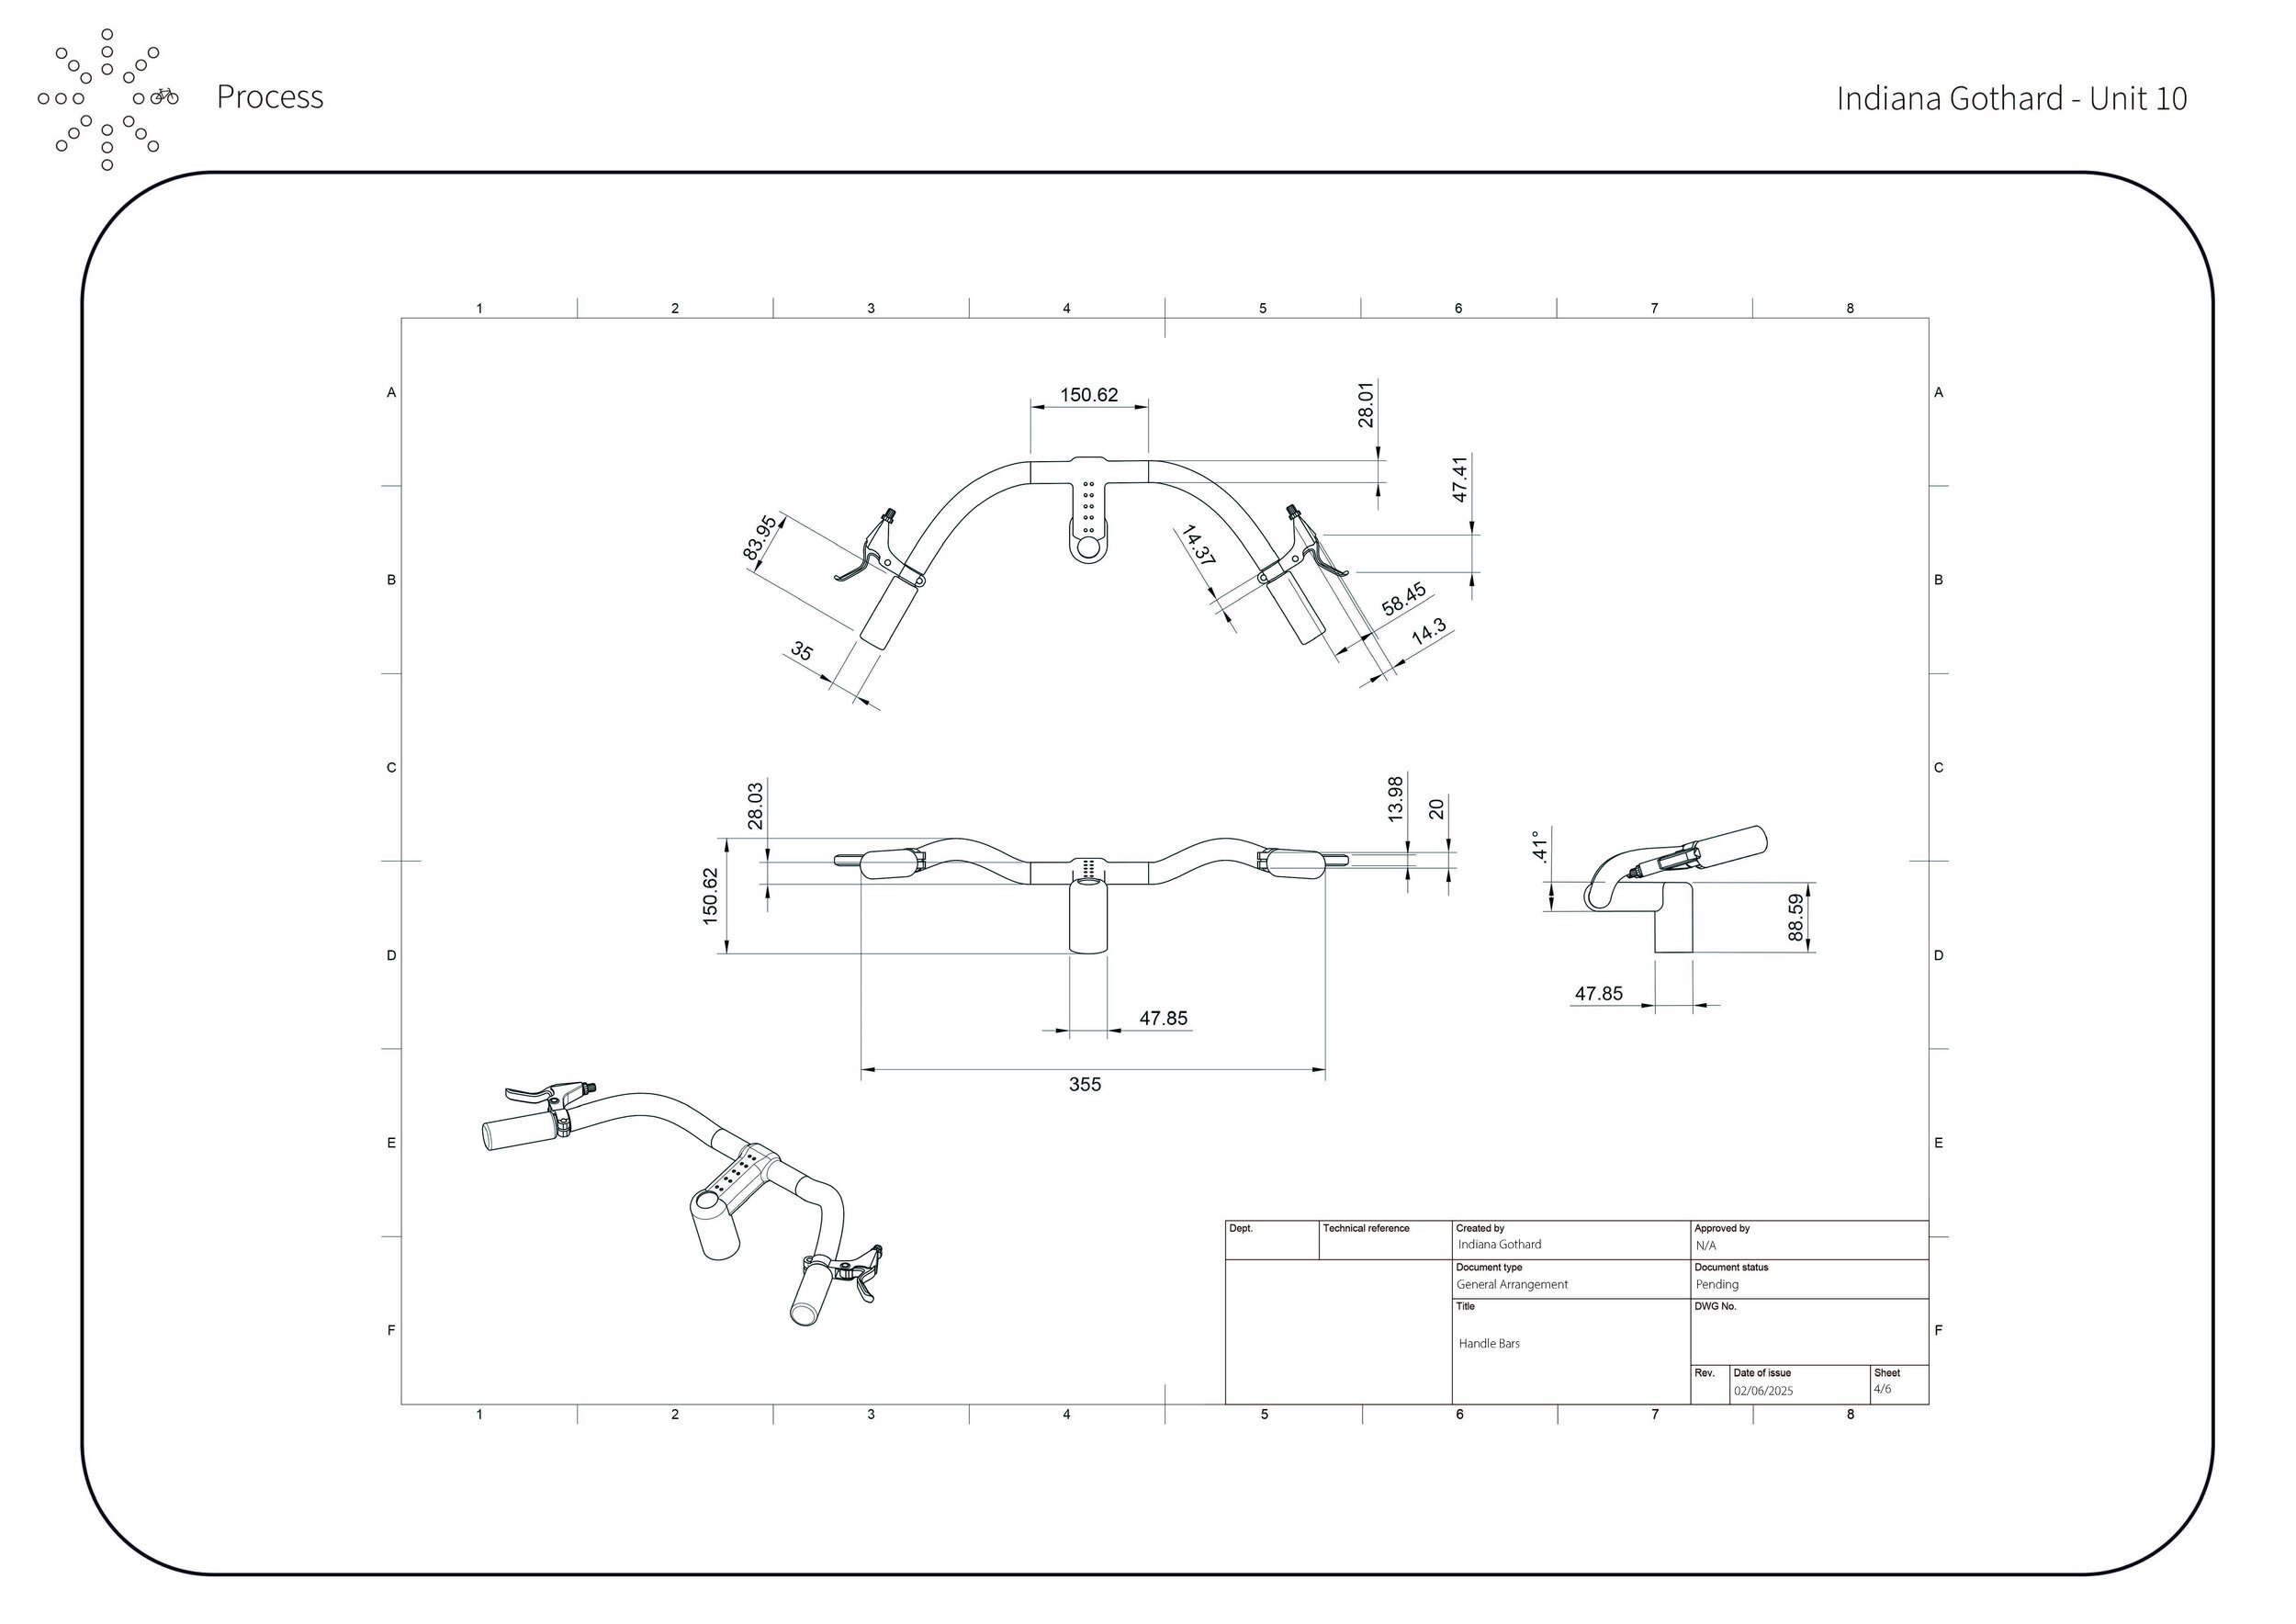
07 FINAL MODELS

1:5 Model

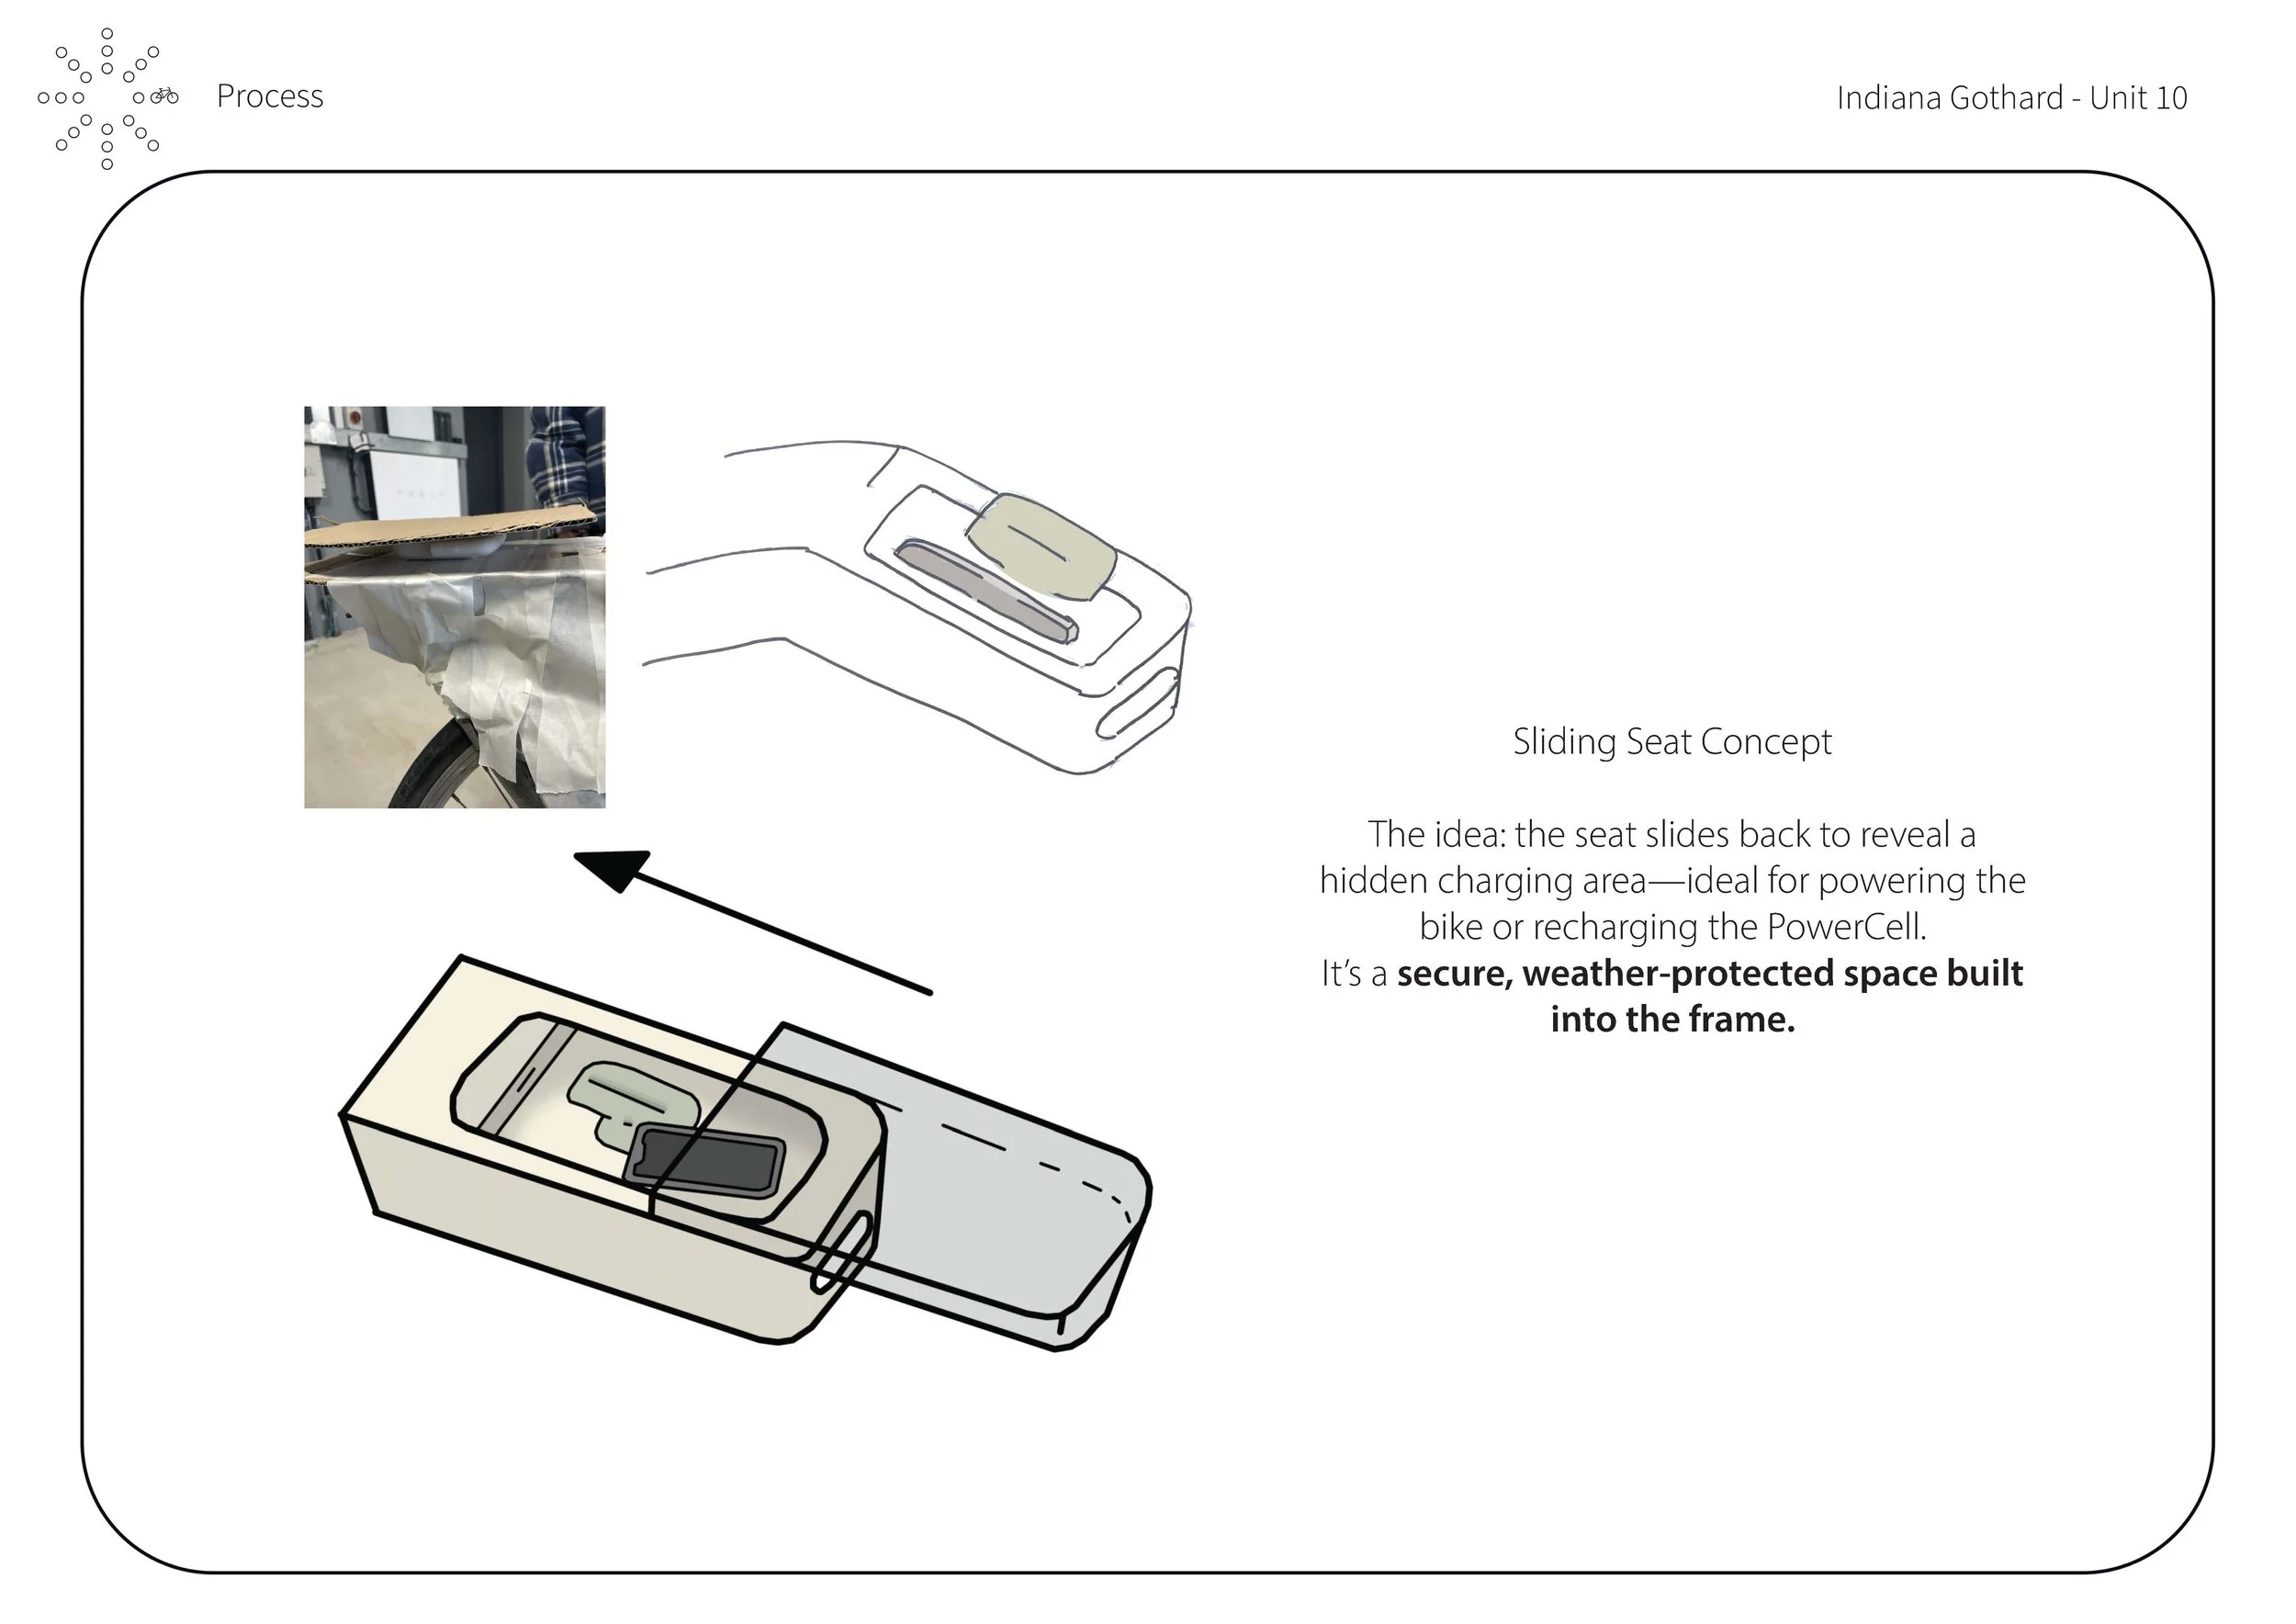
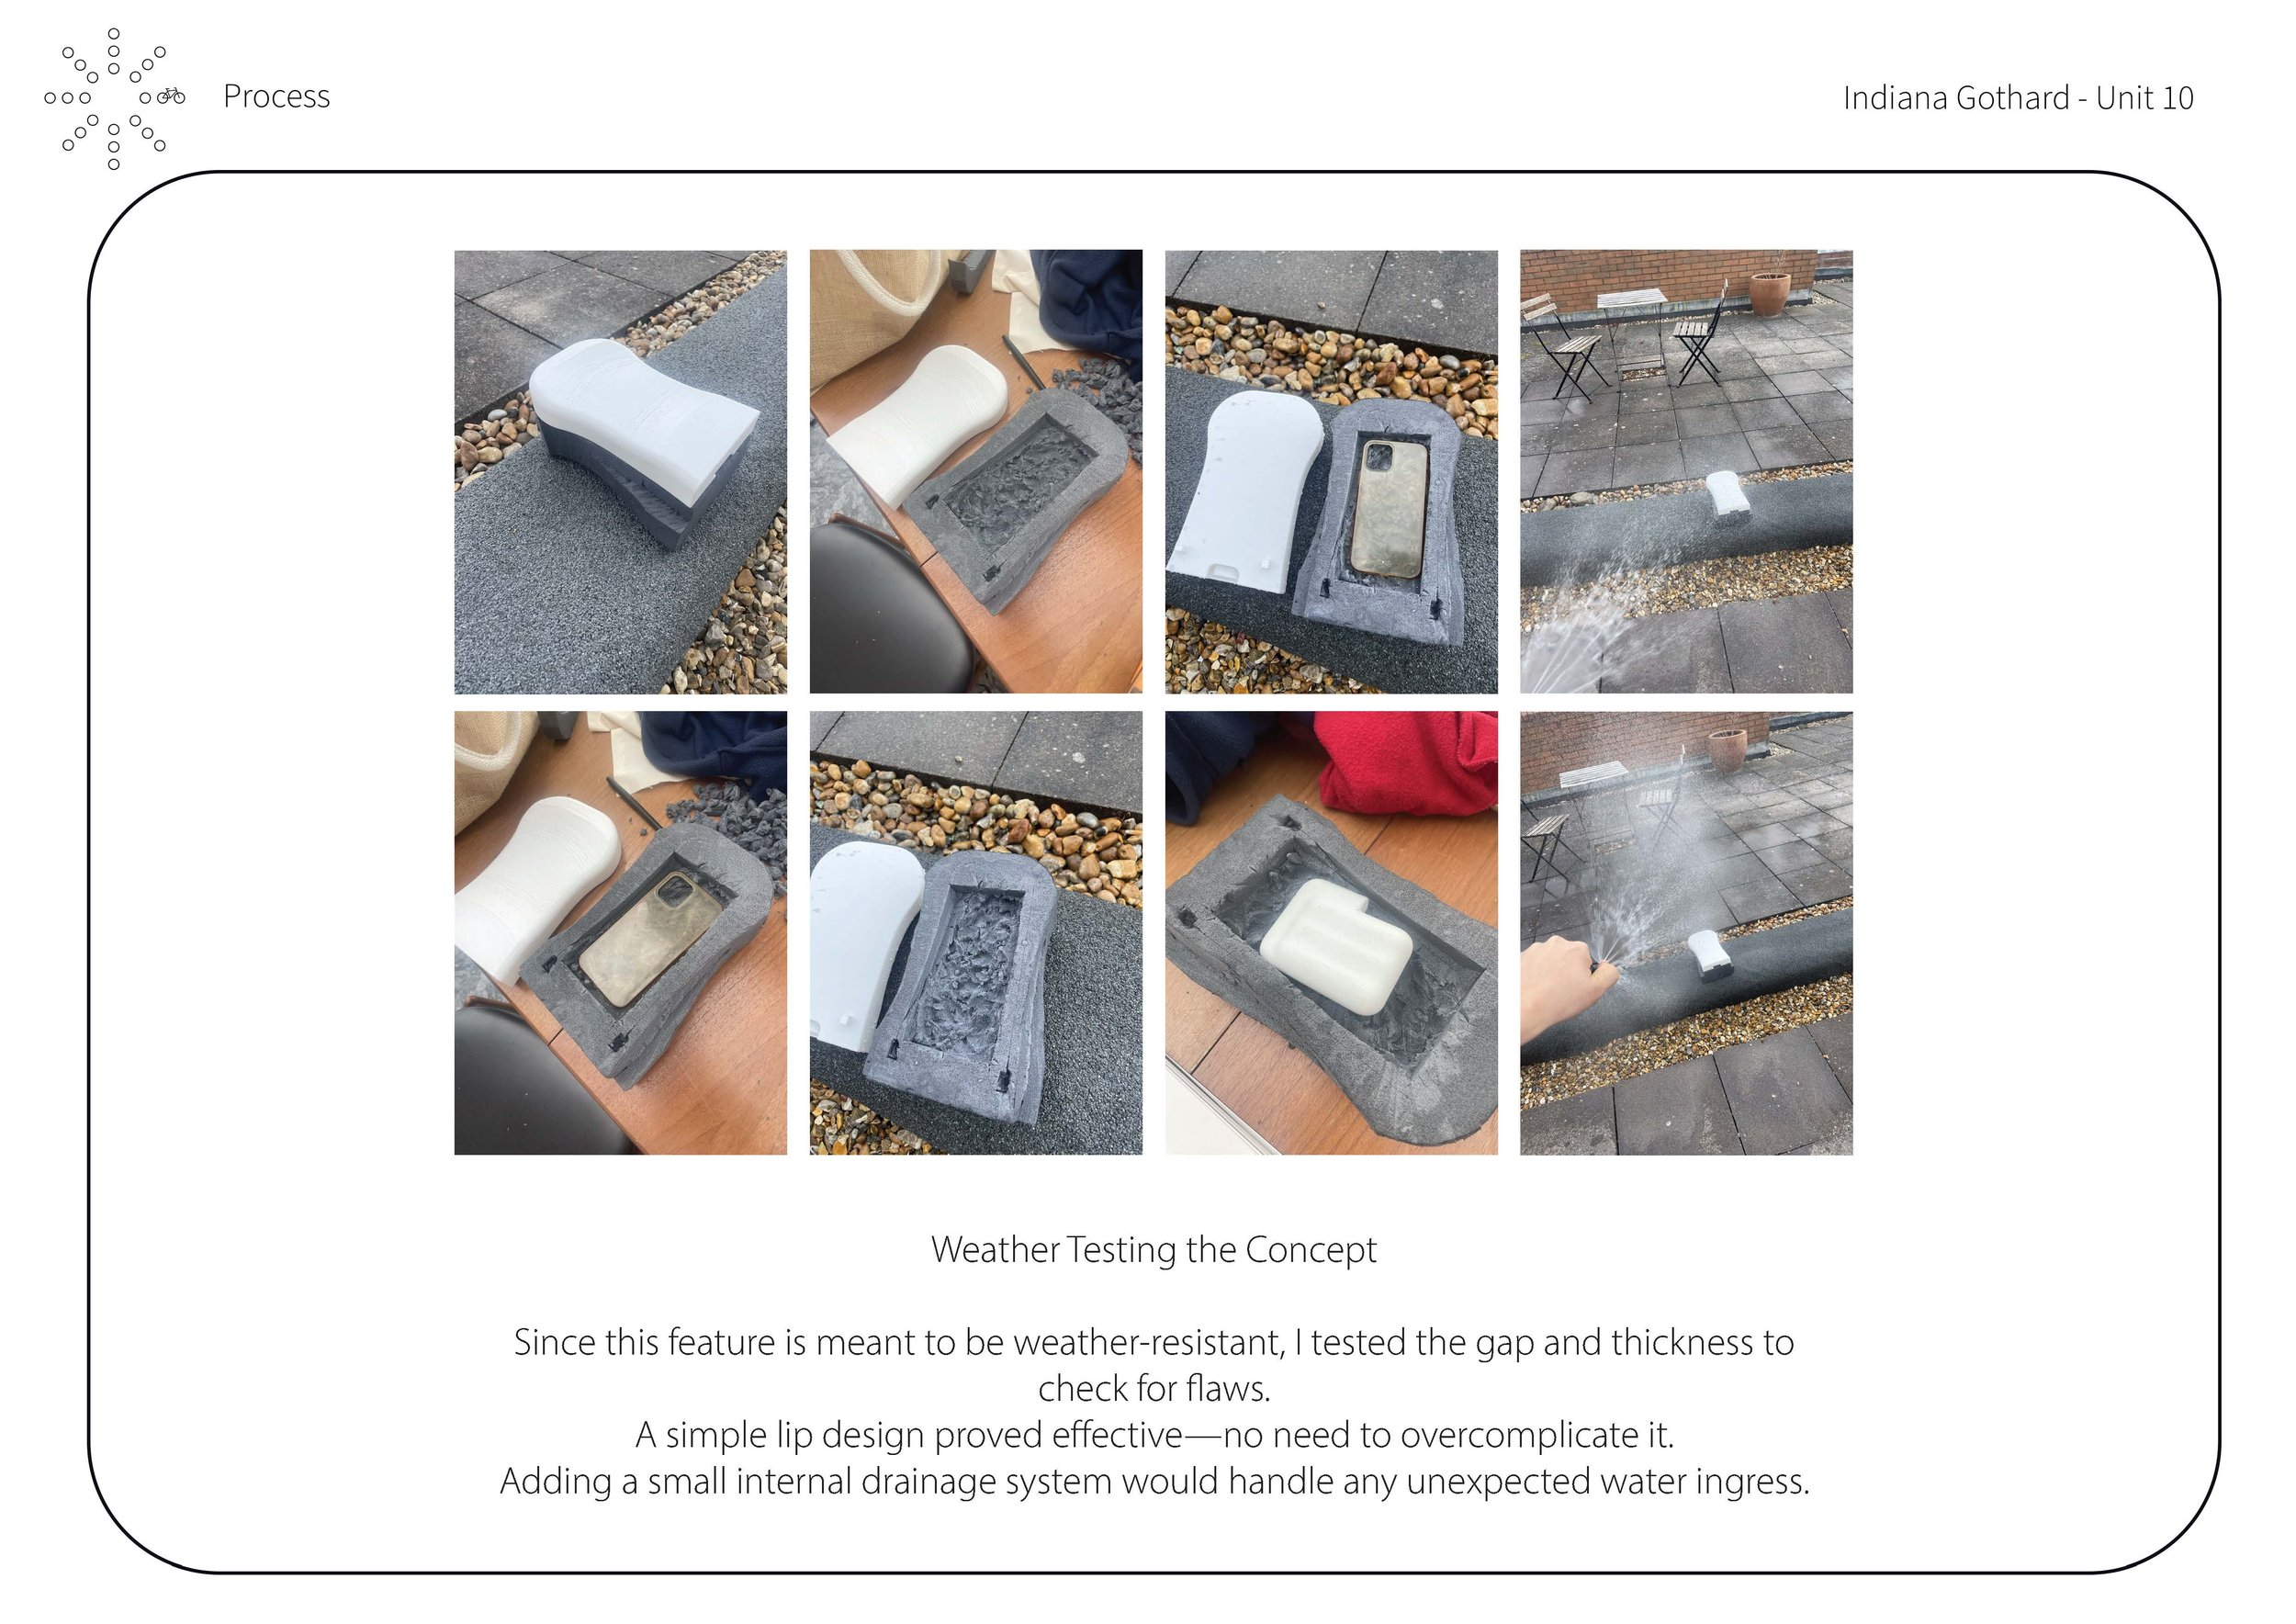
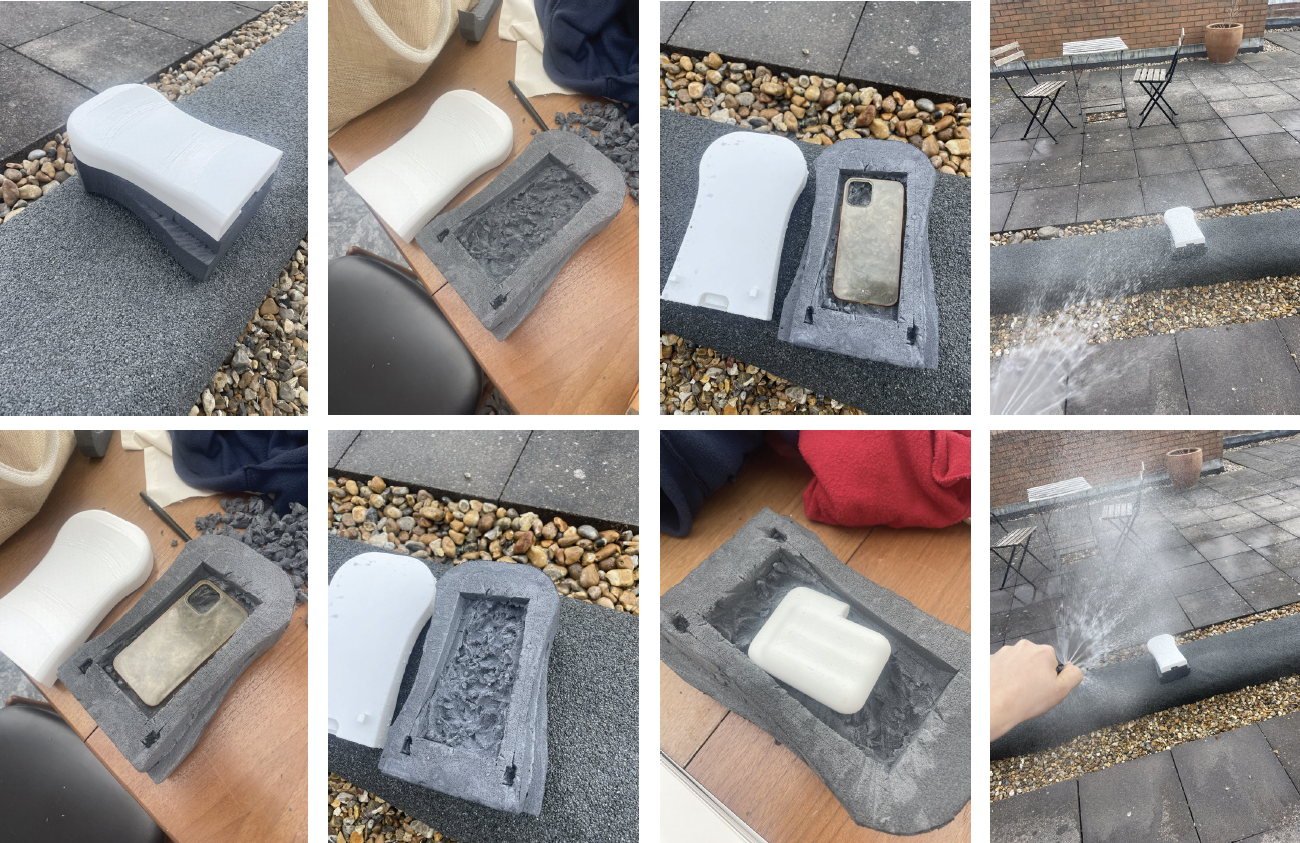
WET SECTION
With the bike’s technology, including the PowerCell, I needed a safe storage area. Placing it under the seat, I tested how rain entered the space and found that shape and gaps affected water ingress. I then refined the design to keep the section dry.
1:1 Model
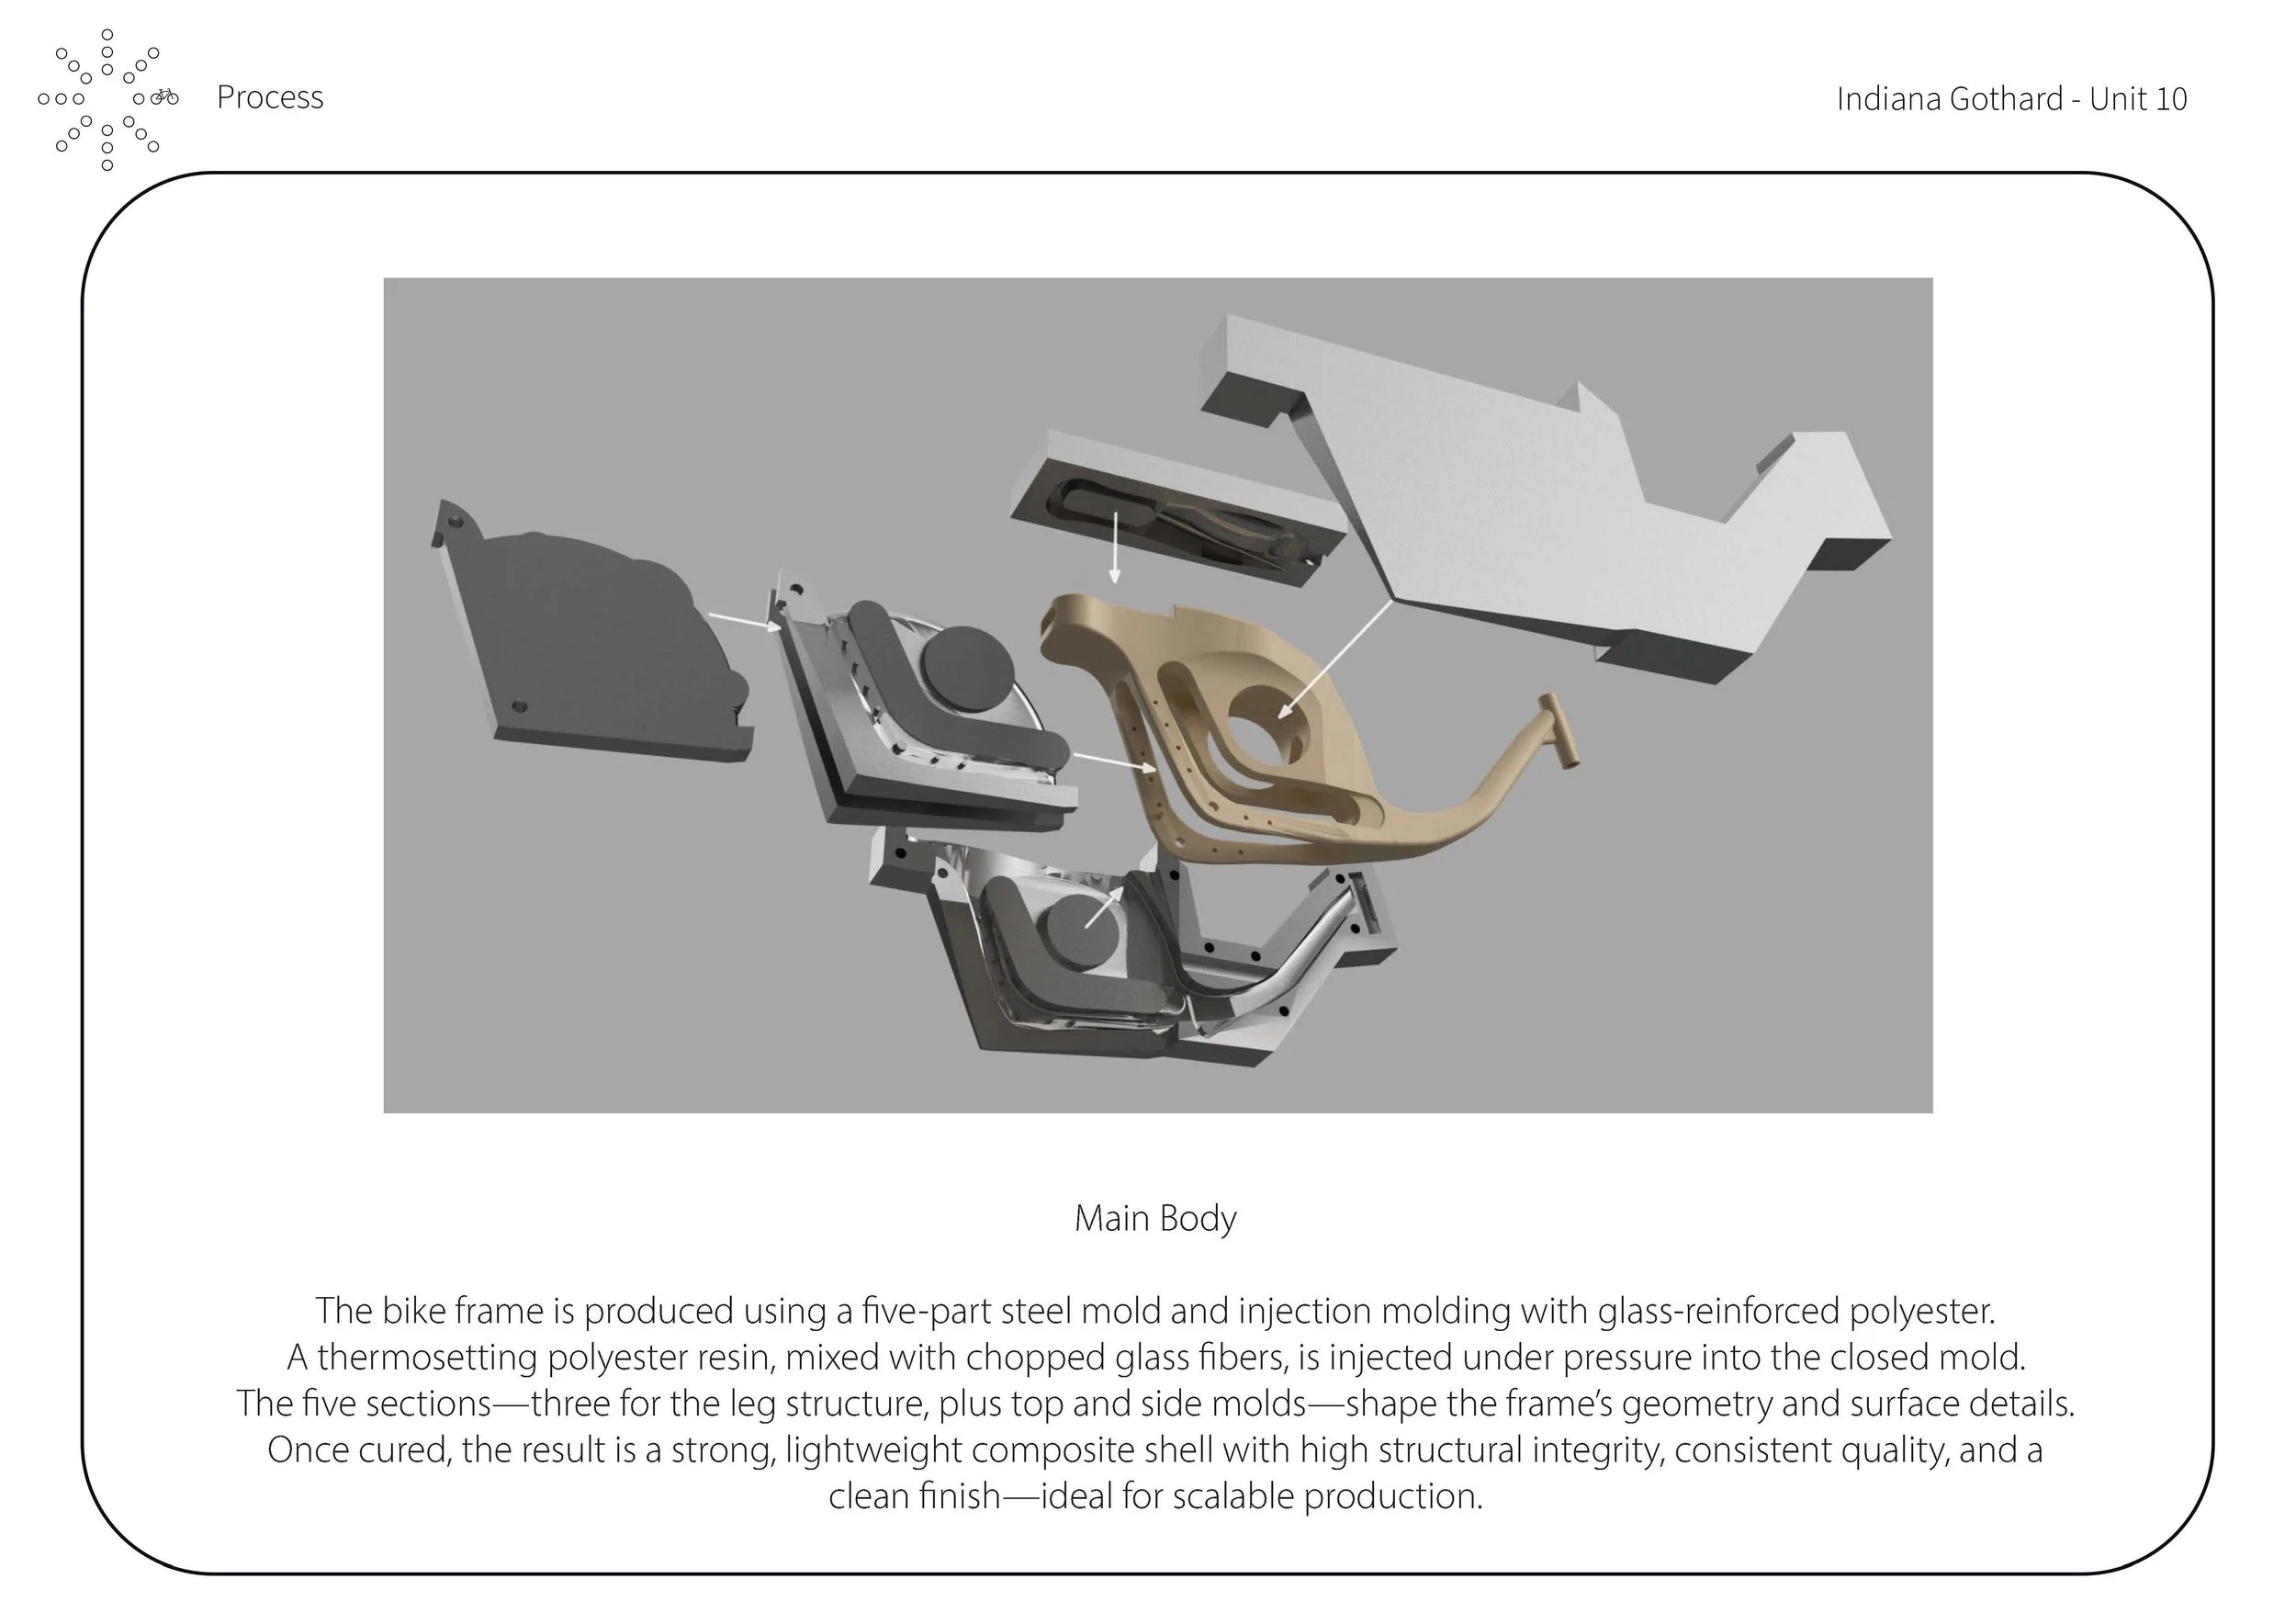
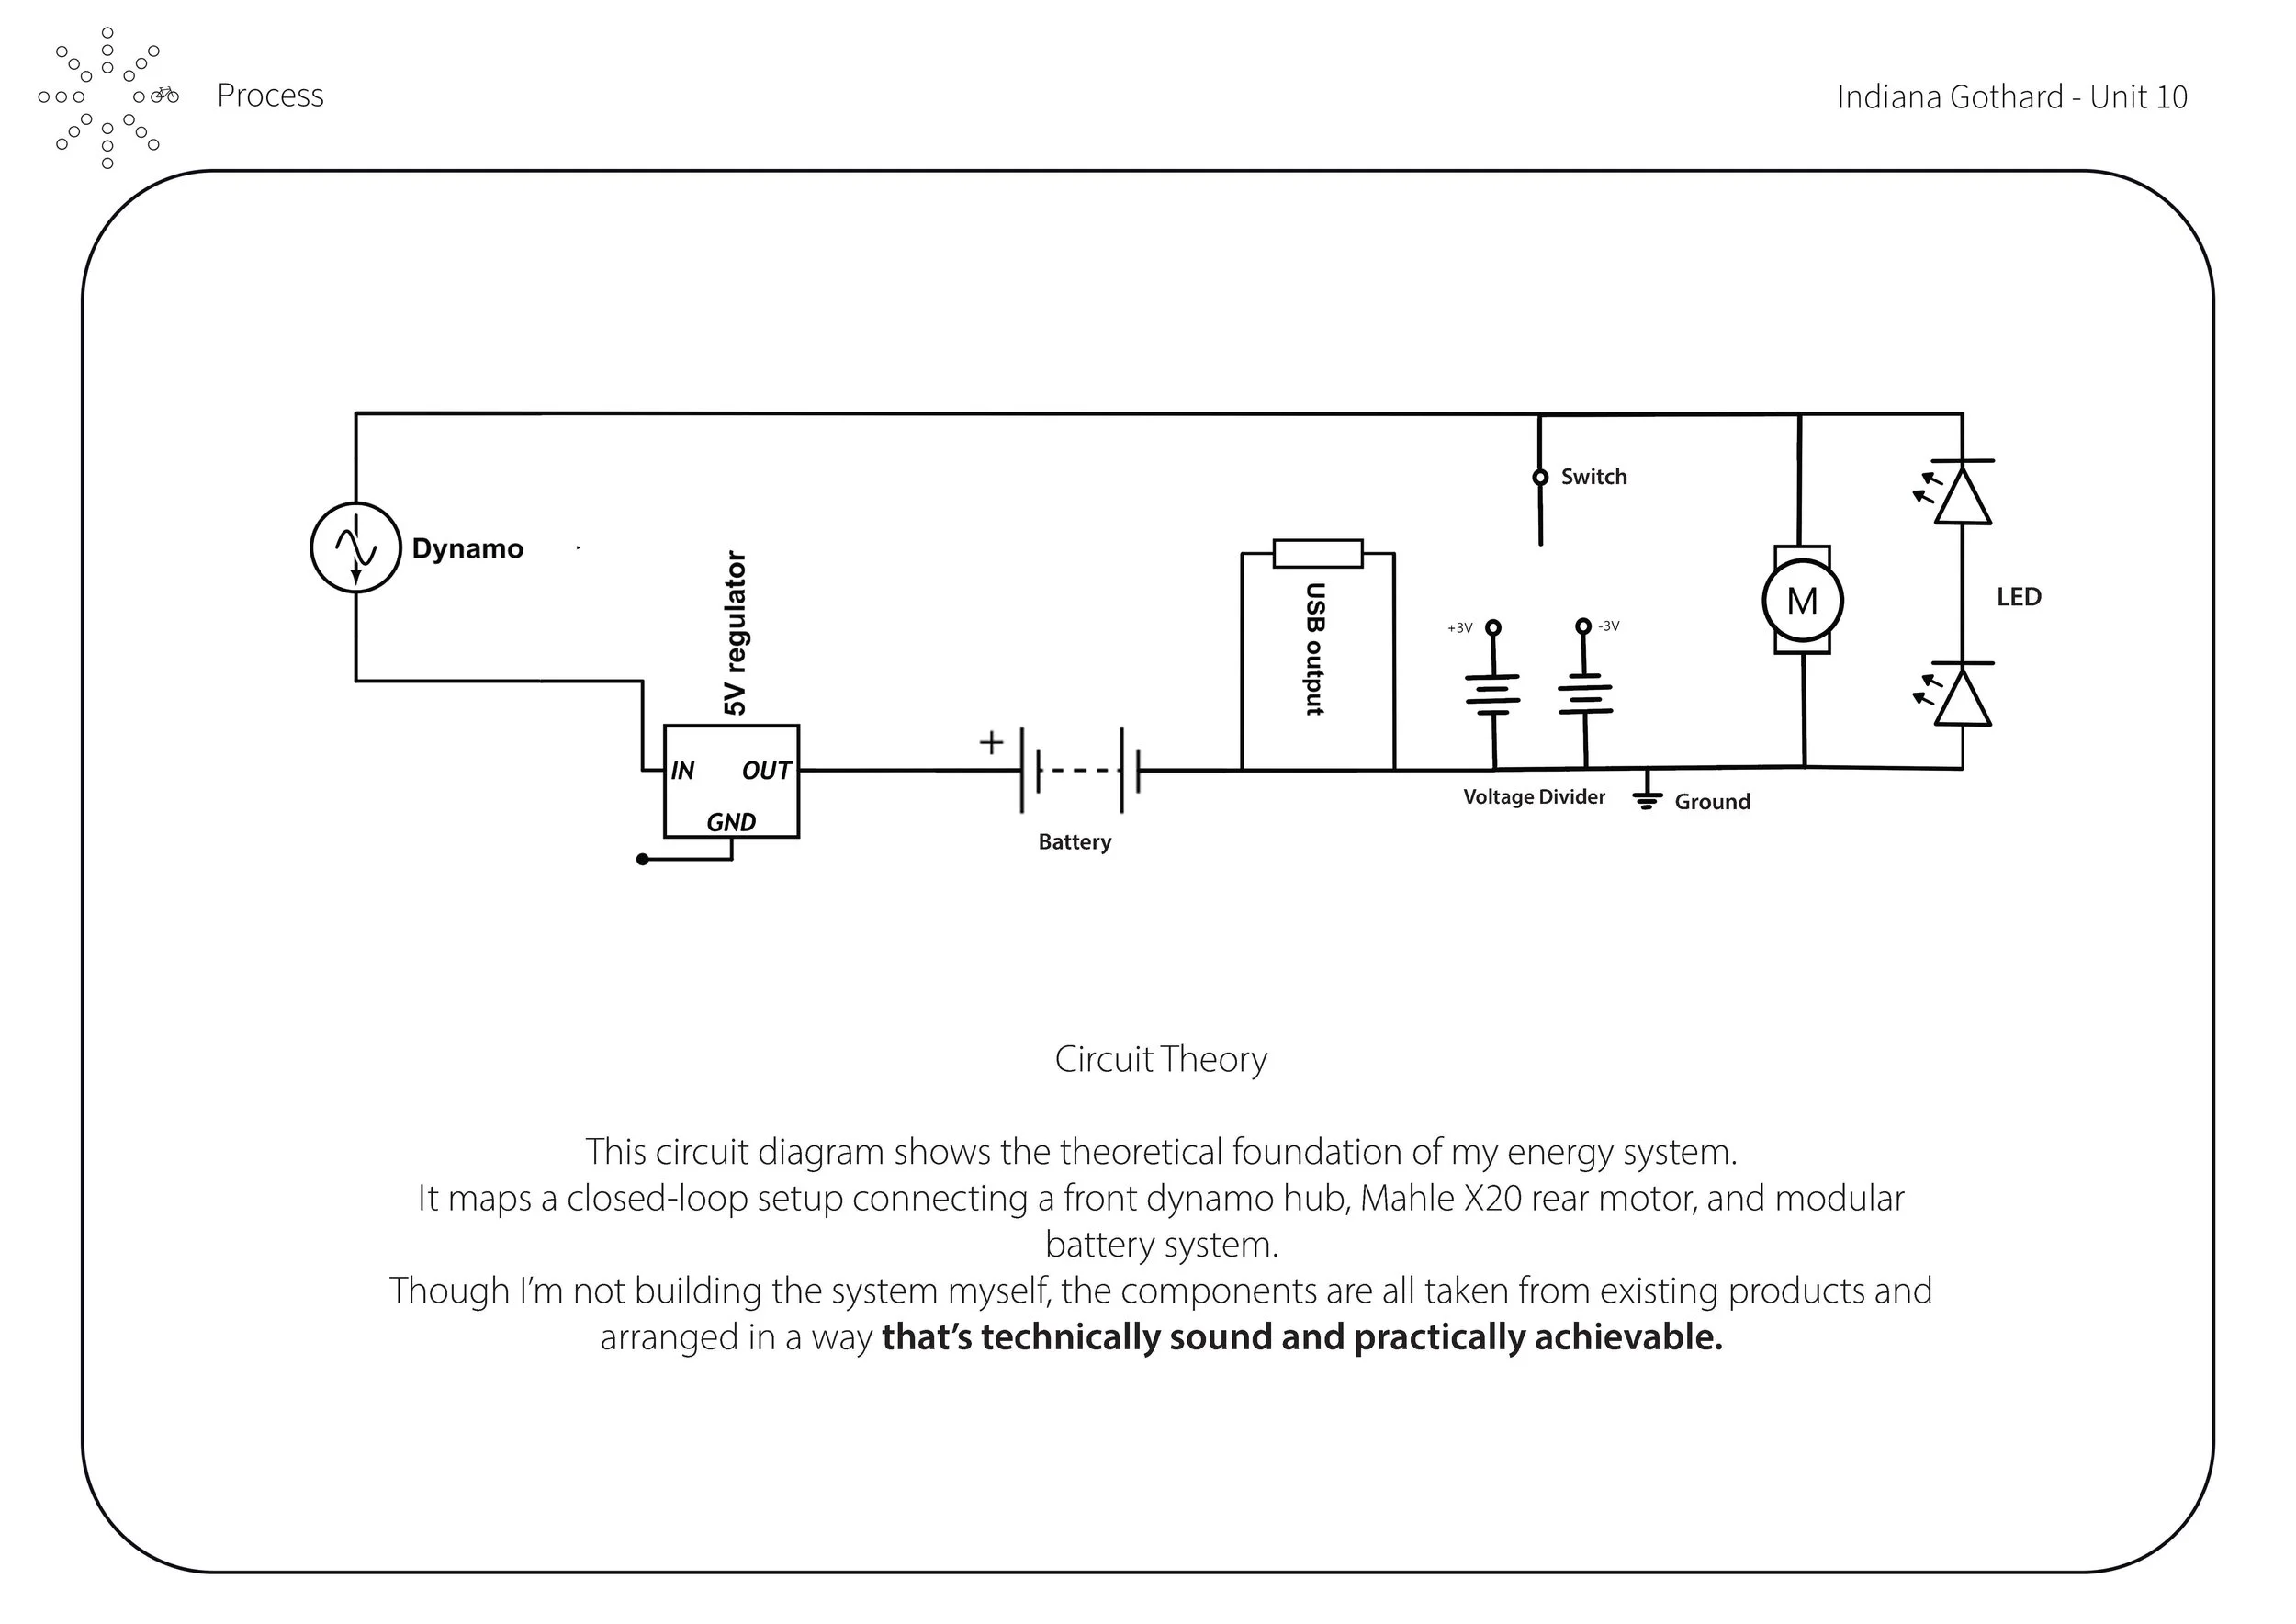
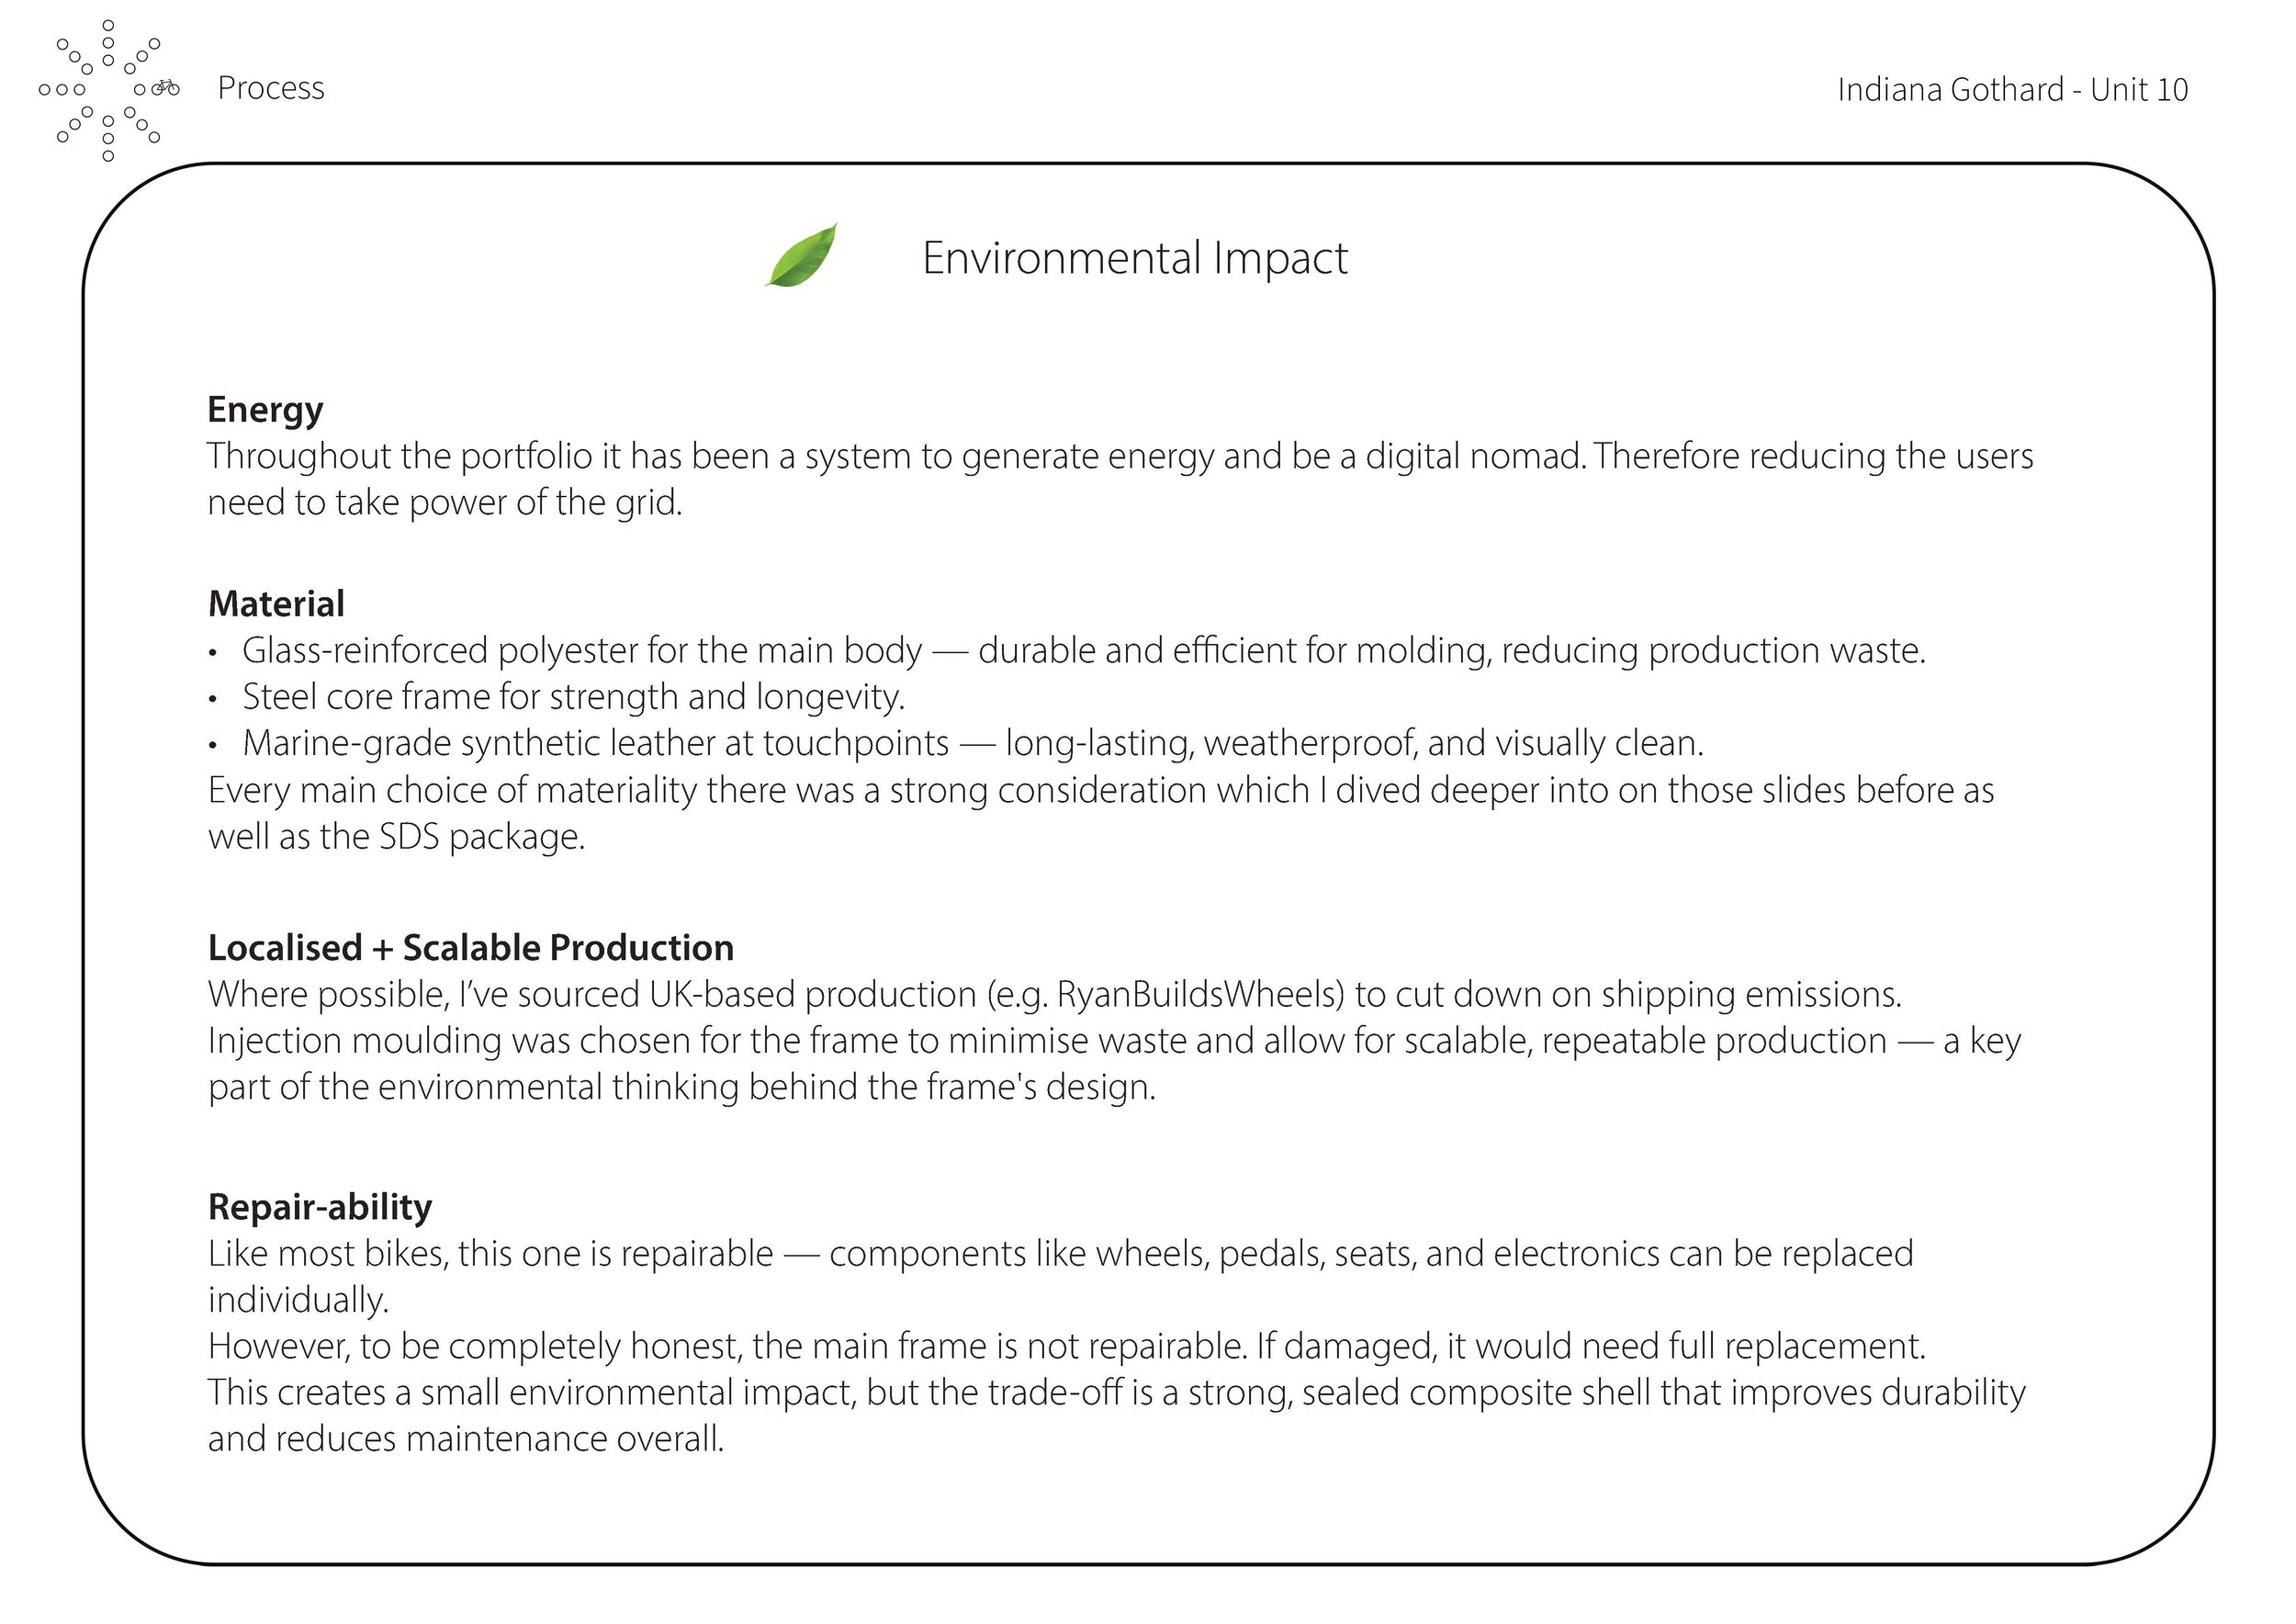
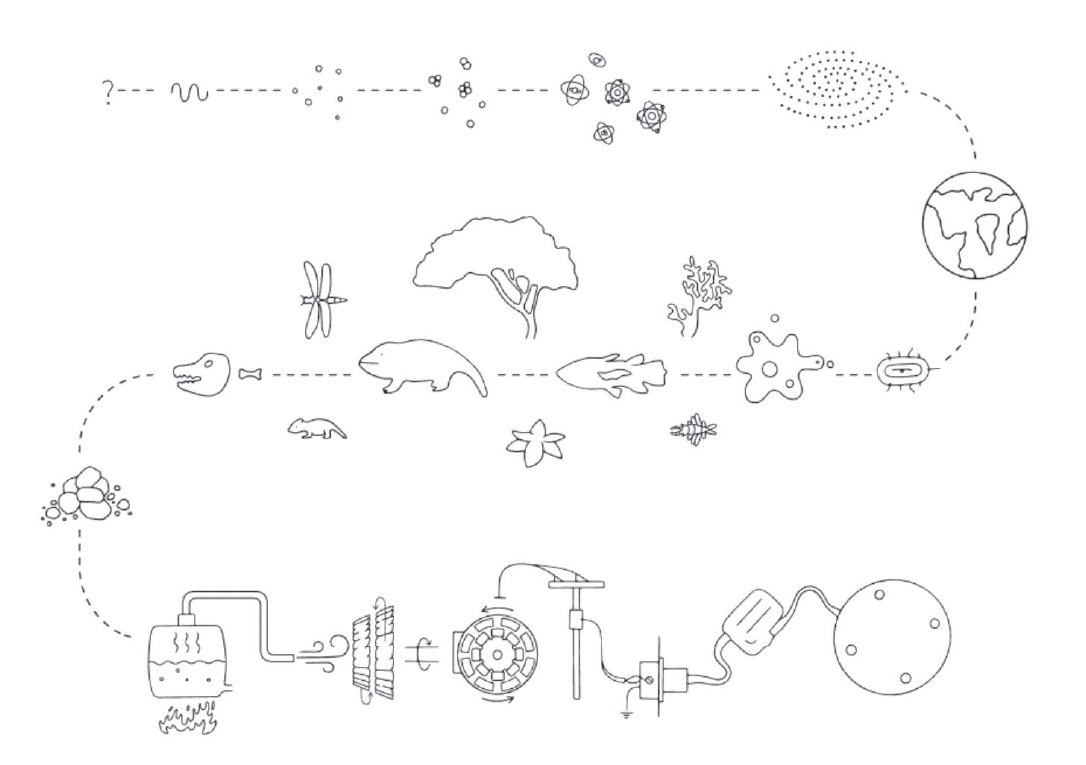
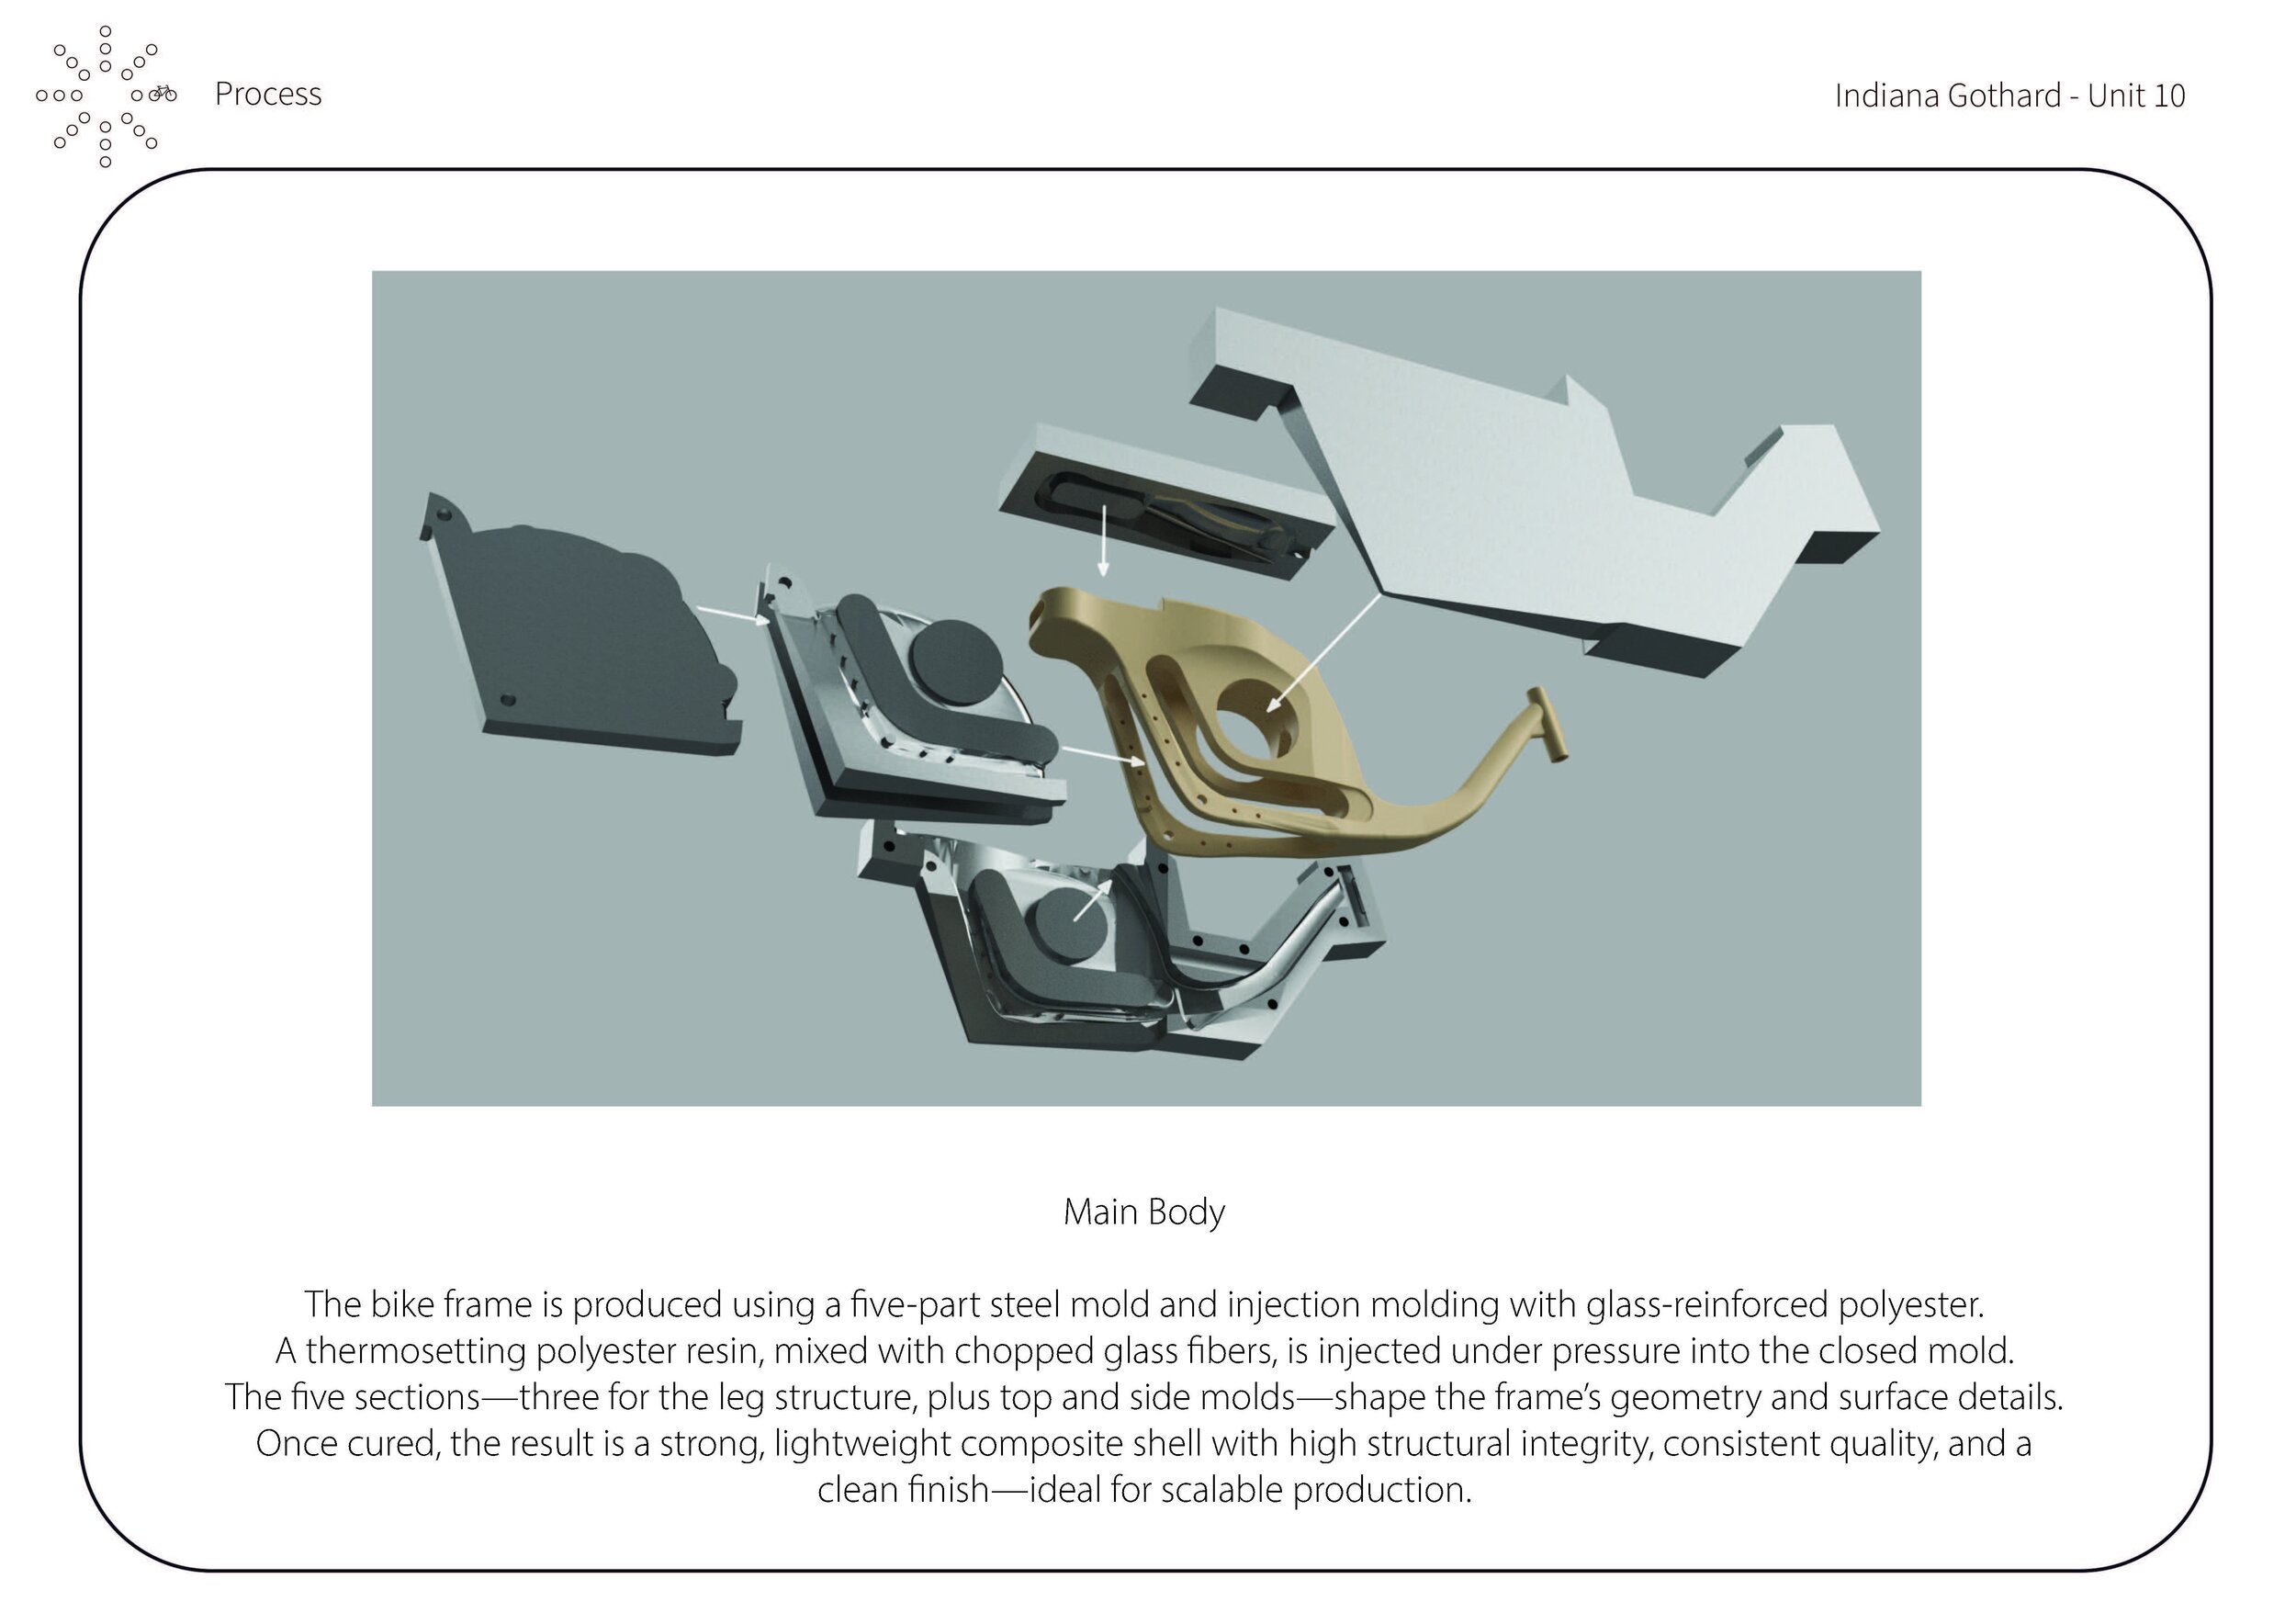
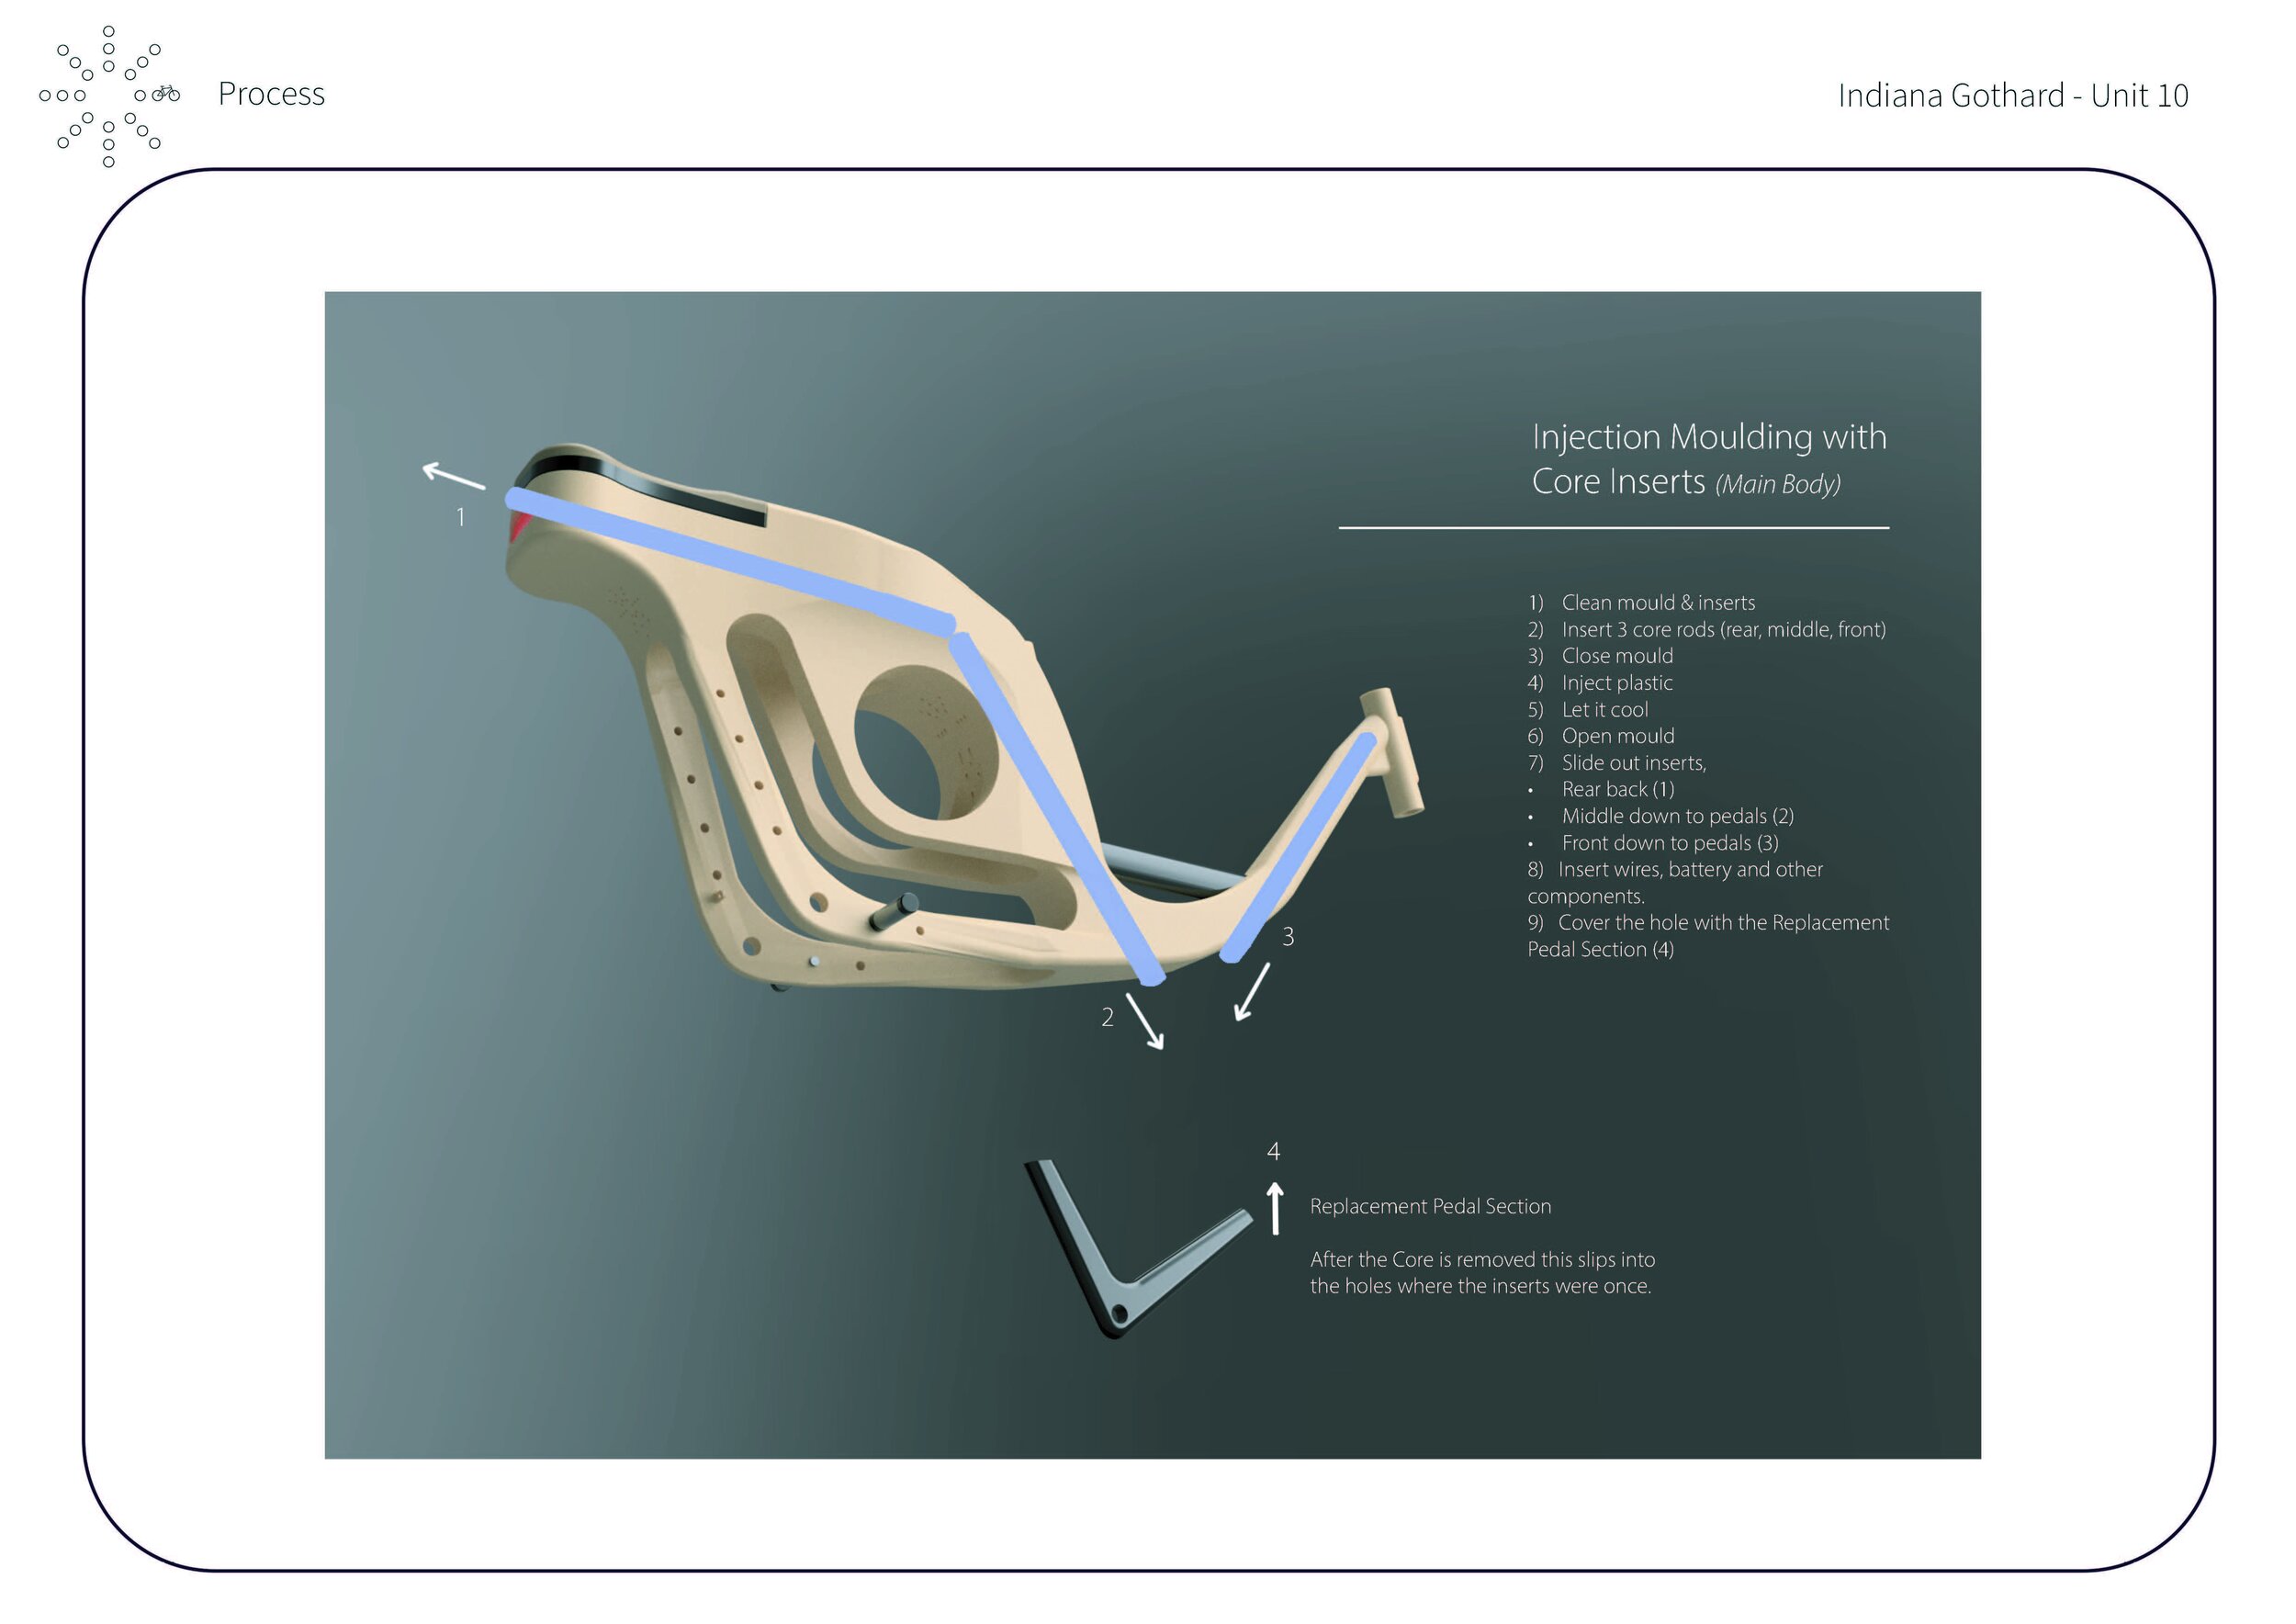
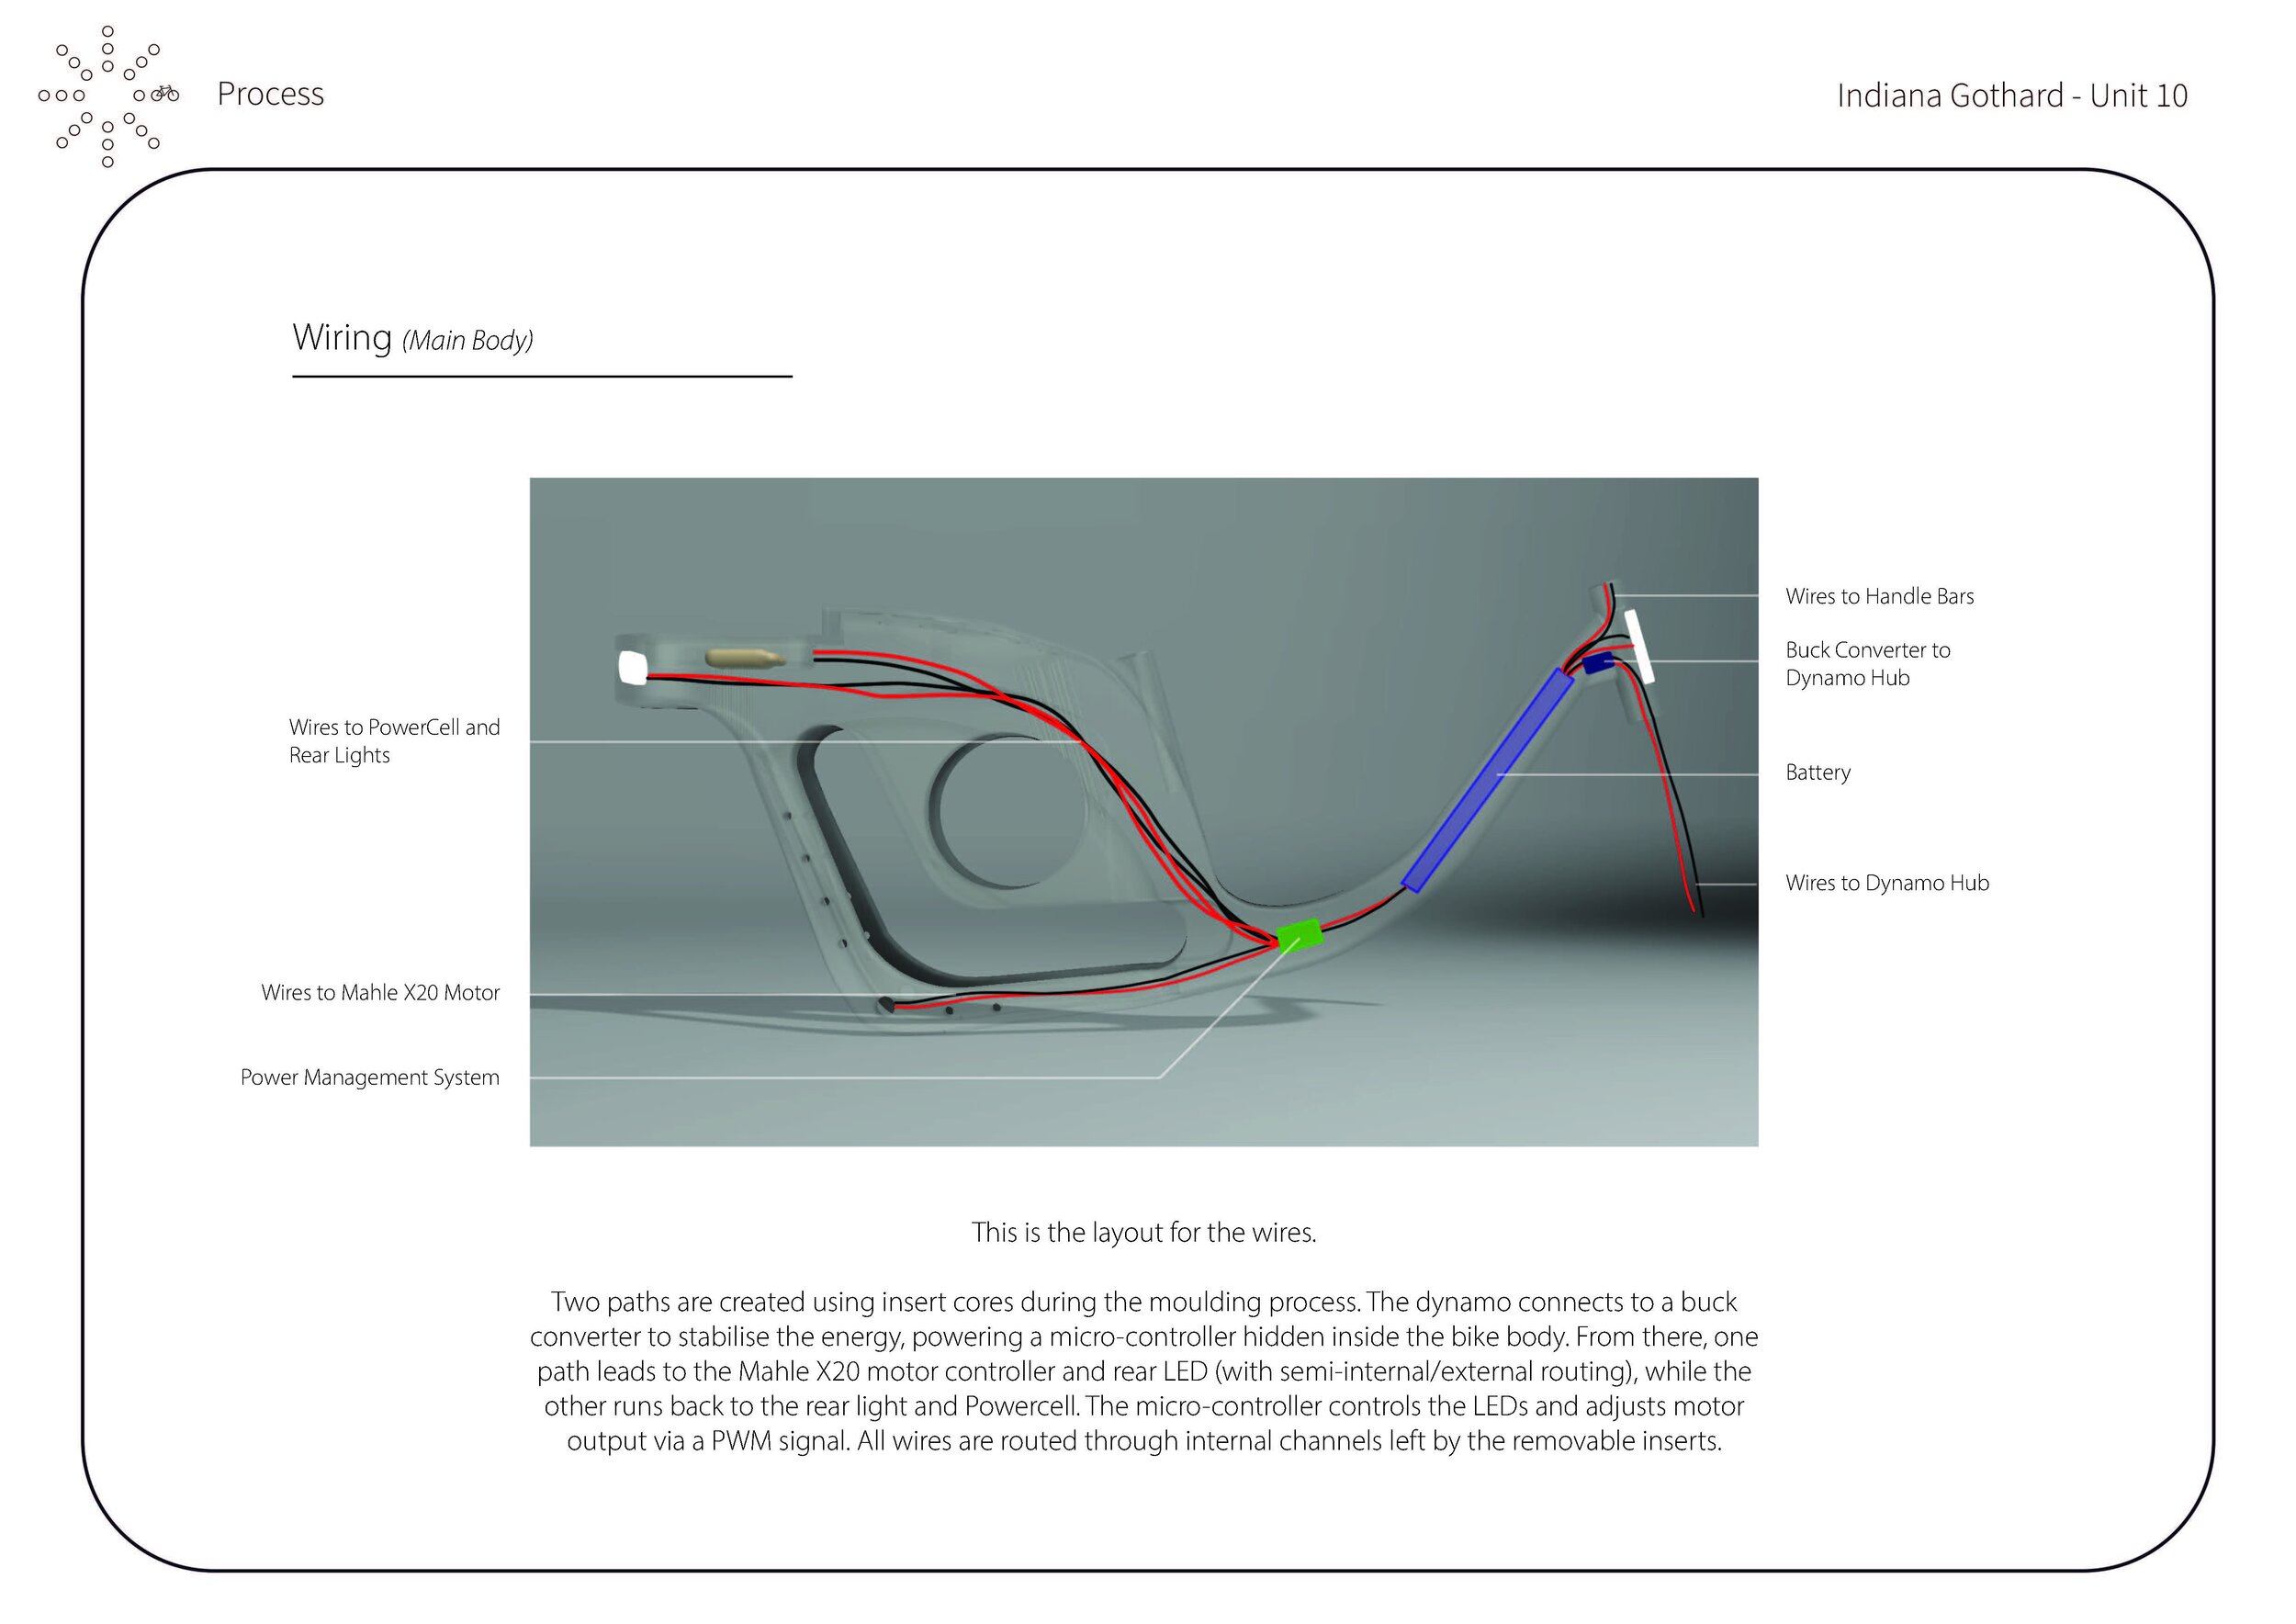
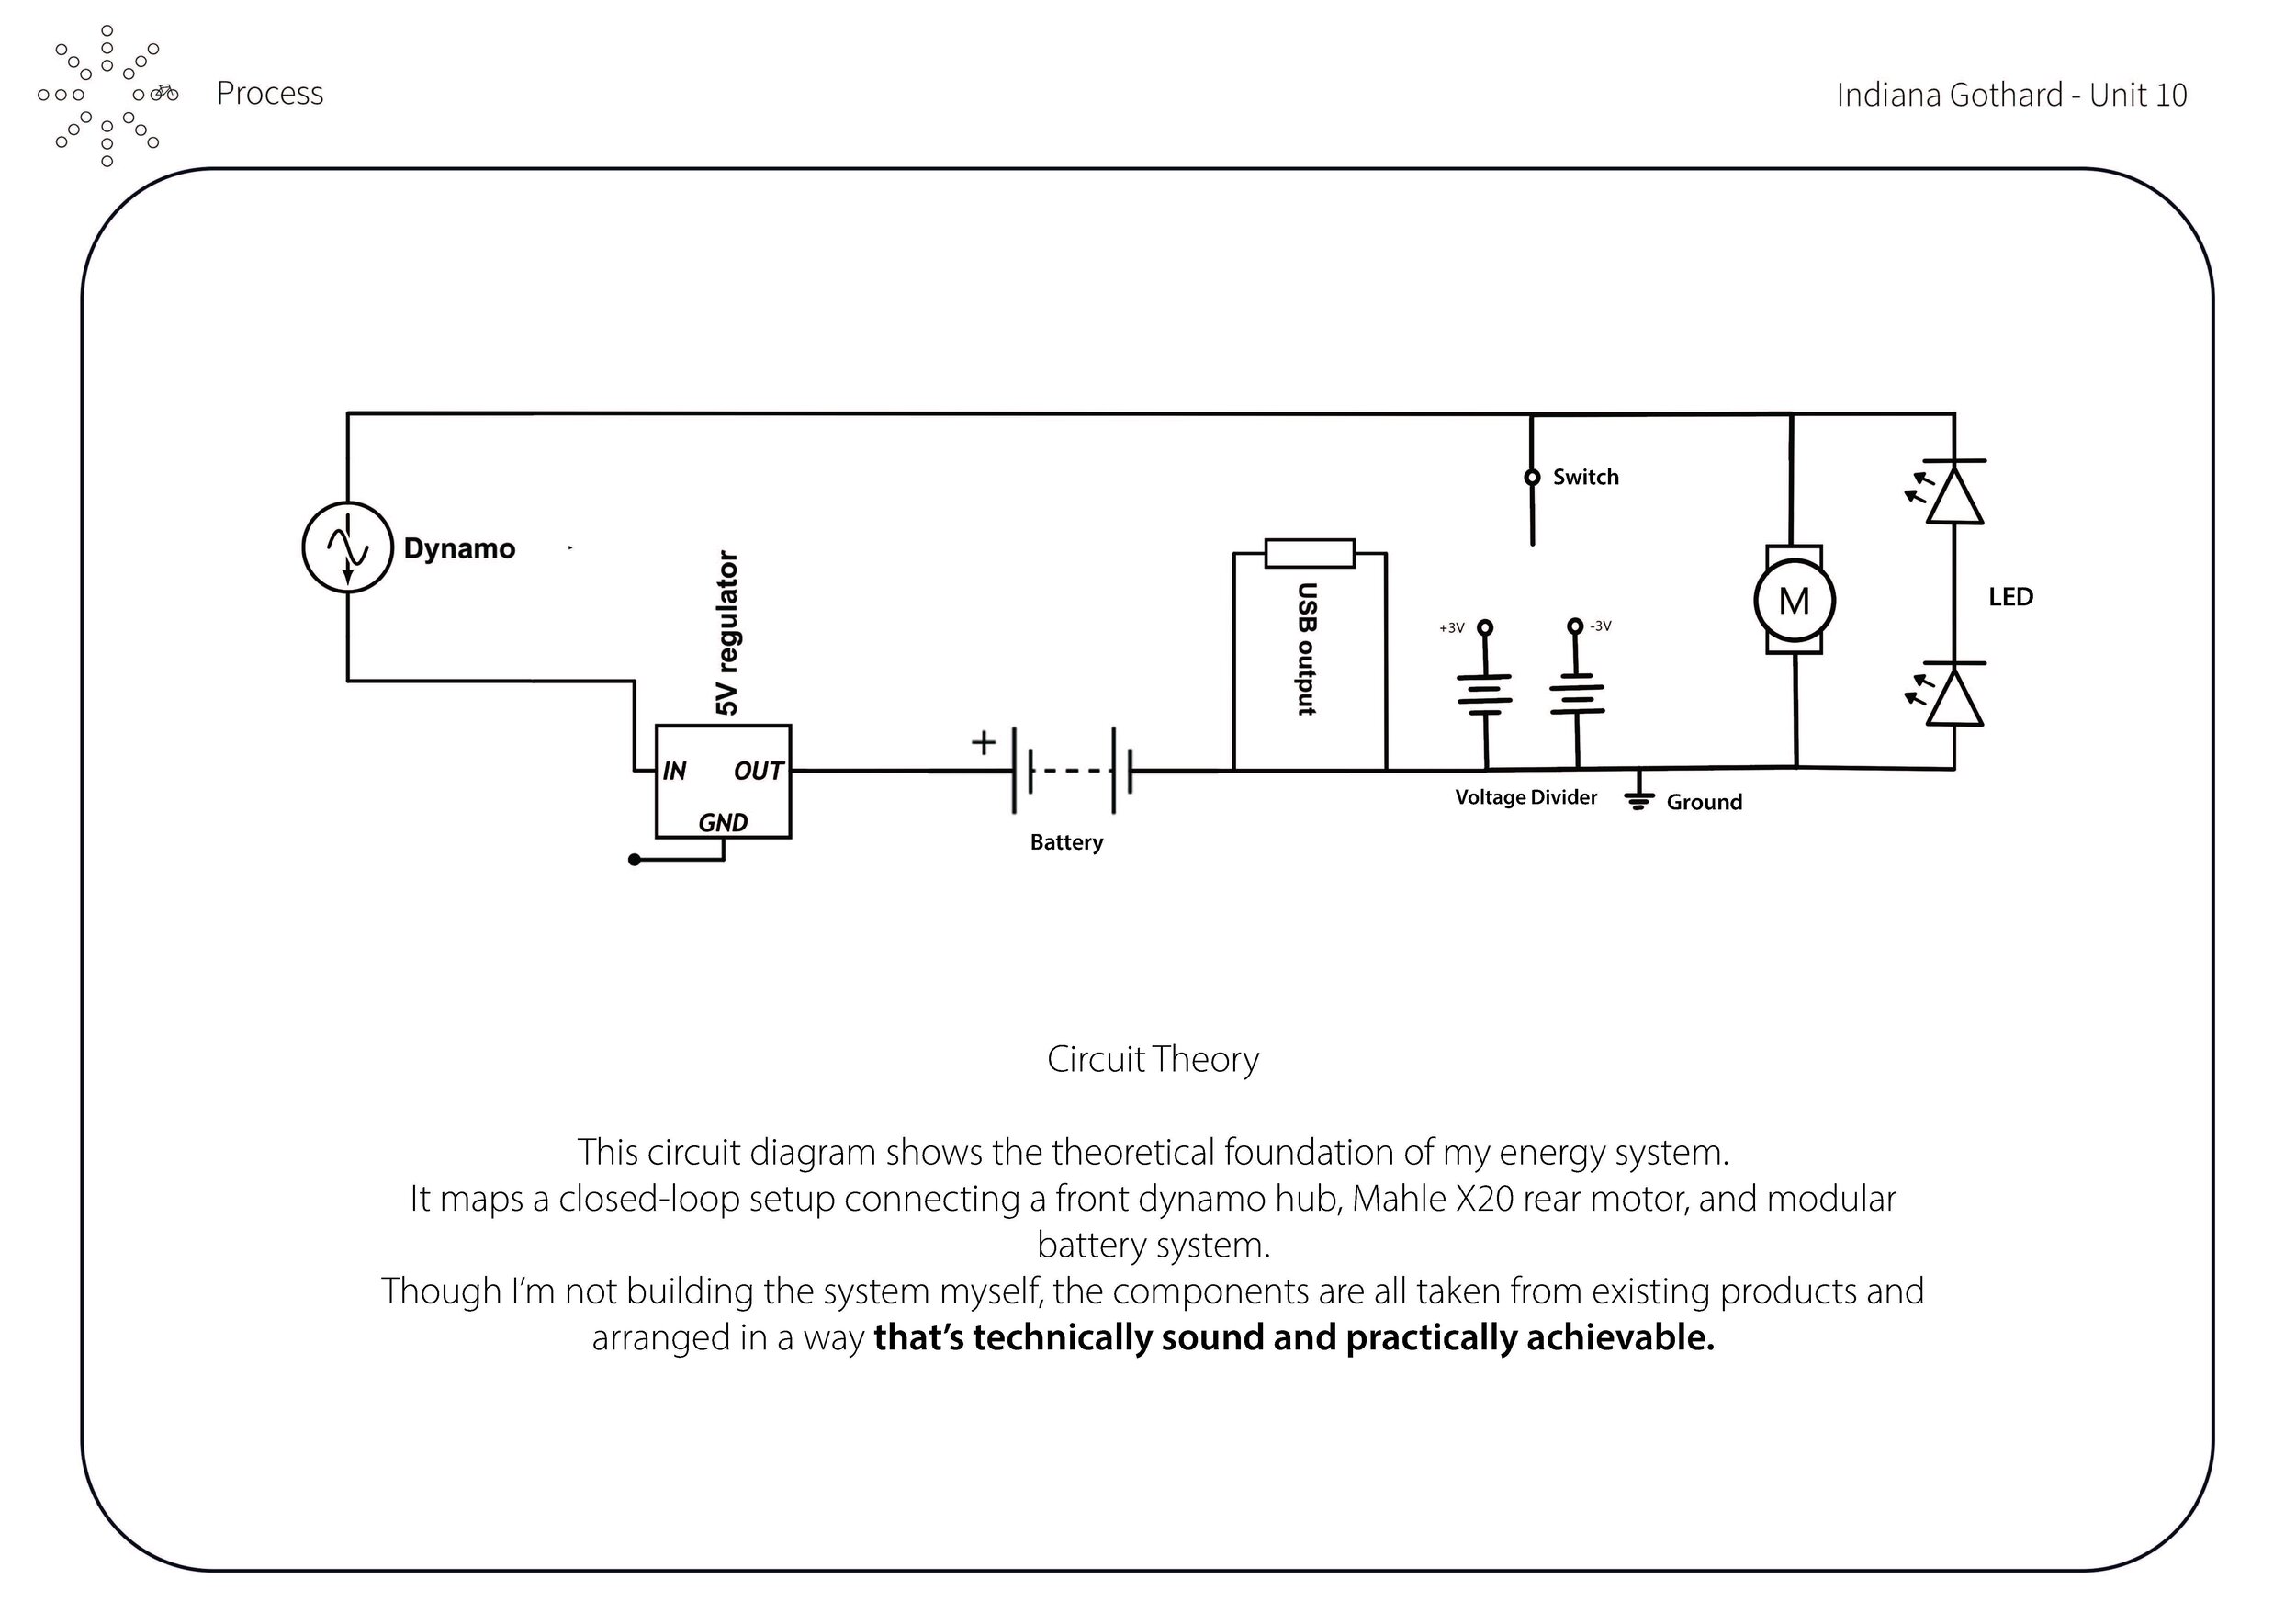
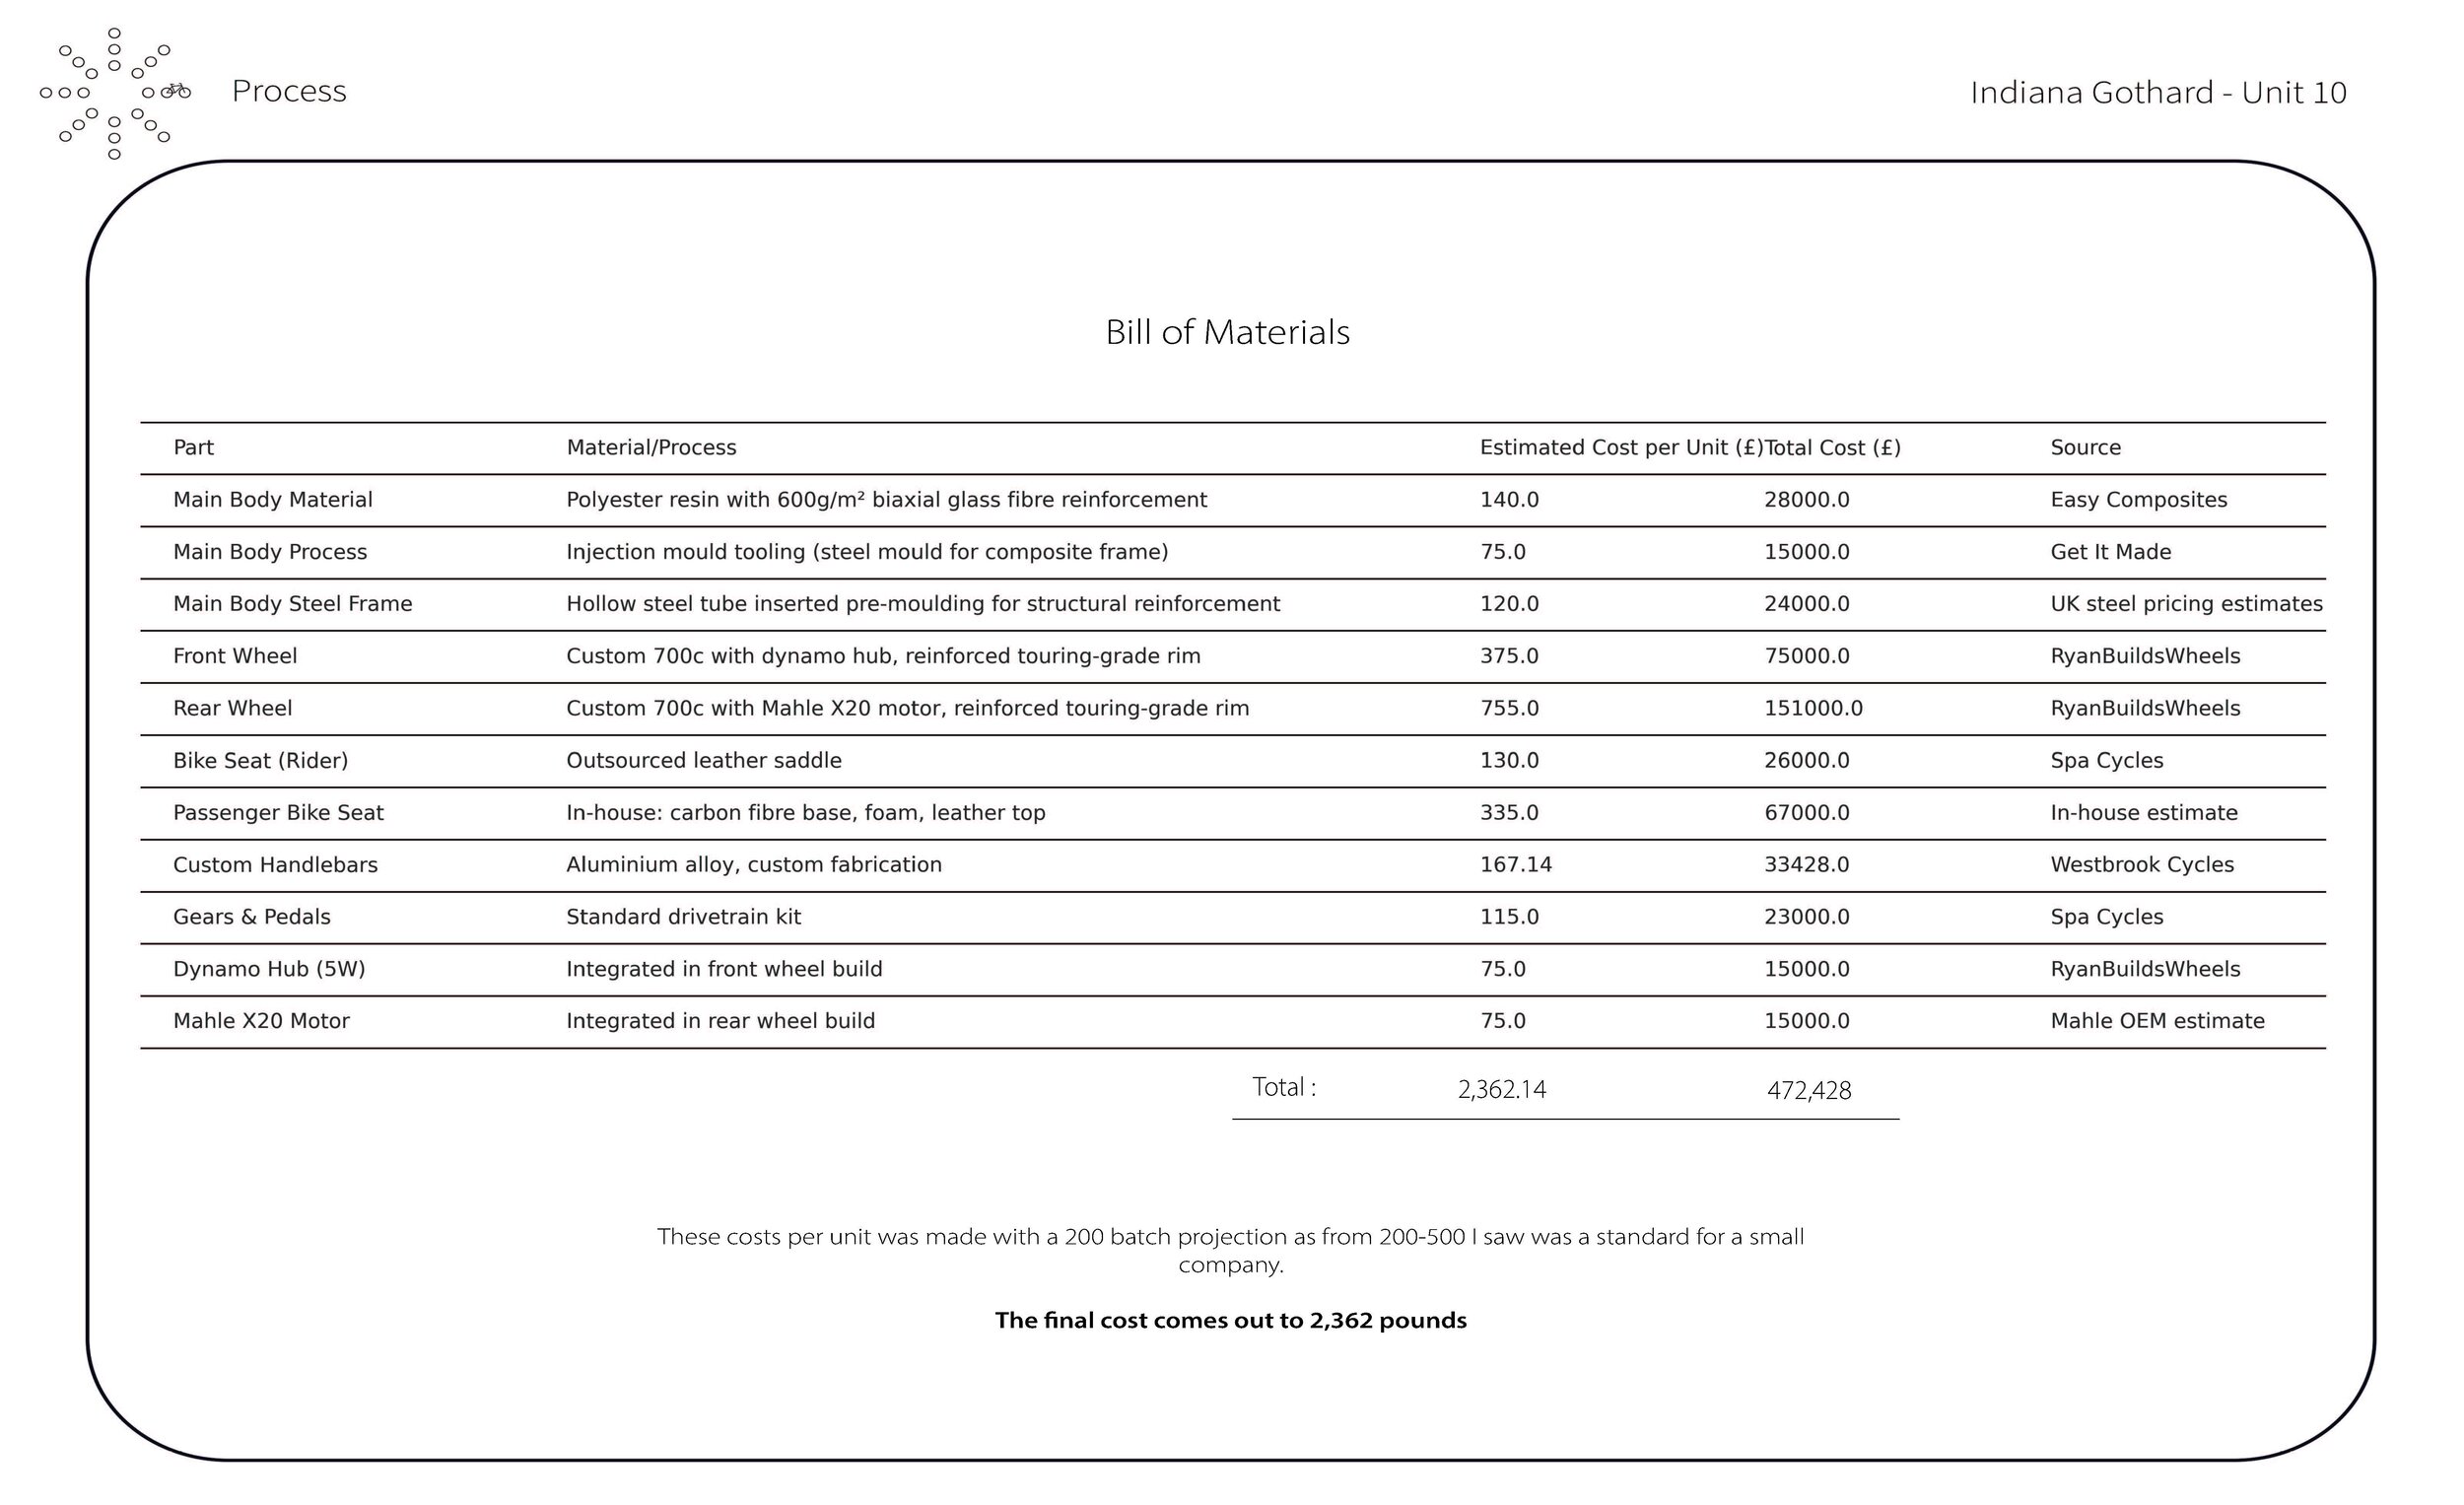
MANUFACTURING PROCESS
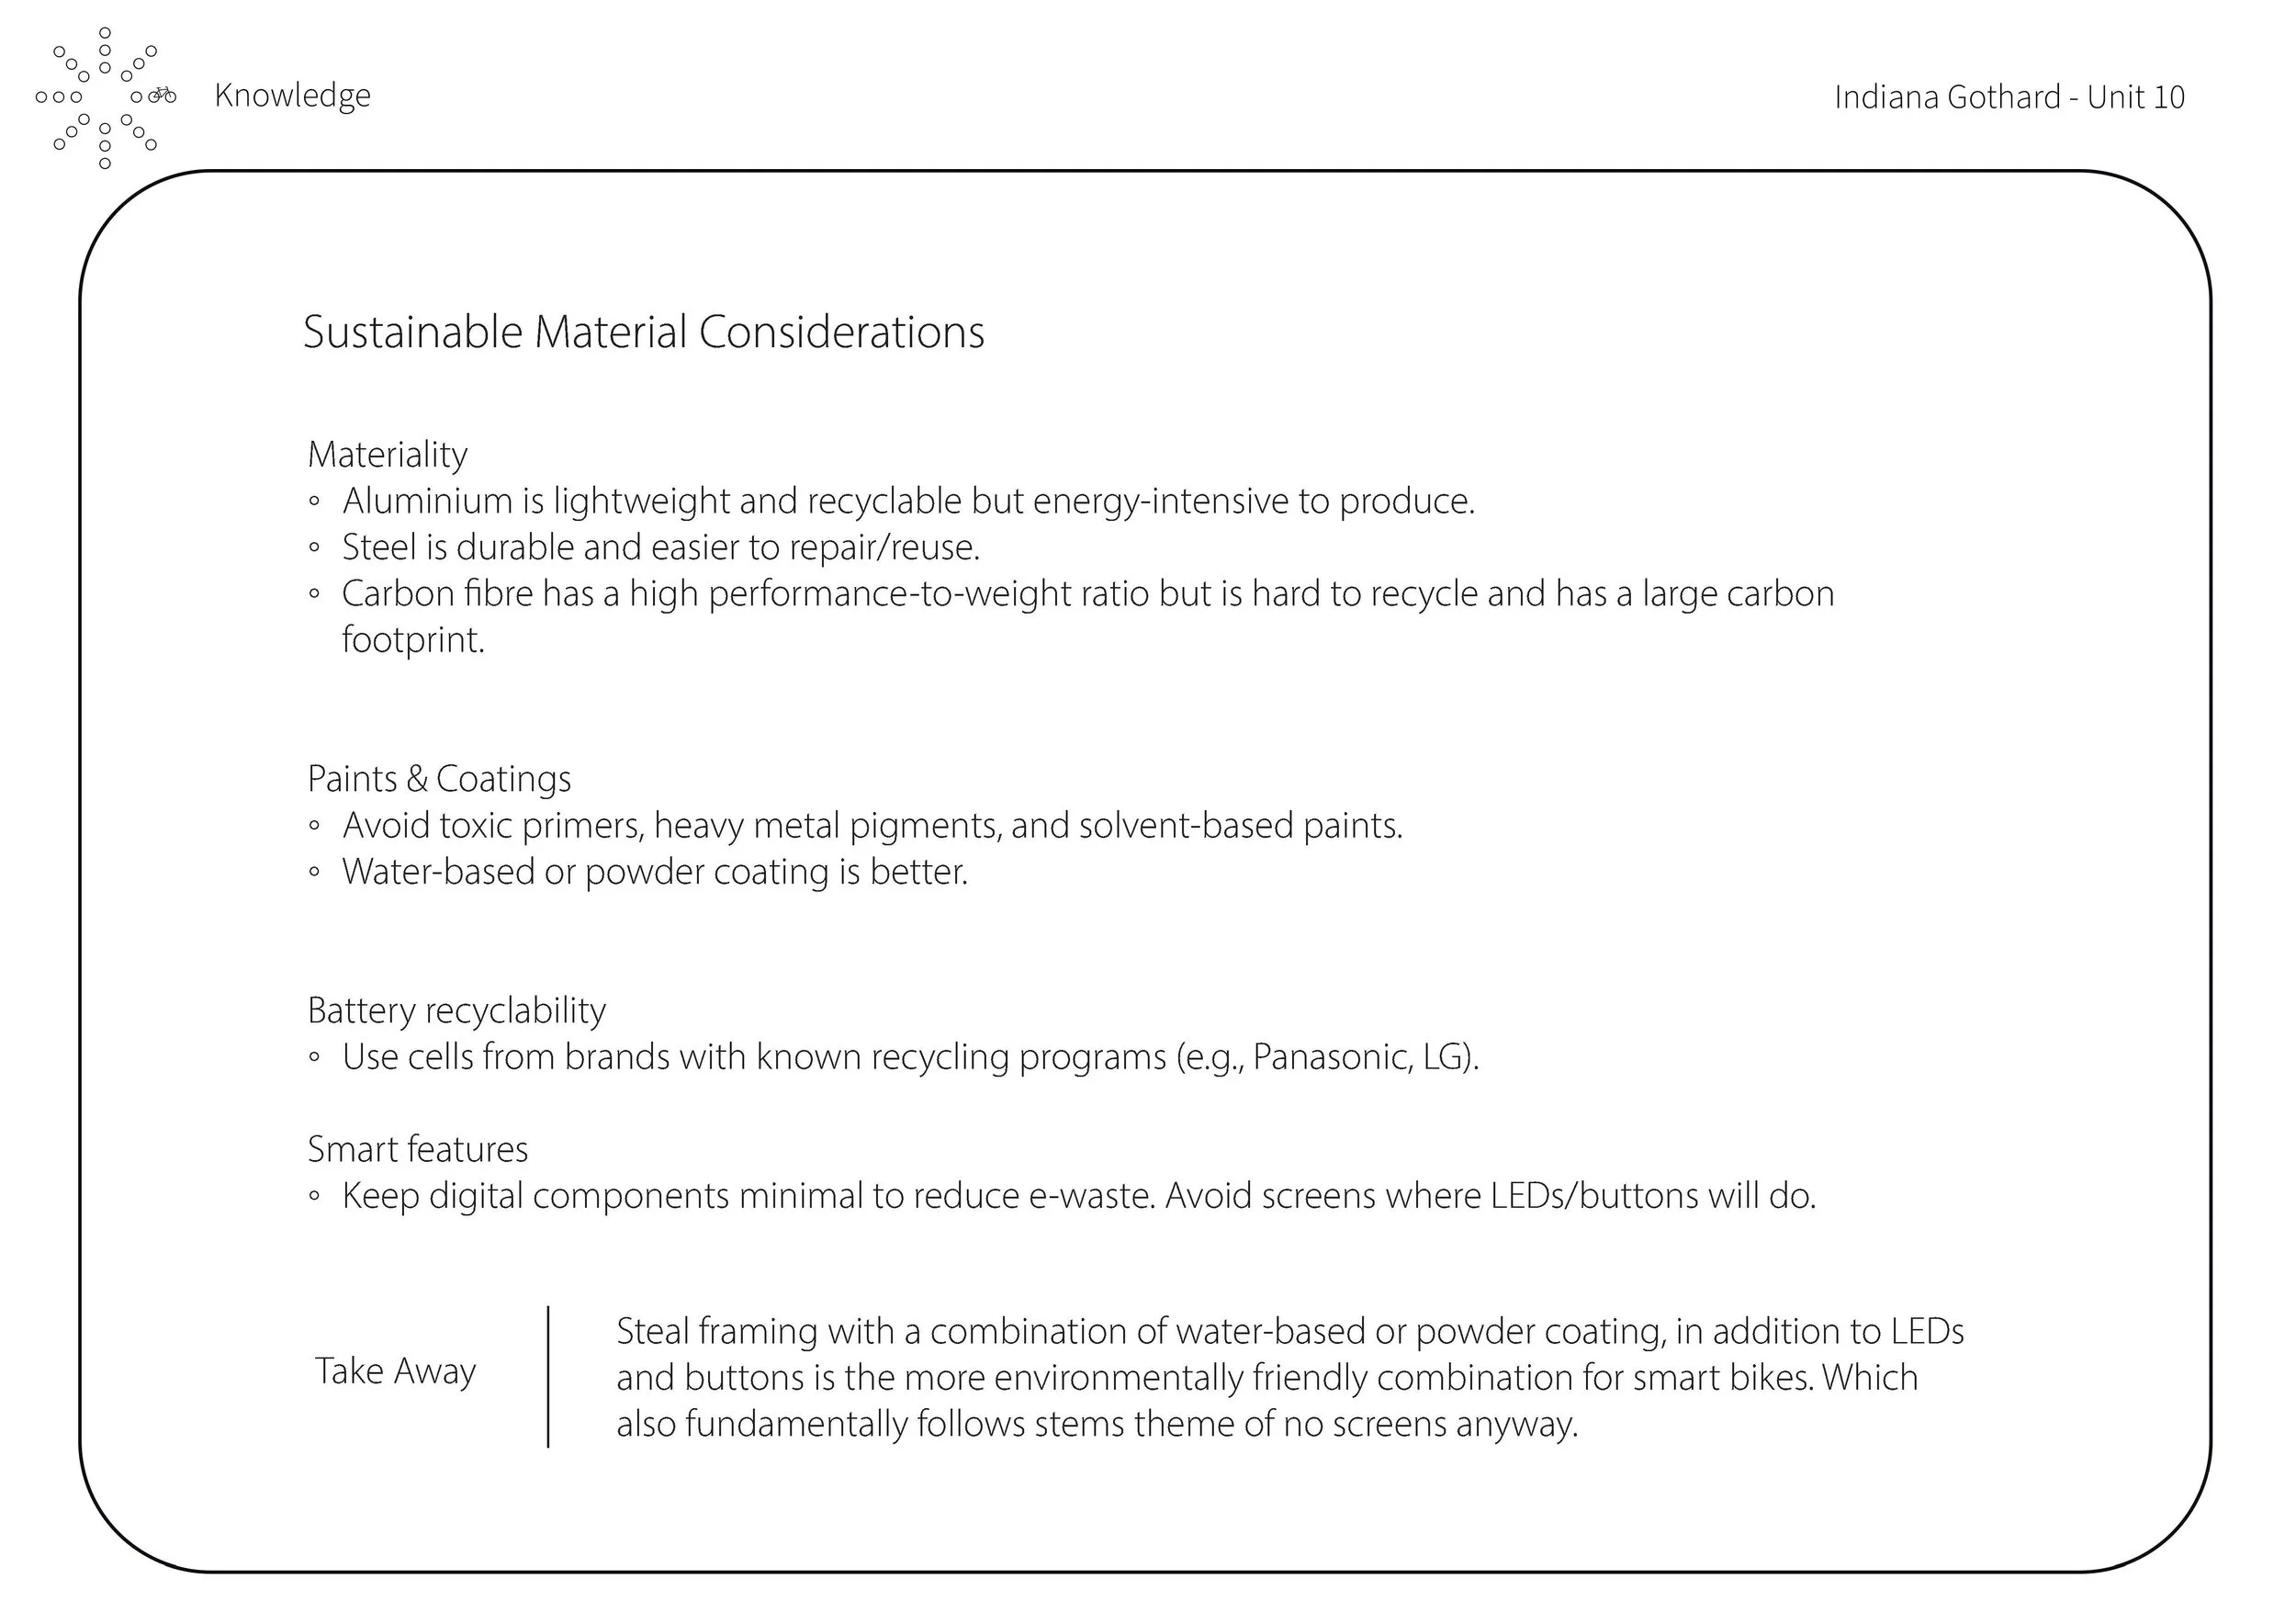
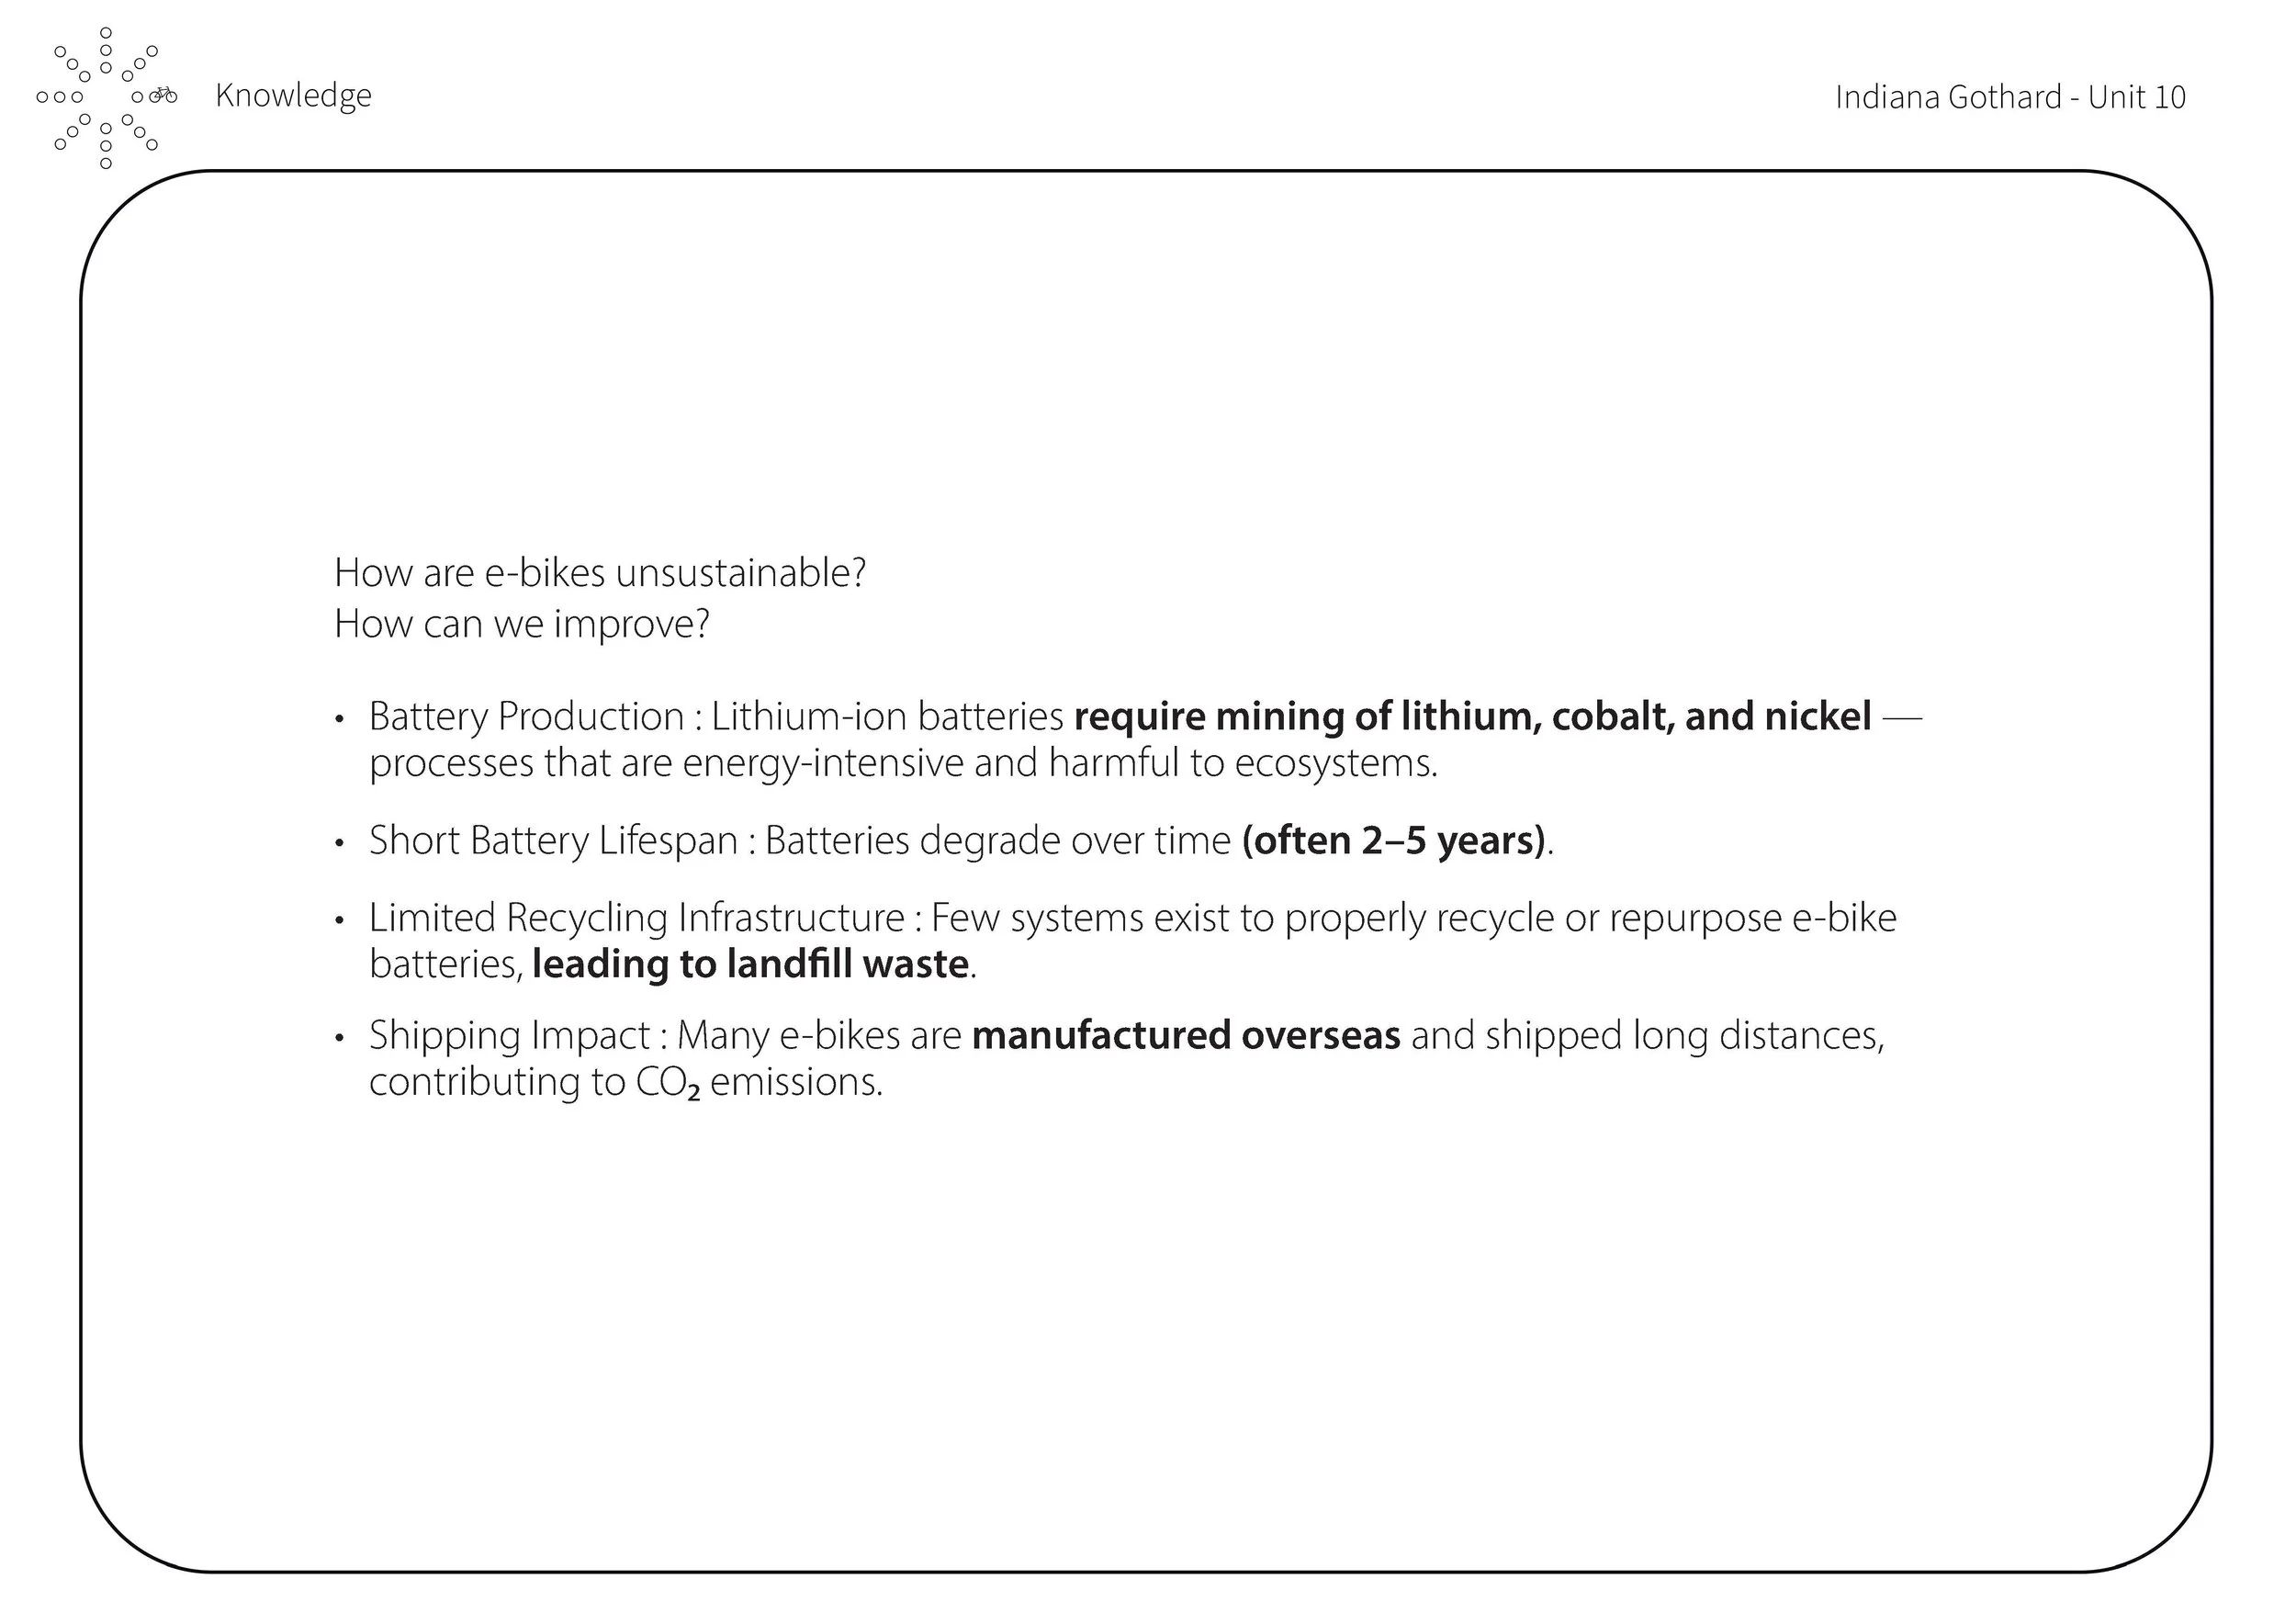
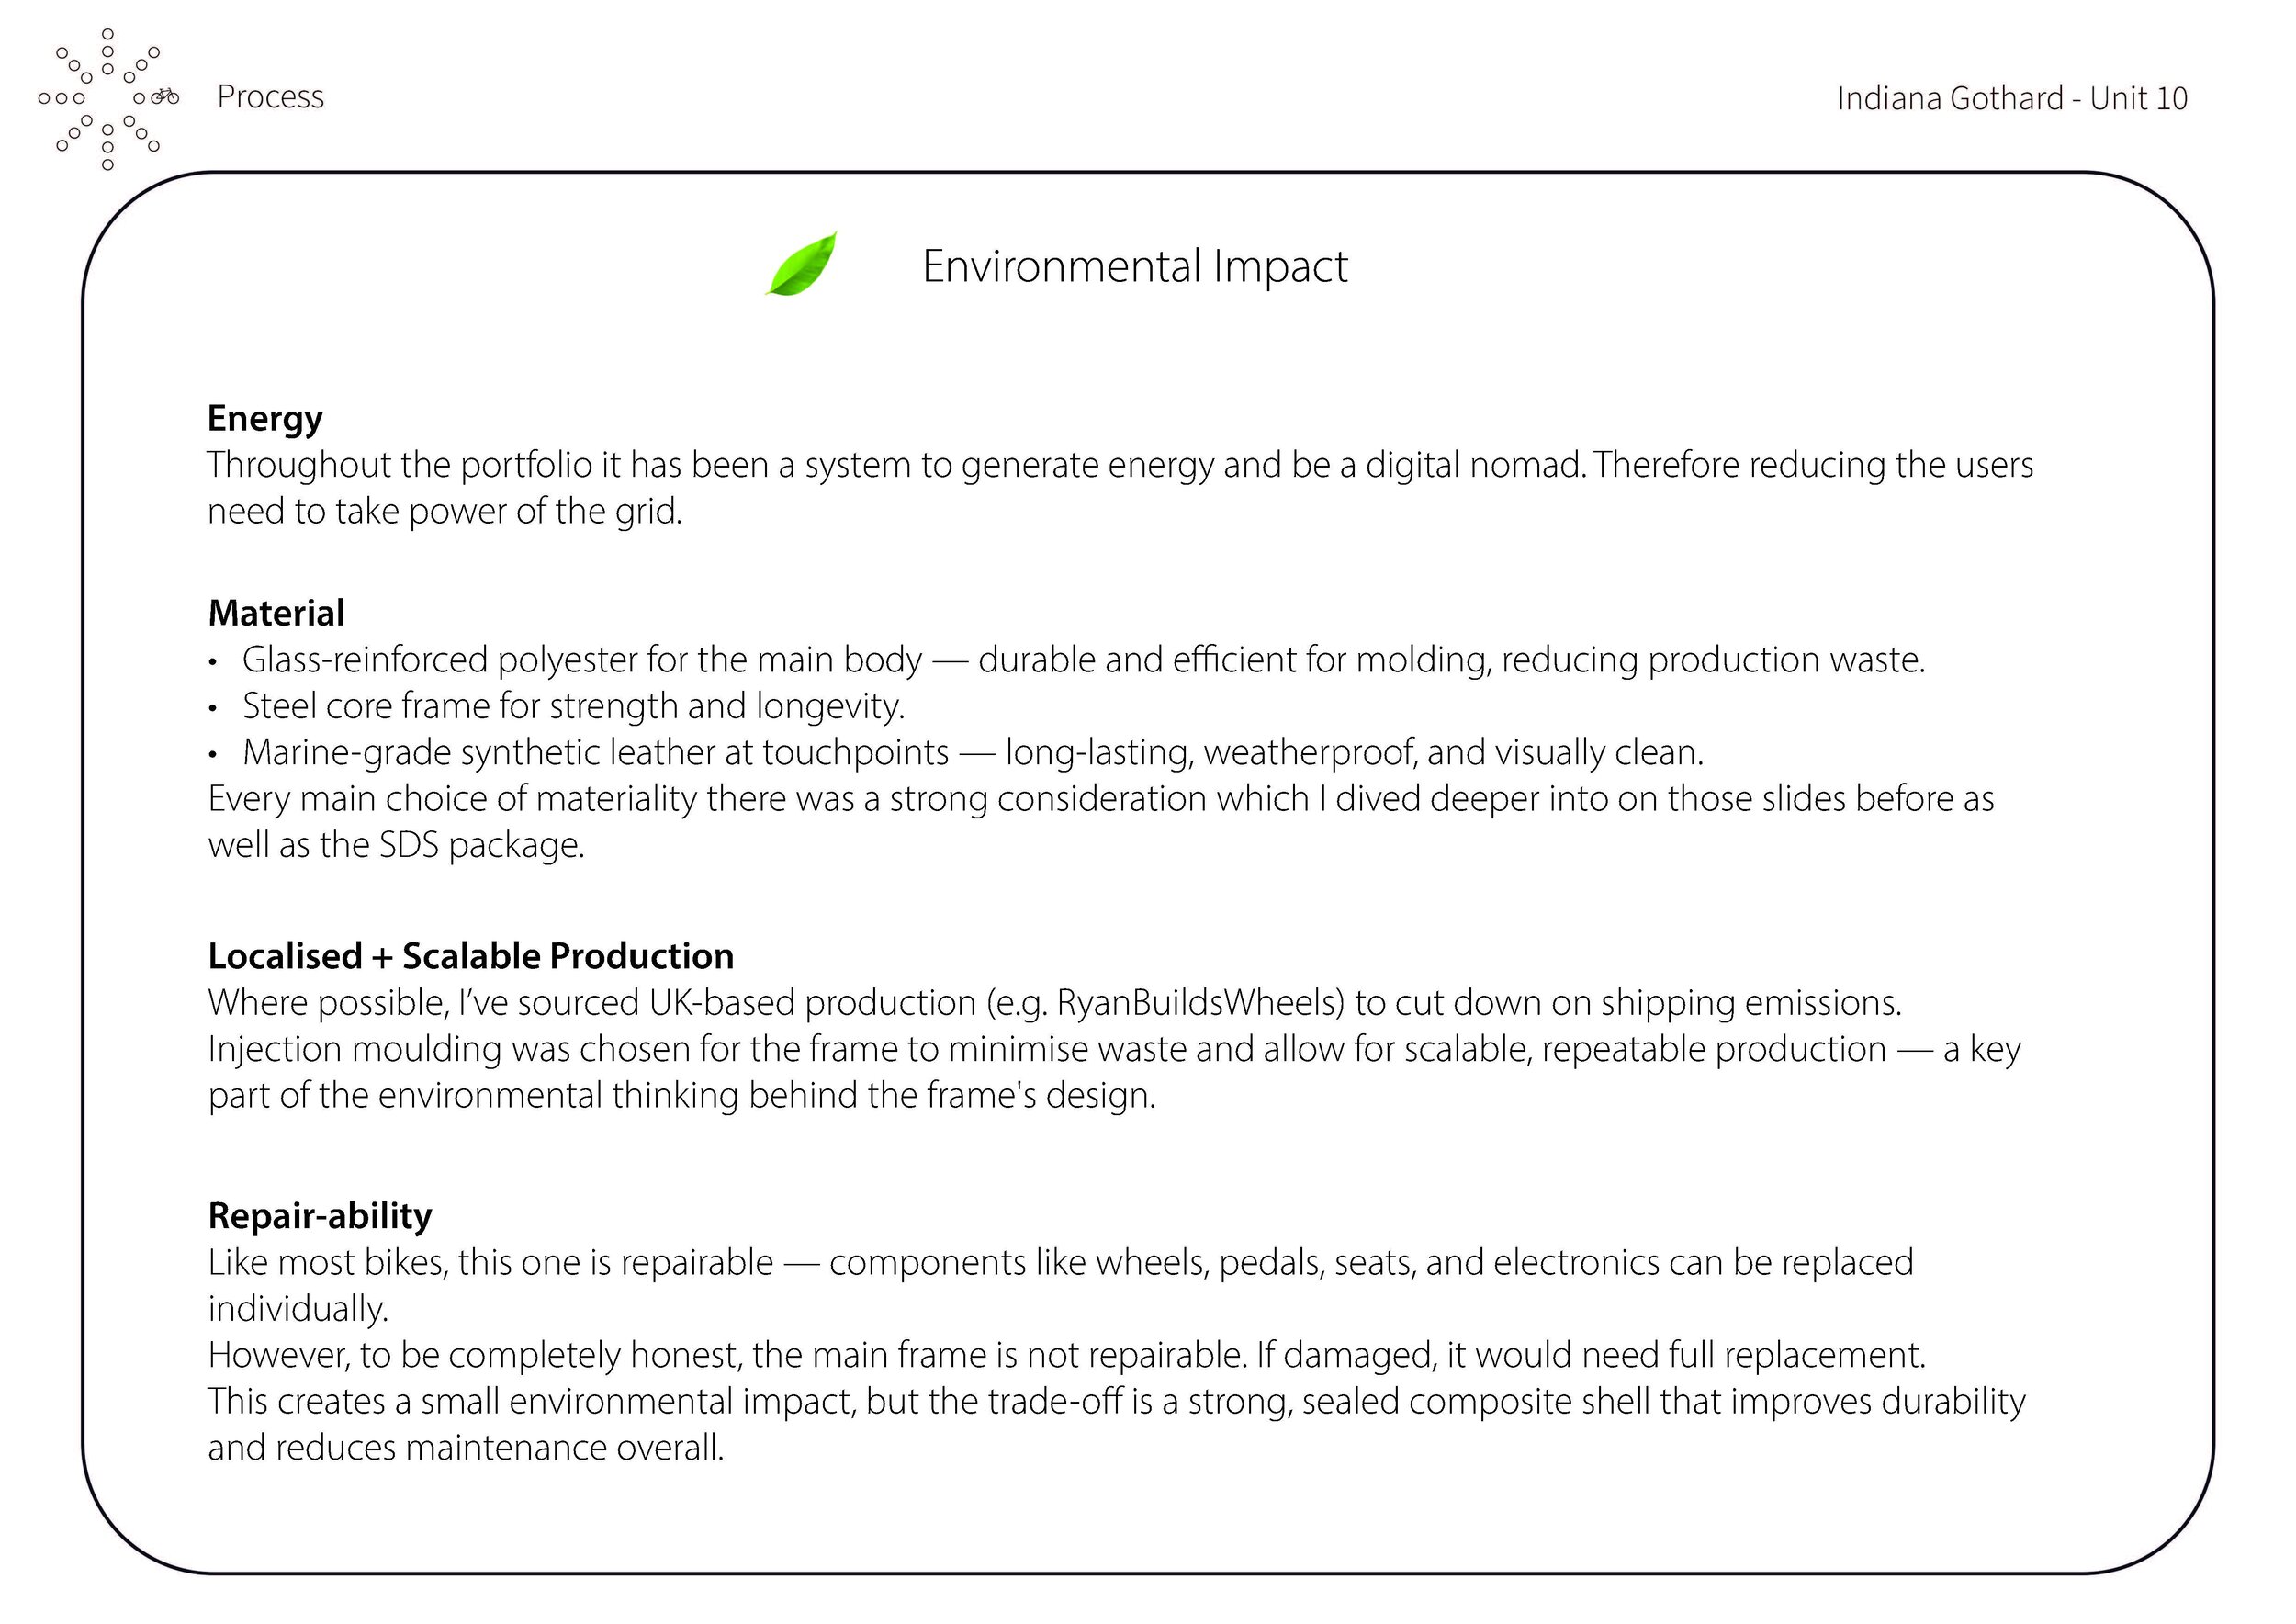
This highlights the full manufacturing process, along with environmental impacts, wiring, and material choices.
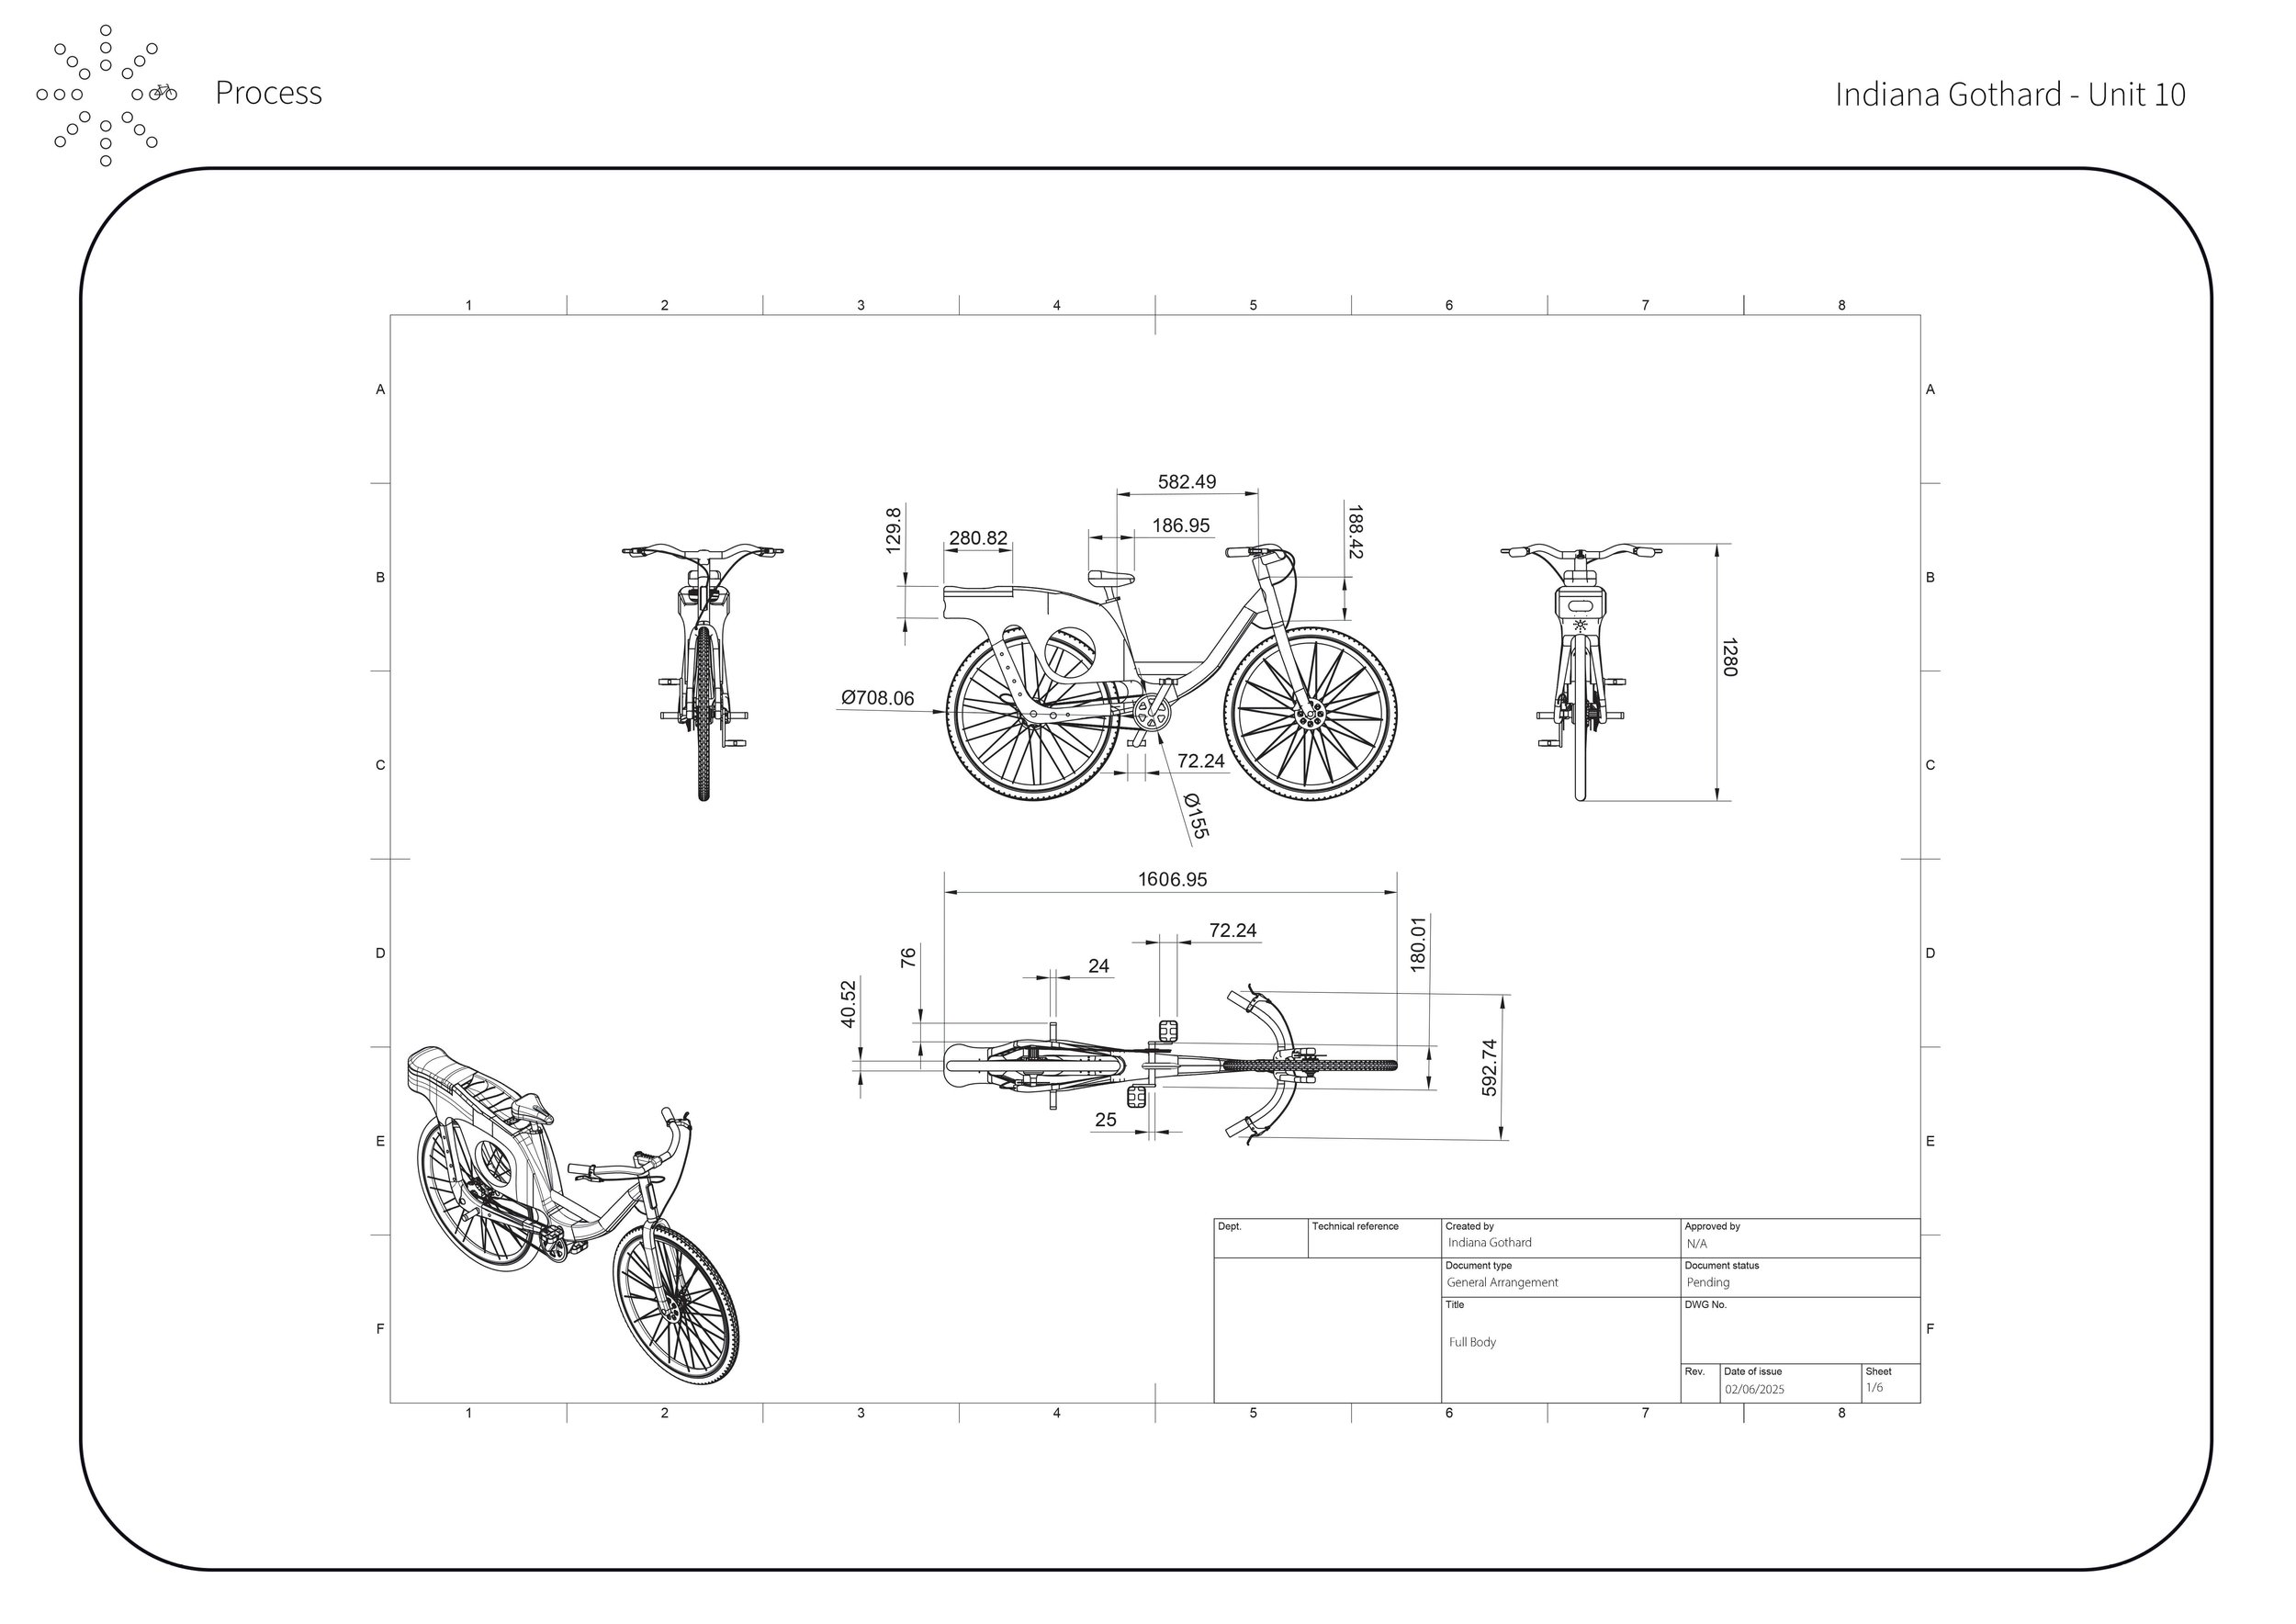
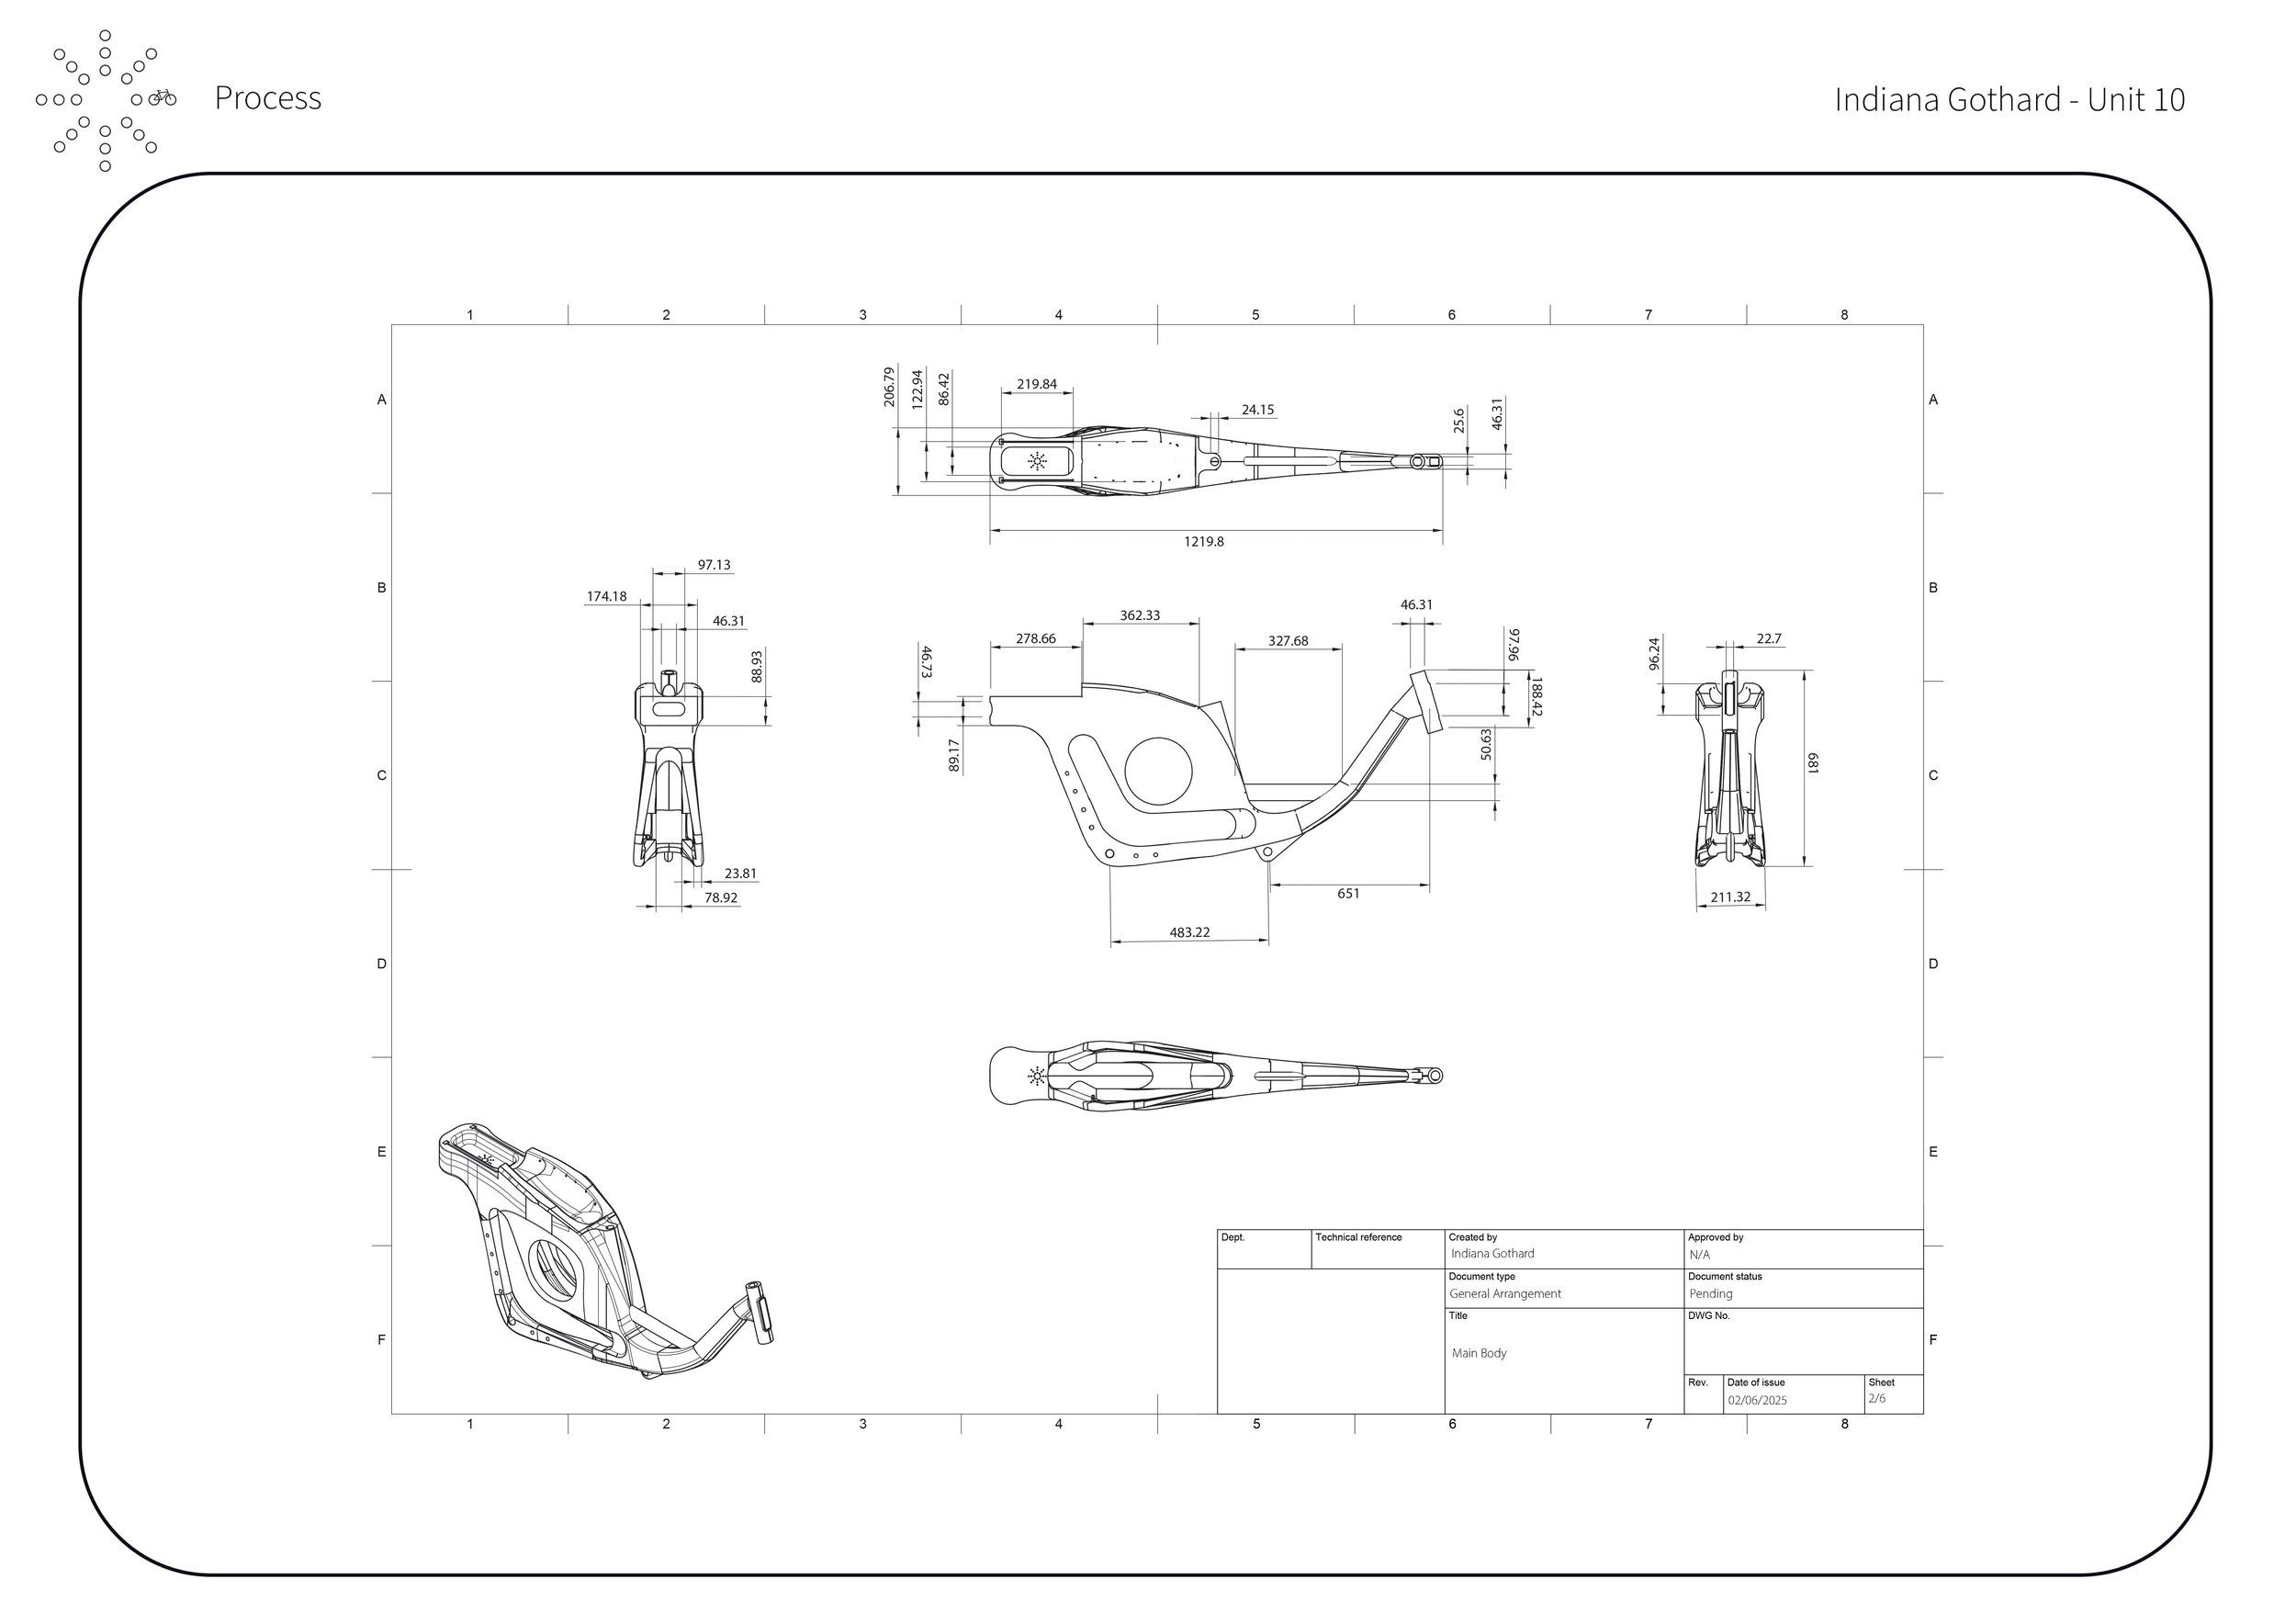
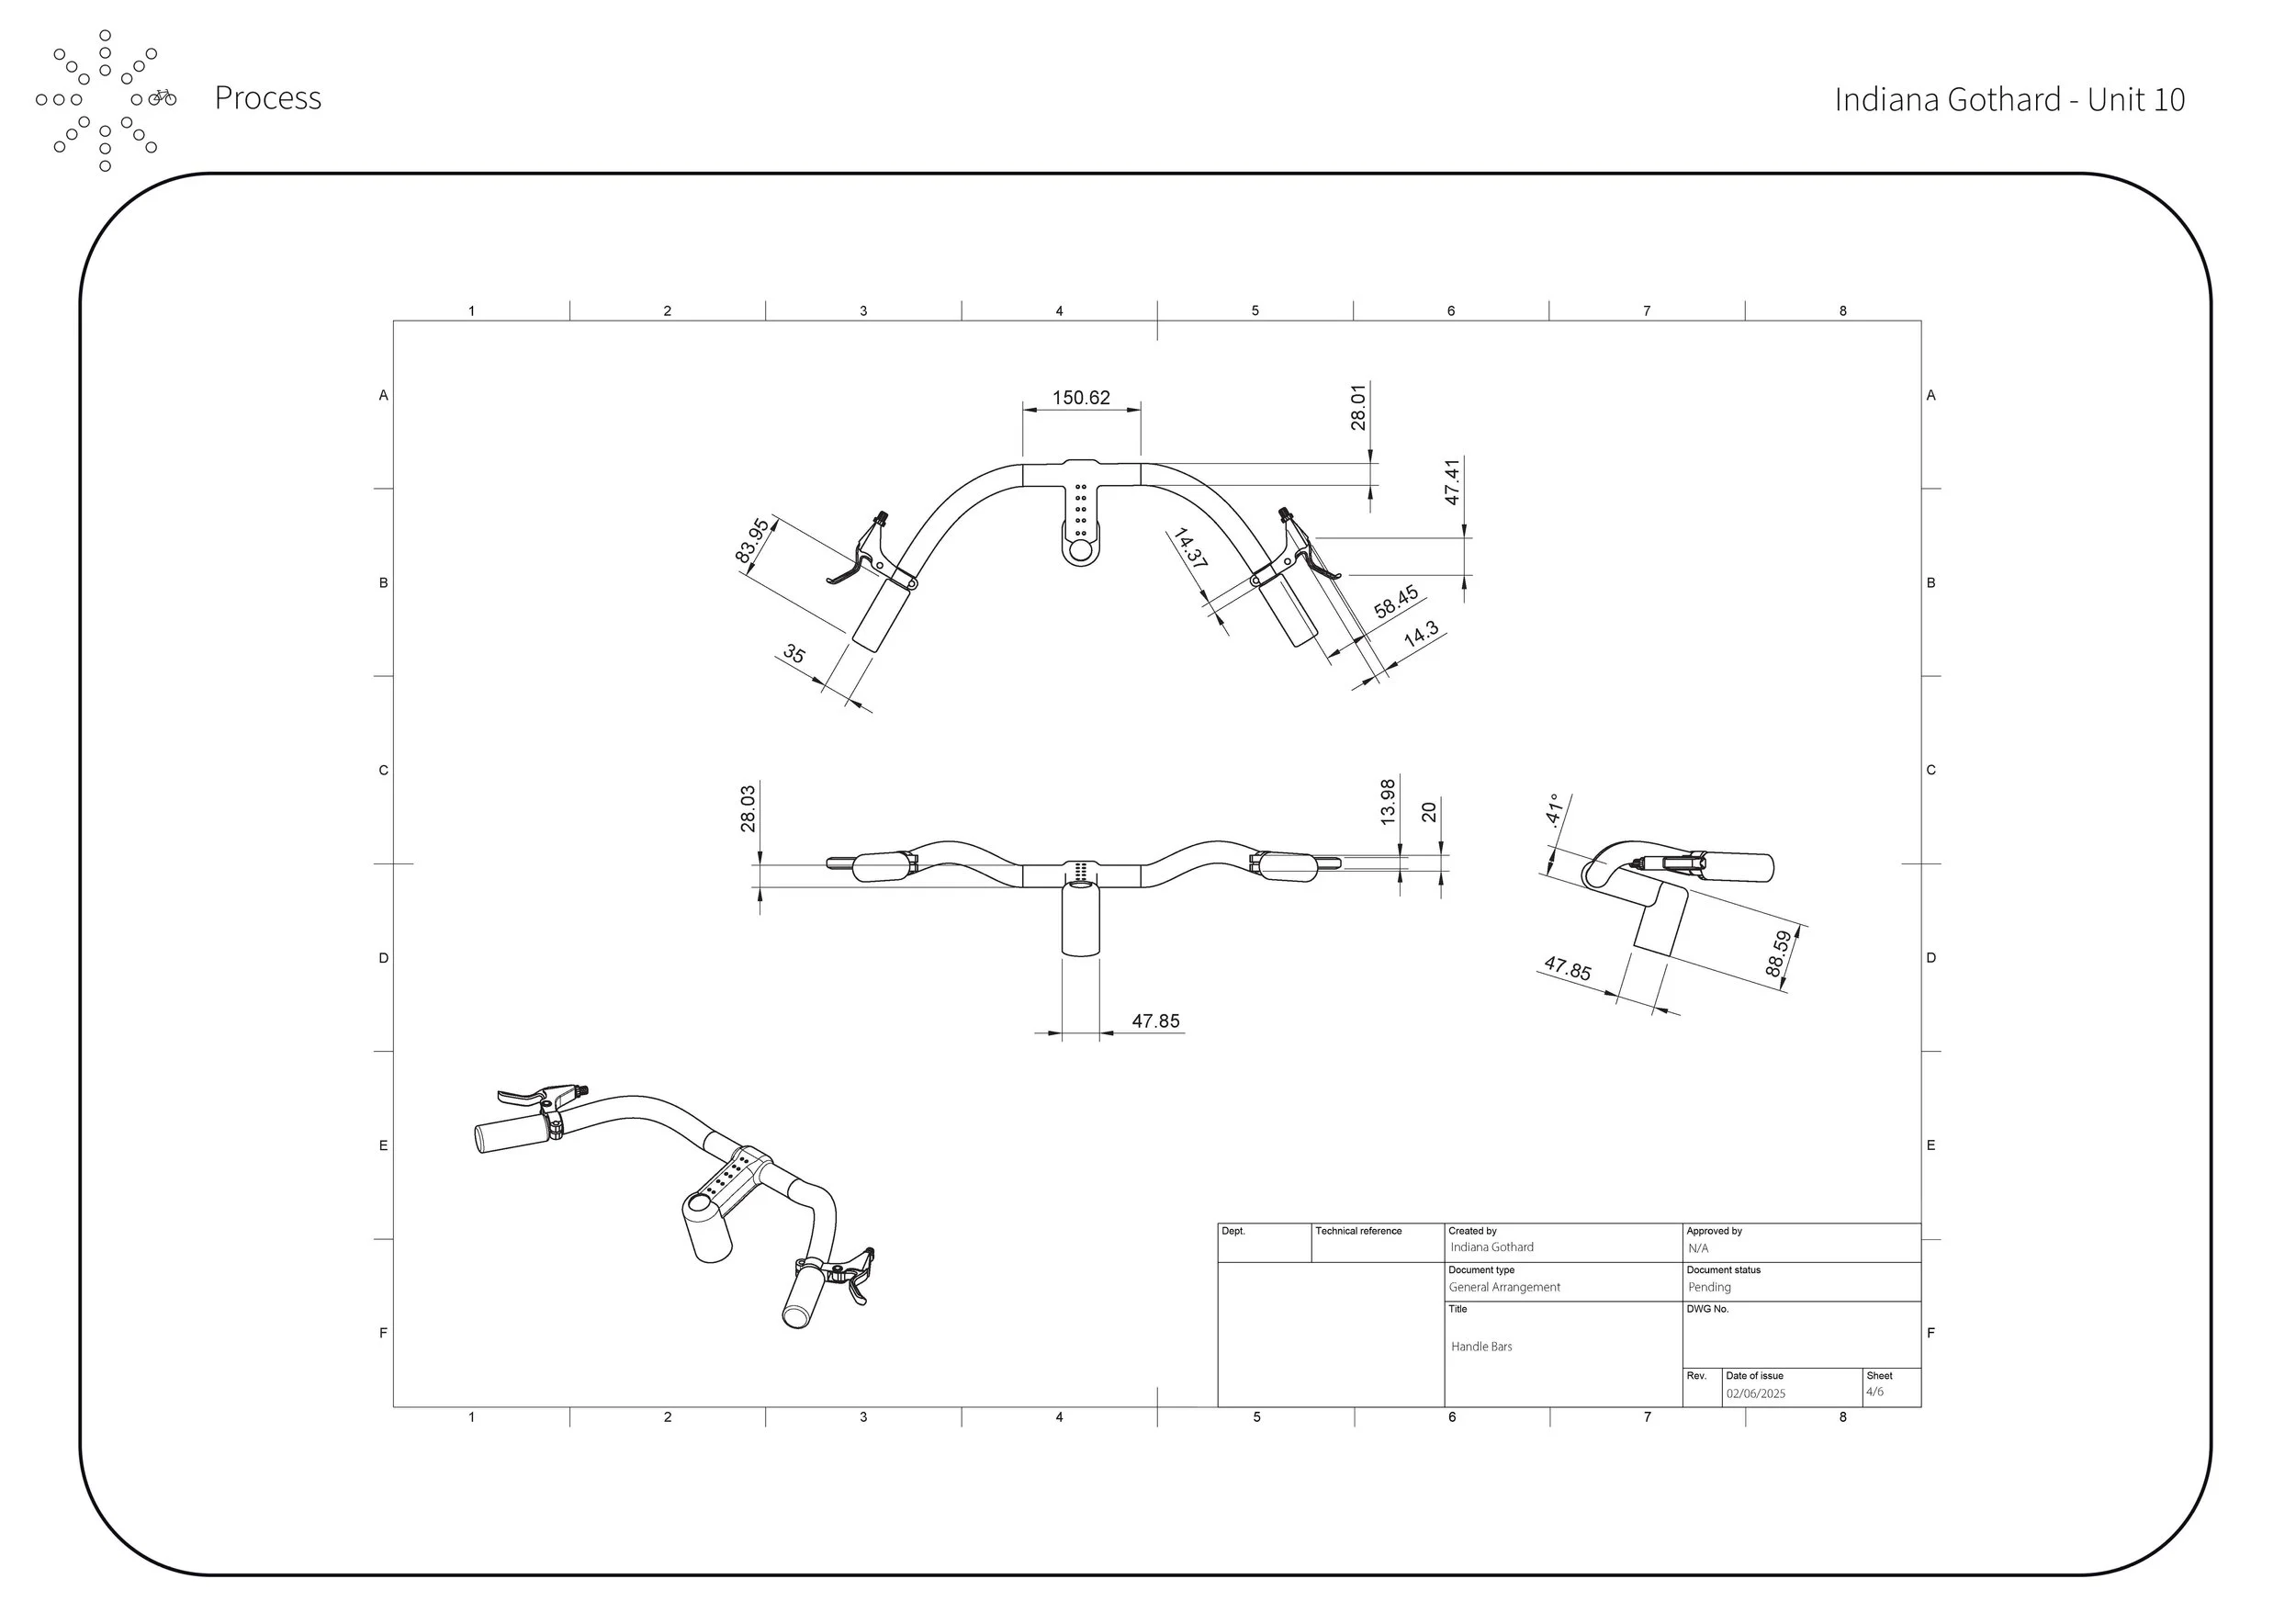
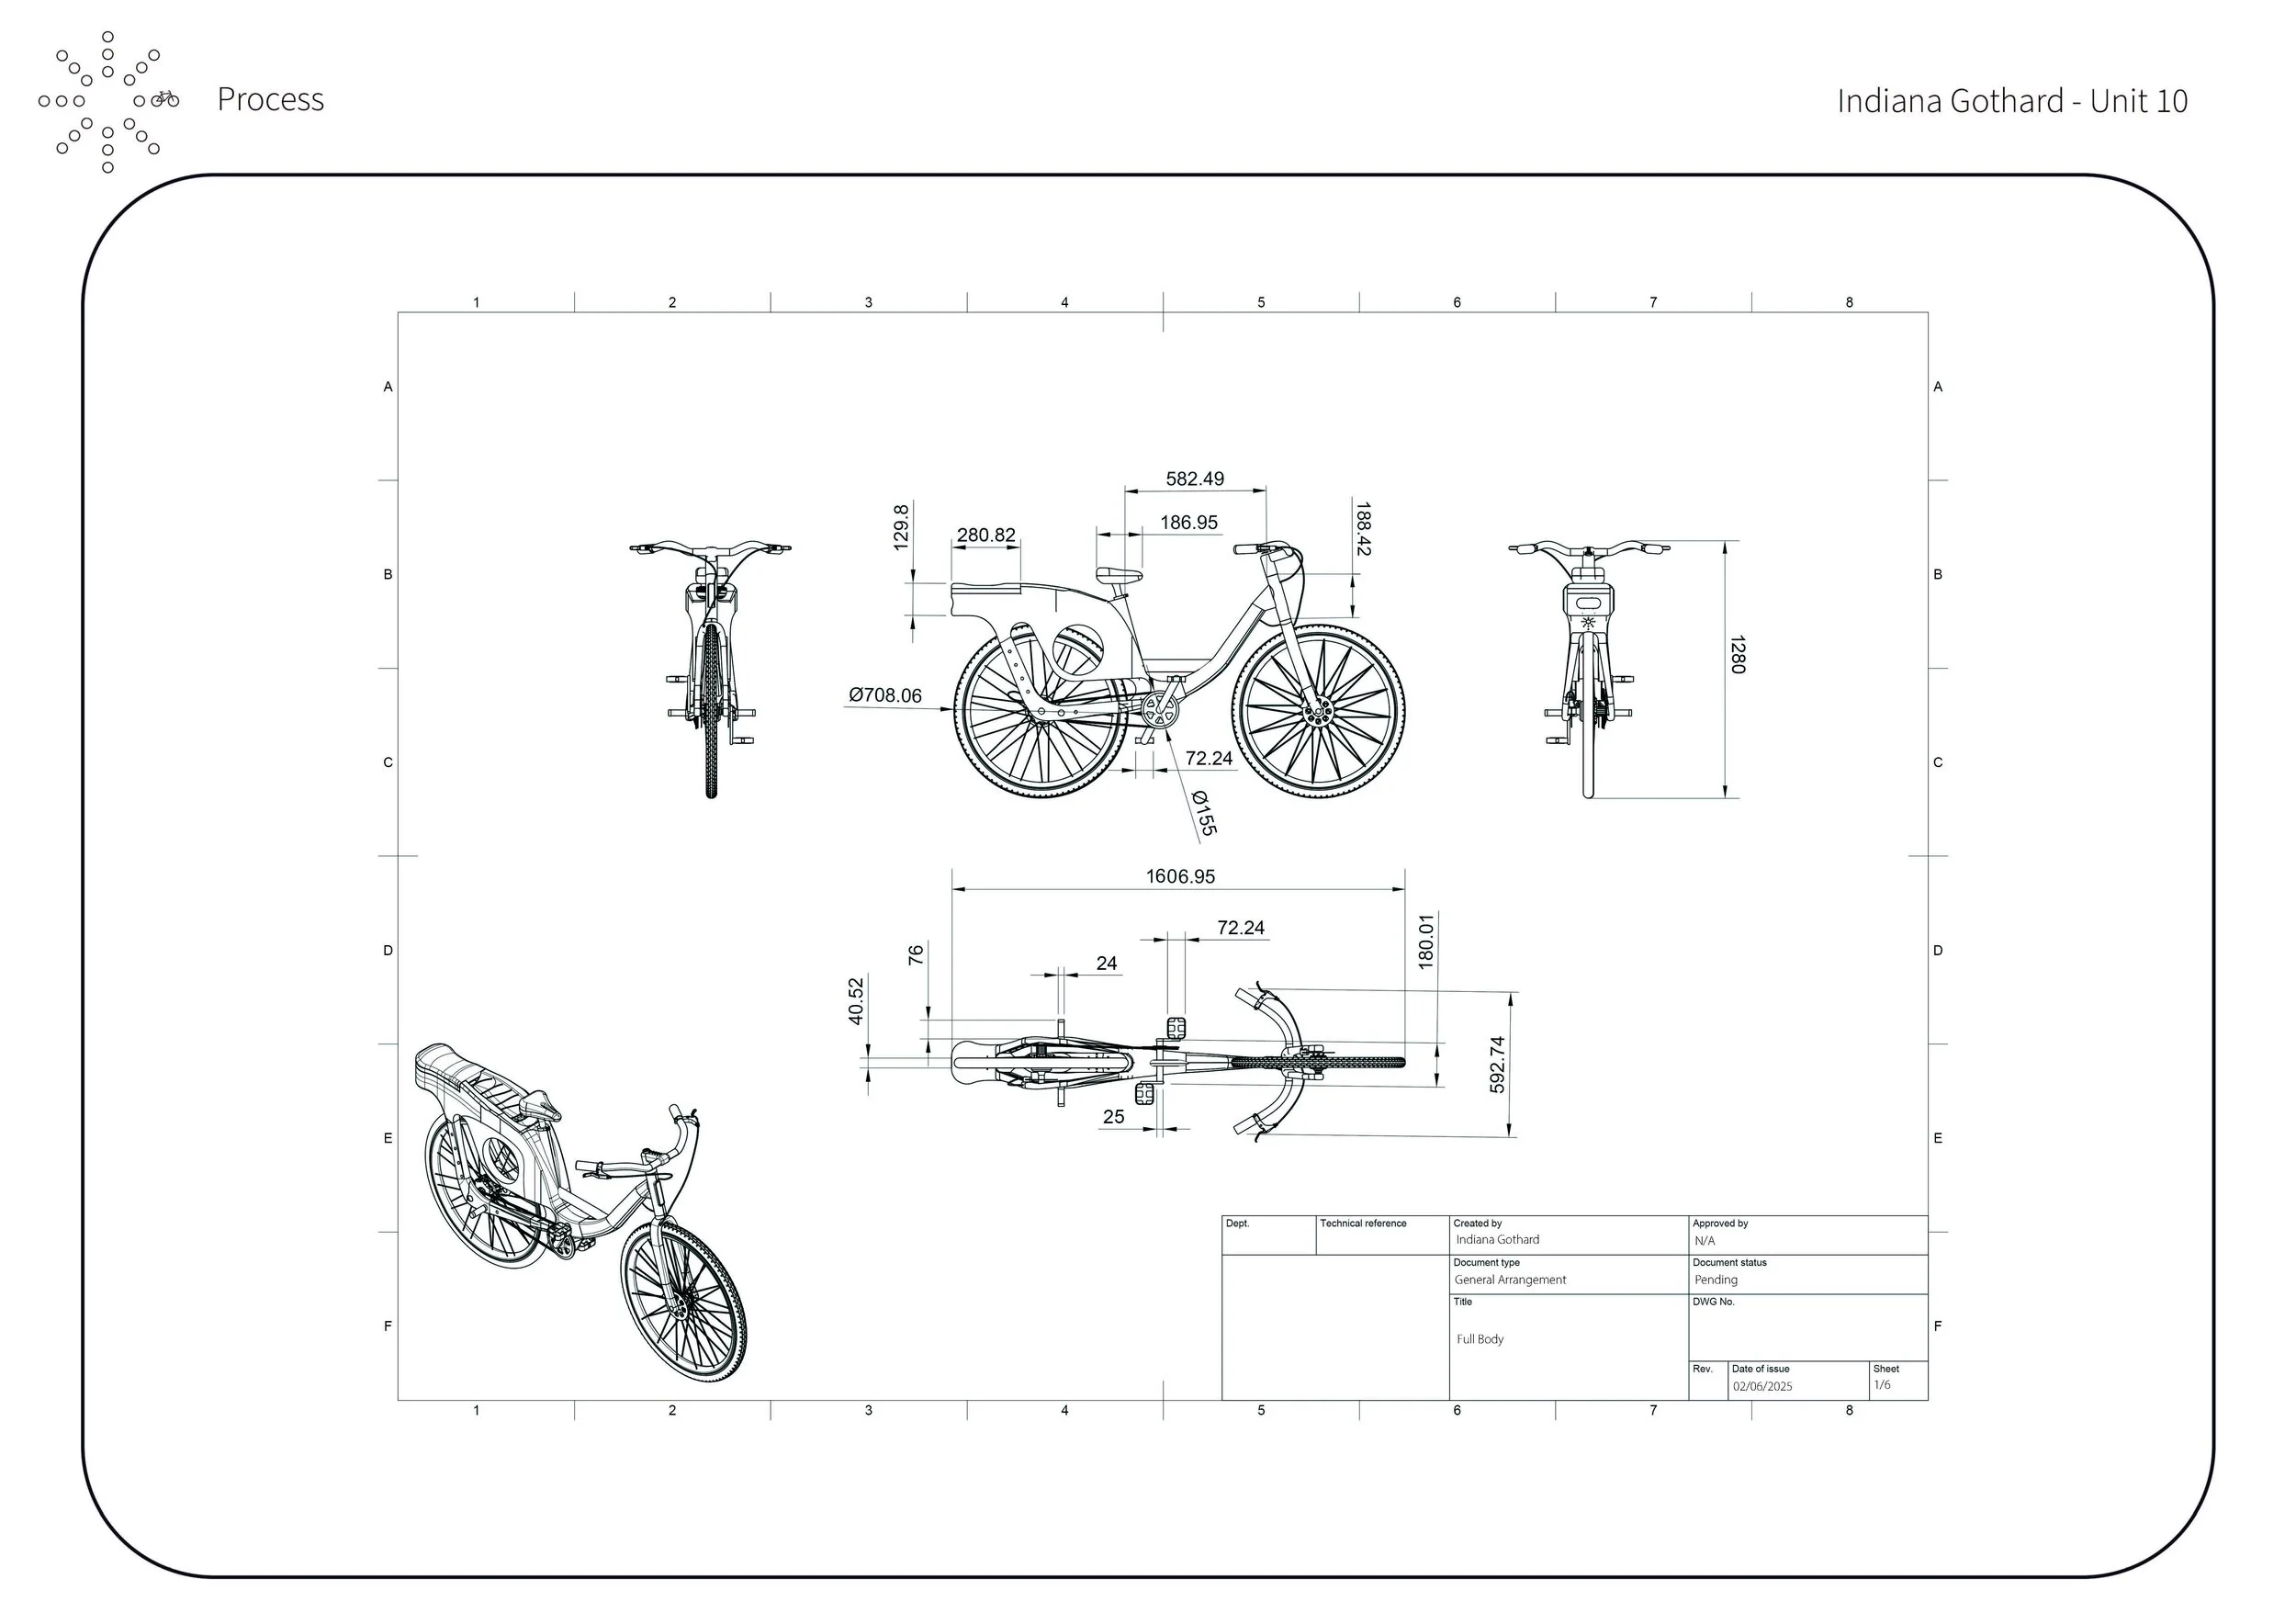
07 TECHNICAL PACKAGE


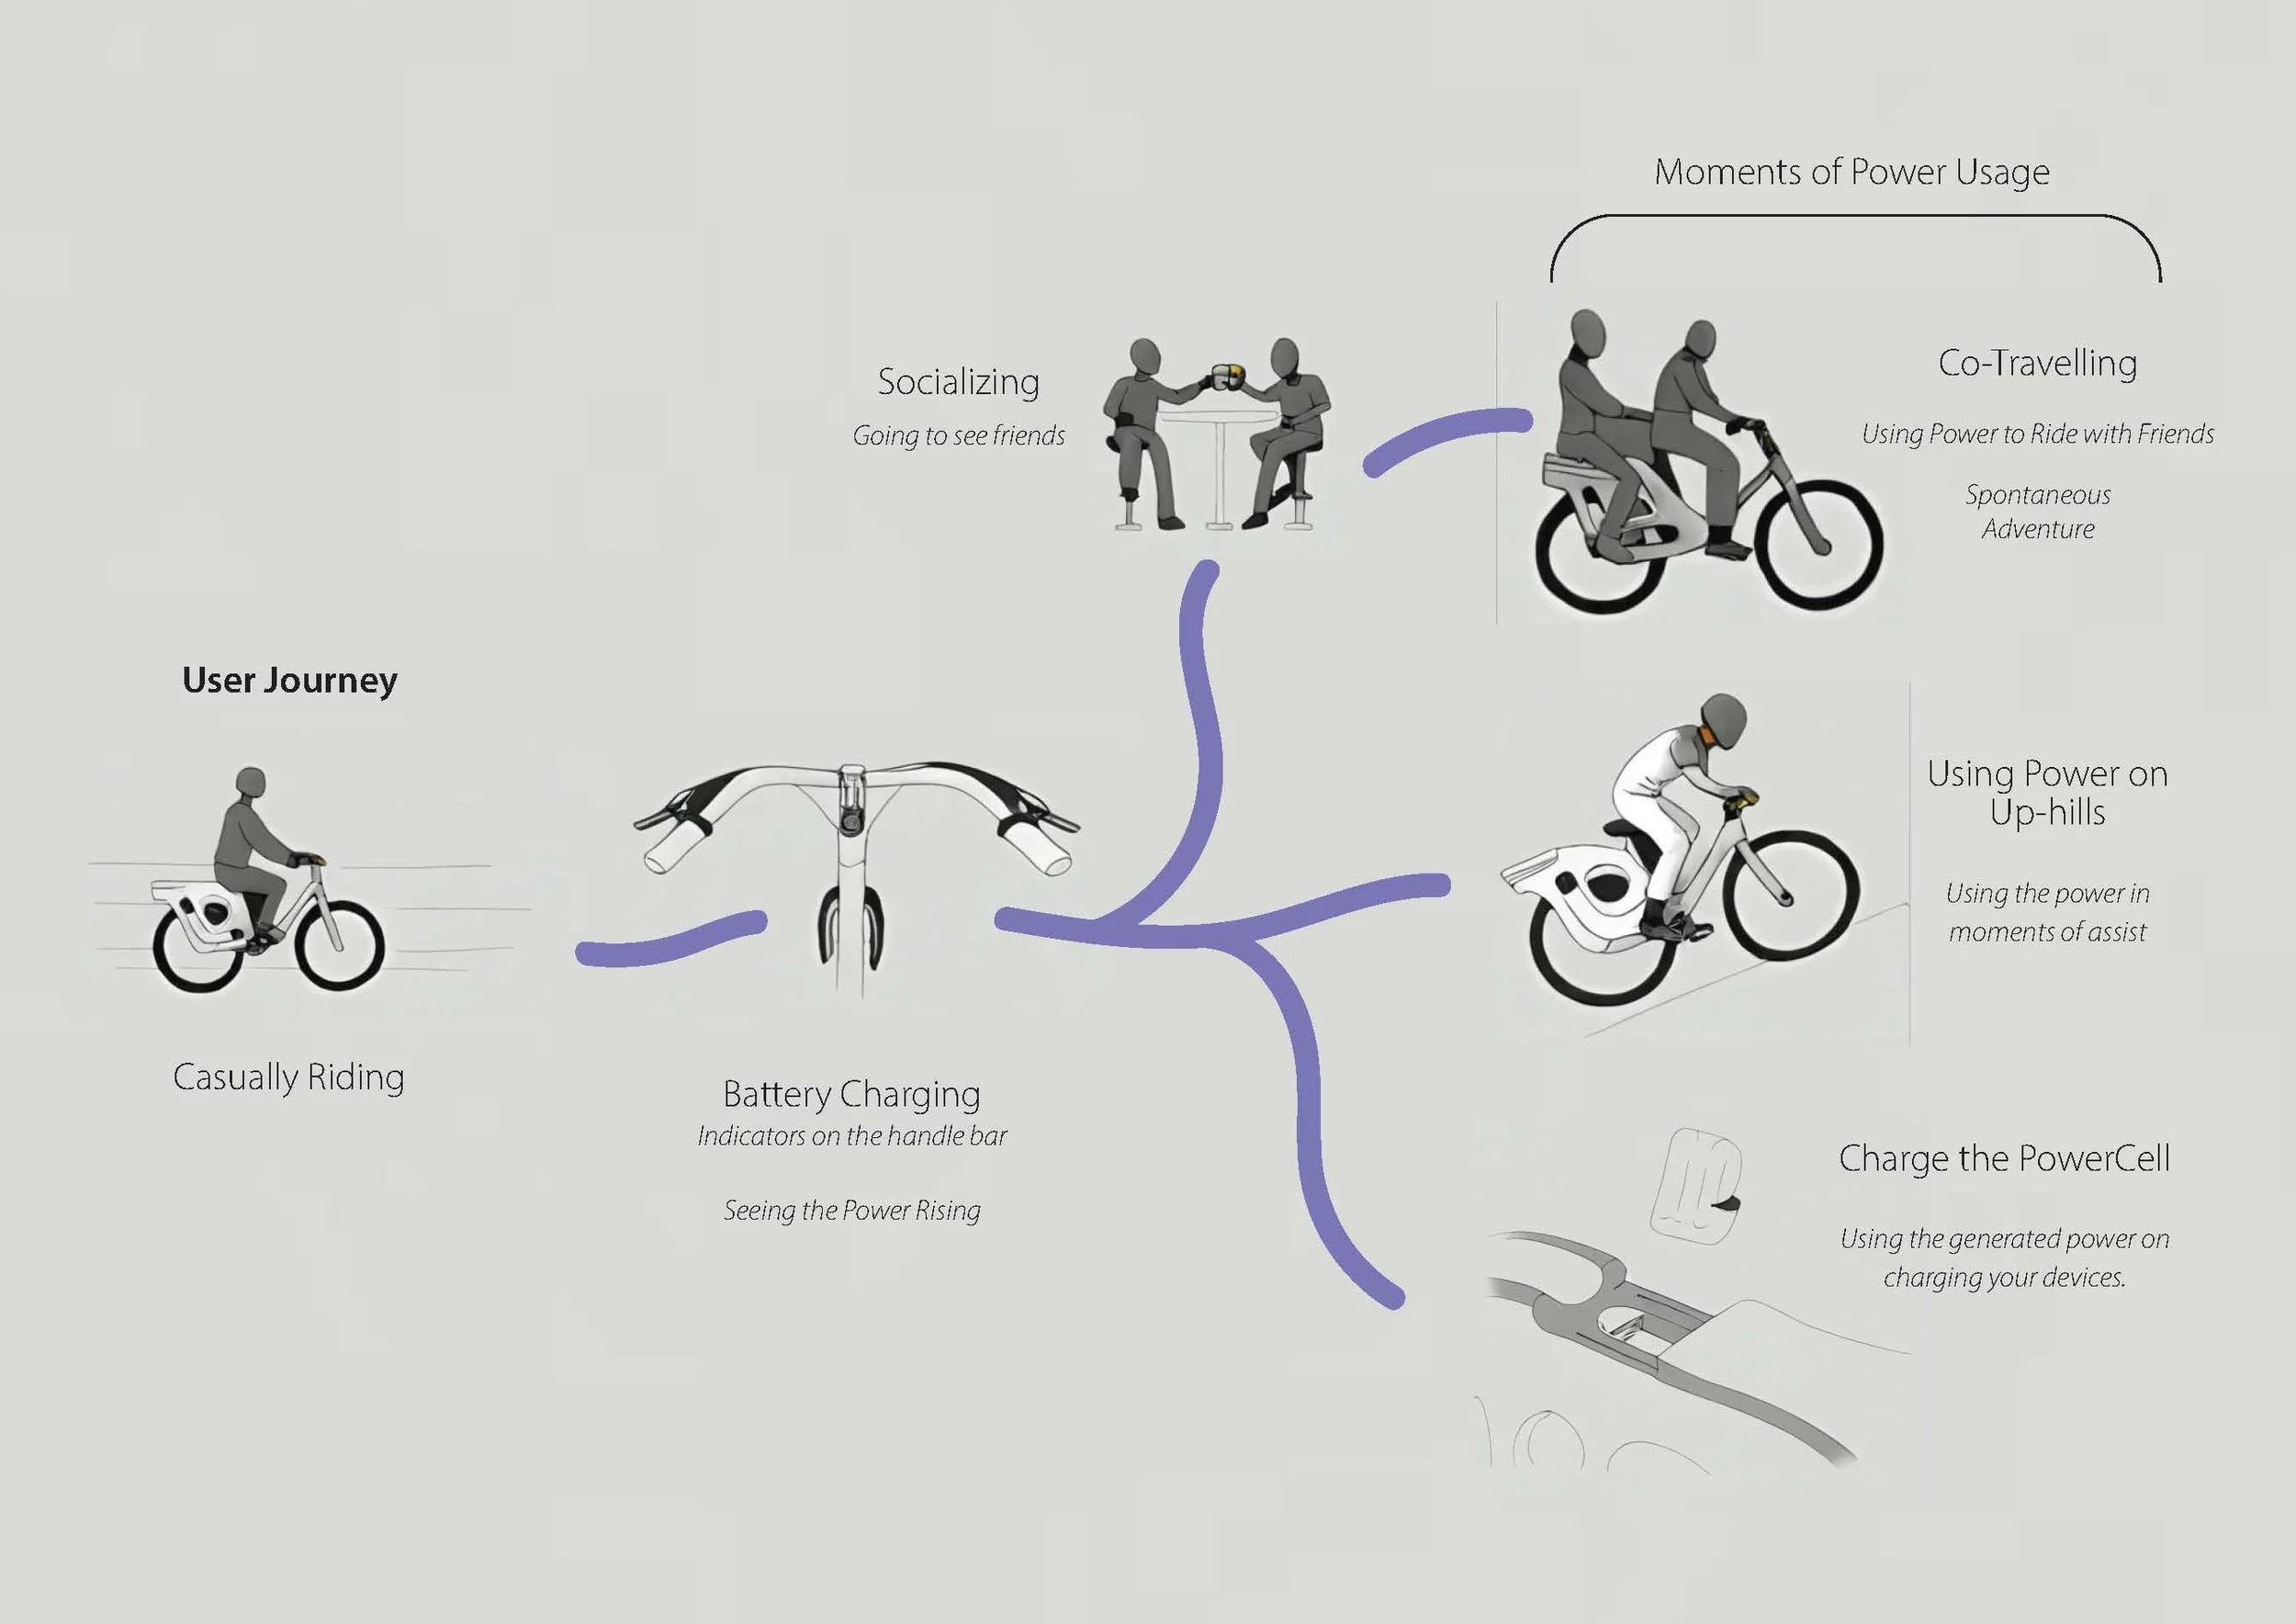
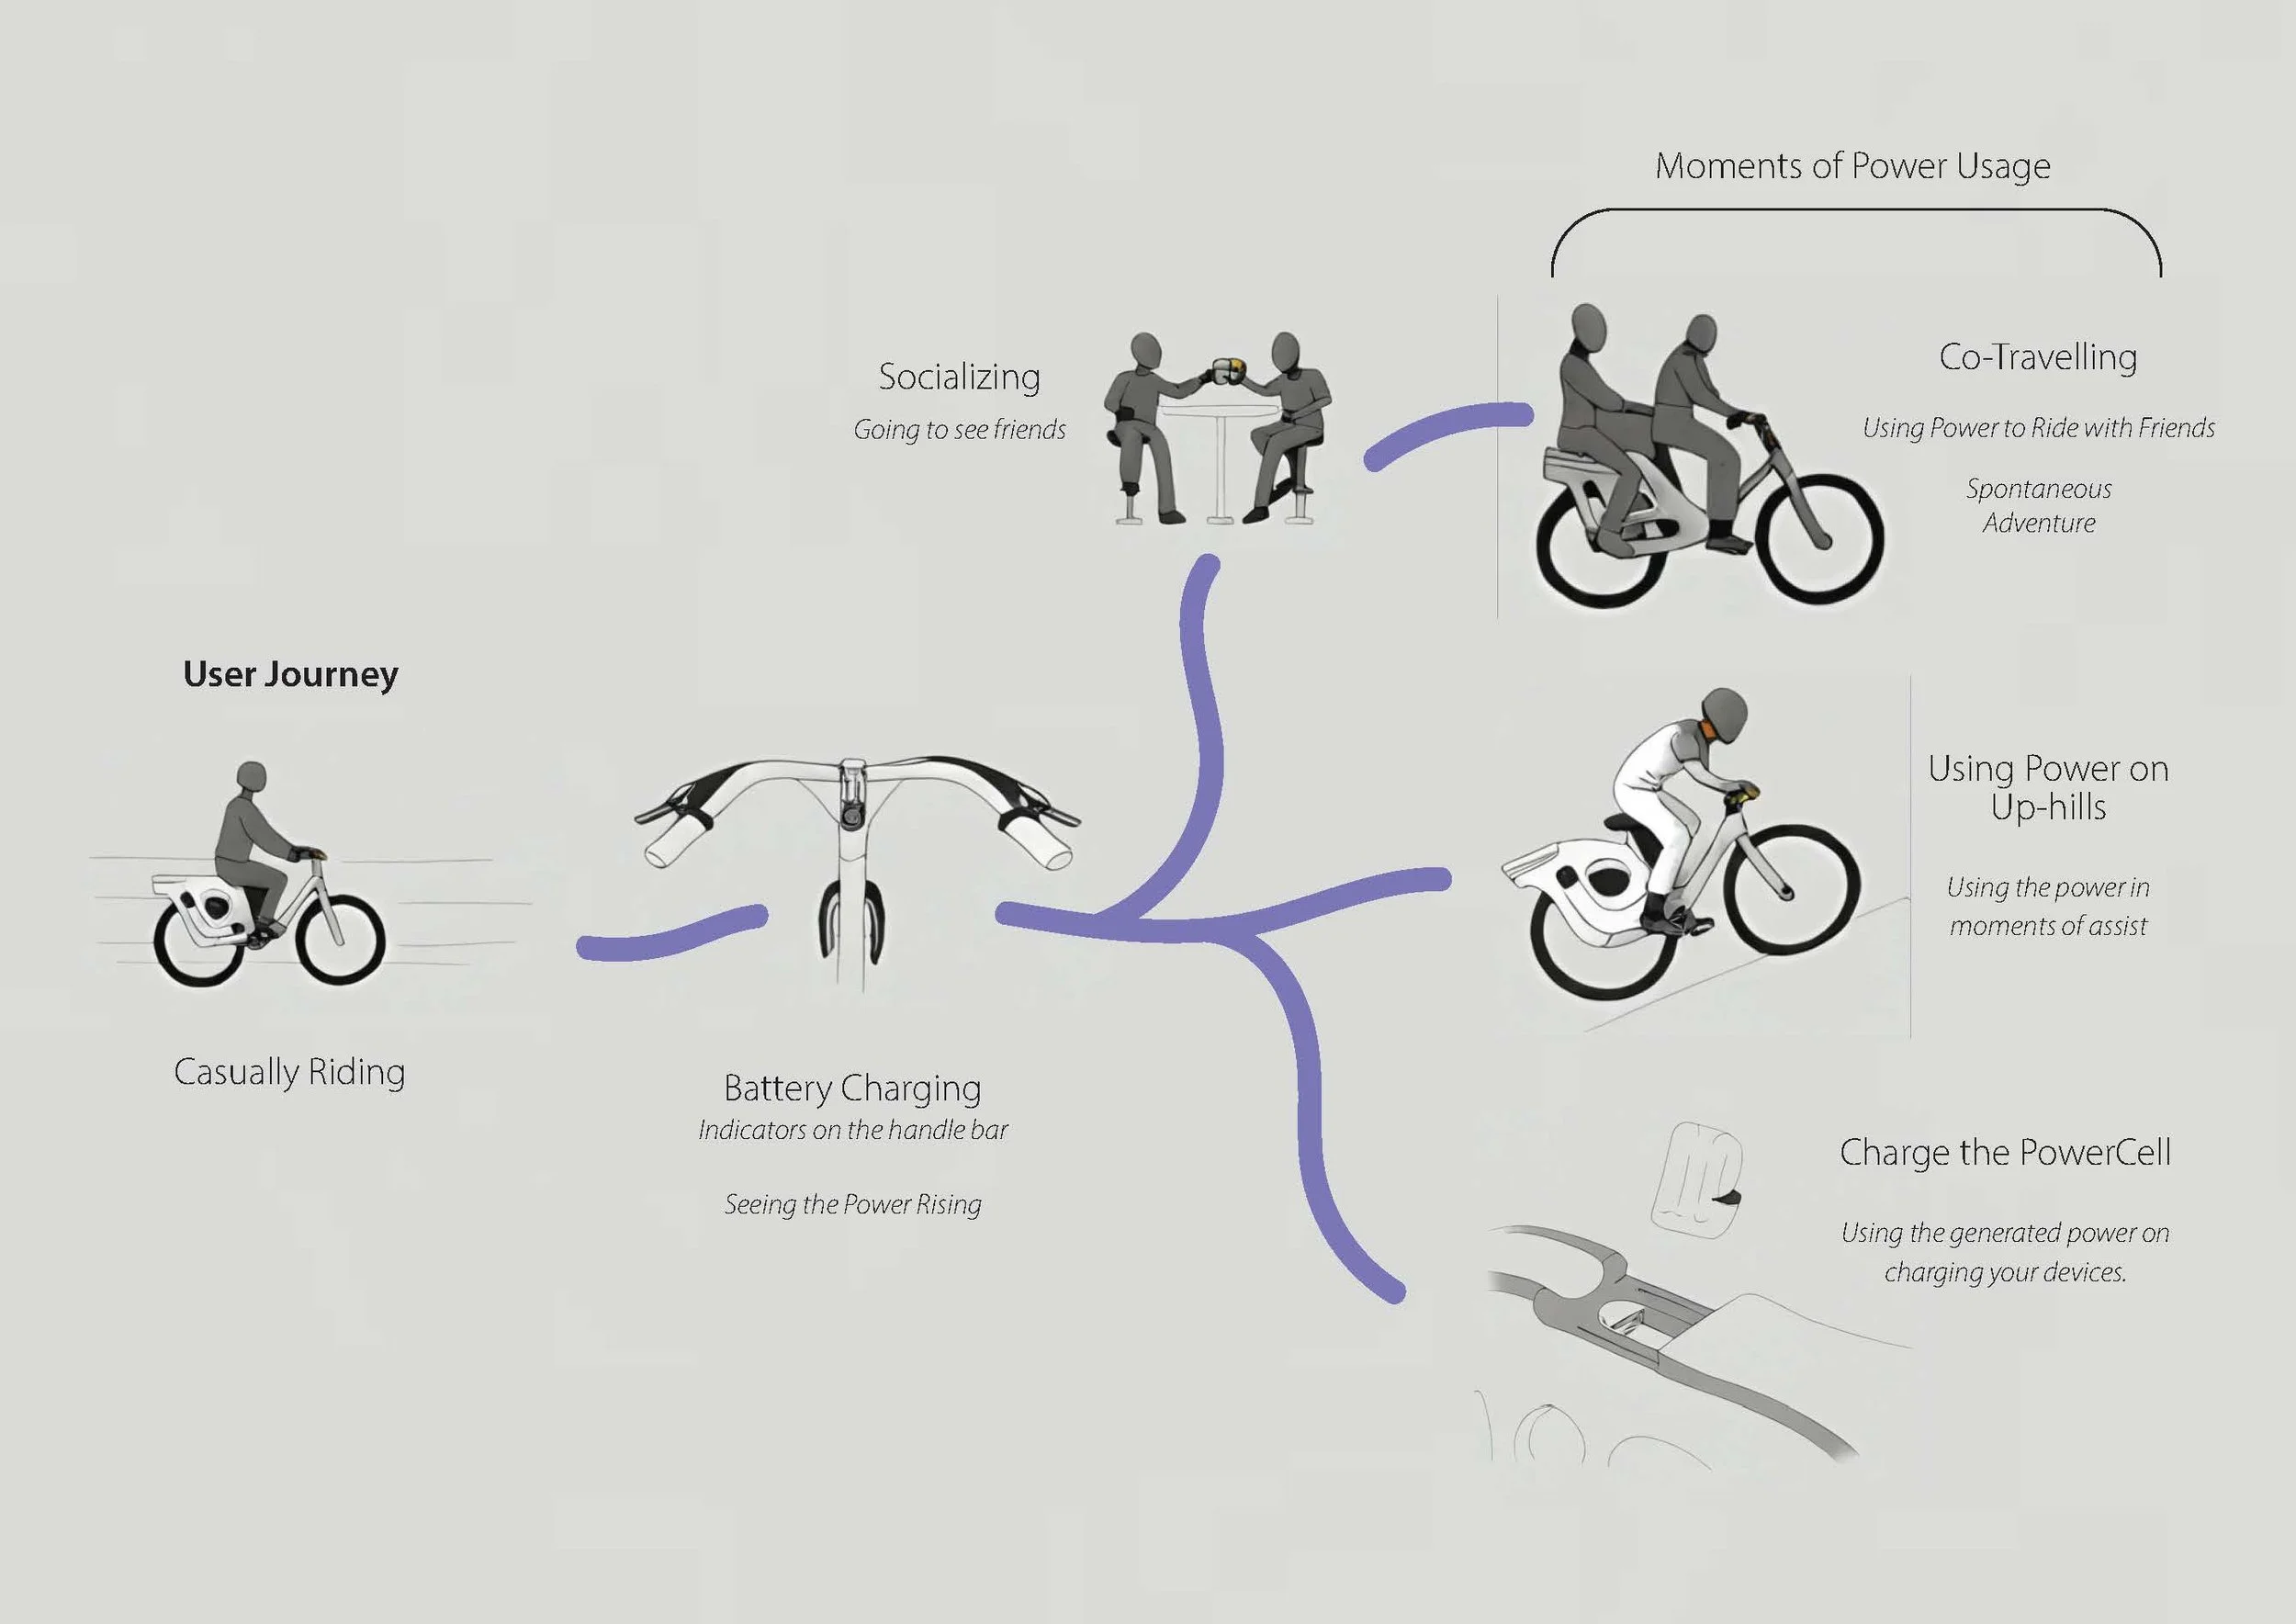
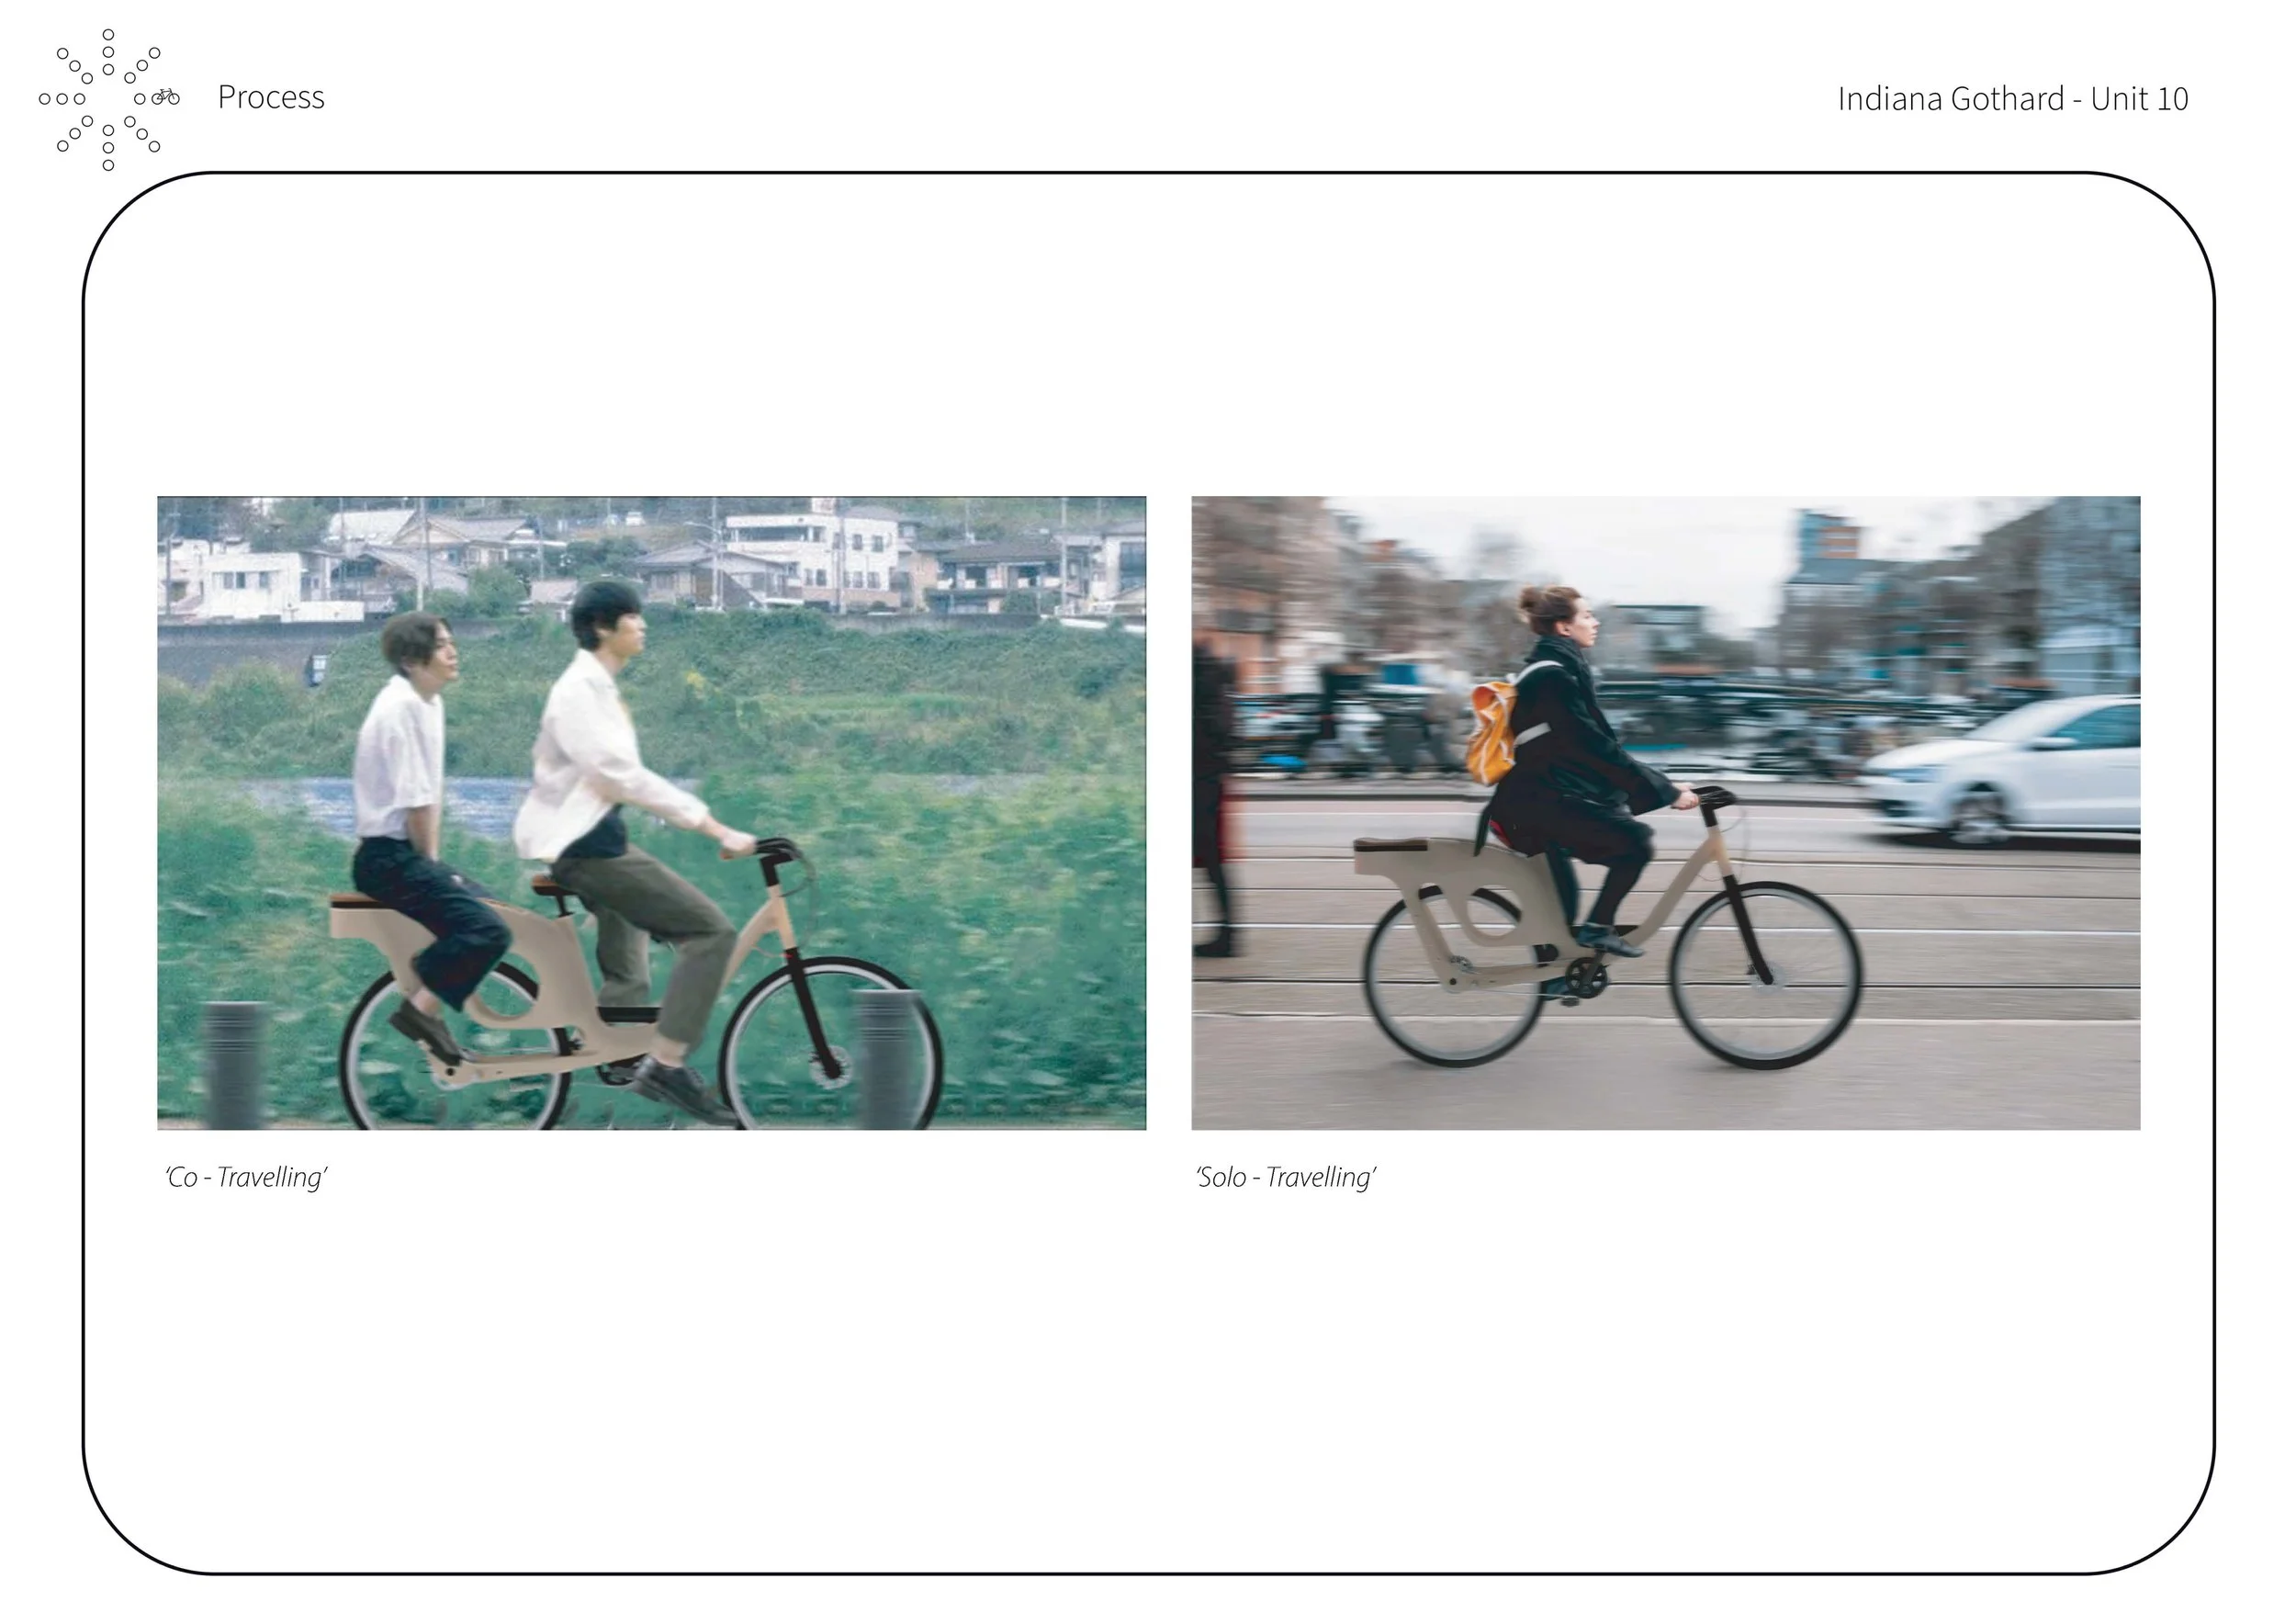
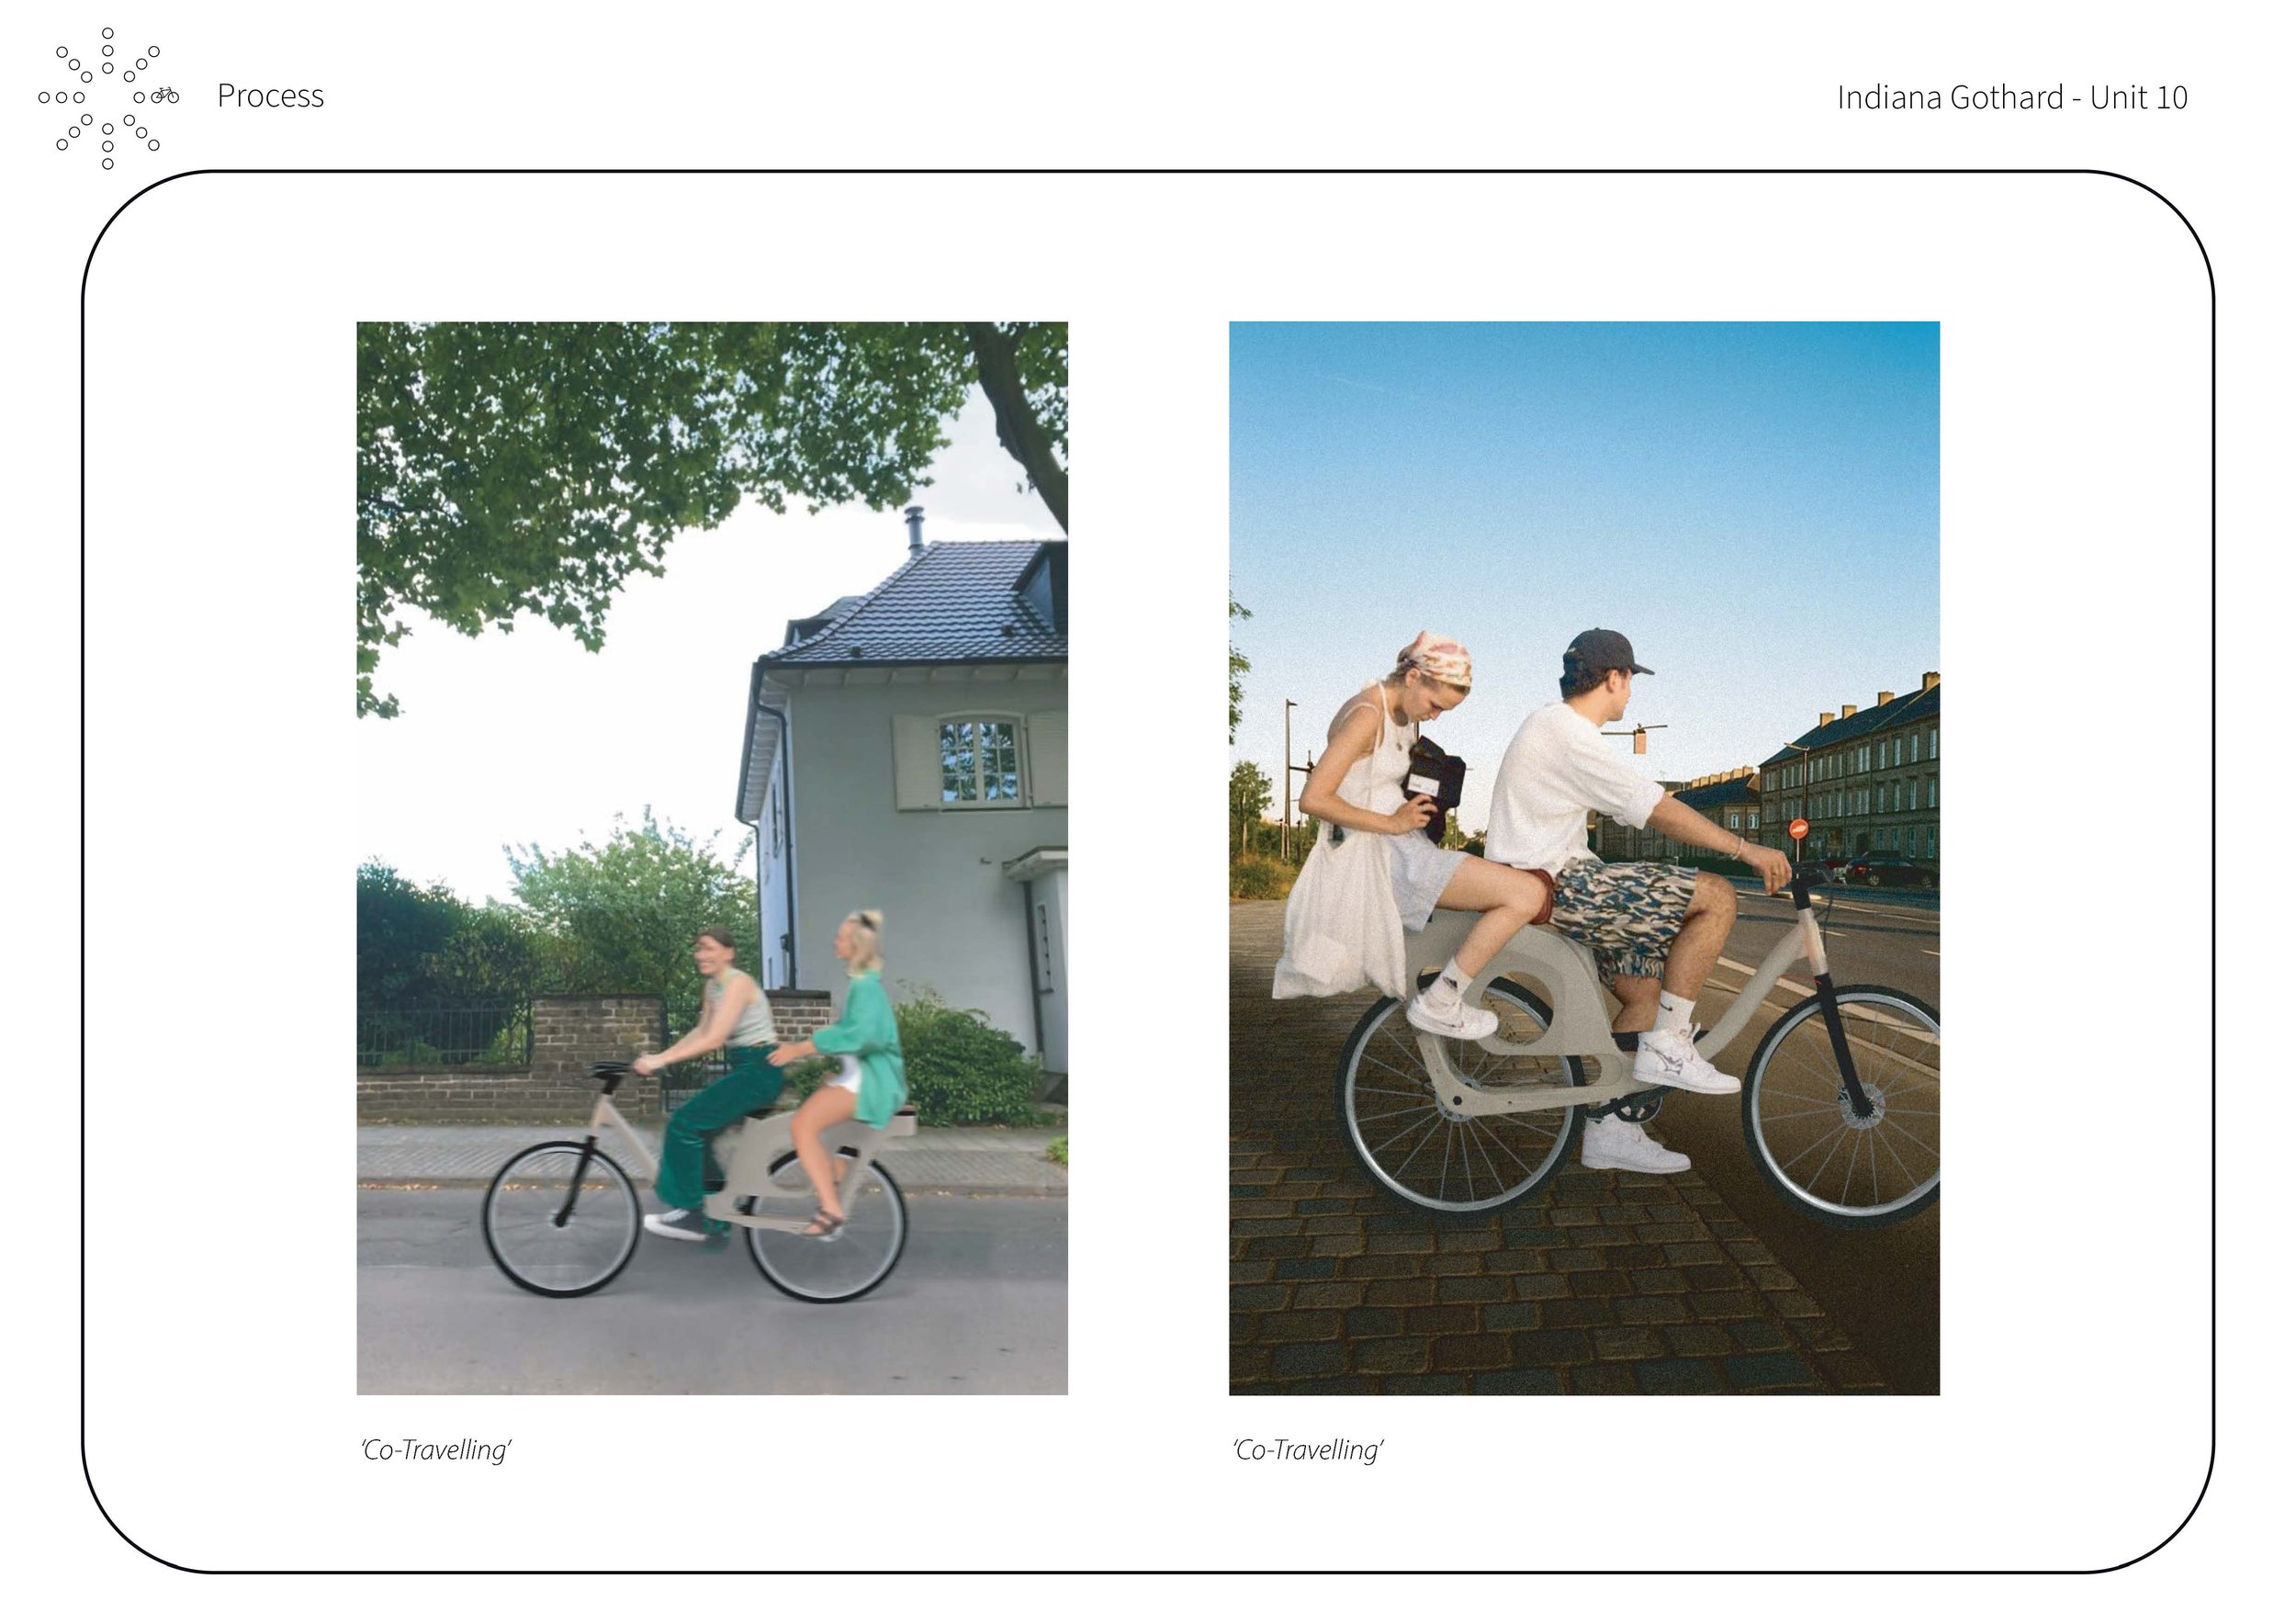
Spontaneous Lifestyle
Co - Travel

WHOLE PROJECT - 164 Pages Document